Homemade Garden Compost Making Process
Today, let us discuss about Garden Compost Making Process at home.
Healthy garden soil will give you amazing results. Adding compost to the garden soil will make it more productive. Adding a commercial compost is a bit expensive, so why don’t you do it yourself.
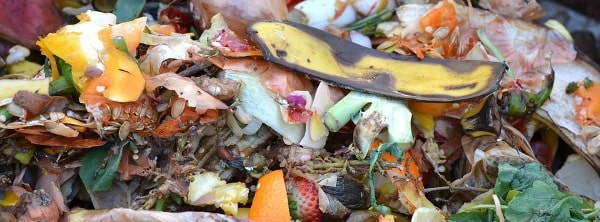
Making homemade compost is quite easy, Homemade compost is done by natural decomposition to transform landscapes and kitchen waste into a rich soil compost. Home-made compost done using some Decomposers, like bacteria, fungi, insects, nematodes, earthworms and other composting critters. What are we waiting for? Let’s get into the details of garden compost making process steps.
What is a Compost?
The Compost is decomposed matter of organic material which can be produced by bacteria in the soil, by breaking down garbage and biodegradable trash, which results in a product rich in minerals that is best for ideal garden or landscaping amendment.
Benefits of Homemade Compost:
- No extra cost, it is made of kitchen waste, lawn clippings, leaves and other vegetation.
- Potting mixes and soils with compost can produce vigorously regardless of growing vegetables, growing herbs or organic rose gardening.
- Boosts up the garden soil structure, texture and aeration.
- Adding compost will improves soil fertility and stimulates healthy root development in plants.
- The organic matter provided in compost increases the microorganisms, which keeps the soil in a healthy, balanced condition.
- Compost will loosen clay soils and makes sandy soils retain water.
- When you use homemade organic compost, there will be no need for the additional fertilizer
- Home made composts are good sources of nitrogen, phosphorus, and potassium which promotes the optimal growth of the plants. Composts are the best source of micronutrients like boron, cobalt, copper, iodine, iron, manganese, molybdenum and zinc.
You should not miss the Organic Farming FAQ.
How do composts work?
- Composts helps the bacteria and fungi in recycling the waste material into fertilizer.
- Composts are mixed into the garden soil or this homemade compost is also used as mulch.
How to make the Homemade Compost?
- Choose a best place for your pile or compost bin. So that it cannot create problems for your neighbors, choose a discreet location. The location you choose should have good airflow, access to water and partial shade in the summer to protect bin or pile from getting too hot), but good sun in the winter keeps it warm in winter.
- How to choose bin for making compost?
For this work, composter can be ideal one, or you can make your own. Rotating bins are the best, easy and keeps animals out, but it is easy to make a workable bin on your own. Simple compostercan be constructed by, tracking down shipping pallets. Keep on for the bottom. Bound them with metal support poles and add pallets by slipping them over the support poles for making bin walls.
The bin should be of 3x3x3 feet, it is the minimum size to create its own heat, but small enough to turn if you are opting commercial composter, you can an optimal size.
- What are the materials needed in garden compost making process?
To add materials, don’t add everything into the compost bin; we have listed the things that should be added and things that should be avoided.
Greens for Composting: Green leaves, Garden Waste, Flowers, Vegetables, Fruit peels, Scraps, Coffee Grounds, Tea leaves or bags, Eggshells, etc.
Browns for Composting: Evergreen needles, Dried leaves, Paper egg cartons, paper towels, Dried grass clippings, shredded newsprints, Barks, straw, sawdust, vacuum lint, small cardboard pieces, dead house plants, shredded brown paper bags etc.

Material that should be avoided: Meat or animal products (bones, fish, eggs, butter, yogurt, etc.), Coal ash, Weeds or weed seeds, Pet droppings, Synthetic chemicals.
- Filling the Composting Bin/Pile: Add alternate layer materials, the first layer should be course material like twigs/barks as they promote drainage and aeration. Now cover this layer with leaves, then add alternate layers of green and browns. Green materials are a good source of nitrogen and brown material are a good source of carbon. Add the layers till the bin is full. The bin contents start to shrink when it begins to decompose.
- Adding kitchen waste to Compost Bin: While adding food scraps or yard waste to the bin/pile, add a layer browns over the kitchen waste. If you don’t add the browns the compost will be wet and break down process becomes slow.
- Temperature: the best and easiest way to test your compost’s temperature is by dipping your hand into the center of the compost bin. The composter temperature should be warm or hot, it is at a good temperature. If the bin temperature is same as the ambient temperature. This indicates that the microbes have slowed down — and has been slowed down.
Use a compost thermometer to for checking bin temperature. An ideal compost pile will heat up to temperatures of 60-80°C. At these temperatures most pathogens and weed seeds disposed completely. When your pile/bin is really doing its composting process, then its temperature reaches up to 70°C. If the temperature of your pile reaches to peak and then starts to drop, then it’s time to turn the pile.
- Moisture: Compost should be moist, but not soaking wet. Composting works well with 40-60% moisture content.
- Aeration: the compost bin should have a good amount of oxygen, as every tiny microorganism needs oxygen to survive, so make sure enough oxygen is getting into your pile by turning your compost regularly. You use a compost aerator or pitchfork to mix your pile. If you are using a compost tumbler, it can be recommended option.
- Maintain the Bin/Pile: for a quick composting process, check your compost bin regularly and follow the tips below:
When never you add fresh material, mix it in with the lower layers thoroughly.
Materials you add should be as wet as a wrung-out sponge. Add dry materials or water – as per the requirement to maintain adequate moisture levels.
Mix or turn the compost once a week to fasten the breakdown process and eliminate odor.
Read: How To Get Organic Certificate In India.
- Harvest your compost.
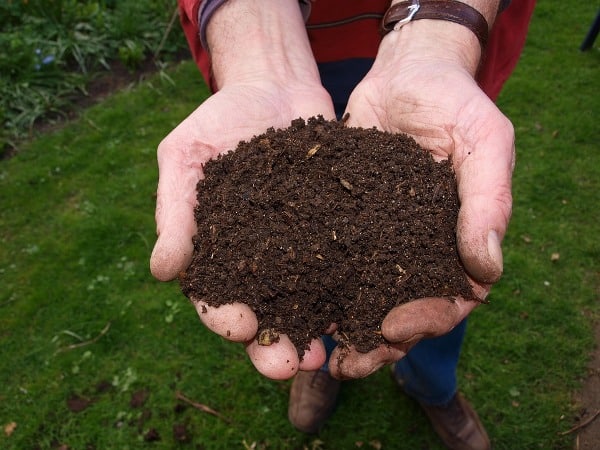
When the compost turns completely dark color, crumbly and smell like earth, it indicates that your compost is ready to harvest. The composting process takes within four to six months of starting your bin.
The finished compost will stay at the top of the bin. Remove all the finished compost from the bin, leave the unfinished materials in the bin to continue decomposing. Make sure that the decomposition process is done completely before you use; otherwise, microbes in the compost could take nitrogen from the soil and harm plant growth.
Tips and Techniques of Composting:

- Adding blood meal, cottonseed meal, well-aged manure or compost starter will fasten the breaking process of organic matter into compost. These materials are rich in nitrogen.
- Chopping the material into smaller pieces will also fasten the breakdown process.
- Plants that are treated with pesticides and/or herbicides should be avoided.
- Add a lot to your pile of time will provide enough heat to the pile.
- Turning compost regularly will increase the oxygen supply to the material and speeds up the composting process.
- A Warm climate will keep the microbes more active, so keep your pile or bin in the sun.
- The compost that smell like rich, dark soil will indicate the completion of the composting process.
- Apply finished compost to the garden soil about 2-4 weeks before you plant, giving the compost time to integrate and stabilize within the soil.
Avoid Common Mistakes in Composting Process:
- Don’t start too small. The breakdown process enough in order to do its job. Some composting bins work well for small amounts of material, so choose a product as per your requirements.
- Maintain the good moisture level. Check the composting bin regularly, mainly during hot, dry weather conditions.
- A compost made of different textures and nutrients is made of disintegration of many different plants will give your garden soil a perfect organic nutrient source that helps create disease and pest resistance.
How to use Homemade Garden Compost:
- Sprinkle the compost in your garden twice of thrice in a year.
- Use can use the compost as top dressing for flower beds and at the base of trees and shrubs.
- You can mix compost in with garden and flower bed soil.
- You can the homemade compost as a soil conditioner when planting or transplanting trees, flowers and shrubs.
That’s all folks about garden compost msking process. You might be interested in Growing Hydroponic Radish, Process, Requirements.
Excellent Write up. Very helpful.
We are trying to make compost at our home. We got lot of inputs.
Thank you. Keep writing….
Glad that it really helped you.
am working on the same project in my degree this is cool for reference
informative indeed