Home Blog Page 58

How to Start Rose Farming in the USA: A Step-by-Step Production Guide for Planting to Harvesting

The Rose belongs to the “Rosaceae” family, and its scientific name is “Rosa.” Rose farming is a widespread and popular business worldwide. The Rose is indeed one of the leading flowers in world floriculture. It is used in almost every ceremony, and the flower has medicinal properties.

How to Start Rose Farming in the USA
Image Source

How to start Rose farming in the USA

Rose varieties in the USA

Around the world, Roses come in wide varieties. However, for Rose farming, where you want to make maximum profit, you must choose a variety that suits your purpose. 

  • Rugosas, with their bright, bright pink, white, or lavender 5-petaled flowers, are perfect for hedges and wherever a barrier is needed in an exposed or difficult area. 
  • Pink Roses like ‘Carefree Wonder’ are well-rounded bush Roses that are cold and hardy to zone 5. They are about 3 feet tall and require only a little shaping in early spring. 
  • Yellow Roses like ‘Harrison’s Yellow bloom early, bright and sweet, and survive Zone 4 winters. 
  • Seafoam – A good climbing Rose. It produces double white flowers that repeat in spring, summer, and fall. 
  • Cecile Bruner – Another wonderful shrub Rose. 
  • Red Cascade – A true Rose. It can grow 6 to 7 feet wide without any particular shape. It produces small, deep red flowers all summer.
  • Caldwell Pink – It is a small pink flower that blooms on this well-mannered shrub Rose. Mature plants can grow to about 3 feet by 3 feet and hardly ever stop blooming.
  • Drift Roses – Good for ground cover. They come in many different flower colors, from red to peach, and bloom best in spring and fall. 
  • Mutabilis – Also known as butterfly Rose. A Mutabilis can be very large – often 8 feet tall and nearly as wide.

Roses can be either low or high-maintenance. Low-maintenance Roses require very little care. Grandiflora, hybrid tea, floribunda, and polyantha Roses (“modern” Roses) are high maintenance because they require frequent grooming, fertilizing, watering, and spraying. 

Hybrid Roses grafted onto ‘Fortuniana’ rootstock perform best. “Old” and dwarf varieties will do well on their roots but often do better when transplanted. In addition to choosing low or high-maintenance and rootstock, choosing a variety depends on your personal preferences and growing needs.

Field selection for Rose farming in the USA

You should choose the field that suits the soil condition required for the Rose farm. Generally, Roses grow well in plains where fertile loamy soil with saline water is the ideal condition. Choose a site that offers year-round sunlight in the northern half of the USA. In the southern half of the US, choose locations with some afternoon shade. It protects the flowers from the scorching sun and helps your flowers last longer. 

When to Plant Roses 

Roses can be planted at any time, except during extreme weather. Extreme weather conditions in which we advise against planting are when the ground is frozen, waterlogged, or in a drought. Successful commercial Rose cultivation depends largely on the Rose variety. There are many methods of Rose planting available in modern technology, but the greenhouse method of Rose cultivation is very popular and easy for Rose plants. 

  • Rooftop 
  • Indoor 
  • Open Field 
  • Greenhouse 
  • Polyhouse 
  • Pots

In case you missed it: Rose Farming Income, Cost, Profit, Project Report

Pink Rose Garden
Image Source

Climate for Rose Farming in the USA 

Roses (Rosa spp.) populate hundreds of species with thousands of varieties, meaning climate requirements can vary significantly depending on which one you choose. Roses usually grow in warm climates and flower in the summer months. However, some Roses can grow in warm tropical climates like those found in Florida, while others can thrive in hardiness zones less than 2, with winter temperatures dropping to -50°F. 

South Florida has a tropical climate, enjoying long, hot, humid summers. Wide varieties of Roses grow well in this climate and can tolerate droughts that other Roses do not. Colorado has a dry climate, especially in the west of the state. Winters are dry and freezing, with most of Colorado classified as hardiness zones 4 or 5. It means winter temperatures can drop as low as -30°F. Springtime can be windy.

Hardiness Zones for Rose Farming in the USA

Roses grow in most vegetation hardiness zones. Most Rose plants will grow in zones 7, 8, 9, and 10. These growing zones are warm and ideal for Roses to thrive. The Rose species and the amount of heat and sunlight available are factors for active plant growth. Rose plants can grow in cold climates, and some even need the cold of winter to be at their best for flowering.

The coldest zone for Roses to grow in Zone 3, although there are varieties to consider in Zone 2. Roses are not hardy enough to withstand the harsh climate of Zone 1. If you live in this zone, plant a miniature Rose in the container or pot and place it indoors in a sunny place or room. 

Where to plant Roses in the USA

Some of the best Roses in the USA come from Colombia and Ecuador. Altitude, proximity to the equator (year-round sunshine), and nutrient-rich soil help grow beautiful flowers (especially Roses!). In addition, roses thrive in direct sunlight. 

Avoid intense competition with other plants – The closer you plant your Roses to other plants, the more competition there is for moisture and sunlight. For better results, plant the Roses 3 feet from other plants and 2 feet from other Roses. 

Avoid very exposed, windy places – Strong winds can loosen the base of the Rose in the soil. It will cause your Rose to swing in the wind causing it to grow at an angle, which in extreme cases will kill it. To prevent this, make sure you follow planting instructions. If you get this problem with an existing Rose, make sure you firm up the soil around it. 

The best time to plant Rose in northern regions of the USA

The best time to plant Roses in northern areas is in the spring, from April to May. April through May is generally the recommended planting season for bare-root Roses in USDA zones 1 through 5, the northern regions of the United States. Weeks in May for Zones 1 to 3, wait to plant container Roses from the nursery until after the last spring frost has passed in your area.

 The best time to plant Rose bushes depends on when your garden plot is dry enough for the soil to crumble. Otherwise, the soil especially if it includes clay, is liable to get stuck in hard balls. Don’t panic if you still have snow on the ground after your bare-root Roses come out. You can keep them in a bucket in a cool, dark place for a few days with water covering the roots. If it doesn’t prove tall enough, move them to a container with drainage holes and cover the roots with lightly moistened sawdust or compost. 

In the hotter South, you may need to place your Roses where they get plenty of morning sun but some afternoon shade. In either case, the bushes will need plenty of air movement around them to avoid fungal disease. However, avoid placing them in places that are so open that the Roses are constantly exposed to the wind. 

Best time to plant Rose in Southern regions in the USA

Plant Roses from January through March if you work the soil in the southern states. Zones where planting Roses in January or early February are often recommended include zones 9 through 13, including the southern United States and Hawaii. Gardeners in zone 8 should wait until late February, early March for zone 7, and late March for zone 6 is the best time to plant.

However, the time to plant Roses can vary yearly, depending on how seasonal or unseasonal the weather is. If you have to wait, you can always “heal in” the Roses for a few days by digging a trench in a well-drained spot, placing the Roses in it, and covering their bare roots with a bit of moist soil compost. 

In case you missed it: Rosemary Oil Extraction Methods, Process, Techniques

Pink Rose
Image Source

Rose planting process in the USA 

Roses can be planted year-round except in northern Florida, where early spring planting is best. Nurseries sell Roses year-round. Rose plants need at least 6 hours of direct sunlight each day. Most soils will have to be replaced mainly for modern Roses. To transplant, a container-grown Rose into your yard, plant the Rose at the same depth as it was growing in the container to ensure that the graft union remains above the soil.

Apply mulch around each plant and water frequently for 6 to 8 weeks to establish. Planting bare-root or container Roses properly will ensure they get off to a good start. To accommodate the roots, the planting hole must be deep and wide. This area needs good drainage, as Roses do not like wet feet. Water well, and then fill the hole with the remaining soil. 

Homemade fertilizers for Rose plants 

When you prepare the land for your growing Rose, use mostly organic matter and do not use chemical fertilizers. Using chemicals for Rose cultivation, you cannot get good quality Rose water or oil. Using an organic fertilizer will give you a higher-quality Rose. You can make organic compost using cow urine, tobacco, and datura (angel’s trumpet). Firstly, mix these three materials well and bury them in the ground for one month.

After a month, you will get ready pesticide, and you can apply it to the Rose plant. You can apply this organic fertilizer only on one acre of land at 1 kg. If you want to use chemical fertilizers, add 8 grams of nitrogen, 8 grams of phosphorus, and 16 grams of potassium per plant. After harvesting, apply 10 kg of rotted farmyard manure (FYM) and above chemical fertilizers to Rose plants at three-month intervals.

Grooming and Pruning in Rose plants

Grooming and trimming means Roses to keep them healthy and productive. To groom your Rose plants: 

  • Remove faded flowers. 
  • Break off suckers growing from the rootstock. 
  • Remove dead wood and canes showing signs of disease. 

When you prune the Rose plant, do the following: 

  • Remove branches that are dead, diseased, injured, or damaged. 
  • Trim the main canes and lateral branches. 
  • Prune just above a dormant bud. Remove entire branches with a smooth cut at the point of the bend. 

Regular pruning should be done in early spring and will help continue flower production throughout the season. Firstly, pull off all the leaves and use your pruning shears to trim the horizontal canes growing in the center of the plant, around, or anything that crosses the plant. It will allow for an open core and reduce friction between branches and flowers. 

Water requirement for Rose plant growth

Irrigate Roses immediately after planting. Continue watering daily until the Rose crop is established. However, during winter, you can irrigate once every two weeks, depending on soil moisture. Rose plants need about 1 liter of water per plant. Drip irrigation is the most preferred method of irrigation for Rose cultivation.

Install a single drip line between two rows of plants to irrigate a Rose crop. Do not use sprinkler irrigation to nurture a Rose crop, as this can cause fungal infections in Rose plants. But during hot summers, you can use sprinklers to reduce the temperature under controlled conditions. As a guide, recommend the following amounts of water per Rose each time you water. 

  • Shrub Roses – 1 gallon 
  • Climbing Roses – 2 gallons 
  • Rambling Roses – 2 gallons 
  • Standard Tree Roses – 2 gallons 
  • Potted Roses – 1 gallon 

In case you missed it: Rose Plant Pruning Methods; Training Methods; Process

Red Rose Garden
Image Source

Mulching for effective results in Rose plants

Mulching is essential to retain moisture in the soil. It also helps prevent weeds. Agricultural materials like straw, grass clippings, rice husk, sawdust, dry leaves, etc., are very good for mulch. Modern Rose growers use black or white polyethylene sheets for mulch, with effective results. 

Common pests and diseases are other problems for Roses 

Japanese beetles have been easily identified thanks to their bright green body and copper-colored wing coverts. Look for frayed edges and holes in the petals. Rose petals are usually skeletal or completely eaten away. Hand-picking is an excellent option for these beetles. The Rose aphid is the dominant species of aphid that feeds on Roses. All aphids are small, but these are small, no more than 1/8 inch long.

These aphids have soft, pear-shaped bodies that are pink or green in color and tend to cluster on the undersides of leaves and around buds. Aphids pierce Rose petals with their mouthparts and then suck the sap. Although a few Rose aphids will not cause much damage, an infestation can reduce the number of flowers and the quality of the Rose. In addition, aphids deposit a sticky waste called honeydew on Rose leaves. It attracts other insects and can cause the growth of sooty mold fungi.

The easiest method to combat aphids is to introduce ladybugs as predators. You can buy live ladybugs commercially. Spider mites are not insects; they are in the spider family. If you suspect mites, place a piece of printer paper under the branch, tap on the branch, and run your hand over the paper. The Red lines mean you have particles. Like aphids, they pierce plants and suck plant sap. Ladybugs eat mites and aphids, or you can buy and leave lacewings, which also eat insects. 

Fungal diseases are common in Roses, including powdery mildew and leaf spots. It is much easier to prevent these diseases than to fight them. Prevention is based largely on two principles. Never water in a way that leaves the leaves wet, especially in the evening, and space the plants far enough apart to allow air to circulate between them. To keep insects away from your Roses, try companion planting with garlic.

Once a week, when watering your Roses, mix some dishwashing soap with the water and apply this homemade “insecticidal soap” to your bushes (of course, there are real insecticidal soaps you can use). Growing Rose bushes where adequate spacing is not provided is an open invitation to powdery mildew. Don’t plant them too close together. When purchasing Rose bushes, follow the spacing requirements for each specific variety, as indicated on the plant label.

In case you missed it: Rose Plant Grafting Methods; Techniques; Procedure

Rose Plant
Image Source

Harvesting time for Rose farming in the USA

Harvesting in Rose plants is done with a sharp object at the narrow bud stage when the shedding is completely settled, and the petals have not yet begun to unfold. Buds that open are harvested at the long narrow bud stage. At the time of harvest, it was regularly practiced to scale to the initial 5-leaf stage. After that, it is only set to scale back to the first cutting. Production starts 4-5 months after planting. 

How profitable is Rose cultivation in the USA? 

Whether dealing with a backyard garden or a few acres, it’s possible to turn your gardening hobby into a lucrative business. Approximately backyard Rose farm can earn $25,000 to $30,000 per acre, with about half that usually profits. 

In what zone do Roses grow best in the USA? 

Most Roses grow in the US Department of Agriculture plant hardiness zone 5, although 9. There is likely a Rose for your climate with thousands of Rose species. Before choosing a Rose, find out the plant hardiness zone in your area. They range from 1 to 11 and are based on the lowest winter temperatures. You will find Roses that grow in every zone except zone 1. 

Every brick, mortar, or online garden store should indicate the hardiness zones where each Rose will grow. If you buy from a store in a city or neighborhood, there is a good chance that the Rose will match your zone. If you buy online, you will need to clarify this carefully. 

Rose marketing in the USA

California is still the top producer of cut flowers in the US, with Florida second for flowers and plants. But, despite its long history of producing quality fresh flowers, many domestic growers are struggling to keep up with the foreign competition. Imports dominate today’s flower market, sometimes accounting for 90% or more of all US sales within a particular category. It means an increased supply of beautiful fresh flowers from around the world year-round.

But, this poses a challenge for domestic producers, many of whom already face higher energy, land, and labor costs than their foreign competitors. Top-rated cities for market Rose gardens include Phoenix, Arizona, Tucson, Arizona, and Houston, Texas.

Today, Colombia is the dominant producer of American cut flowers, with Roses, carnations, spray chrysanthemums, and alstroemeria among its top crops. Ecuador is close to each other. Both countries have an exceptional climate for commercial growth, and both have successfully positioned themselves in the most popular product segments. Ecuador’s top crops include Roses. Colombia and Ecuador accounted for about 90% of all Roses sold in the United States last year. And they’re not the only countries vying for America’s love of flowers.

Frequently asked questions about Rose farming in the USA

Do Roses grow well in Florida? 

Roses grow and bloom year-round in Florida. Rose’s success in Florida depends on choosing varieties that do well in our state and fit your lifestyle. 

Where are the most Roses grown in California? 

Wasco, California – The city of Wasco bills itself as the pinkest place on earth when you consider that more than 55% of all Roses grown in the United States are grown in Wasco.

In case you missed it: Rose Plantation Cost, Growing Methods For Cut Roses

Rose Plantation
Image Source

Can Roses grow in Tennessee? 

Tennessee’s warmer climates allow Rose planting in late summer and fall, as winters are less severe. The southern parts of the state are located in zone 7a, considered a warm zone suitable for fall planting. 

Where are Roses imported from? 

Colombia and Ecuador accounted for about 90% of all Roses sold in the United States last year. 

Which US state produces the most Roses? 

California produces 60% of US Roses, but most of the Roses sold on Valentine’s Day in the US are imported from South America. 

Where does America get Roses from? 

Colombia is the largest cut flower supplier to the United States, followed by Ecuador.

Where do Roses grow in America? 

The two US cities tied for the top spot were Tampa, Florida, and Jacksonville, Florida. 

Where are Roses usually grown? 

Some of the best Roses in the Americas come from Colombia and Ecuador. The altitude, proximity to the equator (year-round sunshine), and nutrient-rich soil help grow beautiful flowers (especially Roses). 

Which US states produce the most flowers? 

California leads the nation in flower production. 

Conclusion

Roses grow well throughout the United States. In most of the US, Roses will go dormant in the fall. Roses usually bloom from spring to fall but take time to grow. In the spring, you should expect blooms six to eight weeks after you see some growth on your plant. Please follow the above information to get more Rose production in the USA.

17 Key Rules for Effective Piggery Management: From Planning to Reduce Production Cost

3

Pig farming is an excellent business venture that brings ready cash anytime and is easy for every producer. However, operational efficiency is key to being competitive and successful for pig producers. It means converting feed, which accounts for about 75 percent of total production costs, into pork. Also, the greater genetic potential of animals is changing standard approaches to production practices. Below are the 17 key rules for effective Piggery management that can significantly contribute to a piggery unit’s success. 

Key Rules for Effective Piggery Management
Image Source

Key rules for effective Piggery management

Effective rules for the type of pig farm you are operating 

Pig farming requires a small investment in buildings and equipment. Pigs are mainly known for their meat production, which is between 65 and 80% compared to other livestock animals whose dressing production cannot exceed 65%. Commercial pig raising is capital and labor-intensive business. Success requires excellent business management and pig farming knowledge and skills.

Raising even just a few pigs requires husbandry skills and attention to legal requirements. Therefore, before setting up a pig, several important elements must be considered. For example, you can run one of the following types of pig farms: 

  • Farrow-to-finish pig farm: This type involves breeding and raising sows until they are about 280 pounds. Do not reach market weight, including feeding offspring. 
  • Farrow-to-Feeder Pig Farm: This type involves breeding and raising sows and then selling the pigs for finishing work when they weigh 30 to 60 pounds. 
  • Feeder-to-fine pig farms: These types of pig farms buy feeder pigs when they weigh 30 to 60 pounds and feed them to market weight. 

Selection of pig breeds for effective management

  • Upgraded/crossbred or exotic stock in good health should be selected for commercial pig farming. 
  • When selecting a gilt or sow, the primary objective should be to secure a female that will produce viable litters and reach a marketable weight at six months of age or less. 
  • Animals that are ready for breeding should be selected. 
  • Identify the newly purchased animal by giving it an appropriate identification mark (ear tag or tattoo). 
  • Vaccinate animals against diseases. Keep the animal under observation for about two weeks and then mix it with other animals. Buy animals in two batches three months apart. 
  • Practice culling and replacing the animals in the herd correctly. 
  • Cut the older animals after 10 to 12 farrowing. 

Proper breeding rules for pigs grow faster and get more production

Pigs grow faster than other livestock and reproduce twice a year with a gestation period of only 114 days. The sow gives birth to piglets at least twice a year, producing about ten piglets, thus usually increasing the farmer’s production when fully grown. Once a pig is established, the farmer should research the best types of breeds that perform best at the piggery location. A farmer should choose a breed that has good farming, good mothers, and high fertility and is not susceptible to infection.

In case you missed it: Pig Diseases, Symptoms, and Treatment

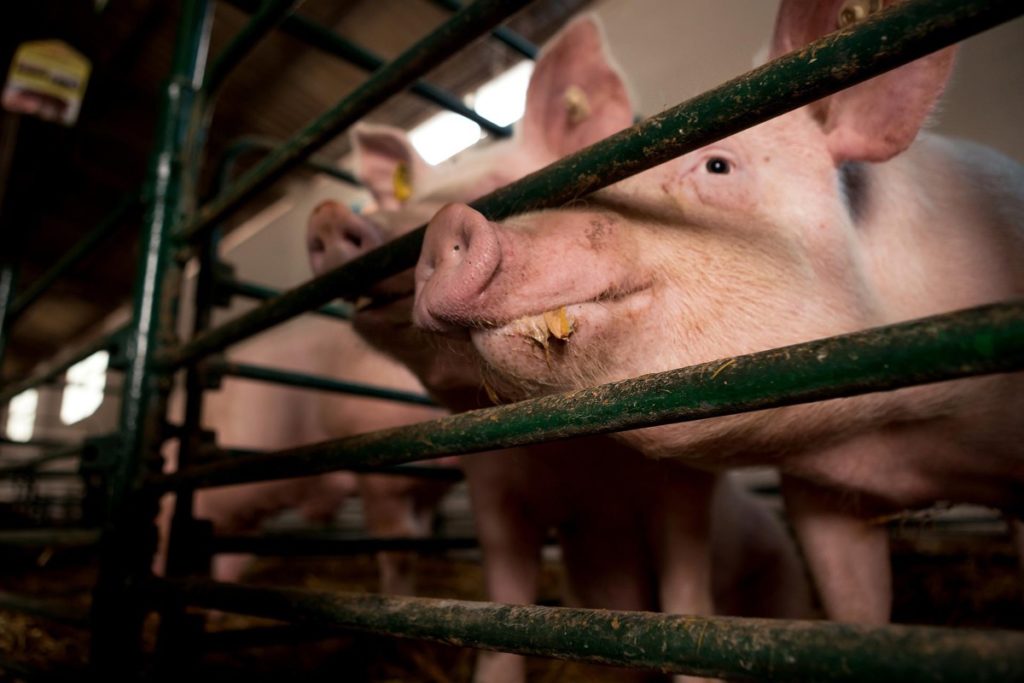
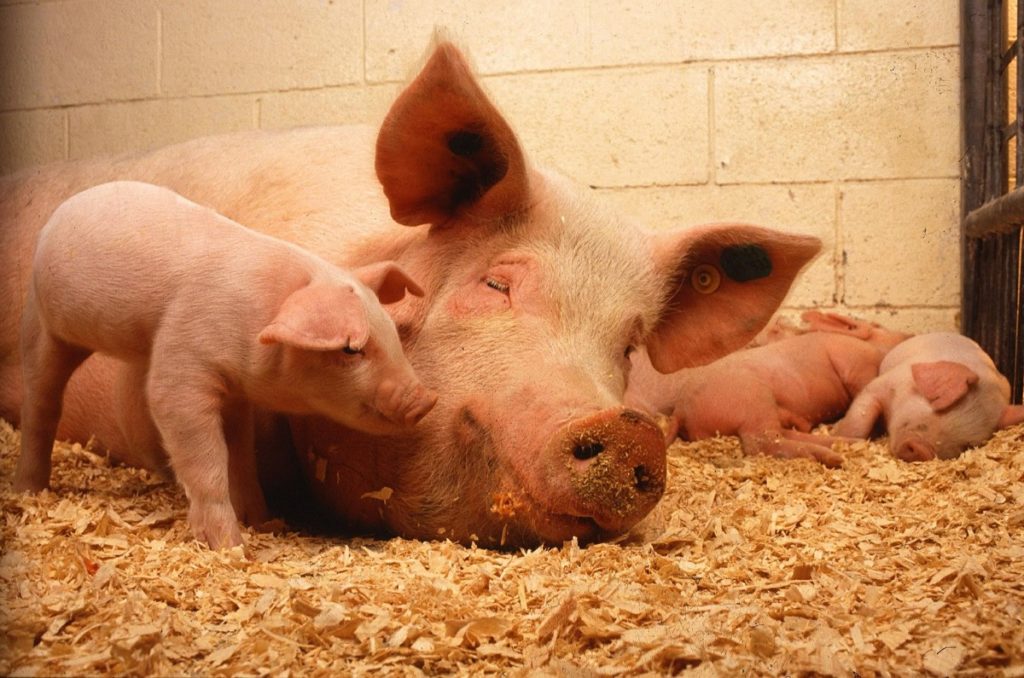
Pig Housing
Image Source

Key rules for selecting a pig farm location and housing

Pig farm location is an important factor in disease control. Ideally, a pig farm should be located in an isolated area far away from other animal farms. In areas with high pig densities, highly contagious diseases can spread easily. Disease problems on farms with high pig population densities illustrate the difficulty of preventing the spread of infectious diseases in areas where pig farms are located close together. In densely populated pig farm areas, it becomes difficult to prevent certain diseases on the farm. 

The site should be on high ground where rainwater cannot flood. The site should be protected from the sun (shade of trees), and there should be plenty of fresh air. Away from residences (about 8-10 meters downstream). In the case of a large-scale pig farm, the site selected should also be well-connected by year-round roads, suitable for manure disposal, and connected to reliable water and electricity sources. 

Management practices to increase the productivity of pigs 

Pig farming is the livelihood of the rural poor who belong to the lowest socio-economic strata and have no means to carry out scientific pig farming with better foundation stock, adequate housing, feed, and management. Pigs have the highest feed conversion efficiency, i.e., they produce more live weight for a given feed than any other meat-producing animal except broilers. 

Breeding care – Pigs are very prolific by nature, and two farrowing should be planned in a year adopting optimal management conditions. One boar should be maintained for every ten sows for maximum fertility—breed animals in the heat period (around 12 to 24 hours of heat). 

Care during pregnancy – Pay special attention to pregnant sows by providing adequate space, food, water, etc., a week before harvesting. The farrowing pens and the sows should be sterilized 3-4 days before the expected harvest date, and the sows must be kept in the farrowing pen after bedding it properly.
Get training in raising pigs – Before starting a commercial pig business, it is essential to undergo proper training in pig rearing from established training centers and universities. The main objective of this training will be: 

  • To help you understand the nuances of this business. 
  • Tell you what environment you should raise pigs in to maximize their welfare. 
  • Enable you to build working relationships with managers and industry people. 
  • Help increase your firm’s financial stability, productivity, health, and efficiency. 

Quality of pig farm design for profitability

The quality of pig farm design directly affects pigs’ health and profitability. Although it is not the only determinant of swine production quality, it can reduce mortality, promote growth, and increase feed efficiency. Moreover, pig farmers can save money when swine health conditions are less problematic. There are no shortcuts to success in pig farming, but building a good one is a great start.

Choosing housing that maintains the health and well-being of pigs can increase the quality of swine production. In designing a pig farm, you must consider the feeding regimen, pig slaughter weight, pig manure handling, and swine production plan. To effectively manage pigs, you must consider pig production and performance, identify ways to improve your herd, provide adequate housing, and manage your herd’s diet and environmental factors.

Issues should be monitored. Sow management requires investment in feed, skilled labor, and other overheads that are not directly linked to sow productivity. The fewer pigs a sow produces in a year, the more expensive the product. As the number of piglets weaned each year increases, production profitability also increases. 

In case you missed it: Pig Farming in USA: How to Start

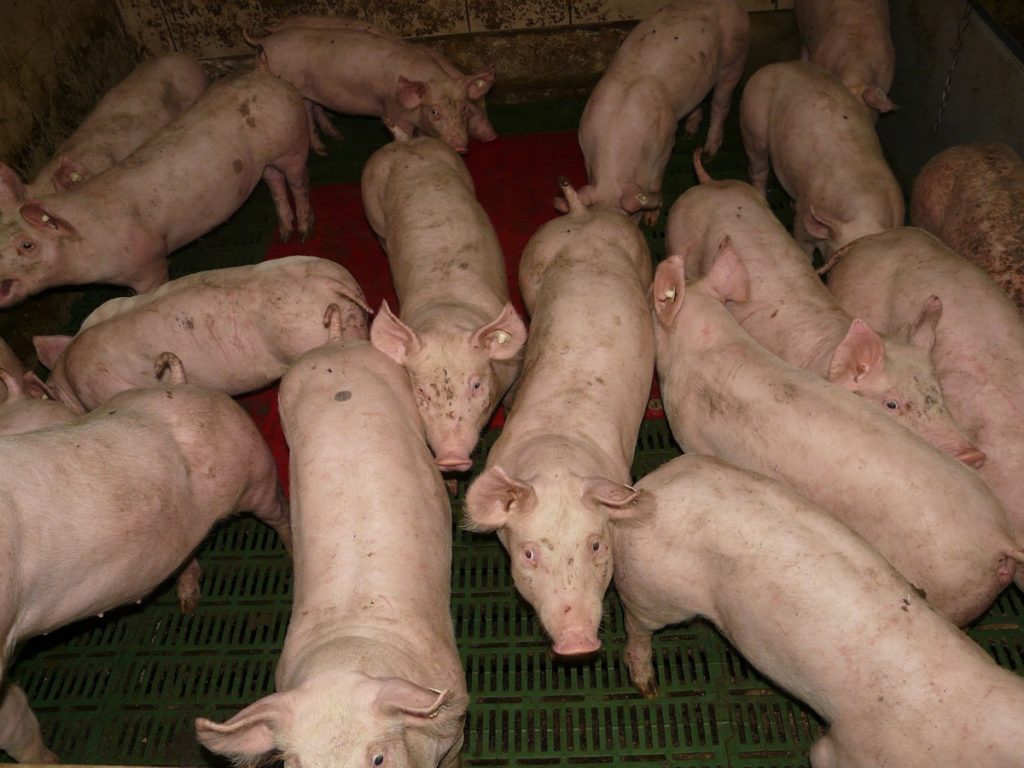
Pig Farming
Image Source

Maintain effective production management 

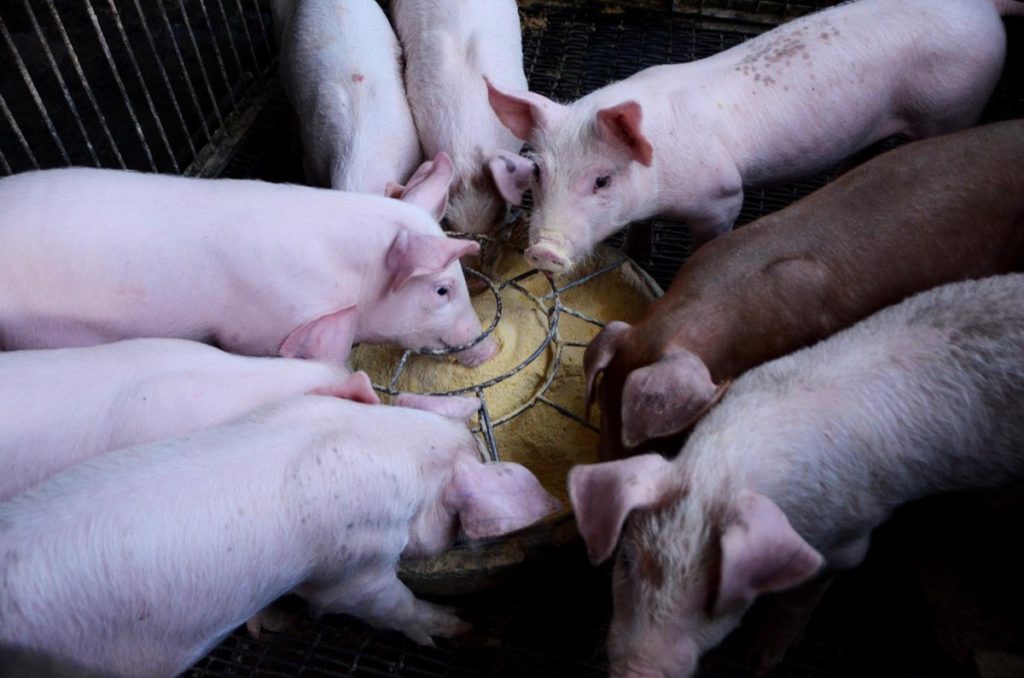
  • Feed – This is a significant part of the cost of growing a pig. The efficiency of use is very important, and nutritional value is very important compared to price. How it is delivered and made available to the pig can increase feed intake and maximize feed efficiency. Pigs should be fed a balanced diet with all the necessary nutrients and clean drinking water once or twice daily. Pigs consume about three to four kilograms of feed per day. The great thing about pigs is they eat a variety of food from leftovers, fruits, vegetables, kitchen scraps, agricultural waste, and more until it decomposes. Because it can make them sick, it saves most household vegetable scraps from waste. However, pork pellets are the best food. 
  • Type of housing used and quality of the environment. 
  • Disease levels and their economic impact. These are shown by significant improvements in daily gain and feed conversion when pigs are separated and weaned early or raised under different disease control conditions. 

Key points to successfully raising pigs

Sufficient space for pigs – The key to raising pigs is ensuring they have enough space. In general, pigs need as little space as possible. Pigs barely run around and become active. Pigs spend most of their time eating, sleeping, and rooting. Keeping them in the field allows them to move around and breathe fresh air.

If you plan to keep them out, be prepared to go after their destructive behaviors. Be sure to take care of the damage they cause to the landscape and dedicate areas to rest. Keeping them in shelters can make monitoring their health and eating habits easier. This also allows you to control their ventilation and manage the manure. Either way, it is recommended that you allocate at least 8 square feet of space for each pig. 

Climate control system – A comprehensive climate control system is important in pig farming. In extreme temperatures, pigs may experience discomfort affecting their appetite, growth, and reproduction. Maintaining adequate ventilation is key to keeping the shelter between 18 and 22 degrees for adult pigs and higher for piglets. The ventilation of the pig farm can be either mechanical or natural to provide adequate cooling in summer and heat in winter. 

  • Natural ventilation system: Uses doors and panels to promote air circulation in the shelter. 
  • Mechanical Ventilation System: Eliminates toxic odors, moisture, dirt, and other harmful organisms that prevent adequate ventilation around the shelter. This requirement requires a pig-form exhaust fan. 

Tips for pig health management 

Add nutritional supplements early in life – Special nutritional products can be used to support the vitality of small or weak piglets immediately after birth. Liquid formulations of essential oils are used for their appetite-enhancing, strong antimicrobial, and anti-oxidative effects. Additionally, they can contain medium-chain fatty acids, which provide pigs with the rapid energy they need.

Vitamin E supplementation supports the development of the immune system. Such products can help weak piglets on the first day of life to reduce mortality during the first few hours. A typical dose is 1 to 2 ml per piglet, injected directly into the mouth once, twice, or thrice per day, after which the piglet’s appetite can be expected to increase. 

In case you missed it: Earning 20 Lakh Per Year from Raising Pigs – A Success Story of a Pig Farmer

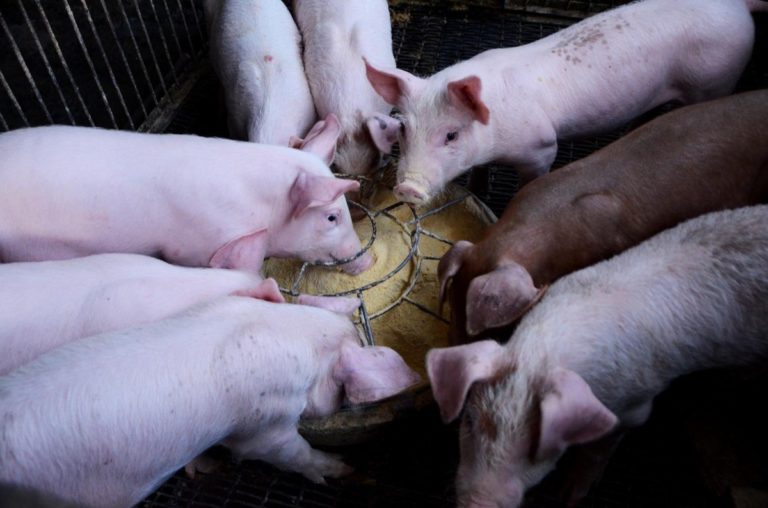
Feeding Pigs in Farm
Image Source

Support early immune system development – Newborn piglets receive passive immunity from the mother during pre-birth. After birth, passive immunity subsides over several days, stimulating the development of the innate immune system based on the initial colostrum intake. Piglets absorb the greatest amount of immunoglobulins from colostrum in the first 12 hours after birth. Over time, the amount of immunoglobulins in colostrum and milk decreases as the piglets have a chance to absorb them.

Ensure water supply is of adequate quality – Fresh, clean water is often overlooked when managing crops. Dwarfs need water just like pigs and growing and finishing pigs. A sow needs to drink 2.5 liters of water to produce 1 liter of milk. During gestation, a sow drinks about 15-20 liters of water daily.

Sows need more than 22 liters of water per day during the lactation period, depending on their litter size. An optimal environment (with optimum temperature, humidity, and airflow), a high level of biosecurity, and skilled labor is the only method to achieve high breeding results. 

Factors to consider in pig farm construction 

Housing – Proper design and construction of the pig house are critical to disease prevention. The drainage system should be designed so that water and sewage from one part do not enter the other part. Concrete floors should be sloped for proper drainage and ease of cleaning. Floors that allow standing water invite dirt and cleaning problems.

Solid partitions, especially the furrow section, and between individual hog houses will help prevent the spread of infectious diseases. Housing should be constructed with well-designed water and feed troughs; access to good quality water and constant water is essential for animal health. 

Fencing – When pig farms are located very close to each other with no physical barriers such as fences between them, disease control measures become extremely difficult, as preventing the rapid spread of diseases is difficult. It becomes almost impossible to transfer between forms via vectors, such as people and animals, including dogs and rats.

It is not surprising, therefore, that outbreaks of diseases in such cases are almost routine and that the diseases in the country are all found in such areas. Therefore, all pig farms should be fenced. A simple chain-link fence should keep people and animals like dogs out.

Key factors can affect the type of pig farms

  • Supply of suitable feed for pigs 
  • Ability to handle manure or other by-products from the pig operation 
  • Local beliefs or traditions, including religion 
  • The breed or type of pig available on the farm 
  • Local diseases or conditions that affect pig breeding or growth
  • Local requirements, including government zoning and land use laws 
  • Local and global market conditions and demand 
  • Traditional farming styles and practices 

Tips for reducing the pig production cost 

Feed costs represent the largest input for producers, often up to 70% of production costs. Pig producers need to adapt their feed strategy to maximize feed efficiency. 

Reducing feed costs for Pigs – The pressure to reduce feed costs and the constant effort to understand available feed ingredients better is the livestock industry’s biggest challenge today. Animals cannot fully utilize about 25% of the nutrients in feed because of anti-nutritional factors. With this in mind, producers worldwide use sustainable methods to meet demands for animal welfare and produce based on nutritional and economic factors (which are often different). 

In case you missed it: Common Mistakes in Pig Farming: For First Time Pig Owners

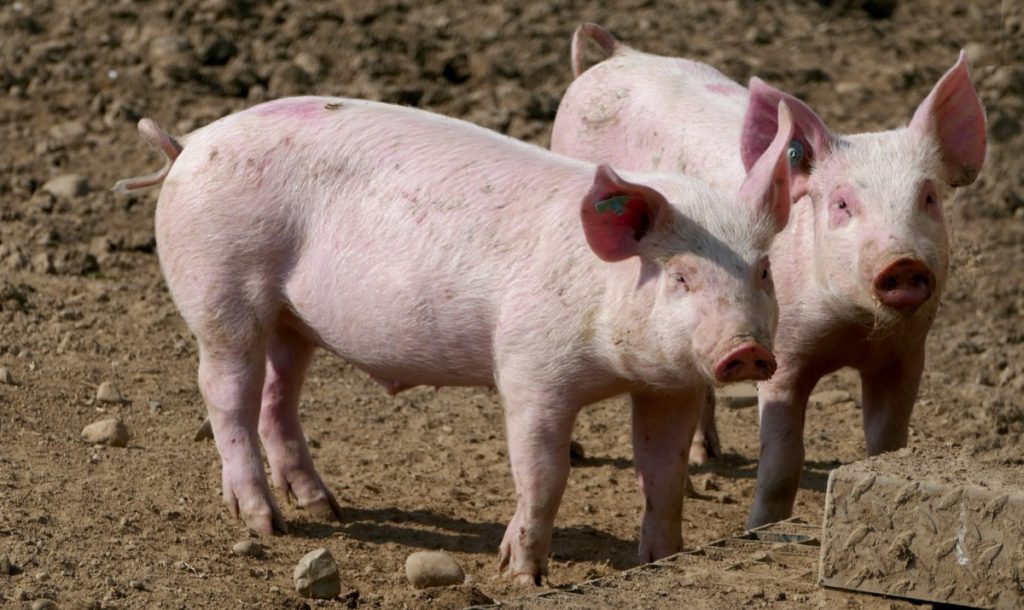
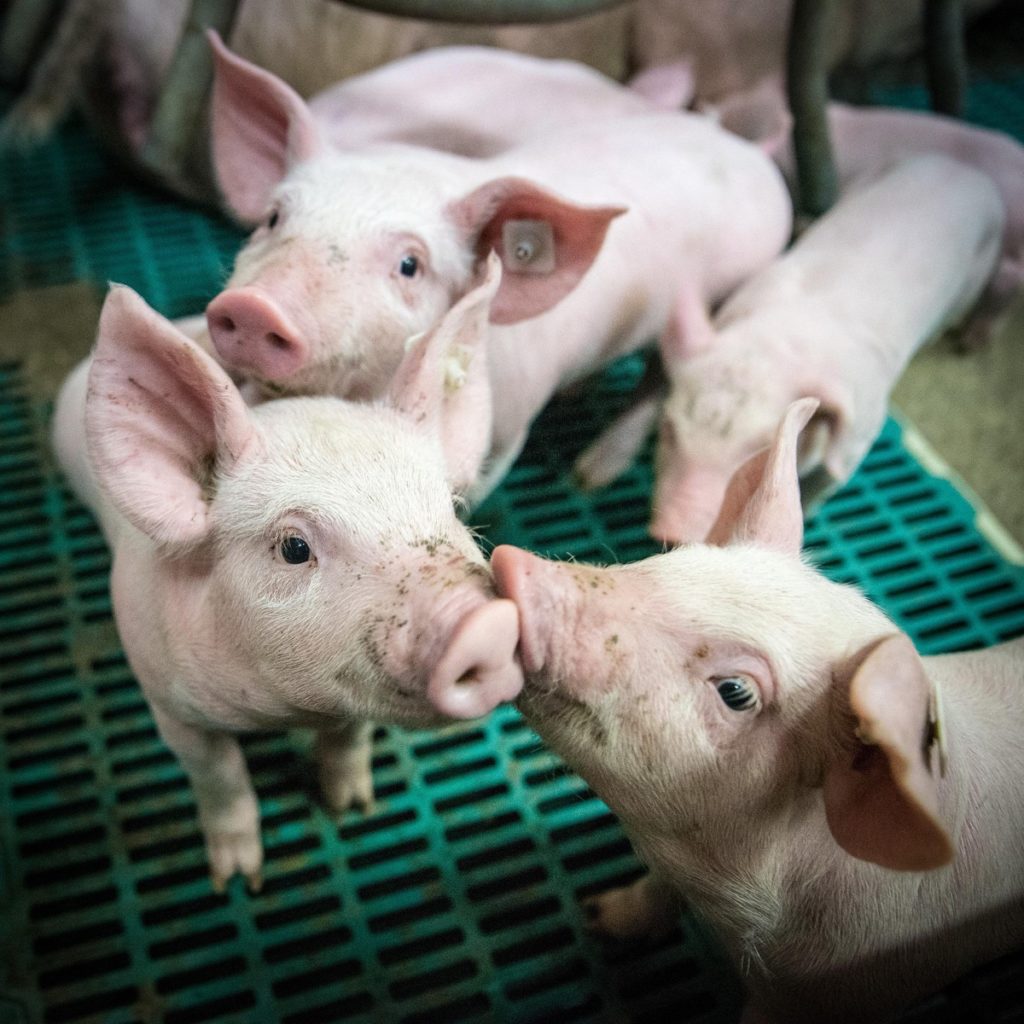
Baby Pigs
Image Source

Pig producers may want to increase feed digestibility to manage short-term risks associated with low market prices. Helps increase feed digestibility: 

  • Provide more nutrients for pigs to absorb. 
  • Improve efficiency by allowing producers to get animals to market faster. 
  • Low food costs. 

Improving pig performance, starting with sows – In recent years, genetics has played a major role in improving sow performance by increasing the number of pigs produced per sow each year. As litter size increases, pig birth weight decreases, and litter conversion increases. Reducing weaning variation helps the producers market pigs in a tighter window and decrease slaughter variation. Reducing variability at the time of slaughter also can reduce sorting losses at the processing facility and increase revenue per pig.

Optimizing water consumption – Pigs’ water consumption is just as important as their feed intake because pigs that don’t drink enough water don’t eat enough feed. Pigs drink about 10 percent of their body weight daily or about twice the amount of feed. Keeping the pH in a low range for long periods reduces the conditions that allow harmful bacteria to grow and thrive. 

While many variables can affect production costs, understanding the factors that affect feed quality and implementing a quality assurance program will help ensure that your pigs receive the best nutrition. It will help the pig producer save more money in the long run. 

Care practices for raising pigs
  • Feed crepe feed with breast milk for the first 6-8 weeks. 
  • Protect pigs from extreme weather conditions, especially during the first two months. 
  • Needle teeth should be trimmed immediately after birth. 
  • Vaccinate pigs according to the recommended vaccination schedule.
  • Iron supplementation is essential to prevent piglet anemia.
  • Pigs intended for sale as breeder stock must be properly reared. 
  • Male pigs not selected for breeding should preferably be castrated at 3-4 weeks of age which will prevent the smell of pork in the cooked meat, thus enabling the production of quality meat. 

In this pig farming business, you have to take care of the animals at every stage of life. Also, you have to keep farms free from all diseases and health problems. Therefore, proper deworming vaccination is a crucial step.
Key rules for safe handling of pigs 

Feeding is an important aspect of commercial pig farming. Overall, animals’ health and growth rate depend on the availability of nutritious food. The main ingredients of pig feed are oats, grains, corn, wheat, rice, sorghum, and other millets. However, you should add some protein supplements such as oil cake, fish meal, and meat meal. Also, you can use packaged feed that comes with proper nutritional balance. A pig needs about 1.5-2 gallons of water per day over six months. 
Buy productive pig breeds for effective piggery management

After setting up the farm, you need to buy pig breeds. All over the world, there are several breeds of pigs available on the market. However, it would help if you chose commercially good breeds for your farm.
The common pig breeds for commercial production are the Yorkshire, Landrace, Duroc, Tibetan, Tamworth, Hampshire, and Meishan breeds and their crosses. These breeds produce lean meat in combination with efficient feed conversion. These commercial breeds are less resistant to disease and more susceptible to hot weather and poor-quality feed. 
In case you missed it: Pig Farming in Germany: How to Start, Tips and Ideas

Pig Shelter
Image Source

Effective pig farming business for more production

Starting a piggery business is easy and requires little capital/investment to build a house and purchase equipment. Pork is universally delicious and nutritious food. And the demand for meat is growing very fast. To start a business, you must prepare a business plan for your pig. Your plan should include an executive summary, business objective, market analysis, marketing plan, management and operational plan, and financial plan.

Creating a business plan is as easy as writing down an idea on paper. It involves writing about the various components in a way that would persuade a bank or individual to invest in a business venture. According to your business plan, you should have two things ready. One is space, and the other is financial resources. Firstly, you must choose the land to set up your pig farm.

Additionally, you should have a system to protect the farm from theft. Additionally, the location should have the availability of certain required resources. The list includes sources of clean water, electricity, proximity to markets, availability of veterinary doctors in the area, etc. Finally, check the transportation facility at that particular location. 

It is most important to choose a location for a pig farm that is not close to a residential area. It is advised to the local authorities, and their approval is sought before establishing the distance. Additionally, ensure that the place is a pollution-free and noise-free environment. It increases the good and quality of the good and healthy production of pigs. Other factors to consider before making a choice are water supply and transportation costs. 

Focus on marketing 

When the pigs reach their slaughter age, you can easily sell them in the local and international markets as it is in high demand. However, the problem persists when you have to compete with other farming business owners. Suppose you have a good marketing campaign that will focus on promoting the quality of your product and the health safety measures adopted during pig rearing.

In that case, you will not only be in the local and national market but internationally. There will be more clients in the international market as well. In starting a pig business, you must have a marketing plan. Apart from local slaughterhouses, meat processing centers are potential customers. Additionally, you can contact local restaurants and hotels with large needs throughout the year. Additionally, you can also consider pig farming for organic meat production. Pig farming is becoming increasingly concentrated on fewer farms than in the past.

There are some large specialist pigs, many family-run units, and fewer farms (although still a large part of the total) with a small side-line piggery. Pork prices are sensitive to supply and demand for pork, ham, bacon, and small items. Some pork (about 30% of domestic production) is imported for use in cooked, bone-in products such as ham and bacon. Rapidly changing knowledge is a feature of the pork industry that producers must adapt to, managing the enterprise like a business.

Conclusion

Starting a pig business is a very profitable livestock business. Among the various livestock species, pigs are the most powerful source of meat production and are more efficient feed converters than broilers. The business ensures high returns to farmers. Pig farming will provide seasonally employed rural farmers with employment opportunities and additional income to improve their standard of living. The above rules are good for every farmer to know the effective management of pig farming and how to raise pigs.

Best Season to Grow Onions at Home in India: in Pots, Terrace, Apartment Balcony, and Backyards

0

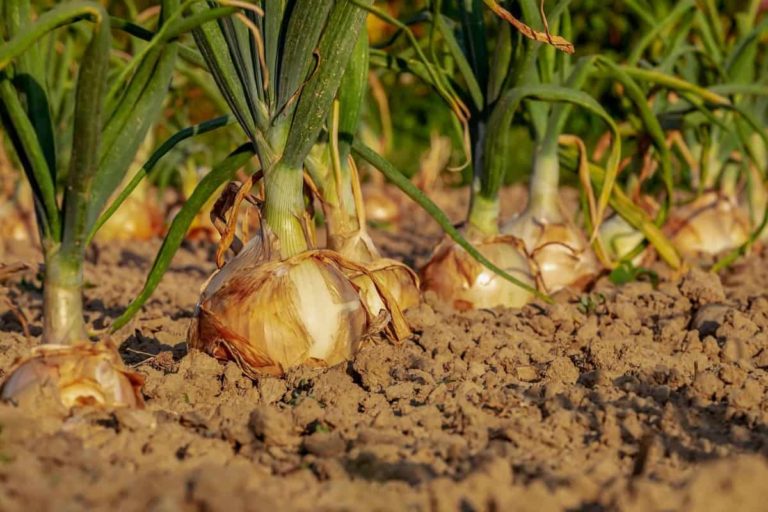
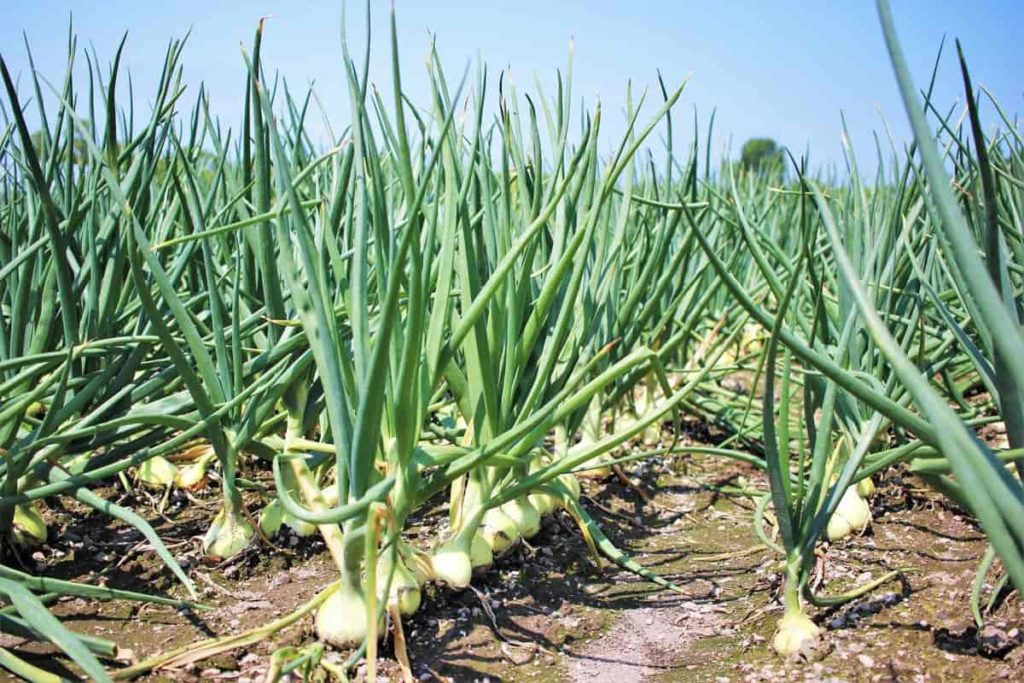
Onion is one of the most popular cultivated vegetable species. Onion belongs to the Amaryllidaceae family. Onion is a bulbous plant with bulbs and semi-cylindrical or tubular leaves with a waxy coating on the surface. Maharashtra, Madhya Pradesh, Karnataka, Gujarat, Rajasthan, Bihar, Andhra Pradesh, Haryana, West Bengal, Uttar Pradesh, Chhattisgarh, Odisha, Tamil Nadu, Jharkhand, and Telangana are the major Onion producing states in India. 

Best Season to Grow Onions at Home in India
Image Source

Best season to grow Onions at home in India

Onion growing time in India

India is the second-largest Onion cultivating country in the world. Indian Onion varieties are famous for their pungency and are available throughout the year. Indian Onion has two crop cycles; the first harvest starts from November to January, and the second harvest from January to May. 

Onion is a hardy cool-season biennial but is commonly grown as an annual crop. Onions have narrow, hollow leaves and a base that enlarges to form a bulb. The bulb can be white, yellow, or red, and takes 80 to 150 days to reach harvest. Onion is usually grown only once a year in many states but not in Maharashtra.

Three crops are harvested in a year in the largest Onion-producing state. Due to this, the Onion prices in the country are usually fixed from here. It is grown here in Kharif, post-Kharif, and Rabi seasons. In the Kharif season, Onion sowing is done in the month of July-August, which is going on in many districts of Maharashtra these days. Onion crops sown in the Kharif season will reach the market in October-December. 

Spring/Summer Onion features 

  • Available in yellow, red, and white from March to August. 
  • Recognizable by their thin, light-colored skin. 
  • They usually have a high water content, which shortens their shelf life and makes them more susceptible to injury. 
  • Sweet to mild flavor, best used in salads, sandwiches, and fresh, lightly cooked, or grilled dishes. 
  • Many specialty sweet Onions are part of this category and are sold under a specific trade name. Some domestic and imported Onion varieties with these characteristics are offered at other times of the year. 

Autumn/Winter Onion features

  • Available from August to May in yellow, red, and white. 
  • They are easy to find by their multiple layers of thick, dark-colored skin. 
  • Usually low in water content, they have a long shelf life. 
  • Mild to spicy in flavor, perfect for savory dishes that require more cooking time or flavor.

Recommended varieties for different seasons and regions of the country

VarietiesSeason & Region
Bhima SuperKharif – Madhya Pradesh, Maharashtra, Odisha, Punjab, Rajasthan, Chhattisgarh, Delhi, Haryana, Karnataka, Gujarat, and Tamil Nadu
Late Kharif – Gujarat, Karnataka, and Maharashtra
Bhima RedKharif – Haryana, Karnataka, Delhi, Gujarat, Maharashtra, Punjab, Rajasthan, and Tamil Nadu
Late Kharif – Gujarat, Karnataka, and Maharashtra
Rabi – Madhya Pradesh and Maharashtra
Bhima Dark RedKharif – Madhya Pradesh, Maharashtra, Odisha, Punjab, Rajasthan, Haryana, Karnataka, Chhattisgarh, Delhi, Gujarat,  and Tamil Nadu
Bhima RajKharif – Gujarat, Karnataka, and Maharashtra
Late Kharif – Gujarat, Karnataka, and Maharashtra
Rabi – Delhi, Gujarat, Haryana, and Rajasthan
Bhima Shakti
 
Late Kharif – Gujarat, Karnataka, and Maharashtra
Rabi – Andhra Pradesh, Bihar, Chhattisgarh, Delhi, Gujarat, Haryana, Karnataka, Madhya Pradesh, Maharashtra, Rajasthan, Odisha, Punjab, and Uttar Pradesh
Bhima Light RedRabi – Karnataka and Tamil Nadu
Bhima KiranRabi – Andhra Pradesh, Bihar, Delhi, Haryana, Karnataka, Maharashtra, Punjab, and Uttar Pradesh
Bhima Shubra
Kharif – Madhya Pradesh, Maharashtra, Chhattisgarh, Gujarat, Karnataka, Odisha, Rajasthan, and Tamil Nadu
Late Kharif – Maharashtra
Bhima Shweta

Kharif – Madhya Pradesh, Maharashtra, Chhattisgarh, Gujarat, Karnataka, Odisha, Rajasthan, and Tamil Nadu
Rabi – Andhra Pradesh, Bihar, Chhattisgarh, Delhi, Haryana, Karnataka, Madhya Pradesh, Maharashtra, Orissa, Punjab, and Uttar Pradesh
Bhima SafedKharif – Karnataka, Madhya Pradesh, Chhattisgarh, Gujarat,  Maharashtra, Odisha, Rajasthan, and Tamil Nadu

Climate requirement and crop rotation time for best Onion cultivation 

Being a shallow-rooted crop, efficient and maximum utilization of all available soil mineral nutrients is impossible. Unused nutrients will leach out and settle into the subsoil. Planting leguminous crops in the next growing season will ensure the use of these nutrients. Thus, the Onion and legume cropping sequence is recommended for maintaining soil health, optimum utilization of nutrients, and high yield. 

In case you missed it: Onion Farming in Polyhouse for Maximum Profits

Onion Field
Image Source

Onion cultivation is best possible in subtropical, temperate, and tropical climates. Simply put, a mild climate that is not too rainy, too cold, or too hot is ideal for growing Onions. However, Onion cultivation is done in a specific season for better results. For example, Onion bulbs are planted in winter, further cultivated in late winter, and harvested before the onset of summer. 

The Best time to start Onion seeds indoors and outdoors

  • In the spring season, as soon as the ground can be worked, plant Onions outdoors, usually in late March or April, when temperatures are unlikely to drop below -2°C. 
  • In the spring, start Onion seeds indoors (once the soil is at least 10°C) about six weeks before planting in the ground. 
  • A fall-planted crop of Onions needs at least 4 to 6 weeks of warm temperatures to get established in the ground. They will go dormant in cold weather, but in early spring, the bulbs revive as temperatures and soil warm again. 
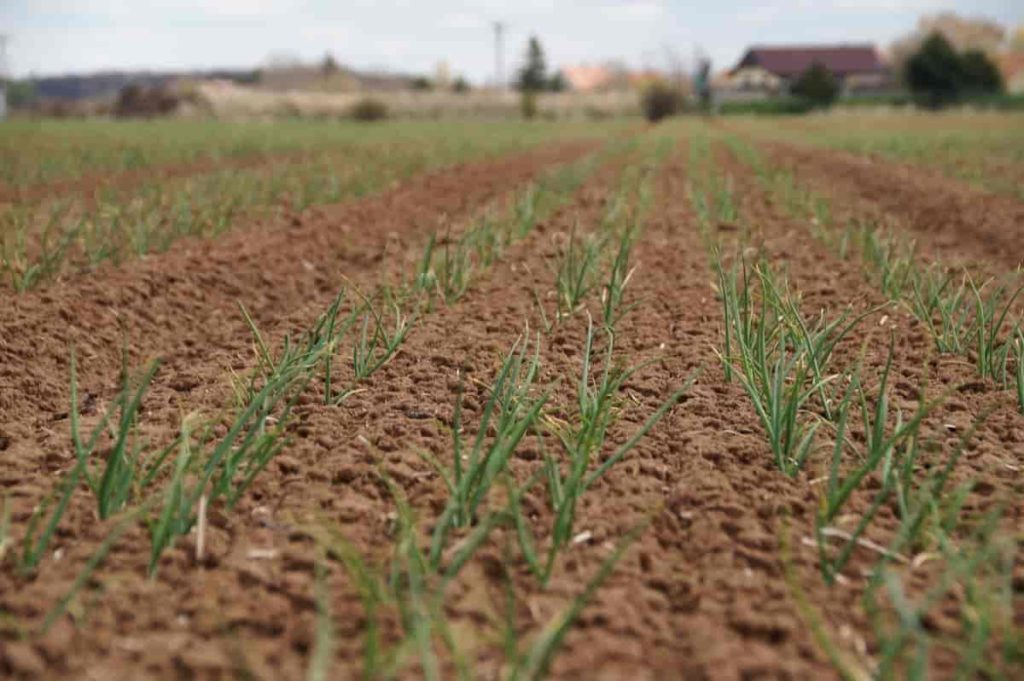
  • Onions can grow in almost all types of soil. Generally, the seeds are sown in the nursery, and the plant is transplanted after about 30-40 days. Before transplanting, the field should be plowed properly to get rid of soil clods and unwanted debris. Vermicomposting (about 3 tons per acre) or poultry manure can be added. It is done during final plowing. 
  • After plowing, fields are leveled, and beds are prepared. Depending on the season, beds can be flat or wide beds. Flatbeds are 1.5-2 meters wide and 4-6 meters long. Wide beds have a height of 15 cm and a top width of 120 cm. The depth of the furrows is 45 cm to achieve the correct spacing. Onion is grown in wide-bed furrows during the Kharif season as it is easy to drain excess water out of the furrows. It also facilitates aeration and reduces the incidence of anthracnose disease. If Onions are cultivated in the Rabi season, flat beds are made. Flatbeds for Kharif can cause waterlogging. 

Three sowing seasons for Onion crop 

Karnataka, Maharashtra, and Andhra Pradesh are the major Onion growing states in Kharif, while Rajasthan, Haryana, Madhya Pradesh, Gujarat, and Uttar Pradesh are the five non-traditional Onion growing states. Kharif Onion area in Rajasthan may be increased to 24,500 hectares this year from 22,295 hectares in the same season last year.

Kharif Onion area can be increased from 7,250 hectares to 10,000 hectares in Haryana and 5,000 to 5,500 hectares in Gujarat. Similarly, the Kharif Onion area in Madhya Pradesh may increase from 4,729 hectares a year ago to 6,500 hectares this year. In contrast, in Uttar Pradesh, it may increase from 4,000 to 4,500 hectares. 

There are three sowing seasons for the Onion crop in India

  • Kharif (planted between July-August and harvested in October-December); 
  • Late Kharif (planted between October-November and harvested in January-March); and 
  • Rabi (planted between December and January and harvested in March and May). 

Rabi 70%, Kharif 20%, and Late Kharif 10% share the total Onion production. Sowing is an important process for Onion cultivation as any change in seed rate, time of sowing, and method of sowing can significantly reduce the yield. So, care should be taken to adopt proper sowing practices. The best time for raising the nursery is between the months of mid-October to November. Plants are ready for transplanting from mid-December to mid-January. Select healthy plants of 10-15 cm in height for transplanting.

In case you missed it: Onion Cultivation Income, Project Report, Yield, Profits

Onion Farming
Image Source

In Maharashtra, the seed for the early Kharif crop is sown in nurseries in early June and transplanted by late July. In contrast, normal Kharif Onion seed is sown in nurseries in late August and transplanted in mid-October. 

Planting time for Onion crop in India

Onions are a cool-season crop, and temperatures can stay below freezing. They can be planted from seeds, or small bulbs called sets or transplants. Planting seeds costs less, but Onions take longer to mature. When planting Onions for bulbs, plant them ¼ inch deep from October through December. 

Space the seeds 1 inch apart. When the Onion plants are about 6 inches tall, thin them to one plant every 2 to 3 inches. Eat extra greens like green Onions. If you use sets or transplants, plant them ¾ inch deep and 3 inches apart (Photo 1). Plant Onions no deeper than 1 inch. 

Raising seedlings and transplanting time to grow Onions

It is the standard technique for irrigated cropping because it results in higher yields and larger bulb sizes. In the plains, seeds are sown during October-November for the Rabi crop. In the hills, the seeds are sown from March to June. The seeds are first sown in well-prepared nursery beds of 90-120 cm in width, 7.5-10.0 cm in height, and appropriate length. The nursery area and main field ratio are about 1:20.

The seed rate ranges from 8 to 10 kg per hectare. Plants with about 15 cm height and 0.8 cm neck diameter are good for transplanting, and this is achieved in around 8 weeks. However, it varies from 6-10 weeks depending on the soil, climate, and rainfall. It is customary to top the plants when transplanting if they are overgrown. 

Summer / Rabi Onion Cultivation 

Summer / Rabi Onions are generally used for irrigated cropping, resulting in higher yields with larger-sized bulbs. Seedlings are first grown in the nursery. October to November is recommended as sowing time for India’s summer/Rabi crop. 

In Maharashtra, it is transplanted from November to December. About 10 to 12 Kg of Onion seed is required to raise seedlings for one-hectare transplanting. The seeds are ready for transplanting 45-60 days after sowing. Over-aged seedlings tend to bolt, taking longer to initiate new growth. Spacing 15 x 10 cm. (plant to row) is recommended for maximum population and high yield. 

Rabi is the only Onion crop that is storable due to low humidity. Rabi season Onion sowing has started in Maharashtra, the largest Onion producer. Rabi season Onion cultivation has almost started in several districts of Marathwada, which have been worst affected by heavy rains. Three crops of Onion are grown in Maharashtra. It is cultivated in the early Kharif, Kharif, and Rabi seasons.

Onion sowing in the Rabi season starts in October and November and continues till January. It takes about four months to produce this season’s Onions. That is, it is ready between February and March. As per Rabi season, Onion seed sowing by some people comes out till April-May. Similarly, early Kharif is the seed sown in June-July and reaches till November. 

Kharif season Onions are sown in August and September, which fall between December and January. But storage of both of them is not possible. Stocking is done only for Rabi season Onions. About 65% of Maharashtra’s total Onion production is during the Rabi season. Nashik, Pune, Solapur, Jalgaon, Dhule, Aurangabad, Beed, Osmanabad, Ahmednagar, and Satara districts are famous for Onion farming.

In case you missed it: Onion Seed Germination, Time, Temperature, Procedure

Onion Farm
Image Source

In the Rabi season, Onions are planted as soon as winter begins. After 1 to 2 months of planting, the weather becomes cool. An increase in temperature during the flowering period of an Onion is considered favorable for its harvest. Onions thrive in medium to loamy soil with good drainage and are rich in organic matter. Applying 40 to 50 tonnes of indigenous manure per hectare to this land will increase the yield. 

Good Onion varieties for the rabi season 

Baswant 780: This Onion variety is suitable for the Kharif and Rabi seasons and has a deep red color. These Onions grow in size in the middle of the month. This type of plant matures in 100 to 120 days. The crop yield per hectare is about 250 to 300 quintals. 

N-2-4-1: This Onion variety is suitable for the Rabi season and has a saffron color. Onions are medium round in shape and keep very well in storage. This Onion variety matures in 120 to 130 days. The Onion yield per hectare is 300 to 350 quintals. 10 kg seed per hectare is sufficient. 

Onion growing in Kharif season 

A Kharif crop generally requires 5-8 irrigations. The best Onion varieties for the Kharif season are;

Bhima Super: A red Onion variety is grown in the Kharif season in Chhattisgarh, Delhi, Gujarat, Haryana, Karnataka, Maharashtra, Rajasthan, Odisha, Madhya Pradesh, Punjab, and Tamil Nadu. Its average yield in Kharif is 20 – 22 tonnes per hectare, and in late Kharif, 40 – 45 tonnes per hectare. 

Bhima Dark Red: This Onion variety for Kharif season in Chhattisgarh, Delhi, Gujarat, Haryana, Karnataka, Madhya Pradesh, Maharashtra, Odisha, Punjab, Rajasthan, and Tamil Nadu. 

Bhima Red: This variety is already recommended for Rabi season in Maharashtra and Madhya Pradesh; it is also recommended for Kharif season in Delhi, Gujarat, Haryana, and Karnataka, Maharashtra, Punjab, Rajasthan, and Tamil Nadu. 

Bhima Shweta: This variety is recommended for Rabi season and Kharif in Chhattisgarh, Gujarat, Karnataka, Madhya Pradesh, Maharashtra, Odisha, Rajasthan, and Tamil Nadu. 

Bhima Shubhra: This white Onion variety is recommended for the Kharif season for Chhattisgarh, Gujarat, Karnataka, Madhya Pradesh, Maharashtra, Odisha, Rajasthan, and Tamil Nadu. It is recommended for late Kharif in Maharashtra.

Fertilizer requirements for growing Onion crops in different seasons

  • Kharif season Onion – 100:50:50:50 kg NPKS/ha
  • Late kharif Onion – 150:50:50:50 kg NPKS/ha
  • Rabi season Onion – 150:50:80:50 kg NPKS/ha

In case you missed it: Top 18 Steps/Ways to Boost Onion Yield: How to Increase Production, Size, and Quality

Onions Farm
Image Source

Sowing, transplanting, and harvesting time in different regions in India

PlaceSeasonTime of seed sowingTime of
transplanting
Time of harvest
Hilly areasRabi
Summer
September-October
November-December
October-November
February-March
June-July
August-October
Punjab, Haryana,
UP, Bihar,
Rajasthan
Kharif
Rabi
June- July
October- November
July-August
December-January
October-November
May-June
Orissa and West Bengal               Kharif
Late Kharif
Rabi
June- July
August- September
September- October
August-September
October-November
November-December
November-December
February- March
March- April
Maharashtra and
parts of Gujarat
Early Kharif
Kharif
Late Kharif
Rabi   
February- March
May- June
August- September
October- November
April-May
July-August
Oct-November
December- January
August- September
October- December
January- March
April- May
Andhra Pradesh,
Tamil Nadu, Karnataka   
Early Kharif
Kharif
Rabi
February- April
May- June
September- October
April-June
July-August
November-December
July- September
October- November
March- April

Onion yield according to the season

  • Onion (Kharif) – 15-20 tonnes/hectare
  • Onion (Late Kharif) – 30-35 tonnes/hectare
  • Onion (Rabi) – 25-30 tonnes/hectare

Frequently asked questions about growing Onions

Can we grow Onions in summer in India? 

Summer / Rabi Onions are generally used for irrigated cropping, resulting in higher yields with larger bulbs. Seedlings are first grown in the nursery. October to November is recommended as sowing time for India’s summer/rabi crop. 

Can Onions survive the winter? 

It is a little-known fact that many seasoned gardeners aren’t aware of: you can grow Onions (and shallots) in the winter. These extremely hardy plants can survive incredibly cold temperatures with little protection and still provide quality bulbs after bolting in the spring.

How long does it take to grow Onions? 

Onion seeds are mainly available throughout the year and are less expensive than sets. However, seeds take longer to germinate. Since Onions take a long time to ripen, you can start them indoors. The average growth rate of an Onion is 100 to 175 days to maturity. 

In case you missed it: How To Start Onion Farming, Questions, Answers

Onion Growth
Image Source

Can I plant Onions in June? 

You can plant Onions almost any time of the year (especially if growing green Onions), but your timing will affect the size of the Onions you harvest and when to harvest them. Onions will be prompted to the bulb when the day length in your area is getting the right number of daylight hours for the variety.

Conclusion

Onions are surprisingly easy to grow. They are planted in early spring and harvested from mid-summer to fall. The above information is useful to know about planting time in the Onion crop.

\

12 Key Rules for Effective Poultry Farm Management: From Planning to Reducing Production Cost

1

Poultry farming has already proven that it can be very profitable. If you have adequate space and knowledge, starting a small poultry farm can be a great source of income for your family. Let’s check out the 12 key rules for effective poultry farm management below.

Key Rules for Effective Poultry Farm Management
Image Source

Key rules for effective poultry farm management

1. Key rule for good planning management in poultry farming

Good planning is essential for a successful poultry farming business. Poultry farming involves the rearing of birds either domestically or commercially, producing eggs, meat, etc. They understand the role of poultry in a farm system with an emphasis on chickens in poultry management, learning how to care for adults and chicks, producing eggs, meat, and other products, pasture-based production models, etc.

It involves knowing poultry health monitoring includes; ensuring that the poultry house is maintained with adequate brooding, rearing, growing, and laying conditions, and ensuring that recommended vaccinations are given and appropriate feeding programs are used. The objective of the event is to achieve maximum profit with minimum investment;

  • Key components of poultry farm management software.
  • Selection of data collection records. 
  • Accurate and secure data reading. 
  • Proper feed mill and medication maintenance. 
  • Analytical data report. 

2. Key rules for poultry productivity improvement tips

There are husbandry practices, cost-effective vaccination strategies, and other disease prevention and control measures that can reduce mortality and increase production in these village flocks. 

1. Circulation Fan System: A properly designed circulation fan system that circulates the air inside the house from floor to ceiling and from one end of the house to the other saves fuel usage by 10-30% reduction but improves litter and air quality. 

2. Fully enclosed houses: In a curtained house, 30-50% of the heat loss can be attributed to the wall curtain. By replacing sidewall curtains with well-insulated solid sidewalls, heating costs are dramatically reduced, and the home is cooler in the summer. Also, the increased level of environmental control in a fully enclosed house leads to improved bird performance. 

3. Insulated Tunnel Doors: Replacing traditional tunnel curtains with insulated tunnel doors in a fully enclosed home can reduce fuel consumption by 10% or more. Tunnel doors also create increased air movement over birds entering the tunnel during warm weather, resulting in cooler birds and drier litter. 

4. Litter treatment: By using litter treatment to limit ammonia production, ventilation rates during brooding can be kept to a minimum, reducing heating costs by 30%. It easily covers the cost of waste treatment. 

5. Bigger Houses: Bigger houses cost less during cold weather than traditional 40-foot-wide houses because they have less surface area. With the growing popularity of fully enclosed homes, producers have discovered that it is possible to build larger homes without excessive temperature differences between the inside of the home tunnel and the fan heads.

Houses up to 550 feet tall require higher wind speeds for today’s larger birds at a lower initial investment and, more importantly, lower operating costs per bird compared to houses 400 feet and 500 feet tall. 

In case you missed it: Poultry Farming in Nepal: How to Start, A Step-By-Step Guide for Beginners

Poultry Farm Housing
Image Source

6. Radiant Heating Systems: Radiant heaters provide 10 to 30% fuel savings compared to hot air furnaces. 

7. Attic Inlet System: The attic is a typical shed poultry house that is 5 to 30 degrees Fahrenheit hotter than the outside during daylight hours. Atari inlets allow producers to reduce fuel consumption by 10-20% in cold weather. Increased daytime ventilation rates result in lower ammonia levels and improved air quality.

3. Effective cost-saving ideas for poultry housing 

These technologies will provide indoor environmental control while using less energy and reducing operating costs. Poultry farms are an important sector that consumes large amounts of fuel worldwide. It is because the indoor temperature, relative humidity, chemical environment, ventilation, and lighting inside the chicken house dramatically affect the growth of broilers, which should be kept within the proper scope.

The growth of broilers mainly depends on indoor environmental conditions that can impede meat and egg production, such as heat or cold stress. Houses for poultry birds will have to be designed and built with a much greater emphasis on operating costs, especially heating and cooling, than in the past, most experts agree, as propane and electricity costs rise.

Learn poultry farming – The first step to getting started is basic training. Don’t rush into running a poultry farm business without proper training from a reliable farming institution. Be aware that this is a delicate business dealing with live birds. For example, if you don’t get training on day-to-day chicken rearing, it can ultimately prove costly for your poultry farm business. If you don’t know what to do at this point, many of your children may die. So, learn all those farming basics to run your chicken business successfully. 

4. Management practices in successful poultry farming 

Maintain clean sheds, enclosures, and equipment. Feeds for birds and animals meet the nutritional requirements of all age groups. There should be a control system for the environmental condition that ensures the ecological needs of the birds and animals. 

Select the right type of bird – Poultry farm business owners raise many types of birds. Your small poultry farm can start by focusing on two to three birds and then add more birds as the business grows. Poultry farms raise birds such as domestic fowl or chicken, broilers and layers, ducks, geese, quails, guinea fowl, turkeys, pigeons, and peacocks. You must decide whether to raise broilers or layers. It is a choice to start raising for meat production or egg production.

Determine the farm’s location – You should consider setting up your poultry farm in the most suitable place. The location should have all the necessary amenities. Try to start a poultry farm business a little away from the city so that you can get cheap land and labor. However, setting up a farm chicken business too far from the nearest city would be a mistake. Remember to approach a city more often to target your customers. Additionally, you may incur higher transportation costs if the poultry farm business is far from the city. 

A poultry farm business owner located near four poultry companies or integrators is 8 percent more likely to have a higher gross income than a farmer located near only one supplier. This data shows that the location of the poultry farm business is very important for the viability of the poultry farmers. 

Keep birds healthy – Another obvious observation, but it’s always worth repeating: Sick birds don’t grow; if they don’t, feed efficiency is never ideal. Sick or subclinical infected birds do not eat as well as healthy birds; what they eat usually goes to fighting the disease. In addition, they can also break down muscle protein, which reduces their body weight, making feed efficiency worse. In contrast, healthy birds, especially those with very healthy digestive systems, will use the nutrients in the feed more efficiently. 

In case you missed it: Equipment Needed for Poultry Farming: Tools, and PDF

Poultry Farm
Image Source

Collect necessary equipment – ​​You will need to purchase a lot of necessary equipment to run your poultry farm efficiently. Some of the most common equipment pieces are Waterers, Feeders, Cages, Nests, Incubators, Egg trays, Perches, Lighting equipment, Coops, Crates, Heaters or brooders, Waste disposal systems, and Ventilation systems.

5. Poultry husbandry principles for effective management

There are a set of requirements by which animals must be managed to achieve optimum performance in a manner acceptable to those responsible for the care of the animals and the community in general. These requirements are the key to good management and can be used to evaluate a poultry enterprise’s management for its quality. These requirements are also called principles. 

Welfare needs – A successful poultry house must meet birds’ welfare needs, which vary with class, age, and housing system. Failure to meet these requirements will, in many cases, result in poor bird performance. These requirements include: 

  • Provision of adequate floor space with adequate headroom 
  • Provision of good food quality with adequate feeding 
  • Provision of good water quality with adequate drinking 
  • Opportunity to socialize with flock mates 
  • The elimination of anything that could cause injury
  • Elimination of all sources of unnecessary harassment 

Good health care – A disease in a flock is reflected in inferior performance. The herd must be in good health to achieve its performance potential. There are three elements to good poultry flock health management. These are: 

  • Prevention of disease 
  • Early detection of disease 
  • Early treatment of disease 

6. Consideration of factors affecting poultry meat quality 

Successful broiler farming is related to successful day-to-day management of all aspects of broiler life. Feed is the most important among the management aspects necessary to grow broilers successfully. Poultry converts feed into food products quickly and efficiently. Their high production rates result in relatively high nutrient requirements. Poultry needs an adequate amount and balance of at least 38 nutrients in their diet.

After extensive data review, the minimum nutrient requirements for poultry are derived from empirically determined levels. Criteria for determining the need for a given nutrient include growth, feed efficiency, egg production, prevention of deficiency symptoms, and poultry product quality. These requirements assume that nutrients are in a highly bioavailable form and include no safety margin.

In terms of cost, feed is the most important input for intensive poultry production, and the availability of low-cost, high-quality feeds is critical to expanding the poultry industry. Managers must ensure that feed supplied to birds in commercial operations meets the nutritional requirements of all age groups and chickens.

Smallholder systems in developing countries generally place less emphasis on maximizing yields and more on maximizing profits by using diets composed primarily of local feedstuff ingredients rather than imported feed. Different forms of feed;

  • Mash feed: The raw material is obtained by grinding and mixing. It is the most widely used feed, easy to prepare, and economical. 
  • Pellet feed: The feed is prepared by exposing it to heat treatment under pressure. The heat destroys the micro-organisms and anti-nutritive factors in the raw material, making the feed more digestible. This feed system minimizes feed wastage.
  • Crumbles: Pellets are broken into granules. Feed is slightly more expensive to prepare than mash and pellets. 

In case you missed it: Poultry Farm Insurance in India, Companies, Policy, and Premium

Poultry Farm Fence
Image Source

7. Factors to consider in deciding to raise poultry production

Record Keeping – Keeping records and meeting production goals are good management practices that allow problems to be identified and resolved. When a problem is identified, the next step is to try to fix it. Identifying the cause of a problem and fixing it is an important part of a farmer’s knowledge base. One of the most useful documents for record keeping is a diary, which can be combined with record-keeping sheets to record important activities, identified problems, equipment repairs, and equipment deviations.

Records of production, growth, feed, egg weight, mortality, treatments given, and response to treatments should be maintained to aid in the investigation of optimum performance. In all production systems, signs of poor health can be detected when poultry reduce their feed and water intake; reduce production or growth; undergo a change in appearance, behavior, or activity level; or has an abnormal condition or droppings.

Engage in training/knowledge sharing – Poultry farming is a field that requires a lot of knowledge to take care of the birds during their growth. It includes a thorough knowledge of their nutritional needs and overall well-being, including food and water, care, attention, and an appropriate environment. The end consumer is increasingly health-conscious; thus, broilers’ quality has become of utmost importance.

A bird’s health, wear percentage, muscle development, etc., are more frequently checked these days. Under such conditions, complex and scientific farming has become the norm today. Such cultivation requires proper training. Poultry farmers should, therefore, periodically train and exchange information with their peers to remain competitive. 

8. Key rules for increasing your poultry egg production

If you are starting a poultry farm to raise chickens for egg production, there are a few things you need to keep in mind. You need to have a clear knowledge of your flock’s productivity. You should know how to estimate the number of eggs your flock can produce and, of course, the factors affecting egg production rates. The number of eggs a hen produces each year and the number of years a hen lays eggs depends on several factors: 

  • Management of the brooder before laying, 
  • Breeding, 
  • Light management, 
  • Space allowances, 
  • Nutrient management

Improper use of management systems can also affect egg production. Some of the mistakes farmers often make are: 

  • One of them is lack of feed. If you keep your hens away from food, it will reduce egg production. The decrease in egg production depends on the time without food. Make sure your birds have plenty of food. 
  • Water is also an essential element. Water represents about 70 percent of the body’s weight. Inadequate water supply can reduce egg production. Poultry birds are more sensitive to water than food. 
  • Daylight is also a major factor that controls egg production. Chickens need at least 14 hours of daylight. Light intensity should be sufficient to increase egg production.

9. Effective management tips for better poultry performance 

Water management – 70-80% of a bird’s daily drinking requirement is drinking water. Poultry will generally use more water than feed. An abundance of clean water will minimize challenges and maximize efficiency. Factors to consider when thinking about water management include: 

  • Pressure, quality, height, mineral content, and access 
  • Cleaning of drink lines/regulators before flock placement and during production 
  • Water lines between flocks and during production 
  • Flushing Removal of biofilms and mineral build-up 
  • Drinking equipment maintenance 

In case you missed it: Common Mistakes Everyone Makes in Poultry Farming

Poultry Farming
Image Source

General environmental management of a warehouse involves many components, such as temperature, relative humidity, ventilation, and lighting. Understanding how these components work separately and together can help guide your management practices. 

10. Key rules that you should consider before starting a poultry farm

Get a loan – Starting a poultry farm business is not easy financially, as you usually need a lot of funds in the beginning. It is because you must buy a piece of land and the necessary equipment. Besides, there should be a constant supply of money to pay workers’ salaries, etc. Find out what types of loans your government offers in this area.

You should discuss your loan requirements for the poultry farm business with a financial advisor. Don’t apply for enough loans. Instead, start by taking out a loan to buy farm equipment and chickens. As the poultry farm business grows, you can apply for a larger loan to pay off with increased income. 

11. Poultry health management for reducing production cost

Establish a poultry health management plan – Various diseases affect poultry. Infectious diseases, including bacterial, viral, and fungal, are spread from infected birds to healthy ones. Then there are parasitic diseases like mycoplasma, colibacillosis, coccidiosis, etc., nutritional diseases caused by deficiency of vitamins and minerals, and other miscellaneous diseases.

Poultry farmers must keep their defense mechanism ready against such diseases, as they face huge losses due to various poultry diseases yearly. A little proactive activity can help them avoid all these as measures like providing nutritious food, clean water, timely vaccination, availability of some common and essential medicines on the farm, etc., can be very helpful.

For successful poultry farming, disease-free conditions are essential. Birds are susceptible to many diseases. Illness can be caused by various infection methods with viruses, bacteria, fungi, and other agents, or even by a lack of food or malnutrition. Therefore, regular and proper cleaning, sanitization, and spraying of insecticides and disinfectants should be done to keep the surroundings clean, tidy, and free from all germs. Also, all domestic birds are vaccinated to control the disease and increase the number of backyard birds. 

Vaccination is usually a biological preparation that helps prevent the possibility of infection from occurring and spreading. One of the reasons for the potential loss of the poultry business is the lack of a health management plan. It may result in the increased mortality rate of poultry birds. You should be aware of these common poultry diseases that can seriously damage your poultry farm business. To create an effective poultry health management plan for your poultry farm.

The plan should include requirements such as clean drinking water and maintaining proper hygiene. Also, the light management plan for the poultry farm should be precise. Chickens need adequate lighting in the area where you keep them. They need 16 hours of light. Yellow, red, and orange light for 24 hours is considered best for broiler breeds. Before buying poultry breeds to start your farm business, consult a lighting expert to make the right arrangements. 

Treat sick birds immediately – You should check your poultry regularly to ensure that you can spot sick birds early. Otherwise, the disease spreads rapidly among chickens. Spot any unusual behavior or appearance as soon as possible to keep your poultry farm business safe. If you find one or more of them sick with insect infestation or disease, treat them immediately before it’s too late. Call a doctor for further diagnosis of the disease and implement a treatment plan immediately. 

12. Good marketing practices for effective poultry farming

  • Produce what the customer wants – this usually means that market research must be done continuously to match production to demand. 
  • Be competitive – Higher prices are usually associated with better quality and specialty products. It is therefore important to link price to quality and market demand and to work competitively with the opposition. 
  • Reliability – Produce a product for the market and ensure that supply, price, and quality are reliable.

In case you missed it: Poultry Farming in New Zealand: Breeds, How to Start

Poultry Farm
Image Source

Poultry production ranges from small family systems to large-scale industrial enterprises, supporting livelihoods and supplying local or niche markets. The latter are usually incorporated into integrated value chains, while the former sell their products through informal trade networks due to low productivity. Poultry market prices can vary significantly, affected by seasonal patterns (such as higher prices during festivals), production costs, and competition from other products. 

Production costs are highly volatile and can vary significantly from region to region. They are largely based on the characteristics of the final product (e.g., high-quality meat takes longer to produce, which means higher costs) as well as feed prices (primarily grains), seasonal conditions, and the inputs used. Poultry is cheaper than other meats because it is an efficient feed converter. 

Conclusion

Poultry production is highly dynamic in terms of structural and management changes. The ever-increasing demand for protein-rich poultry meat and allied products has made poultry farming one of the most profitable businesses today. The above effective factors are needed for a successful poultry farming business safely.

How to Start Fish Farming on Terrace at Home: in Tanks on Small Scale, and a Guide for Rooftop Fish Farming

0

Raising fish on a Rooftop can open up many profitable opportunities today. Home-raised fish can easily be sold around the neighborhood or to restaurants for profit. Some people want to raise fish from local organic farms. It can also provide you and your family with delicious fresh seafood. Proper management includes monitoring your fish ponds regularly, keeping good records, and planning to run your farm. The roof is given over to an aquaponics system, which produces food by connecting a tilapia fish tank to a gravel-filled planter.

How to Start Fish Farming on Terrace at Home
Image Source

How to start Fish farming on terrace at home

Advantages of Rooftop fish farming

Rooftop fish farming helps in the livelihood of many people and the food supply in our country. These aquaculture systems represent a new and unique way of farming fish. The system follows high-density fish in indoor tanks in a controlled environment. Fish farming is considered one of the most important food-producing sectors in the world. However, the growing population and urbanization have reduced the land area and water resources available for farming.

With this in mind, we have devised innovative ways to use the available land efficiently. Starting farmed fish requires a significant financial outlay. Depending on the fish farming you do and the species of fish you choose, you can earn good profits. A fish farm is a location where fish are artificially reared and grown. The practice of fish farming is called pisciculture. Composite fish culture can be the main type of fish culture.

In this fish culture, five or six fish species are raised in a single pond. But the advantages are no use of pesticides or antibiotics, food localization, the city’s greening, almost closed nutrient cycles, less energy, perfect control of food safety, about 90% in water use reduction, and vertical farming increases efficiency.

  • A gift for fish enthusiasts who can rear ornamental fish on their rooftops on a small scale. 
  • Easy care and maintenance. 
  • Reduction in transport cost from farm to city, resulting in a shorter length of the market channel and indirectly CO2 emissions are reduced. 
  • Cultivation of food fishes in an organic manner
  • It can be integrated with small-scale olericulture
  • Cooling effect on houses 

In case you missed it: How to Start Cage Culture Fish Farming in India: Types, Cost, Profit, Report, and Management

Fish Farming
Image Source

Tips for successful fish production on Rooftops

Rooftop fish farming plays an important role in meeting global protein requirements. Tank-grown fish can withstand all types of weather conditions. A constant supply of clean water and dissolved oxygen content is required, which is optimal for growth. A filtering or biofilter system is necessary to purify the water and remove or detoxify harmful waste products and undigested feed.

Fish should be fed a complete nutrient-rich feed daily to encourage rapid growth and greater survival. Globally, rooftop fish farming is in its infant stage, except that some aquaponics systems find their place with ornamental and commercial fish production. The design is based on aquaponics farming techniques: the fish feed the plants, and the plants purify the water for the fish. Successful fish production depends on good oxygen management. The addition of oxygen in pure form or as atmospheric air is essential for

  1. Survival (respiration) of fish at high densities.
  2. Survival of aerobic, nitrifying bacteria on the biofilter.
  3. For decomposition (oxidation) of organic waste products. 

Sufficient oxygen supply is essential to maintain healthy fish and bacterial populations and to meet the biochemical oxygen demand (BOD) of fish waste and unused feed. Maintain oxygen levels close to saturation or even slightly at supersaturation. Low oxygen levels reduce growth, feed conversion rates, and fish production. 

Material needed for starting rooftop fish farm

The functional parts of a tank farming system include (1) a growing tank, (2) some device for removing particles, (3) a biofilter, (4) oxygen injection with u-tube aeration, and (5) a water circulation pump. A water heating system may be necessary depending on water temperature and fish species. Ozone and ultraviolet Sterilization can also be beneficial in reducing organic and bacterial loads. 

Fish tank construction for Rooftop farming

Fish can grow in tanks of almost any shape and size. Fish tanks are usually rectangular, circular, or oval. Circular or oval tanks with central drains are easier to clean and circulate water than rectangular tanks. Rectangular tanks are typically built with or set on sloping floors to facilitate cleaning and circulation. 

The tank size depends on various factors, including stocking rate, water supply for the species selected, water quality, and economic considerations. Compatible with water, especially the biofilter and sump size, so that all system parts are compatible. Tanks can be made of plastic, concrete, metal, wood, glass, rubber, plastic sheeting, or any other material that will hold water, won’t rust and isn’t toxic to fish.

In case you missed it: Basic Equipment and Tools Required for Fish Farming: A Beginners Guide

Fish Farm
Image Source

Smooth surfaces inside the tanks are recommended to prevent skin scratching and infection by the fish and to allow for cleaning and Sterilization. Lightweight, durable plastic tanks can be easily moved and cleaned when needed but require special support to prevent stretching when later filled. Stainless steel is also a good tank material but can be expensive. Concrete tanks can be the most economical to build, but they are permanent and immovable structures.

Non-toxic plastic or rubber liners can be used on frames made of wood, metal, concrete, or other materials. The first thing you will need to start a home-based fish farming business is some basic knowledge about fish farming. You will also need to know about the business side of farming. You will need to dig a fish pond in your backyard, basement, or elsewhere if you want to raise fish in containers. Fish can be raised in any fish tank, container, or tub. 

Different types of fish mature at different rates, so your choices in the number and size of tanks will vary with the type of fish you plan to grow. At a minimum, you want a tank for newly hatched fish known as fry, a tank for fingerlings, and at least one tank for growing fish to finish size. Depending on the water source for fish farming, you need a tank for conditioning replacement water.

If you plan to grow a variety of fish food on site, you will also need a pond or tank. Tank materials include concrete, metal, plastic, wood, glass, rubber, and plastic sheets. Your primary consideration in choosing a material for any tank is its ability to hold water, resist corrosion, and be non-toxic to fish. For a healthy fish harvest, choose a smooth material that won’t scratch the fish brushing against it and doesn’t have holes to hold dirt and bacteria. 

Integrated rooftop fish farming 

The rooftop system can produce 100 kg of fish and 400 kg vegetables. It means four families of four people can be fed throughout the year. Vegetables such as cucumber, squash, tomato, eggplant, and melon can be grown in hot weather. Vegetables such as Swiss chard, carrots, peas, broccoli, and cabbage can be grown in the winter. All types of fish, such as Tilapia, Salmon, and Trout, can be farmed.

The structure is designed as a dome, the heavy fish tank rests on the greenhouse frame, and its weight is redistributed over a large surface area. It is designed to pump water from the fish tank through a biofilter to filter out nutrient-rich waste, which bacteria convert into plant nutrients. This water from the fish tank is pumped into the upper grow bed. Using gravity, the water trickles down to the lower grow beds. The clean water is pumped back into the tank.

This ‘loop’ makes the system easy to run on minimal resources. Forms can be placed on rooftops without any structural or building adaptations. The structure is built with organically farmed bamboo, making it biodegradable and sustainable. In addition to growing vegetables and fish, the dome can be equipped with PV panels and cooling turbines.

The infrastructure can adapt to environments and weather conditions with greenhouse or insulating panels. Depending on cost, environmental requirements, and insulation, grow beds can be installed indoors in various configurations. The entire dome can be dismantled and packed inside the tank for easy shipping. 

In case you missed it: How to Start Perch Fish Farming: Raising in Ponds, and Cages, A Step-By-Step Guide for Beginners

Fish Farming on Terrace
Image Source

Risk factors for tank farming

Currently used to grow catfish, striped bass, Tilapia, crawfish, blue crabs, oysters, mussels, and aquarium pets. Indoor fish culture systems offer the flexibility to 

  1. Grow a wide variety of fish species, 
  2. Grow several different species simultaneously in the same tank (polyculture) or different tanks (monoculture), 
  3. Varieties of different sizes of one or more species depending on market demand and price. 

Tank farming allows farmers to manipulate production to meet year-round demand and harvest at the most profitable times during the year. This flexibility in species selection and harvest time allows the grower to respond to a rapidly changing market to maximize production and profitability. 

Build your pond on Rooftop

The best land for building a pond is flat or gently sloping, with plenty of clay. Remember to leave soil around the ponds, so feeding and harvesting the fish is easy. To start a simple home fish farm, you must dig a pond or collect fish tanks or containers for indoor fish farming. Choose water from a reliable source. Your municipal supply of water will be fine.

Once you have your pond or container set up, start feeding your juvenile fish and fish. For large-scale pond-based fish farms, you’ll need some additional equipment. The equipment list is given below. For a commercial fish farm, you will need the following: 

  • Aquarium or fish tank 
  • Pumps 
  • Aeration equipment 
  • Net or Seine Reels
  • Handling and grading equipment 
  • Water testing equipment 

Tips for starting a fish farm 

After raising fish at home, you may find aquaculture a profitable business for yourself, decide to purchase more property and begin expanding your farming program. To start a large-scale farm, you will need start-up capital, commercial equipment, and more people. There are many ways you can raise the necessary funds and get others to help you get started. Create a business plan and prepare a feasibility report that calculates all your costs and profits.

It will help you get a bank loan and attract partners or investors. If you are passionate about fish farming, try to get as much help as possible. Try to get work with another fish farm to gather experience first. Therefore, before entering the aquaculture industry and starting your fish farming business, consider all the possible factors and decide whether fish farming is the best business for you. 

Feeding management

A complete feed containing all the necessary minerals and vitamins for the healthy growth of the fish and specially formulated for the fish breed is essential for producing fish in the tank. Do not substitute another type of animal feed for fish feed. Even different fish species have different nutritional requirements, particularly the quality and quantity of protein required, that must be met to optimize growth.

Recommend fish feeding a commercial feed of dry, floating pellets so that fish feeding and health can be easily observed at the water’s surface. The size of the pellet should correspond to the size of the fish. Feed the largest pellet that the fish will swallow to maximize consumption and minimize waste. Order only a limited supply to keep the feed fresh and store it in a cool, dry place, free from insects and rodents.

In case you missed it: Fish Farming in Karnataka: How to Start, Subsidy, License, and Business Plan

Fish Farming
Image Source

If there is a liability issue with contaminated feed, it is a good idea to freeze samples of each new batch of feed purchased for later analysis if necessary. Farmed fish are usually fed 3 to 5 percent of their body weight or all the feed they can consume in a short time, say five minutes. Rarely feed food left in the tank after five minutes, and overfeeding can seriously degrade water quality. A good, quick indicator of problems with water quality or disease is when fish stop eating or refuse to eat.

If the fish suddenly stop feeding, check immediately for high ammonia levels, low oxygen levels, diseases, or other problems. Low feeding rates occur at high and low water temperature levels. To maximize fish growth, feed on a regular schedule at the same time each day. Feeding more frequently several times a day resulted in better growth rates and increased feed conversion efficiency. Distribute the feed evenly throughout the tank to prevent uneven growth and stagnation. 

Best fish species for rooftop fish farming 

Fish selection should consider the interests and tastes of the farmer. The size of ponds and water availability should also be considered. Local species like Carp, Asian Stinging Catfish, Salmon, etc., can be farmed. Cyprinus and Tilapia, becoming indigenous to our country from abroad, can also be reared on a small scale in kitchen ponds. All they need is a rigid structure. It also uses rigid package material as a box and covers its inner surface with a polythene sheet to turn the waterproof container structure.

In addition to changing, and also adopt a natural method of fertilizing. It mixes cow dung and coconut cake with water in a container. When exposed to sunlight, planktons will grow within five to six days. Once this process is complete, the fish are released. It is possible to have 100 fingerlings in a 500-liter container as each fingerling requires about five liters of water. Generally, small ornamental fish species such as platy, mollies, swordtail, and guppy, which are colorful, are preferred for rooftop fish farming. 

In case you missed it: Earning 1 Lakh Per Month From RAS Fish Farming: A Success Story From India

Fish in Hand
Image Source

Things to keep in mind while keeping fish on Rooftop

  • The pool or tank should be placed in direct sunlight. The pond must be where there is good air circulation. 
  • Shade should be provided on roofs and other places with a lot of sun. 
  • Supply of water as per requirement. 
  • Feed nutritious food on time. 
  • Do not allow waste to accumulate on the water surface. 
  • Remove large fish every five to six months. 
  • Use polyurethane netting around and above the pond to protect against birds. 

Conclusion 

Rooftop fishing is an excellent method of urban farming that can help urban dwellers save money and earn extra income by selling fish raised in rooftop ponds. This type of practice can achieve efficient use of rainwater. The rooftop approach can create greener, cleaner and safer cities shortly. Since most of the population density is high in cities, this approach will lead to a modern blue revolution with zero acres of land in India.

Top 19 Steps/Ways/Methods to Boost Lettuce Yield: How to Increase Production, and Quality

0

Lettuce is an easy-to-grow annual vegetable. Lettuce plants need plenty of sun and thrive in soil rich in nitrogen. Many farmers monitor crops daily, checking soil moisture, pests, diseases, and general crop health. Let’s check out the top 19 steps/ways/methods to boost Lettuce yield below.

Steps/Ways/Methods to Boost Lettuce Yield
Image Source

Steps/ways/methods to boost Lettuce yield

Step 1: Select high yield Lettuce varieties 

  • Head (or Bibb) Lettuce – Produces loose heads of soft, folded leaves. 
  • Iceberg Lettuce – Produces a firm head of crisp, juicy leaves. 
  • Leaf Lettuce – Produces loose leaves (not heads) that can be harvested when very young. 
  • Romaine Lettuce – Produces a long, crisp head with ribbed leaves. 

Here are some cutting and regrowing Lettuce varieties that have a uniform, straight growth for the best baby leaves: 

  • Loose Leaf – Loose leaf Lettuce is the easiest to grow. It is also extremely fast, producing large loose heads in five to six weeks. 
  • Oakleaf – Oakleaf Lettuces grow as leaf Lettuce, often harvesting from the plants as they grow. If left to mature, they will grow eventually form full-sized heads. The leaves are folded like oak leaves and can be green or red, depending on the variety. 
  • Romaine – An essential ingredient in Caesar salads, Romaine Lettuce plants form hard, upright heads of crisp leaves. 
  • Butterhead – It is also known as Boston or bib, makes beautiful loose heads of soft, crisp leaves. There are heat-tolerant varieties of butterhead that can be grown in summer and cold-tolerant varieties for winter harvesting. 
  • Summer Crisp – Early summer crisp or Batavia-type Lettuces look like loose-leaf varieties. But as the plant matures, they form beautifully rounded heads. There are wide heat tolerant varieties that are suitable for summer growing.
  • Grand Rapids varieties broad, rough, loose leaves
  • Green leaf and red leaf 

Step 2: Soil requirements for proper plant growth

The Lettuce plant thrives in nutrient-rich, well-drained soil. Proper field preparation is essential before sowing seeds or transplanting young plants. Experienced growers suggest that tilling the soil and adding compost or well-rotted manure usually a week before transplanting or direct seeding is helpful. In most cases, it prefers fertile soil with a pH of 6 to 6.8.

In case you missed it: How to Grow Lettuce at Home with Seeds and Without Seeds

Lettuce Yield
Image Source

Growers should conduct a soil analysis before planting. Consultation with a local licensed agronomist is recommended to create a logical field preparation plan. An ideal potting mix should be a good mix of fertile soil and vermicomposting. If you are growing Lettuce in containers, you can mix equal parts of any natural compost like dried leaves or grass, food scraps, etc., with perlite. 

Step 3: Sun requirement for growing Lettuce 

Most Lettuce varieties enjoy full sun. Make sure to plant Lettuce in an area with about 6 to 8 hours of direct sunlight daily. Some Lettuce varieties can also be grown in partial shade, receiving 4 to 6 hours a day. If you are planting Lettuce when the temperature is warmer, provide some shade to protect the plant from overheating. 

Step 4: Water requirements for growing healthy Lettuce 

Lettuce plants have a shallow root system. They generally prefer shorter but more frequent irrigation sessions. It may need to water the Lettuce plants daily during the hot summer and maybe shade them. If we don’t water our plants regularly this season, the Lettuce plants will suffer from the heat, and bolting (the plant starts to produce seeds) can be a problem. As a result, Lettuce leaves can become bitter. 

Bolting is usually irreversible, and these plants cannot be marketed. Most growers use sprinkler or drip irrigation systems. Farmers can apply a thin layer of mulch to the soil to keep the soil consistently moist. Sudden deviations in soil moisture will impair plant growth. Watering Lettuce plants in the early morning or late afternoon is highly recommended. It is important to avoid overwatering, which can result in disease and root rot. Keeping the soil moist is the primary key to growing healthy Lettuce. 

Different irrigation systems include furrow irrigation, drip irrigation, and sprinkler irrigation. Frequent and light irrigation is more effective in achieving high yield and quality yield in Lettuce cultivation. After planting, crops should be irrigated at an interval of 8 to 10 days. Drip irrigation increased yield by about 30% as compared to furrow irrigation.

Step 5: Tips to grow Lettuce from a starter plant 

Lettuce starter plants are widely available in spring and fall at most greenhouses and nurseries. The same rules apply, whether planting Lettuce from a store-bought starter plant or transplanting your plants indoors. Keep in mind the distance between each Lettuce plant and sun exposure depending on the plant you are planting.

Step 6: Plant time for more Lettuce yield

The main thing you want to know about growing Lettuce is when to plant it. Lettuce grows best between 60 and 70F. Primarily known as a spring and fall crop, you can start growing most varieties in early spring and early fall. Start growing your spring Lettuce after the last frost has melted and your soil has thawed. 

Lettuce plant grows best in loose, cool soil with good drainage. Adding organic material, such as compost or compost, will increase drainage, provide essential nutrients and improve growing conditions for your Lettuce. If you’re having trouble growing Lettuce, consider purchasing a soil test kit. Lettuce is sensitive to low pH. Adding lime can help bring the pH down to at least 6.0. 

Step 7: Fertilizing tips for growing healthy Lettuce

Lettuce does well in nutrient-rich soil. After the Lettuce plants emerge, fertilizer can be applied to maximize Lettuce leaf production. Because most Lettuce plants mature quickly, only one dose of fertilizer is usually needed. When choosing your compost, ensure it is well-balanced, with equal parts of nitrogen, potassium, and phosphate. If you select a granular fertilizer, look for a 10-10-10 or 5-5-5 mix.

In case you missed it: Earn Excellent Income Returns from Lettuce Farming

Lettuce Farming
Image Source

These numbers indicate the amount of nitrogen, potassium, and phosphate in the fertilizer. Apply plenty of animal manure at transplanting time. Use compost or pod tea once a week or as needed. Prepare compost tea by soaking manure in a plastic drum. After two days, the resulting mixture, tea compost, is used as a fertilizer to promote plant growth. The pod tea is prepared by steeping ipil-ipil or Madre de cacao leaves in water.

The mixture is ready after 6-10 days. At transplanting, apply 10 grams of 14-14-14/till with basal fertilizer followed by 5-10 grams urea (46-0-0)/plant 2-3 weeks later. Add compost to the soil before Lettuce planting to enrich it with organic matter. Then, following label directions, apply a high-nitrogen fertilizer about three weeks after planting. It will help promote healthy, strong leaf growth.

Step 8: Reasons for Lettuce is not growing very well and is wilting

Both insufficient soil moisture and excessively wet soil can result in poor growth and wilting. Lettuce under drought stress wilts rapidly and fails to produce new growth. Wet and wet soil causes plant roots to rot. Leaves begin to yellow and wilt, or the entire plant may stop. Planting in rich, moist soil drains well, and covering the bed with mulch helps prevent drought stress.

Give plants about 1 inch of water weekly, but avoid overwatering, which creates a waterlogged situation. Hot temperatures reduce leaf production and can cause wilting. Lettuce can also bolt or form a seed stalk if temperatures get too hot. Two fungal pathogens can cause wilting of Lettuce: Sclerotinia minor and Sclerotinia sclerotiru. Infected plants may rot or wilt in the leaves, stems, and roots. Plants grow poorly before eventually collapsing and dying.

These fungal diseases like moist soil, so planting in a well-drained bed is not a problem beforehand. Destroy infected plants immediately and keep Lettuce plants dry to minimize the spread of Lettuce drops. Chemical controls are usually not necessary in the home garden. Instead, move Lettuce to a better garden bed, plant in a raised bed, or grow in containers with good drainage. 

Step 9: Space does Lettuce need to grow well

Place the plants correctly if you are growing your Lettuce in the garden. Large heads of Lettuce should be planted about 10 to 12 inches apart. Baby Lettuce can be planted about 6 to 8 inches apart. Lettuce can also be grown in any pot or container at least 4 to 6 inches deep with drainage holes. Some of these include: 

  • Window boxes 
  • Pots 
  • Fabric planters 
  • Baskets 

In case you missed it: Organic Lettuce Farming, Cultivation, Growing Process

Lettuce Field
Image Source

Step 10: Succession planting for increasing crop yield

If you are interested in harvesting Lettuce so that it continues to grow, you should consider succession planting. Instead of planting your Lettuce all at once, start planting in April and plant new seeds or starter Lettuce plants every 10 to 14 days to increase your harvest. To prevent bolting, stop planting at least a month before warm summer temperatures begin. You can follow the same process in late summer/early fall until the cooler fall temperatures take over. 

Step 11: Seed rate to boost Lettuce plant yield

Lettuce seeds are thin and delicate – about 325 grams are required for one hectare of Lettuce cultivation. Since the seed is very thin, plant the seed in the bed. One gram of Lettuce contains about 800 seeds.

Step 12: Sow the Lettuce seeds to get more yield

  • The process of growing Lettuce by sowing seeds is easy. First, prepare the potting mix. If you plant Lettuce directly in the ground, add vermicomposting to the fertile soil. Fill the containers with potting mix carefully. Next, scatter the seeds 1 inch apart and cover with a thin layer of potting mix. 
  • Make sure that the area where your garden is located gets enough sunlight for the seeds to germinate. And sprinkle enough water to moisten the soil. But don’t get it wet. Too much water prevents the roots from growing and spreading to their full potential. 
  • The Lettuce seed’s germination time will be about 7 to 10 days. During germination, ensure your plants get the right sun, and the soil is constantly moist. 
  • Once the seeds germinate, they will turn into small plants with 2-3 small leaves. Then, this is the right time to thin them out. Thinning means cutting back a few plants to allow the rest to grow. 

Step 13: Mulching for healthy, strong leaf growth 

Mulching keeps the soil moist and cool. Mulch prevents drought, wind, and hot sun from penetrating the soil by covering it. For organic Lettuce, apply a 2-3 inch layer of organic mulch such as straw, wood chips, leaves, and grass around the Lettuce, making sure to leave a little space around the plant to prevent rot. 

In case you missed it: Hydroponic Lettuce Farming In Greenhouse For Beginners

Lettuce Plant
Image Source

Step 14: Tips to grow Lettuce in containers 

Growing Lettuce in a pot or container is an excellent option to help protect it from pests. Be sure to check the space requirements for your specific Lettuce type. In general, a six- to 12-inch container should be sufficient. Make sure it has drainage holes. Unglazed clay is an ideal container material because it will allow excess clay moisture to escape from its walls. 

Step 15: Pruning for more Lettuce growth

The only pruning care Lettuce needs are the harvesting of its mature leaves. Also, trim off any broken leaves in the Lettuce plant that drag on the ground to prevent them from pests and diseases. 

Step 16: Pests and diseases control for achieving high yield 

It is essential to know the enemies of the crop and develop environmentally friendly methods in advance to deal with them. Consult a local licensed professional to control Lettuce plant pests and diseases properly. The most common Lettuce plant pests and diseases are listed below. 

Aphids can easily destroy Lettuce patches. Sucking up nutrients and water causes the leaves to droop and wither. Aphids also spread disease and cause mold problems. You’ll find these pesky little white bugs hiding under Lettuce leaves. There is no systemic insecticide to control aphids, so the best option is to encourage natural predators like lady beetles or to apply horticultural soap or neem oil.

They are the most common enemies of leafy vegetables. Adults and nymphs feed on Lettuce plant sap and attack stems, flowers, and leaves. Slugs like to crush Lettuce plant leaves, making large holes an unmarketable product. If they are allowed to reproduce freely, they can destroy an entire Lettuce crop in a short time.

  • White mold – It is also called sclerotenia, and it is a fungal disease. It affects a wide variety of plants, including Lettuce. It is identified by looking at the stems. Stems appear discolored and wilted. 
  • Bottom rot – It is a fungal disease that attacks mature Lettuce plants. It is caused by Rhizoctonia solani. 
  • Downy mildew – It is caused by Bremmia lactucae that causes yellow spots on older leaves. 

The best method to control Lettuce pests and diseases is always prevention rather than intervention. Lettuce growers should consider the following steps. It is essential to use certified seeds and plants. The use of disease-resistant varieties can prevent the spread of the disease. Encouraging natural pest enemies (such as ladybugs) can be helpful in some cases. Ask your local licensed agronomist.

In case you missed it: Growing Lettuce In Pots, Containers, Backyards At Home

Lettuce
Image Source

Rows are often covered to protect Lettuce plants from insect attacks. Nets can protect the Lettuce plant from various pests. Avoid excessive use of fertilizers in Lettuce plants. Crop rotation and weed control methods can be used against some diseases. Chemical control measures are permitted after consultation with a local licensed agronomist. 

Step 17: Tips for reducing bolting in Lettuce

Lettuce does not like hot weather. The plant panics and decides to produce better seeds as soon as possible. Seed pods develop, and the plant begins to turn nutrients into seed production. This process, called bolting, produces bitter Lettuce. To reduce Lettuce bolting, look into bolt-resistant Lettuce cultivars first. For example, Slobolt can be grown in warmer temperatures. Other gardening tips include planting Lettuce in shady areas to prevent bolting in hot weather, using mulch to cool the soil, and providing a light mist of overhead irrigation to cool plants. 

Step 18: Harvesting time for Lettuce plant growth

You don’t have to worry about harvesting Lettuce – it’s one of the easiest vegetables to harvest. Most Lettuce can be harvested between 30 and 70 days after planting. Timing is based on individual preference. Once your Lettuce has reached your desired size, it’s ready. Lettuce harvesting in the morning gives you the best flavor. Always harvest Lettuce early in the morning.

The leaves will be fresher and crispier during this time. But, before heading out to your garden with pruning tools, water the plants and wait 15-20 minutes. The best time for Lettuce leaves harvesting is when they grow 4-6 inches. You can also chop the young leaves, which adds great flavor to the salad. Learning how to harvest leaf Lettuce is easy. Butterhead, Romaine, and Head Lettuce are easily cut near ground level.

If you cut back every other Lettuce plant, you give the rest of the plant room to grow. If you keep the Lettuce leaves short, the plants will continue to produce new leaves well into the summer. Allowing the leaves to grow large and mature signals the plant to send out flower stalks and produce seeds, the point at which it will no longer be edible. Keep your leaf Lettuce small, even if it means discarding some leaves because there is more than you can eat. 

Step 19: Yield of Lettuce per hectare

The average yield of Lettuce per hectare is 20-40 tonnes.

Conclusion

Lettuce is a healthy leafy vegetable grown primarily for its delicious green leaves with a mild flavor. These simple above steps will provide you with a bountiful supply of crisp salad greens throughout multiple seasons. 

How to Start Tomato Farming in the USA: A Step-by-Step Production Guide to Planting to Harvesting

0

Tomatoes are the most widely grown vegetable in the United States. Tomatoes (Solanum Lycopersicum L), members of the nightshade family, are nutritionally dense, widely available, affordable, commonly used in diverse cuisines, and preferred by all ages. The USA produces more than $2 billion worth of commercial Tomatoes each year, mainly in California (the leader in the processing market) and Florida (the leader in the fresh market). Let’s check out how to start Tomato farming in the USA below.

How to Start Tomato Farming in the USA
Image Source

Tomato production requires intensive management, production and marketing skills, and a significant investment. Production costs per acre are high, and environmental pest problems can severely limit yields. The US Tomato processing industry, which consists primarily of Tomato paste, sauces, and canned Tomato products, is quite separate from the fresh market industry. Tomatoes have essential nutrients; they are a good source of vitamin C, vitamin A, and antioxidants. 

How to start Tomato farming in the USA

Top Tomato-producing states in the USA

Tomatoes are the leading vegetable processing crop in the United States. California and Florida are the major US states for Tomato production for fresh market consumption. The plant originated in Mexico but spread around the world through Spanish colonization. The three largest producers of Tomatoes in the United States are Indiana, Florida, and California.

However, the top 10 Tomato-producing states are Tennessee, Florida, South Carolina, Virginia, North Carolina, Ohio, New Jersey, California, Michigan, and Indiana. California is the leading Tomato producer in the United States. Other major Tomato producers are Indiana, Michigan, and Ohio. California and Florida are the newest market Tomato-producing states in the United States. Ohio, Tennessee, Virginia, and Georgia also produce significant fresh market Tomatoes. 

California – California produces 2,55,388 thousand centum weight (cwt) Tomatoes yearly. As a result, it is the largest producer of Tomatoes in the United States and the largest producer of Tomatoes in the world. California produces 2,55,388 thousand centum weight (cwt) Tomatoes each year. As a result, it is the largest producer of Tomatoes in the United States and the largest producer of Tomatoes in the world. 

More specifically, about one-third of the world’s Tomatoes and 95 percent of the United States are produced in California. Some areas where Tomatoes are grown include the Sacramento Valley and the San Joaquin Valley. Production occurs mainly in Solano, Merced, Sutter, and Stanislaus counties. The main planting period is from late January to early June, while the harvesting season is from late June to October. 

Florida – Florida is the second largest producer of Tomatoes in the United States. Tomato production areas in Florida include Tampa Bay and Dade County. Some of the most popular Tomato varieties grown in Florida are Floragold, Everglades, and Better Boy. Suitable planting seasons for this state are March and August. Florida produces about 50 percent of the fresh Tomatoes in the United States. 

Indiana – Indiana is the third largest Tomato producer in the United States, producing 4,940 thousand cwt. Farmers in Indiana grow both fresh market Tomatoes and processed Tomatoes. 

Ohio – Ohio is the fourth largest producer of Tomatoes in the United States, with an annual production of 2,808 thousand cwt. The best varieties for Ohio farms are Early Grill, Sun Gold, Brandywine, and Roma. The state has a short growing season that begins in late May.

Best season for Tomato farming in the USA

The Tomato is considered a mild warm-season crop but is a perennial plant, while it is cultivated as an annual. The Tomato plant is sensitive to frost and will not grow outdoors permanently in most parts of the country. Most cultivated Tomatoes take about 75 days from transplant to first harvest and can be grown for several weeks before yield declines. The ideal temperature for growing Tomatoes is 21-29˚C during the day and 18-21˚C at night.

In case you missed it: High Yield Tomato Varieties in India: A Farmer Guide for Good Profits

Tomato Farming in the USA
Image Source

Significantly higher or lower temperatures can adversely affect fruit set and quality. Tomato is a self-pollinating plant and can be effectively pollinated outdoors by wind currents. The best time of year to grow your Tomatoes depends on a few key factors, including: 

  • Temperature 
  • Location 
  • Tomato plant type 
  • Days to maturity 

Tomato plants are warm-season tender crops that love the sun and are frost-tolerant. Due to the long growing season required for this heat-loving crop, several states in the US Sun Belt became major Tomato producers, mainly Florida and California. Tomato plants are cultivated under irrigation for California’s fresh fruit market and canning and processing. Therefore, the California University, Davis (UC Davis) became the main center of Tomato research.

In California, growers have used a dry farming method, mainly with Early Girl Tomatoes. This method encourages the plant to send roots deeper to find moisture in the soil that retains moisture, such as loam. If you’re in the USA and within USDA hardiness zones 8 and 9, start your seeds in mid-January. However, if you are in USDA zone three or four, you should start your seeds between mid-March and early April. 

Fresh Tomatoes are produced year-round in California, except in winter. Fresh Tomatoes are produced from October to June, with peaks in April–May and November–January in Florida. Other top Tomato-producing states in the USA (Georgia, North Carolina, Ohio, Tennessee, and Virginia) produce Tomatoes during the summer when Florida is out of the market. 

Different Tomato varieties in the USA

  • Beefsteak Tomato (British English) is one of the largest varieties of cultivated tomatoes, some weighing 450 grams (1 lb) or more. Beefsteak Tomato is usually pink or red, with numerous small seed pods distributed throughout the fruit, sometimes pre-Columbian Tomatoes. Common in the United States. Red Ponderosa and Coustralee varieties are included. 
  • ‘Sun Gold’ (cherry Tomato, indeterminate) Fruits are produced in large quantities on vines and are prone to cracking after rain, so plant them in well-drained soil, away from heavy rains. Harvest the ripe fruit first. 
  • ‘Kellogg’s Breakfast’ (beef steak, unspecified) is best flavored with orange-sliced ​​Tomatoes. Its large, light fruits are bright orange with smooth, fleshy flesh that is fruity, sweet, and flavorful. Heat-loving vines are very productive. 
  • ‘Carbon’ (Slicer, indeterminate) has large, firm, juicy fruits of deep purplish-red color. 
  • ‘Flamme’ or ‘Jaunne Flamme’ (saladette, indeterminate, heirloom) is an early bearer that produces loads of small, round, bright orange salad Tomatoes on productive vines.
  • Roma paste Tomatoes are a good choice for gardeners in California’s Central Valley, where summer temperatures often climb into the triple digits, according to Redwood Barn Nursery in Roma-Davis. Plum-shaped Tomatoes grow on set plants, so they remain compact, making them a good choice for growing in pots or containers on patios and balconies. The Roma Tomato variety is a good-tasting salad Tomato, and its low water content makes it suitable for sauces.
  • Solar set – This hybrid Tomato variety comes from the University of Florida, which developed it in response to the need for a home-grown Tomato that withstands the state’s harsh summers. 
  • Some other varieties are Hungarian Heart and Mushroom Basket.

In case you missed it: Top 24 Steps to Boost Tomato Yield: How to Increase Production, Quality, and Size

Tomato Farming
Image Source

Soil requirements and site preparation for Tomato planting in the USA

Tomatoes can be grown on a variety of soil types. Avoid sites that tend to stay wet. Choose sites with good air circulation (to reduce disease) and are weed-free. Plants depend on soil for physical support, anchorage, nutrients, and water in field production. The extent to which soil provides these three factors depends on topography, soil type, soil texture, and soil management. 

For Tomato production, proper tillage is important for land management and optimum yield. Land preparation should include sufficient tillage operations to make the land suitable for planting or transplant establishment and to give the best soil structure for root growth. The soil profile influences the extent to which the Tomato plant’s root systems develop. Root growth will be mainly restricted if there is a hard pan, compacted layer, or heavy soil zone. 

Tomatoes are known to be deep-rooted; some roots grow as deep as 10 feet under favorable conditions. However, most roots will be in the top 12 to 24 inches of soil. Because compacted soil severely limits root growth, proper preparation should eliminate or significantly reduce soil compaction and hardpan. Tillage systems using moldboard (“bottom” or “turning”) plows produce the greatest amount of soil suitable for solid root growth.

It allows for the development of more extensive root systems, which can access nutrients and water in the soil more efficiently. Discing after moldboard plowing re-compacts the soil and should be avoided. Compaction pans are present in many soils. They are mainly created by machinery and are usually located deep in or under the plow.

Although compaction pans may only be a few inches thick, their inhibitory effects on root growth can significantly reduce Tomato yields. After soil preparation, even parallel raised beds are created, and a drip irrigation system is installed. Raised beds are usually covered with thick plastic. Young Tomato plants germinate in greenhouses and are transplanted into fields by hand or using special mechanical equipment. 

Most fresh market Tomatoes, such as those grown in Florida and some areas of California, are grown with a support system such as metal poles or wooden stakes. This support system allows for higher product quality by keeping fruit off the ground, increasing yield, and allowing harvest crews to enter the field for multiple picks without jeopardizing plant integrity. 

Plant spacing for crop productivity

Tomatoes can be planted in many arrangements that provide adequate space for plant growth. Spacing is often based on the training and equipment used in the field. The within-row and between-row spaces are chosen to meet these limits. Maximum plant population per acre may also be influenced by plant growth habit (compact, spreading), plant size at maturity (small, medium, large), specific cultivar vigor, climate, soil moisture, and nutrient availability, which may also be affected by management systems and soil productivity. 

Generally, a minimum of 5 feet between rows of 18 to 24 inches is used to produce determinate varieties of Tomatoes. A six-foot spacing between rows is also a popular spacing. Planting 22 inches in rows 5 feet apart requires 4,760 plants per acre. With 6-foot centers and 18 inches between plants, 4,840 plants are needed per acre.

In case you missed it: Tomato Farming In Karnataka, Areas, Seasons, Yield

Tomatoes
Image Source

A row of Tomatoes is usually planted in the center of each plastic mulched bed. On bare ground, plant rows 48 to 72 inches apart with 18 to 24 inches between plants in the row. Adjust spacing to reduce populations accordingly for indeterminate Tomato varieties that produce large plants.

Best conditions for growing Tomatoes in the USA

Fresh Market Tomatoes are available year-round due to overlapping growing seasons in Florida, California, and other growing states. Imports from the Mexican and Canadian greenhouse industries also contribute to the availability of fresh tomatoes during the winter months when US domestic production is at its lowest.

During the winter months, Florida Tomatoes are shipped primarily to states in the eastern United States and imported Mexican Tomato varieties account for most of the Tomatoes sold in the West. Tomato is a warm-season crop sensitive to frost at any growth stage. Daily maximum air temperatures between 22 and 35˚C are optimal for plant growth.

Tomato plants can tolerate temperatures well above 37˚C, although extremely hot temperatures can adversely affect developing fruit. Tomato plants grow well in various soil textures, but commercial growers prefer the sandy soils in most of Florida’s and California’s coastal regions. Sandy soils heat up more easily than well-drained and dense soils.

Denser soils such as loam and clay loam can also be used if fields are carefully irrigated and have good drainage. A denser soil texture is more common in the growing regions of the Central Valley in California. Universally, all soils are prepared before planting using specialized equipment to improve overall soil quality by breaking up clods and adding amendments. 

Irrigation and fertilizer management for Tomato farming in the USA

The irrigation type used in Tomato fields depends on the water resources in the growing area. In some areas of Florida, where water is abundant, furrow irrigation is used. In California, a drip irrigation system is used exclusively because of its efficient water use. Overhead sprinklers are used to help establish new Tomato transplants. 

Commercial Tomato growers use chemical fertilizers or properly composted organic materials to feed growing plants. Fertilizer is applied before transplanting, side-dressed in a furrow irrigation system, or applied by drip irrigation. The term “chemigation” is the injection of a chemical such as nitrogen, phosphorus, or pesticide into irrigation water and applied to land using an irrigation system. 

Apply any necessary lime 2 to 3 months before installation of plastic mulch. The application of pre-plant fertilizer will vary with bed size and planting scheme. On large beds (4 feet wide or more), it is advisable to add all phosphorus and micronutrients to the bed before applying plastic. Also, apply all nitrogen and potassium preplant if drip fertigation is not used. Pre-planting all necessary fertilizers can lead to fertilizer salt toxicity if narrow beds are used.

Side dressing is required by liquid injection wheel, drip irrigation, or banding outside the fragmented part of the bed. Most Tomatoes are grown where fertigation is used with drip irrigation. In these cases, all the phosphorus (P) and micronutrients and one-third to one-half of the nitrogen (N) and potassium (K) should be added to the bed before laying the plastic. Apply the remaining N and K by weekly fertigation immediately after transplant establishment. The application rate of these fertigations will vary with the stage of the crop.

In case you missed it: Tomato Farming in Polyhouse for Profit – A Full Guide

Tomato marketing in the USA

The two segments of the industry have different marketing methods. The majority of fresh Tomatoes are hand-picked and sold in the open market. In contrast, all processed Tomatoes are mechanically harvested and then sold under contract, with only 1 percent sold in the open market. Fresh-market Tomatoes are grown in every state in the United States, with commercial-scale production occurring in about 20 states.

Florida and California produce the majority of commercially grown fresh market Tomatoes in the US – about 30 million pounds per year. Florida ranks first in the fresh market Tomato production. Major Tomato production areas are located in South Florida, Central Florida (south of Tampa), and a small production area in Northwest Florida. California is the second largest producer of fresh market Tomatoes and contributes significantly to the fresh market Tomato crop produced in the United States. 

Tomatoes are grown in almost every county in California, but most fresh market Tomatoes are grown in and around the Central Valley. Other major South Coast fresh market-producing states are Virginia, Georgia, Ohio, Tennessee, North and South Carolina, New Jersey, and Michigan. 

Tomato production importance in the USA 

The largest Tomato-producing states in the USA are California and Florida. Tomato is an annual vegetable that takes about 75 days from transplanting to the first harvest. Production costs per acre can be high and present complex problems for the grower, who must be knowledgeable about soil, fertilizer, pest control, harvesting, marketing, and other record-keeping necessary for agribusiness.

Fresh-market Tomato varieties are produced in every state in the USA, with commercial-scale production in about 20 states. Florida overtook California as the top producer, likely due to the ongoing drought in California. Tomatoes are warm-season crops; at any growth stage, they are sensitive to frost, so field planting in temperate climates occurs when the risk of frost has passed in the spring or transplants.

Row covers are planted and grown in late spring. Tomatoes in temperate climates are also grown in greenhouses and under high tunnels covered with plastic to extend the Tomato production season. The emergence of greenhouse Tomato farming has begun to change the shape of the US fresh market Tomato industry.

Greenhouse Tomato farming allows producers to grow fresh Tomatoes in a structure, sometimes using climate control and alternative soil methods. The advantages of greenhouse production include uniform appearance and quality, consistency of yield, increased yield per acre, and increased ability of the grower to maintain year-round production. 

Cost of growing Tomatoes in the USA

The Tomato growing cost varies depending on the variety of Tomatoes grown, stocking methods, and fertilization and labor costs. You can expect 200 to 400 hours of labor per acre for a growing season, costing $2,000. You must successfully produce approximately 15 tons of Tomatoes. As you gain experience in Tomato production, costs may decrease. 

Tomato yield in the USA

The United States produces about 1.4 million metric tons of Tomatoes for fresh consumption. The largest portion of US Tomato production is used for further processing. California and Florida are the major US states for Tomato production for fresh market consumption. Crop utilization has increased rapidly over the past 100 years. Approximately 400,000 acres of Tomatoes are cultivated in the USA.

Annual production exceeds about 14 million tons (12.7 million metric tons), of which more than 12 million tons are processed into different products like soups, catsup, sauces, salsas, and prepared foods. Another 1.8 million tonnes are produced for the fresh market. Global production exceeds 70 million metric tons. The number of 25-pound cartons counts as a Tomato harvest. An average acre of Tomatoes will produce over 37,500 pounds of red, ripe fruit. About 5000 Tomato plants are needed to meet this number. 

In case you missed it: Cherry Tomato Farming in India; Planting; Care; Harvesting

Tomato Farm
Image Source

Challenges facing Tomato producers in the USA

  • The first challenge is global climate change, resulting in unpredictable weather patterns. Thus, farmers must invest more in irrigation due to longer sunshine hours. 
  • Secondly, fluctuations in global Tomato prices also affect its production in the US as it is a major export component of states like California. 
  • The third challenge can be termed the imbalance of supply and demand. An example of such a scenario is an oversupply of Tomatoes with less demand. Ultimately, manufacturers have excess inventories that may take time to clear. 
  • Finally, Tomato growers face problems with common viruses such as early blight, leaf mold, blossom end rot, verticillium wilt, etc.

Conclusion

The United States is one of the world leaders in fresh Tomato production. Fresh Tomatoes are produced nationwide in the USA, with California and Florida being the top producers. Tomato production in the United States is among the six largest Tomato producers. Tomato is a warm-season vegetable crop.

California produces 90% of US Tomatoes, with about 4% going to the fresh market and the rest for processing. The USDA has reported total Tomato production for states outside California since all production in those states is for the fresh market. The above information is the best strategy to increase yields in Tomato farming in the USA.

Top 15 Steps/Ways/Methods to Boost Hazelnut Yield: How to Increase Production, Size, and Quality

Hazelnuts are the fruit of the Hazelnut plant, also known as the standard or wild Hazelnut. Hazelnut trees (Corylus avellana) grow 10 to 20 feet tall with a spread of about 15 feet. You can let them grow naturally as a shrub or prune them into a small tree. Either way, they are an attractive addition to the home landscape.

Top 15 Steps/Ways/Methods to Boost Hazelnut Yield
Image Source

It is a deciduous tree with rounded leaves 2 to 5 inches long and hairy on the sides. The following are some important steps to achieve a high Hazelnut yield is recommended. Let’s check out the Top 15 steps/ways/methods to boost Hazelnut yield below.

Top 15 steps/ways/methods to boost Hazelnut yield

Step 1: Select high-yield varieties for more production

Barcelona

Barcelona is the main variety grown in the Pacific Northwest, accounting for 60% of the commercial area. It is also popular among home growers for its heavy production of large, flavorful nuts. It prefers a little shade in hot and sunny areas. It grows to about 18 feet tall and ripens in August. 

Daviana

Daviana is a good companion for Barcelona varieties because they pollinate freely. It grows up to about 15 feet tall and ripens in August. 

American Hazelnut

It is native to the Eastern and Midwestern parts of the United States. Modern varieties resist eastern filbert blight and produce small, thick-shelled nuts in the fall. Grows to about 18 feet tall. In addition to short and thick scales, native Hazelnuts exhibit a wide range of adaptability and disease resistance.

The cold-sensitive but more commercially standard (large nut size) European Hazelnut, along with the American or beaked Hazelnut, can greatly expand the range of commercial Hazelnuts that can be grown as hybrid disease resistant well, adapted—the American climate with significantly better nuts.

In case you missed it: Hazelnut Farming, Cultivation, And Production

Hazelnut Plant
Image Source
Beaked Hazel

Beaked hazel is native to North America, southern Canada, Pacific Northwest, and New England. Now, you can find disease-resistant varieties at nurseries. This small tree grows to about 12 feet tall and can also be grown in a container. Ripe in August. 

European Hazelnut

The European or common Hazelnut is native to Europe and western Asia. They are usually shrubs but can also be grown as trees. The nuts of European Hazelnuts are mostly free-falling and larger than American or beaked nuts. 

Step 2: Soil management for nuts growth

Hazelnuts require well-drained soil to a depth of about 1.8 meters. The tree has a primarily fibrous root system, but the deep soil allows for maximum exploitation of soil resources and heavy products in a mature orchard. In areas with shallow soil, trees initially grew but then declined. Heavy and very sandy soils should be avoided, and deep loams are preferred. 

Some Hazelnut varieties have shown good plant growth on heavy soils, silt loams, and sandy loams. At depth, the pH of these soils can drop to 4.5. It was thought they could be planted on poor soil types because hazels in their wild state grow on poor soil and produce nuts, but now fertile soils are considered necessary for profitable commercial production. A neutral to slightly acidic soil means a pH of about 6 is suitable. Lime should be applied below pH 5.6. 

Step 3: Sunlight requirement for more nuts production

Growing Hazelnut trees can handle a little shade, mainly in hot and dry areas. The trees need at least 4 hours of direct sunlight a day to grow well. The shadier the location, the less fruit the tree will produce. 

Step 4: Precision irrigation to increase nut yield and size 

Maintain optimal moisture in each phenological stage of Hazelnut growth. Precision irrigation promotes uniform flower and fruit development, increasing nut yield and size. Hazelnuts have shallow root systems. Drip irrigation ensures that all fertilizer reaches the roots, not just the soil, avoiding leaching and optimizing your investment.

Step 5: Planting spacing for better plant growth

Various spacings have been used to grow Hazelnuts, and more efficient methods have been adopted in recent years to increase yields and better use the available land area. The selection of tree planting distances should consider the relative strength of the variety, soil type, and width of equipment available in the garden. Closer vegetation may have to be thinned out at maturity, but high returns in the first ten years can be critical to the economic survival of new plantings. 

Spacing of 4.5 meters is considered more efficient as the yield has the potential to double in the first ten years of spacing of 7.5 × 7.5 meters. Trees can be thinned out in the long run if excessive shading and crowding occur. Close planting also improves pollination and nut set. If planting in the landscape, leave enough space so the plants are not crowded to allow for sufficient nut production.

Step 6: Tips for growing Hazelnut from seeds 

You can easily grow Hazelnuts from seeds. Plant the nuts in 6-inch pots filled with soil or at least 15 feet apart in the garden. First, the seed needs to be scored, which means using a file and scribing a small “slash” into the outer coat of the seed. It will help in germination. 

In case you missed it: Growing Grapes In Greenhouse – Farming, Cultivation, Production In India

Hazelnut
Image Source

Plant the seeds in the fall and keep them protected over the winter with a thick layer of mulch or a cold frame. Also, you can plant them in pots and then store them in a greenhouse or indoors. They take several months to grow, so be patient. Wait for the seedling to grow 8-10 inches tall before transplanting. Hazelnuts planted from seed will take 7-8 years to become productive. 

Step 7: Conditions for growing Hazelnut from suckers or runners 

Another way to grow Hazelnuts is to find a bush of wild Hazelnuts. Hazelnuts can be propagated by underground runners or suckers spread around the bush. After the tree goes dormant in late fall, dig out a sucker and its roots, dig into the root ball and then pull out a runner with roots. After that, plant in a prepared bed about 20 feet between future plants.

To make the planting bed, mix existing soil with peat or sphagnum moss, vermiculite, and potting soil until you have an airy mixture. Usually, use two parts moss to one part vermiculite and add it to five parts existing soil and five parts potting soil. Plant the roots about 12 inches below the top soil line and mound the roots around the stems that extend above the ground and water well. 

Step 8: Process for growing Hazelnut from transplants 

The most common method of planting Hazelnuts is to purchase plants from a nursery. Plant Hazelnuts about 20 feet apart in full sun and dig a hole at least twice the root ball size to give the roots a good start. Then if needed, add some peat moss and potting soil to the soil in the hole to improve water retention and drainage. You can add sand—Hazelnuts like well-drained soil if you have heavy soil. Place the plant in the hole, but not too deep. Hazelnut roots like to grow close to the surface. Soak the plant thoroughly. 

Step 9: Water quality and quantity for increasing plant health

Choosing a site with the proper quality and quantity of water is important because garden irrigation will improve plant health. Always collect and analyze the site to determine pH level, salinity, and other nutrients before use. It is important to ensure sufficient water sources to maintain the prescribed irrigation requirements for a particular field, as hot summers can bring drought and other complications with field management. 

Newly installed plants need supplemental irrigation for at least two years. It involves periodic deep watering while allowing the soil in and around the plant’s root zone to dry out moderately between irrigations. Daily and frequent, shallow watering is discouraged. Soil type greatly affects moisture availability. High clay soils retain water longer than sandy soils. Cooler weather also reduces frequent irrigation, while warmer temperatures increase water requirements.

These should not be planted in turf where lawn and woody plants have different irrigation needs and compete for nutrients. After 2 to 3 years, Hazelnut trees need less frequent supplemental irrigation. Irrigate established plants 2 feet deep once a month during the hottest part of the year in loamy or loamy soils. Sandy or other fast-draining soils may need to increase this frequency to twice a month. 

Step 10: Planting care for better yield

Hazelnut trees do not tolerate drought and need maximum moisture throughout the year. It requires 30 to 50 inches of rain annually, of which 14 to 16 inches are in the vegetative stage, which lasts from April to September. The Hazelnut plant should be plowed and cultivated in the first and second years of Hazelnut cultivation. After the sixth year, a low-cut lawn should be maintained on the row site. The area where the shrub or hazel tree grows should be regularly fertilized and mulched. 

Never allow the soil around a Hazelnut tree or shrub to dry out completely. Water weekly during dry spells, allowing as much water as possible to penetrate deep into the soil. Hazelnuts do not need to be fertilized regularly if they are grown in good soil. If you notice slow growth and yellow leaves, the plant will benefit from a small amount of nitrogen fertilizer in the spring. When grown as a shrub, Hazelnuts require little or no pruning except to remove suckers from the roots.

To shape the tree, select six strong upper branches to form the central scaffold and remove the lower branches and any overhanging branches. Hazelnuts fall from the tree as they ripen in the fall. For easy harvesting, stack the nuts in a pile and collect them every few days. The first nuts can be empty. Consider Hazelnuts if you’re looking for a practical and attractive small tree. It is easy to grow, and you will enjoy the first nuts from your tree in at least four years. 

In case you missed it: Top 20 Steps to Boost Cashew Yield: How to Increase Production, Cashew Size, and Quality

Hazelnut Yield
Image Source

Hazelnuts prefer soil that is well-drained and fairly low in nutrients. Excessively rich soil causes excessive leaf growth at the expense of nuts and flowers. The Hazelnut trees have both male and female flowers; they are not self-fertile and always get better results so that the pollen can cross from one Hazelnut to another, even though other trees in the neighborhood may not. It also helps with pollination. Hazelnuts are usually grown as bushy shrubs and can be kept to a very manageable size by pruning. 

Step 11: Pruning Hazelnut trees for more growth

Cut off the center branches, and shorten the lower laterals. Remove suckers growing through the canopy in spring before they harden. Replanting trees with 3- and 4-year-old wood is particularly helpful in stimulating new growth and can maintain production in older crowded trees. Pruning is done beyond its establishment stage to regulate the tree’s growth and give vigor to older trees. In Hazelnuts, it also removes diseased or dead wood to extend the orchard’s life.

Prune young trees lightly. Prune older trees as much as possible, especially if they have little growth. Don’t try to overcome years of neglect in one year. Do not remove more than 25-30% of the living canopy at any time. Hazelnuts can be harvested in winter, spring, or summer. Pruning during the winter (dormant season) will cause the most vigorous growth the following spring. Spring or summer pruning produces little return growth and is useful in removing suckers and low-hanging limbs. 

Step 12: Choose drip irrigation for nut yield 

  • Increase nut yield and size – Maintain optimum moisture at each phenological stage of Hazelnut growth. Precision irrigation promotes uniform flower and fruit development, increasing nut yield and size. 
  • Hazelnuts have a shallow root system. Drip irrigation ensures that all fertilizer reaches the roots, not just the soil, avoiding runoff and optimizing your investment. 
  • Protect your crop from water stress – Water stress can damage your yield, resulting in smaller nuts, uneven filling, and lower crop value. Use drip irrigation frequently, avoiding stress. 
  • Maintain a dry surface – With drip irrigation, the surface between your rows stays dry, ensuring that the nuts on the ground do not suffer from rotting due to moisture. A dry surface also favors easy mechanical harvesting.

In case you missed it: Orange Farming, Planting, Growing, Care, Harvesting

Hazelnut Farming
Image Source

Step 13: Nutrients application for increasing crop yield 

Hazelnuts benefit from a balanced nutrition program such as an annual application of a complete NPK fertilizer. Nitrogen, potassium, and boron are the elements commonly found in Hazelnuts. Nitrogen deficiency is indicated by short-shoot growth and pale green to yellow leaves. Calcium nitrate applied by fertigation provides N is readily available water-soluble form.

Calcium nitrate fertilizer grade is granular and is not lost to the atmosphere like other urea and ammonium-based fertilizers. Small leaves or small nut husks indicate a potassium deficiency. Muriate of potash is a cheap source of potassium and should be applied in autumn. Boron deficiency can be recognized by typical shoot tip dieback. Boron is applied as a foliar spray in the spring. If deficiencies are suspected, commercial soil tests should be used to identify them.

For established orchards, standards for leaf tissue analysis are available. Soil test results should be interpreted in consultation with your district horticultural advisor. Your Hazelnut tree must also be pollinated and fertilized to start producing nuts. While most trees bloom and pollinate during the spring, the Hazelnut tree is unusual, as it blooms and is pollinated during the winter. Despite the need for different cultivars for fertilization, Hazelnut trees bear both male and female flowers.

Male flowers are long and yellow, while female flowers are small and red. Pollen travels on the wind to the female flowers of the nut-producing tree during the winter. Pollen accumulates there, and the tree remains dormant until spring, when fertilization occurs, signaling the tree to begin producing nuts. Once the tree is established, you will begin to see Hazelnuts forming around May in its second to the fifth year.

Step 14: Harvesting tips for Hazelnuts 

As the nuts mature, they begin to turn brown. Hazelnuts indicate that they have fallen from the tree and are ready to be harvested. Nuts fall from the tree in early August but are usually ready for harvest during September and October. Because of its dense canopy and obstruction to sunlight, Hazelnut trees typically have little turf grass growing beneath them, making it easier to find and harvest the nuts as they fall to the ground. 

In case you missed it: Dryland Farming, Agriculture Technologies in India

Hazelnut Farm
Image Source

Hazelnuts begin to produce about three to five years after planting. Nuts are harvested in August, September, or late October, depending on your agricultural zone and variety. Remember that if you let them fall, hungry animals may end up on your bounty. Just shake the tree. 

Step 15: Hazelnut yield per acre

Mature plants yield one to two gallons of nuts per bush or up to 25 pounds. The full production of Hazelnut yield is about 2,800 marketable pounds per acre.

Conclusion

Commercial Hazelnut trees prefer rich, light, well-drained soil, but the plants can tolerate a wide range of conditions. Hazelnuts grow in bunches and can have up to five pods each. Each Hazelnuts is in a shell; when removed, they are about an inch in size. The Hazelnut shell is brown, while the fruit is yellowish with a white mark in the middle. If you are thinking of growing your Hazelnut plantation, the above information can guide you in profitability. 

How to Start Cage Culture Fish Farming in India: Types, Cost, Profit, Report, and Management

1

Researchers and commercial producers are paying greater attention to cage culture these days. For reasons such as rising demand for fish, diminishing wild supply, and bad farm economics, interest in cage-fish farming has grown. Traditional crops are becoming less and less popular among small- and medium-sized-scale farmers. Opportunities for small-scale aquaculture can be found even in a rapidly developing sector.

How to Start Cage Culture Fish Farming in India
Image Source

Cage culture also allows farmers to use water resources that would otherwise go unused. Below will learn about cage culture in India, how to start cage culture fish farming in India, why cage culture is profitable, how to maintain a cage culture farm, and the cost and profits involved in the cage culture business in India. 

What is cage culture in the fishery?

Cage aquaculture raises fish in an enclosed net cage in an existing body of water while allowing the water to circulate freely. It is a production system for aquaculture that comprises a floating frame, net materials, and mooring system (with rope, buoy, anchor, etc.) with a circular or square floating net to contain and culture a huge number of fishes. This system can be deployed in a reservoir, river, lake, or ocean.

A catwalk and guardrail surround a floating cage battery. Fishery cages are divided into four categories: fixed cages, floating cages, submerged cages, and submersible cages. The submerged cages are the most common type. Cage farming is a low-risk approach that yields excellent profits and produces the least carbon emissions. Growing fish in an existing water body can grow without needing a steady flow of clean, oxygenated water.

As a result of the cage farms’ placement, fish are exposed to oxygen and other naturally occurring circumstances. Cage farms. A considerable contribution to India’s total fish output might be made by the cage culture technique, owing to the large yields that can be achieved. Cage culture is a viable option for using India’s extensive coastline, large brackish water regions in coastal states, and other neglected water bodies.

It’s an excellent way for small-scale fishers to supplement their income since it needs little or no land space and only a minimal initial investment. Due to the low labor required, this project is ideal for a small family to embark on. The cage and its attachments can be designed to meet the individual farmer’s needs.

Why cage culture?

A total of 3.25 million hectares (ha) of inland water resources in India, most of which are in the tropical zone, making them the country’s most significant inland water resource. Fisheries in small reservoirs, medium reservoirs, and large reservoirs have all produced fish yields of at least 50 kilograms per hectare per year, 20 kilograms per hectare per year, and 8 kilograms per hectare per year, with room for further improvement through capture fisheries, including those based on culture. 

Auto-stocking has an extremely poor success rate in Indian reservoirs, particularly the smaller ones. During the summer, many smaller reservoirs are entirely or partially depleted, leaving no fish to sustain them. The fisheries in these bodies of water would be substantially improved if they were stocked on a regular, sound, and maintained basis. The primary goal of cage culture addressed here is to raise fingerlings at least 100 millimeters (mm) long, mainly carp, for stocking reservoirs.

In case you missed it: How to Start Perch Fish Farming: Raising in Ponds, and Cages, A Step-By-Step Guide for Beginners

\Cage Culture Fish Farming
Image Source

To get the most fish out of reservoirs, it’s critical to use the proper kind of fish, use the correct size seed, and introduce it at the right time. India produces 22 billion fish fries annually. However, there is a severe scarcity of fingerlings for stocking reservoirs, notwithstanding this fact. Transporting fingerlings to reservoirs frequently results in a high death rate. Fingerlings raised in cages on-site provide a chance to deliver stocking materials and critical inputs in a program to improve Indian reservoir fish productivity.

About inland cage culture in India

Reservoirs make up the greatest inland fishing resource in India. Significant additional areas are being added to them annually due to the development of new impoundments brought about by the construction of dams over rivers and streams. These water bodies are frequently employed to capture fisheries by local fishers; yet, due to insufficient seed supply and a lack of understanding of reservoir fishery development among stakeholders, the productivity of these rich resources has remained at 50 kg/ha. 

This is a much lower rate compared to those in other Asian and Latin American nations. On the other hand, land-based aquaculture systems are becoming increasingly capital-intensive due to the exponential increase in land costs. Therefore, the time has come to harness these water resources that have not been fully explored using modern aquaculture practices such as cage culture. 

Various research institutes conducted trials of cage culture in Indian reservoirs over the last three decades, particularly for rearing carp seed to a bigger size for stocking in the reservoirs. However, raising Tilapia and other Pangasius species has become a commercial industry in the last ten years. The adoption of this technology was met with several fundamental obstacles, including the availability of seed and feed, the government’s regulations, the market’s acceptability, and so on.

Nonetheless, the results of these experiments conducted by private entrepreneurs were rather positive. Even the government has gotten involved, formulating policies on cage culture and providing financial support and educational opportunities for those interested in the emerging industry.

The National Fisheries Development Board (NFDB) is now encouraging business owners by performing demonstrations in several states via the respective governments of those states. More than 100 units of commercial cage culture are currently under operation in India, and this figure is multiplying.

Demand for inland aquaculture in India in the coming future

The quantity of food produced in India places it at the number two spot worldwide. Fish and marine merchandise form an essential constituent of India’s food production. As a result of its 8041 kilometers of coastline, 3 million hectares of reservoirs, and 1.2 million of brackish water, the Indian subcontinent has a bright future in producing marine goods. India is the world’s third-biggest fish producer and plays a significant part in the industry.

Since the 1950s, the Indian fisheries industry has seen significant growth, reaching yearly output levels of nearly 7 million tonnes of fish and shellfish from capture fisheries and aquaculture. India is responsible for producing around 7 percent of the world’s total aquaculture output and roughly 5 percent of the world’s total fish production.

In case you missed it: Earning 10 Lakh Per Year from Biofloc Fish Farming – A Success Story, Double Your Profit with Biofloc

The nation’s fisheries and aquaculture industries are poised for explosive expansion, which presents a huge opportunity for the government. In contrast to the coastal fish output, which has remained mostly unchanged as it has everywhere else, inland aquaculture production in India is making significant progress.

The promotion of inland aquaculture in India is focused mainly on the rearing of perch, carps, and other species of catfish, including Pangasius and freshwater prawns. Tilapia, being introduced responsibly, also has substantial potential in the future. As a result of the wealth of resources that have untapped potential and the significance assigned to the sector on a national level, aquaculture in India is positioned to see rapid growth shortly.

What are the advantages of cage culture?

For various reasons, open freshwater ecosystems, such as reservoirs, are well-suited to cage culture. Using the naturally occurring productivity of water bodies frees up other resources by using them more effectively. The cages are constructed and operated using basic technologies and locally accessible materials, making them ecologically, economically, and socially sound. Rearing carp fingerlings have little effect on the ecosystem since they eat at a low trophic level.

Distinct carp species with different eating patterns and their ability to eat various additional foods optimize fingerling feed intake while decreasing competition among species, waste, and the pollution that results from this waste and competition. Cage culture reduces predation losses and makes it easier to take preventative actions in case of a disease breakout, resulting in high survival rates for fingerlings.

Since the daily maintenance and monitoring protocols are straightforward, as is the harvesting process, it efficiently uses human resources. High yields can be attained at a low cost since cage culture can be performed extensively. As most reservoirs in India have many purposes, including the provision of drinking water, cage culture is ideal because it pollutes the reservoir slightly and helps keep it healthy ecologically.

What are the disadvantages of cage culture?

Cage culture has several hazards if not well handled. If the cages are placed incorrectly, they might obstruct navigation or detract from the beauty of a reservoir. Improperly positioned cages may harm the sedimentation process. Unconsumed feed and fish fecal material can damage the environment if cage culture is carried out too intensively or poorly managed.

To prevent cage batteries from being destroyed by high currents or floods during the summer, place them in sheltered inlets far from solid winds. When raising fish to fingerling size, theft is seldom an issue. Intensive cage aquaculture for the production of marketable fish or prawns has specific challenges.

Therefore the method is only utilized in Indian reservoirs to raise fingerlings, with minimal usage of supplementary feed. Controlled waste output from cage culture can be beneficial in maintaining water nutrient levels in reservoirs transitioning from oligotrophic to mesotrophic conditions.

How to start cage culture fish farming In India

Site selection 

Before selecting a place for cage culture, certain aspects must be considered. The physicochemical factors, such as temperature, salinity, oxygen, wave action, pollution, algae blooms, and water exchange, affect whether or not a species can flourish in a given habitat. The circumstances of the weather, the availability of shelter, the depth of the substrate, and other factors are all important considerations during the site selection process.

The last thing that has to be taken care of is the legal factors, such as access, closeness to hatcheries or fishing harbors, safety, economic, social, and market considerations, etc. The following are the most important considerations while choosing a location: It is recommended that there be at least 5 meters of water column depth. There should be no local or industrial contamination in the water supply, which should be clear and flow freely.

Sites should be sheltered bays in large and medium-sized reservoirs to defend against severe winds. Sluice gates and irrigation channels might cause problems for the cage if it isn’t anchored deep enough in the reservoir. Locals and grazing animals shouldn’t be able to disrupt them regularly. 

Access to land and marine transportation is essential. To prevent fouling, make sure there are no algae blooms present. Aquatic macrophytes and large concentrations of wild fish that deplete the water’s oxygen content should be avoided. To avoid obstructing traffic, cages should be put out of the way. Ghats, where people bathe, should be avoided. Chosen areas must be safe.

In case you missed it: Fish Farming in Karnataka: How to Start, Subsidy, License, and Business Plan

Fish Farming
Image Source

Fishes that are preferred for cage culture

Many biological factors should be considered when selecting cage-culture species, including hardiness, rapid growth, effective food conversion, the availability of high-quality seeds, and disease resistance. In India, the most preferred species for cage culture is Tilapia.

Know the types of cages in cage culture

In cage aquaculture, there are four types of fish cages: fixed, floating, submerged, and submerged. With a depth of less than – meters, the fixed cage is the simplest basic, and most often used kind of cage.

Size of the cage

It is a proven fact that, given the limitations of the materials and construction techniques, prices per unit volume fall as cage size increases. In addition to HDPE cages for seed growing, CMFRI has developed open sea cages with diameters of 6 m and 15 m for grow-out fish culture. Due to the ease of movement and less labor, a 6 m grow-out cage is the ideal size. Fingerlings can be housed in 2m enclosures.

Choosing cage frames and nets

It’s possible to employ various cage materials in cage farms. Many types of materials are used in producing these pipes, such as HDPE, galvanized iron, and polyvinyl chloride (PVC). However, HDPE frames have a high price but a long lifespan. Small groups and fishers should use Galvanized Iron (GI) frames coated with epoxy, which is more cost-effective.

When compared to HDPE frames, GI frames have a shorter lifespan. To see which worked best, different net sizes and materials were used for cage farming in India. The CMFRI has employed HDPE nets that are braided and twisted to grow out. In certain cases, it might endure for many seasons.

Because of its lightweight, a nylon net can be a cost-effective option, but more ballast weight is required to maintain its shape. The cost must be considered when adopting innovative netting materials like sapphire or Dyneema for a net cage. A net with a depth of 2 to 5 meters works well. Predator nets are essential in open sea cage culture to protect the fish from predatory organisms.

Stocking of the fish 

Although species needs and operational concerns should guide stocking density decisions, the impact of stocking density on growth and productivity has been shown experimentally. The size of the cages and the eating habits of the cultivated species both have a role in determining stocking density. A fish’s species and size determine its ideal stocking density.

Ideally, healthy carp fish between 12 and 25 millimeters long should be used for fingerling rearing in Indian reservoir cages. Since eutrophied nurseries are a common source of fungal infections, advanced fry larger than 35 mm should be avoided in cage culture until the fingerling stage. The fungus attacks Indian big carp in particular. Cages in Indian reservoirs should be stocked at a density of 250 carp fry, measuring 12-18 mm per cubic meter.

To allow for conditioning at the point of procurement and acclimatization at the point of release in cages, the fry should be released late in the day or early in the evening. Transporting the fry with an empty stomach puts them at risk of being poisoned by the ammonia and carbon dioxide produced by fish waste. Acclimatization of fry in cages before release is critical to maintaining a healthy habitat, particularly regarding temperature.

A polythene package containing 1,000 fry and 33% oxygen is carried with the fry and maintained in cages for at least an hour before the discharge of the fry. Prophylactic steps are taken on the fry before release to keep them free of diseases and parasites. A 5-6 percent salt solution and potassium permanganate (5-8 percent) are dipped into the cage water for 1 to 2 minutes before they are released back into the water.

In case you missed it: Fish Farming in USA: How to Start, Breeds, Business Plan, and Guide for Beginners

Tilapia Fish
Image Source

Feed details in cage culture 

Carbohydrates, fat, minerals, protein, and vitamins are any feeding product’s five most important components. For an animal to develop properly, it must get enough protein. Listed below are the nutritional needs of carnivorous marine fish (as a percentage):

Fish sizeCrude fiberCrude fatCrude proteinMoisture 
1 – 20 gm<4>5>43<12
20 – 50 gm<4>5>40<12
50 – 300 gm<4>5>38<12
>300 gm  (market/selling size)<4>5>36<12

To reach their full potential, marine fish need diets higher in protein (35-40%). The size of the feed pellets should be changed about the fish’s growth. As farming advances, the feeding rate for immature fish may be lowered from 10% to 3% of body weight. An FCR of 1:2 is recommended. Overfeeding fish may lead to waste and environmental contamination. Thus, only the appropriate diet should be fed to them.

Protein-rich feed components include fish and meat items from animal sources, as well as oilcakes of plant origin, which are used to make feeds. Predominantly, energy-dense components are grains and their by-products. Feed manufacturing also includes the utilization of non-conventional feed resources (NCFR). Mineral and vitamin combinations, oil, phospholipids, carotenoids, and other additions are also used, depending on the situation.

Synthetic binders, anti-oxidants, and antifungals are also used as non-nutrient additions. The next step is understanding the importance of mixing feed components to create a nutritious, balanced feed mixture. The nutritionally complete feed may be prepared using scientifically based elements to provide the required outcomes in fish production. The fish should be able to ingest the feed with as little loss of nutrients to the water as possible because of its physical qualities.

There has been a dramatic shift in the way people feed their livestock throughout the years. Depending on a fish’s eating habits, pellets may now be made to sink, gradually sink, or float. Pellets that float or sink slowly have been proven suitable for cage farming. There are extruders accessible in India, or they can be imported, that are used to make floating and slow-sinking pellets.

Not only the nutritional content of feed that declines during storage but also its look and flavor. Dry, ventilated warehouses, away from direct sunlight, should be used to store feeds, which should be kept at a consistent temperature. Preferably within two months of manufacturing, it should be utilized and periodically examined.

Fat rancidity and fungal development are possible side effects of long-term food preservation. Using excessive force may destroy feed bags and turn pellets into a powder the fish don’t eat. Therefore the feed is squandered. To prevent contamination, rodents, cockroaches, and other pests must be rigorously managed in the storage. To maintain the quality of feed, proper storage is not difficult.

Cage farming requires careful consideration of various criteria, including the amount fed, how often it is fed, and when it is fed. The size and age of the fish affect feeding rates and frequency. High-protein diets should be offered to fish larvae and fry on a more regular basis. Feeding rates and frequency may be lowered as fish get larger.

Feeding fish is time-consuming. Thus the frequency must be regulated to make it financially sustainable. Feeding more often leads to an increase in growth and feed utilization. Other water quality elements such as water temperature and dissolved oxygen levels may also affect the amount of food a fish consumes. Regarding feeding, it’s best to create your chart.

Maintenance of cage culture 

Cage Farm management aims to maximize output while keeping expenses to a minimum. Efficient management relies on a farm operator’s expertise and feeding rate, stocking density, limiting disease and predator loss, monitoring environmental conditions, and other technical issues. Regular inspections and repairs of the whole structure, including the cage frame and mooring, are required.

As a result, low oxygen levels and deposited wastes lead to fish deaths due to bio-fouling, which blocks the mesh of net cages. Fouling rates are affected by various factors, including mesh size, water temperature, and productivity at the cage location. As a result, the fish-rearing net cages need to be replaced regularly so the water quality is maintained and the fish may develop more quickly. Net cages of the correct mesh size should also be utilized when fish get larger.

In case you missed it: Basic Equipment and Tools Required for Fish Farming: A Beginners Guide

Tilapia Fish Farming
Image Source

Health management in cage culture

Intensive cage farming has the potential to cause disease epidemics. The buildup of garbage, crowding, handling, water quality parameters change, and bio-fouling are the primary causes of infectious diseases. Vibriosis, which is caused by a bacterium species called Vibrio, is the most prevalent sickness seen in zoo animals. Farmed fish can suffer fin and skin damage due to cage abrasion.

Choosing a suitable location, stocking density, and cautious stock management can reduce infections and diseases. Fish farmers must keep detailed records of everything from weather conditions to water quality metrics to feeding rates, lengths, and weights of fish they’ve tested to changes in their fish’s behavior. Assessment of health status is made easier by these data.

Harvesting details in cage culture 

For optimal profit, harvesting may be done by current market conditions. To prevent a glut on the market and a subsequent drop in the selling price, it is possible to undertake partial stock harvesting by initially harvesting the bigger fish. On-site documentation of harvests is required. One needs a post-harvesting and marketing plan to succeed in marine cage farming.

Facilities such as fishing boats and gear, icing facilities, holding and storage facilities, live-fish transportation, and connections to post-harvest processing facilities and market chains should be available at the production centers.

Cost to start a cage culture fish farm in India

Income details of cage culture of 8 cages, each 10*10 sq. feet.

Capital costs 

Item                                             Cost (in INR)
Cage frame4,00,000
Netting2,00,000
Installation charges50,000
Total 6,50,000

Recurring costs 

Item Cost (in INR)
Labour (net tying)30,000
Fry (fingerlings)3,00,000
Feed1,00,000
Labour (daily maintenance)3,00,000
Labour (harvest)2,00,000
Miscellaneous50,000
Total9,80,000

Total cost of the venture: 6,50,000 + 9,80,000 = 16,30,000

Income table 

Item Cost (in INR)
Sales of the venture per cage3,00,000
Number of cages in the venture = 8
Total income of the venture24,00,000
Total expenditure of the venture16,30,000
Profit in the first year 7,70,000
Profit in the second year14,20,000

Conclusion 

Cage culture in the water is a dangerous job that requires a high degree of caution. As a result, proper safety precautions must be taken to avoid mishaps, including deaths. Mandatory lifesaving equipment, such as jackets, communication devices, and first aid kits, shall be installed at the cage site. Everyone who works in the sea cage must wear a life jacket. Commercial-quality aquaculture relies heavily on cage culture, as we’ve seen, and this is good news for farmers in the future.

How to Start Hydroponic Farming/Gardening from Scratch in India: A Step-By-Step Guide for Beginners

1

New technologies are coming into the world every day. As the world’s population grows, the agriculture industry is developing new techniques to grow food using less space and water. A hydroponic growing system is a step in that direction. Hydroponic farming is a modern farming method that grows plants without soil.

How to Start Hydroponic Farming/Gardening from Scratch in India
Image Source

By abandoning the plant as a carrier for nutrients and instead using water to minimize inputs and maximize output, hydroponic farming is a subset of hydroculture. A healthy crop yield is guaranteed faster, and monitored nutrient absorption is promoted with the help of nutrients tailored to the crop. 

A hydroponic system is growing crops without soil, often called soilless farming. A liquid nutrient solution is a mixture of essential plant nutrients in the water. Plant roots are suspended in a static liquid solution or a continuously flowing nutrient mixture. Hydroponic growing systems require constant attention to crops, unlike traditional farming systems. 

How to start hydroponic farming/gardening from scratch in India

Advantages of hydroponic farming

  • Higher crop productivity than conventional farming, efficient use of plant nutrients, and reduced wastage of resources.
  • It provides a controlled climate system to help grow crops year-round. 
  • Plant roots have direct contact with water-soluble nutrients, thus aiding rapid absorption and growth. Since crops are grown in a closed environment under a hydroponic farming system, it is free from insects and pests.  
  • Space usage – A hydroponic plantation requires less space than soil-filled plants. Therefore, according to the framework, when hydroponic vegetable farming is combined with vertical farming strategies, they can use almost 100% less land than conventional farming practices.
  • Less labor requirement – ​​Hydroponics farming offers a light labor burden without plowing, herbicides, weeding, and pesticide use and allows farmers to focus on other tasks. It reduces the cost of transporting the crop and saves time for various operations. A lone low-maintenance worker can completely supervise a small hydroponic farm. 
  • Crops grow faster – Hydroponic farming makes supplements more efficiently accessible for plant absorption. The grower can handle light, heat, supplements, hydration, insects, and other parts of the growing system. The entire cycle can be streamlined for larger, faster-growing plants with better returns. 

Equipment required to start hydroponic farming

There are several hydroponic systems, and each system has its own specific needs. However, some standard equipment or materials are required to set up a hydroponic farm: 

  • A temperature-controlled greenhouse or indoor shelter 
  • Flood chamber/Reservoir
  • Electronic meters
  • Grow Trays
  • Power backup 
  • Water channels for circulating water through the plant’s closed-loop frame 
  • Water tanks 
  • Nutrient solution 
  • Grow lights

Tips for growing hydroponic plants 

  • When starting a hydroponic farm, the first thing to consider is what type of plants you want to grow. This decision you make determines what type of hydroponics system you can use. It also helps you decide what kind of lighting and space you need. 
  • Growers need to test the quality of their water supply before introducing it to a hydroponic system. 
  • The absence of soil in hydroponics means that there must be something through which the plants can be propagated and help the nutrient solution to flow efficiently. 
  • The definition of an excellent growing medium allows a good balance of oxygen and moisture to be absorbed by plant roots. If you’re growing plants for kitchen use, know that hydroponic grow systems can produce much more, so you don’t need as many plants as you normally would. 
  • If starting your hydroponic garden with young plants or seedlings, carefully wash the soil off the plant roots before transplanting them into your hydroponic system. 

In case you missed it: Hydroponic Farming in USA: How to Start, a Guide for Beginners

Hydroponic Farming
Image Source

Lighting needed for hydroponics farming 

With indoor hydroponics, it is essential that you strictly control the light. You can isolate the grow room using a commercial grow box to achieve this. Or, locate your grow room in an indoor space with no windows and cover it with mylar to increase your light distribution. With so many hydroponic lighting options out there, your choice will depend on the size of your garden and the plants you’re growing.

T5 or Compact fluorescent grow lights are great for beginners, as they are inexpensive, low heat, and suitable for growing leafy vegetables. LEDs are efficient and reliable, and while they are still quite expensive to purchase, the lifetime cost will be lower than other grow lights. To determine how much light you’ll need per square foot of gardening space, you must know how much light your plants need.

Small leafy plants such as Lettuce require about 20-30 watts per square foot, so a light with a true output of about 300 watts will cover 10 to 15 square feet of Lettuce and similar crops. To increase the lighting efficiency, consider installing reflectors. You can even help reduce the heat your lights generate using air-cooling reflectors. 

Nutrient solution tips for hydroponic plant growth

For anyone starting in hydroponics, the easiest way to ensure your plants are getting the nutrients they need is to ensure they are getting the nutrients they need. Purchase a commercial hydroponic fertilizer formulated for the plants you want to grow and closely follow the directions for use. A hydroponic nutrient solution has all the nutrients plants normally get from the soil. These essential nutrients can be purchased at a hydroponic supply store.

Most are highly concentrated, using 2 to 4 teaspoons per gallon of water. They come in liquid mixes or strength mixes, usually with at least two different containers, one for growing and one for blooming. Liquids are more expensive and easier to use. They dissolve rapidly and completely in reservoirs and often contain an additional pH buffer. Powerful varieties are cheaper and require a little more attention.

They must be mixed more thoroughly and often do not completely dissolve in the reservoir. Most do not have a pH level buffer. Like soil, hydroponic farming systems can fertilize organic or chemical nutrients. Maintaining an organic hydroponic system is quite a lot of work. Organic compounds tend to clump together and cause clogging of pumps. Some hydroponic gardeners only supplement their gardens with organic nutrients, using chemical nutrients as the main food supply. 

A liquid nutrient solution will dissolve more efficiently, and two- or three-part solutions are the easiest to use at all stages of plant growth. You must monitor and top up the nutrient solution in your reservoir. Keep an eye on the below nutrient solution factors for growing hydroponic plants: 

  • Temperature – Optimum rooting temperatures vary by plant. 
  • pH Level – The pH of a solution measures its acidity and must be closely monitored to ensure that plant roots can absorb the nutrients they need. For starters, it’s best to check your solution’s pH daily, always checking it after adding nutrients. It uses a liquid test kit, test strips, or a digital meter. Optimal pH levels change, so you’ll need to refer to the chart. For Lettuce, the pH level is 6.0-6.5. If the pH needs to be adjusted, apply chemicals made specifically for hydroponics, as they are the safest to use. 
  • Electrical Conductivity (EC) – Because the nutrients used in hydroponics are mineral salts, an EC meter can measure the strength of a nutrient solution. Keep the EC level around 1.2-1.6 for most plants for the vegetative stage. EC increases in the system due to plant evaporation and water transpiration. And if it gets too high, the solution will be toxic to your plants. Therefore, you should measure the EC of the nutrient solution every few days and adjust it as needed. 

Types of hydroponic systems 

Growing methods for each crop can be different, as can hydroponic systems. Choosing the right hydroponic system for the selected plant species, the physical hydroponic location and the amount of potential interaction with the system is essential and should be well thought out. Hydroponic systems need to;

In case you missed it: Hydroponic Farming in Bangalore: How to Start, Setup Cost, Companies, and Suppliers

Hydroponic Farming Setup
Image Source
  • Provide fresh, properly balanced nutrients to the root system. 
  • Maintain adequate gas exchange between roots and nutrients. 
  • Keep a backup to protect the root system from dehydration during a power blackout. 
Different types of hydroponic systems
1. Nutrient Film Technique (NFT)

In the nutrient film technique, gully channels are used to grow plants. In this system, the nutrient solution flows through these gully channels. It is designed for quick turnaround; it is used for lettuce and herb growers. A constant flow of nutrients is introduced continuously without any growth medium.

Power and pump failure can be fatal in this environment, so adequate backup is indicated—a very efficient system. It is best for Vegetables, Ornamental Crops, Tomatoes, Lettuce, and Herbs. One of the advantages of NFT is the easy installation of the system and the relatively low cost of materials. There are mainly two different types of NFT systems: 

  • Horizontal NFT system 
  • Vertical NFT system 
2. Aeroponic system

The aeroponic system greatly reduces the water used to grow crops. In this system, plant roots receive their nutrients and water through an aerosol mist that is sprayed onto them. Plant roots obtain oxygen from the air during the suspension. Aeroponic systems are relatively difficult to manage but very economical in nutrient and water use. 

3. Drip hydroponic system

A drip hydroponic system has to be one of the most dynamic vertical hydroponic farming frameworks. It uses a pump to maintain plants with water and supplements. This hydroponic farming uses small-scale producers to spray additive formulations onto plants directly. It is a shelter for a huge air circulation problem, providing constant watering and nourishment with hoses, lines, and developing media. 

It is the most common and simplest hydroponic system used for Tomato and Capsicum commercial crops. Very low maintenance and simple. Adopts a timer to start a pump that delivers nutrient-rich water along a drip line to the base of the plant. The run-off solution is collected in reservoirs. Perlite, Rockwool, and clay pellets are used as the medium. It is best for Peppers, Capsicum, Tomatoes, and Herbs.

4. Ebb and Flow

This system places plants in a wide-growing bed. This growing bed is filled with a medium such as perlite or rock wool. After establishing the plants, you’ll fill the grow bed with additional arrangements. It is purely organic farming. This framework deals with the principle of flooding the roots routinely and for a more limited period. 

It is especially good for small-scale hydroponics with high-density plantings. It is an ideal choice where space is limited. Growing trays are flooded. Growing rocks, rock wool, LECA, or vermiculite can be used as the medium. Simple, reliable, and low-cost. It is best for Shallow Root Vegetables and herbs.

5. Dutch Bucket Growing System

As the name suggests, this growing system uses buckets to grow plants. These buckets can change in size depending on the grower’s needs. The bucket contains a growing media such as vermiculite to support the growing plant. Plants with large roots are grown using the Dutch bucket system, such as Tomatoes and Cucumbers. 

6. Deep Water Culture

It works for many plants. However, it is a gift for larger plants, especially those with extensive roots. In this framework, the establishment of the plant is suspended in a supplemental arrangement, and you present the air directly with a diffuser or air stone. It will help if you put the plants in the net pots to get them. At the point when you cause plants to sit in unlimited oxygen-providing supplements, your plants accomplish insane development. 

In case you missed it: Hydroponic Farming in Hyderabad: Setup Cost, Training, Companies, and Equipment Suppliers

Hydroponic Gardening
Image Source

Hydroponic growing mediums 

Consider drainage characteristics, water retention, and system compatibility when choosing a growing medium. A good medium should hold moisture well to keep the roots moist and provide good drainage to avoid waterlogging. The medium should have a neutral pH. Resistance to fungal infections is also important because fungal infections are difficult to eradicate. Growers can mix mediums.

Vermiculite and perlite are best used together in a 50/50 ratio. Coconut coir is mixed with a medium with high drainage values ​​, such as perlite or LECA (lightweight expanded clay aggregate). The resilience of coconut fibers to fungal growth makes it an excellent growing medium. The main purpose of a growing medium is to aerate and support the plant’s root system and flow water and nutrients. Different growing mediums work well in different hydroponic systems. 

Hydrocorn: A fast-draining medium, such as Hydrocorn, works well in ebb and flow type systems. Hydrocarbon is a light-expanded clay aggregate. It is a light, aerated growing medium that allows plenty of oxygen to enter the plant’s root system. 

Rockwool – Rockwool is made from molten basalt rock spun into fine fibers and is widely used in commercial hydroponic gardens. Rockwool is mostly air, so controlling the water-to-air ratio is easy. Rockwool is available mainly in blocks, cubes, and granules. Rockwool is not biodegradable, requires a lot of energy to make, and requires gloves and masks to be worn when handling it.

Coconut fiber or cocoa coir is made from shredded and ground coconut husks. Fibers are rich in natural hormones that reduce fungal growth and improve germination and root growth. Vermiculite is water-retentive, and perlite is air-retentive. Available in many forms, compressed bricks require washing before use to allow the coconut fibers to expand and loosen. 

Perlite – Perlite is the original hydroponic medium and is inexpensive. Perlite is a mined mineral that is made of glass pellets. It has excellent oxygen retention and good filtration properties. It is mixed with mediums that lack drainages, such as vermiculite and coconut fiber. Perlite has low water retention properties and dries quickly if left without water. 

Vermiculite – Vermiculite is a mined mineral that undergoes exfoliation when heated rapidly to form flakes. It is a type of soil that retains water well but has poor drainage. Vermiculite is mixed with perlite in a 50/50 ratio to allow the water retention of the vermiculite and the air ration and filtration. 

LECA (Lightweight Expanded Clay Aggregate) – LECA is designed for commercial hydroponics. Baked clay pellets have a neutral and inert pH, so pH control is straightforward. LECA is lightweight with maximum filtration and ventilation properties. LECA is used with a denser medium. LECA must be washed before first use. It can be reused when cleaned and sterilized. 

In case you missed it: Growing Strawberries Vertically from Scratch: Methods, Tips, and Ideas

Strawberry Farming
Image Source

Cost of setting up a one-acre hydroponic farm 

The final cost of setting up a hydroponic farm on one acre of land will be Rs. 110 lakhs to Rs.150 lakhs, excluding land value. This cost (after INR 1.1 and up to INR 1.5 Crore) varies according to the technology and automation. 

Most profitable hydroponic crops to grow for beginners

  • Microgreens 
  • Lettuce 
  • Radishes 
  • Sweet Bell Peppers 
  • Herbs 
  • Flowers 
  • Hydroponic Vegetables: This produces Tomatoes, Cucumbers, Lettuce, and Peppers. 
  • Hydroponic Fruits: This produces fruit crops such as Strawberries, Blueberries, and other types of fruit that grow on vines or shrubs. 
  • Hydroponic Herbs: This produces culinary herbs like Basil, Mint, Thyme, Rosemary, etc., or medicinal herbs such as Cannabis.

Future of hydroponic farming in India 

Hydroponic farming is a new concept in India. Several companies provide training and have set up some vertical farms using hydroponics. This farming method is hailed as the future of farming. Due to rapid industrialization and the growing population, traditional farming methods cannot adapt. ‘As of now, India imports about 85 percent of foreign vegetables. Through soilless farming, it has a huge potential for change. For example, hydroponic farming can yield approximately 300-400 tons of Lettuce per year compared to 9-10 tons of soil-based farming. 

Elements of a Hydroponic System 

Plant roots need water, moisture, nutrients, and oxygen. A fundamental principle in all hydroponic systems is how these nutrients will be delivered to the plant roots. Four important elements are considered before building or buying a hydroponic system online. The four main elements of a hydroponic system are the water delivery system, the nutrient injection system, the media for holding the roots, and the irrigation catchment. 

Hydroponic farming business plan for beginners

If you want to start a hydroponics farming business or expand your existing hydroponics farming operation, you need a business plan. A business plan will help you raise funds if needed and plan the growth of your hydroponics farming business to improve your chances of success. 

  • Management – The first step before starting a hydroponics business is to create a detailed business plan. As a hydroponics business, an indoor area typically involves setting up a greenhouse, supplying the plants with the necessary nutrients, installing the entire electrical system and drainage, and packaging and selling the grown food. So, to manage all these tasks, you must prepare a detailed management plan before taking up the startup. 
  • Market Research – The first step is to survey the market and understand the target demographic and industry. Common vegetable plants like Lettuce or Peppers may or may not be in demand in your area. Therefore, looking for potential customers and analyzing the industry trend is important. 
  • Training – Hydroponic farming is a modern and innovative method of farming. Many factors can determine how well your farm will perform. Hydroponics relies on a constant flow of water and stable temperature conditions. 
  • Choosing Crops and Land Acquisition – The next step you should take is to finalize your crop. The most popular plant to grow in hydroponics is Lettuce. Calculate the required area based on the number of crop rows you are planting. Based on this, you can lease or rent a commercial property for hydroponic farming.

In case you missed it: Mulching Tomato Plants, Procedure, and Benefits

Tomato Farming
Image Source

Frequently asked questions about hydroponic farming

Is hydroponic farming profitable? 

Hydroponic farming is extremely profitable. It is an example of high production in a small space in any season or climatic condition. Hydroponic vegetables are highly balanced in fiber, minerals, and vitamins. It is the first method of farming/cultivation without soil. 

Is hydroponics a good investment? 

Yes. Hydroponic business can be a good investment. Hydroponics is a modern farming method where plants (crops or flowers) are grown in certain nutrients instead of soil. 

What is the most profitable hydroponic crop? 

Leafy vegetables like Lettuce are the most profitable crops to grow in hydroponics because they have the lowest operating costs. 

Is hydroponics good for beginners? 

Creating an indoor hydroponic system for your vegetables, herbs, and other plants is easier than people think. Hydroponics for beginners is for anyone. The basic idea is to provide water, nutrients, and oxygen to your plant’s roots without soil. 

What grows fast in hydroponics? 

Mustard Greens, Swiss chard, Spinach, Kale, and Watercress are all fast-growing plants that will thrive in a hydroponic system, and you can usually start harvesting them within a month of planting. 

Is hydroponic better than soil? 

As mentioned earlier, hydroponically grown plants grow significantly faster than soil-grown plants. It is because plant roots are bathing in nutrients so that they can absorb them easily and directly with minimal effort.

Conclusion 

Hydroponic farming means a system of growing crops without using soil and is often called soilless or soil-free farming. Under hydroponic farming systems, plant roots grow in moist inert materials such as rock wool, vermiculite, and a liquid nutrient solution. It involves suspending plant roots directly above a stagnant liquid solution or floating them in narrow channels filled with a nutrient mixture. 

If you live in India and are planning to grow plants using a hydroponics system, this article may help you to understand the basics of Hydroponic gardening and Hydroponic farming.

Key Rules for Effective Pasture Management: From Planning to Reducing Production Costs

0

Effective pasture management is vital for livestock farmers if they want to succeed and scale their farms. It ensures animal productivity and health, sustainability, and high forage yield. All of these eventually reduce the cost of production and augment the pasture ecosystem. Pasture is one of the most important resources in the cattle industry. To effectively manage it, you will need a good understanding of forage production.

Pasture Management2
Image Source

Also, it is vital to set achievable production goals and implement effective grazing strategies that adapt to environmental changes. Grazing lands need to be managed effectively so that they are productive over long periods. This entails knowing when to graze certain animal species, specifying grass recovery time, and effective pasture management for cattle to prevent overgrazing. 

Pasture Management at Different Times of the Year

Every season provides opportunities to make your pasture better. However, during the winter, the farmers must constantly feed the animals and recover accumulated losses. Grazing during winter is not advisable because the livestock may damage soil cover and perennial plants. So, to ensure that the animals are fed well during this period, it is vital to designate a separate winter grazing area. 

During the spring, it is more advisable to feed the cattle with hay because the land still needs time to recover. So for spring pasture management, you must continue checking soil fertility, nutrients, and weeds. Summer is the perfect time to check grazing conditions. You can use nitrogen fertilizer which encourages crop growth. Here, you need to apply fertilizer according to the amount of rainfall. 

In case you missed it: Top Cattle Feed Manufacturers in India: Companies List

Pasture Management1
Image Source

The weed pressure is reduced in early fall, so fall grassland management is good for overseeding cold-season grasses. Farmers can also treat the grass with nitrogen fertilizer for better growth. However, ensure that the rains have washed away the chemicals before releasing the livestock to graze. 

What Rules Should be Followed for Effective Pasture Management

Effective pasture management is not achieved by chance. Farmers need to be consistent and follow some rules, eventually leading them to their goals. So for effective pasture management, you will need to:

Set up a grazing plan according to the number of livestock on the farm. It will help to predict forage yields. So, you need to define the objectives and goals of the grazing activities. This usually includes enforcing profitability measures by making lifestyle changes, which will increase soil fertility, forage production, and animal performance. Create an efficient grazing system that will continuously feed the animals.

Managing these systems is very important because it provides food for livestock. Grazing systems vary depending on the climate, soil type, livestock, and plant species. Weeds are detrimental to the desirable plants in your pasture as they compete for water, nutrients, and soil. That is why it is necessary to keep weeds off your pasture and should be done on a regular basis. So, to control the weeds, the first step is to identify the crop you want in the pasture. This will help you know the best weed control method to use on the farm. 

Target feeding ensures that nutrients are reallocated across your padlocks. Here, the farmer needs to focus on paddocks with low soil fertility. This will ensure that they get the most nutrients and less amount of grazing. The paddock shape will depend on different factors such as soil type, topography, animal species, and rotation. This is done to reduce issues with uneven grazing and give the plants time to recover. 

In case you missed it: Dairy Disease Symptoms and Treatment for Cows, Cattle, Goats, and Sheep

Pasture Management3
Image Source

Proper livestock distribution is also important for increased productivity. This can be achieved by spreading the animals evenly over the grazing units for uniform use of resources. By nature, cattle do not graze evenly and must be forced to other areas. By nature, they will graze in areas with easy access to water sources.

What Modern Solutions for Pasture Management EOS Data Analytics Offers

With the use of satellite technology, it becomes possible to control huge farmlands. EOS Crop Monitoring is one of the best tools for monitoring grazing conditions and planning farm activities based on reliable information. Also, agricultural consultants can use software to make recommendations for their customers based on satellite data. 

Pasture Management4
Image Source

The vegetation index map is one of the features which is very useful in pasture management. Farmers can apply vegetation indices such as NDVI and NDRE to determine the best grazing vegetation levels and health of the plants. Another index like MSAVI is also vital in pasture management as it can be used to detect bare soil. This will help farmers plan and monitor grazing activities. 

The weather is an important factor in pasture management and should be monitored closely. Using the EOS Crop Monitoring, farmers can monitor temperature and rainfall. It also provides a 7-day weather forecast to notify farmers about dangerous weather conditions. It can be very challenging to monitor large farmlands. It will require lots of resources to send scouts blindly into the field. However, EOS Crop Monitoring provides precise locations for scouting activities, saving lots of time and resources. To learn more about the tool, visit this link.

In case you missed it: Hereford Cattle Breed Facts, Profile, and Characteristics

Pasture Management5
Image Source

Benefits of Implementing These Rules in Pasture Management

Efficient pasture management brings many benefits to your farm, irrespective of its size or number of animals. Some of the top advantages of previously described rules in pasture management:

  • include animal health, growth, and development;
  • reduced feed costs;
  • land stewardship;
  • beautiful landscapes;

In case you missed it: How this Farmer Made 1 Lakh Per Month from His Dairy Farm: A Success Story

Pasture Management6
Image Source

How to Start Strawberry Farming in the USA: A Step-By-Step Production Guide to Planting to Harvesting

Strawberries are the fruits of flowering plants of the genus Fragaria, belonging to the Rosaceae family. Usually, they are a bright red color with small green seeds on the outer skin. Strawberries have a sweet, sour taste. Most Strawberry varieties grown in the United States are eaten fresh.

How to Start Strawberry Farming in the USA
Image Source

Generally, the price for processing Strawberries is less than half that received for fresh market berries. Almost all Strawberries are used for fresh market sales in Pennsylvania and surrounding states. Let’s check out more information on how to start Strawberry farming in the USA below.

How to start Strawberry farming in the USA

Location for successful Strawberry farming in the USA

Good site preparation is essential for successful Strawberry production. A cover crop and adding enough organic matter to the soil the previous year are the keys to success. Strawberry plants can go almost anywhere. Strawberries are no-picks, from raised beds, containers, and in-ground gardens to those planted in places that need ground cover. They also do not grow very deep roots.

So if you can find space for any container or designate an area of ​​the garden, you can probably grow Strawberries there. Most Strawberry plant varieties do best with lots of sun, so ensure your plants get plenty of sun. Also, make sure you choose hardy varieties for your area and double-check their care requirements because not all varieties have the same growing conditions that can be applied. 

Tips for growing Strawberries in the USA

  • Consider overwintering Strawberry pots – The process of moving Strawberries indoors is to protect them from cold weather in the winter. A shed or unheated garage will do. If you plan to overwinter your Strawberry plants, plant them in pots or hanging baskets so they’re easy to move at the end of the growing season. Give your potted Strawberry plants extra winter protection by insulating them. Wrap them in burlap and stuff straw mulch between the burlap and the pot. Cover the top of the plant with six to eight inches of straw.
  • Keep the Strawberry runners – Runners are shoots that produce new plants. As runners develop, decide whether to keep, remove, or spread them. Place the runners where you want the daughter plants to grow and gently press the ends into the soil to encourage rooting. You can also transplant daughter plants by placing a pot full of soil next to the mother plant and allowing the runners to take root there. 
  • Remove the flowers first – To encourage your Strawberries to put their energy into developing roots and shoots, cut off the flowers first. For June-bearing Strawberries, remove flowers the entire first year to ensure healthy plants for the following year. For other varieties, you can pinch off flower buds for the first four weeks and harvest Strawberries later in the season. 
  • Weed regularly – Strawberries have trouble fighting weeds, so keep your Strawberry patch weed-free with frequent hand weeding and mulching. 

In case you missed it: Top 20 Steps to Boost Strawberry Yield: How to Increase Strawberry Production

Strawberry Farming
Image Source

Strawberry growing states in the USA

The major Strawberry states grown in the United States are California, Florida, North Carolina, Wisconsin, and Pennsylvania. The Strawberry industry in the US is always booming, so it’s no surprise that many farmers are interested. In all places, it’s possible to grow these delicious and healthy berries successfully. For example, if you are in other states like Idaho, Michigan, and Nebraska, greenhouses are beneficial for growing Strawberries. 

Strawberry growing methods

Growing from seed 

However, garden Strawberries are hybrids, and there’s no guarantee that you’ll get the Strawberry characteristics you love. Some seed companies offer Strawberry seeds for alpine varieties and some heirloom varieties, so if you’re planning a large Strawberry garden, this can be an economical way to get started. It also grows well from seed, but it takes a long time. You can save your favorite Strawberries, wait until they’re mushy, collect and dry the seeds, and plant them indoors in early spring. 

Growing from a Starter 

In mild climate conditions, Strawberry crowns can be planted in the fall, dormant over the winter, and sprouted in the spring. But in locations where the ground freezes, they are best planted in early spring. The different growth habits of Strawberries determine how they should be planted. June plants that produce more stolons can be planted in early spring with plenty of space between mother plants (18-24 inches apart, 36-48 inches apart in rows).

It is called mated row production and works well with disease-resistant varieties. Ensure pinching back flowers in the first year after planting to prioritize vegetative and stolon growth. Planting Strawberries in high rows or mounds can help them avoid rotting in overwater, resist frost, and keep diseases at bay by providing good air circulation around the plants.

The University of Oregon Extension recommends this process for day-neutral varieties, as they produce fewer stolons, and recommends planting 2-3 rows of plants 12-15 inches apart with 2 feet of space between them. If you plant June varieties like this, you must trim the stolons whenever you see “daughter” plants. Whether you grow Strawberries from seed or purchased starts or dormant crowns, plant Strawberries so that the crown base is level with the soil, it ensures that the roots do not dry out and that the stems and leaves can grow freely. 

Where do Strawberries grow best in America? 

California, Florida, North Carolina, Wisconsin, and Pennsylvania states are ideal places to grow Strawberries in the United States. However, the top two, California and Florida, will be among the best. If you are from another state, you can also use a greenhouse, creating a perfect growing environment for a productive Strawberry farm. California is responsible for 75% of the production. Fruits are available from January to November, with peaks from March to May.

The state can produce a billion pounds of berries yearly; each acre averages 21 tons annually. California is followed by Florida, where the Strawberry season runs from December to May. It peaks from March to April, and the state imports winter Strawberries from November to May. This way, the state can meet the demand for Strawberries throughout the year. The largest producer of Strawberries in the United States of America, which grows 20-25 percent of the world’s annual production.

California dominates US Strawberry production. The state’s annual harvest consistently reaches nine-tenths of all US Strawberries. Most Strawberries are grown in the state’s southwestern counties (especially along the coast), where the full sun and a mild climate dominate. With 8 to 9% annually, the second largest Strawberry producer in the United States is Florida. Plant City is the center of Strawberry farming for the state.

Most of the Strawberries sold in American grocery stores during the winter (especially in December and January) come from Florida. Together, California and Florida account for more than 95% of all Strawberries in the United States. These states’ mild winters allow farmers to use hill cultivation on Strawberry farms. 

In case you missed it: How To Start Strawberry Gardening, Tips, Ideas

Strawberry Farm
Image Source

Best Strawberries in the USA 

Remember that there are three types of Strawberries: June-bearing, ever-bearing, and day-neutral—choosing among the three means considering certain factors. For commercial production, June bearing is most common in the US because they produce larger fruits and have many runners. This variety can bear fruit for up to two weeks, making it more productive than other varieties. In contrast, the evergreen Strawberry only bears fruit three times a year. 

Day-neutral Strawberries will be abundant from July to September, but maintaining ideal temperatures is critical as this can affect their flowering. Considering greenhouses, you can have a long growing season at a minimal cost. You don’t have to deal with potential outdoor fluctuations in climate, and the extended season helps you get a higher price for your Strawberries. As a bonus, you’ll always be confident in the quality of your berries, considering that the weather affects their flavor. 

It is important to have a constant supply of high-quality Strawberries to make them easy to sell. Some stores also require good quality, so don’t waste all your hard work settling for so-so fruit quality. June-bearing Strawberry varieties bear fruit all at once, usually over three weeks. Sensitive to day length, these varieties produce buds in the fall, flowers and fruit the following June, and runners in the long summer days. Although known as “June bearing” or “June bearers,” these Strawberries bear before June in warmer climates. 

Most common Strawberry varieties in the USA

June-bearing Strawberries are the most common in the United States. 

  • Chandler: A high-yielding June Strawberry with a classic conic fruit, Chandler is relatively tolerant of hot climates. 
  • Earliglow: One of the early-season Strawberry crops in June, ‘Earliglow’ plants produce medium-sized fruits that are firm and hardy. 
  • Honeoye: These June-bearing Strawberry plants produce their crops earlier in the season than others. Bright red and glossy, ‘Honeoye’ Strawberries can be susceptible to many plant diseases, making them less suitable for novice home gardeners. 
  • Sparkle: A June-hardy Strawberry plant, Sparkle produces bright red, medium-sized fruit with a sweet flavor. They are especially popular for jams, jellies, and desserts and freeze well.

Best site and climate for Strawberry farming in the USA

California supplies more than 90% of the US’s Strawberries, and that percentage is expected to grow. One reason is the state’s Mediterranean climate with hot, dry summers and mild, wet winters. Year-round mild temperatures with sunny days and cool, humid nights create perfect conditions for growing Strawberries. Unlike Florida, the second largest Strawberry-producing state in the US, where berries can be harvested between March and November, California has a 12-month growing season.

The climate and growing season make California’s fields highly productive. About 75% of all California Strawberries are harvested for the fresh fruit market each year, and 25% are frozen for the processed fruit market. Grow Strawberries in a full-sun location with at least 8 hours of sunlight. Make sure the planting site has good drainage. Before planting, mix two pounds of compost with nitrogen, phosphorus, and potassium per 10 feet of soil. 

Use transplants for Strawberry planting; bare root transplants are the most common, but you can also find container transplants in plastic trays at garden centers. Many people plant Strawberries in raised beds with black plastic mulch to control weeds and keep soil off the berries. Set your transplants through the silt in the mulch. Make sure you don’t cover the crown of the transplants. 

Strawberry planting and care in the USA

Planting times for Strawberries will change depending on where you are in the state. North Florida gardeners can plant between September 15 and October 15, Central Florida between September 25 and October 25, and South Florida gardeners between October 1 and December 1. Purchase transplants from local garden centers in late fall or early winter and plant them 10 to 18 inches apart. You can plant them on the ground, in raised beds, or in containers. 

For best results, pot plants in rich soil or potting media, water them often, and fertilize regularly with a balanced fertilizer. Covering the plants with a light blanket will help protect the flowers or fruit from damage if a frost is forecast. The first berries must be ready to pick about 90-110 days after planting. If you have trouble with rabbits or birds stealing fruit, try using netting to protect the plants.

In case you missed it: Strawberry Farming Project Report, Cost, Profit Guide

Strawberry Farming Field
Image Source

Pick the berries when at least three-quarters of their surface is red. Once picked, the berries will no longer be sweet. Freshly picked Strawberries usually only keep for a few days, so be sure to eat them right after picking. If you have more berries, you can freeze them. 

Watering for healthier plants and better yields

For Strawberries, about 1 inch of water per week is a general rule of thumb; your irrigation will vary depending on your soil type, temperature, and humidity. Do not let the soil soak, as the crowns will rot, but Strawberries are susceptible to water stress because of their shallow roots and should not be allowed to dry out, especially when producing fruit.

Drip irrigation is the healthiest method and conserves water, and it allows you to set up fertigation – a system of distributing liquid or dissolved soil amendments through irrigation. Micro-sprinklers save water and produce healthier plants and better yields. 

Strawberry acreage in the USA

About 60,000 acres in the United States are devoted to growing and harvesting Strawberries, with California accounting for 38,200 acres. California’s oldest Strawberries are grown in Orange, Los Angeles, and San Diego counties, where the harvest is from January to May, with the peak season in April.

The Oxnard area (Ventura County), known for its Strawberry Festival, produces fresh Strawberries from January through June. Northern areas, such as Monterey, San Benito, Santa Clara, and Fresno counties, begin shipping in April, while the peak season is in May and June. 

Strawberry market size in the USA

The United States produces more than 1.6 billion pounds of Strawberries annually, valued at approximately $3.5 billion. The market value of Strawberries in California is estimated at $2.34 billion. It ranks among the valuable crops in the state, along with dairy, grapes, almonds, cattle and calves, and pistachios. 

Good marketing also plays a role in market size. The California Strawberry Commission launched a “Snack with Heart” marketing campaign to encourage consumption and connect the hearts of farmers with the hearts of consumers. Using social media and digital media with influencer partnerships, the marketing campaign highlights the health benefits of California Strawberries to increase consumption.

Pest and disease management 

Many insects and diseases can damage the crop. Therefore, it is important to monitor and control pests. Some insects attack flowers and fruits, while others attack plant foliage, stems, crowns, and roots. Pest management involves many aspects of production, pesticide application being only one. Learn to accurately identify pests, incorporate scouting into your routine to catch problems early, and familiarize yourself with pest biology. 

Many pest problems can be avoided or prevented by proper site selection, crop rotation, proper planting timing, and the use of disease-free seeds or plants. Birds can be a serious problem on Strawberry farms. Crop protection may require netting, chemical repellents, scare tactics, and noise devices. Deer can also cause extensive plant damage by trampling and eating plants and ripening berries. Hunting, fencing, and repellents can all reduce deer damage. 

In case you missed it: Strawberry Farming; Planting; Growing; Care; Harvesting

Strawberry Harvest
Image Source

Weed control is important, as Strawberries have shallow root systems that damage them when they compete for water and nutrients. Weed problems can be reduced by avoiding areas with persistent weeds and removing weeds before planting. Once established, herbicide application and shallow cultivation can control weeds in plants, but consistency is required. Few herbicides are available for Strawberry plants, but if used properly and cultivated by hand and machine when chemical control cannot be used or fails, Strawberry cultivation is very profitable. 

Healthy transplants are an excellent defense strategy to avoid diseases and pests when growing Strawberries. Buy plants from reputable nurseries or garden centers. Most foliar, flower, or fruit diseases can be controlled with fungicides for home garden use. Be sure to remove dead and diseased plant leaves to reduce infection. Control powdery mildew with sulfur applications. Please ensure the temperature is cooler than 80°F before applying sulfur; otherwise, it will cause burns on fruits and plants.

Pests on Strawberry plants will change with the seasons. Caterpillars, Aphids, and thrips are found early in the season in Strawberries. Spider mites are a persistent pest in Strawberries – look for them around December. Nematodes and soil-borne diseases can cause problems if you plant Strawberries in the same spot yearly. Vary your planting areas, and avoid planting Strawberries in areas where tomatoes, eggplants, or other vegetables susceptible to Verticillium wilt have just been planted.

Which US state produces the most Strawberries? 

In the United States, fresh Strawberries are grown primarily in California (about 90 percent annually), Florida (about 8 percent), New York, North Carolina, Oregon, and Washington. 

When to harvest Strawberries 

When about three-quarters of the Strawberry’s surface is red, it’s time to pick it! Leaving part of the green stem attached will help the berries last longer. Strawberries stay fresh for a few days after picking, so eat them soon or add them to your favorite recipes. If you don’t think you’ll have all of your delicious Strawberries within a few days of picking, you can freeze them for later use. 

Strawberry yield per acre in the USA

The United States planted 43,400 acres of Strawberries. The average Strawberry yield per acre was 50,500 pounds, ranging from 68,000 pounds per acre in California to 3,200 pounds per acre in New York. The large range between yields per state is due to differences in climate.

In case you missed it: Blueberry Farming in USA: How to Start, A Step-by-Step Guide for Beginners

Strawberry Farm
Image Source

California has a temperate climate, allowing for a 12-month growing season and higher yields per acre than other states. Other states’ climates limit the growing season to an average of five months, with some areas having a growing season as short as three weeks (California Strawberry Commission).

Conclusion

Strawberries are one of the easy-to-grow fruits and are great for beginners. The taste is far more flavorful than anything you’ll ever find in a grocery store. According to Pennsylvania State University, the United States is the number one producer of Strawberries globally, with 60,000 acres grown in the country.

Top 19 Steps/Ways/Methods to Boost Mint Yield: How to Increase Production and Quality

Mint is an aromatic, perennial herb. Most species grow best in wet, moist environments. Mint belongs to the Lamiaceae family. Mint is an easy-to-grow, hardy, perennial herb plant grown for its leaves. It is one of the most profitable herb plants to grow. Depending on the land availability, you can cultivate Mint on both a small and large scale. The high-yielding variety gives more profit in Mint cultivation. The most significant potential is its fragrance and culinary use. Let’s check out the top 19 steps/ways/methods to boost Mint yield below.

Top 19 Steps/Ways/Methods to Boost Mint Yield
Image Source

Top 19 steps/ways/methods to boost Mint Yield

Step 1: Select the best Mint variety for more production

Japanese Mint/Menthol Mint – Japanese Mint is the primary source of menthol. Fresh leaves contain 4-6% oil. Japanese Mint grows in full sun to partial shade, preferring moist soil. All soil types are acceptable, including heavy clay soils. This Mint can take slightly drier soil than others, although it prefers moist conditions. 

Peppermint – The most common type of Mint is peppermint. Peppermint has a cool, strong flavor, which is why it is used in candies, desserts, and teas. Peppermint spreads prolifically in garden beds, spreading by runners in all directions rather than by seed. Peppermint has pink flowers and rounded (sometimes more lance-shaped) leaves.

The leaves are toothed along the margins and dark green. The most common use of this herb is to flavor tea, but, like most Mint varieties, it is also effective in Mints. The aroma of Mint is stimulating and can also reduce stomach upset when consumed. 

Spearmint – Spearmint plants have long, narrow leaves on thin stems and pink or white flowers. The name “Spearmint” comes from the spear-like leaves. Like other species, Spearmint spreads in all directions by invasive runners, so containers are perfect. This Mint is also called lamb Mint because it is used in lamb and potato dishes. Flowers are pink to pale violet color.

Bergamot Mint – It has fragrant, lemon-flavored leaves ovated on elegant burgundy stems. Bergamot Mint is known for its aromatic properties and is used as an ingredient in the preparation of jellies, salads, and chutneys. Its essential oil is used in the perfume industry. 

Some other varieties are Apple Mint, Pennyroyal, Banana Mint, Chocolate Mint, Lavender Mint, Water Mint, Corsican Mint, American Wild Mint, Cuban Mint, Orange Mint, Grapefruit Mint, etc.

Step 2: Suitable soil for Mint plant growth 

Mint grows well in most soil types. It includes heavy and moist soil if drainage is adequate. It will not perform well on waterlogged soils in winter, and the plants may die. It can adapt to most soil types but prefers rich soil with a slightly acidic to neutral pH. Good soil drainage is also important.

In case you missed it: Organic Mint Farming (Pudina), Planting And Growing

Mint Farming
Image Source

Mint plants love water, but waterlogged soil can cause their roots to rot. Finally, the best soil is deep, well-drained, and humus-rich, with good moisture retention. Finally, it would help if you collected soil samples for analysis to determine the soil’s fertility level before planting Mint. 

Step 3: Seed rate and seed treatment for more production

Stolons or branches do propagation. Apply stolon at 160 kg per acre of land for good growth. Stolons are obtained from previous plantings and are harvested in December and January. To protect the crop from stolon root, do stolon treatment with Captan @0.25% or Agallol solution @0.3% or Benlate @0.1% for 2-3 minutes before sowing. 

Step 4: Mint planting time for best growth 

The best time to grow Mint mainly depends on where you live. Suppose you live in a cold area and plant in the spring. The fall season is ideal if you live in a warm area. So, choose accordingly, but be sure to give your plants afternoon shade if you live in a hot area. During light frosts, new plants need protection, but established plants can withstand a full frost. 

Step 5: Mint propagation method for getting more yield

Mint is easily propagated by seeds, cuttings, or dividing an established plant. Seeds should be sown in spring or fall in frost-free areas. Mint seeds must be sown to a depth of about 6 mm (0.25 inches). After seeding and thinning, the plants are 46 to 61 cm (18 to 24 inches) apart. Established Mint can be easily divided for grafting by taking a few branches and a portion of the root. Many people select to keep Mint in containers in the ground when planting to prevent the Mint from spreading uncontrollably.

Step 6: Planting method for healthy plants

Mint can be propagated either vegetative or by seed. Vegetative propagation in Mint is achieved by digging up plants in late winter – early spring and dividing them into runners along the roots, then replanting. It will prevent plants from becoming root bound and susceptible to disease, ensuring strong and healthy plants for the new season. 

Planting distance will change with the mechanical equipment used to cultivate and manage the crop. A suitable row spacing is about 50 cm, with runners spaced 10 cm apart in rows. As the plants grow, the rows will become one continuous mass of Mint. 

Step 7: Nutrition management for plant development

Mints require a balanced nutrition program. An annual dressing of animal manure will provide a good balance of major and minor elements. About 10 tonnes per hectare of good quality fowl manure applied mid-winter will provide a good nutrition program. 

Step 8: Tips for growing Mint in a pot

Because it spreads through underground runners, Mint can quickly start to invade areas where you don’t want it. This herb grows well in containers, so you can prevent it from wandering into your landscape by potting it in a pot at least 12 to 16 inches wide. If you still want to add the plant to the garden bed, first sink a plain, lightweight plastic pot into the soil so that the rim is just above ground level. This way, the pot won’t show, but it will still keep the weed in it under control. 

In case you missed it: Growing Pudina In Pots, Mint Planting In Containers

Mint Garden
Image Source

You can also plant Mint in a large half-barrel or other large container and leave it outside year-round. However, do not keep ceramic pots outside during winter. They often break during freeze-thaw cycles as temperatures fluctuate during the colder months. Mint can also be grown indoors in pots. Place the herb in a container with drainage holes and place it where it can get plenty of light from natural or grow light. 

Step 9: Tricks and conditions for growing Mint

Grow Mint well in full or partial sun (shade is best for warmer areas). Prevent Mint from taking over your garden bed by planting it in a container and then planting the container in the ground or a larger container with other plants. Water the plant deeply whenever the top inch of soil is dry. Mint plants with yellow leaves and drooping appearance die from root rot from overwatering and pots without good drainage. 

Mint that is drooping is usually because the Mint is not getting enough light or from over-fertilizing with too much nitrogen. Plant Mint in a well-draining compost and keep the soil consistently moist without saturating it. Ensure the Mint has drainage in the base of the pot or container. Mint prefers full sun or partial shade. Keep Mint under these conditions, and your Mint has the best chance of recovery. 

Step 10: Tips to revive dying Mint in a pot 

Overwatering is the most common cause of Mint dying, creating the perfect conditions for root rot and disease. Lack of sun or poor soil conditions are also possible causes. A pest infestation, incorrect soil pH, and light conditions can cause various problems for Mint that can eventually be fatal. Plant or transplant the Mint into a pot at least 12 inches large to prevent the soil from drying out too quickly and prevent the Mint from wilting. 

Make sure the base of your pot has drainage holes, so the soil doesn’t become soggy. A larger pot or container holds more soil and therefore holds more moisture. A larger pot doesn’t dry out as quickly as smaller pots, which prevents the Mint from wilting, as does a more frequent watering schedule. 

With more soil, your Mint plant’s roots have more room to establish and access the nutrients they need, so the Mint produces more plants and is less prone to disease. Water the Mint as often as necessary to keep the soil moist, and the Mint will recover from its wilted appearance in a few days. Also, it is important to plant Mint in pots with drainage holes in the base to allow excess water to drain and prevent root rot. Avoid trays, saucers, or anything else under the pot that can catch water and muddy the soil. 

The most common causes of Mint dying are: 

  • Under watering (Mint needs consistently moist soil). 
  • Root rot (soggy soil or poorly drained pots can cause Mint to yellow and drop). 
  • Mint dies in pots or pots that are too small or in a pot that lacks a drainage hole in the base so that not too much water can drain out. 
  • Leggy grows with few leaves due to too much fertilizer or lack of sun.

In case you missed it: Mint Farming (Pudina) Information Guide

Mint Plant
Image Source

Step 11: Tips for growing Mint from cuttings 

Yes, Mint can be grown from cuttings, also known as propagating Mint. Propagation means producing a plant that is identical (genetically) to its parent through division, cuttings, etc. To grow Mint from cuttings, you will need: 

  • A small pot (make sure it is at least 3″ in diameter, with good drainage) or a growing area with some potting soil 
  • Water 
  • Rooting hormone 

Before getting into the specific steps, it should be noted that growing Mint from cuttings can be lengthy depending on the method used. If you use growth hormone, it can take up to a year until you can harvest and eat your new Mint plant. To propagate, take a long cutting from a healthy, vibrant Mint plant (think five inches, lower leaves removed, and trimmed just below the newest leaf nodes) directly into the soil, or put the cuttings into a glass. Add water until roots form and transfer to the soil in a well-draining pot or garden bed. 

Step 12: Tips for maximizing the growth of your indoor Mint plant 

Sunlight: Mint needs a very bright indoor location. Outdoors, Mint can tolerate a little shade. But inside, the more light, the better. Otherwise, the plant will stretch for light and become leggy and yellow. If you don’t have a sunny, north-facing window that gets sun for the better part of the day, consider buying a small grow light to put on your Mint plant. 

Water: One of the easiest factors to consider when learning how to grow Mint indoors is watering. 

Fertilizing Indoor Mint – This is another task for growing Mint indoors. From mid-spring to late summer, fertilize your Mint plant every three weeks with a liquid organic fertilizer. Mix it according to the label directions. If you plan to harvest from the plant all winter, fertilize once every six weeks from fall through early spring. Indoor Mint will still be actively growing during winter, so feeding it is a good idea. Just don’t overdo it. 

Step 13: Fertilization and manuring for improving flavor and quality

You should add proper fertilizer to Mint cultivation to get a good crop. Therefore, nitrogen fertilization is essential to encourage plant growth and improve flavor and quality. Fertilizer rates are usually high for good vegetable growth and a maximum number of leaves. Finally, maintaining soil fertility requires frequent nitrogen applications throughout the growing season. 

In case you missed it: Paper Towel Seed Germination Process: for Vegetables, Fruits, Flowers, and Herbs

Mint Farm
Image Source

A Mint plant planted in moist organic soil does not need a lot of fertilizer. Too much fertilizer can damage Mint plants and reduce the production of the flavorful Mint oil in the leaves. It is very important to preserve the flavorful oil in the Mint. Mint plants require very little fertilization; this is one of the best fertilizers for Mint plants. Before planting Mint plants, compost or manure is added to the soil.

Manure adds important nutrients to the soil and improves the soil’s water-holding capacity. In addition, compost has a relatively low concentration of nitrogen, phosphorus, and potassium compared to commercial fertilizers, which is ideal for vigorous growing plants such as Mint. The best compost method is adding a 3-inch layer on top of the soil before painting new pants. For growing Mint in a pot or container, a 2-inch layer is sufficient. 

NPK 16-16-16 is the best commercial fertilizer you can use to fertilize Mint. This ratio formula is found to be effective in Mint plant growth. This fertilizer is good for all types of Mint and does not reduce Mint oil production. Excessive fertilizer application will result in aggressive growth and loss of flavor. With this slow-release mix, wait for the frost to pass and fertilize Mint plants in spring. 

Step 14: Irrigation management to maximize plant growth

Mint needs frequent and adequate irrigation. It is used to supplement rainfall. When the Mint plants are fully developed, they are watered at least three times a week. The crop needs more water in summer. Mint requires a large amount of water compared to other crops for maximum production. Plants should be watered at least twice a week to keep the soil moist during periods of high evaporation. During the summer growth period, plants may require up to 1500 mm of water.

Step 15: Pest and diseases control for more plant growth

Most pests are troublesome in older Mint fields, especially nematodes. Never use weeds from old lands to plant new lands. It can introduce pest problems to new lands. It would help if you adopted natural pest control measures as the first choice. Follow a pest management program. Additionally, early detection and management of pest problems can prevent major problems. Accurate identification of pests and beneficial natural predators is essential.

Finally, use controls that target specific taxonomic groups, food habits, or life stages. Mint rust disease is a serious disease that attacks common Mint species. Disease-free planting material and proper rotation with other crops will help control it. Rust affects the leaves and shoots and will quickly kill the plant if not controlled. Plants can be ignited with a propane gas burner in the spring to destroy diseased material before new shoots appear. 

A wide range of pests can attack it. Important pests in the Mint crop are loopers, leafrollers, slugs, snails, and aphids. Although growing Mint usually presents few problems other than aggressive infestations on the plant, pests can occasionally infect Mint plants. Mint’s most common problems include cutworms, aphids, spider mites, and Mint root borers. Mint can be susceptible to diseases like rust, verticillium wilt, and anthracnose. 

Step 16: Solutions to Mint wilting 

Mint wilting solution is easy to apply. Water the Mint plant frequently to keep the soil moist. Water is needed once every three days in hot climates, while in temperate climates, water may be needed only once a week. Compost is excellent at retaining moisture but has a porous structure that allows excess water to drain away so it doesn’t become soggy.

Careful monitoring of soil moisture by checking the depth of a finger, and adjusting watering frequency accordingly, ensure that the soil does not dry out and your Mint plant does not become dehydrated. Always soak Mint in water to encourage the plant roots to establish themselves properly. 

In case you missed it: Growing Herbs Hydroponically – Farming Practices

Mint Farming
Image Source

Frequent light watering encourages shallow root growth, making Mint plants more susceptible to drought. It’s important to recognize that pots and containers dry out quickly after soil in the garden, especially if the pot is in full sun (Mint can grow in full sun or partial shade). 

Step 17: Pruning for increasing crop growth

Remove the flower stalks if they are visible, as they will degrade the flavor of the Mint. Pinch back the stems regularly to encourage bushier growth. If the plant becomes too leggy or stunted, it can be cut back to an inch above the soil line to regrow with full growth. Pinch the stem tips back as they grow back. Watch out for the plant spreading over the edge of its pot, as it is possible for Mint stems from taking root and spread if they come into contact with your lawn or garden soil. Cut them back to prevent unwanted spreading. 

Step 18: Harvesting Mint for more yield

Mint plants do best when pruned frequently. Pick individual leaves or twigs at any time during the growing season. The best flavor is before flowering. If you have to harvest a large amount of Mint, cut the plants almost to the ground, leaving a few pairs of leaves. The plant will grow again. 

Harvesting Mint is key to the plant’s health and is easy to do. Pick leaves as needed, or use pruning shears or pruning shears to cut off large shoots to within an inch of the ground. Pinch off flowers as they appear to extend the harvest cycle. Allowing the plant to grow longer than this point will cause the stems and leaves to become woody and brittle. 

Step 19: Mint yield per acre

The crop yield is about 100-125 quintals per acre of fresh herbs containing 0.5 to 0.75% oil.

Top 17 Steps/Ways/Methods to Boost Pineapple Yield: How to Increase Production, Size, and Quality

0

Pineapple is botanically called Ananas comosus, an herbaceous plant growing up to 1.5 meters in height. The stem is stocky with waxy, thick leaves. Pineapple is the important commercial fruit of India. It is the most important fruit, with large production in tropical and sub-tropical regions, and is highly appreciated by consumers.

Steps/Ways/Methods to Boost Pineapple Yield
Image Source

The Pineapple plant has many distinctive morphological, anatomical, and physiological characteristics that determine important aspects of Pineapple crop management, such as flower induction, water use, and plant breeding methods. However, harvesting high-quality sweet fruits requires more attention to soil nutrients. Proper planting and regular fertilization preparation can do wonders for a Pineapple plant. Let’s check out the top 17 steps/ways/methods to boost Pineapple yield below.

Steps/ways/methods to boost Pineapple yield

Step 1: Soil preparation for high fruit production

Pineapple cultivation is limited to the high rainfall and humid coastal areas of peninsular India and the hilly areas of the country’s northeastern region. Firstly, you need to understand that Pineapple thrives best on the well-drained sandy soil of the nature of its roots. The roots are fragile and can only grow in loose, well-aerated soil with relatively good water retention. Therefore, silty soil and clay soil are not recommended for growing Pineapple.

Pineapple plants prefer sandy, loamy soil with a neutral to slightly acidic pH. Prepare the soil for Pineapple plants by adding a small amount of compost or compost to the top 12 inches of soil, ideally a week before planting. Compost helps the soil retain water and important nutrients, helping the Pineapple plants’ roots grow. Applying a thin natural mulch layer, such as wood chips or bark, after planting helps improve the nutrient quality of the topsoil. 

Step 2: Land selection for Pineapple growth

The selection of a good piece of land is essential before starting Pineapple cultivation. Land preparation includes primary and secondary tillage, land reclamation, land leveling, and creating ridges and furrows. It is better to select plain land instead of a sloppy land. The soil should be such that the Pineapple receives sunlight throughout the day. 

In case you missed it: A Step-By-Step Guide to High Density Fruit Farming: For Guava, Banana, Mango, Pineapple, Lemon, Papaya, Litchi, and Apple

Pineapple
Image Source

Sunlight helps Pineapples to set fruit quickly. Also, grow Pineapple in half shade. Unwanted materials, large stones, weeds, and other materials that may affect the growth of the Pineapple tree are removed from the site. An important task in preparing the land is designing the garden layout. Make some maps or lines depending on the planting system, whether square, rectangular, hexagonal, or triangular. And choose a place to plant in a garden setting.

The first step in Pineapple production is the land preparation for Pineapple planting. Growers must treat the soil, including applying fertilizers, herbicides, and pesticides. Then, they prepare the beds, clear and weed, and burn off excess plants; this requires herbicides. The final step in soil preparation is applying chemicals designed to kill any parasites already in the soil, also known as nematicides.

Step 3: Tips to increase the size of Pineapple fruit 

Removal of suckers, slips, and hapas during plant growth and fruit development will accelerate fruit development and increase fruit size. However, new planting material will be available after harvesting the fruit before allowing a few suckers, slips, or hapas to germinate. 

Step 4: Are coffee grounds good for Pineapple plants? 

Coffee grounds have high nitrogen levels, and Pineapples need nitrogen. Sprinkle on the coffee grounds and sprinkle some water over it. 

Step 5: Select the most important varieties for more growth

India’s most commercial Pineapple varieties are Kew, Giant Kew, Queen, Mauritius, Jaldhup, and Lakhan. Among these varieties, the Queen, Giant Kew/Kew, is widely grown in the northeastern parts of India and is preferred by fruit juice makers. 

There are different types of Pineapples, but Pineapples are divided into three major groups: the Cayenne, the Queen, and the Spanish. 

  • Cayenne group – Smooth Cayenne, Giant Kew, Kew, Typhoons, Hilo, Charlotte, Champaka, Baronne de Rothschild 
  • Queen group – Queen, James queen, Victoria, Comte de Paris, Common rough, Mac Gregor, Alexandra Ripley queen 
  • Spanish group – Red Spanish, Singapore Spanish, Selengor green, Nangka, Gandol, Betek, Castilla, Espanola roja, Cabezona, Pina de Cumana.

Step 6: Pineapple growing stages for more development

Pineapples can be propagated along the crown of the plant, the topmost leafy part of the fruit you usually discard. Also, they can be cultivated from shoots that grow from the base of the plant, known as pups. A Pineapple plant can take 14 to 18 months after planting to reach maturity and produce flowering stems. Then, it takes another 50 days for the first flower to bloom.

In case you missed it: High Density Pineapple Planting – Farming In India

Pineapple Plant
Image Source

Although each flower will only live for a day, the plant will flower for about a month before setting fruit. Each Pineapple plant produces a single fruit. Once the Pineapple plant has flowered, it can take five to seven months for the fruit to develop and ripen. Pineapples should be harvested when one-third to two-thirds of the skin has turned green-yellow. It is when the fruit is at its sweetest. The fruit can be harvested while it is still green, and the plant is allowed to ripen. 

Step 7: Best practices in Pineapple cultivation 

  • Pineapple Growing Season in India – Rainy Season 
  • Pineapple Growing Time – 5 to 6 months; old suckers flower in 12 months, but flowering takes 19 to 20 months after crowning. 
  • Pineapple Flowering Time – February to April 
  • Pineapple Fruiting Time – July to September is the Pineapple fruiting season. 

Step 8: Tips for making Pineapple farming more profitable

Mark the plants that produced the largest, sweetest, and juiciest fruit, so you know they are worth planting as suckers. Avoid plants that produce long fruit stalks. The fruit should be as low as possible, or it will fall and burn in the sun.

However, it is initially tempting to choose plants that produce lots of seeds, keep in mind that seeds are produced at the expense of fruit. You get bigger, better fruit from plants that produce fewer seeds. Pineapple plants have small root systems and rely heavily on their leaves for water and nutrients. So, there is no objection to digging and transplanting them. 

Step 9: Planting systems for getting more fruit yield  

Four different planting systems viz. Flatbed, furrow, contour, and trench are followed. Planting systems vary depending on soil and rainfall. Terracing or contour planting is adopted on slopes, which helps prevent soil erosion. Pineapple is mainly planted only at the beginning or end of the monsoon. However, September is the best time to plant it in the NEH region.

About 85% of plants bear fruit and are ready for harvest within 18 months of planting. Planting Pineapple on slopes is better for higher yields due to less soil loss. Pineapple farms in Costa Rica use popular propagation methods such as crown grafting, planting seeds or suckers, and sometimes seeds or tissue culture are also used by Pineapple growers. 

  • Pineapple suckers or seeds: Choose suckers or slips weighing 350 to 450 grams; this is considered to yield more platelets than one mother plant.
  • Growing Pineapples from Cuttings: Kew Pineapple variety can be grown from Pineapple leaf cuttings. To do this, you should remove the dried leaves from the base of the Pineapple sucker and then trim it with the help of a trimming tool. 
  • Slips: A solution of 5 ml of 0.1% diazinon in 4.5 liters of water is prepared to kill insects on slips. 

Step 10: High-density planting distance for more production

High-density Pineapple cultivation is recommended for commercial viability. Planting density 63,400 plants per hectare. (22.5 x 60 x 75 cm) is ideal for subtropical and mildly humid conditions.

In contrast, the plant density for hot and humid conditions is 53,300 plants per hectare spaced at 25 cm apart from plant to plant within a row about 60 cm from row to row and from trench to trench about 90 cm, about 25 x 60 x 90 cm provides high crop yield. In the northeastern states’ rainier, more fertile, and mountainous regions, a lower density of 31,000 plants/hectare is recommended.

In case you missed it: Organic Pineapple Cultivation – Farming In India

Pineapple Farming
Image Source

High-density planting: 70-105 tonnes per hectare yield may be obtained under high-density planting; yield/unit area increase of 45-85 tonnes/hectare can be achieved. Additional benefits of high-density planting include:

  • Reduced weed infestation.
  • Fruit protection from sunburn.
  • Increased production of propagules (suckers and slips)/unit area.
  • No plant lodging. 

Step 11: Nutrition factors to promote good root development 

Nitrogen and potassium are the important nutrients for Pineapple. Nitrogen is the main factor affecting yield and potassium in fruit quality. Phosphorus application is recommended in the early stages of growth to promote good root development. A dose of nitrogen, P2O5, and K2O at 12,4 and 12 grams/plant/year is optimum under Jorhat conditions. No response to the request has been seen.

However, 4 grams P2O5/plant increases fruit weight and yield in the rattan crop. Plants receiving 12 grams K2O/plant/crop produced higher yields under irrigated and rainfed conditions without negatively affecting fruit quality. Application of N and K2O each by 12 grams/plant is recommended. P application is not required. However, if the ground is poor in P, 4 grams P2O5/plant can be applied.

N should be applied in 6 divided doses. The first dose of nitrogen can be given two months after planting and the last dose 12 months after planting. K should be applied in two divided doses. Full P and half K can be applied at the Time of planting and the remaining K six months after planting. Fertilizers should be applied under rainfed conditions when moisture is available.

Step 12: Weeding and mulching for more Pineapple production

Weed control is particularly important from an economic point of view for any crop. Nutgrass is the most common type of weed in Pineapples. Since hand weeding is a laborious and cumbersome process, chemical herbicides are recommended. Diiron is recommended in combination with Bromacil as a pre-emergence spray. The pre-emergency spray is 0.6 kg Dirons with 0.8 kg Bromacil.

It was repeated five months after the first application with half concentration. If Pineapple is being grown as a rainfed crop, mulching is an essential step. The main purpose of mulching is moisture conservation and weed control. Using black polythene film is the easiest and least labor-intensive method of mulching.

However, using a mulch of leaves and straw and spreading them into the soil between Pineapple plants is a more organic mulching method. Maintaining soil moisture and weed growth are important issues in Pineapple cultivation. Mulching of field with black polythene followed by spraying grass/sawdust gives better yield and quality and inhibits weed growth. 

Step 13: Irrigation management to maintain year-round production 

Pineapple cultivation is mostly done under rain-fed conditions. Supplemental irrigation helps produce good-sized fruits in areas with high rainfall. Irrigation also supports off-season planting to maintain its year-round production. In case of low rainfall and hot weather, irrigation can be provided once in 20-25 days. 

Pineapple trees can absorb water through their leaves. They don’t need a lot of water, so wait until the soil is dry before watering, and then water the leaves and soil. They are more likely to be affected by excess water than under water. 

In case you missed it: Pineapple Farming Project Report, Cost and Profit

Pineapples
Image Source

Step 14: Pests and diseases control for plant growth

The mealybug is the most important pest of Pineapple. Nymphs and adults suck sap from leaves and soft twigs. Monocrotophos (Nuvacron) 2.5 grams/liter of water for insect control and Dimethoate @ 2.5 ml/liter of water at the fruiting stage is recommended to manage the pest. Heart rot or stem and root rot diseases are common Pineapple diseases.

Green leaves turn yellow-green, and tips turn brown. When infected, the central whorl of leaves will come out with a soft pool. The leaves’ base shows rotting signs and emits a foul odor. The disease is mainly controlled by good drainage, proper selection of healthy planting material, and chemical preventive treatment with Dithane Z-78 (3 grams/liter water).

Step 15: Fruit abnormalities symptoms and their control

It is a major challenge in Pineapple growing. Pineapple should be the perfect fruit with the perfect elongated shape and just the right ‘Pineapple’ taste. Otherwise, they lose market value. Although infestations are uncommon in Pineapple cultivation, different fruit types commonly threaten the Pineapple crop. Some of them are as follows: 

Multiple crowns: Sometimes, Pineapple fruits have more than one crown (25 crowns in some extreme cases). As a result, the apex of the fruit becomes wider and flattened. The fruits are corcky and have a mild flavor. It is most commonly seen in Kew fruit which makes it unsuitable for canning.

Crown and fruit fasciation: Fasciation makes Pineapples almost useless for consumption. High soil fertility and warm weather promote plant growth resulting in attractiveness. Such plants take longer to flower than normal plants. In extreme cases, the fruit may be flattened and appear twisted with numerous crowns. 

The collar of slips: The presence of numerous slips from the stem near the base of the fruit or sometimes from the fruit is the result of this condition. Due to excessive slip growth, the resulting fruit is small, with knobs at the base. Generally, high nitrogen fertilization, heavy rainfall, and relatively low temperature combine to produce slips. 

Step 16: Harvesting tips Pineapple fruit development

Pineapple plants flower about 12-15 months after planting, and the fruit becomes ready 15-18 months after planting, depending on variety, Time of planting, type, and size of planting material used during the fruit development. Under natural conditions, Pineapples are harvested in May-August. The Pineapple fruit ripens about five months after flowering. Irregular flowering results in prolonged pruning.

In case you missed it: Pineapple Farming, Cultivation Techniques – A Full Guide

Pineapple Fruit
Image Source

A solution of Etheral (@ 100 ppm) is applied to plants one month before flowering to achieve uniform flowering (more than 80%) in the main season. Fruits are harvested for canning when the base of the developing fruit is slightly deformed. Table fruits are preserved until they turn golden yellow. After harvesting, the plant crop can be maintained as a ratoon crop for three to four years, depending on soil conditions.

Ratooning in high-density plantings showed that the average fruit weight in the first and second ratoon was 88% and 79% of the plant yield, respectively. The plant stand is also progressively reduced, resulting in 49 and 46 percent (approx.) reduction in the first and second crops, respectively.

Step 17: Pineapple yield per hectare 

The average yield is 50-80 tonnes/hectare depending upon spacing and cultural practices. 

How to Start Banana Farming in the USA: A Step-By-Step Guide to Planting to Harvesting

0

Banana is a fruit of the Musaceae family and is one of the world’s most important fruit crops. Banana is the most common and profitable fruit. Bananas are one of the most enjoyed fruits in the United States. Bananas are so cheap and widely available that decades ago, they overtook apples to become the most consumed fruit in the country. Bananas are considered berries and grow in clusters hanging from the plant. 

How to Start Banana Farming in the USA
Image Source

Bananas grow best in warm, humid climates and are imported from Central America, including Panama, Costa Rica, Guatemala, and Ecuador. Banana fruits come in all different colors, sizes, firmness, and taste. There are over 1,000 different types of Bananas, about half of which are inedible. Let’s check out more information on how to start banana farming in the USA below.

How to start Banana farming in the USA

Banana varieties available in the USA

Cavendish Bananas – These Bananas are the most common type, readily available in supermarkets in the United States. They are available from young green to fully ripe, from smooth yellow to deep yellow with brown spots when ripe. You can add them to smoothies, pancakes, or Banana bread. 

Cavendish Bananas are the most common variety. These are the long yellow, slightly sweet Bananas in supermarkets around the US that range from underripe green to perfectly ripe and still firm mellow yellow to deep yellow, very soft and brown when ripe with one or two brown spots. The perfect ripeness depends on personal taste. They are grown throughout Central America, and their production is essential to the economies of these regions.

Apple Bananas – Apple Bananas are exceptionally sweet, hence their other name, Candy Apple Bananas. They are grown in the tropical rainforests of Hawaii. Their flesh is firm and has a slight pink tone. It is perfect for snacking or using in desserts. It is especially suitable for adding to fruit salads and other raw preparations because it doesn’t brown as quickly as other Banana varieties. 

Macho Plantain – Macho plantain is common in Florida. It is the popular Banana variety grown in the United States. This variety has a deep sweet and sour flavor, making it perfect for sautéing in butter, roasting, or grilling. 

Manzano Banana – The Manzano Banana is sweeter than the Cavendish Banana with a hint of crunchy apple strawberry flavor. They are grown in Central and South America, the Caribbean, and Mexico. They are small and plump with thoughtful yellow skins that turn black when fully ripe. 

Plantain – Plantains are a subgroup of Bananas known as cooking Bananas. They are high in starch and are commonly used in savory dishes. They are not usually eaten raw. They are a staple food in West and Central Africa, the Caribbean Islands, and Central America. 

Are there Banana farms in the US? 

The largest Banana producer in the USA is Hawaii, followed by Florida. Banana production in Hawaii is approximately 8,090 MMT to 13,181 MMT. 

In case you missed it: A Step-By-Step Guide to High Density Fruit Farming: For Guava, Banana, Mango, Pineapple, Lemon, Papaya, Litchi, and Apple

Banana Farming
Image Source

Suitable soil for Banana farming in the USA

Bananas do best on flat (slope 0-1%), well-drained, deep organic matter soils with a pH of 5.5–7. Banana varieties perform well in sandy, muck, loamy, and calcareous marl and rocky soils mainly found in South Florida. The most important factor is soil drainage.

In areas susceptible to wet or flooded soil conditions, sufficiently high beds or mounds should be created, and the land should be properly engineered (sloped) for drainage. The beds will keep most of the root system above the saturated soil layer, and the proper slope of the pits between the beds allows excess water to drain from the ground.

The best location for Banana farming in the USA

The USA is the largest consumer of Bananas; the only real locale for them would be Florida and Hawaii. The largest Banana producer in the USA is Hawaii. The tropical island grows the popular Cavendish Banana variety while producing the local favorite Hawaiian Apple Banana. Florida is another state that does commercial Banana production but on a much smaller scale than the Aloha State.

Florida prides itself as the largest exporter of Bananas in the United States. The Sunshine State produces Thai and Bluggoe (cooking) Banana varieties. Banana is most notable in Texas, Louisiana, California, Arizona, Mississippi, Georgia, Alabama, South Carolina, and coastal North Carolina (outside of Florida and Hawaii). In Hawaii, yields of 12,000, 15,000, and 35,000 lb/acre can typically be achieved respectably for ‘Brazilian,’ ‘Bluefields,’ and ‘Cavendish.’ Yields of 75,000 lb/acre have been reported under optimal conditions.

In improved plants in Central and South America, yields can exceed 40,000 lb/acre. Banana plants grow rapidly and usually reach 20-40 feet in about 9 months. As they prepare for harvest, pickers need to look for tarantulas. A Banana plant can produce up to 240 Bananas; once they are picked, it doesn’t take long for new Bananas to appear. 

Commercial Banana production in the USA

Commercial Bananas are grown on only 16,000 acres in the United States. That’s a very small area – less than 0.01% of the total land in the United States. Banana cultivation in Hawaii has followed an increasing trend from 13,181 MMT to 8,090 MMT. Hawaii primarily produces Bananas of the traditional Cavendish classification and Hawaiian apples, which are sold in local markets because of high employment and land. 

The largest exporter of US Bananas is Florida, which produces most of the Thai and cooking Bananas (Bluggoe variety). Also, US Banana producers are looking for opportunities in the organic segments of the Banana market in Florida, California, Mississippi, Texas, Alabama, South Carolina, and Georgia. Bananas in Florida are about 500 acres valued at the US $2 million.

In case you missed it: Top 20 Steps to Boost Your Banana Fruit Yield: How to Increase Fruit Size, and Production

Banana Farm
Image Source

Other states in the USA that remain popular locations for independent Banana farming, typically only exported at a domestic level, are Georgia, Louisiana, Mississippi, Arkansas, Texas, Oklahoma, Alabama, South Carolina, North Carolina, Virginia, Arizona, and California. These states produce a variety of varieties depending on the region, including the Cavendish, Bluggoe, Lady Finger, Red Dacca, Ice Cream, Goldfinger, Latundan, Pisano Awak, and Balbisinia subtypes.

Banana farming in the United States is diverse, with some areas of the country maintaining plantations of a wide variety of Banana trees as perennial or near-perennial planting systems. It is most notable in Texas, Louisiana, California, Arizona, Mississippi, Georgia, Alabama, South Carolina, and coastal North Carolina (outside of Florida and Hawaii).

Other regions of the country (northern Arkansas, southern Missouri, mountain Tennessee, southern Kansas, the far southern Midwest, and along the Ohio River, Kentucky, and Virginia) have a climate similar to the Banana-growing region of the inland South. Banana cultivation is mainly in central and eastern China (Sichuan, Anhui, Zhejiang, Hubei, Jiangsu, Henan, Jiangxi, Hunan, Chongqing, and Guangzhou provinces) and is more seasonal. Also, Banana plants are grown commercially in Puerto Rico, Guam, and American Samoa. 

Can Bananas grow in Texas? 

Trees will produce heavy fruit in frost-free areas. Banana fruits can be grown in most parts of Texas. These plants are tropical so they will grow well in Texas. Fruit production is favorable in warmer regions, and trees are used as ornamental specimens in cooler regions. 

Why are most US Bananas grown in Florida and Hawaii? 

Bananas grow best in tropical climates. Where the temperature is hot, and the air is humid. In humid climates, they grow rapidly and produce large fruits. It means farmers get more Bananas for the same amount of effort. So, if a person or company wants to grow Bananas on a commercial scale, they will select a tropical region because they will earn more profit.

Both the states of Hawaii and Florida have a tropical climate. Texas, California, and Arizona get hot and can sometimes be humid. But by and large, it is a very dry heat which is not suitable for growing Bananas. Other states across the US are hot in the summer but cool in the winter. And as a result, you can’t grow them year-round like you can in Florida and Hawaii. 

Can Bananas grow in Florida? 

Bananas will do best when planted in moist, fertile soil in a sheltered location with full sun. Because most Florida soils are sandy and have low fertility, Bananas require frequent fertilization (4 to 6 times a year) for high growth and yield rates.

Tips for Bananas growing in California

Bananas can be grown successfully here in Southern California if they are provided with the right soil conditions and protected from below-freezing temperatures. 

Can you grow Bananas in San Francisco? 

Edible Bananas usually grow in areas between 30 degrees south latitude and 30 degrees north latitude. For example, California, San Francisco, is at 37 degrees north latitude, San Diego is at 32 degrees north latitude, and Miami, Florida, is at 28 degrees north latitude. 

Best climate and site for growing Banana in the USA

  • Bananas grow best in the humid tropics. In the USA, Bananas can be grown in USDA zones 9 through 11. Some crops can survive with protection in colder zones, as cold as zone 5. 
  • Banana trees grow best in full sun, but when high temperatures, the leaves, and fruit can become sunburned and scorched in the high sun. Check the growing conditions of the variety you choose to grow. 
  • In some locations, some Banana varieties are best planted in partial shade—planting Bananas in fertile, loamy, well-drained soil.
  • Bananas prefer a soil pH between 5.5-7.0. 
  • Protect Banana trees from wind for maximum crop yield. Banana trees are susceptible to wind damage; they can be dislodged and blown away by the wind. 
  • Bananas are best planted in a block or clump of several plants. Block planting allows shallow-rooted plants to support each other. Block planting also increases humidity around the plants. Plants in centers or blocks produce the best fruit because they are sheltered from the wind. A block can have 5 rows of 5 plants in each row; each plant is about 5 feet apart. 

In case you missed it: Top Varieties of Bananas in India: Best List, Banan Types for Higher Profits, and Yield

Banana Plant
Image Source

Planting Banana Trees in the USA

Place Banana trees in an area with at least six hours of sunlight daily. If Banana trees are kept inside, place them near a sunny window. They are also sensitive to wind, so make sure you place them near a wall or behind a row of evergreens. Additionally, Banana trees prefer slightly acidic soil. Make sure you can test the soil pH level with a kit from your local gardening store. Increase the soil acidity by adding peat moss or a high-nitrogen fertilizer.

In terms of soil, keep the soil moist but not oversaturated. You can also increase the soil drainage by adding organic material such as peat moss. Bananas are grown from root divisions or cuttings. A portion of the root is cut from the mother plant and replanted. The division may or may not include the growth of leaves, called suckers. It is best to use root division with leaf growth.

Choose a sucker from a strong Banana plant and choose a sucker that has small and spear-shaped leaves. A 3- or 4-foot-long sucker is best. Small suckers take longer to fruit, and the first bunch of Bananas will be smaller. Cut the suckers from the main Banana plant with a sharp blade. Cut downward between the mature plant and the sucker. Cut the sucker with a pruning knife or saw if a spade isn’t sharp enough.

Roots should be included in the sucker. Replant the division, so the plant roots are covered at about the same level they were growing with the mother plant. If you plant root divisions without leaves, keep the division 1 to 2 inches below the ground. 

Banana tree care 

  • Although most species grow best in warm climates, some cold hardy Banana trees exist. Choosing the right planting spot is key to making maintenance easy if you’re planting a Banana tree outdoors. 
  • Grow this plant in a location protected from strong winds, as it is susceptible to damaged leaves. Prepare your planting spot by adding some compost to the soil. And, remember you have enough space for the height and spread of your particular species. 
  • During the growing season, spring to fall, Banana trees are water hogs. You may need to water daily, especially in hot weather, to maintain adequate soil moisture. Plants will also need regular fertilization during the growing season. Bananas form in late summer in clusters called hands. Once the fruit is green but plumped up, the stalk can be cut off and stored in a cool, dry place to ripen. 

In case you missed it: Dwarf Banana Farming -Plantation In India

Banana Farming
Image Source

Irrigation management

Banana trees are tropical and grow in rainforests, so they need a lot of water and moisture in the air. They do best when planted in groups close together, as this helps retain moisture in the leaves. Water regularly to ensure the soil is evenly moist but not soggy. Avoid overwatering the plant, which can cause root rot. 

Banana Farming Importance in the USA

1. Harvesting is easy – Bananas grow in one bunch on one main stem. So, when they’re ready, growers cut out the main stem with a swipe of a knife, and then they can take all the Bananas at once. Compared to other fruits, you have to pick them one by one; they take very little time to harvest. Therefore, Banana farmers do not have to spend much on labor costs. 

2. Easy to transport – Bananas grow in bunches and don’t get damaged when you stack them on top. They can also be ripened upon arrival. Bananas are very hard when they are still green, and don’t bruise them when you stack them on top of each other. Also, they can be green when harvested and ripen over time. It means they will hold up well even during long transport times. 

3. They grow year-round – Banana plants produce one or two main Banana stems. Several bunches of Bananas grow on each stem. But, after your producers harvest the Bananas, the next Banana stems are not as big and don’t produce as many Bananas. So, farmers cut down the Banana plant once they removed all its stems.

When they cut down a Banana plant, another Banana plant grows in its place. When they cut it, a new shoot grows from the left stump, regardless of the time of year. It means farmers have a continuous harvest and can keep prices low regardless of the season. 

US market for fresh Bananas 

Unlike the EU, the US Banana market is free from tariffs or quantitative import restrictions, making it a competitive market. Bananas are still the largest fresh fruit imported into the United States by value or volume. Guatemala is the largest supplier of fresh Bananas to the United States. The USA has become an important market for Guatemalan Bananas, accounting for 85-90 percent of total Banana exports.

Ecuador maintains its position as the second-largest supplier of fresh Bananas to the United States, with a market share of 24 percent. The main conventional Banana brands in the United States are Dole, Chiquita, Del Monte, Turbana (Uniban), and Bonita (Exportadora Nobua). It helps limit the plant to three or four stalks of different ages for good fruit production. Must be the oldest and longest flowering and fruiting.

The second should be one-half to one-third the size of the first. And finally, there should be one or two young Banana plants that are six to three feet tall. Bananas in South Florida should also be watched for signs of nematode damage or signs of Fusarium wilt and Sigatoka disease.

In case you missed it: Red Banana Farming, Cultivation, Planting Methods

Drone in Banana Farm
Image Source

The harvesting season for Banana farming

Bananas are usually ready for harvest in late spring or early summer. The best time to pick your Bananas is when the fruit is still green. After harvesting the Banana, cut your tree back to about 30 inches and allow the trunk to dry for two weeks before removing it. Dwarf Bananas are ready for harvest 11 to 14 months after planting, while tall cultivars take 14-16 months to harvest.

Depending on climate and cultural practices, it usually takes 90-120 days for a bunch to mature after shooting. Banana maturity is indicated by drying the upper leaves, the color of the fruit changing from dark green to light green color, and the tendency of the flower tip of the fruit to fall off when lightly touched by the hand.

Conclusion 

Bananas grown in the United States are mostly grown in Florida and Hawaii. The reason is that both these climates are tropical. Bananas grow large and fast in tropical climates. So, many commercial Bananas are grown there because of the companies that make the most money. Commercial Banana farming in the USA is relatively limited in scale and economic impact.

While Americans eat about 26 pounds (12 kg) of Bananas per person each year, most of the Banana fruit is imported from other countries, particularly Central and South America, where the United States previously occupied Banana plantation areas, and Its import is controlled. Bananas by various fruit companies, such as Dole and Chiquita.