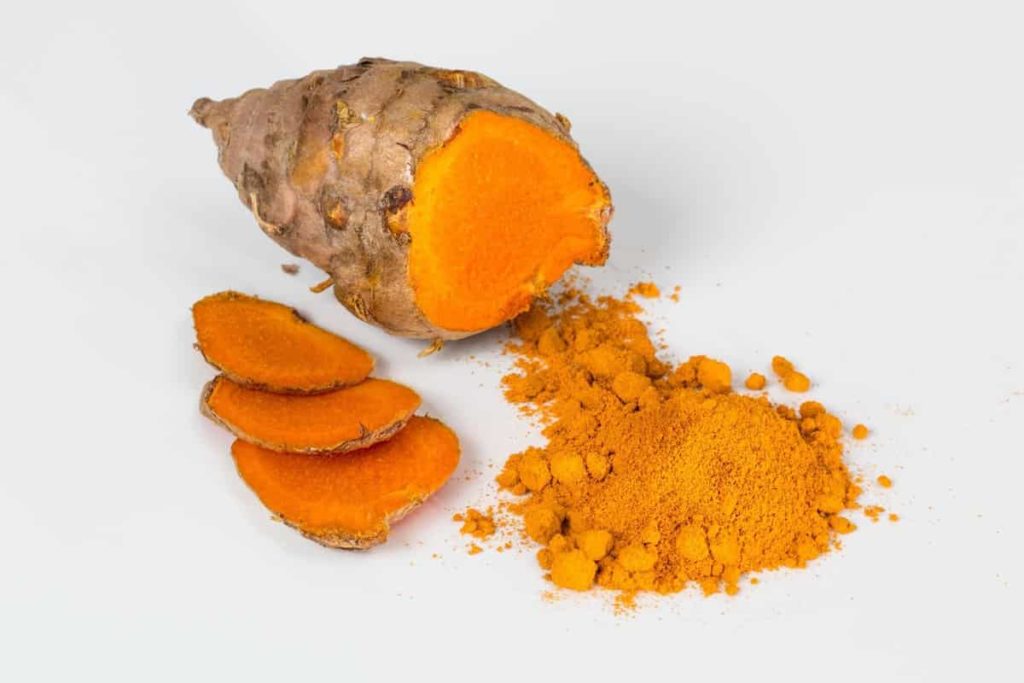
Turmeric is a flowering plant belonging to the family Curcuma Longa, Zingiberacea, whose roots are used in cooking. Rhizomes are used fresh or boiled and dried in water, after which they are ground into a deep orange-yellow powder and usually used as a dyeing and flavoring agent. Let’s check out the Top 20 steps to boost Turmeric yield below.
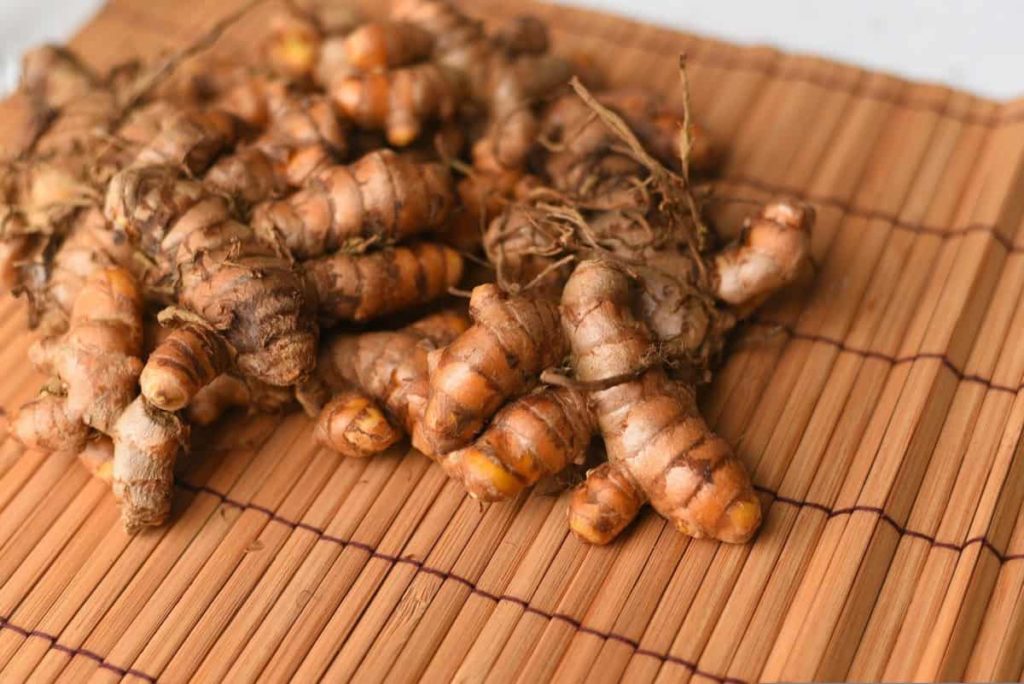
Top 20 steps to boost Turmeric yield
Step 1: Soil requirement for more crop growth
The soil used for Turmeric cultivation should be rich and soft. It grows well in well-drained sandy loam or loam with small sand. It grows on various soils from sandy loam, light black, clay to red soils with a pH range of 4.5-7.5 and should have good organic matter. Clay is essential for growing Turmeric, which contains a lot of humus. However, it can also grow in well-drained sandy soils.
The second soil type suitable for Turmeric cultivation is red, ash loam, or light black soil. In other words, any kind of clay with a natural drainage system is ideal for growing Turmeric. Water should be drained and not frozen in place. In addition, soil acidity should be neutral. Alkaline or acidic soil damages the rhizome of the Turmeric plant, and it cannot grow.
In other plowing fields, fertilizer and organic manure are applied at 8 tons per acre or 6-7 tractor-trailers per acre. Organic matter is the key to the good growth of Turmeric, and it is also known to improve air circulation in the soil for smooth movement of roots. Turmeric, being a root crop, needs to loosen the soil as much as possible.
Step 2: Land preparation for Turmeric cultivation
When cultivating Turmeric and preparing the ground for cultivation, beds should be prepared with a height of 15 cm and a width of 1 meter. The length can be such that blisters and skins must be prepared for Turmeric cultivation if crops are to be irrigated. Rhizomes are planted in shallow ridges.
In case you missed it: Organic Turmeric Cultivation in Polyhouse (Haldi Farming)
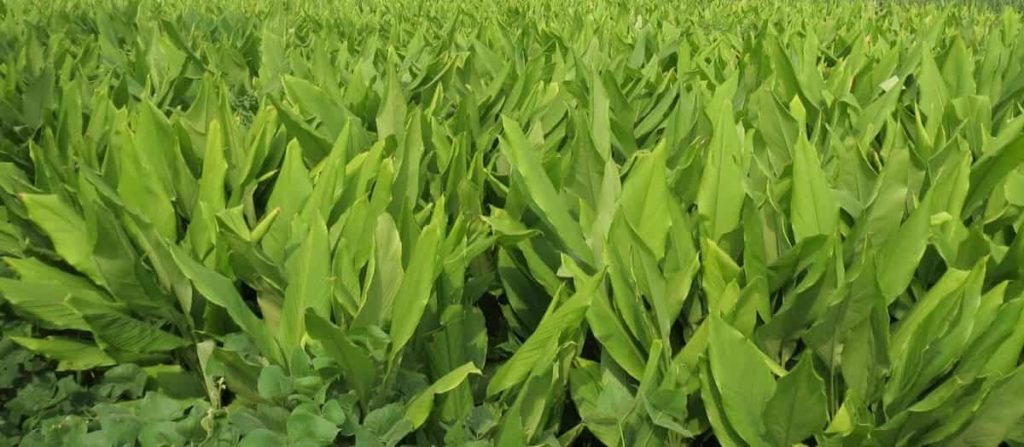
Step 3: Tips to increase Turmeric production
Increase in potassium utilization rate in KCl form, increase in quantity and use of nutrients and increase in Turmeric production and quality. From the results, the application of 260 kg K2O per hectare should be recommended.
Step 4: Management practices in high Turmeric yield
- Use of improved varieties
- Implementation of drip irrigation and planting on drip irrigation as well as fertigation
- Implementation of improved cultivation methods on raised beds
- Implement integrated plant protection measures
Step 5: Select popular Turmeric varieties
Several varieties are available in the country, and the name knows most of the areas where they are grown. Popular crops are Sugandham, Erode local, Alleppey, Duggirala, Tekurpeta, Moovattupuzha, and Lakadong. High-yielding varieties like Suguna, Krishna, Sudarshana, Sugandham, Roma, and Ranga can be used for commercial production.
Step 6: Planting method for Turmeric growth
The planting method works best for Turmeric crops under a drip irrigation system. The crop needs a better bed method for better yield under a drip irrigation system. It is essential for the growth of the rhizome and maintaining the condition of the field, and when combined with a proper drainage system results in higher crop yields.
This method also helps farmers to use better tools for intercultural activities. The space between the two beds is helpful for herbs, spraying, and intercultural activities. The drip irrigation system is useful for maintaining the field capacity in the bed.
Step 7: Spacing for more production
In pits, small pits with hand hoe are made in rows with a spacing of 25 cm x 30 cm, and it is covered with soil or dry powdered cattle manure. The appropriate distance between plants in skins and tops should be between 45-60 cm and 25 cm.
Step 8: Planting material for Turmeric plant growth
If you are cultivating it for the first time, you can buy them from the market or local agricultural establishment. However, if you opt for the organic growth of Turmeric, you should collect seed rhizomes from organically cultivated fields. Both the mother and finger rhizomes are used for sowing purposes. The mother rhizome can be sown entirely or divided into two parts with a complete bud.
In case you missed it: Turmeric Cultivation Income, Project Report, Yield, Profits
Step 9: Seed rate and seed treatment for better yield
For sowing, fresh and diseased free rhizomes (mother rhizomes and fingers) are selected. The 6-8 quintal seed rate is sufficient for sowing one acre of land. Treat seeds with rhizome treatment Quinalphos 25EC by 20ml + Carbendazim @ 10gm / 10-liter water before sowing and preparing a solution. Then soak the rhizome in the solution for 20 minutes. It protects the rhizomes from fungal infections.
Step 10: Fertilizer is best for Turmeric growth
Turmeric grows best with a fertilizer that contains the following formula: N: P205: k20 in a ratio of 1: 1: 2. If your soil does not have good enough nutrients, you can use N: P2O5: K2O in the ratio of 3: 2: 6.
Fertilization is also usually done through drip irrigation. So, you can consider online drips for water-soluble fertilizers. The first few weeks need regular watering, and the bed should be moist. Germination occurs in 3-4 weeks, and significant growth can be seen. The fertilizer application will work after the plant grows. The water used for irrigation of Turmeric does not have to be from any particular source, but the pH level preferably is neutral.
Urea is a requirement for the Turmeric plant. It requires at least 20 kg of nitrogen in the soil every month. Therefore, 20-25 kg urea is necessary for the first six months of the 9-month harvest. The application should be regular and can be by drip or general application.
Step 11: Organic management practices for getting more yield
For organic production, use traditional varieties depending on local soil and climatic conditions, resistant or tolerant to diseases, pests, and nematode infections. All crop residues and agricultural wastes, such as green loppings, crop residues, cow dung slurry, poultry manure, etc., can be recycled through fertilizers, including vermicomposting, to maintain a high soil fertility level. Organic farming is a crop production method that encourages sustainable agriculture by increasing the biological cycle in nature.
The goal is to produce healthy, nutritious, pollution-free food that maximizes farm resources and minimizes off-farm resources. Agricultural fertilizer @ 40 tons per hectare with vermicompost @ 5-10 tons per hectare and mulching with green leaves @ 12-15 tons per hectare can be applied at 45 days intervals. Based on soil tests, lime/dolomite, rock phosphate, and wood ash must be used to obtain the required amount of phosphorus and potassium.
In case you missed it: Turmeric Cultivation in Polyhouse (Haldee) for Profit
When a trace element deficiency situation limits production, limited use of mineral/chemical sources of micronutrients through soil or foliar sprays is permitted by standard-setting or certifying organizations. In addition, complementing appropriate microbial cultures of oil cakes such as neem cake (2 tonnes/hectare), composted coir peat (5 tonnes/hectare), and Azospirillum and phosphate solubilizing bacteria will improve fertility and productivity.
Step 12: Increase Turmeric production with precision irrigation
India is the largest Turmeric producer globally, as it is cultivated globally, of which India contributes about 78-80%. Although Turmeric growers face some challenges, proper irrigation helps in increasing the quantity and quality of Turmeric production. In addition, with adequate irrigation in Turmeric cultivation, Turmeric growers can save valuable resources like water, money, and labor. Furthermore, with proper irrigation, Turmeric growers can protect their crops from various diseases by properly using water and fertilizers.
In addition, they can improve the quality of production because, with proper irrigation, essential nutrients will reach the crop’s roots in appropriate quantities, thus saving the crop a considerable saving in the use of water, nutrients, and fertilizers. Proper irrigation brings certain benefits for both crop quality and quantity.
Yield increase from a typical 50-60 quintals/hectare to 90/100 quintals/hectare. 30% and 50% better water efficiency than sprinkler and flood irrigation. Significant reduction in pest attacks and consequent crop diseases. Significant reduction in labor costs in Turmeric cultivation.
Step 13: Importance of irrigation management for better productivity
Irrigation is an essential factor that helps maintain field potential in the crop’s root zone using drip irrigation techniques based on climatic conditions, soil type, and crop stages. For example, during the germination process, light irrigation should be done. Irrigation should be managed according to soil type, crop growth stage, and evaporation rate. Consider installing a drip irrigation system to make it easier to retain moisture.
Step 14: Crop rotation for more plant production
If Turmeric is to be grown organically, it should be rotated with other organic crops. Using inorganic or synthetic fertilizers will affect the quality of the soil, and the crop thus produced will not be organic. Commercially, crops such as Sugarcane, Garlic, Onions, Pulses, Yam (Elephant’s Foot), Wheat, Corn, Ragi, and some other fast-growing vegetables are rotated with Turmeric. It is also cultivated as a sub-crop of Ginger and Chilli.
Step 15: Mulching and weeding are important for better yield
The crop should be mulched immediately after planting with green leaves at 12-15 tons per hectare. Mulching can be repeated at 5 7.5 tons per hectare at 45 and 90 days after weeding, fertilizing, and earthing. Depending on the severity of the weeds, it is necessary to plant weeds three times 60, 90, and 120 days after planting. In the case of the irrigated crops, depending on the soil conditions, about 15 to 23 irrigations are to be given in clay and 40 irrigations in sandy loams.
In case you missed it: Organic Turmeric Planting, Growing, Harvesting Techniques
Step 16: Look out for damage or discoloration of your plant
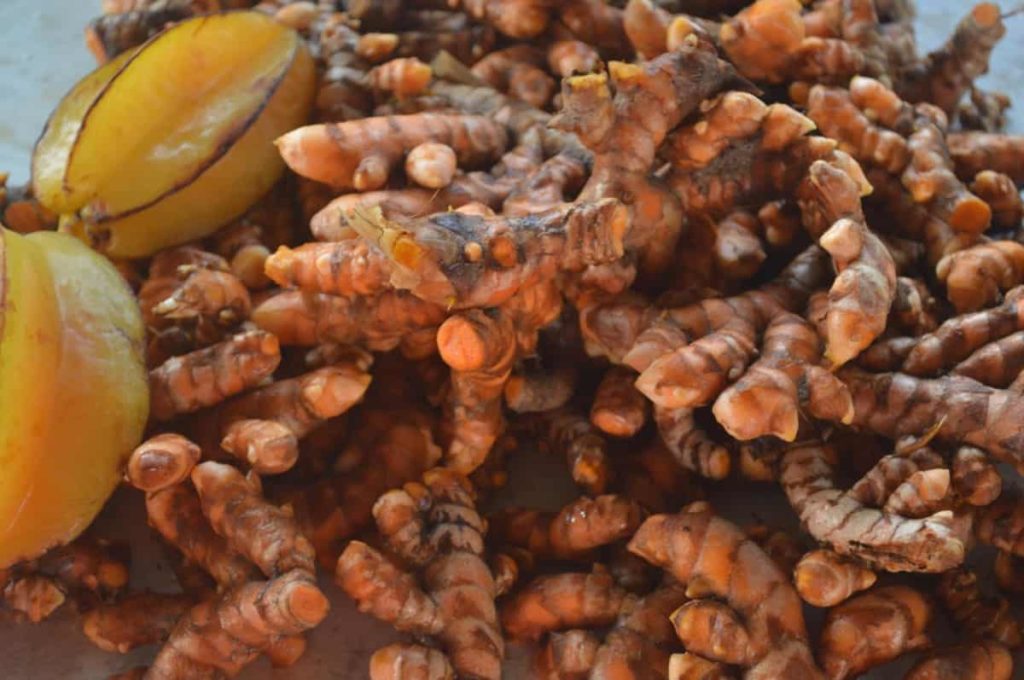
If you notice too much physical damage to your leaves, you may have a thrips attack or that caterpillars are eating your plant. Use organic pesticides like neem oil or non-toxic soil treatment to remove unwanted pests. When you remove or inspect the rhizome, use this scale if it looks gray or yellow. It may be a sign of damage.
Throw out your rhizomes to prevent the infection from spreading, and then treat your soil with dimethoate. Turmeric plants are often undesirable to many pests in temperate regions of the world. Turmeric powder can also be used as a pesticide for some crops.
Step 17: Pest and disease management for better production
To prevent pests and diseases, start with standard seed rhizomes or plants that have been successfully bred. Plant for shade in well-drained, organically rich soil as advised in full sun, and provide space between plants to achieve mature dimensions with good airflow.
- Common pests are Grubs, Leaf Rollers, Nematodes, Rhizome Flies, Rhizome Scale, Shoot Boring Caterpillars, Slugs and Snails, and Thrips.
- Diseases affecting this plant include Bacterial Soft Rot, Bacterial Wilt, Dry Rot, Fusarium Rot, Leaf Blotch, Leaf Spot, Pythium, and Rhizome Rot.
Leaf spot appears on the upper surface of young leaves as brown spots of various sizes. The spots are random in shape and white or gray in the middle. Later, two or more spots may come together and form an irregular patch covering almost the entire leaf. Affected leaves eventually dry out. Rhizomes do not grow well. Leaf spot disease in Turmeric can be controlled by spraying Bordeaux mixture 1%.
Rhizome rot disease in the Turmeric plant is caused by Pythium graminicolum or P. aphanidermatum. The collar area of the pseudostem becomes soft and soaked in water, causing the plant to fall off and the rhizomes to begin to rot. Treatment of seed rhizomes with Mancozeb 0.3% for 30 minutes before storage and at sowing time prevents disease. When the disease appears in the field, the beds should be moistened with mancozeb 0.3%.
Root-knot nematodes and burrowing nematodes are the two major nematodes that damage Turmeric. In addition, root lesion nematodes are common in Andhra Pradesh. Where nematode problems are common, use only healthy, nematode-free planting materials. Increasing soil organic matter also checks the multiplication of nematodes. Poconia chlamydosporia can be applied to beds at 20 grams/bed to treat nematode problems.
In case you missed it: Growing Turmeric In Pots, Containers, Indoors
Lacewing bugs affect plants, causing them to turn yellow and dry out. Therefore, pest infestation is more after the monsoon, especially in the country’s arid regions. Spraying of dimethoate (0.05%) is effective in pest management.
Turmeric thrips affect the leaves, causing them to wilt, turn yellow and dry out slowly. Pest infestation is more after the monsoon, especially in the country’s arid regions. Dimethoate (0.05%) spray is effective for pest management.
Step 18: Strategies for pest and disease management
Pest and disease management is paramount, especially in organic farming, to protect plants from diseases. Various strategies can be adopted, such as;
- Regular field surveillance
- Understanding the life cycle of insects and predators
- Appropriate phytosanitary measures.
Step 19: Turmeric yield per acre
The positive response of Turmeric to increase potassium fertilization manifested itself through improved cultivation and increased yields. The cut rhizomes are cleaned of mud and other extraneous substances attached to them. Pure crop yields range from 8,000 to 10,000 kg per acre. In unusually favorable conditions, i.e., abundant fertilizer and irrigation can be up to 12000 kg per acre.
Step 20: Harvesting tips for more production
Harvesting is done from January to April. Early varieties mature in 7-8 months, and intermediate types in 8-9 months. The crop must be harvested at the proper maturity, and 7 to 8 months after sowing, it is ready for harvesting, depending on the variety. Fragrant varieties ripen in about seven months, medium varieties ripen in about eight months, and late varieties ripen in about eight months.
The rhizome is usually collected by hand by plowing the ground, or the bunches are carefully lifted with a spade. The cut rhizomes are cleaned of mud and other foreign substances attached to them. When the leaves turn yellow and dry out, the crop is ready for harvest. At maturity, the leaves are cut close to the ground, the ground is shaken well, and the rhizomes are picked by hand or collected in bunches. The rhizomes that are picked up are collected and cleaned. Before treatment, the mother and finger rhizomes are separated.
- How to Make Houseplants Bushy: Effective Tips and Ideas
- Innovative Strategies for Boosting Coconut Pollination and Yield
- Pollination Strategies for Maximum Pumpkin Yield
- The Complete Guide to Chicken Fattening: Strategies for Maximum Growth
- Natural Solutions for Tulip Problems: 100% Effective Remedies for Leaf and Bulb-Related Issues
- Revolutionizing Citrus Preservation: Towards a Healthier, Greener Future
- Natural Solutions for Peony Leaf and Flower Problems: 100% Effective Remedies
- Maximizing Profits with Avocado Contract Farming in India: A Comprehensive Guide
- Natural Solutions for Hydrangea Problems: 100% Effective Remedies for Leaf and Flowers
- The Ultimate Guide to Choosing the Perfect Foliage Friend: Bringing Life Indoors
- From Sunlight to Sustainability: 15 Ways to Use Solar Technology in Agriculture
- The Ultimate Guide to Dong Tao Chicken: Exploring from History to Raising
- The Eco-Friendly Makeover: How to Convert Your Unused Swimming Pool into a Fish Pond
- Mastering the Art of Delaware Chicken Farming: Essentials for Healthy Backyard Flocks
- 20 Best Homemade Fertilizers for Money Plant: DIY Recipes and Application Methods
- How to Craft a Comprehensive Free-Range Chicken Farming Business Plan
- Brighten Your Flock: Raising Easter Egger Chickens for Beauty and Bounty
- How to Optimize Your Poultry Egg Farm Business Plan with These Strategies
- Subsidy for Spirulina Cultivation: How Indian Government Schemes Encouraging Spirulina Farmers
- Ultimate Guide to Raising Dominique Chickens: Breeding, Feeding, Egg-Production, and Care
- Mastering the Art of Raising Jersey Giant Chickens: Care, Feeding, and More
- Ultimate Guide to Raising Legbar Chickens: Breeding, Farming Practices, Diet, Egg-Production
- How to Raise Welsummer Chickens: A Comprehensive Guide for Beginners
- How to Protect Indoor Plants in Winter: A Comprehensive Guide
- Ultimate Guide to Grow Bag Gardening: Tips, Tricks, and Planting Ideas for Urban Gardeners
- Guide to Lotus Cultivation: How to Propagate, Plant, Grow, Care, Cost, and Profit
- Agriculture Drone Subsidy Scheme: Government Kisan Subsidy, License, and How to Apply Online
- Ultimate Guide to Raising Araucana Chickens: Breed Profile, Farming Economics, Diet, and Care
- Bringing Hydroponics to Classroom: Importance, Benefits of Learning for School Students
- Ultimate Guide to Raising Polish Chickens: Breed Profile, Farming Economics, Diet, and Care
- Ultimate Guide to Raising Australorp Chickens: Profile, Farming Economics, Egg Production, Diet, and Care
- Silkie Chicken Farming: Raising Practices, Varieties, Egg Production, Diet, and Care
- Sussex Chicken Farming: Raising Practices, Varieties, Egg Production, Diet and Care
- Homemade Feed Formulations for Livestock: Discover Cost-effective Starter to Finisher Feed Recipes
- 20 Best Pig Weight Gain Supplements: Top Swine Weight Gain Formulas
- Ultimate Guide to Elderberry Farming: Propagation, Planting, Yield, Cost, and Profit
