Home Blog Page 3

Ultimate Guide to Grow Bag Gardening: Tips, Tricks, and Planting Ideas for Urban Gardeners

0

Discover the ultimate guide to grow bag gardening, perfect for urban gardeners seeking sustainable solutions. From fabric grow bags to DIY ideas, explore the versatility of container gardening. Learn about the best plants suited for growing bags and the ideal soil mix to foster healthy growth.
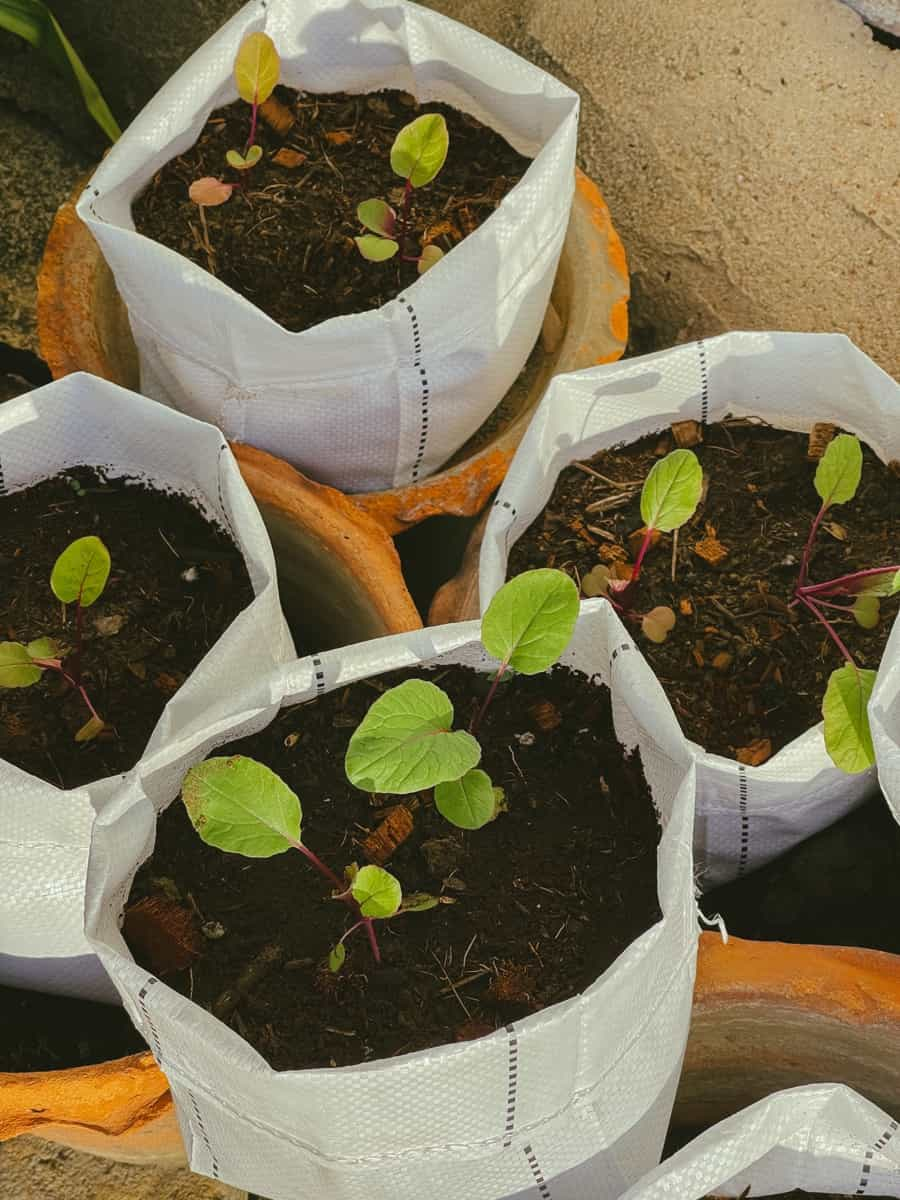
Grow Bag Gardening

Uncover watering tips and pest management strategies tailored for grow bag gardens. Whether indoors or outdoors, on balconies or patios, embrace the benefits of this eco-friendly approach. Elevate your urban gardening experience with vertical gardening techniques and reusable grow bags.

All You Need to Know About Grow Bag Gardening

What are Grow Bags?

Grow bags are containers made from fabric materials that are specifically designed for gardening. Unlike traditional pots, grow bags allow plants’ roots to breathe, promoting healthier root development and overall plant growth. They are typically made from durable, non-woven fabric which provides excellent drainage, aeration for the plants. Grow bags come in various sizes, shapes, making them suitable for a different range of plants.

The Advantages of Using Grow Bags

  1. Grow bags allow plants’ roots to breathe, which is used for their overall health and growth. The fabric grow bags allows for better airflow and prevents root circling, which can occur in traditional pots.
  2. Grow bags are portable, easy to move, allowing you to position your plants in the best location for optimal sunlight and temperature conditions.
  3. Grow bags are lightweight and can be folded and stored when not in use, making them a convenient option for urban gardeners with limited space.
  4. Grow bags are cost-effective and reusable, making them a sustainable choice for gardening.

Choosing the Right Grow Bags

  1. Consider the size of the grow bags. Larger grow bags are suitable for plants with deeper root systems, while smaller ones are ideal for shallow-rooted plants.
  2. Consider the material of the grow bags. Fabric grow bags are the most common and recommended option as they provide excellent drainage and aeration for the plants.
  3. Look for grow bags with sturdy handles, as this will make them easier to move when filled with soil.

Getting Started with Grow Bags

  1. Choose a Suitable Location: Select a sunny spot for your grow bags, ensuring that your plants receive at least 6-8 hours of sunlight per day.
  2. Prepare the Grow Bags: Before filling the grow bags with soil, ensure they have drainage holes at the bottom to prevent waterlogging. You can use scissors or a gardening knife to create these holes.
  3. Fill the Grow Bags with Soil: Utilize a container gardening-specific, well-draining soil mix to ensure the plants receive the necessary nutrients and proper drainage.
  4. Plant Your Desired Plants: Select the appropriate plants for growing bag gardening (we will discuss suitable plants in detail later). Follow the recommended spacing guidelines for each plant to ensure proper growth and development.
  5. Water and Maintain: Regularly water plants to maintain moist soil, monitor for pests or diseases, and take preventive measures for effective control.

Soil and Compost Mix for Grow Bags

  • Use well-draining Soil: Grow bags require well-draining soil to prevent waterlogging and root rot. Well-draining soil allows water to flow in bag, ensuring that the roots can breathe.
  • Use moisture-retaining Soil: While well-draining soil is important, it’s also essential to choose a soil mix that can retain moisture between waterings. This will help and prevent the plants from becoming thirsty and ensure they have a consistent water supply.
  • Consider adding Compost: Adding compost to your soil mix can provide additional nutrients for your plants. Compost improves soil fertility and helps retain moisture, promoting healthy plant growth.

In case you missed it: Sustainable Living: The Growing Trend of Urban Apartment Gardening in India
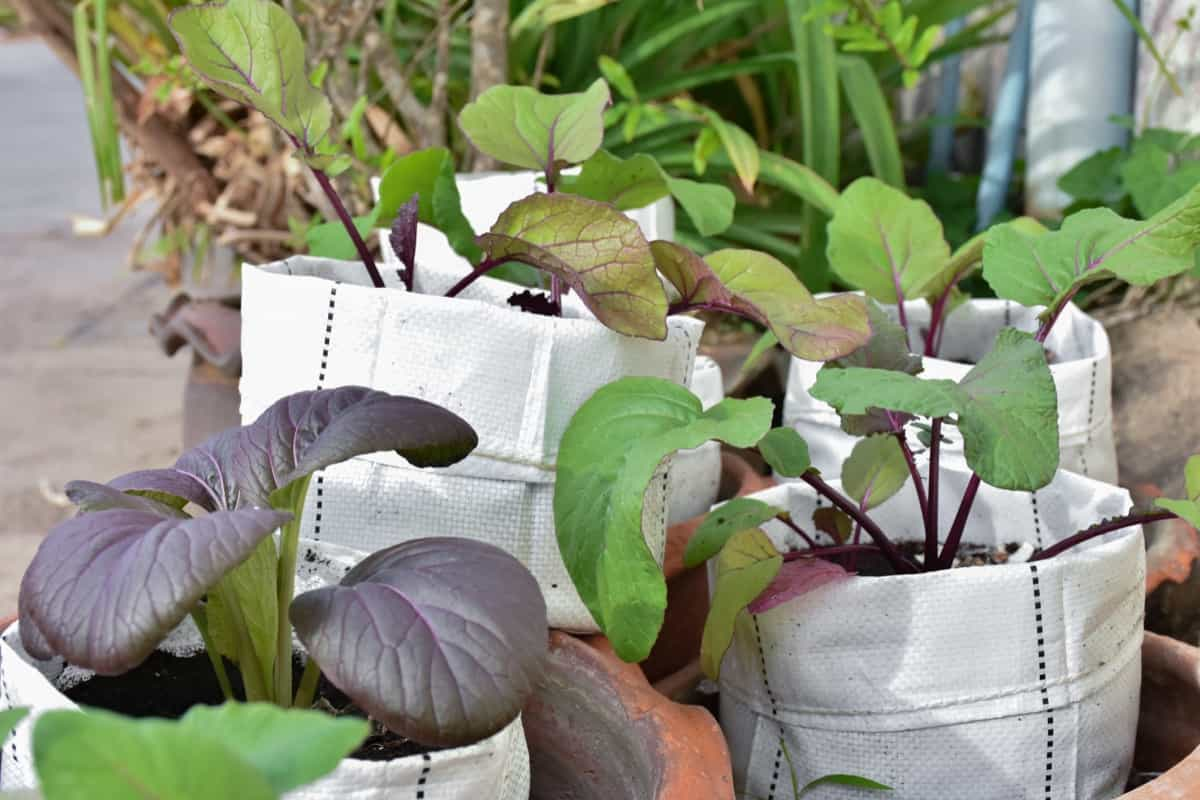
Fresh green lettuce seedlings in small pot with soil.

Plant Selection for Grow Bags

  • Shallow-rooted Plants: Grow bags are best suited for shallow-rooted plants. Examples include tomatoes, peppers, lettuce, herbs, strawberries, and flowers.
  • Compact and Bushy Plants: Choose plants that have a compact growth habit and don’t require extensive staking or support. This will help maximize space in your grow bags and prevent overcrowding.
  • Consider the Mature Size: Take into account the mature size of the plants when selecting them for grow bags. Ensure that they have enough space to grow and develop properly without overcrowding.

Suitable Plants for Grow Bag Gardening

  • Tomatoes: Compact varieties such as cherry tomatoes or determinate varieties are well-suited for grow bags. They provide a bountiful harvest and are relatively easy to grow.
  • Peppers: Both sweet, hot pepper varieties can be grown successfully in grow bags. Choose compact varieties that don’t require extensive staking.
  • Herbs: Herbs like basil, parsley, cilantro, and mint are excellent choices for growing bags. They are compact, easy to grow, and provide fresh flavors for your culinary creations.
  • Lettuce and Salad Greens: Leafy greens like lettuce, spinach, and arugula can be grown in shallow grow bags. They are quick-growing and perfect for small-space gardening.
  • Strawberries: Grow bags are an ideal option for growing strawberries. The elevated position of the bags helps prevent slugs and other pests from reaching the fruits.

Seasonal Planting Guide

  • Spring: Plant cool-season crops like lettuce, spinach, radishes, and peas in early spring. These crops thrive in cooler temperatures, can be harvested in late spring or early summer.
  • Summer: Plant warm-season crops like tomatoes, peppers, cucumbers, and beans in late spring or early summer. These crops require warmer temperatures and longer days to grow and produce a bountiful harvest.
  • Fall: Plant cool-season crops again in late summer or early fall for a second harvest. Lettuce, kale, carrots, and beets are excellent choices for fall planting.
  • Winter: In mild winter climates, you can continue growing cool-season crops throughout the winter. Protect your plants from frost and provide adequate insulation to ensure their survival.

Planting Techniques in Grow Bags

  • Preparing Your Grow Bags: Before planting, make sure your grow bags have drainage holes at the bottom. This will prevent waterlogging and promote healthy root growth.
  • Seed Sowing and Transplanting Tips: Follow the recommended seed sowing and transplanting guidelines for each plant. Start seeds indoors and transplant them into grow bags once they have developed strong roots.
  • Spacing: Proper spacing is crucial to prevent overcrowding and ensure adequate airflow and sunlight for each plant. Follow the spacing recommendations provided for each plant variety.

Watering and Nutrition

  • Watering Requirements for Grow Bags: Grow bags require more frequent watering compared to in-ground or raised-bed gardens. The fabric material of grow bags allows for faster evaporation, leading to quicker drying of the soil. Monitor the moisture levels regularly, water your plants when soil feels dry.
  • Fertilizing Your Grow Bag Plants: Due to the limited volume of soil in grow bags, plants grown in them require more frequent fertilization. Use a balanced organic fertilizer and slow-release fertilizer to provide the necessary nutrients for your plants’ growth and development.

In case you missed it: The Growing Trend of Urban Terrace Gardening in India for Healthy Living and Sustainability
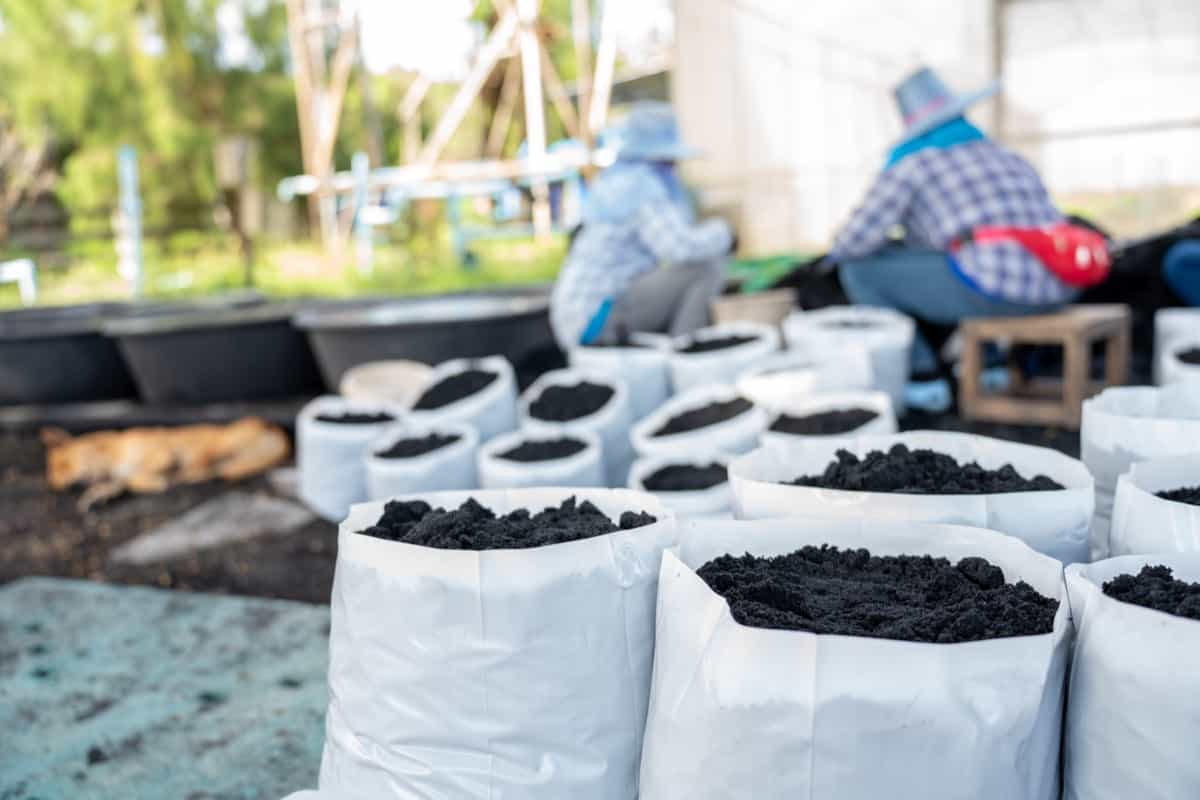
Preparing grow bags for home gardening

Pest and Disease Management

  • Common Pests in Grow Bag Gardens: Some common pests that can affect grow bag gardens include aphids, thrips, slugs, snails, and caterpillars. Monitor your plants regularly and take appropriate measures such as handpicking, using organic pest control methods, or introducing beneficial insects to manage pest populations.
  • Preventing Diseases in Grow Bags: To prevent diseases, ensure proper airflow and ventilation around your plants. Avoid overwatering, as excessive moisture can create a favorable environment for fungal diseases. If necessary, use organic fungicides or disease-resistant plant varieties.

Staking and Support

  • Supporting Tall Plants in Grow Bags: Tall plants like tomatoes or pole beans may need support to keep them upright. Use stakes, trellises, or cages to provide support and prevent the plants from toppling over.
  • DIY Staking Solutions: You can create your staking solutions using bamboo stakes, PVC pipes, or other sturdy materials. Secure the stakes firmly in the grow bags, tie the plants to stakes using soft plant ties or twine.

Maximizing Space with Grow Bags

  • Vertical Gardening with Grow Bags: Utilize vertical space by growing vining plants like cucumbers or beans on trellises or vertical structures. Allows to grow multiple plants in a limited footprint.
  • Companion Planting Strategies: Pair compatible plants together in the same grow bag to make the most efficient use of space. For example, plant lettuce and radishes together, as the radishes will mature before the lettuce needs the space.
  • Intercropping: Plant fast-growing crops between slower-growing ones to maximize space. For example, plant lettuce or herbs between rows of tomatoes or peppers.
  • Hanging Grow Bags: Hang grow bags from hooks or railing to create a vertical garden. Suitable for small balconies or patios where floor space is limited.

Seasonal Care for Grow Bag Gardens

  • Preparing for Changing Seasons: As the weather transitions from one season to another, adjust watering and fertilization based on the changing needs of the plants. For example, decrease watering in cooler months to prevent over-saturation.
  • Overwintering Grow Bag Plants: In colder climates, you can overwinter certain plants in grow bags by moving them to a protected area or providing insulation. Extend the growing season, continue harvesting fresh produce.

Harvesting from Your Grow Bag Garden

  • Signs Your Plants are Ready for Harvest: Different plants have different signs that indicate they are ready for harvest. For example, tomatoes harvested should be firm and fully colored, while lettuce is ready when the leaves are mature and can be easily picked.
  • Harvesting Techniques for Different Crops: Each crop requires specific harvesting techniques. Use pruning shears or scissors to harvest herbs, while you can gently twist or pull root vegetables like radishes and carrots from the grow bags.

Sustainability and Grow Bags

  • Reusing and Recycling Grow Bags: After harvesting, empty the grow bags and reuse them for the next planting season. If the grow bags are damaged or worn out, recycle them appropriately.
  • Making Your Grow Bag Garden More Sustainable: Use organic and natural fertilizers to reduce chemical inputs. Collect rainwater for watering your plants to conserve water. Compost kitchen scraps and plant waste to create nutrient-rich compost for your grow bags.

In case you missed it: Cultivating Plants in Recycled Plastic Bottles and Containers: New Art of Sustainable Gardening Practices

Trees growing of greenhouse in a grow bags

Common Challenges and Solutions

  • Addressing Overwatering and Underwatering: Proper watering is crucial for growing bags. Avoid overwatering by monitoring soil moisture and adjusting watering frequency accordingly. If plants are underwatered, increase the watering frequency and ensure thorough hydration.
  • Managing Soil Health in Grow Bags: Over time, the soil in grow bags can become depleted of nutrients. Mix the soil with compost and organic fertilizers regularly to ensure your plants have access to essential nutrients.

Advanced Tips for Grow Bag Gardening

  • Experimenting with Hydroponics in Grow Bags: Explore the world of hydroponic gardening by adapting grow bags for hydroponic systems. Precise control over nutrient delivery, can result in faster growth and higher yields.
  • Advanced Nutrient Management Techniques: Consider using specialized nutrient solutions or supplements to optimize plant growth and maximize yields. Conduct regular soil tests to monitor nutrient levels and make adjustments as needed.

Key Facts and Tips and Tricks for Urban Gardeners

Grow Bag Gardening: Experience the innovation of cultivating plants in fabric containers, revolutionizing traditional gardening methods.

Fabric Grow Bags: Invest in durable and breathable containers that provide optimal growing conditions for various garden plants, ensuring healthy root development and abundant yields.

Urban Gardening with Grow Bags: Ideal solution for urban dwellers facing space constraints, as fabric grow bags offer a compact and versatile option for cultivating greenery in city environments.

Best Plants for Grow Bags: Choose from a wide range of herbs, vegetables, and flowers that thrive in fabric grow bags, such as tomatoes, peppers, basil, lettuce, and marigolds, to name a few.

Reusable Grow Bags: Opt for environmentally friendly containers can be used for multiple growing seasons, reducing waste and promoting sustainable gardening practices.

Organic Gardening in Grow Bags: Commit to growing plants without synthetic chemicals in fabric containers, ensuring a healthier and more eco-friendly approach to gardening.

Watering Tips for Grow Bag Gardens: Master proper watering techniques to maintain soil moisture levels in fabric grow bags, ensuring optimal hydration for plant growth and development.

Soil Mix for Grow Bags: Create the perfect blend of soil, compost, and other amendments to provide essential nutrients and support for plant growth in fabric containers. Examples include a mixture of potting soil, perlite, and compost for optimal drainage and aeration.

Grow Bag Vegetable Gardening: Enjoy growing tomatoes, peppers, lettuce, carrots, and herbs like basil and parsley in fabric grow bags. These portable containers are perfect for balcony gardens or small outdoor spaces where traditional gardening isn’t feasible.

Indoor Gardening with Grow Bags: Enhance your indoor space with vibrant greenery by using compact fabric containers for growing houseplants like herbs (rosemary, thyme), leafy greens (spinach, kale), and small vegetables (cherry tomatoes, mini bell peppers).

In case you missed it: 17 Gardening Mistakes to Avoid This Summer: For Vegetables, Flowers, Herbs, and Fruits

Recycled growing bags for tomato flowers on balcony

Outdoor Grow Bag Setups: Transform your balcony or patio into a green oasis by arranging fabric grow bags filled with colorful flowers like petunias, marigolds, and geraniums. Grow herbs such as mint and lavender for added fragrance and culinary delight.

Vertical Gardening in Grow Bags: Utilize vertical space by hanging fabric grow bags filled with strawberries, trailing herbs like thyme and oregano, and compact vegetables such as cherry tomatoes and lettuce. This maximizes space while creating an eye-catching green wall.

Sustainable Grow Bag Options: Opt for eco-friendly grow bags made from recycled materials or biodegradable fabric. Examples include bags made from recycled plastic bottles or natural jute fiber, reducing environmental impact while promoting sustainable gardening practices.

Grow Bag Garden Design: Plan a stylish and functional garden layout by arranging fabric grow bags in creative patterns or tiers. Mix and match sizes and colors for visual interest, and incorporate trellises or stakes for vertical support when growing climbing plants like cucumbers or beans.

Grow Bags for Balconies and Patios: Utilize small outdoor areas efficiently with grow bags, allowing for gardening in limited spaces. Grow compact vegetables such as peppers and eggplants, along with dwarf varieties of fruits like strawberries and blueberries, to enjoy fresh produce even in urban settings.

In case you missed it: Gardening Tips for Beginners: At Home, in Pots/Containers, Indoors, On Terrace for Vegetables, Flowers, Fruits, and Herbs

Tomatoes grow in grow bags on balcony

Conclusion

Grow bag gardening offers urban gardeners a versatile and convenient way to grow their food. With the right selection of grow bags, suitable plants, proper care, and a sustainable approach, you can create a thriving and productive grow bag garden. So, get started with your own grow bag garden, enjoy the benefits of fresh and homegrown produce right at your fingertips.

Guide to Lotus Cultivation: How to Propagate, Plant, Grow, Care, Cost, and Profit

0

Welcome to the ultimate guide to lotus cultivation, where we delve into everything you need to know about propagating, planting, growing, and caring for these exquisite water garden plants. Whether you’re a seasoned aquatic gardener or just starting, this comprehensive resource covers it all, from lotus pond setup to bloom enhancement and winterizing techniques.

Guide to Lotus Cultivation

Discover invaluable tips on fertilizing, pest control, disease management, and maximizing sunlight exposure for optimal growth. Dive into sustainable practices and container gardening options, and even explore the potential for profitable lotus cultivation.

Guide to Lotus Cultivation

Introduction to Lotus Cultivation

Lotus is a perennial aquatic plant in the Nelumbonaceae family, known for its large, round leaves and colorful flowers. Its cultivation has been practiced for thousands of years and is revered by various cultures for its beauty, symbolism, and medicinal properties. Lotus seeds and roots are edible and nutritious and can be grown in ponds, containers, or indoors with proper care.

The Significance of Lotus in Culture and Gardening

Lotus is more than just a pretty plant. It has a deep cultural, spiritual significance for many people around the world. Lotus is often associated with purity, enlightenment, rebirth, and wisdom. This is because lotus grows from the muddy bottom of the water and emerges as a clean and beautiful flower. Lotus is also a symbol of the sun, as it opens in the morning and closes at night.

Overview of Lotus Varieties: Choosing the Right One for Your Garden

There are numerous lotus varieties available in the market, each with unique characteristics such as size, color, shape, and blooming time. Some popular lotus varieties include dwarf lotus, bowl lotus, medium lotus, and large lotus. Dwarf lotus grow up to 1 foot tall and have 2 to 4-inch-wide flowers, ideal for small ponds or containers. 

Bowl lotus grow up to 2 feet tall and have 4 to 6-inch-wide flowers, suitable for medium-sized containers or ponds. Medium lotus grow up to 3 feet tall and have 6 to 8-inch-wide flowers, ideal for large ponds or lakes. Large lotus grow up to 5 feet tall and have 8 to 12-inch-wide flowers, ideal for spacious ponds or lakes. When choosing a lotus variety, consider factors such as the size of your pond or container, the climate of your area, and your taste and style.

How to Propagate Lotus Cultivation

To grow a lotus plant in your garden, you need essential equipment and supplies. A pond or container should be at least 18 inches deep and have a surface area of at least 2 square feet per plant. A pot or basket should be made of plastic or metal mesh to allow water circulation and prevent soil erosion. A healthy lotus tuber with nodes or eyes on purchased from nurseries or online stores.

In case you missed it: Bolting Management in Plants: Prevention for Premature Flowers and Seeding in Crops and Vegetables

Asian pink lotus flower

A soil mix rich in organic, such as compost, peat moss, or manure, should be used, as lotus plants prefer sandy or loamy soils. Fertilizers should be low in nitrogen and high in phosphorus and potassium, as lotus plants need more for blooming. Slow-release fertilizers formulated for aquatic plants, such as 10-26-10 or 5-10-5, or organic fertilizers like bone meal, fish emulsion, or seaweed extract, can be used.

Propagating Lotus Plants

Methods for Propagating Lotus: Seeds vs. Division

Seeds: Growing lotus plants from seeds can be an exciting and rewarding process. Here are some key steps to follow To grow Lotus seeds, create a small hole in the hard shell with a drill bit for water absorption and germination. Soak the seeds in water for 24 – 48 hours to soften the seed.

Fill a container with loam soil and aquatic plant fertilizer, plant seeds 1 inch deep and cover lightly. Place the container in a warm, well-lit area with a consistent temperature and water depth. Lotus seeds take 2 to 4 weeks to germinate, and after a few aerial leaves, fertilize them with an aquatic plant fertilizer.

Division: Dividing lotus plants is another common method of propagation. Here’s how to do it:

  • Timing: The best time to divide lotus plants is in early spring when new growth begins.
  • Preparing the plant: Carefully remove the lotus plant from its container or pond. Gently wash the soil to expose the rhizomes.
  • Dividing the rhizomes: Use a sharp knife or shears to separate the rhizomes into sections. Each section should have at least one growing tip (eye) and a portion of the rhizome.
  • Planting the divisions: Fill a container or pond with a suitable soil mix and place the divisions, with the growing tips facing up, about 2 inches deep in the soil. Ensure that the growing tips are slightly above the soil surface.
  • Watering and care: Keep the soil moist and provide adequate sunlight. Once the divisions establish roots and new growth, you can start fertilizing them.
Tips for Successful Lotus Propagation
  • Choose healthy and viable seeds or divisions for propagation.
  • Maintain proper water temperature and quality for seed germination and division establishment.
  • Provide adequate sunlight or artificial light for healthy growth.
  • Use a suitable soil mix with good drainage for planting lotus seeds or divisions.
  • Follow a regular fertilization schedule to provide essential nutrients for optimal growth.
  • Monitor the lotus plants for signs of pests, diseases and take appropriate measures if needed.
  • Be patient, as lotus plants may take some time to establish and reach maturity.

Winter Care for Lotus Plants

Preparing Your Lotus for Winter
  1. Trimming and cleaning: Before winter arrives, trim any dead or dying foliage from your lotus plants. This will help prevent the accumulation that can rot and cause issues during winter.
  2. Overwintering in containers: If you have lotus plants in containers, move the containers to a protected area, such as a garage or basement, where the temperature remains above freezing. Ensure plants receive adequate light during this period.
  3. Overwintering in ponds: If you have lotus plants in ponds, there are a few options for overwintering:

Deep water method: In regions with mild winters, you can leave the lotus plants in the pond and lower them to a deeper section where the water is less likely to freeze completely. This will provide some insulation and protection for the plants.

Tropical lotus method: In colder regions, you can treat lotus plants as tropical plants and remove them from the pond before the first frost. Trim the foliage and place the tubers in a container filled with water. Store the container in a cool, dark place with a temperature of 50-60°F (10-15°C). Check the tubers periodically for any rot or drying out.

Tuber storage method: Another option is to carefully dig up the tubers and store them in a container filled with peat moss. Store the container in a cool, dark place with a temperature between 35-45°F (2-7°C). Check the tubers regularly for any signs of rot or drying out.

In case you missed it: How to Make Flowers Bloom Faster: Naturally, Overnight, at Home, and in Water with Fertilizers

buddha lotus flower
Overwintering Techniques for Different Climates

The specific overwintering techniques may vary depending on your climate and the severity of winter conditions. It’s important to consider the average winter temperatures and the hardiness of your lotus plant varieties. Consulting with local gardening experts or experienced lotus growers in your area can provide insights into the best overwintering practices for your specific region.

Troubleshooting Common Lotus Cultivation Issues

Yellowing Leaves: Yellowing leaves sign of nutrient deficiency, improper water conditions, or pest infestation. Ensure that your lotus plants receive adequate sunlight, proper fertilization, and appropriate water depth and quality. Address any nutrient deficiencies or pest issues promptly.

Rotting Tubers: Rotting tubers can occur due to excessive moisture or poor drainage. Make sure your lotus plants are not sitting in waterlogged soil or containers. Improve drainage by using a well-draining soil mix and providing proper water depth.

Other Concerns: Other concerns may include pests, such as aphids or snails, and diseases like fungal infections. Monitor your lotus plants regularly for any signs of pests or diseases. Implement appropriate organic or chemical control methods if necessary. Proper sanitation, hygiene practices, such as removing dead foliage and debris, can also help prevent issues.

Solutions and Preventive Measures
  • Maintain proper water depth and quality for lotus plants.
  • Provide adequate sunlight and temperature conditions.
  • Follow a regular fertilization schedule using an aquatic plant fertilizer.
  • Ensure good drainage to prevent waterlogging and rotting.
  • Practice good sanitation and hygiene by removing dead foliage and debris.
  • Avoid overwatering or underwatering your lotus plants.
  • Seek advice from local gardening experts or experienced lotus growers for specific issues in your region.

Harvesting Lotus Seeds and Flowers

When and How to Harvest Lotus Seeds

Lotus seeds are ready for harvest when the pods turn brown and dry out. Cut them from the plant, place them in a dry, well-ventilated area, and gently break them open to collect the seeds. Store the seeds in a dry place until they’re ready for propagation or culinary use. This process may take a few weeks.

Tips for Cutting Lotus Flowers for Arrangements
  • Choose lotus flowers that are fully open and in their prime bloom.
  • Use sharp scissors or pruners to cut the flower stems at an angle, just above a leaf node.
  • Immediately place the cut stems in a container filled with clean water.
  • Remove any excess foliage or leaves.
  • Change the water regularly to keep the flowers fresh and extend their vase life.

In case you missed it: How to Increase Flowering in Vegetables: Best Ways to Induce and Enhance Flower Set  

pink lotus flower growing in a lush garden setting, with large green foliage

Marketing Strategies for Lotus Flowers in India

Local markets: Explore selling lotus flowers at local markets, flower shops, or garden centers. Connect with local florists or event planners who may be interested in purchasing lotus flowers for arrangements or events.

Online platforms: Utilize online platforms and marketplaces to reach a wider audience. Create a website on social media page to showcase your lotus flowers and connect with potential customers. Consider partnering with online flower delivery services to expand your reach.

Wholesale and bulk orders: Establish relationships with wholesalers or retailers who specialize in flowers. Offer competitive pricing and quality products to attract bulk orders.

Specialty markets: Identify niche markets or specific events where lotus flowers may be in high demand, such as weddings, religious ceremonies, or cultural festivals. Target these markets and promote your lotus flowers accordingly.

Networking and collaborations: Collaborate with local florists, event planners, or garden enthusiasts to promote lotus flowers. Attend industry events, workshops, or trade shows to network with potential customers and build partnerships.

In case you missed it: How to Increase Flowering in Fruit Trees: Step-by-Step Guide for Beginners

blooming Lotus flowers

Economics of Lotus Cultivation in India

The average scenario where a farmer plants 5,000 lotus plants on one acre and incurs an expenditure of Rs 27,500 (midpoint of Rs 25,000 to 30,000). With a yield of 1 lakh lotuses annually, at a minimum price of Rs 5 per lotus, the revenue would be Rs 5 lakh. Subtracting the expenditure from the revenue, the profit would be Rs 4,72,500.

FactorsData
Area1 acre
Number of plants5,000 to 6,000
Total expenditureRs 25,000 to 30,000
Yield per farmerApproximately 1 lakh lotuses per year
Price per lotusMinimum Rs 5, up to Rs 10 during festivals and exports
Revenue per yearAt least Rs 5 lakh
Additional revenue sourcesRootstalks: Rs 40-50 per kg, Leaves: used for crafts, Seeds: used for sweets or medicines, Flowers: used for religious or decorative purposes

In case you missed it: Easy Homemade Recipes for Garden Plants: Natural and Organic Fertilizer for Vegetables, Flowers, and Houseplants

Guide to Lotus Cultivation6

Conclusion

Mastering lotus cultivation offers a myriad of benefits, from spiritual significance to economic opportunity. With proper propagation, planting, and care techniques, coupled with an understanding of costs and profit potential, enthusiasts can foster thriving lotus gardens that nourish both the soul and the pocketbook.

Agriculture Drone Subsidy Scheme: Government Kisan Subsidy, License, and How to Apply Online

0

Delve into the realm of precision agriculture with the Agriculture Drone Subsidy Scheme, a pioneering initiative by the government to empower farmers. Seamlessly blending technology and tradition, this scheme offers subsidies for drone acquisition and operation, revolutionizing crop monitoring and assessment.

Agriculture Drone Subsidy Scheme

Farmers can obtain a drone license for agriculture, enabling them to leverage advanced UAV technology for enhanced crop management. Applying online for the drone subsidy is simple and accessible, streamlining the process for farmers nationwide. Join the digital farming revolution and register for the Kisan Drone Scheme to unlock new opportunities in smart farming.

Agriculture Drone Subsidy Scheme

Introduction to the Agriculture Drone Subsidy Scheme

The agriculture industry is witnessing a technological revolution with the emergence of drones. These unmanned aerial vehicles potential to revolutionize farming practices by providing farmers with valuable insights and data. To promote the adoption of drones in agriculture, the government has introduced the Agriculture Drone Subsidy Scheme.

Eligibility Criteria for Farmers and Businesses

To avail of the benefits of the Agriculture Drone Subsidy Scheme, farmers and businesses need to meet certain eligibility criteria. Generally, farmers with a minimum landholding of 2 hectares and registered agricultural businesses are eligible. However, specific criteria may vary based on the region and scheme guidelines. It is essential to consult the official scheme documentation to ensure eligibility.

Types of Drones Covered Under the Scheme

The Agriculture Drone Subsidy Scheme covers a wide range of drones that are specifically designed for agricultural purposes. These drones come equipped with advanced sensors, cameras, and data processing capabilities to assist farmers in crop monitoring, precision spraying, and mapping. From fixed-wing drones for large-scale operations to multi-rotor drones for smaller farms, the scheme provides subsidies for various types of agricultural drones.

Government Kisan Subsidy Overview

Under the Agriculture Drone Subsidy Scheme, the government provides financial assistance to farmers and businesses to promote the adoption of drones in agriculture. The subsidy amount varies based on the region and the type of drone being purchased. The subsidy can cover a portion of the drone’s cost, making it more affordable for farmers to invest in this technology.

The Agriculture Drone Subsidy Scheme, launched under the Kisan Drone Scheme in February 2022, represents a significant initiative by the government to promote the adoption of drone technology in Indian agriculture. Drones, also known as unmanned aerial vehicles, offer various benefits in precision farming, crop monitoring, pest control, and livestock management. This scheme aims to make drone technology more accessible to farmers by providing subsidies for the purchase of Kisan Drones.

Under the scheme, subsidies are provided to different categories of beneficiaries, including agricultural research institutes, Farmer Producer Organizations (FPOs), Custom Hiring Centers (CHCs), agricultural graduates, and small and marginal farmers. The subsidies cover a percentage of the drone’s cost, up to a maximum limit, depending on the category of the beneficiary.

  1. It helps in increasing crop yields by addressing issues like pest infestations and nutrient deficiencies in a timely manner.
  2. Precision agriculture reduces the need for excessive use of inputs like fertilizers and pesticides, leading to cost savings for farmers. Drones also enable time-efficient crop management, allowing farmers to focus on essential aspects of farming.
  3. The real-time data provided by drones empowers farmers to make informed decisions, contributing to better outcomes in crop production.

One of the key objectives of the scheme is to promote sustainable agricultural practices. By minimizing the use of chemicals, optimizing resource utilization, drones help reduce environmental impact and promote environmental sustainability in agriculture. Farmers interested in availing subsidies under the Kisan Drone Scheme need to check the eligibility criteria set by the government and prepare the necessary documents.

In case you missed it: Drone Farming, Drone Technology In Agriculture

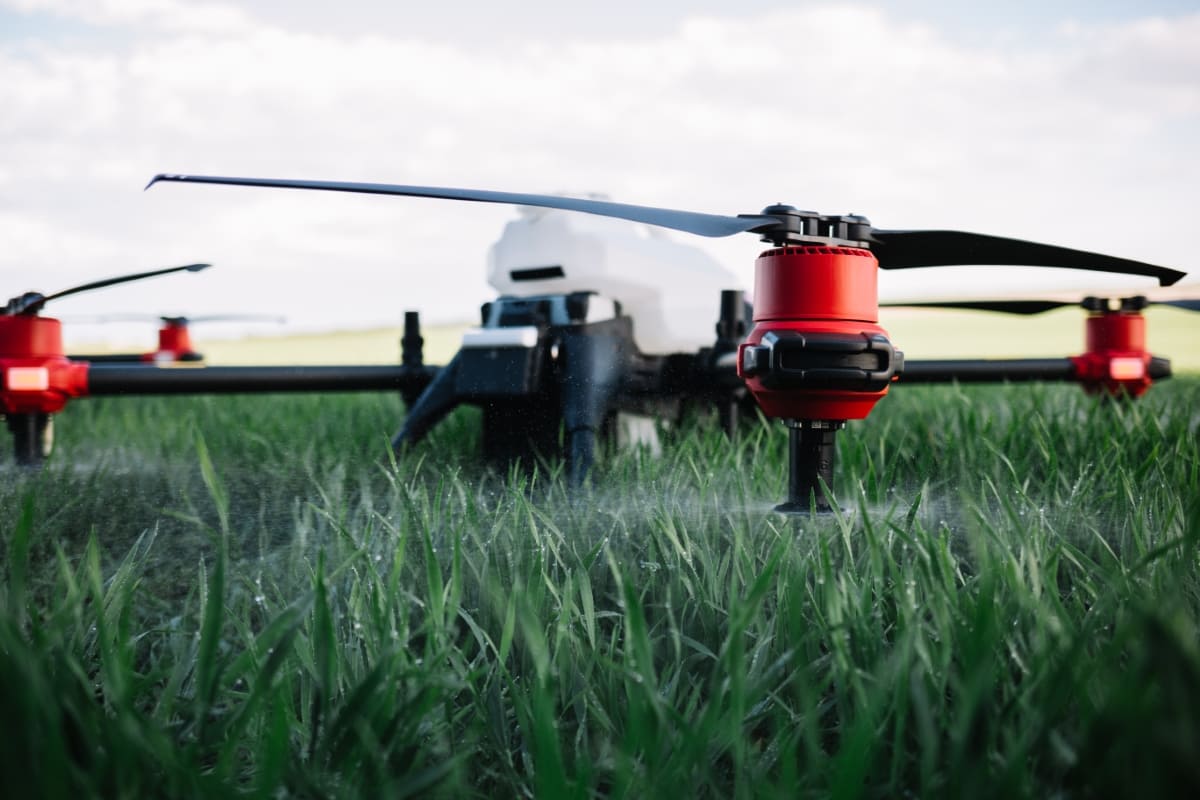
Engineer Controlling Drone Spraying Fertilizer

They can then reach out to the designated agricultural authorities or government offices to submit their applications. After approval, farmers may undergo training sessions on operating and maintaining the drone technology before implementing it in their fields.

Benefits of Using Drones in Agriculture

Using drones in agriculture offers numerous benefits to farmers. Drones enable aerial imaging, providing valuable data on crop health, water stress, and pest infestations. This information allows farmers to make informed decisions, optimize resource allocation, and take preventive measures. Drones also facilitate precision spraying, reducing the use of pesticides and herbicides, thereby minimizing environmental impact and promoting sustainable farming practices.

License Requirements for Operating Agricultural Drones

Operating agricultural drones requires adherence to certain regulations and licensing requirements. Pilots need to obtain for Remote Pilot License (RPL) or an Unmanned Aircraft System (UAS) license, depending on the region. These licenses ensure that operators are aware of safety protocols, airspace regulations, and emergency procedures. It is necessary to undergo proper training and certification before operating agricultural drones.

How to Apply for a Drone Operating License

To obtain a drone operating license, applicants need to undergo training from certified drone training institutes. The training covers topics such as flight regulations, safety protocols, and emergency procedures. After completing the training, applicants need to pass a written exam and a flight test. Once these requirements are fulfilled, applicants can apply for a drone operating license from the designated aviation authority.

Application Process for Agriculture Drone Subsidy Scheme

To apply for the Agriculture Drone Subsidy Scheme, farmers, and businesses need to follow a specific application process. The process typically involves:

  • Fill out an online application form.
  • Providing essential details about the drone.
  • Its purpose.
  • The expected benefits. Applicants also need to submit supporting documents, such as land ownership proof, business registration documents, and drone specifications.

In case you missed it: A Guide to Understand Importance of Drones in Agriculture/Farming:  Advantages, Applications, and Different Types

Drone in Farm

Document Checklist for Subsidy Application

When applying for the Agriculture Drone Subsidy Scheme, it is essential to have all the necessary documents ready. The document checklist may include:

  • Identification proof.
  • Land ownership proof.
  • Business registration documents.
  • Drone specifications.
  • Any other documentation required by the scheme. Ensuring that all documents are in order can streamline the application process and prevent delays.

Timeline and Processing Steps

The timeline for processing subsidy applications may vary based on the region and the scheme’s guidelines. It is advisable to check the official scheme documentation for estimated processing times. Generally, the application goes through a series of steps, including verification of documents, evaluation of the proposal, and disbursal of the subsidy. Regular follow-ups and prompt submission of any additional requested information can help expedite the process.

Online Application Portal Guide

To simplify the application process, many subsidy schemes offer an online application portal. This portal allows applicants to fill out the necessary forms, upload documents, and track the progress of their applications. It is important to familiarize yourself with the online portal and follow the instructions provided to ensure a smooth and efficient application process.

Troubleshooting Common Application Issues

During the subsidy application process, applicants may encounter common issues or have questions. It is advisable to refer to the frequently asked questions (FAQs) section of the scheme’s official website or contact the designated authority for assistance. Promptly addressing any issues can prevent delays and ensure a successful application.

Monitoring and Reporting Requirements

Upon receiving the subsidy, beneficiaries are often required to adhere to certain monitoring and reporting requirements. This may involve periodic reporting on the utilization of the drone, its impact on farming practices, and any challenges faced. Compliance with these requirements helps the government assess the effectiveness of the scheme and make informed decisions for future initiatives.

Renewal and Continuation of Subsidy

Some subsidy schemes may require beneficiaries to renew their subsidy periodically. This ensures that the subsidy is being utilized effectively and encourages continuous engagement with the technology. It is important to stay updated with the scheme guidelines to know the renewal process and any additional requirements.

Promoting Precision Farming: Government Subsidies for Agriculture Drones

The Union Ministry of Agriculture and Farmers Welfare has introduced guidelines aimed at making drone technology more accessible to stakeholders in the agricultural sector. These guidelines, under the “Sub-Mission on Agricultural Mechanization” (SMAM), offer substantial grants for the purchase of agriculture drones.

In case you missed it: Problems of Indian Agriculture: Problems Faced by Indian Farmers

Gathering Data Over Country Farm Land

The subsidies cover up to 100% of the drone’s cost or Rs. 10 lakhs, whichever is less, for institutions like Farm Machinery Training & Testing Institutes, Krishi Vigyan Kendras, and State Agriculture Universities. The objective is to facilitate large-scale demonstrations of drone technology on farmers’ fields.

Eligibility and Grants for Farmers Producers Organizations (FPOs)

To further encourage the adoption of drone technology, financial assistance is extended to existing Custom Hiring Centers (CHCs) and those established by agricultural graduates and rural entrepreneurs. These centers can receive grants covering a percentage of the basic drone cost or a specified amount, depending on their setup and operation.

Accessibility and Widespread Adoption

The subsidized purchase of agriculture drones for SHCs and Hi-tech Hubs aims to make this technology more affordable, thereby promoting its widespread adoption. This initiative not only benefits farmers but also encourages domestic drone production, contributing to the growth of the agricultural technology sector in India.

Regulatory Framework and Compliance

Drone operations in agriculture are regulated by the Ministry of Civil Aviation (MoCA) and the Director General of Civil Aviation (DGCA). The “Drone Rules 2021” provides guidelines for the use and operation of drones in India, ensuring safety and compliance. The Department of Agriculture & Farmers Welfare has also developed Standard Operating Procedures (SOPs) for drone applications in agricultural activities, including pesticide spraying and crop protection. It is mandatory for demonstrating institutions and service providers to adhere to these rules and SOPs.

Budget Announcement and Prime Minister’s Endorsement

In the budget speech for 2022-23, the Union Finance Minister emphasized the promotion of ‘Kisan Drones’ for various agricultural purposes, including crop assessment, digitization of land records, and spraying of insecticides and nutrients. Prime Minister Narendra Modi has lauded the initiative, recognizing its potential to empower farmers and enhance agricultural profitability.

Background and Technological Advancements

The use of drones in agriculture has evolved significantly over the years, with advancements in sensor-based smart agriculture technology. Initiatives like SENSAGRI have focused on developing indigenous prototypes for drone-based crop and soil health monitoring systems. These systems utilize hyperspectral remote sensing (HRS) sensors and can integrate with satellite-based technologies for large-scale applications.

Drone Rules and Permissions

The Ministry of Civil Aviation has played a crucial role in regulating drone operations through the publication of Drone Rules, 2021. These rules aim to streamline the use and operation of drones in various sectors, including agriculture. The Ministry has also granted conditional exemptions for drone usage to the Ministry of Agriculture & Farmers Welfare for remote sensing data collection in agricultural areas of 100 districts, aiding in yield estimation under schemes like the Pradhan Mantri Fasal Bima Yojana (PMFBY).

In case you missed it: Land Cost Per Acre in India: Exploring Village Farm Land Cost and Agriculture Land Cost Per Acre

Farmers Set up Agricultural Drones

Government Initiatives and Subsidy Guidelines

Under the Agriculture Drone Subsidy Scheme, various grants and subsidies are provided to institutions, Farmer Producer Organizations (FPOs), Custom Hiring Centers (CHCs), agriculture graduates, and rural entrepreneurs for the purchase and demonstration of agriculture drones. Financial assistance and grants are available until March 31, 2023, with the aim of promoting the widespread adoption of drone technology in agriculture.

Future Prospects and Growth

The government’s efforts to promote drone use in agriculture are expected to catalyze growth in the drone sector, attracting investments, generating employment opportunities, and fostering innovation. The Production-Linked Incentive scheme for drones and drone components further incentivizes domestic manufacturing and contributes to the sector’s growth trajectory.

In case you missed it: Cooperative Societies in the Agricultural Sector in India: Benefits, Role, and Challenges

Drone on Field of Sunflowers

Conclusion

The Agriculture Drone Subsidy Scheme offers a valuable opportunity for farmers and businesses to harness the power of drone technology in agriculture. By understanding the eligibility criteria, license requirements, and application process, users can navigate through the scheme effectively.

The integration of drones in agriculture can lead to improved crop management, enhanced resource efficiency, and sustainable farming practices. Embrace the potential of agricultural drones and take advantage of the government subsidy to shape the future of farming.

Ultimate Guide to Raising Araucana Chickens: Breed Profile, Farming Economics, Diet, and Care

0

Welcome to the Ultimate Guide to Raising Araucana Chickens! Whether you’re a seasoned farmer or a backyard enthusiast, Araucana chickens offer a unique and rewarding experience. In this comprehensive guide, we’ll delve into everything you need to know about Araucana chicken farming, from breed profiles and farming economics to diet and care tips. Explore the fascinating world of Araucana chickens, learn how to provide them with the best care, and discover the joys of raising these charming birds right in your backyard.

Raising Araucana Chickens

Raising Araucana Chickens

Introduction to Araucana Chickens

The Araucana breed has an interesting history that traces back to South America, specifically the Araucania region in Chile. It is believed that Araucanas were first introduced to the United States in the 1930s. Salvador Castello, a Spanish aviculturist, encountered these chickens during a visit to Chile in 1914 and named them “Gallina Araucana” after the Araucania region. Araucanas are often confused with Ameraucanas and Easter Eggers, but they are distinct breeds with their unique characteristics.

Distinctive Features and Appearance

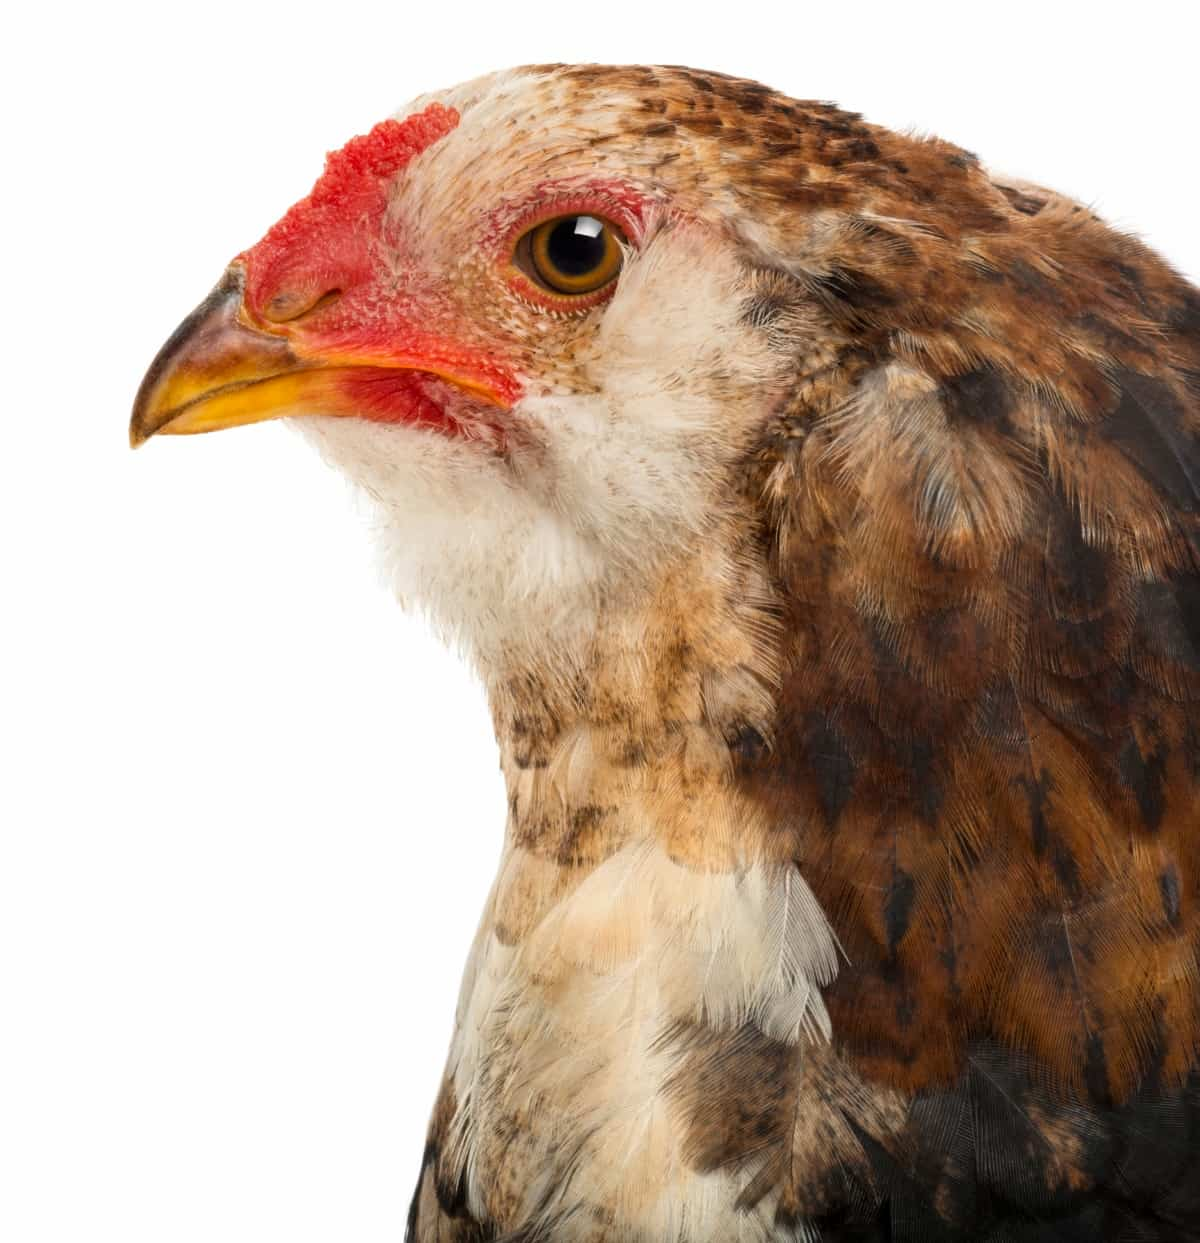
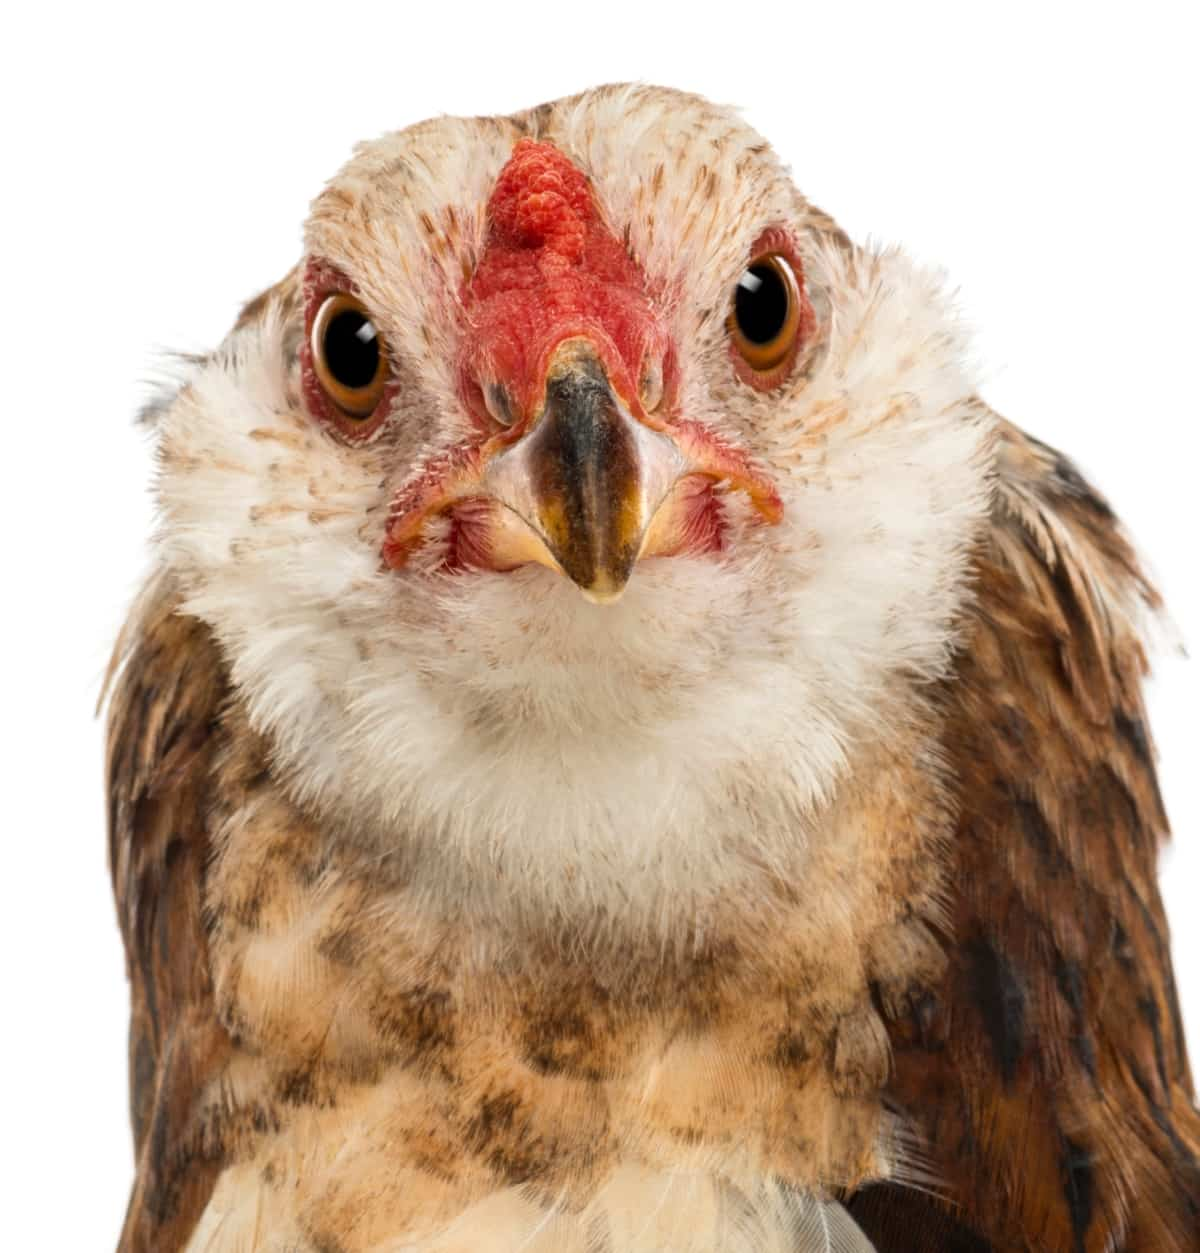
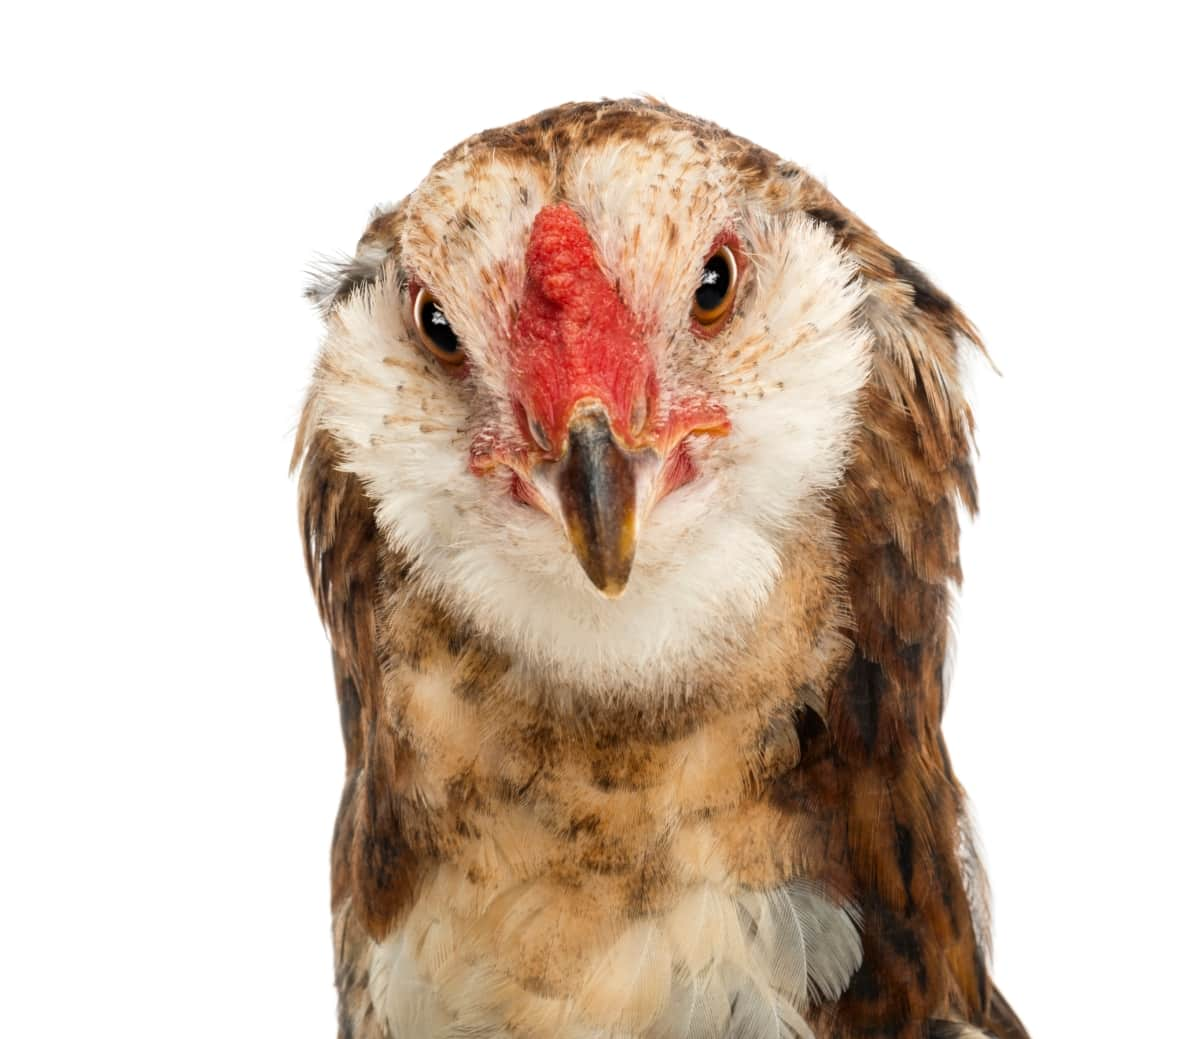
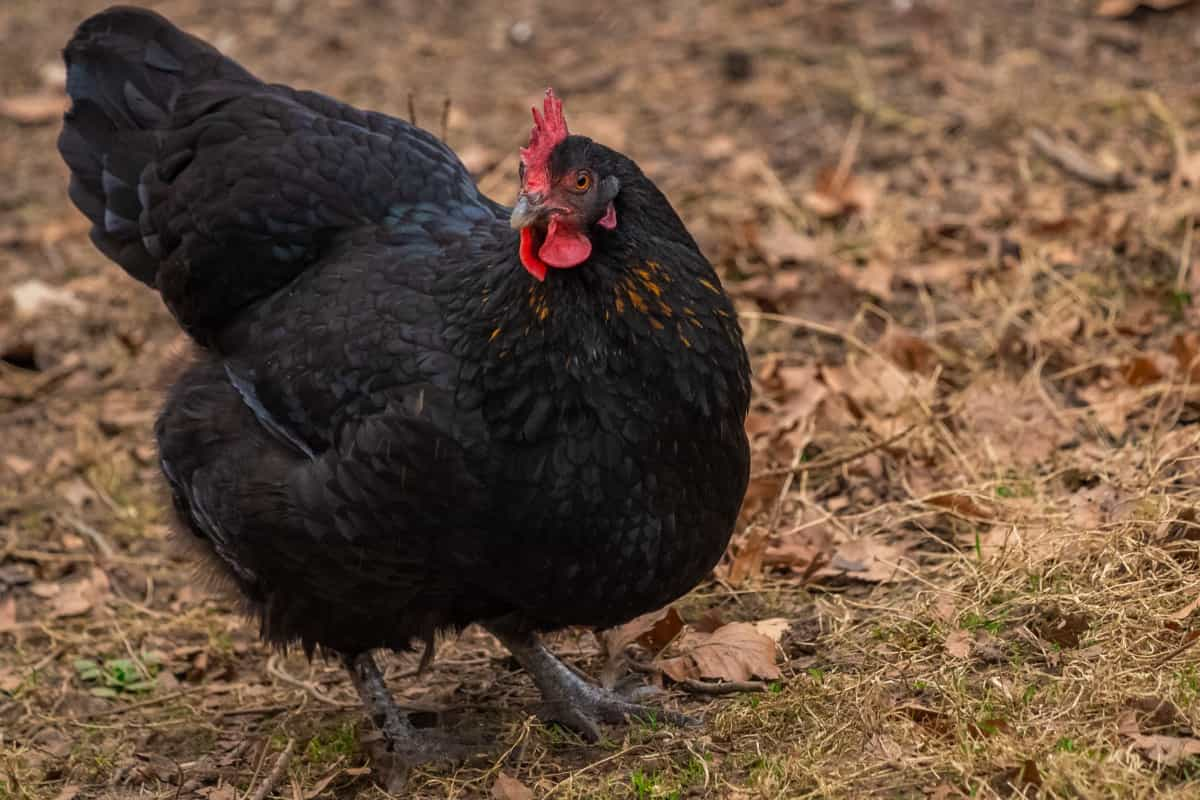
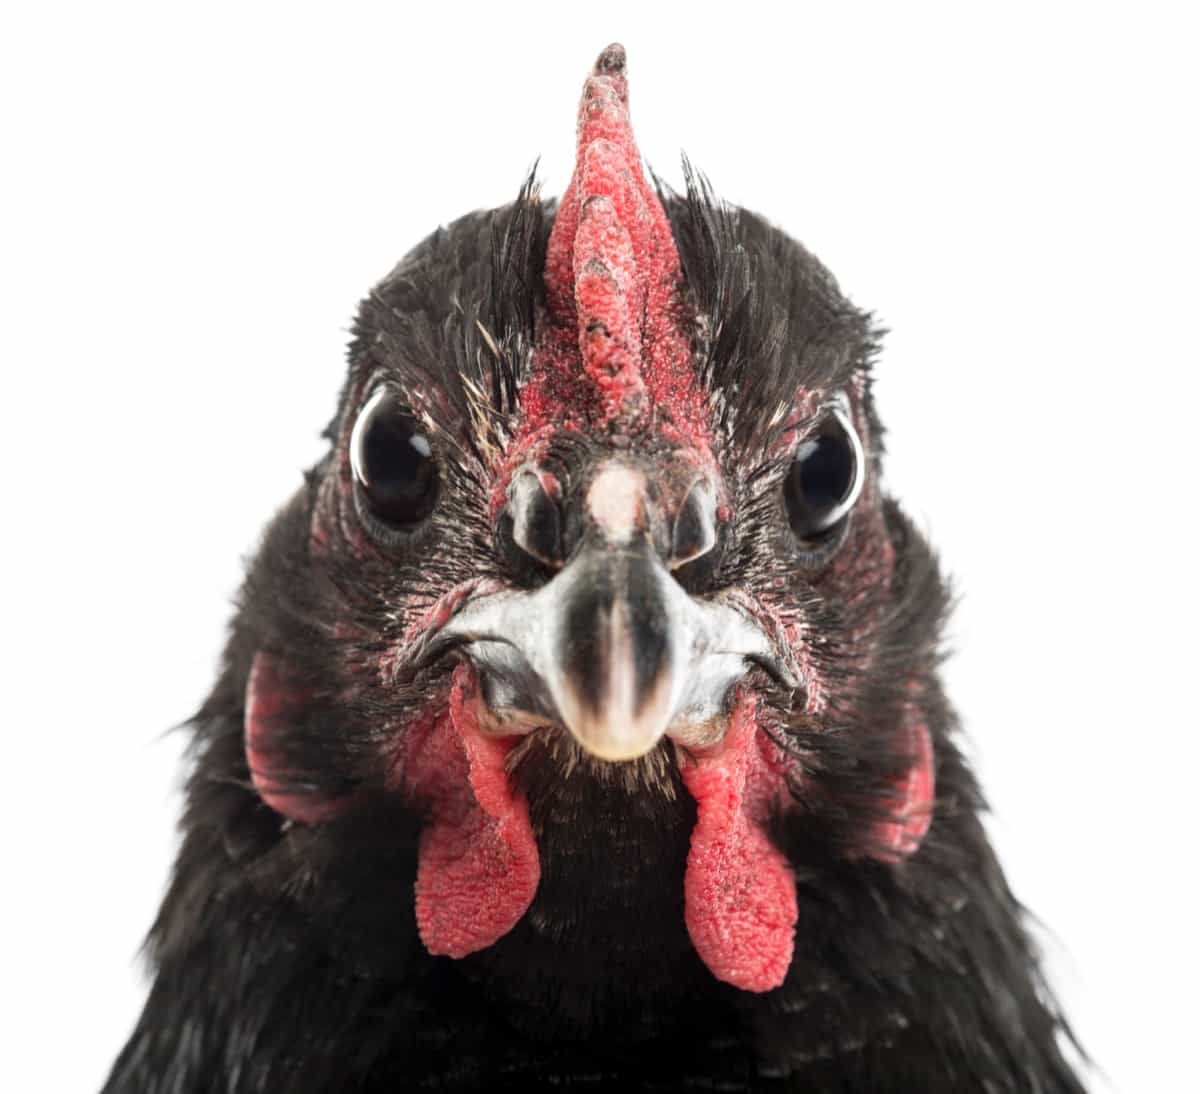
Araucana chickens have several distinctive features that set them apart from other breeds. They are rumpless, meaning they lack a tail, and some individuals have tufts of feathers on the sides of their heads. These ear tufts are different from the beards found in breeds like Ameraucanas and Silkies. Araucanas also have a broad skull, an upright stance, and an unusual wart-like feature called plicae, where the earlobes are typically seen.

Varieties and Recognized Colors

The American Poultry Association recognizes five color varieties of Araucana chickens: Black, Black, Breasted Red, Golden Duckwing, Silver Duckwing, and White. Each variety has its unique feather plumage, which can include whites, greys, browns, blacks, and speckles. Bantam Araucanas, which are smaller versions of the breed, are also available but are relatively rare.

Araucana Chicken Price

Due to their rarity and unique characteristics, Araucana chickens can be more challenging to find compared to other breeds. Many hatcheries choose not to breed Araucanas due to hatch rate issues caused by genetics. Therefore, if you are looking to add Araucanas to your flock, it is advisable to consult with a breeder who is actively working on developing the breed.

Araucana Chicken Lifespan

Araucana chickens have a 6–8 year lifetime on average, although they may live up to 10 years or more with the right care. Their lifetime may be increased by giving them a healthy food, frequent veterinarian treatment, and a proper habitat.

Araucana Chicken

Physical Characteristics of Araucana Chicken

Size and Weight Standards

Araucana chickens come in different sizes, with bantam varieties being smaller than standard-sized ones. Bantam hens typically weigh around 25.75 ounces (730g), while roosters weigh around 28 ounces (800g). Standard-sized Araucanas have varying weights depending on their genetics and diet.

Feathering and Crest Details

Araucanas have a wide range of feather plumage, including whites, greys, browns, blacks, and speckles. Their distinctive feature is the absence of a tail, making them rumpless. Some individuals may also have tufts of feathers on the sides of their heads, known as ear tufts.

Beak, Eyes, and Comb

Araucanas have typical chicken beaks, eyes, and combs. Their beaks are designed for pecking and foraging, their eyes are bright and alert, and their combs can vary in size and shape depending on the individual bird.

Behavior and Temperament of Araucana Chicken

Social Dynamics and Behavior

Araucana chickens are known for their calm and friendly nature. They are generally calm and get along well with other flock members. They tend to be active and enjoy foraging, scratching the ground, and exploring their surroundings. Araucanas are also known for their tendency to go broody, making them excellent mothers if you are interested in hatching chicks.

Interaction with Humans and Pets

With proper handling and socialization, Araucana chickens can become quite tame and enjoy human interaction. They can be trained to eat from your hand and may even enjoy being gently petted. They can also coexist peacefully with other pets, such as dogs and cats, as long as proper introductions and supervision are provided.

Noise Levels and Activity

Araucana chickens are generally moderately quiet compared to some other breeds. They will vocalize with soft clucks and occasional crowing from roosters. Their activity levels vary but are typically moderate, with periods of foraging, dust bathing, and roosting throughout the day.

Housing Araucana Chickens

Coop Design and Space Requirements

When designing a coop for Araucana chickens, it is important to provide adequate space for their comfort and well-being. The general rule of thumb is to allow at least 4 sq ft of coop space per bird. The coop should be well-ventilated and predator-proof and provide roosting bars and nesting boxes for the chickens to rest and lay eggs. Consider using natural materials such as straw or wood shavings for bedding.

Ventilation and Temperature Control

Proper ventilation is maintained for good air quality inside the coop and prevent the buildup of moisture and ammonia. Adequate airflow helps regulate temperature and reduces the risk of respiratory issues. Ensure that the coop has windows or vents opened or closed as needed to maintain a comfortable environment for the chickens.

Safety from Predators

Protecting Araucana chickens from predators is essential. Use sturdy fencing or wire mesh to secure the coop and the outdoor area where the chickens will have access. Consider installing an apron or burying wire mesh perimeter of coop to prevent digging predators from gaining access. Additionally, provides a secure locking mechanism for the coop door to keep predators out at night.

Araucana Chicken Feeding and Nutrition

Basic Dietary Needs

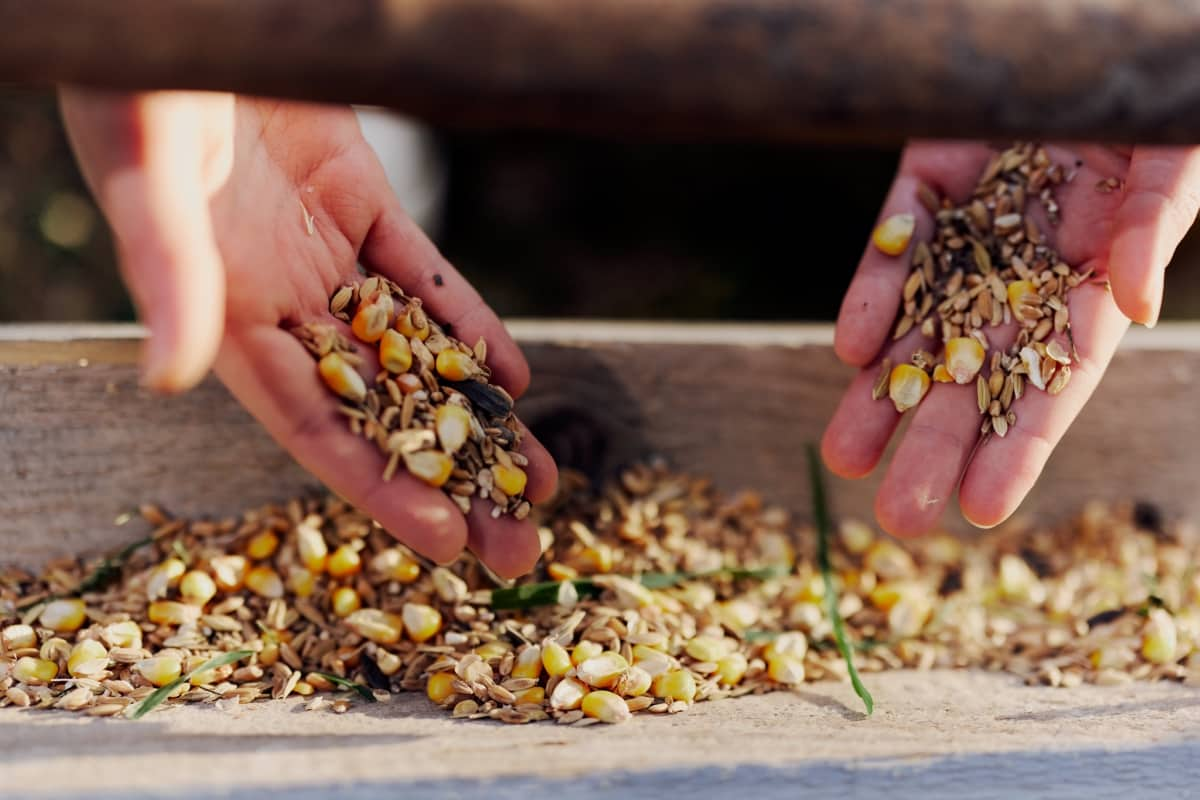
Araucana chickens have similar dietary requirements to other chicken breeds. A balanced diet should consist of a good-quality commercial chicken feed that provides essential nutrients such as protein, carbohydrates, fats, vitamins, and minerals. The feed should be appropriate for the age and life stage of the chickens, whether they are chicks, pullets, or adult birds. Consult with a poultry nutritionist or veterinarian for specific feeding recommendations.

Organic Feed
Supplements and Treats

In addition to commercial feed, Araucana chickens can benefit from supplemental treats and foraging opportunities. Offer them fresh fruits, vegetables, and kitchen scraps in moderation. Provide access to grit, which helps with digestion, and offer calcium supplements such as crushed oyster shells to support eggshell production.

Water Access and Management

Clean and fresh water should be available to Araucana chickens at all times. Ensure that the water containers are cleaned regularly to prevent growth of bacteria and algae. During extreme weather conditions, monitor the water supply to prevent freezing in cold temperatures or overheating in hot temperatures.

Health, Wellness, and Care for Araucana Chicken

Common Health Issues and Prevention

Araucana chickens, like any other breed, can be susceptible to certain health issues. Some common health concerns include respiratory infections, parasites, and egg-related problems. To prevent these issues, maintain a clean and dry coop, provide regular veterinary check-ups, practice good biosecurity measures, and ensure a balanced diet for optimal health.

Vaccinations and Parasite Control

Consult with a poultry veterinarian or local agricultural extension office to determine if any specific vaccinations are recommended for Araucana chickens in your area. Implement parasite control program to prevent infestations of external and internal parasites. This may include regular deworming and the use of appropriate pest control products.

Emergency Care and Veterinary Assistance

It is important to have a plan in place for emergencies. Familiarize yourself with common signs of illness or distress in chickens and establish a relationship with a poultry veterinarian who can provide guidance and assistance when needed. Prompt veterinary care can ensur the health and well-being of your Araucana chickens.

Araucana Chicken Egg Production

Laying Frequency and Seasonality

Araucana chickens are known for their ability to lay blue eggs, which is one of the main reasons people are attracted to this breed. They lay around 150-200 eggs per year, although individual variations may occur. The frequency of egg production can be influenced by factors such as age, diet, lighting conditions, and seasonal changes.

Egg Size, Color, and Quality

Araucana eggs are small to medium in size, with variations depending on the individual bird. The most notable characteristic of Araucana eggs is their unique blue-green color. The color is not just on the surface of the shell but throughout the shell itself. The intensity of the blue color among different Araucana individuals.

Eggs
Enhancing Egg Production

To encourage optimal egg production, provide a balanced diet, ensure access to clean water, and maintain a stress-free environment for your Araucana chickens. Adequate lighting, with a minimum of 14 hours of light per day, help stimulate egg production.

Breeding Araucana Chickens

Selecting Breeding Stock
  • When selecting breeding stock, it’s crucial to choose healthy and genetically diverse birds that conform to the breed standards. Look for Araucana chickens with rumpless features, distinct ear tufts, and the ability to lay blue eggs.
  • Breeding Araucanas for show purposes requires attention to detail, as the lack of a tail is a key consideration in poultry shows. Only blue-laying birds are admitted to poultry shows in the US, and specific standards for skin, shanks, and other physical attributes must be met.
Breeding Techniques and Tips

Breeding Araucana chickens involves complex genetic considerations, especially when aiming to produce rumpless birds and maintain the ability to lay blue eggs. Complicated breeding procedures are involved in creating rumpless birds, and breeders must be aware of the allele issues that can affect hatch rates and chick survival. To enhance fertility and improve hatch rates, breeders may need to trim the fluff on the rear of Araucanas to prevent hindrances during mating. Careful selection of parent stocks and attention to genetic traits are essential for successful breeding.

Incubation and Chick Care

After successful breeding, proper incubation and chick care are crucial for the health and survival of Araucana chicks. Due to the allele issues and mortality rates associated with the breed, breeders must provide optimal conditions for incubation and attentive care for the hatched chicks.

Showing Araucana Chickens

Preparation for Poultry Shows

Prior to poultry shows, meticulous grooming and preparation are essential to showcase Araucana chickens at their best. Attention to the birds’ physical appearance, including the absence of a tail and distinct ear tufts, is crucial for presenting them in poultry shows.

Show Standards and Expectations

Poultry shows and exhibitions in the US have specific standards and expectations for Araucana chickens. Only blue-laying birds are admitted, and breeders must ensure that their birds meet the required standards for skin, shanks, and other physical attributes.

Winning Tips and Strategies

Winning in poultry shows with Araucana chickens requires dedication to breeding and grooming practices that align with the breed standards. Engaging with experienced breeders and judges can provide valuable insights into the specific criteria and expectations for achieving success in poultry shows.

Araucana Chicken Care in Different Climates

Adapting Araucana chickens to different climates requires careful management and attention to their specific needs. Here are some considerations for managing Araucana chickens in various environmental conditions:

Adapting to Cold Conditions

Araucana chickens are hardy birds that can thrive in cold climates. Pea combs are prone to frostbite, so providing adequate shelter and possibly a coop heater during extreme winter conditions is essential to ensure their well-being.

Managing in Hot Weather

While Araucanas originated in warm areas, they have proven to be adaptable to a wide range of weather conditions. Providing shade, access to fresh water, and proper ventilation in the coop are important for managing Araucana chickens in hot weather.

Seasonal Care Adjustments

Seasonal care adjustments for Araucana chickens involve monitoring their comfort and well-being in response to changing environmental conditions. Providing appropriate shelter, ventilation, and access to water are essential aspects of seasonal care adjustments for these adaptable birds.

Chicken

Integrating Araucana Chicken with Other Breeds

Compatibility and Flock Dynamics

When integrating Araucana chickens with other breeds, it’s important to observe flock dynamics and ensure that the birds coexist peacefully. Monitoring interactions and providing adequate space and resources can contribute to harmonious flock dynamics.

Managing Mixed Flocks

Managing mixed flocks involves understanding the social dynamics and hierarchy within the flock. Providing multiple feeding and watering stations, as well as observing interactions, can help minimize conflicts and ensure the well-being of Araucana chickens within mixed flocks.

Avoiding Bullying and Crest Damage

Araucana chickens, with their distinctive features such as ear tufts, may require protection from potential bullying or damage from other flock members. Observing interactions and providing a safe environment can help prevent bullying and protect the unique characteristics of Araucana chickens.

Conclusion

raising Araucana chickens offers a unique and rewarding experience. Understanding their breed profile, farming economics, diet, and care is essential for successful poultry farming ventures, ensuring the well-being of these fascinating birds.

Bringing Hydroponics to Classroom: Importance, Benefits of Learning for School Students

0

Integrating hydroponics in education offers hands-on STEM learning opportunities. Classroom hydroponic systems engage students in practical projects, fostering skills in sustainability and environmental science. DIY hydroponics projects empower students to set up systems, exploring urban gardening and food security concepts.

biologists in hydroponic farm

STEM hydroponics curriculum enhances critical thinking and problem-solving abilities. Benefits include experiential learning, understanding hydroponic technology, and career skill development. By teaching hydroponic gardening, schools promote sustainable practices and empower students to address global challenges. Urban hydroponics initiatives and environmental science projects further enrich the educational experience, preparing students for a future focused on innovation and sustainability.

Bringing Hydroponics to Classroom

Introduction to Hydroponics in Education

Hydroponics, a soilless cultivation method, is revolutionizing education by offering hands-on learning experiences for students. As schools seek innovative ways to engage learners in science, technology, engineering, and mathematics (STEM), hydroponics emerges as a powerful tool for cultivating curiosity and fostering critical thinking skills.

Benefits of Hydroponic Gardening for Students

Hydroponic gardening provides numerous benefits for students. Beyond the traditional classroom setting, it offers practical applications of scientific principles, allowing students to witness plant growth firsthand. Moreover, hydroponics teaches sustainability by promoting water conservation and reducing environmental impact.

Overview of Hydroponic Systems

Hydroponic systems vary in complexity, from simple setups like wick and deep water culture (DWC) to advanced techniques such as nutrient film technique (NFT) and ebb and flow. Understanding the basic types of these systems is essential for creating successful classroom gardens.

Understanding the Basics of Hydroponics

At the core of hydroponics lies the efficient delivery of nutrients and water directly to plant roots. Key components include nutrient solutions, growing mediums, pumps, and reservoirs. By eliminating soil, hydroponics optimizes resource utilization and accelerates plant growth.

In case you missed it: 7 Best Hydroponics Kits in India: Guide to Buy Top Hydroponics Kit at Affordable Price

 indoor hydroponic vegetable farming with led lighting in controlled environment
The Science of Hydroponics: Nutrients and Water

In hydroponic gardening, nutrient solutions play a major role in providing these essential elements for plant growth. Understanding the principles of plant nutrition and the dynamics of water uptake is crucial for maintaining healthy plants.

Types of Hydroponic Systems for Classrooms

Classroom hydroponic systems range from beginner-friendly setups to more advanced configurations. Each system offers unique advantages and challenges, allowing educators to tailor the partical learning experience to their student’s needs and abilities.

Simple Systems: Wick and Deep Water Culture (DWC)

Wick and deep water culture systems are ideal for beginners due to their simplicity and low maintenance requirements. These systems rely on passive nutrient delivery methods, making them suitable for educational environments.

Advanced Systems: Nutrient Film Technique (NFT) and Ebb and Flow

NFT and ebb and flow systems offer more control over nutrient delivery and oxygenation, making them suitable for advanced classrooms. These systems require careful monitoring and adjustment but provide valuable insights into plant physiology and hydroponic technology.

Setting Up Your Classroom Hydroponic Garden

Creating a successful classroom hydroponic garden requires careful planning and preparation. Educators must gather the necessary equipment and materials, follow a step-by-step setup guide, and ensure proper plant care practices are implemented.

Equipment and Materials Checklist

Before embarking on a hydroponic gardening project, educators must procure essential equipment such as grow lights, pumps, reservoirs, pH meters, and nutrient solutions. Additionally, selecting suitable growing mediums and containers is essential for plant health and growth.

Step-by-Step Setup Guide

To set up a classroom hydroponic garden, educators must follow a systematic approach, starting with assembling the equipment and preparing the growing area. Next, they must mix nutrient solutions, install lighting and irrigation systems, and introduce plants to the hydroponic environment.

Plant Science and Hydroponics

Hydroponic gardening provides a unique opportunity to explore plant science concepts in a hands-on manner. From germination to harvest, students can observe and analyze the plant life cycle, photosynthesis, respiration, and nutrient uptake processes.

In case you missed it: Pros and Cons of Wick Hydroponics: Ease of Setup to Limitations

Bringing Hydroponics to Classroom
Germination to Harvest: The Plant Life Cycle

Understanding the differnet stages of the plant life cycle is essential for successful hydroponic gardening. Students learn about seed germination, vegetative growth, flowering, and fruit development, gaining insights into plant biology and development.

Photosynthesis and Respiration in Hydroponic Gardens

Photosynthesis and respiration are fundamental processes that drive plant growth and metabolism. In hydroponic gardens, students can observe these processes in action, exploring how light, water, and nutrients influence plant physiology.

Nutrient Management and Plant Health

Maintaining proper nutrient levels is critical for plant health and productivity in hydroponic systems. Students learn how to mix and manage nutrient solutions, identify and address nutrient deficiencies, and monitor plant health indicators.

Mixing and Managing Nutrient Solutions

Hydroponic nutrient solutions must provide all essential elements in the correct proportions to support plant growth. Students gain practical experience in mixing nutrient solutions, adjusting pH levels, and monitoring nutrient concentrations to ensure optimal plant nutrition.

Identifying and Addressing Plant Nutrient Deficiencies

Nutrient deficiencies can manifest as visible symptoms in plant leaves and tissues. By learning to recognize these symptoms, students can diagnose nutrient deficiencies and take corrective action to restore plant health and vitality.

Integrating Hydroponics into Curriculum

Hydroponic gardening offers endless opportunities for integrating STEM concepts into the curriculum. Educators can develop interdisciplinary projects and activities that engage students in scientific inquiry, engineering design, and mathematical analysis.

STEM Applications and Projects

Hydroponics lends itself to a wide range of STEM applications and projects. From designing and building hydroponic systems to conducting experiments on plant growth factors, students can explore scientific principles in a hands-on, inquiry-based manner.

A STEM hydroponics curriculum integrates principles of science, technology, engineering, and mathematics into the study of hydroponic gardening. It provides a structured framework for educators to teach students about plant biology, nutrient cycles, environmental science, and sustainable agriculture through hands-on activities and real-world applications. Students engage in designing, building, and maintaining hydroponic systems, conducting experiments to explore factors influencing plant growth, and analyzing data to make informed decisions.

DIY hydroponics in schools involves students constructing their hydroponic systems using readily available materials. This hands-on approach not only teaches practical skills but also fosters creativity and problem-solving abilities. Students learn about plant biology, nutrient management, and environmental science while actively participating in the construction and maintenance of their hydroponic gardens.

In case you missed it: Different Types of Growing Mediums for DWC: Deep Water Culture Hydroponics

learning hydroponic gardening

Hydroponics STEM activities engage students in interdisciplinary learning experiences that integrate science, technology, engineering, and mathematics. From designing hydroponic systems to conducting experiments on plant growth factors, these activities promote critical thinking, collaboration, and innovation, preparing students for future STEM-related careers.

Environmental Science and Sustainable Agriculture

Hydroponic gardening promotes environmental awareness and sustainable agriculture practices. Students learn about water conservation, nutrient recycling, and alternative farming methods, gaining insights into the challenges and opportunities of modern agriculture.

Maintaining Your Hydroponic Garden

Daily and weekly maintenance routines are essential for ensuring the health and productivity of a classroom hydroponic garden. Educators and students must collaborate to monitor plant growth, adjust nutrient levels, and troubleshoot common issues.

Daily and Weekly Maintenance Routines

Regular maintenance tasks include checking nutrient levels, adjusting pH and EC levels, pruning plants, and cleaning equipment. Educators can assign specific roles and responsibilities to students, fostering teamwork and accountability.

Troubleshooting Common Issues

Despite careful planning and maintenance, hydroponic gardens may encounter various challenges, such as nutrient imbalances, pest infestations, and equipment malfunctions. Educators and students must work together to identify and address these issues promptly.

Harvesting and Using Your Produce

Harvesting produce from a classroom hydroponic garden is a rewarding experience for students. Educators can incorporate lessons on food preservation, cooking, and nutrition, encouraging students to explore healthy eating habits and culinary skills.

Harvesting Techniques and Timing

Proper harvesting techniques ensure the quality and freshness of hydroponic produce. Students learn how to identify ripe fruits and vegetables, use appropriate tools for harvesting, and handle produce safely and hygienically.

From Garden to Table: Utilizing Produce in School

Hydroponic produce can be used in school meals, snacks, and culinary projects. Educators can organize cooking demonstrations, taste tests, and recipe contests, encouraging students to explore new flavors and cuisines.

Expanding the Learning Experience

Beyond the classroom, hydroponic gardening offers opportunities for community engagement, service learning, and career exploration. Educators can collaborate with local organizations, businesses, and experts to enrich the learning experience and inspire students to pursue future opportunities in hydroponics and agriculture.

Community Engagement and Service Learning

Hydroponic gardens can serve as hubs for community engagement and service learning initiatives. Students can organize garden tours, host workshops, and donate produce to local food banks, fostering connections with the broader community and promoting social responsibility.

In case you missed it: 15 DIY Aquaponic Plans You Can Build in Your Garden

Indoor hydroponic farming
Future Opportunities in Hydroponics and Agriculture

Hydroponic gardening opens doors to exciting career paths and professional opportunities in agriculture, science, and environmental management. Students can explore fields such as agronomy, horticulture, hydrology, and sustainable development, preparing them for meaningful and impactful careers in the future.

Monitoring and Optimizing Plant Growth

Continuous monitoring, optimization are essential for maximizing plant growth and productivity in hydroponic systems. Educators and students can utilize sensors, data logging systems, and IoT technology to track environmental conditions and make informed decisions about nutrient management and plant care.

Lighting Requirements and Solutions

Lighting plays a critical role in hydroponic gardening, influencing plant growth, flowering, and fruiting. Students learn about different types of grow lights, their spectral properties, and optimal lighting schedules for various plant species.

Temperature and Humidity Control in the Classroom

Maintaining optimal temperature and humidity levels is needed for differnt plant health and growth in a classroom hydroponic garden. Students explore strategies for climate control, including ventilation, insulation, and shading, to create an ideal growing environment for their plants.

Technological Innovations in Hydroponics

Advancements in technology are transforming the field of hydroponics, offering new opportunities for automation, optimization, and sustainability. Students can learn about sensors, actuators, and control systems, as well as emerging trends such as vertical farming, aquaponics, and aeroponics.

Automating Hydroponic Systems with Technology

Automation simplifies routine tasks and enhances efficiency in hydroponic systems. Students can design and implement automated systems for nutrient delivery, irrigation, and environmental monitoring, gaining valuable experience in engineering and technology.

The Role of Sensors and IoT in Modern Hydroponics

Sensors and IoT technology enable real-time monitoring and control of hydroponic systems, optimizing resource utilization and maximizing crop yields. Students explore sensor technologies, data analysis techniques, and IoT platforms, gaining insights into the intersection of agriculture and digital innovation.

Sustainable Practices and Hydroponics

Hydroponic gardening offers opportunities for implementing sustainable practices and reducing environmental impact. Students learn about water conservation techniques, renewable energy solutions, and circular economy principles, contributing to a more resilient and eco-friendly food system.

Water Conservation Techniques

Water scarcity is a major growing concern in agriculture, making water conservation a priority for hydroponic growers. Students explore strategies for reducing water usage, such as drip irrigation, rainwater harvesting and methods, and water recycling, promoting responsible stewardship of natural resources.

Renewable Energy Sources for Hydroponic Systems

Harnessing renewable energy sources like solar, wind power can enhance the sustainability of hydroponic systems. Students learn about alternative energy technologies, their applications in agriculture, and the benefits of transitioning to clean, renewable energy sources.

Hydroponics and Global Food Systems

Hydroponic gardening has the potential to revolutionize global food systems by enabling year-round production, minimizing resource inputs, and mitigating environmental impact. Students explore the role of hydroponics in addressing food security challenges, improving nutritional access, and promoting sustainable development worldwide.

In case you missed it: How to Set Up a Nutrient Film Technique – NFT Hydroponics

teaching hydroponics
Addressing Food Deserts with Urban Hydroponics

Urban hydroponic farming offers a solution to food deserts, providing fresh, nutritious produce in densely populated areas. Students examine the socioeconomic factors contributing to food insecurity, as well as the potential of hydroponics to increase food access and promote community health and well-being.

The Impact of Hydroponics on Food Security and Sustainability

By empowering communities to grow their food locally, hydroponic gardening strengthens food security and resilience in the face of climate change, environmental disruptions. Students learn about the interconnectedness of food systems, environmental sustainability, and social justice, inspiring them to become agents of positive change in their communities.

Career Paths and Professional Skills

Hydroponic gardening cultivates a diverse range of professional skills, prepares students for rewarding careers in agriculture, science, and environmental management. Students explore career pathways in hydroponic farming, research, education, and entrepreneurship, gaining practical experience and developing transferable skills for future success.

Exploring Careers in Agriculture, Science, and Environmental Management

Hydroponic gardening opens doors to exciting career opportunities in diverse fields such as agronomy, plant physiology, greenhouse management, and sustainable agriculture. Students can pursue careers as hydroponic growers, researchers, educators, consultants, and advocates, contributing to a more resilient and sustainable food system.

Developing Entrepreneurial Skills through Hydroponic Ventures

Hydroponic gardening offers students the opportunity to develop entrepreneurial skills and explore business opportunities in the growing field of urban agriculture. Students can start their hydroponic ventures, from small-scale microgreen production to large-scale commercial hydroponic farms, leveraging their creativity, innovation, and passion for sustainability.

Conclusion

Bringing hydroponics to the classroom provides invaluable learning opportunities for students, fostering scientific inquiry, environmental stewardship, and entrepreneurial spirit. By integrating hydroponic gardening into the curriculum, educators can empower students to become future leaders in agriculture, science, and sustainability, driving positive change in their communities and beyond.

Ultimate Guide to Raising Polish Chickens: Breed Profile, Farming Economics, Diet, and Care

0

Embark on the journey of raising Polish chickens with our Ultimate Guide. Whether you’re a novice or an experienced poultry enthusiast, discover everything you need to know about Polish chicken care, from breed profiles and temperament to egg production and health issues. Explore various Polish chicken varieties, coop designs, and feeding requirements for successful farming.

Raising Polish Chickens

Introduction to Polish Chickens

Raising Polish chickens at home is a rewarding experience for poultry enthusiasts. These charming birds are known for their distinctive appearance and friendly demeanor, making them popular choices for backyard flocks. Whether you’re a novice or an experienced chicken keeper, Polish chickens can add beauty and personality to your flock.

History and Origin of the Breed

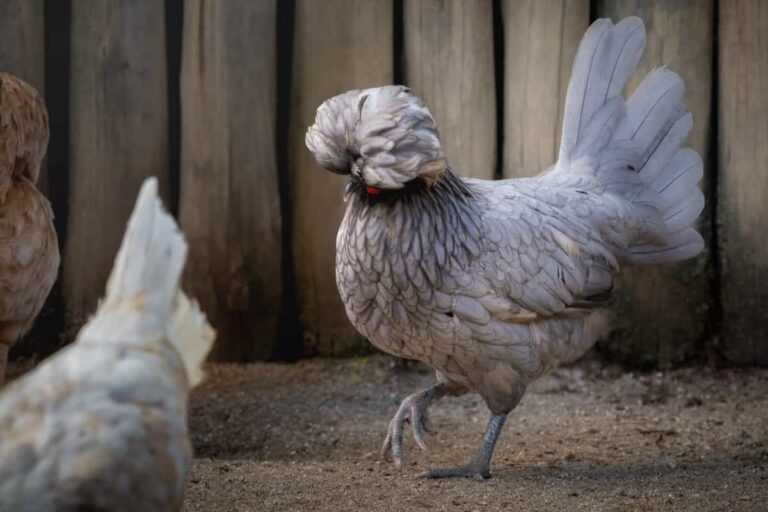
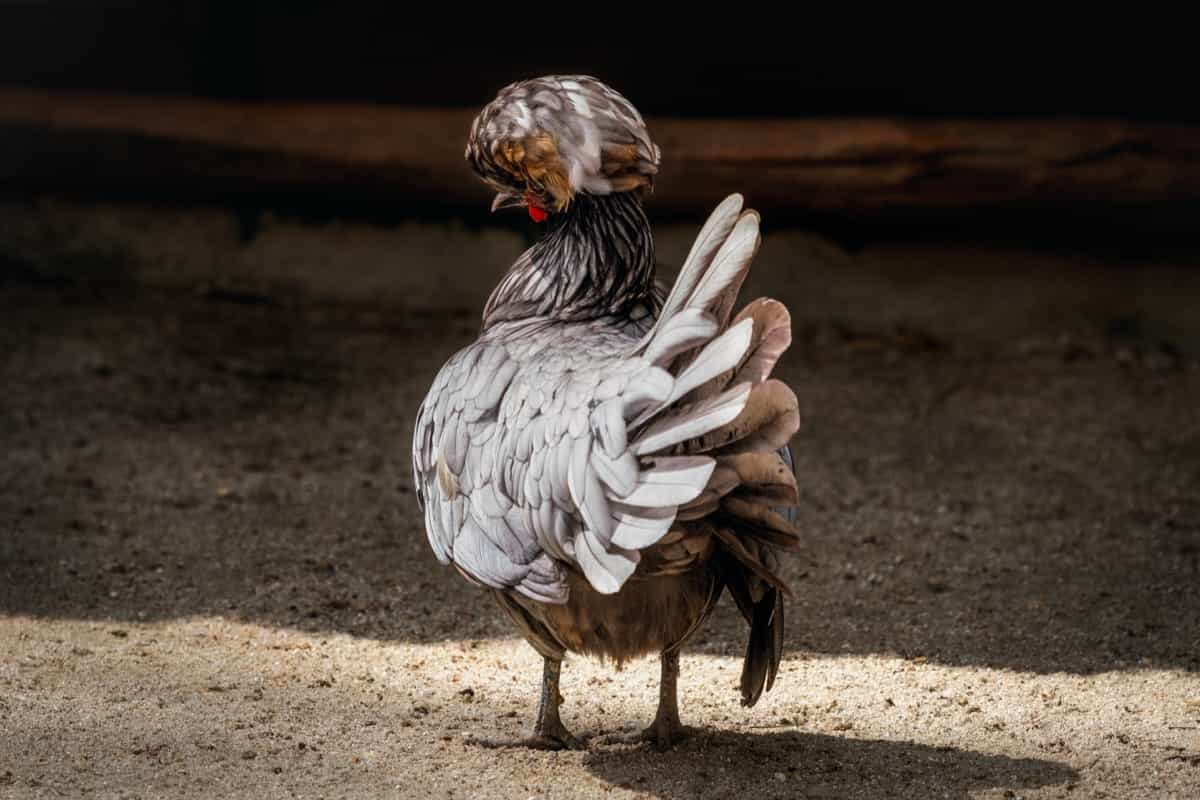
Polish chickens have a rich history dating back to the 16th century in Poland. Originally bred for their ornamental qualities, they were favored by European nobility for their extravagant plumage and unique crests. Over the centuries, Polish chickens have become beloved for their striking appearance and gentle disposition.

Distinctive Features and Appearance

Polish chickens are easily recognizable by their large crests of feathers atop their heads, known as “topknots” or “pom-poms.” They have clean, elegant bodies with long necks and tails, giving them a regal appearance. Their striking appearance makes them popular subjects for exhibitions and poultry shows.

Varieties and Recognized Colors

Polish chickens are available in white, black, buff, silver, and golden hues, among other colors and patterns. Each variety has its unique charm, with some featuring laced or spotted plumage. Breeders and enthusiasts often seek out rare color varieties to add diversity to their flocks.

Polish Chicken Price

The price of Polish chickens varies depending on factors such as age, quality, and color variety. On average, chicks can cost between $5 to $15 each, while mature birds may range from $20 to $50 or more. Polish chickens can vary in price depending on factors such as age, color, and quality.

Polish Chicken Lifespan

With proper care, Polish chickens can live up to 5-7 years on average. Providing a balanced diet, adequate shelter, and regular health checks can help extend their lifespan and ensure their well-being. Polish chickens have an average lifespan of 5-7 years, though some may live longer with proper care. Providing a suitable environment, a nutritious diet, and regular health checks are key to ensuring their longevity and quality of life.

Physical Characteristics of Polish Chicken

Polish chickens have a slender build with long, graceful necks and tails. Their most distinctive feature is their crest of feathers, which can vary in size and shape depending on the individual bird. Despite their elegant appearance, they are robust birds capable of foraging and roosting with ease.

In case you missed it: Ultimate Guide to Raising Australorp Chickens: Profile, Farming Economics, Egg Production, Diet, and Care
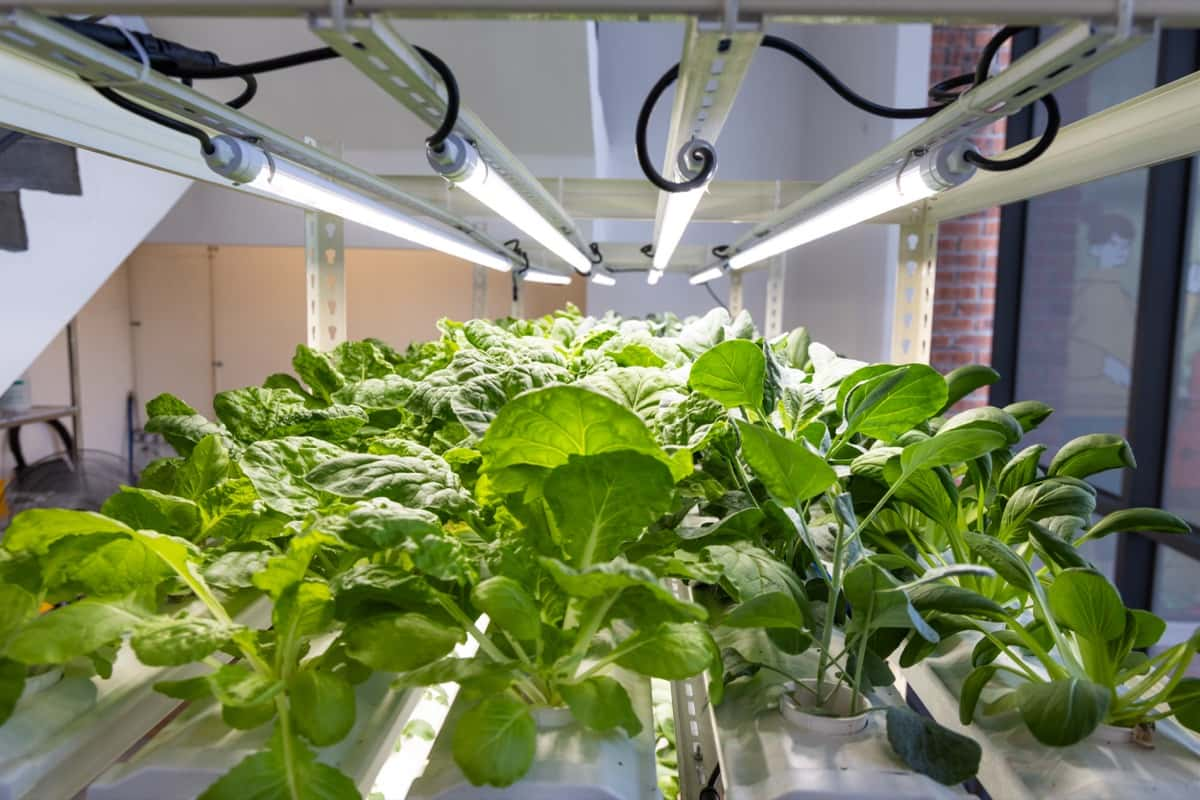
Polish chicken
Size and Weight Standards

Adult Polish chickens typically weigh between 4 to 6 pounds, with hens being slightly smaller than roosters. Despite their lightweight build, they are hardy birds capable of withstanding various weather conditions. Their moderate size makes them suitable for both backyard and commercial production.

Feathering and Crest Details

The feathers of Polish chickens are smooth and glossy, with distinct patterns and coloration. Their crests, composed of tightly packed feathers, come in various shapes, including round, V-shaped, or even heart-shaped. Breeders often select for well-defined crests and vibrant plumage in breeding programs.

Beak, Eyes, and Comb

Polish chickens have small, curved beaks and bright, alert eyes. Their combs are typically small and neat, often overshadowed by their elaborate crests. Their small combs make them less susceptible to frostbite in cold climates, making them adaptable to various environments.

Behavior and Temperament of Polish Chicken

Polish chickens are very gentle and friendly, making them ideal additions to backyard flocks. They are curious birds that enjoy foraging and exploring their surroundings. Despite their regal appearance, they are not aggressive and get along well with other flock members.

Social Dynamics and Behavior

Polish chickens are social animals that thrive in small flocks. They form close bonds with their flock mates and often engage in communal activities such as dust bathing and roosting together. Their friendly nature makes it easy to integrate into existing flocks and enjoyable to observe.

Interaction with Humans and Pets

Polish chickens are affectionate birds that enjoy human interaction. They can be easily tamed and may even seek out attention from their caretakers. They also get along well with other pets, such as dogs and cats, making them versatile additions to households with multiple animals.

Noise Levels and Activity

Polish chickens are relatively quiet birds, with hens occasionally vocalizing when laying eggs or communicating with their flock mates. They are moderately active, spending their days foraging and exploring their environment. Their calm demeanor makes them suitable for urban and suburban settings where noise restrictions may apply.

Housing Polish Chickens

Providing adequate housing is essential for the health and well-being of Polish chickens. A well-designed coop with proper ventilation and predator-proofing ensures a safe and comfortable environment for these birds. Whether you’re building a coop from scratch or repurposing an existing structure, prioritize security and comfort for your flock.

Coop Design and Space Requirements

Polish chickens require a spacious coop with ample room to move around and stretch their wings. A minimum of 4 square feet of space per bird is recommended, with additional space for nesting boxes and perches. Providing adequate space prevents overcrowding and reduces the risk of aggressive behavior among flock members.

Ventilation and Temperature Control

Good ventilation is important for maintaining optimal air quality and temperature inside the coop. Adequate airflow helps prevent respiratory issues and regulates temperature fluctuations, ensuring the comfort of the chickens. Consider installing windows, vents, and fans to promote air circulation and regulate temperature year-round.

In case you missed it: Silkie Chicken Farming: Raising Practices, Varieties, Egg Production, Diet, and Care

Polish chicken Black/Brown
Safety from Predators

Protecting Polish chickens from predators is essential, especially for backyard flocks. Installing secure fencing, predator-proofing the coop, and using deterrents such as motion-activated lights can help deter potential threats. Regularly inspect your coop for weak spots and reinforce them to keep predators at bay.

Polish Chicken Feeding and Nutrition

Providing a balanced feed is key to keeping Polish chickens healthy and thriving. A combination of commercial poultry feed, fresh fruits and vegetables, and supplemental treats ensures they receive essential nutrients. Whether you’re feeding a small backyard flock or a larger commercial operation, prioritize quality nutrition for optimal health and productivity.

Basic Dietary Needs

Polish chickens require a diet rich in protein, vitamins, and minerals to support their growth and development. A high-quality layer feed with a protein content of 16-18% is suitable for adult birds, while chicks require a starter feed with higher protein levels. Additionally, providing access to grit and oyster shells ensures proper digestion and eggshell formation.

Supplements and Treats

In addition to commercial feed, Polish chickens can enjoy a variety of supplemental treats, including mealworms, fruits, vegetables, and grains. These treats provide enrichment and variety in their diet while offering additional nutrients. However, treats should be given in moderation to prevent nutritional imbalances and obesity.

Water Access and Management

Access to clean, fresh water is important for Polish chickens’ health and hydration. Providing multiple water sources and regularly cleaning and refilling waterers ensures they have access to clean water at all times. During hot weather, consider adding electrolytes to their water to prevent dehydration and heat stress.

Health, Wellness, and Care for Polish Chicken

Maintaining the health and well-being of Polish chickens requires regular care and attention. Monitoring signs of illness, providing proper nutrition, and implementing preventive measures are essential for keeping them happy and healthy. Whether you’re a novice or an experienced chicken keeper, staying proactive with your flock’s health ensures they lead long, fulfilling lives.

Common Health Issues and Prevention

Polish chickens are generally hardy birds but may be susceptible to common poultry health issues such as respiratory infections, parasites, and injuries. Regular health checks, proper hygiene, and biosecurity measures can help prevent illness and disease. Promptly address any health concerns to minimize the risk of spreading illness to the rest of the flock.

Vaccinations and Parasite Control

Vaccinating Polish chickens against common diseases such as Marek’s disease and Newcastle disease helps protect them from serious health threats. Additionally, regular parasite control measures, such as deworming and mite prevention, are essential for maintaining their well-being.

Emergency Care and Veterinary Assistance

In the event of diseases or injury, quick veterinary care is crucial for Polish chickens’ recovery. Having a basic first aid kit on hand and knowing how to administer basic treatments can help address minor issues while consulting a veterinarian ensures proper diagnosis and treatment for more serious conditions. Familiarize yourself with common poultry health concerns and establish a relationship with a poultry-friendly veterinarian to ensure your flock receives timely and appropriate care.

In case you missed it: Sussex Chicken Farming: Raising Practices, Varieties, Egg Production, Diet and Care

Polish Chicken with beautiful Crest

Polish Chicken Egg Production

Polish chickens are not the most prolific egg layers, typically producing around 150-200 medium-sized white eggs per year. However, their eggs are prized for their quality and taste, making them a favorite among backyard poultry enthusiasts.

Laying Frequency and Seasonality

Polish chickens exhibit seasonal laying patterns, with high production taking place in the spring and summer months. Laying frequency can vary depending on factors such as age, health, and environmental conditions. Providing adequate nutrition and proper care can help optimize egg production throughout the year.

Egg Size, Color, and Quality

Polish chicken eggs are typically medium-sized and white. While they may not lay as frequently as other breeds, Polish chickens are known for producing eggs with excellent quality and flavor. Proper diet and care contribute to the overall quality of the eggs.

Enhancing Egg Production

To enhance egg production in Polish chickens, ensure they have access to a balanced feed rich in protein and calcium. Supplementing their diet with treats such as mealworms and greens can also stimulate egg laying. Additionally, providing a stress-free environment and adequate nesting boxes encourages hens to lay regularly.

Breeding Polish Chickens

Breeding Polish chickens requires careful selection of breeding stock to maintain desired traits, such as crest size and color. Proper breeding techniques, including controlled mating and genetic diversity, help produce healthy and vigorous offspring.

Selecting Breeding Stock

When selecting breeding stock, choose birds with strong crests, good conformation, and vibrant plumage. Avoid birds with health issues or deformities, as these characteristics can be passed on to offspring. Look for reputable breeders or hatcheries that prioritize breeding for quality and breed standards.

Breeding Techniques and Tips

Successful breeding of Polish chickens involves techniques such as controlled mating, proper housing, and vigilant monitoring of breeding pairs. Avoid inbreeding by introducing new bloodlines periodically and maintaining detailed records of breeding activities.

Incubation and Chick Care

Incubating Polish chicken eggs requires maintaining optimal temperature and humidity levels throughout the incubation period. Once hatched, chicks should be kept warm and dry, with access to clean water and starter feed formulated specifically for chicks.

Showing Polish Chickens

Preparing Polish chickens for poultry shows involves grooming their feathers, cleaning their crests, and ensuring they meet breed standards for size, color, and conformation. Proper handling and training can help acclimate chickens to the show environment and minimize stress.

Preparation for Poultry Shows

Before a poultry show, Polish chickens should be bathed, dried, and groomed to enhance their appearance. Practice posing and handling the birds to ensure they are comfortable and cooperative during judging.

Show Standards and Expectations

Judges evaluate Polish chickens based on breed standards established by poultry organizations such as the American Poultry Association. Birds are assessed for traits such as crest size and shape, body conformation, and overall presentation.

Winning Tips and Strategies

To increase the chances of winning at poultry shows, focus on breeding and selecting birds that closely adhere to breed standards. Pay attention to grooming and presentation and seek feedback from experienced breeders and judges to continually improve.

In case you missed it: How to Raise Wyandotte Chickens: A Profitable Wyandotte Farming for Beginners

Polish Chicken Breed

Polish Chicken Care in Different Climates

Polish chickens can adapt to a variety of climates, but proper care is essential to help them thrive. In cold conditions, provide adequate shelter, insulation, and supplemental heat as needed. In hot weather, ensure access to shade, ventilation, and plenty of fresh water.

Adapting to Cold Conditions

In cold climates, Polish chickens may require additional insulation and protection from harsh weather conditions. Provide draft-free housing with plenty of bedding, and consider using heat lamps or heated waterers to prevent frostbite and hypothermia.

Managing in Hot Weather

During hot weather, Polish chickens are susceptible to heat stress and dehydration. Provide ample shade, ventilation, and access to cool water to help them regulate their body temperature. Avoid overcrowding and handle birds gently to minimize stress.

Seasonal Care Adjustments

Adjust care routines seasonally to meet the changing needs of Polish chickens. Monitor temperature fluctuations, predator activity, and daylight hours to ensure chickens remain healthy and comfortable throughout the year.

Integrating Polish Chicken with Other Breeds

Integrating Polish chickens into mixed flocks requires careful consideration of flock dynamics and compatibility with other breeds. Introduce new birds gradually, monitor interactions closely, and provide adequate space and resources for all chickens.

Compatibility and Flock Dynamics

Polish chickens can coexist peacefully with other breeds in mixed flocks, but individual temperament and hierarchy dynamics may vary. Provide multiple feeding and watering spots to prevent competition and reduce aggression among flock members.

Managing Mixed Flocks

Managing mixed flocks involves balancing the needs and preferences of different chicken breeds. Provide adequate space, roosting areas, and nesting boxes to accommodate the diverse needs of Polish chickens and other breeds.

Avoiding Bullying and Crest Damage

To prevent bullying and crest damage in Polish chickens, monitor flock interactions and intervene if necessary. Provide hiding spots and escape routes for bullied birds and separate aggressive individuals if conflicts arise.

Polish Chicken Sustainable Practices

Raising Polish chickens using sustainable practices promotes environmental stewardship and self-sufficiency. Utilize chickens for insect control, composting with chicken manure, and rotational grazing to minimize environmental impact and maximize resource efficiency.

Using Chickens for Insect Control

Polish chickens are excellent foragers and can help control insect pests in the garden or on the farm. Allow chickens access to areas with high insect populations, such as compost piles or garden beds, to naturally reduce pest numbers.

Composting with Chicken Manure

Chicken manure is a rich and valuable source of nutrients for composting, enriching soil fertility, and promoting healthy plant growth. Combine chicken manure with carbon-rich materials such as straw or leaves to create nutrient-rich compost for garden use.

Raising Polish Chickens in the Backyard

Raising Polish chickens in the backyard is a rewarding experience that provides fresh eggs, pest control, and entertainment for the whole family. With proper care and management, Polish chickens can thrive in backyard settings and contribute to a sustainable lifestyle.

Economic Aspects of Raising Polish Chickens

Polish chickens offer potential income through sales of chicks, eggs, and show-quality birds. Understanding the costs involved and maximizing productivity is key to economic success.

Costs Involved in Rearing

Rearing Polish chickens involves initial costs for purchasing chicks of $3 each, housing, feed, and ongoing expenses for veterinary care and maintenance. Calculating these costs accurately helps in budgeting and financial planning.

Potential Income and Products

Polish chickens can generate income through the sale of chicks, hatching eggs, and show-quality birds. Additionally, their eggs are sought after for their unique appearance and nutritional value, offering additional revenue streams.

Economic Tips for Small-Scale and Hobbyist Keepers

Small-scale and hobbyist keepers can optimize their finances by focusing on niche markets, such as rare color varieties or specialty eggs. Collaborating with local breeders and attending poultry shows can also boost income.

In case you missed it: Ultimate Guide to Raising Leghorn Chickens: Feeding, Breeding, Egg Production, and Care

Polish chicken

Ethical and Welfare Considerations

Ensuring the welfare of Polish chickens is essential for ethical breeding practices. Providing proper living conditions, nutrition, and veterinary care promotes their health and well-being.

Ensuring Proper Living Conditions

Polish chickens require adequate space, shelter, and protection from predators to thrive. Providing a clean and well-ventilated coop, along with access to fresh water and balanced nutrition, is crucial for their welfare.

Ethical Breeding Practices

Ethical breeding practices prioritize the health, temperament, and genetic diversity of Polish chickens. Responsible breeders focus on improving breed standards while avoiding detrimental traits.

Welfare Standards and Guidelines

Adhering to welfare standards and guidelines set by reputable poultry organizations ensures the humane treatment of Polish chickens. Regular health checks, vaccination programs, and proper handling contribute to their welfare.

Community and Support for Polish Chicken

Joining breed clubs, associations, and online forums provides valuable support and resources for Polish chicken enthusiasts. Networking with fellow breeders and sharing knowledge fosters a sense of community and camaraderie.

Joining Breed Clubs and Associations

Breed clubs and associations offer opportunities for education, networking, and collaboration among Polish chicken breeders. Membership provides access to breed standards, shows, and breeding programs.

Online Forums and Social Media Groups

Online forums and social media groups facilitate communication and information exchange among Polish chicken enthusiasts worldwide. Participating in discussions, sharing experiences, and seeking advice contribute to collective learning and support.

Workshops, Seminars, and Educational Resources

Attending workshops, seminars, and educational resources on poultry farming and breed-specific topics enhances knowledge and skills in raising Polish chickens. Learning from experienced breeders and industry experts improves breeding practices and productivity.

Conclusion

Raising Polish chickens offers a rewarding experience for poultry enthusiasts. By understanding Polish chicken care, including diet, housing, and health maintenance, breeders can ensure the well-being and productivity of their flock. Whether you’re interested in Polish bantam chickens or crested Polish varieties, this comprehensive guide equips you with the knowledge to raise and enjoy these unique birds.

Ultimate Guide to Raising Australorp Chickens: Profile, Farming Economics, Egg Production, Diet, and Care

0

Australorp chickens, originating in Australia in the early 20th century, are known for their excellent egg-laying abilities and meat quality. Originating from Orpington breeds, they gained global popularity due to their productivity and gentle temperament, with varieties including Black, Blue, and White.

Raising Australorp Chicken

Raising Australorp Chickens

History and Origin

The Australorp is an Australian chicken breed renowned for its egg-laying abilities. Originating from the Australian black Orpington, it gained worldwide popularity in the 1920s. The breed, named after its origin, was developed with significant Australian involvement, making it the honorary national bird of Australia.

Breed Characteristics and Appearance

Australorps are known for their striking appearance, with glossy black feathers in the sunlight. They have a sturdy build, broad chests and well-rounded bodies. Standard-size Australorps weigh around 6.5-8.5 pounds (hens) and 8.5 pounds (roosters).

Recognition and Popularity

Australorps gained recognition for their exceptional egg-laying abilities, setting a world record by producing 364 eggs in 365 days. They quickly grew in popularity both in Australia and internationally.

Different Types of Australorps/ Australorp Chicken Varieties

There are various strains of Australorps, each with slight differences in appearance and temperament. Some common varieties include Black, Blue, and White Australorps.

Australorp Chicken Price

The cost of Australorp chickens can vary depending on factors such as age, quality, and lineage. On average, day-old chicks may range from $3 to $5, while mature breeding stock can cost anywhere from $10 to $40.

In case you missed it:

Australorp Chicken

Australorp Chicken Lifespan

With proper care and management, Australorp chickens can live for 6 -8 years on average, although some individuals may live longer.

Physical Traits

  • Australorps have glossy black feathers that shine in the sunlight.
  • They have a sturdy build, broad chests and well-rounded bodies.
  • Hens typically weigh between 6.5 to 8.5 pounds, while roosters range from 8.5 to 10 pounds.
  • Feather colors may also include blue and white varieties.
  • They have single combs, red wattles, and earlobes matching their plumage color.
  • Size and Weight: Australorps are considered a large breed, with hens typically weighing between 6.5 to 8.5 pounds and roosters ranging from 8.5 to 10 pounds.
  • Feather Colors and Patterns: The most common color variety of Australorps is black, characterized by lustrous, shiny feathers. However, blue and white varieties also exist, with variations in feather coloration.
  • Comb, Wattles, and Earlobes: Australorps typically have single combs, red wattles, and earlobes that match the color of their plumage.

Behavior and Temperament

  • Australorps are known for their friendly and docile nature.
  • They get along well with other chickens and are not prone to aggression.
  • Easily handled and enjoy human interaction.
  • Produce soft clucking sounds and have a relatively low noise level.
  • Make excellent additions to backyard flocks due to their calm demeanor.
  • Social Behavior: Australorps are known for their friendly and docile nature, making them excellent additions to backyard flocks. They tend to get along well with other chickens and are not prone to aggressive behavior.
  • Handling and Friendliness: Due to their calm demeanor, Australorps are easily handled and often enjoy human interaction. They can be quite affectionate towards their caretakers.
  • Noise Level: Compared to some other breeds, Australorps are relatively quiet birds, with hens producing soft clucking sounds and occasional vocalizations.

Housing Australorp Chickens

  • Require a well-ventilated coop to protect them from the elements.
  • Each bird needs approximately 4 square feet of indoor space.
  • Secure fencing is essential to prevent escapes and protect against predators.
  • Implement predator-proofing measures around the coop and run.
  • Provide nesting boxes and roosting space for comfort and safety.

Coop Requirements: Australorps require a well-ventilated coop that protects them from predators and the elements. The coop should be spacious enough to accommodate the flock comfortably.

In case you missed it:

Australorp Chicken Breed

Space Needs and Fencing: Each Australorp chicken requires approximately 4 square feet of indoor space and access to outdoor run space for exercise. Fencing should be secure to prevent escapes and protect against predators.

Protection from Predators: To safeguard Australorps from predators such as foxes, raccoons, and birds of prey, it’s essential to use sturdy fencing and implement predator-proofing measures around the coop and run.

Feeding and Nutrition

  • A balanced diet is crucial for Australorp chickens’ health and productivity.
  • Feed them high-quality commercial poultry feed supplemented with fresh fruits and vegetables.
  • Offer calcium and grit supplements to support bone health and digestion.
  • Treats such as mealworms and kitchen scraps can be given in moderation.
  • Diet Essentials: A balanced diet for the health and productivity of Australorp chickens. Their diet should consist of high-quality commercial poultry feed supplemented with fresh fruits, vegetables, and occasional treats.
  • Supplements and Treats: Supplements such as calcium and grit should be provided to support bone health and digestion. Additionally, treats like mealworms and kitchen scraps can be offered in moderation as occasional snacks.
  • Water Requirements: Access to clean, water is essential for Australorp chickens at all times. Waterers should be checked regularly and refilled as needed to prevent dehydration.

Health, Wellness, and Care

  • Generally hardy birds but may be susceptible to common poultry ailments.
  • Regular health checks and vaccinations are recommended.
  • Implement parasite prevention measures to keep Australorps healthy.
  • Provide appropriate shelter and nutrition to support overall wellness.
  • Practice humane euthanasia when necessary and prioritize animal welfare.
  • Common Health Issues: Australorps are generally hardy birds but may be susceptible to common poultry ailments such as respiratory infections, parasites, and reproductive disorders.
  • Preventative Care and Vaccinations: Routine health checks and vaccinations against diseases like Marek’s disease and Newcastle disease are recommended to maintain flock health and prevent outbreaks.
  • Dealing with Parasites: Regular parasite prevention measures, including deworming and mite control, should be implemented to keep Australorp chickens healthy and comfortable.

Australorp Egg Production

  • Australorps are prolific layers, producing around 250 to 300 large brown eggs per year.
  • Their eggs are prized for their excellent taste and nutritional value.
  • Maximize egg production by providing optimal living conditions and minimizing stress.
  • Maintain a balanced diet and ensure access to nesting boxes for comfortable egg-laying.
  • Egg size and color may vary slightly but typically have a rich brown shell color.

Egg Laying Capabilities: Australorps are prolific layers, capable of producing around 250 to 300 large brown eggs per year under optimal conditions. Australorps are famous for laying more than 300 eggs per year.

Egg Size, Color, and Quality: Australorp eggs are typically large and have a rich brown shell color. They are prized for their excellent taste and nutritional value.

In case you missed it:

Australorp Chicken Farming

Improving Egg Production: To maximize egg production, ensure that Australorps receive a balanced diet, adequate lighting, and optimal living conditions. Minimize stressors and provide nesting boxes for comfortable egg-laying.

Breeding Australorp Chickens

  • Select breeding stock with desirable traits like good egg-laying ability and friendly temperament.
  • Incubate eggs using natural or artificial methods, maintaining optimal temperature and humidity.
  • Provide chicks with a warm and secure brooding environment for healthy growth.
  • Monitor flock genetics and avoid inbreeding to maintain genetic diversity.
  • Rearing chicks require attention to nutrition, temperature, and socialization.

Selecting Breeding Stock: When breeding Australorps, choose individuals with desirable traits such as good egg-laying ability, strong conformation, and friendly temperament.

Incubation and Hatching: Australorp eggs can be successfully incubated using either natural or artificial methods. Maintain optimal temperature, humidity levels throughout the incubation period for best results.

Rearing Chicks: Provide chicks with a warm and secure brooding environment, along with a balanced diet, to support healthy growth and development.

Australorp Chickens for Shows

  • Prepare Australorps for exhibitions by grooming and handling them regularly.
  • Showcase their plumage and overall condition through meticulous bathing and grooming.
  • Familiarize birds with the show environment to minimize stress during competitions.
  • Follow breed standards and judging criteria set by poultry associations.
  • Attend workshops and seek advice from experienced exhibitors for success in poultry shows.

Preparing for Exhibitions: To prepare Australorps for the show, bathe and groom them meticulously to showcase their plumage and overall condition. Practice handling to ensure they are comfortable with the show environment.

Show Standards and Judging Criteria: Australorps are judged based on breed standards set by poultry associations, with criteria including conformation, feather quality, and overall presentation.

Tips for Success in Poultry Shows: Attend workshops and seek advice from experienced exhibitors to learn best practices for showing Australorp chickens. Pay attention to grooming and presentation details to make a favorable impression on judges.

Managing Australorp Chickens in Different Climates

  • Provide adequate shelter and insulation to protect Australorps from cold temperatures.
  • During hot weather, provide shade, ventilation, and cool water to prevent heat stress.
  • Adjust management practices seasonally to account for changes in temperature and environmental conditions.
  • Monitor flock health closely and make adjustments as needed to ensure their well-being.
  • Implement appropriate measures to prevent weather-related health issues and discomfort.

Adapting to Cold Weather: Provide adequate shelter and insulation to protect Australorps from cold temperatures. Ensure access to fresh water that doesn’t freeze and adjust feeding to account for increased energy needs.

Heat Stress Management: During hot weather, provide shade, ample ventilation, and cool water to prevent heat stress in Australorp chickens. Avoid handling birds during the hottest parts of the day.

In case you missed it:

Australorp Chicken Black

Seasonal Care Variations: Adjust management practices seasonally to account for changes in temperature, daylight hours, and environmental conditions. Monitor flock health closely and make adjustments as needed.

Integrating Australorps with Other Breeds

  • Introduce Australorps to existing flocks gradually to minimize aggression.
  • Provide sufficient space and resources to reduce competition and establish a pecking order.
  • With proper supervision, Australorps can coexist harmoniously with other chicken breeds.
  • Mixed flock management enhances diversity and dynamics within the flock.
  • Consider compatibility and hierarchy establishment when integrating Australorps with other breeds.

Compatibility and Pecking Order: When introducing Australorps to existing flocks, monitor for signs of aggression and establish a pecking order gradually. Provide sufficient space and resources to minimize competition.

Mixed Flock Management: With proper supervision and management, Australorps can coexist harmoniously with other chicken breeds, contributing to a diverse and dynamic flock.

Benefits and Challenges: Integrating Australorps with other breeds can enhance flock dynamics and productivity but may also present challenges related to compatibility and hierarchy establishment.

Sustainable Practices with Australorp Chickens

  • Utilize Australorps for pest control by allowing them to forage for insects and pests.
  • Compost chicken manure to create organic fertilizer for gardens and crops.
  • Backyard chicken farming with Australorps promotes self-sufficiency and sustainable food production.
  • Implement environmentally friendly practices to minimize waste and resource consumption.
  • Advocate for responsible chicken keeping practices and support legislation that protects animal welfare.

Utilizing Chickens for Pest Control: Australorps can contribute to pest control efforts by foraging for insects and pests in the garden or around the property, reducing the need for chemical interventions.

Composting Chicken Manure: Chicken manure is source of organic fertilizer rich in nitrogen and other nutrients. Composting chicken manure can help reduce waste and improve soil health.

Australorp Chicken Farming in the Backyard: Backyard chicken farming with Australorps allows individuals to produce fresh eggs and meat sustainably while connecting with nature and practicing self-sufficiency.

The Economic Aspect of Raising Australorps

  • Evaluate the economic feasibility of raising Australorps by considering initial investment and ongoing maintenance costs.
  • Income sources may include selling eggs, chicks, mature birds, and participating in poultry shows.
  • Hobbyists may prioritize enjoyment and self-sufficiency, while commercial farmers focus on profitability.
  • Conduct a cost-benefit analysis to find the financial viability of raising Australorps.
  • Consider both short-term, long-term financial implications when raising Australorps for profit.

Cost Analysis of Raising Chickens: Consider factors such as initial investment, ongoing maintenance costs, and potential returns when evaluating the economic feasibility of raising Australorps.

Potential Income Sources: Income sources from raising Australorps may include selling eggs, chicks, or mature birds, as well as participating in poultry shows and competitions.

Financial Considerations for Hobbyists vs. Commercial Farmers: Hobbyists may prioritize enjoyment and self-sufficiency over financial gains, while commercial farmers focus on maximizing profitability through efficient production and marketing strategies.

Ethical Considerations and Animal Welfare

  • Provide Australorps with adequate space, shelter, food, and water to ensure their well-being.
  • Prioritize humane treatment and implement euthanasia practices when necessary.
  • Offer opportunities for natural behaviors and enrichment to promote physical and psychological health.
  • Stay informed about local regulations and advocate for policies that protect animal welfare.
  • Consider the ethical implications of raising and caring for Australorps and strive to uphold high standards of animal welfare.

Ensuring Humane Treatment: Provide Australorps with adequate space, shelter, food, and water, and prioritize their physical and mental well-being. Implement humane euthanasia practices when necessary.

Space and Enrichment Needs: Offer opportunities for natural behaviors such as foraging, dust bathing, and roosting to promote the physical and psychological health of Australorp chickens.

Advocacy and Legal Issues: Advocate for responsible chicken-keeping practices and support legislation that protects the welfare of poultry. Stay informed about local regulations regarding chicken ownership and care.

In case you missed it:

Australorp Poultry Brred

Conclusion

The Australorp is an Australian chicken breed known for its egg-laying abilities, originating from the Australian black Orpington. Originating in the 1920s, it gained worldwide popularity and is now the honorary national bird of Australia. Known for its versatility, the Australorp is an ideal choice for both novice and experienced poultry enthusiasts, embodying excellence in poultry husbandry through its rich history and sustainable practices.

Silkie Chicken Farming: Raising Practices, Varieties, Egg Production, Diet, and Care
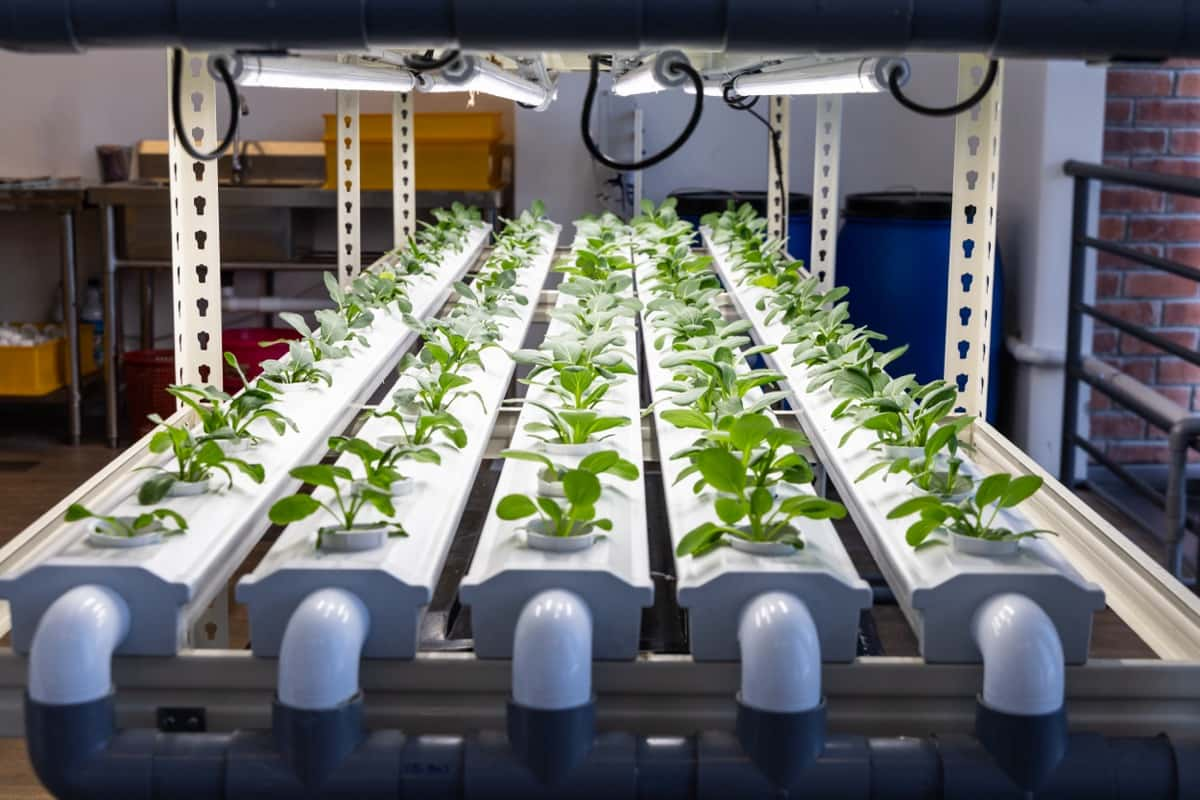
0

Raising Silkie chickens offers a delightful venture into poultry farming. With their unique appearance and gentle disposition, Silkies make for charming additions to any flock. This guide covers essential aspects, from selecting the right breed varieties to ensuring optimal egg production.

Silkie Chicken Farming

Learn about dietary needs, coop design, and health tips for these fluffy wonders. Explore grooming techniques, seasonal care, and integration with other breeds. With proper attention to nutrition, hygiene, and preventive measures, you can enjoy the company of Silkies for their entire lifespan, relishing in their organic eggs and occasional meat harvests.

Silkie Chicken Farming

Introduction to Silkie Chickens

Silkie chickens, originating from ancient China, are renowned for their fluffy plumage and friendly demeanor. These unique birds captivate with their black skin, feathered legs, and distinct blue earlobes. Despite their small size, they boast a calm temperament, making them ideal pets for families and hobbyists alike. They weigh between 1.5 to 3 pounds and have a lifespan of about 7 to 9 years. They are considered a dual-purpose breed, for both eggs and meat.

  • Silkie chickens are a breed of chicken for their fluffy plumage that feels like silk or satin.
  • They have several other unusual features, such as black skin and bones, blue earlobes, and five toes on each foot.
  • They are native to China and have a long history of being kept as ornamental or pet chickens, as well as for their medicinal value.
History and Unique Features

Silkie chickens history dating back over 2,000 years in China. Their striking appearance, including their silky feathers and distinct black skin, sets them apart from other breeds. Renowned for their gentle disposition, Silkies are often used as therapy animals and in poultry shows.

Understanding Silkie Temperament

Silkie chickens are docile and friendly nature, making them excellent companions. They enjoy human interaction and are particularly fond of being held and cuddled. Their calm temperament makes them suitable for novice poultry keepers and families with children.

Different Color Varieties of Silkie

Silkie chickens come in white, black, blue, buff, and splash. Each color variety adds to the breed’s allure with its soft, fluffy feathers and contrasting skin tones. Breeders often select specific color traits to achieve desired appearances in their flocks.

Preparing the Coop

Creating a comfortable and secure coop is essential for the well-being of Silkie chickens. Consider factors such as ventilation, predator protection, and space requirements when designing and constructing the coop. Adequate nesting boxes and perches provide essential amenities for nesting and roosting.

  • They can eat commercial layer pellets or crumbles or a homemade mix of grains, seeds, and protein sources.
  • They also enjoy fresh fruits, vegetables, herbs, insects, worms, and mealworms as snacks or supplements.
  • They should have access to clean water at all times, preferably in a hanging or nipple drinker, to prevent contamination and wetting of their feathers.

In case you missed it: Sussex Chicken Farming: Raising Practices, Varieties, Egg Production, Diet and Care

Silkie Chicken Breeding
Design Considerations for Silkie Chickens

When designing a coop for Silkie chickens, prioritize features such as low perches to accommodate their feathered feet and adequate ventilation to prevent respiratory issues. Additionally, ensure the coop is predator-proof to safeguard against potential threats.

Bedding and Insulation for Comfort

Provide ample bedding, such as straw or shavings, to keep Silkie chickens comfortable and warm. Insulating the coop can help regulate temperature fluctuations, ensuring a cozy environment year-round.

Feeding Silkies

Silkie chickens require a balanced diet consisting of high-quality poultry feed supplemented with fresh fruits, vegetables, and grains. Ensure access to clean water at all times to support hydration and digestion.

Nutritional Requirements

Silkie chickens have specific nutritional requirements to maintain optimal health and egg production. A diet with protein, vitamins, and minerals supports feather growth, immune function, and reproductive health.

Special Dietary Considerations

Consider dietary supplements such as calcium for eggshell formation and probiotics for gut health. Monitor feed intake to prevent obesity and adjust diet as needed based on age, activity level, and environmental conditions.

Watering Your Flock

Provide clean and accessible water sources to Silkie chickens at all times to prevent dehydration and support overall health. Regularly clean waterers to prevent bacterial contamination and algae growth.

Keeping Water Clean and Accessible

Regularly clean water containers to remove debris and prevent bacterial buildup. Position waterers at a height that is easily accessible to Silkie chickens, taking into account their low stature and feathered feet.

Preventing Water from Freezing in Winter

In colder climates, use heated waterers or implement strategies such as adding insulation or using heated bases to prevent water from freezing during winter months. Regularly check water sources to ensure accessibility.

Egg Production in Silkies

Silkie chickens are moderate egg layers, producing approximately three eggs per week on average. Egg production influenced by factors such as age, diet, and environmental conditions.

  • They lay about 100 to 120 eggs per year, or about three eggs per week on average.
  • They usually start laying at around six months of age, but this may vary depending on the season, diet, and health of the bird.
  • They are very broody and will often stop laying to sit on their eggs or those of other birds.
Understanding Silkie Egg Laying Patterns

Silkie chickens typically lay eggs in the morning hours, with peak production occurring in the spring and summer months. Monitor nesting boxes regularly to collect eggs promptly and prevent broodiness.

Collecting and Storing Silkie Eggs

Collect eggs daily to maintain freshness and prevent them from being damaged or soiled. Store eggs in a cool, dry location away from direct sunlight to prolong shelf life.

In case you missed it: How to Raise Wyandotte Chickens: A Profitable Wyandotte Farming for Beginners

Silkie chicken farm

Health Care for Silkies

Regular health checks and preventive measures are crucial for ensuring the well-being of Silkie chickens. Monitor for signs of or distress and promptly address any health concerns. Some common health issues include respiratory infections, coccidiosis, worms, mites, lice, scaly leg mites, bumblefoot, fungal infections, Marek’s disease, and Newcastle disease.

Common Health Issues and Prevention

Silkie chickens are susceptible to common poultry ailments such as respiratory infections, parasites, and injuries. Implement biosecurity measures, maintain cleanliness, and provide appropriate veterinary care to prevent and manage health issues.

Routine Health Checks and Vaccinations

Schedule regular health checks with a poultry veterinarian and follow recommended vaccination protocols to protect against infectious diseases such as Marek’s disease and Newcastle disease.

Breeding Silkie Chickens

Breeding Silkie chickens requires careful selection of breeding pairs to maintain desired traits and genetic diversity within the flock. Proper incubation and brooding techniques are essential for successful hatching and chick rearing.

Selecting Breeding Pairs

Choose breeding pairs based on desired traits such as feather color, body conformation, and temperament. Avoid breeding birds with genetic defects or health issues to maintain a healthy breeding stock.

Caring for Eggs and Incubation Techniques

Collect eggs regularly and store them in a cool, humid environment before incubation. Use a reliable incubator with proper temperature and humidity control to ensure successful hatching.

Rearing Silkie Chicks

Provide a warm and secure brooder environment for newly hatched Silkie chicks, with access to food, water, and heat sources. Monitor chick development closely and address any issues promptly.

Silkie chicks should be fed a high-protein starter feed first eight weeks, then switched to a grower feed until they reach maturity at around six months.

  • Silkie chicks should be vaccinated for Marek’s disease and checked for signs of coccidiosis, parasites, and other illnesses.
  • Silkie chicks should be handled gently and socialized with humans and other chickens from an early age.
  • Integrating Silkies with Other Chickens
  • Silkies are very docile and friendly, but larger or more aggressive breeds may bully them.
Brooder Setup and Requirements

Set up a brooder with appropriate bedding, heat lamps, and draft protection to create a comfortable environment for Silkie chicks. Provide space for chicks to move freely and access feed and water easily.

In case you missed it: Ultimate Guide to Raising Brahma Chickens: Care, Feeding, Egg Production, and Breeding

Brown Silkie Chicken
Monitoring Growth and Development

Monitor Silkie chicks’ growth and development, adjusting feed and environmental conditions as needed to support healthy growth. Provide opportunities for socialization and exercise to promote overall well-being.

Integrating Silkies with Other Chickens

Integrating Silkie chickens into mixed flocks requires careful planning and consideration of social dynamics. Introduce new birds gradually and monitor interactions to prevent aggression and ensure a smooth transition.

Social Dynamics in Mixed Flocks

Silkie chickens generally get along well with other breeds, thanks to their gentle nature. However, monitor flock dynamics closely to prevent bullying or aggression, especially during the integration process.

Tips for Successful Integration

Provide ample space and resources for all flock members, including multiple feeding and watering stations. Supervise interactions between birds and intervene if necessary to prevent conflicts.

Grooming and Care

Regular grooming is essential for maintaining Silkie chickens’ feather health and overall appearance. Trim nails and beaks as needed to prevent overgrowth and discomfort.

Maintaining Silkie Feather Health

Silkie feathers require special care to prevent matting and tangling. Regularly bathe and fluff feathers to keep them clean and free from debris.

Nail and Beak Trimming

Trim Silkie chickens’ nails and beaks regularly to prevent injuries and maintain comfort. Use sharp, clean clippers and exercise caution to avoid cutting too close to the quick.

Seasonal Considerations

Adjust care practices for Silkie chickens based on seasonal changes in weather and environmental conditions. Provide additional warmth and protection during cold winters and implement cooling measures during hot summers. Silkies are cold-hardy and can tolerate low temperatures as long as they have a dry and draft-free coop with adequate ventilation.

  • Silkies should have plenty of bedding material, such as straw or wood shavings, to keep them warm and comfortable.
  • Silkies should have access to fresh water that does not freeze in winter.
  • Silkies may need extra protection from predators such as hawks, foxes, or raccoons in winter when there is less cover available.
Protecting Silkies from Extreme Weather

Provide shelter from weather conditions like rain, wind, and snow to protect Silkie chickens from discomfort and stress. Insulate coops and provide extra bedding during colder months.

Adjusting Care for Summer and Winter

During summer months, provide shade, adequate ventilation, and access to cool water to prevent heat stress in Silkie chickens. In winter, insulate coops, use heat sources as needed, and provide extra bedding to keep birds warm.

Pest and Parasite Management

Implement regular pest and parasite control measures to protect Silkie chickens from common pests such as mites, lice, and worms. Monitor birds for signs of infestation and treat them promptly as needed.

In case you missed it: Ultimate Guide to Raising Leghorn Chickens: Feeding, Breeding, Egg Production, and Care
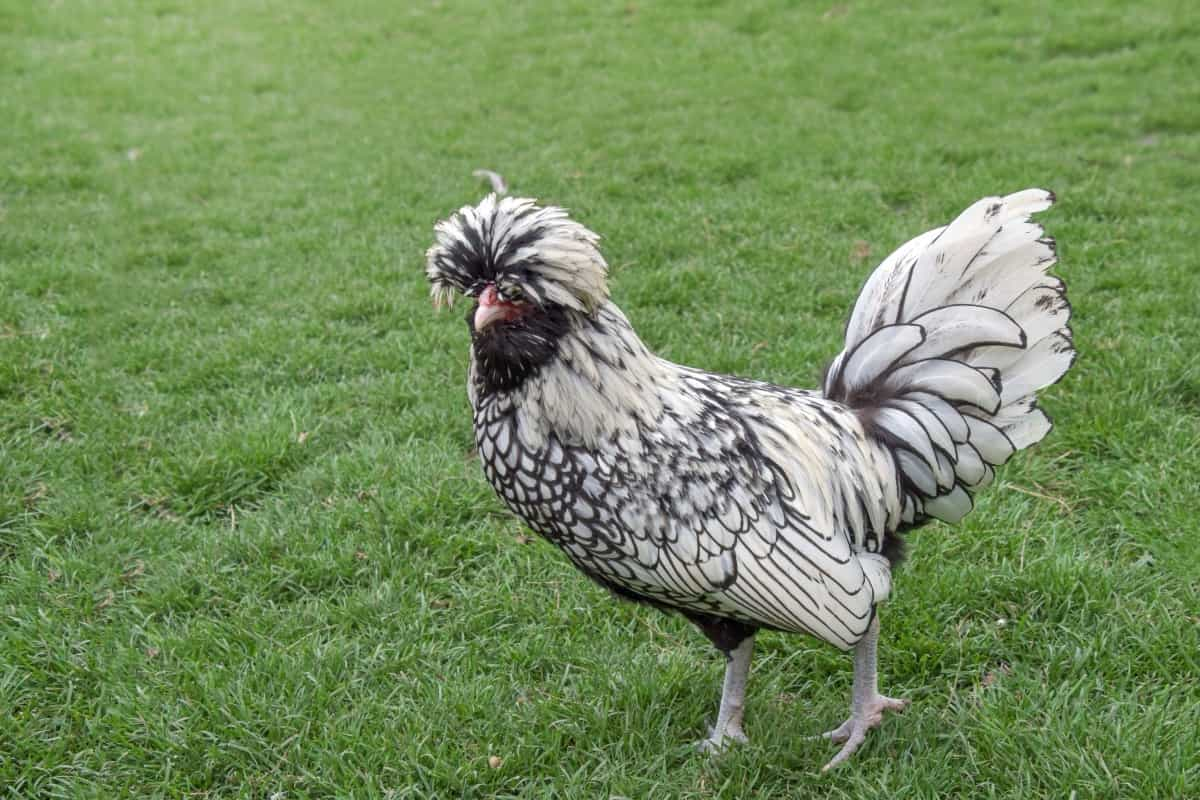
White Silkie Chicken Breed
Identifying and Treating Common Pests

Regularly inspect Silkie chickens for signs of pest infestation, including feather loss, irritation, and abnormal behavior. Treat affected birds with appropriate medications and take measures to prevent re-infestation.

Preventative Measures and Treatments

Practice good biosecurity measures to prevent the spread of pests and parasites. Use poultry-safe insecticides, dewormers, and repellents as part of a comprehensive pest management plan.

Behavior and Handling

Understanding Silkie chicken behavior is essential for proper care and handling. Learn to recognize common behaviors and cues to promote positive interactions and minimize stress.

Understanding Silkie Behaviors

Silkie chickens exhibit a range of behaviors, including foraging, dust bathing, and roosting. Pay attention to their body language and vocalizations to gauge their mood and well-being.

Tips for Handling and Socialization

Handle Silkie chickens gently and confidently to build trust and positive associations. Spend time interacting with birds regularly to promote socialization and bonding.

Diet Adjustments for Optimal Health

Tailor Silkie chickens’ diet to meet their nutritional needs at different life stages, including chickhood, pullet development, and adult maintenance. Provide a balanced diet with protein, vitamins, and minerals to support overall health and vitality.

Tailoring Nutrition for Life Stages

Adjust feeding practices based on Silkie chickens’ age, activity level, and reproductive status. Offer starter feeds for chicks, grower feeds for pullets, and layer feeds for mature hens. Supplement with treats and fresh foods for variety and enrichment.

Supplementing for Feather Health

Incorporate dietary supplements such as omega-3 fatty acids and biotin to promote healthy feather growth and luster in Silkie chickens. Provide access to grit and oyster shells for calcium and mineral supplementation.

Enhancing Egg Production

Maximize egg production in Silkie chickens by providing optimal nutrition, lighting, and environmental conditions. Implement strategies to address factors such as age, genetics, and seasonal influences affecting egg laying.

  • Silkies are fair egg layers, producing about three eggs per week or 100 to 120 eggs per year.
  • Silkies lay small to medium-sized eggs that are cream or tinted in color.
  • Silkies may stop laying eggs during the winter months or when they go broody.
  • Silkies can be encouraged to lay more eggs by providing them with enough light, warmth, space, food, and water.
Strategies to Increase Egg Yield

Encourage consistent egg laying in Silkie chickens by providing a stress-free environment, adequate nesting boxes, and supplemental lighting during shorter daylight hours. Monitor egg production closely and adjust management practices as needed.

Addressing Factors Affecting Egg Laying

Identify and address potential factors affecting egg production, such as nutritional deficiencies, stress, or health issues. Consult with a poultry veterinarian for guidance on optimizing egg yield and overall flock health.

In case you missed it: 45 Days Chicken Business Plan: Revenue, Costs, and Profitability Analysis

Silkie Chicken Breed

Conclusion

Raising Silkie chickens is a rewarding endeavor that requires attention to detail and care. By understanding their unique characteristics, providing proper nutrition, and maintaining a comfortable environment, you can enjoy the companionship of these charming birds while reaping the benefits of their delightful eggs.

Sussex Chicken Farming: Raising Practices, Varieties, Egg Production, Diet and Care
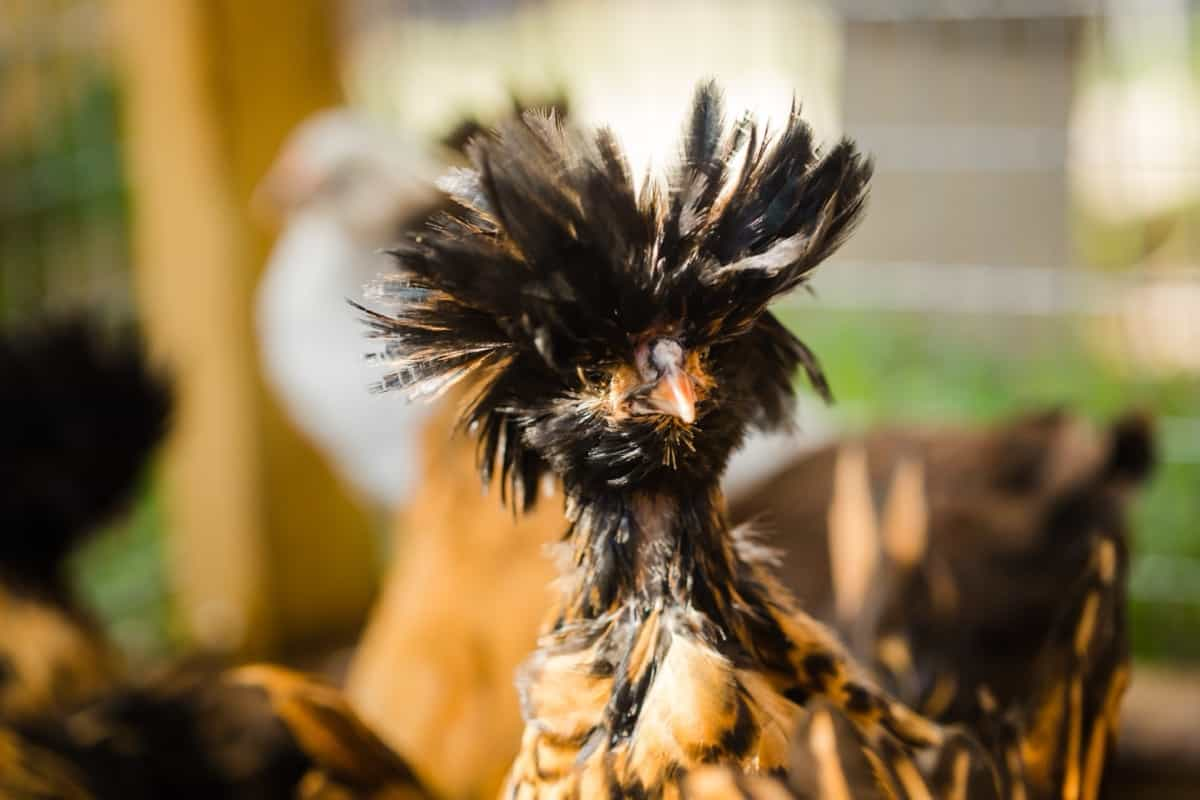
0

Are you considering raising Sussex chickens? Discover essential tips for successful poultry farming. Learn about Sussex chicken varieties, egg production, and the best diet for optimal health. Explore breeding tips, coop requirements, and health management practices to maximize egg yield and ensure the well-being of your flock. 

black and white Sussex chickens in a flowerbed

From preventative health measures to winter care and predator protection, we cover everything you need to know about raising Sussex chickens for backyard farming. Explore organic feeding options and nutritional needs to support the lifespan of your Sussex chickens and enjoy the benefits of sustainable poultry farming.

Sussex Chicken Farming

Introduction to Sussex Chickens

Sussex chickens are a dual-purpose breed, meaning they are good for both meat and eggs. They originated in England, where they have been raised for centuries. They are known for their calm and docile temperament, as well as their adaptability to different climates and environments.

History and Breed Characteristics

Sussex chickens were developed in the county of Sussex, England, where they were bred for their meat quality and egg production. They were first recognized by the American Poultry Association in 1914 and have since become one of the most popular breeds in the world. Sussex chickens have a large and sturdy body, with a broad chest and a deep abdomen.

They have a single comb, red earlobes, and white skin. Their feathers are soft, fluffy and come in colors and patterns, such as white, buff, speckled, red, brown, silver, and light. The most common variety is the speckled Sussex, which has a mahogany base color with white spots.

Varieties of Sussex Chickens

Sussex chickens come in eight varieties, each with its unique appearance and personality. The most popular variety is the Speckled Sussex, which has a mahogany base color with white spots. They are friendly pleasantand and make great pets. Light Sussex has a white base color with black markings, making them alert and active. Buff Sussex has a buff or golden base color with black markings, making them gentle and calm.

Red Sussex has a red base color with black markings, making them hardy and resilient. Brown Sussex has a brown base color with black markings, making it rare and difficult to find. Silver Sussex has a silver or gray base color with black markings, making it elegant and beautiful. Coronation Sussex has a white base color with lavender markings, making it rare and expensive.

Creating the Right Environment

Coop Design and Space Requirements

Sussex chickens require ample space for comfortable movement and natural behaviors. A coop should be well-ventilated, dry, clean, and secure, with enough roosting bars, nesting boxes, feeders, and waterers for the number of birds. In cold climates, the coop should be insulated with a heat source, while in hot climates, it should have shade and ventilation to prevent overheating.

Security Against Predators
  1. Enclose the coop and run with sturdy materials like wire mesh, wood, or metal.
  2. Bury wire mesh at least 12 inches underground to prevent digging predators from entering.
  3. Cover the top of the run with wire mesh or netting to prevent aerial predators from swooping down.
  4. Lock the coop door at night and check it regularly for signs of damage or intrusion.

Requirements for Backyard Farming

  1. Follow local laws and regulations, including restrictions on the number, size, and type of chickens.
  2. Consult with neighbors about noise, smell, and pest concerns.
  3. Be respectful and responsible for your flock’s impact on the environment and community, such as proper manure disposal, controlling flies and rodents, and keeping noise levels low.
  4. Be aware of potential noise concerns and ensure your flock is well-managed.

Feeding Your Sussex Chickens

Sussex chickens are known for their foraging habits and love for food, but they also require a balanced diet to support their growth, health, egg production, and meat quality. They need different types of feed depending on their age and purpose, with chicks needing a starter feed high in protein (18-20%) and low in calcium (0.8-1%) for the first 6-8 weeks, pullets needing a grower feed lower in protein (15-16%) and higher in calcium (1-1.5%) from 8 weeks until they start laying eggs, layers needing a layer feed moderate in protein (16-18%) and high in calcium (3-4%) once they start laying eggs, and meat birds needing a finisher feed high in protein (20-22%) and moderate in calcium (1-2%) from 8 weeks until slaughter.

Sussex chickens can benefit from supplements and treats like grit, oyster shells, apple cider vinegar, garlic, herbs, probiotics, and vitamins. Grit aids digestion by grinding food in their gizzard, oyster shells provide extra calcium for eggshell formation, apple cider vinegar balances water pH levels, garlic boosts the immune system, probiotics improve gut flora and digestion, and vitamins prevent deficiencies and diseases.

Water Management for Sussex Chicken

Water is crucial for the health and well-being of Sussex chickens, especially during hot weather or egg-laying. It should be provided in easily accessible, clean containers, changed daily, and cleaned regularly to prevent algae, bacteria, or parasite growth. Water containers should be protected from freezing or overheating.

Monitoring water intake can help detect health problems or stress factors affecting productivity or welfare. Water intake varies depending on age, size, breed, diet, temperature, humidity, and activity level. Chickens drink about twice as much water as they eat feed, and low or high intake may indicate dehydration, disease, heat stress, poor water quality, or other issues that need to be addressed.

Egg Production Essentials

Sussex chickens are known for their excellent egg production, laying around 200 to 250 large brown eggs per year. To optimize their egg-laying potential, they need adequate nutrition, lighting, nesting, and hygiene. Nutritionally, they need a balanced diet with enough protein, calcium, phosphorus, and other nutrients for egg formation. Lighting is crucial, especially during winter months when natural daylight is shorter. 

In case you missed it: How to Raise Wyandotte Chickens: A Profitable Wyandotte Farming for Beginners

fresh organic raw eggs

Nesting is essential for comfort and security, and clean, dry, and dark boxes are necessary. Hygiene is crucial to prevent diseases and parasites that can affect egg quality and quantity. The coop and nesting boxes should be cleaned regularly and disinfected as needed. Eggs should be collected daily and stored in a cool, dry place. Eggs should be handled gently and stored at a temp of 10°C (50°F) relative humidity of 75%. Washing eggs before use or incubation is essential to prevent spoilage or infection.

Health and Wellness

Preventative health measures for Sussex chickens include a balanced diet, clean water, adequate space, proper ventilation, appropriate bedding, regular cleaning, vaccination, biosecurity, parasite control, and quarantine. A balanced diet provides nutrients for growth, maintenance, reproduction, and immunity.

Clean water prevents dehydration and waterborne diseases. Adequate space allows natural behaviors; proper ventilation ensures fresh air circulation and appropriate bedding provides comfort. Regular cleaning removes waste materials, and vaccination protects against infectious diseases like Marek’s disease.

Breeding Sussex Chickens

Sussex chickens are easy to breed due to their natural fertility and broody nature. They can mate year-round but are more active in spring and summer. To breed, you need a rooster and a few hens of the same variety, which can be chosen from eight recognized varieties: light, red, speckled, brown, buff, silver, white, and coronation. To provide a comfortable and secure coop, clean water, food, and calcium supplements, you need to ensure the hens lay 4-5 eggs per week. 

You can either collect and incubate the eggs artificially or let the hens hatch naturally. If you choose the natural method, you need to mark the eggs and remove unwanted ones daily. Monitor the broody hen’s condition and ensure she gets enough food and water. The incubation period for Sussex chicken eggs is about 21 days, and you can candle the eggs after ten days to check for development.

Rearing Chicks of Sussex chickens

After hatching chicks, ensure they are kept in a warm, safe brooder with a heat lamp or heating pad. They should also receive fresh water, chick starter feed, and grit for digestion. Introduce treats like mealworms or chopped greens after a week or two, but ensure they get enough protein from their main feed. Keep the chicks in the brooder for 6-8 weeks, gradually lowering the temperature by 5 degrees every week until it reaches room temperature. 

Introduce them to the outside world by letting them out for short periods in a secure run or pen. When fully feathered, introduce them to the main flock gradually, placing them in a separate coop or cage near the main coop. Allow them to mingle with older birds during supervised free-ranging sessions, and provide extra feeders and waterers to prevent competition and bullying.

Flock Management in Sussex Chickens

Sussex chickens are sociable and easy-going birds that are well-behaved with other breeds of chickens and other animals. They have a balanced pecking order that doesn’t cause much trouble or stress. However, regular monitoring and intervention are necessary to ensure their health and well-being. To maintain their health:

  1. Provide enough space in their coop and run, roosting bars, nesting boxes, clean and dry coop, and frequent bedding changes.
  2. Feed them fresh water, food, treats, and entertainment items like perches, swings, toys, or dust baths.
  3. Check your flock for signs of illness or injury daily and treat accordingly.
  4. Protect them from predators like foxes, hawks, raccoons, or dogs using fences, nets, locks, or alarms.
  5. Prevent pests and parasites like mites, lice, worms, or fleas using natural or chemical remedies.
  6. Vaccinate them against common diseases like Marek’s disease, Newcastle disease, or infectious bronchitis.

Seasonal Care for Sussex chicken

Sussex chickens are adaptable birds that can handle various climates and weather conditions. To keep them warm and dry in winter, insulate their coop, provide extra bedding, and use heaters or heat lamps if necessary. Prevent freezing of water and food by using heated waterers and feeders, and provide extra calories and protein through feed and treats. Apply petroleum jelly or coconut oil to prevent frostbite on combs and wattles.

In case you missed it: Ultimate Guide to Raising Brahma Chickens: Care, Feeding, Egg Production, and Breeding

sussex chicken

In summer, keep the flock cool and hydrated by providing shade, fans, or misters, fresh water, and ice cubes, and avoiding overfeeding or treats. Prevent heat stress or stroke by monitoring signs of panting, drooping wings, or lethargy. In spring and fall, maintain the flock’s health and happiness by allowing them to enjoy mild weather and fresh grass. Prepare them for the upcoming season changes by adjusting their diet and environment and monitoring for molting and egg production issues.

Pest and Disease Prevention

Sussex chickens are generally healthy and robust birds, but they are susceptible to common poultry problems that can affect their well-being and productivity. To prevent these issues, follow good hygiene and farming practices. Common pests and diseases that can affect Sussex chickens include mites and lice, worms, fleas, coccidiosis, Marek’s disease, Newcastle disease, and infectious bronchitis.

Mites and lice are tiny insects that live on the skin, feathers of chickens, causing irritation, itching, feather loss, anemia, or infections. To prevent them, keep the coop clean and dry, use diatomaceous earth or wood ash in bedding, spray the coop and birds with natural or chemical insecticides, or dust the birds with poultry dust or permethrin.

Worms are internal parasites that live in the digestive system of chickens, causing weight loss, diarrhea, reduced appetite, or reduced egg production. Fleas are external parasites that live in the blood of chickens, causing irritation, itching, anemia, or infections. To prevent them, keep the coop clean and dry, provide fresh water and food, avoid overcrowding or stress, and medicate the birds with coccidiostats or antibiotics.

Marek’s disease is a viral infection that affects the nervous system of chickens, causing paralysis, tumors, blindness, or death. To prevent it, vaccinate chicks at hatch, keep the coop clean and sanitary, avoid contact with wild birds or rodents, or cull infected birds. Infectious bronchitis is another viral infection that affects the respiratory system of chickens, causing sneezing, coughing, gasping, discharge from the eyes or nose, or death.

Handling and Behavior of Sussex Chicken

Sussex chickens are generally calm, docile birds that enjoy human interaction. They are not aggressive or flighty, and they can get along well with other breeds. However, they can be curious and adventurous, so they need a secure coop and run to prevent them from wandering off or getting into trouble. It would help if you also handled them gently and regularly from a young age to make them more tame and trusting.

Diet Adjustments for Sussex chicken

Sussex chickens are not picky eaters, and they will happily eat a balanced commercial feed that meets their nutritional needs. However, they also love to forage for insects, seeds, grasses, and other treats in the garden. Supplement their diet with fresh fruits, vegetables, grains, and occasional mealworms or earthworms. However, you should avoid giving them too many treats or scraps, as they can easily become overweight and prone to health problems. You should also provide them with fresh water at all times.

In case you missed it: Ultimate Guide to Raising Leghorn Chickens: Feeding, Breeding, Egg Production, and Care
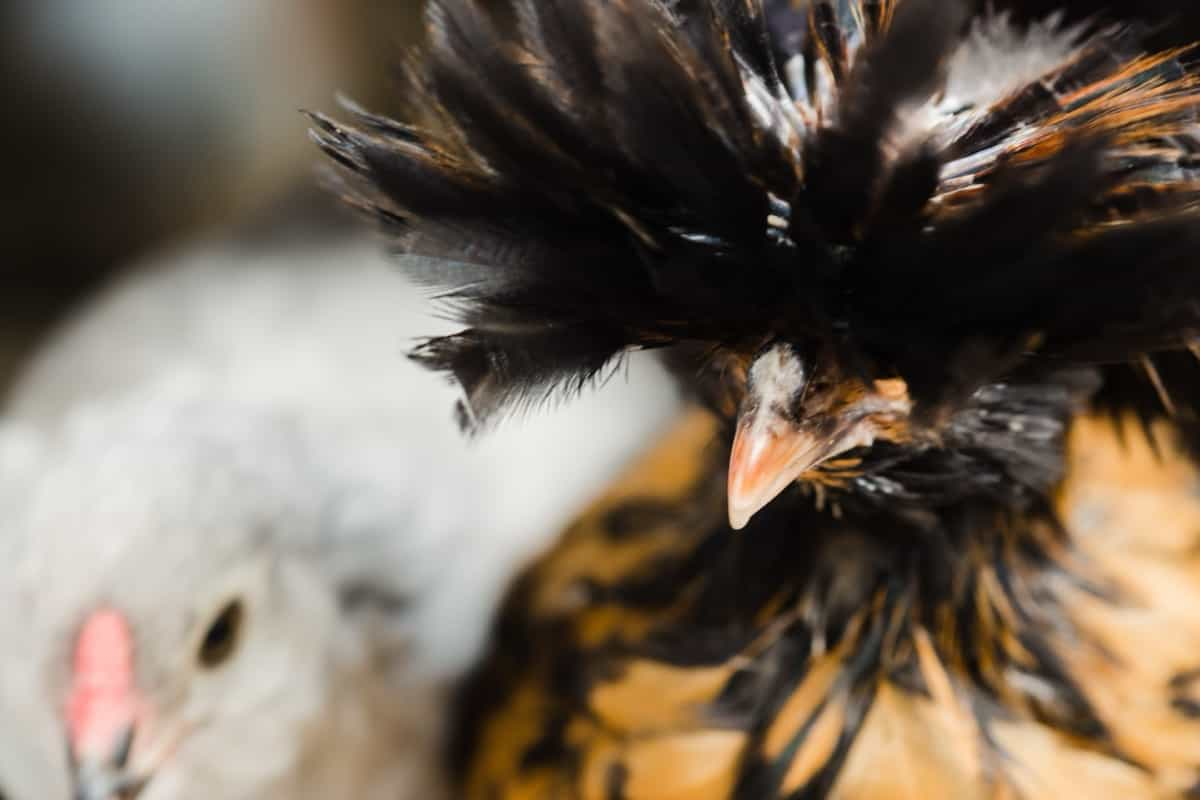
Chickens eating from a wooden feeder at a farm

Egg-Laying Health Issues

Sussex chickens are prolific layers that can produce about 250 eggs per year. Their eggs are large and tinted in color, ranging from cream to light brown. They usually start laying at around 5 to 6 months of age, and they can continue laying for several years. However, they may experience some egg-laying health issues, such as egg binding, prolapse, or vent gleet.

In case you missed it: Strategies for Maximizing Egg Production in Your Chicken Farm: Tried and Tested Strategies

Poultry egg inspection

To prevent these issues, you should ensure that your hens have enough calcium, protein, and vitamins in their diet, as well as access to nesting boxes, perches, and dust baths. You should also check their vents regularly for signs of infection or injury.

Record Keeping and Improvement

If you want to keep track of your Sussex chickens’ performance and improvement, you should keep records of their egg production, weight gain, health status, and pedigree. You can use a notebook, a spreadsheet, or an online app to record these data. By keeping records, you can monitor your chickens’ progress and identify any problems or areas of improvement. You can also use these records to select the best birds for breeding or showing purposes.

Sussex Chicken for Backyard Farming

Sussex chickens great choice for backyard farming because they are versatile, productive, and friendly. They can provide you with eggs and meat of excellent quality and flavor, as well as companionship and entertainment. They are also easy to care for and adaptable to different climates and environments. If you are looking for a reliable and rewarding breed of chicken to raise in your backyard, you should consider the Sussex chicken.

In case you missed it: Innovations in Poultry Farming: Technology and Automation

White sussex

Conclusion

Raising Sussex chickens involves understanding their varieties, optimizing egg production through proper care and diet adjustments, managing flock health, and preventing pest and disease issues. By implementing these farming practices, you can successfully raise healthy and productive Sussex chickens for backyard farming.

Note: The images presented in this post are intended solely for representation purposes. The images are meant to serve as visual aids and should not be relied upon as accurate representations of their real-life counterparts.

Homemade Feed Formulations for Livestock: Discover Cost-effective Starter to Finisher Feed Recipes

0

In the realm of livestock nutrition, homemade feed formulations offer a tailored approach, optimizing nutrient balance from starter to finisher stages. By blending livestock feed ingredients strategically, farmers can create customized feeds that enhance feed efficiency and overall animal health. From swine feed formulations to mineral supplements, each component plays a vital role. 

Homemade Feed Formulations for Livestock

Natural additives bolster feed quality, promoting optimal growth and development. Moreover, prioritizing cost-effective animal feed solutions ensures sustainability without compromising on nutrition. With proper mixing techniques and attention to detail, homemade livestock feed emerges as a cornerstone in modern farming practices, catering to both economic and nutritional demands.

Livestock Nutritional Needs

Livestock needs different nutrients to perform various functions such as growth, reproduction, lactation, and maintenance. The main nutrients required by livestock are water, energy, protein, minerals, and vitamins. The amount and proportion of each nutrient depends on the type, age, weight, and production level of the animal. For example, growing animals need more protein than mature ones, and lactating animals need more energy and minerals than non-lactating ones. Nutrient requirements can be expressed as daily or per unit of body weight or product (e.g., milk, meat, eggs).

Factors Affecting Livestock Nutrition

Livestock nutritional needs and intake are influenced by various factors, including environmental factors like temperature, humidity, altitude, and season; health issues like diseases, parasites, and stress; and feed quality and availability. Environmental factors like temperature, humidity, altitude, and season can affect energy expenditure and water consumption, while health issues like diarrhea and worms can reduce nutrient absorption and utilization.

Feed quality and availability also play a role, with fresh grass having more water and less energy than hay and grains having more energy and less fiber than roughage. The availability of feed also affects animal performance, with animals consuming less when it is scarce, spoiled, or unpalatable.

Key Ingredients for Homemade Livestock Feed

Energy sources: These are feeds that provide carbohydrates and fats to supply the energy for various body functions and activities. Examples of energy sources are:

  • Grains (e.g., corn, wheat, barley).
  • By-products (e.g., molasses, distiller’s grains).
  • Oilseeds (e.g., soybean, sunflower).
  • Oil cakes (e.g., soybean meal, cottonseed meal).

Protein sources: These are feeds that provide amino acids to build and repair body tissues and produce milk, meat, and eggs. Examples of protein sources are:

  • Legumes (e.g., peas, beans).
  • Oil cakes (e.g., soybean meal, cottonseed meal).
  • Animal products (e.g., fish meal, blood meal).
  • By-products (e.g., corn gluten meal, brewer’s grains).

In case you missed it: Livestock Vaccination Cost in India: Exploring Strategies to Reduce Animal Vaccination Costs

Livestock feed

Mineral sources: These are feeds that provide macro-minerals (e.g., calcium, phosphorus, magnesium) and micro-minerals (e.g., iron, zinc, copper) to support bone formation, enzyme activity, and immune function. Examples of mineral sources are limestone, dicalcium phosphate, salt, and mineral premixes.

Vitamin sources: These are feeds that provide fat-soluble vitamins (e.g., A, D, E, K) and water-soluble vitamins (e.g., B complex, C) to regulate metabolism, vision, reproduction, and health. Examples of vitamin sources are:

  • Green forages (e.g., alfalfa).
  • Oilseeds (e.g., sunflower).
  • Animal products (e.g., liver).
  • Vitamin premixes.

Formulating Starter Feed for Young Livestock

Starter feed is the first solid food for young livestock after weaning, designed to provide adequate nutrition for growth and development, stimulate rumen function, and stimulate growth in ruminant animals. Common components include corn, oats, barley, wheat, soybean meal, alfalfa hay, molasses, salt, and premixes. Balancing nutrition for growing animals is crucial, as their nutritional requirements vary based on species, breed, age, weight, and health status.

Protein for muscle growth, tissue repair, and immune function, and starter feed should have a protein level between 16% and 22%, depending on the animal type. Energy is needed for maintenance, growth, and activity, and starter feed should have an energy level between 70% and 80% of total digestible nutrients (TDN), mainly from starch and sugar.

Minerals are crucial for bone development, enzyme function, and metabolic processes, and starter feed should meet the daily requirements of each animal type. Vitamins are involved in biochemical reactions and physiological functions, and starter feed should have a sufficient vitamin level to prevent deficiencies and support health.

Grower Feed Formulation for Developing Livestock

Grower feed is the second stage of solid food for developing livestock, providing optimal nutrition for growth and development. It typically contains moderate levels of protein, energy, minerals, vitamins, and fibrous ingredients to promote rumen function and health. Common ingredients include corn, oats, barley, wheat, soybean meal, cottonseed meal, alfalfa hay, beet pulp, molasses, salt, and premixes.

As developing livestock grow older and heavier, the nutritional needs of each animal group change. To meet these needs, grower feed should be adjusted to specific needs of each animal group. Protein for muscle growth, tissue repair, and immune function, and the protein level should be between 12% and 18%, depending on the animal type. Energy is also essential for maintenance, growth, and activity, with an energy level between 60% and 70% of TDN.

Homemade Feed Formulations for Livestock

Finisher Feed Recipes for Mature Livestock

Crafting finisher feed recipes for mature livestock requires a blend of nutrients tailored to their specific needs. A balance of protein, carbohydrates, and fats promotes optimal growth and muscle development, preparing animals for the market while ensuring their overall health and well-being.

In case you missed it: Berseem Forage Cultivation: Best Fodder Farming for Livestock

Feeding a cow in a cowshed
Composition of Finisher Feed

Finisher feed typically consists of grains such as corn, barley, and wheat, supplemented with protein sources like soybean meal or fishmeal. Fat sources like vegetable oils may be added for energy, along with vitamins and minerals, to meet nutritional requirements. Balancing these ingredients is crucial for optimal performance.

Preparing Livestock for Market

Proper nutrition is essential in preparing livestock for the market. Finisher feed formulations ensure animals reach their desired weight and condition, maximizing profit for farmers. A gradual transition to finisher feed helps prevent digestive upset and ensures a smooth transition to the finishing phase before sale or butchering.

Customized Feed Formulas for Livestock

Customized feed formulas allow farmers to tailor nutrition to the specific needs of their animals. Factors such as breed, age, and intended use are considered when formulating feeds, ensuring each animal receives the nutrients for optimal growth, health, and performance.

Tailoring Feed for Specific Animal Needs

Different animals have varying nutritional requirements based on factors such as species, age, and physiological status. Tailoring feed formulations to meet needs ensures optimal health, growth, and productivity, ultimately leading to better overall performance and profitability for farmers.

Adjusting Formulas for Different Growth Stages

As animals grow and develop, their nutritional needs change. Adjusting feed formulas to accommodate these different growth stages is essential for promoting optimal health and development. Starter feeds provide essential nutrients for young animals, while finisher feeds support muscle growth and weight gain as animals mature.

Nutrient Balance in Homemade Livestock Feed

Achieving the right balance of nutrients in homemade livestock feed is crucial for supporting optimal growth and performance. Balancing protein levels ensures muscle development while managing energy content provides animals with the energy they need for daily activities and growth.

Achieving the Right Protein Levels

Protein for muscle development and overall growth in livestock. Ensuring the right protein levels in homemade feed formulations supports muscle growth, reproduction, and overall health. Protein sources such as soybean meal, fishmeal, and legumes are commonly used to meet these requirements.

Managing Energy Content

Managing the energy content of homemade feed is critical for meeting the energy needs of livestock. Carbohydrates and fats are primary energy sources in feed formulations, providing animals with the energy they need for growth, maintenance, and production activities.

In case you missed it: Moringa as Feed for Livestock: Moringa Fodder Crop Yield Per Acre

dairy cows eating feed together in farm

Mixing and Preparing Homemade Livestock Feed

Proper mixing techniques are essential for ensuring uniform distribution of nutrients in homemade livestock feed. Thoroughly mixing ingredients helps prevent nutrient imbalances and ensures animals receive consistent nutrition with each feeding.

Ensuring Feed Hygiene and Safety

Maintaining feed hygiene and safety is crucial for preventing contamination and ensuring the health and safety of livestock. Proper storage, handling, and processing practices help minimize the risk of foodborne and maintain the quality of homemade feed.

Testing and Quality Assurance for Livestock Feed

Regular testing, quality assurance measures are essential for ensuring the nutritional quality and safety of homemade feed. Nutrient analysis helps verify nutrient levels, while quality control measures help identify, address any potential issues with feed quality and safety.

Nutrient Analysis of Homemade Feed

Nutrient analysis involves testing homemade feed samples to determine their nutrient content. This information helps farmers assess the nutritional adequacy of their feed formulations and make any necessary adjustments to meet the needs of their animals.

Quality Control Measures

Implementing quality control measures helps maintain the quality and safety of homemade feed. This may include regular inspections, monitoring for contaminants, and following proper processing and storage procedures to ensure feed integrity.

Cost-Effective Homemade Feed Solutions

Developing cost-effective homemade feed solutions involves sourcing affordable ingredients while maintaining nutritional quality. By carefully selecting ingredients and optimizing formulations, farmers can reduce feed costs without sacrificing the health or performance of their animals.

Budget-Friendly Feed Ingredients

Choosing budget-friendly feed ingredients helps minimize feed costs while still meeting the nutritional needs of livestock. Common inexpensive ingredients include grains, legumes, and by-products from food processing industries.

Calculating Feed Costs and Savings

Calculating feed costs involves considering the cost of ingredients, processing, and labor involved in feed production. By comparing these costs to the potential savings from homemade feed production, farmers can assess the economic viability of producing feed on-farm.

Livestock Feed Efficiency

Optimizing feed efficiency is essential for maximizing productivity and profitability in livestock operations. Feed conversion ratios measure the amount of feed required to produce a unit of output, like weight gain or milk production, allowing farmers to identify opportunities for improvement.

Optimizing Feed Conversion Ratios

Improving feed conversion ratios involves optimizing feed formulations and management practices to minimize feed wastage and maximize nutrient utilization by livestock. This helps improve the efficiency and profitability of livestock operations.

In case you missed it: A Guide to Understand Livestock Feeding: Check How this Guide Helps Livestock Farmers

Dairy cow feeding setup
Reducing Feed Wastage

Minimizing feed wastage is crucial for reducing feed costs and improving feed efficiency. Proper feeding management practices, such as using feeders and troughs designed to minimize spillage, help ensure that animals consume the feed provided without waste.

Supplementing Homemade Feed with Minerals

Minerals supporting various physiological functions in livestock. Supplementing homemade feed with essential minerals helps ensure animals receive nutrients for optimal health, growth, and reproduction.

Essential Minerals for Livestock

Essential minerals required by livestock include calcium, phosphorus, magnesium, potassium, and trace minerals such as copper, zinc, and selenium. These minerals are critical for bone development, muscle function, reproduction, and overall health in animals.

Mineral Supplements in Feed

Mineral supplements can be added to homemade feed formulations to ensure animals receive adequate levels of essential minerals. These supplements may be in the form of mineral premixes or individual mineral sources added to feed as needed to meet specific nutritional requirements.

Natural Additives in Homemade Livestock Feed

Incorporating natural additives into homemade livestock feed can enhance nutrient utilization and promote animal health and performance. Herbs, botanical extracts, and other natural ingredients may offer additional benefits such as improved digestion, immunity, and overall well-being.

Incorporating Herbs and Supplements

Herbs and supplements can be added to homemade feed formulations to provide additional health benefits for livestock. Common herbs used in feed include garlic, oregano, and thyme, which have antimicrobial and immune-boosting properties.

Enhancing Feed with Natural Ingredients

Natural ingredients like probiotics, prebiotics, and enzymes can enhance the nutritional quality and digestibility of homemade feed. These ingredients promote gut health, improve nutrient absorption, and support overall animal performance.

Homemade Feed for Poultry

Formulating homemade feed for poultry involves blending grains, protein sources, supplements to meet the specific nutritional needs of chickens, ducks, and turkeys. Customized feed formulations support optimal growth, egg production, and overall health in poultry.

Formulations for Chickens

Chickens require balanced diets rich in protein, energy, vitamins, and minerals for optimal growth and egg production. Homemade feed formulations for chickens typically include grains, soybean meal, calcium sources, and vitamin and mineral supplements to meet these requirements.

In case you missed it: Profitable Pig Breeds: Selecting and Breeding for Success

Cow feed mix
Feed for Ducks and Turkeys

Ducks and turkeys have slightly different nutritional needs compared to chickens, requiring higher levels of certain nutrients such as protein and niacin. Homemade feed formulations for ducks and turkeys may include a higher percentage of protein sources and supplemental niacin to support their unique requirements.

Homemade Feed for Cattle and Dairy Livestock

Customized feed blends for cattle and dairy livestock support optimal growth, milk production, and overall health. These formulations typically include a balance of energy, protein, fiber, vitamins, and minerals to meet the specific nutritional needs of each animal.

Custom Blends for Cows

Cows require diets rich in fiber, energy, and protein to support rumen function, milk production, and body condition. Custom blends for cows may include forages such as hay and silage, along with grains, protein supplements, and mineral premixes to meet their nutritional requirements.

Dairy-Specific Feed Formulations

Dairy cows have unique nutritional needs to support high milk production and reproductive performance. Dairy-specific feed formulations may include high-quality forages, energy-dense grains, protein supplements, and mineral premixes to optimize milk production and cow health.

Homemade Feed for Swine and Pork Production

Swine feed recipes for homemade feed formulations support optimal growth, reproduction, and pork production. Customized blends of grains, protein sources, and supplements provide pigs with the nutrients they need for efficient growth and development.

Swine Feed Recipes

Swine feed recipes typically include a combination of grains such as corn, barley, and wheat, along with protein sources like soybean meal or distillers’ grains. Fat sources such as vegetable oils may be added for energy, along with vitamins and minerals, to meet nutritional requirements.

Preparing Pigs for Butchering

Proper nutrition is essential in preparing pigs for butchering, ensuring optimal growth and carcass quality. Finisher feeds are typically fed during the final weeks before butchering to maximize weight gain and lean muscle development, producing high-quality pork for the market.

Conclusion

Homemade feed formulations provide a cost-effective solution for meeting the nutritional needs of livestock from starter to finisher stages. By customizing recipes and optimizing ingredients, farmers can promote animal health, growth, and profitability sustainably.

20 Best Pig Weight Gain Supplements: Top Swine Weight Gain Formulas

0

Discover the Top 20 Pig Weight Gain Supplements: Boost Swine Growth with High-Calorie Pig Feeds, Protein Pellets, and Essential Nutritional Pellets. Explore Vitamin Mixes, Omega Fatty Acids, and Probiotic Digestive Aids for Optimal Health. Learn about Electrolyte Boosters, Herbal Tonics, and Growth Hormone Alternatives to Enhance Weight Gain Efficiency.

Best Pig Weight Gain Supplements

From Fiber Supplements to Trace Elements, Uncover the Best Formulas to Maximize Pig Weight Gain. Elevate Your Swine Nutrition with Antioxidant Formulas and Lactation Formulas for Healthy Pig Growth. Explore the Latest in Pig Nutrition for Maximum Swine Weight Gain.

20 Best Pig Weight Gain Supplements

Premium High-Calorie Feeds

High-calorie feeds are crucial for pigs to gain weight quickly and efficiently, providing more energy per unit of feed. These feeds, such as corn, barley, wheat, oats, soybean meal, fish meal, and animal fats, help pigs cope with cold weather, stress, and disease. They should be balanced with adequate protein, minerals, and vitamins for optimal growth and health.

Energy-dense diets are designed to maximize pigs’ growth potential by providing enough calories to support their high metabolic rate and muscle development. These diets typically contain high levels of starch, sugar, and fat, which are easily digestible and absorbed by the pig’s body. They reduce the risk of digestive disorders by lowering stomach and intestine pH.

Enhanced Protein Pellets

Protein is crucial for pigs’ growth and development, and protein pellets are a convenient way to supplement their protein intake. These pellets are made from high-quality sources like soybean meal, canola meal, cottonseed meal, sunflower meal, peanut meal, fish meal, meat, and bone meal.

Contains vitamins, minerals, and amino acids to enhance the nutritional value of the feed. Muscle development boosters are feed additives that stimulate muscle tissue growth and development in pigs by increasing protein synthesis and reducing muscle fiber breakdown. They also improve feed efficiency, carcass quality, and meat tenderness. Examples of muscle development boosters include beta-agonists like ractopamine and zilpaterol.

Balanced Mineral Supplements

Minerals are crucial for pigs’ physiological functions, including bone formation, hormone production, nerve transmission, and immune system function. Balanced mineral supplements provide:

  • Adequate amounts of macro-minerals and micro-minerals.
  • Preventing deficiencies that can lead to poor growth performance.
  • Reduced feed intake.
  • Impaired reproduction.
  • Increased disease susceptibility.

Essential nutrient optimization ensures pigs receive optimal levels of nutrients at different growth and production stages, supporting maintenance, growth, reproduction, and lactation without exceeding their capacity or causing toxicity. This optimization improves feed efficiency, profitability, and sustainability of pig production. This can be achieved using feed formulation software, feed analysis tools, feed testing laboratories, and nutrition consultants.

In case you missed it: Unlocking the Potential of Organic Pig Farming: Sustainable and Profitable

Danish duroc pigs sleeping in pen on livestock farm

Fortified Vitamin Mixes

Vitamins are essential for pigs’ normal metabolism and health, acting as coenzymes in various biochemical reactions. Fortified vitamin mixes provide pigs with adequate amounts of fat-soluble vitamins (A, D, E, and K) and water-soluble vitamins (B complex and C). These mixes prevent vitamin deficiencies or excesses that can lead to reduced growth rate, impaired immune function, reproductive failure, and increased mortality. 

Immune system and health enhancers are feed additives that enhance pigs’ immune system function and health status by stimulating the production and activity of immune cells, antibodies, and cytokines. They also modulate the inflammatory response and inhibit the growth of pathogens. Examples of immune system and health enhancers include probiotics, prebiotics, organic acids, essential oils, herbs, spices, antioxidants, and immunomodulators.

Omega Fatty Acid Solutions

Omega fatty acids, which are polyunsaturated fatty acids, are beneficial for the health and performance of pigs. They are divided into two groups: omega-3 and omega-6. Omega-3 fatty acids have anti-inflammatory, anti-thrombotic, and anti-arrhythmic properties, while omega-6 fatty acids have pro-inflammatory, pro-thrombotic, and pro-arrhythmic properties. Pigs can benefit from omega fatty acid solutions that balance their effects on the body and improve feed conversion ratio, carcass quality, and meat flavor. 

Skin health and weight gain are interrelated factors that affect pigs’ welfare and productivity. External factors like temperature, humidity, ventilation, bedding, hygiene, and parasites can affect skin health, while internal factors like nutrition, genetics, hormones, and diseases can affect weight gain. Improving skin health and weight gain can be achieved by providing adequate nutrition, water, shelter, sanitation, and parasite control.

Probiotic and Digestive Aids

Probiotics are live microorganisms that can improve the digestive health of pigs by modulating the intestinal microbiota, enhancing intestinal barrier function, stimulating the intestinal immune system, and producing beneficial metabolites like short-chain fatty acids. Digestive aids facilitate the digestion process by improving the activity of digestive enzymes, bile acids, or digestive hormones. These substances can improve feed efficiency, growth performance, nutrient utilization, and gut health.

Gut health and absorption improvers are feed additives that enhance the health and function of the gastrointestinal tract. They work by maintaining or restoring the integrity of the intestinal mucosa, increasing the surface area of the intestinal villi, enhancing the transport or uptake of nutrients across the intestinal epithelium, or reducing the loss or excretion of nutrients through the intestinal lumen. These improve nutrient absorption, growth performance, feed efficiency, and disease resistance of pigs.

Palatable Molasses Additives

Molasses, a by-product of sugar extraction from sugarcane, is a dense, dark, and sugar-rich liquid used as an energy source and binder in pig feeds. It can improve the palatability of feeds, especially for young, sick, or stressed animals. Molasses can enhance the taste and smell of feeds, mask off-flavors, and increase water intake for pigs’ hydration and digestion.

In case you missed it: Profitable Pig Breeds: Selecting and Breeding for Success

Domestic pig

Feed intake is crucial for pig growth, health, and welfare and can be influenced by factors like feed quality, environmental conditions, health status, genetics, and management practices. Feed intake stimulators, such as flavors, sweeteners, organic acids, amino acids, herbs, and spices, aim to increase pigs’ appetite and consumption, especially during stress or challenges.

Essential Amino Acid Blends

Amino acids are crucial for pig growth, development, and maintenance. Pigs cannot synthesize all amino acids, and the diet must supply some. Essential amino acids, like lysine, methionine, threonine, tryptophan, valine, leucine, isoleucine, phenylalanine, and histidine, are essential for pigs’ growth and development. Essential amino acid blends are feed additives that provide:

  • A balanced supply of these amino acids.
  • Improving protein quality.
  • Reducing nitrogen excretion.
  • Enhancing growth performance and carcass quality.

Optimal growth formulations aim to optimize pig growth by providing adequate nutrients and energy tailored to different pig categories like piglets, growers, finishers, or breeders. These formulations can improve feed efficiency, growth rate, lean meat percentage, and health status.

Electrolyte and Hydration Boosters

Electrolytes, including sodium, potassium, chloride, calcium, magnesium, and phosphorus, are essential minerals in maintaining fluid balance, acid-base balance, and nerve-muscle function in pigs. Feed additives like electrolyte and hydration boosters provide extra electrolytes and water to pigs, aiding in recovery from dehydration, preventing heat stress, and maintaining performance. Stress, a state of physical or mental disturbance, can negatively impact pigs’ health and fluid balance.

Natural Herbal Tonics

Natural remedies made from herbs like chamomile, lavender, mint, rosemary, and thyme can help animals cope with stress, infections, and inflammation. They boost immunity, calm nerves, improve digestion, and enhance mood. Appetite and metabolism enhancers, made from amino acids, vitamins, minerals, enzymes, and probiotics, stimulate appetite and metabolism in animals, especially those underweight, sick, or recovering from surgery or injury. They help animals eat more, digest better, absorb nutrients, gain weight, and improve energy levels, performance, and overall health. These remedies can be added to water, fed, or administered orally.

Yeast-Based Growth Promoters

Live or inactive yeast cultures are products that promote growth in animals by improving rumen function, intestinal health, and nutrient utilization. They can enhance feed intake, feed efficiency, and milk production. These products can be used for both ruminants and non-ruminants and can be added to feed or water.

They also improve nutrient utilization and gut health by containing enzymes, probiotics, prebiotics, and organic acids. They help animals break down feed components, balance gut flora, prevent infections, reduce inflammation, and enhance immunity. These products are suitable for all types of animals and can be added to feed or water.

Fiber-Rich Supplements

Fiber-rich products, made from sources like beet pulp, soy hulls, wheat bran, and alfalfa meal, can benefit animals by reducing digestive disorders, improving fecal quality, and supporting healthy weight management. These products can be used for horses, ruminants, and rabbits and can be mixed with feed or given separately.

In case you missed it: Livestock Vaccination Cost in India: Exploring Strategies to Reduce Animal Vaccination Costs

Feeding Rare Breed Pigs In Garden

Digestive system support products, made from ingredients like clay, charcoal, kaolin, and pectin, can help animals absorb toxins, neutralize acids, soothe ulcers, protect the stomach lining, reduce gas production, prevent diarrhea, and restore electrolyte balance. These products can be given orally or added to feed or water and can be used for all types of animals.

Trace Elements Mix

Trace elements are essential for animal health and performance, sourced from minerals, chelates, and yeast extracts. These products provide essential trace elements like iron, copper, zinc, manganese, selenium, iodine, and cobalt to animals. They help prevent deficiencies, support metabolism, enhance immunity, and improve reproduction. These products can be used for all types of animals and can be added to feed, water, or given as an injection or bolus. 

Micro-nutrients are also crucial for animal wellness, sourced from vitamins, herbs, antioxidants, and other sources. They provide essential vitamins A, D, E, C, B complex, and omega-3 fatty acids. These products help maintain healthy skin, coat, eyes, bones, joints, nerves, and organs while protecting against oxidative stress, inflammation, infections, and diseases. They can be added to feed, water, or given as capsules or tablets.

Lactation Enhancing Formulas

Lactation enhancers are products that aid lactation in nursing animals by enhancing milk production, improving milk quality, and supporting milk letdown. They nourish mammary glands, prevent mastitis, and promote recovery after weaning. These products can be used for dairy cows, sheep, goats, pigs, and other lactating animals and can be given orally or added to feed or water. 

For nursing pigs, these products include whey protein, soy protein, and lactose. They help pigs produce more milk, improve milk composition, support growth and survival, stimulate appetite and feed intake, enhance energy and protein metabolism, and prevent weight loss and fatigue. These products can also be used for sows and gilts and can be given orally or added to feed or water.

Energy-Rich Gels

These products are energy-rich gels that can boost energy levels in animals by increasing blood glucose levels, improving energy availability, and preventing hypoglycemia. They also enhance performance and endurance, support recovery and healing, and prevent ketosis and acidosis. These products can be used orally, subcutaneously, or intravenously and can be given to all types of animals. 

Quick energy sources, made from ingredients like propylene glycol, glycerol, and dextrose, can help animals overcome energy deficits, raise blood glucose levels, improve energy balance, and prevent negative energy balance. They also support liver function, prevent fatty liver syndrome and hepatic lipidosis, and improve appetite and feed intake. These products are suitable for cattle, sheep, goats, horses, and other animals prone to energy shortages and can be administered orally, subcutaneously, or intravenously.

Complete Nutritional Pellets

All-In-One Feed Solutions are products that offer complete nutritional pellets for animals made from ingredients like cereals, legumes, oilseeds, by-products, and additives. These pellets provide animals with carbohydrates, proteins, fats, fibers, vitamins, and minerals, helping them maintain optimal health and performance. They can reduce feed wastage, improve feed conversion ratio, and simplify feeding management. 

In case you missed it: A Guide to Understand Livestock Feeding: Check How this Guide Helps Livestock Farmers

Black Pig Running In Farm Yard

These products are suitable for all types of animals and can be fed as a sole ration or supplemented with other feeds. They are made from ingredients like complete feeds, concentrates, premixes, and additives and can provide all the necessary nutrients in one product. They can save time, money, and labor on feeding while ensuring consistent quality, quantity, and composition of feed. These products can be used for all types of animals and can be mixed with other feeds.

Growth Hormone Alternatives

Growth hormone alternatives are products that enhance animal growth without synthetic hormones. These products, made from natural hormones, peptides, growth factors, and amino acids, can help animals increase growth rate, muscle mass, lean tissue, carcass quality, feed efficiency, nutrient utilization, and animal welfare. They can be used for beef cattle, pigs, poultry, and other meat-producing animals and can be given orally, subcutaneously, or intramuscularly. 

Safe growth accelerators, made from ingredients like beta-agonists, ionophores, antibiotics, and probiotics, can speed up growth without compromising health or safety. They can help animals increase growth rate, weight gain, feed efficiency, and profitability, and can prevent or treat diseases, infections, parasites, and other health problems. They can be added to feed or water, given orally, or injected subcutaneously or intramuscularly.

Feed Efficiency Optimizers

Feed efficiency optimizers are products or strategies that help animals use their feed more effectively and reduce costs. They can include enzymes, probiotics, antioxidants, vitamins, minerals, and other additives that enhance the digestion and absorption of nutrients from feed ingredients. Proper feed storage, mixing, delivery, and management are essential to prevent feed losses and wastage. 

Feed efficiency optimizers can improve animal performance, health, welfare, and profitability. To maximize feed utilization, livestock producers need to provide high-quality feed nutritional requirements for their animals at different growth and production stages. Regular monitoring of feed intake and performance is also necessary to adjust the feeding program accordingly.

Antioxidant-Rich Formulas

Antioxidant-rich formulas are feed formulations containing high levels of antioxidants vitamins C and E, selenium, carotenoids, flavonoids, and other phytochemicals. These antioxidants protect cells from oxidative stress, which can damage DNA, proteins, lipids, and other cellular components, leading to inflammation, aging, and diseases. Antioxidant-rich formulas can help animals cope with oxidative stress by scavenging free radicals and enhancing the body’s natural antioxidant defense system.

They can improve animal health, immunity, reproduction, and productivity. Oxidative stress combatants are substances or practices that help animals fight against oxidative stress, which occurs when the body’s capacity to neutralize free radicals exceeds its capacity. These combatants can include antioxidants, anti-inflammatory agents, detoxifiers, immune boosters, and stress reducers that prevent or repair the damage caused by free radicals.

Custom Weight Gain Premixes

Custom weight gain premixes are feed mixes designed to promote weight gain in animals, varying based on factors like breed, age, weight, and goal. These premixes contain high energy and protein sources, vitamins, minerals, amino acids, enzymes, probiotics, and other additives to enhance nutrient absorption and utilization. They can help animals achieve optimal weight gain quickly without compromising their health or welfare.

In case you missed it: Top 20 Goat and Sheep Weight Gain Supplements: Best Sheep and Goat Weight Gain Formulas

pig shelter with fence

Tailored growth support solutions are tailored solutions that help animals reach their full growth potential. These solutions can include feed formulations, feeding programs, management practices, health interventions, and genetic improvements. They address factors affecting animal growth, such as nutrition, health, environment, behavior, and genetics, and can improve animal performance, quality, and profitability.

Conclusion

The top 20 pig weight gain supplements offer a comprehensive approach to swine nutrition, supporting growth, muscle development, and overall health. From premium feeds to tailored formulas, these supplements ensure optimal feed utilization and efficient weight gain for thriving pigs, promoting a robust and prosperous swine industry.

Ultimate Guide to Elderberry Farming: Propagation, Planting, Yield, Cost, and Profit

0

Embark on a journey through the intricacies of Elderberry Farming with our comprehensive guide. Delve into Propagating Elderberries, explore diverse Elderberry Varieties, and master Planting techniques. Learn about Elderberry Yield Per Acre, delve into Profit prospects, and discover Organic Cultivation methods. Uncover market trends, harvest insights, and sustainable practices.

Guide to Elderberry Farming

Guide to Elderberry Farming

Introduction to Elderberry Farming

Elderberry farming is a rewarding and sustainable way to grow a versatile and healthy fruit. Elderberries are native to North America and can thrive in various climates and soil types. They have many benefits for both humans and the environment, such as boosting immunity, attracting pollinators, and preventing erosion.

Overview of Elderberry Benefits and Uses

The plant elderberry offers a wide range of applications and health advantages. Elderberry berries and blooms are rich in antioxidants, vitamins, and minerals that enhance and strengthen the immune system, shield the heart, and stave off cancer. In addition, elderberry helps lower fever, ease coughing, improve digestion, and treat cold and flu symptoms. Dried berries or elderberry juice might also have laxative and diuretic properties. Elderberries, however, should be prepared before consumption since they can be toxic when raw or underripe.

Market Demand for Elderberries

Elderberries, small purple berries with health benefits, are rich in antioxidants, vitamins, and minerals. They boost the immune system and are used in various products. The market demand for elderberries is increasing, with a CAGR of 6.50%, expected to reach $600 million by 2030.

Understanding Elderberry Varieties

Elderberries are versatile and productive plants that can offer many benefits to the home gardener. They produce beautiful flowers and tasty berries that can be used for food and medicine. However, not all elderberry varieties are the same, and some factors need to be considered before choosing the best one for your garden.

Popular Varieties for Cultivation

Adams, Johns, Nova, and York are native American varieties of grapes, each with unique characteristics. Adams produces medium-sized, juicy purple fruits, while Johns produces large, dark, tart berries suitable for jam and jelly. Nova and York are compact varieties, producing semi-sweet, fresh berries. The University of Missouri’s Bob Gordon variety, with its high sugar content, is ideal for winemaking.

Selecting the Right Variety for Your Climate

Adams is a cold-hardy variety of elderberry that thrives in moist, fertile soils and full sun. It can tolerate acidic and alkaline soils, partial shade, and drought. For colder regions, choose a variety that can withstand low temperatures and frost. For wet areas, choose a variety that can handle excess moisture. Plant compatible varieties near each other for cross-pollination.

In case you missed it: How to Manage Pests and Diseases in Berry Orchards: A Comprehensive Guide

elderberry in the forest

Propagating Elderberries

Elderberries can be easily propagated through various methods, including cuttings, seeds, and division. Each method offers its advantages and considerations.

Methods of Propagation: Cuttings, Seeds, and Division
  1. Cuttings: Take stem cuttings from healthy elderberry plants in the dormant season, usually late fall to early spring, and root them in a suitable growing medium.
  2. Seeds: Collecting ripe elderberry seeds, stratifying them for a few months, then sowing them in a prepared seedbed or container.
  3. Division: Dividing mature elderberry plants by carefully separating the root mass into sections with shoots attached.
Preparing Propagation Material
  1. Cuttings: Select healthy, disease-free stems with a diameter of about pencil-thickness. Cut them into sections around 6 to 8 inches long, ensuring each cutting has at least one node.
  2. Seeds: Extract seeds from ripe elderberries, remove any pulp, and then stratify them in a moist medium, such as peat moss or vermiculite, for 2 to 3 months.
  3. Division: Before dividing, water the elderberry plant thoroughly to make the soil easier to work with. Then, carefully lift the plant and use a sharp tool to separate the root mass into sections, ensuring each section has adequate roots and shoots.

Soil Preparation and Requirements

Elderberries thrive in well-drained soil with a pH level between 5.5 and 6.5. Soil should be rich in organic matter and free from compaction. Before planting, keep the soil loose and friable, allowing roots to establish easily. Incorporating compost or aged manure can improve soil structure and fertility, providing essential nutrients for healthy growth.

Ideal Soil Conditions for Elderberries

Elderberries prefer loamy soil that is rich in organic matter and drains well. Acidic to neutral pH levels ranging from 5.5 to 6.5 is optimal for nutrient uptake. Adequate soil moisture retention is important, but saturated conditions should be inhibited to prevent root rot. Good air circulation around the roots also promotes healthy growth and reduces disease risks.

Soil Amendments and Preparation Techniques

Before planting elderberries, amend the soil with organic matter, including compost or well-aged manure to improve fertility and structure. Incorporating perlite or vermiculite can enhance drainage in heavy soils. Use a shovel or tiller to loosen compacted soil, ensuring roots can penetrate easily. Remove weeds or debris from the planting area to reduce competition.

Planting Elderberries

Choose wholesome elderberry plants from a reliable source. Create a massive hole that is twice as large and deep as the plant’s root ball. Carefully remove the plant from the plant container and place it in the center of the hole. Make sure the plant is at the same level as it was in the container by backfilling it with dirt.

Best Time to Plant

When the weather is chilly and wet, in early spring or late autumn, elderberries grow best. In doing so, the plants are able to form roots prior to the arrival of summer heat or winter cold. Planting should be avoided when there is a severe heat wave or drought since these conditions can stress plants and lower their chances of surviving.

Planting Techniques for Optimal Growth

Elderberries need at least 6 feet between plants in order to have enough airflow and area to flourish. Mulch should be applied around the base of the plants to control soil temperature, prevent weed growth, and preserve moisture. Watering on a regular basis is crucial, particularly in dry or droughty conditions. Every year, prune to encourage new growth and get rid of any dead or damaged wood.

Irrigation and Water Management

Elderberry farms require consistent and efficient irrigation systems to thrive. Drip irrigation is a popular choice, delivering water directly to the roots while minimizing water wastage. Additionally, mulching around elderberry plants helps retain moisture, reducing the need for excessive watering. Proper water management is important to ensure optimal growth and yield of elderberries while conserving water resources.

In case you missed it: How to Control Pests and Diseases in Strawberry Crop: Causes, Symptoms, Chemical, and Biological Management

black elderberry in garden
Irrigation Systems for Elderberry Farms

Elderberry farms benefit from various irrigation systems tailored to their specific needs. Drip irrigation, using perforated hoses or tubing, emits water directly to the base of the plants, minimizing water loss through evaporation and runoff. Overhead sprinklers can also be effective, especially for larger farms, although they may require more water and can increase the risk of foliar diseases.

Watering Schedule and Requirements

Following a consistent watering schedule is essential for elderberry plants’ health and productivity. During the growing season, elderberries typically require around 1 to 1.5 inches of water per week, either from rainfall or supplemental irrigation. However, it’s crucial to monitor moisture levels and adjust watering frequency based on weather and plant needs to prevent over or under-watering.

Fertilization and Soil Management

Maintaining healthy soil fertility is vital for elderberry production, requiring a balanced approach to fertilization and soil management. Regular soil testing helps determine nutrient deficiencies, allowing growers to tailor fertilization strategies accordingly. Incorporating compost or aged manure improves soil structure and nutrient retention, promoting healthy root development and overall plant vigor.

Nutrient Requirements for Elderberries

Elderberries have specific nutrient requirements to support their growth and development. They benefit from a well-balanced fertilizer containing nitrogen, phosphorus, potassium, and micronutrients. Nitrogen is essential for foliage growth, while phosphorus aids in root development and flower production. Potassium supports both disease resistance and general plant health. Micronutrients such as manganese, iron, and zinc are also essential for the nutrition of elderberries.

Organic and Inorganic Fertilization Strategies

Depending on their tastes and output objectives, growers can select between organic and inorganic fertilization techniques. Organic fertilizers offer gradual nutrient release and enhance soil health since they are made from natural sources like compost, manure, or plant leftovers. Inorganic fertilizers, on the other hand, offer precise nutrient formulations and immediate availability, allowing for more targeted nutrient management.

Pest and Disease Management

In elderberry cultivation, it’s crucial to manage pests and diseases to ensure healthy plant growth and optimal yield. Common pests include aphids, spider mites, and Japanese beetles, while diseases such as powdery mildew and bacterial leaf spot can also affect elderberry plants. Implementing Integrated Pest Management (IPM) practices is essential to minimize pesticide use and maintain a balanced ecosystem.

Common Pests and Diseases in Elderberry Cultivation

Elderberries are vulnerable to various pests and diseases, impacting their growth and yield. Among the most common pests are aphids, which suck sap from plants, causing leaf curling and stunted growth. Additionally, elderberry borers can bore into the stems, leading to weakened branches and decreased productivity. Diseases, including powdery mildew and bacterial leaf spot, can also affect elderberries, causing leaf discoloration and fruit deterioration.

Integrated Pest Management (IPM) Practices

Integrated Pest Management (IPM) combines various strategies to control pests while minimizing environmental impact and maintaining economic viability. These practices include monitoring pest populations, employing biological control methods like introducing beneficial insects, using cultural techniques such as crop rotation, and utilizing chemical control only when necessary as a last resort. IPM aims to achieve sustainable pest control while preserving natural ecosystems.

In case you missed it: Top 15 Steps to Boost Blueberry Yield: How to Increase Production, Size, and Quality

elderberry plant

Pruning and Plant Management

Pruning plays a vital role in managing elderberry plants for optimal growth and fruit production. Proper pruning techniques are involved.

  • Removing dead or diseased branches.
  • Thinning out crowded areas to improve air circulation.
  • Shaping the plant to encourage robust growth and easy harvesting.

Additionally, managing plant density by spacing plants appropriately ensures each plant receives adequate sunlight and nutrients for maximum yield.

Pruning Techniques for Elderberry Plants

When pruning elderberry plants, start by removing any dead or damaged branches and cutting them back to healthy wood. Next, thin out overcrowded areas by selectively removing some branches to improve air circulation and light penetration. Shape the plant by cutting back lateral branches to encourage upward growth and facilitate harvesting. Regular pruning promotes vigorous growth and minimizes the risk of disease.

Managing Plant Density for Optimal Yield

Pruning plays a vital role in managing elderberry plants for optimal growth and fruit production. Proper pruning techniques involve removing dead or diseased branches, thinning out crowded areas to improve air circulation, and shaping the plant to encourage robust growth and easy harvesting. Additionally, managing plant density by spacing plants appropriately ensures each plant receives adequate sunlight and nutrients for maximum yield.

Pollination and Berry Production

Pollination is vital for elderberry farming as it ensures the transfer of pollen, leading to fruit formation. Elderberries, rich in antioxidants and vitamins, rely on pollinators like bees for efficient fertilization. This process significantly impacts berry yield and quality, making pollination management crucial for successful elderberry cultivation.

Importance of Pollination in Elderberry Farming

Pollination plays a crucial role in elderberry farming by facilitating fruit set and development. Effective pollination leads to increased berry production, contributing to higher yields and improved fruit quality. Adequate pollination ensures genetic diversity within elderberry crops, enhancing their resilience to environmental stresses and diseases, thereby promoting sustainable farming practices.

Enhancing Pollination through Beekeeping or Natural Pollinators

Farmers can enhance pollination in elderberry cultivation by maintaining healthy populations of bees or encouraging the presence of natural pollinators. Beekeeping practices such as hive placement and habitat conservation create favorable conditions for pollinators, leading to improved fruit set and yield. Additionally, incorporating diverse plantings and minimizing pesticide use support the abundance of natural pollinators.

Harvesting Elderberries

Harvesting elderberries at the optimal stage of ripeness is crucial for maximizing yield and quality. Proper timing ensures that berries are flavorful and nutrient-rich, ideal for consumption or processing. Recognizing the signs of ripeness and employing appropriate harvesting techniques are essential steps in obtaining a bountiful elderberry harvest.

Signs of Ripeness and Harvesting Time

Elderberries are ready for harvest when they turn deep purple or black and feel plump and firm to the touch. Fully ripe berries should easily detach from the stem with minimal effort. Harvesting typically occurs in late summer to early fall, coinciding with peak ripeness and flavor development in elderberries.

Harvesting Techniques to Maximize Yield and Quality

To maximize yield and quality, adopt careful harvesting techniques that minimize damage to the berries and plants. Utilize sharp pruning shears or scissors to gently clip clusters of ripe elderberries from the stem, avoiding excessive bruising or crushing. Harvesting during cooler temperatures and dry weather conditions further preserves berry freshness and flavor.

Post-Harvest Handling and Processing

Proper post-harvest handling and processing are essential for preserving the freshness and nutritional value of elderberries. Swiftly clean and dry harvested berries to prevent spoilage and maintain quality. Implementing appropriate storage practices and exploring various processing options enable value addition and extend the shelf life of elderberry products.

In case you missed it: Bolting Management in Plants: Prevention for Premature Flowers and Seeding in Crops and Vegetables

elderberry fruit
Cleaning, Drying, and Storage of Elderberries

After harvesting, carefully clean elderberries by removing any debris or damaged berries. Spread them in a single layer on trays or screens to air dry thoroughly, ensuring moisture content is reduced to prevent mold growth. Store dried elderberries in airtight containers in a cool, dark place to maintain their flavor, color, and nutritional integrity.

Processing Options for Value Addition

Elderberries offer versatile processing options for value addition, including making jams, syrups, juices, and wines. Explore recipes and techniques for transforming fresh or dried elderberries into a range of delicious and nutritious products. Consider experimenting with different flavor combinations and preservation methods to create unique elderberry-based offerings for culinary enjoyment and health benefits.

Yield Expectations and Factors Influencing Yield

Elderberry yield expectations vary based on factors such as climate, soil quality, and cultivation practices. A well-managed elderberry farm can typically yield between 3,000 to 6,000 pounds per acre, although this can fluctuate significantly depending on various environmental and agricultural variables.

Average Yield per Acre

The average yield per acre of elderberry can range from 3,000 to 6,000 pounds under optimal conditions. However, this figure is subject to change due to factors like weather patterns, soil fertility, pest control measures, and the age and health of the elderberry plants on the farm.

Factors Affecting Elderberry Yield

Several factors influence elderberry yield, including climate, soil composition, moisture levels, sunlight exposure, plant spacing, pruning techniques, fertilization practices, and pest and disease management. Each of these elements plays an important role in determining the overall productivity and profitability of elderberry cultivation endeavors.

Costs of Starting and Running an Elderberry Farm

Starting an elderberry farm requires careful financial planning, including land purchase, equipment, planting materials, labor, and marketing efforts. Running costs include recurring costs for fertilizers, pesticides, labor, utilities, insurance, and marketing efforts, as well as ongoing expenses for maintenance and operations.

Initial Setup Costs

According to Finmodelslab, the initial setup costs for an elderberry farm include land acquisition, site preparation, planting materials, irrigation system, tools and equipment, and legal fees. The total amount may vary depending on the size and location of the farm, but a rough estimate is $50,000 for a 10-acre farm.

Recurring Expenses and Cost Management

The recurring expenses for an elderberry farm include labor, water, fertilizer, pest and disease control, pruning, harvesting, processing, packaging, marketing, and transportation. These costs can be reduced by adopting efficient management practices, such as mulching, pruning, intercropping, organic farming, and direct marketing. The average annual operating cost for a 10-acre farm is estimated at $25,000.

Profitability and Revenue Streams

An elderberry farm’s profitability hinges on the yield, quality, and price of berries. Average yield: 12,000 lbs/acre. Quality varies by size, color, flavor, and nutrients. Average price: $3/lb. Revenue streams include fresh/frozen berries, juice, jelly, wine, syrup, and extracts.

Calculating Potential Profits from Elderberry Farming

Elderberry farming profits are calculated by subtracting total expenses from total revenue. Revenue is yield multiplied by berry price. For instance, a 10-acre farm yielding 120,000 lbs at $3/lb earns $360,000. Expenses include operating costs ($25,000/yr) and setup ($50,000 amortized over ten years), totaling $30,000. Thus, the potential profit for a 10-acre farm is $330,000 ($360,000 – $30,000).

Diversifying Revenue through Value-Added Products

Diversifying elderberry farm revenue through value-added products like juice, jelly, wine, syrup, extract, tea, and cosmetics can increase profitability. These processed items cater to niche markets and can be marketed as organic, local, or medicinal products to fetch premium prices.

Marketing Strategies for Elderberry Products

  • Identifying target demographics.
  • Emphasizing health benefits.
  • Utilizing social media platforms.
  • Collaborating with influencers.
  • Offering samples.
  • Creating visually appealing packaging to attract consumers.

In case you missed it: How to Increase Flowering in Fruit Trees: Step-by-Step Guide for Beginners

elderberry harvest
Identifying Your Market: Fresh, Dried, or Processed Products

Whether you’re selling fresh, dried, or processed elderberry products, understanding your target market is crucial. Fresh elderberries appeal to health-conscious consumers looking for natural remedies, while dried or processed products attract those seeking convenience or specific culinary uses. Conduct market research to pinpoint your audience’s preferences.

Digital and Traditional Marketing Techniques

To reach potential customers effectively, combine digital and traditional marketing techniques. Utilize social media platforms to showcase your elderberry products, engage with customers, and run targeted ads. Additionally, consider traditional methods like attending trade shows, partnering with local retailers, or advertising in relevant publications to expand your reach.

Sustainability and Organic Certification

Consumers increasingly prioritize sustainability and organic certification when purchasing food products. Obtaining organic certification for your elderberry products can enhance credibility and attract environmentally conscious customers. To stand out from the competition, highlight your brand’s dedication to ethical supply chains and sustainable agricultural methods.

Practices for Sustainable Elderberry Farming

Implementing sustainable farming practices is essential for long-term viability and environmental stewardship. Practices including crop rotation, natural pest control methods, and water conservation can minimize ecological impact and promote soil health. Additionally, investing in renewable energy sources and reducing waste can further enhance sustainability efforts on elderberry farms.

Process and Benefits of Organic Certification

Strict requirements and inspections are necessary to get organic certification in order to verify adherence to organic farming practices. Gaining access to upscale markets, gaining the confidence of customers, and raising the price of organic elderberry goods are some advantages. A company’s reputation and customer loyalty are enhanced by certification, which shows a dedication to health-conscious and environmentally responsible business operations.

Conclusion

Mastering Elderberry Farming involves understanding every aspect, from Propagation to Marketing. Selecting the right Elderberry Varieties, coupled with proper Planting and Soil Preparation, maximizes Yield Per Acre. Efficient Pest Management and Irrigation Systems ensure Sustainable Cultivation. Post-harvest processing and Marketing strategies enhance Profit, meeting rising Market Demand. Organic Certification adds value, expanding Revenue Streams.

100% Effective Strategies for Combating Pests and Diseases in Hibiscus: Prevent and Treat Successfully

0

This guide provides effective strategies for protecting hibiscus plants from pests and diseases. Pest management includes using natural predators like ladybugs and lacewings or organic pesticides. Diseases like fungal infections and bacterial diseases can be managed with proper soil care and chemical fungicides. Viral diseases can be prevented through strict sanitation measures and eco-friendly gardening solutions. 

Combating Pests and Diseases in Hibiscus

Proper watering and seasonal care are essential for hibiscus maintenance. Regular pruning promotes airflow and prevents disease spread. Integrated Pest Management (IPM) strategies offer a holistic approach to pest and disease control, incorporating beneficial insects, organic pesticides, and cultural practices to minimize environmental impact.

Combating Pests and Diseases in Hibiscus

Introduction to Hibiscus Plant Care

Hibiscus plants are beautiful flowering shrubs native to tropical and subtropical regions, with over 200 species and thousands of cultivars. They have large, showy flowers ranging from 2 to 10 inches in diameter and come in various colors, shapes, and sizes. They can grow as annuals or perennials, depending on the species and climate. Common types of hibiscus include tropical hibiscus (Hibiscus rosa-sinensis), hardy hibiscus (Hibiscus moscheutos), and rose of Sharon (Hibiscus syriacus). 

Tropical hibiscus grows up to 10 feet tall and wide, with glossy green leaves and year-round flowers in warm climates. Hardy hibiscus can grow up to 6 feet tall and wide, with large flowers reaching 12 inches across. The Rose of Sharon is deciduous, growing up to 12 feet tall and wide, with yellowing leaves and flowers.

Identifying Common Pests in Hibiscus Plants

The first step is managing pests and diseases in hibiscus plants is to identify the culprits. Some of the most common pests that attack hibiscus plants are:

Aphids: These are insects that suck the sap from the stems and buds of hibiscus plants. They can cause yellowing, curling, and distortion of leaves and flowers. They also secrete and produce a sticky substance called honeydew, which can attract ants and fungal growth.

Whiteflies: These are small white insects that fly around the undersides of hibiscus leaves. They also feed sap of the plant and produce honeydew. They can cause wilting, yellowing, and dropping of leaves.

Scale insects: These are hard-shelled insects that attach themselves to the stems and leaves of hibiscus plants. They suck the sap from the plant, weaken it. They can also cause sooty mold to grow on the honeydew they excrete.

Mealybugs: These are soft-bodied insects that look like cottony masses on the stems, leaves of hibiscus plants. They also feed on the sap of the plant and produce honeydew. They can cause stunted growth, leaf drop, and bud abortion.

In case you missed it: How to Grow Hibiscus Plants and Care for Them: Check How this Guide Helps Beginners
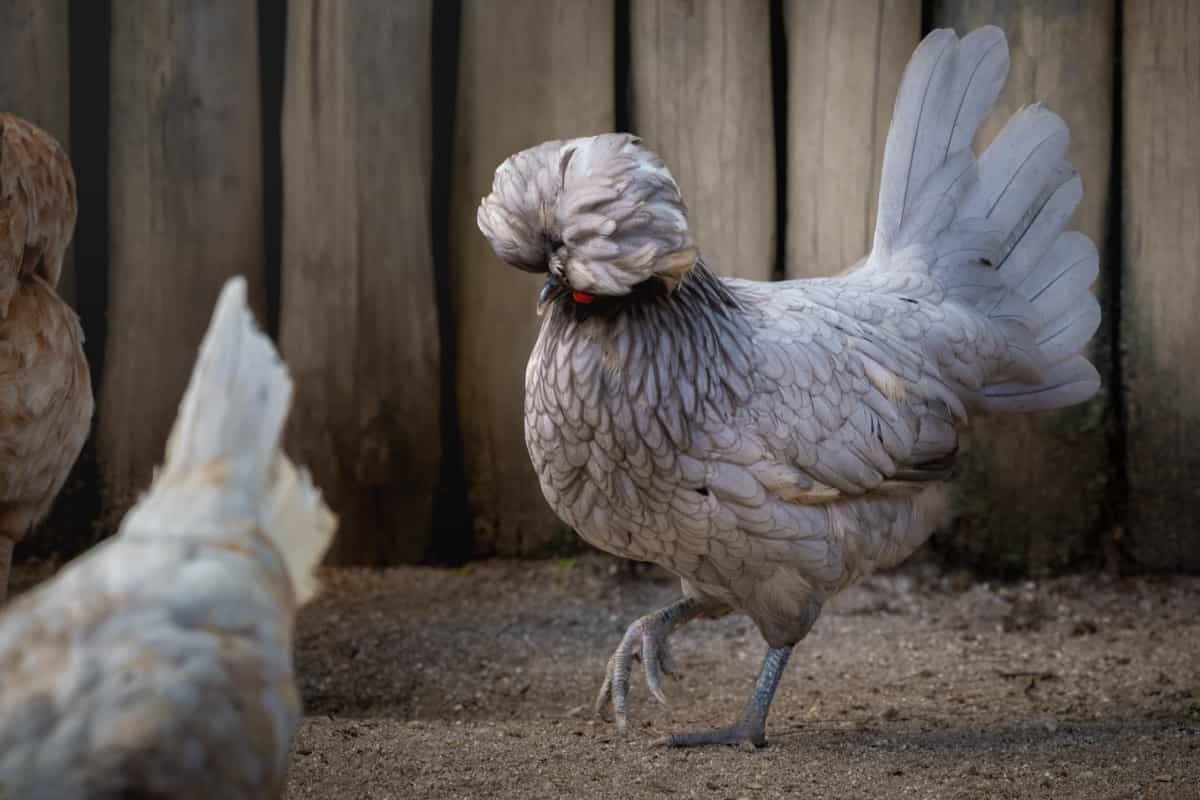
Orange Hibiscus

Dealing with Hibiscus Diseases

Hibiscus plants can also suffer from various fungal, bacterial, and viral diseases that can affect their health and beauty. Some of the most common diseases that affect hibiscus plants are:

Powdery mildew: This is a fungal disease causes a white and gray powdery coating on the leaves and stems of hibiscus plants. It can reduce photosynthesis, flower production, and plant vigor. It thrives in warm and humid conditions.

Leaf spot: This is a fungal or bacterial disease that causes brown and black spots on the leaves of hibiscus plants. It can also cause leaf drop, defoliation, and reduced flowering. It spreads through splashing water or infected tools.

Anthracnose: Fungal disease that causes dark brown and black lesions on the leaves, stems, flowers of hibiscus plants. It can also cause wilting, dieback, and plant death. It spreads through rain, wind, or infected tools.

Wilt disease: This is a bacterial or fungal disease that causes the leaves, stems of hibiscus plants to wilt and collapse. It can also cause root rot, stem cankers, and plant death. It infects the plant through wounds or soil.

Cultural Practices for Healthy Hibiscus Plants

The best way to prevent pests and diseases in hibiscus plants is to provide them with optimal growing conditions and proper care. Some of the cultural practices that can help you keep your hibiscus plants healthy are:

Choose resistant varieties: Some varieties of hibiscus are more resistant to certain pests and diseases than others. For example, tropical hibiscus are more resistant to aphids than hardy hibiscus. You can check with your local nursery or extension service for recommendations on suitable varieties for your area.

Plant in well-drained soil: Hibiscus plants prefer moist but well-drained soil that is rich in organic matter. Avoid planting them in heavy clay or soggy soil that can cause root rot or wilt disease.

Provide adequate sunlight: Hibiscus plants need at least six hours of full sun per day to produce abundant flowers and healthy foliage. Avoid planting them in shady or crowded areas, which can reduce air circulation and increase humidity.

Water regularly but not excessively: Hibiscus plants need regular watering to keep their soil moist. Overwatering or underwatering can stress the plant and make it more susceptible to pests and diseases. Water deeply but infrequently, allowing the top inch of soil to dry out between waterings.

Fertilize moderately but not excessively: Hibiscus plants need moderate amounts of fertilizer to support their growth and flowering. Excessive fertilization can cause excessive vegetative growth, which can attract pests and diseases. Use a balanced fertilizer like of 10-10-10 or similar, and apply it according to the label instructions.

Prune regularly but not excessively: Hibiscus plants need regular pruning to remove dead, diseased, or damaged branches and to shape the plant. Excessive pruning can weaken the plant and expose it to pests and diseases. Prune in late winter or early spring before the new growth begins.

Mulch generously but not excessively: Mulching can help hibiscus plants retain moisture, suppress weeds, and moderate soil temperature. However, excessive mulching can cause root rot or fungal diseases. Use organic mulch such as bark, straw, and compost, and apply a layer of 2-4 inches around the base, leaving some space around the stem.

In case you missed it: How to Make Flowers Bloom Faster: Naturally, Overnight, at Home, and in Water with Fertilizers

Hibiscus Gardening

Physical Pest Control Methods

Pests on hibiscus plants can be removed or reduced through physical methods. Hand-picking, hosing, trapping, and barriers are some methods to use. Hand-picking involves using fingers or tweezers to remove visible pests like aphids, whiteflies, scale insects, mealybugs, or Japanese beetles. Hosing involves using a strong jet of water to dislodge pests from leaves and stems. Trapping involves using sticky or pheromone traps to attract and capture pests. Barriers, like row covers, netting, or screens, protect plants from flying insects but must be secure and not touch the plants.

Biological Control Strategies

To control pests on hibiscus plants, consider using biological agents like beneficial insects, predatory mites, nematodes, or bacteria. These agents can prey on or infect pests, such as ladybugs, lacewings, hoverflies, or parasitic wasps. These insects can feed on aphids, whiteflies, scale insects, mealybugs, or Japanese beetles. Predatory mites, like Phytoseiulus persimilis, feed on spider mites, common pests of hibiscus plants. 

Nematodes, like Steinernema feltiae, can infect and kill fungus gnats, common pests of containers. These nematodes are purchased from garden centers or online suppliers and applied to the soil of the plants. Bacteria, like Bacillus thuringiensis (Bt), can infect and kill caterpillars, common pests of hibiscus plants. These strategies can be implemented by introducing these agents near the plants and ensuring they are well-draining and healthy.

Chemical Control Options

Chemical control options like insecticides, fungicides, or herbicides can be effective in controlling hibiscus pests and diseases. These products can kill or repel harmful organisms and prevent their spread. However, they should be used with caution as they can harm beneficial insects, animals, or humans if not applied correctly. To use chemical control effectively, follow the label instructions, wear protective clothing, gloves, and goggles, and choose the right product for a specific pest or disease. 

Apply the product only to affected parts of the plant, avoid spraying flowers or buds, and apply early in the morning to late in the evening when temperatures are low and the sun is not too strong. Avoid applying the product during windy, rainy, or humid conditions, as this can reduce its effectiveness or cause it to drift to other plants or areas. Repeat the application as needed, following the label instructions.

Integrated Pest Management (IPM) for Hibiscus

Integrated pest management (IPM) is a comprehensive approach to managing hibiscus pests and diseases. It combines cultural, biological, mechanical, and chemical methods to minimize the use of pesticides and their environmental and human health impacts. IPM involves four steps:

1. Regularly monitor hibiscus plants for signs of pests or diseases, like yellowing leaves, wilting stems, holes, distorted buds, black spots, and white powdery coating.

2. Identify the pest or disease causing the problem using online resources or experts. Common pests include aphids, whiteflies, mealybugs, scale insects, powdery mildew, leaf spot, botrytis blight, rust, and wilt disease.

In case you missed it: Best Fertilizers to Increase Crop Yield: Boost the Yields of Vegetables, Fruits, Flowers, and Other Crops

Red and Yellow Hibiscus

3. Evaluate the severity of the problem and decide if intervention is necessary. Factors such as the number of pests or diseased plants, damage extent, and potential for spread should be considered.

4. Choose an appropriate control method based on the evaluation. Cultural methods include improving soil drainage, pruning dead or diseased branches, watering properly, and fertilizing moderately. Biological methods involve introducing natural enemies of pests or beneficial microorganisms to combat diseases. Mechanical methods involve hand-picking pests, traps, or hoses to wash off pests or spores. Chemical methods are used only when necessary.

Seasonal Care for Hibiscus Plants
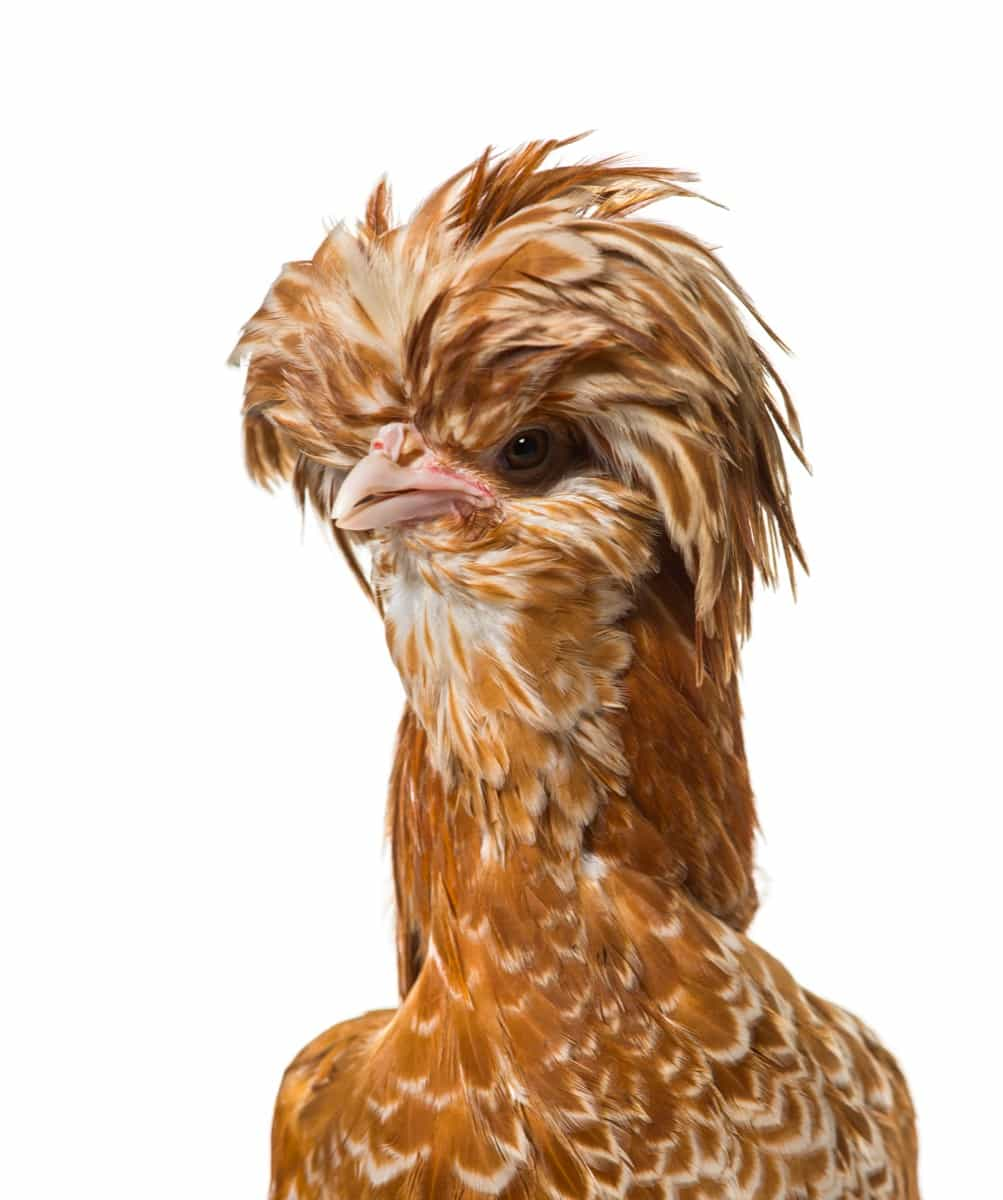
Hibiscus plants require different care depending on the season. In spring, prune your plants before they start to bloom, remove dead or damaged branches, and shape them as desired. Fertilize plants with a balanced fertilizer and water regularly. Deadhead your plants regularly during summer to encourage more blooms and prevent seed formation. Continue fertilizing and watering your plants more frequently, especially during hot or dry periods.

In the fall, stop fertilizing and reduce watering to help them prepare for winter. Protect your plants from freezing temperatures, either indoors or with a frost cloth or blanket. Keep your plants in cool, bright indoors, or sheltered, sunny spots outdoors. Water sparingly in winter, only when the soil feels dry to the touch. Avoid pruning your plants in winter, as this can stimulate new growth that is damaged by cold.

In case you missed it: Best Balcony Plants for Apartments in India: Vegetables, Flowers, and Herbs for Low-light, Full Sun

Red Hibiscus Gardening

Advanced Topics in Hibiscus Care
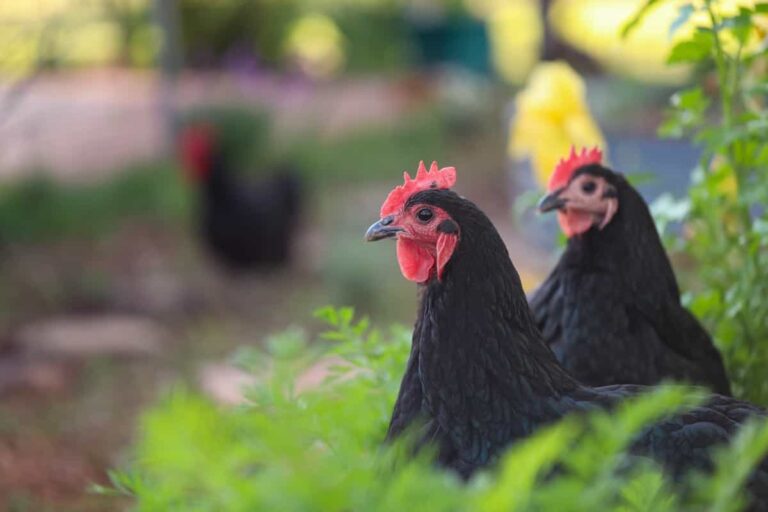
To care for hibiscus plants, explore advanced topics such as propagation, hybridization, and bonsai. Propagation involves using seeds, cuttings, or grafting to create new plants with desirable characteristics. Seeds are easy to obtain but may not produce identical plants to the parent plant. Cuttings are reliable but require skill and equipment. Grafting involves joining two different hibiscus varieties, one as the rootstock and one as the scion, to create a new plant with desirable and improved characteristics. 
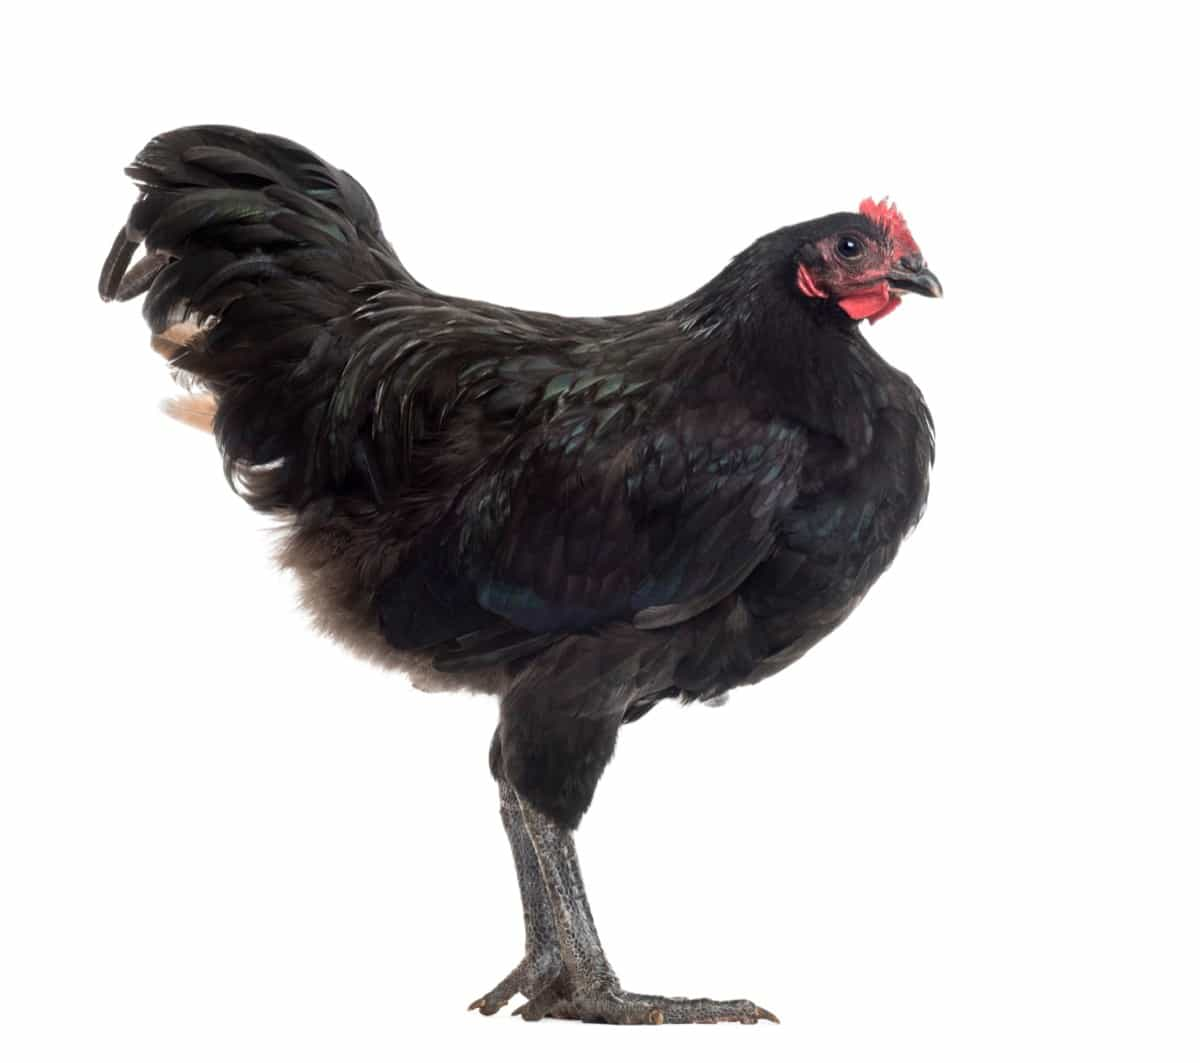
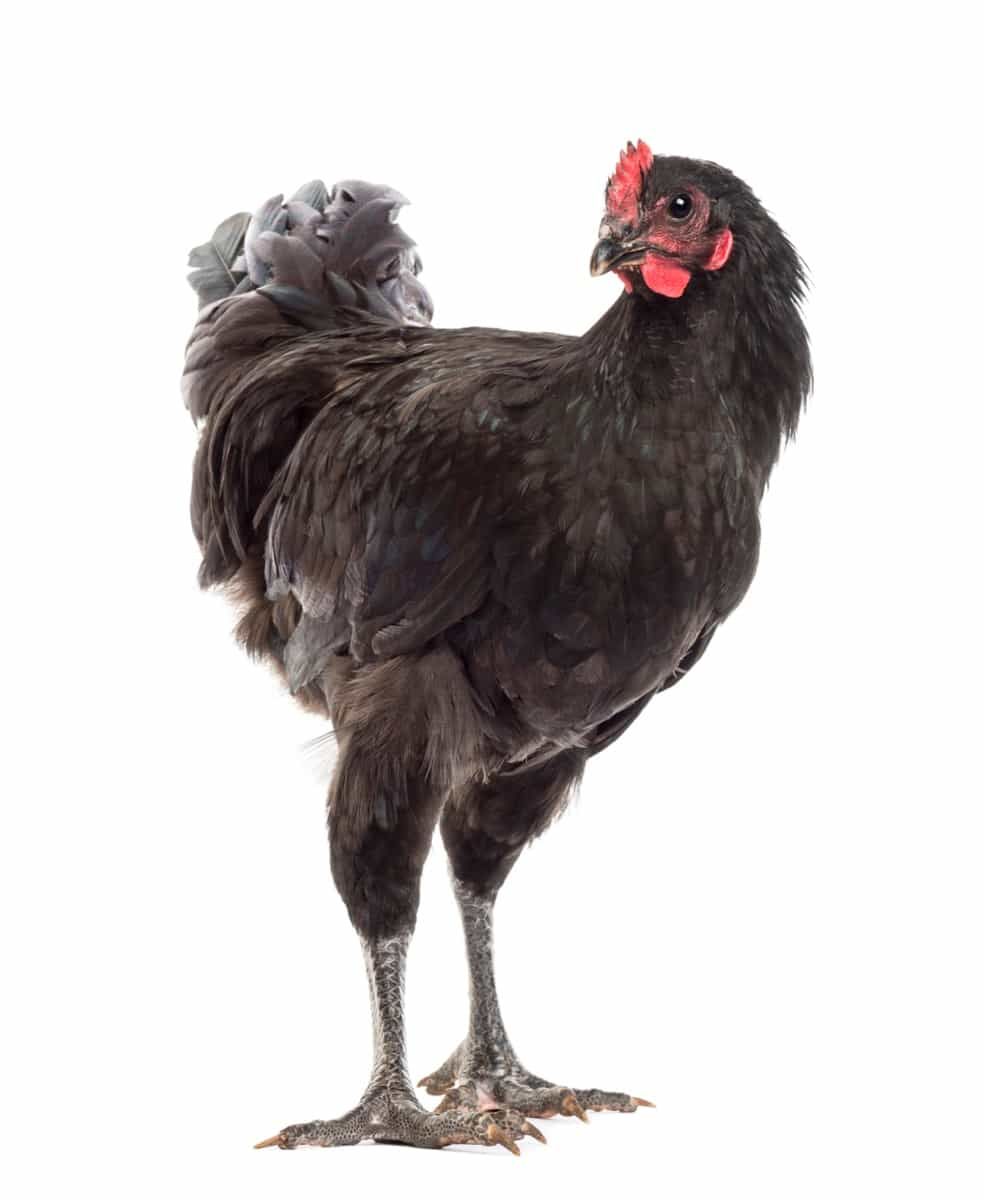
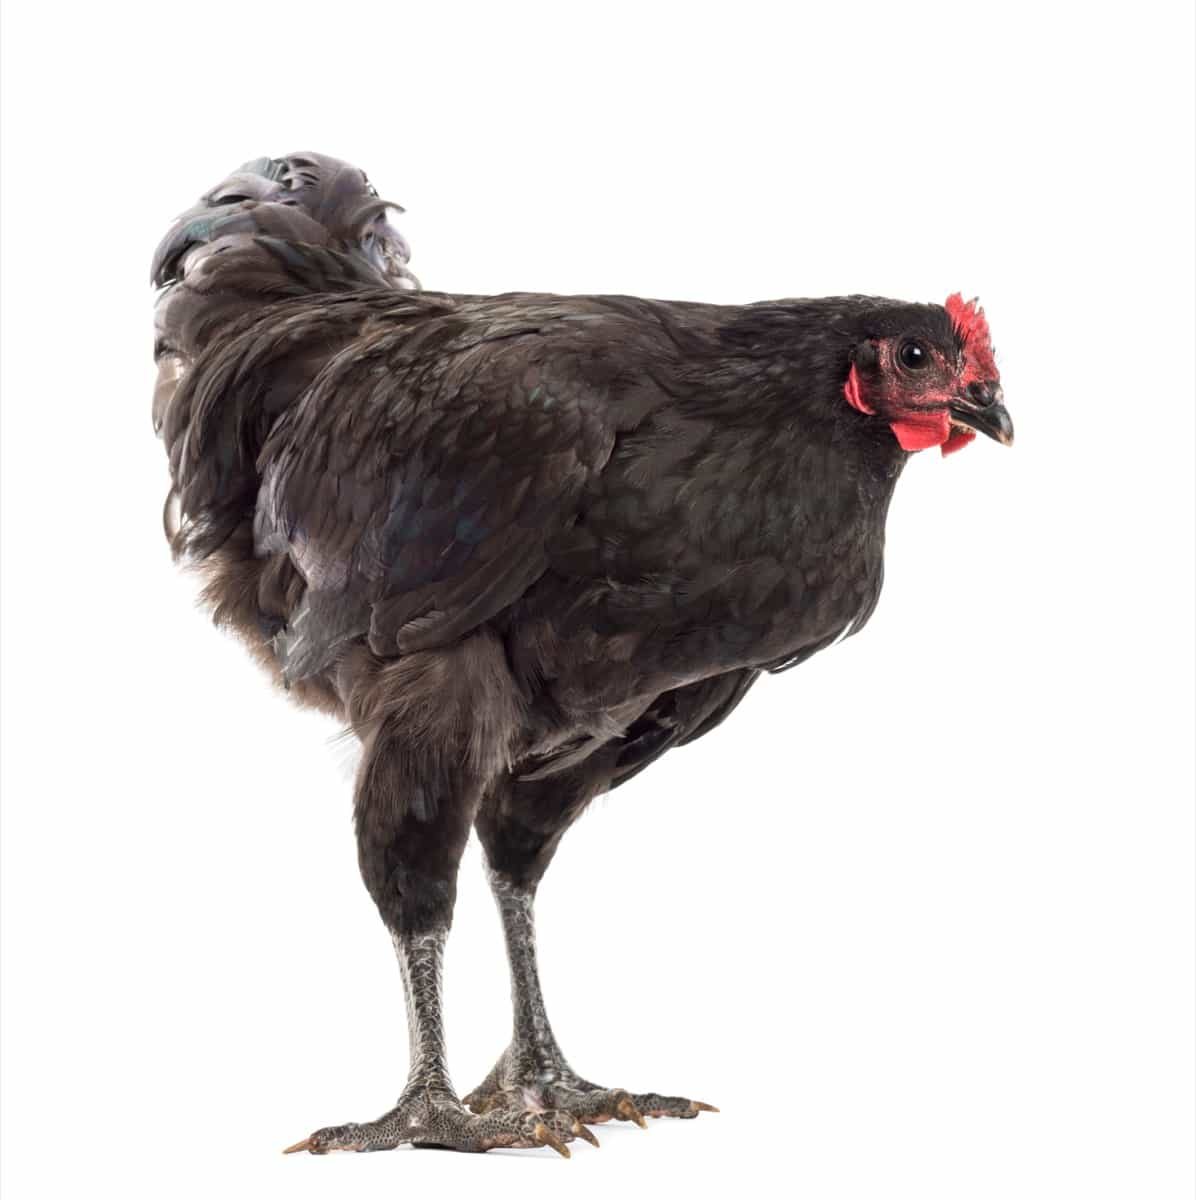
Hybridization involves cross-pollinating two different varieties, either manually or naturally, resulting in unique flowers, colors, shapes, and sizes. This complex and unpredictable process requires patience and experimentation. Bonsai is a fun and rewarding hobby that involves growing hibiscus plants in small containers and pruning them regularly to create miniature versions of their natural forms. However, it requires special skills, tools, and constant attention and care.

In case you missed it: 8 Best Organic Composts to Buy in India for Flowering Plants, Vegetables, and Lawn

Colorful Hibiscus Garden

Conclusion

Hibiscus plants, known for their vibrant colors and tropical appeal, can be a valuable addition to any garden or home. However, they also face challenges from pests and diseases that can impact their beauty and health. By following these tips, you can effectively manage these issues.

Management of Pests and Diseases in Mums: Ultimate Guide to Protecting Mums

0

Management of Pests and Diseases in Mums: Ultimate Guide to Protecting Mums” delves into comprehensive strategies for chrysanthemum enthusiasts. Integrating pest control methods like companion planting and natural predators ensures a balanced ecosystem. Organic solutions offer sustainable alternatives for addressing common threats such as aphids, spider mites, and whiteflies.

Management of Pests and Diseases in Mums

Effective disease prevention tackles issues like powdery mildew, rust, and botrytis blight through proactive measures and proper care. With seasonal tips covering spring preparation and summer maintenance, this guide equips gardeners with the knowledge to safeguard their chrysanthemums year-round, promoting healthy growth and vibrant blooms.

Management of Pests and Diseases in Mums

Understanding Mum Pests and Diseases

Mums are popular fall flowers that come in a variety of colors and shapes. They are generally hardy, easy to grow, but can be affected by pests, diseases that can reduce their health and beauty. Some of the common mum pests are aphids, spider mites, whiteflies, thrips, caterpillars, and leaf miners. Some of the common mum diseases are powdery mildew, rust, botrytis blight, leaf spot, and viral infections. To prevent and control these problems, it is important to follow some good cultural practices and use appropriate management methods.

Identifying Common Pests

  • Aphids are small, soft-bodied insects that suck the sap from the plant tissues. They can be green, black, red, yellow, or white. They usually cluster on the terminal buds and young leaves, where they secrete a sticky substance called honeydew that attracts sooty mold and ants. Aphids can also transmit viral diseases to the plants.
  • Spider mites are tiny arachnids that feed on the underside leaves, causing yellow spots and webbing. They thrive in hot, dry conditions and can multiply rapidly. Spider mites can reduce the photosynthesis and vigor of the plants.
  • Whiteflies are small, white-winged insects that also suck the sap from the plant tissues. They are often found on the underside of the leaves, where they produce honeydew and cause sooty mold. Whiteflies can also spread viral diseases to the plants.
  • Thrips are slender insects with fringed wings that feed on the flowers and leaves, causing distortion, discoloration, and scarring. They can also transmit viral diseases to the plants.
  • Caterpillars are the larvae of moths and butterflies that chew on the leaves and flowers, leaving holes and ragged edges. Some caterpillars can also bore into the stems and cause wilting.
  • Leaf miners are the larvae of various flies that tunnel inside the leaves, creating winding trails or blotches. They can reduce the photosynthesis and aesthetic value of the plants.

In case you missed it: Management of Pests and Diseases in Home Garden: 100% Effective Control and Treatment Strategies

Fresh Bright Red, Purple And Yellow Chrysanthemums Bushes In Autumn Garden

Recognizing Typical Diseases

Powdery mildew, a fungal disease, causes white or gray patches on leaves and stems, reducing photosynthesis and flowering. Rust, another fungal disease, causes orange or brown pustules on the underside of leaves, causing premature leaf drop and plant weakness. Botrytis blight, another fungal disease, causes gray or brown fuzzy growth on flowers, buds, leaves, and stems, causing flower abortion, leaf spotting, stem rotting, and plant death.

Leaf spots, a term for various fungal or bacterial diseases, cause spots or lesions on leaves, ranging from yellow to brown to black, causing leaf drop or blight. Viral infections, transmitted by insects or infected tools, cause symptoms like mosaic patterns, ring spots, vein clearing, distortion, stunting, or wilting on leaves or flowers. There is no cure for viral diseases once they infect plants.

Preventative Measures

To prevent pests and diseases in mums, follow good cultural practices such as choosing healthy and disease-resistant varieties, planting them in well-drained soil with adequate organic matter, spacing them properly, watering them early in the day, fertilizing them according to soil test results and label instructions, mulching them with organic materials, pruning them regularly, sanitizing tools, inspecting them frequently, and removing weeds and debris around them.

Plant mums in spring or early fall when the soil temperature is between 60°F (16°C) and 70°F (21°C), and space them according to their mature size and growth habit. Fertilize them with a balanced fertilizer such as 10-10-10 or 20-20-20 at a rate of 1 pound per 100 square feet (9.3 square meters) of bed area. Water them deeply and infrequently to encourage deep-root development and drought tolerance.

Water them at the base of the plants, avoiding wetting the foliage to avoid fungal diseases. Water them early to allow the foliage to dry before nightfall. Mums need about 1 inch (2.5 cm) of water per week during the growing season, depending on the weather and soil conditions. They should be checked for soil moisture before watering and avoid overwatering or under-watering, as both can cause stress, damage to the plants.

Integrated Pest Management (IPM)

Integrated pest management (IPM) is a method that combines various pest control methods to reduce the use of pesticides and their environmental impact. It involves identifying pests and their natural enemies, monitoring their population and damage levels, choosing the most effective control methods, and evaluating their effectiveness.

In case you missed it: How to Manage Pests and Diseases in Berry Orchards: A Comprehensive Guide

Colorful Chrysanthemums Bushes

IPM methods can include cultural, mechanical, biological, and chemical control. Cultural control involves modifying the environment to discourage pests, mechanical control uses physical barriers, biological control uses natural enemies to reduce pest populations, and chemical control uses selective pesticides to target specific pests.

Biological Control Methods

Biological control methods use living organisms to suppress pest populations naturally. These methods include ladybugs and lacewings, parasitic wasps, Bacillus thuringiensis (Bt), and neem oil. Ladybugs and lacewings feed on soft-bodied pests like aphids, thrips, whiteflies, and mites. Parasitic wasps lay their eggs on pests, laying larvae that feed on and kill their hosts.

It produces a toxin that kills caterpillars when ingested, available as a spray or dust for mums. Neem oil from the seeds of the neem tree has insecticidal, fungicidal, and repellent properties. These methods can be purchased from garden centers or online, should be applied according to label instructions, and used in combination with other IPM methods for best results.

Chemical Control Options

Chemical pesticides are not recommended for mums, as they may harm beneficial insects and pollinators, as well as pose health risks to humans and pets. However, if the infestation is severe and other methods have failed, you may use a product that contains pyrethrin, a natural insecticide derived from chrysanthemums.

Pyrethrin is effective against many common mum pests, such as aphids, beetles, caterpillars, lace bugs, leaf miners, mealybugs, midges, mites, thrips, and whiteflies. It is also biodegradable and has low toxicity to mammals and birds. However, it may harm aquatic invertebrates and bees, so use it with caution and follow the label instructions carefully.

Companion Planting for Mum Protection

Companion planting growing different plants together to enhance their growth, health, and yield. Some plants can also repel or attract certain insects, providing natural pest control for mums. For example, basil can deter aphids, flies, and mosquitoes; garlic can repel aphids, beetles, and spider mites; marigolds can ward off aphids, nematodes, and whiteflies; and mint can keep away ants, aphids, cabbage moths, and flea beetles. Plant these companions near your mums to protect them from pests and enhance their fragrance.

Encouraging Beneficial Insects

Beneficial insects are those that prey on or parasitize pest insects, reducing their population and damage. Some examples of beneficial insects are can help Chrysanthemum are ladybugs, lacewings, hoverflies, parasitic wasps, and predatory mites. These insects can be attracted by the garden by planting flowers that provide nectar and pollen, such as alyssum, calendula, cosmos, dill, fennel, lavender, sunflower, and yarrow. You can also purchase some beneficial insects from garden centers or online suppliers and release them in your garden.

Organic Pest Control

Organic pest control methods are alternatives to synthetic chemicals that harm the environment. Some options for Chrysanthemum include hand-picking, water spray, insecticidal soap, and neem oil. Hand-picking involves removing pests manually from plants and disposing of them in a bucket of soapy water or a sealed bag. Water spray is effective for large pests like beetles and caterpillars.

In case you missed it: Pest Control Cost Per Acre in India: Organic vs Chemical Cost Comparison

Greenhouse filled with chrysanthemums

Insecticidal soap is a solution of soap and water that kills soft-bodied pests by disrupting their cell membranes. Neem oil, an extract of seeds of the neem tree, acts as a repellent, antifeedant, and growth disruptor for many pests. It also has fungicidal properties that can prevent fungal diseases like powdery mildew. Mixing two tablespoons of neem oil with 1 gallon of water and spraying the plants every 7 to 14 days is recommended.

Common Chrysanthemum Pests and Their Control

  • Aphids: Small, soft-bodied insects that suck sap from buds and leaves. They may be black, green, red, white, or yellow.
  • Damage: They cause distorted growth, yellowing, and wilting of leaves. They also secrete honeydew, which attracts sooty mold and ants. They may transmit viral diseases.
  • Control: Spray with water to dislodge them or use insecticidal soap, neem oil, or pyrethrin-based products. Introduce beneficial insects such as ladybugs, lacewings etc.
  • Leaf miners: Larvae of various insects that tunnel inside the leaf tissue. They may be flies, moths, beetles, or wasps.
  • Damage: They create winding trails or blotches on the leaves, reducing their photosynthetic ability and aesthetic appeal.
  • Control: Remove and destroy infested leaves or use systemic insecticides such as imidacloprid or spinosad.
  • Mites: Tiny arachnids that feed on plant cells with piercing mouthparts. They may be red or black.
  • Damage: They cause stippling, bronzing, curling, or dropping of leaves. They may also produce fine webs on the plant.
  • Control: Spray with water to dislodge them or use miticides such as horticultural oil, sulfur, or abamectin.
  • Thrips: Slender insects with fringed wings that feed on plant sap with rasping mouthparts. They may be black, brown, or yellow.
  • Damage: They cause distorted growth, silvering, or browning of buds and flowers. They may also transmit viral diseases.
  • Control: Remove and destroy infested plant parts or use insecticides such as spinosad, pyrethrin, or acephate.

In case you missed it: Pest Management in Sorghum: Major Insect Pests of Sorghum, Control, and Prevention

Chrysanthemum plants in a plant nursery

Common Mum Diseases and Their Management

  • Powdery mildew: A fungal disease caused by various species of Erysiphe, Golovinomyces, Leveillula, Microsphaera, Phyllactinia, Podosphaera, Sphaerotheca, etc.
  • Damage: White or gray powdery coating on leaves, stems, buds, or flowers. Reduced growth and vigor. Premature leaf drop or flower abortion.
  • Control: Avoid overhead watering and crowded planting. Prune infected plant parts and dispose of them properly. Apply fungicides such as sulfur, potassium bicarbonate, or myclobutanil.
  • Leaf spot: A fungal disease caused by various species of Alternaria, Ascochyta, Cercospora, Colletotrichum, Septoria, etc.
  • Damage: Brown or black spots with yellow halos on leaves. Reduced growth and vigor. Premature leaf drop or flower abortion.
  • Control: Avoid overhead watering and crowded planting. Prune infected plant parts and dispose of them properly. Apply fungicides such as copper, chlorothalonil, or mancozeb.
  • Root rot: A fungal disease caused by various species of Fusarium, Phytophthora, Pythium, Rhizoctonia, etc.
  • Damage: Yellowing, wilting, or stunting of plants. Brown or black decay of roots and lower stems. Plant death in severe cases.
  • Control: Avoid overwatering and poorly drained soil. Use clean pots and tools. Apply fungicides such as mefenoxam, fosetyl-aluminum, or fludioxonil.
  • Botrytis blight: A fungal disease caused by Botrytis cinerea.
  • Damage: Grayish-brown fuzzy growth on leaves, stems, buds, or flowers. Brown spots or lesions on plant parts. Reduced growth and vigor. Premature leaf drop or flower abortion.
  • Control: Avoid overhead watering and crowded planting. Prune infected plant parts and dispose of them properly. Apply fungicides such as iprodione, fenhexamid, or cyprodinil + fludioxonil

Seasonal Care for Mum Health
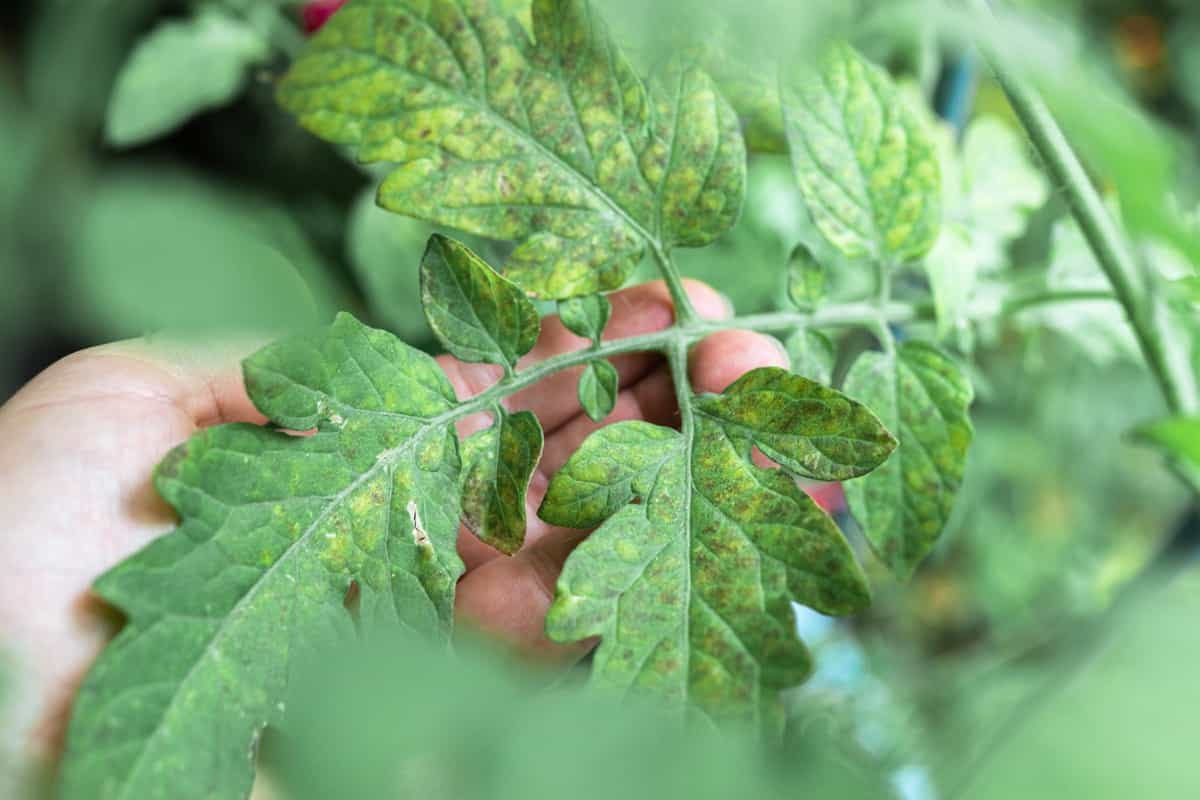
Spring

  1. After the last frost date in your area, cut back the old stems to about 4 inches from the ground to encourage new growth.
  2. Apply a balanced fertilizer two weeks until buds form.
  3. Pinch back the tips of the stems once or twice to promote bushy growth and more flowers.

Summer

  1. Water the plants regularly, especially during dry spells.
  2. Mulch the soil to conserve moisture and prevent weeds.
  3. Monitor the plants for pests and diseases and treat them accordingly.
  4. Stop pinching back the stems by mid-July to allow buds to form.

Fall: Enjoy the colorful blooms of your mums. Deadhead the spent flowers to prolong the flowering period. Water the plants until the ground freezes to prevent dehydration. Apply a layer of straw or evergreen boughs over the plants to protect them from winter damage.

Winter: Leave the plants dormant and prune them in spring. Remove the mulch gradually in early spring as the new growth emerges.

In case you missed it: Integrated Pest Management for Greenhouse Crops: IPM Strategies for Greenhouse Plants

greenhouse flower farming

Conclusion

Mums are popular fall flowers that can brighten up any garden or landscape. They are relatively easy to grow, care for, but they may face some challenges from pests and diseases. By following the tips above, you can prevent or manage most of the common mum problems and enjoy healthy and beautiful plants for years to come.

Management of Pests and Diseases in Home Garden: 100% Effective Control and Treatment Strategies

0

In-home garden management, ensuring effective pest and disease control is paramount. Homemade garden sprays offer eco-friendly alternatives to conventional pesticides, promoting sustainable gardening practices. Utilizing natural repellents and companion planting techniques can bolster pest prevention efforts, while DIY fungal treatments address disease concerns organically.

Management of Pests and Diseases in Home Garden

Incorporating biological pest control methods harnesses the power of beneficial insects, fostering a harmonious garden ecosystem. Seasonal strategies tailored to specific pests and diseases optimize control measures throughout the year. Explore homemade organic pesticide recipes and plant disease diagnostics for comprehensive garden care, promoting 100% effective control and treatment strategies.

Management of Pests and Diseases in Home Garden

Introduction to Pest and Disease Management

Pests and diseases are organisms that damage or reduce the quality of plants in home gardens, affecting their appearance, growth, yield, and health. Common pests include insects, mites, nematodes, slugs, snails, rodents, birds, and weeds. Common diseases include fungal, bacterial, viral, and nematode infections. Environmental factors like temperature, humidity, rainfall, soil type, and plant nutrition can influence pests and diseases. Preventing or managing these issues can be achieved through a combination of cultural, mechanical, biological, chemical, and natural methods.

Identifying Common Garden Pests

  • The first step in pest management is identification and the damage it causes.
  • Some pests seen with the naked eye or a magnifying glass, such as aphids, caterpillars, beetles, spider mites, whiteflies, scale insects, leafminers, etc.
  • Some pests are hidden in the soil or inside the plant tissues, such as root-knot nematodes, wireworms, cutworms, borers, etc.
  • Some pests can be detected by their signs or symptoms on the plant, such as holes, chewed edges, tunnels, galls, webs, honeydew, etc.
  • Some pests can be identified by their droppings or frass on the plant or the ground below.
  • Some pests can be identified by their sounds or smells, such as crickets or stink bugs.

Recognizing Plant Diseases

The second step in disease management is to identify the disease and its symptoms. Some diseases can be seen with the naked eye, such as powdery mildew, rusts, leaf spots, blights, and anthracnose. Others are hidden in soil or plant tissues, such as root rots and wilts. Detection of diseases can be based on signs on the plant, such as yellowing, withering, stunting, distortion, mosaics, and ringspots. Diseases can also be identified by their causal agents or vectors.

Integrated Pest Management (IPM)

IPM is a pest, disease management approach that combines methods to reduce problems while minimizing environmental and health risks. It involves four steps: monitoring, identification, decision-making, and intervention. Monitoring involves regular observation and recording of pest and disease occurrences and damage in gardens.

In case you missed it: How to Grow Pittosporum in Home Gardens: Guide to Planting to Care for Beginners
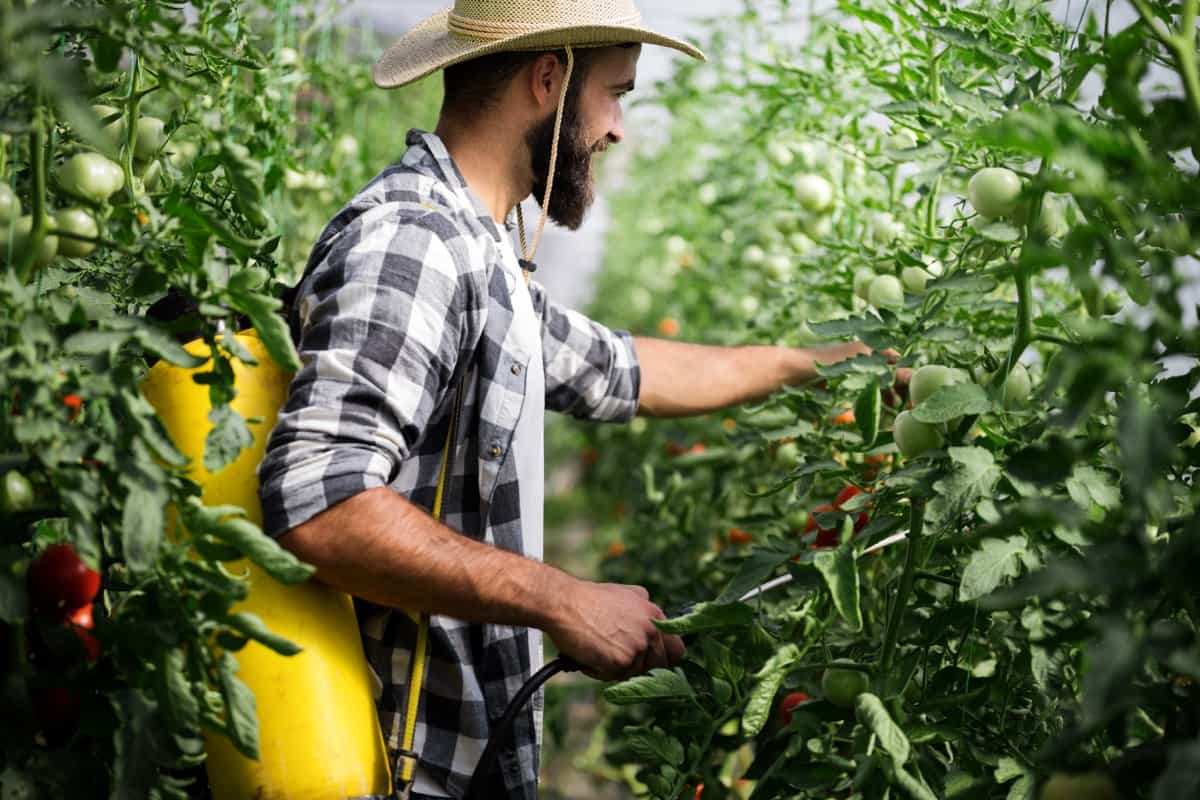
Gardener with spray backpack spraying tomato plants in garden

Identification involves accurate diagnosis of the pest or disease, its life cycle, hosts, and natural enemies. Decision-making evaluates the situation and selects appropriate management options based on economic, environmental, and social factors. The intervention involves implementing management methods to prevent or reduce damage.

Principles of IPM

IPM is a management approach that focuses on preventing pests and diseases from entering or establishing gardens through methods such as resistant varieties, clean seeds, crop rotation, sanitation, and other methods. It also focuses on enhancing plant health through optimal planting dates, spacing, fertilization, irrigation, mulching, and pruning.

Mechanical methods involve physically removing pests and diseases from the garden, while biological methods use natural enemies to suppress pest populations or disease spread. Chemical methods use pesticides as a last resort when other methods are ineffective or feasible, and natural methods use homemade sprays or solutions made from household ingredients.
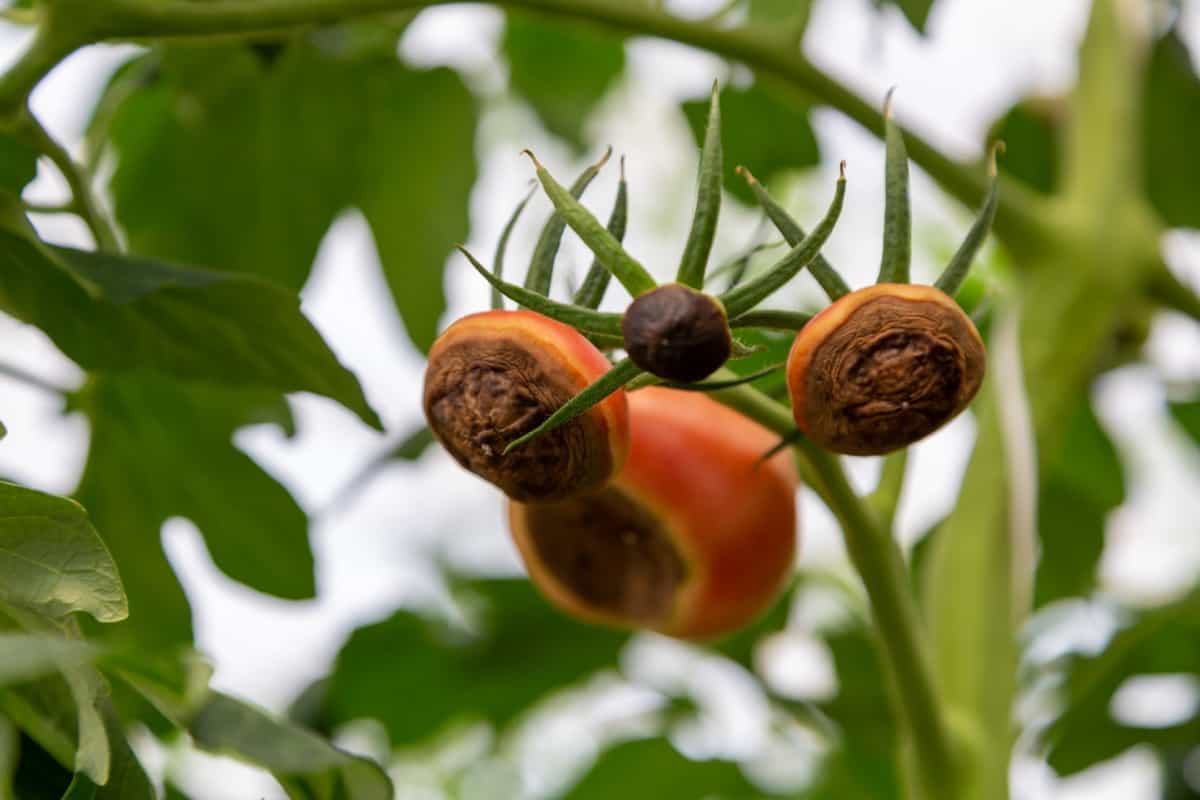
Implementing IPM in Home Gardens

  • IPM stands for Integrated Pest Management, a holistic approach to managing pests, diseases that combines cultural, physical, chemical, and biological methods.
  • IPM aims to prevent pest and disease problems before they occur, reduce the use of pesticides, and enhance the health and diversity of the garden ecosystem.
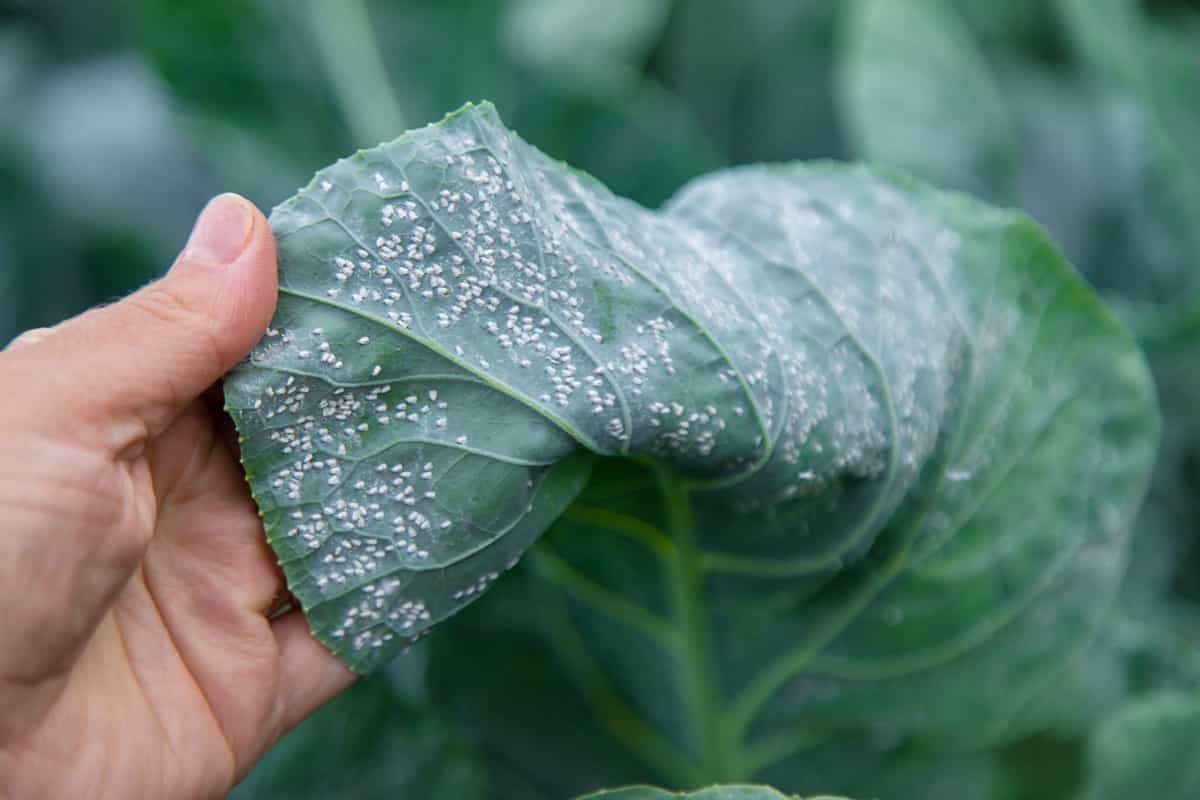
  • IPM involves four steps: monitoring, identification, decision-making, and intervention.
  • IPM requires regular observation of the plants and their surroundings, accurate identification of pests and diseases and their natural enemies, informed decision-making based on pest thresholds and environmental factors, and appropriate intervention using the least disruptive and most effective methods.

Cultural Practices for Disease Prevention

  • Cultural practices are the basic ways of maintaining healthy plants and preventing disease outbreaks in the garden.
  • Cultural practices include choosing disease-resistant varieties, rotating crops, removing diseased plant material, sanitizing tools and equipment, avoiding overhead watering, mulching, pruning, fertilizing, and weeding.
  • Cultural practices help to create unfavorable conditions for disease-causing organisms like fungi, bacteria, viruses, and nematodes and to improve the vigor and immunity of the plants.
  • Cultural practices are the first line of defense against plant diseases and should be followed consistently throughout the growing season.

Enhancing Plant Health

  • Enhancing plant health is another key aspect of preventing pests and diseases in the garden.
  • Enhancing plant health involves providing optimal growing conditions for the plants, such as adequate light, water, nutrients, air circulation, and soil quality.
  • Enhancing plant health also involves supporting the beneficial organisms that live in the soil and on the plants, such as earthworms, microbes, insects, spiders, and birds.
  • Enhancing plant health helps to increase the resilience and resistance of the plants to stressors such as pests, diseases, drought, heat, and cold.

Mechanical and Physical Control Methods

  • Mechanical and physical control methods are ways of removing or excluding pests from the garden using manual or mechanical means.
  • Mechanical and physical control methods include hand-picking, trapping, netting, row covers, barriers, screens, collars, sticky traps, vacuuming, and flaming.
  • Mechanical, physical control methods are effective against larger pests such as insects, snails, slugs, rodents, and birds, but more is needed for smaller pests such as mites, aphids, and thrips.

In case you missed it: Sustainable Living: The Growing Trend of Urban Apartment Gardening in India

treatment of plant diseases

Biological Control Strategies

  • Biological control strategies are ways of using living organisms to control pests in the garden.
  • Biological control strategies include introducing or encouraging natural enemies of pests like predators, parasitoids, and pathogens.
  • Biological control strategies also include using biopesticides derived from natural sources like bacteria, fungi, viruses, or plants.
  • Biological control strategies are environmentally friendly alternatives to synthetic pesticides that can reduce pest populations without harming beneficial organisms or disrupting the natural balance of the garden ecosystem.

Chemical Control Options

Chemical control options are synthetic or organic substances used to kill or repel pests in gardens, including insecticides, fungicides, herbicides, nematicides, rodenticides, repellents, and growth regulators. They should be used as a last resort when other methods have failed or are not feasible and must be followed carefully.

Safe Use of Pesticides

Safe use of pesticides is essential to protect human health, environmental quality, and non-target organisms from pesticide exposure or contamination. Safe use of pesticides involves:

  • Choosing the right pesticide for the target pest.
  • Using the lowest effective dose.
  • Applying at the right time.
  • Disposing of unused or leftover pesticides properly.

Safe use of pesticides also involves wearing protective clothing, equipment, and gear, avoiding contact with skin, eyes, or mouth, washing hands thoroughly after handling pesticides, and storing pesticides securely away from children, pets, and food.

Natural and Home Remedies: Homemade Sprays and Solutions

Natural and home remedies are homemade sprays and solutions used to control pests and diseases in gardens using common household ingredients or plants. These remedies include insecticidal, fungicidal, or repellent sprays made from soap, water, oil, vinegar, baking soda, alcohol, garlic, chili pepper, neem oil, and essential oils.

Although inexpensive, easy to make, and less toxic than synthetic pesticides, they may be less effective, consistent, or long-lasting. To achieve the desired effect, natural and home remedies should be tested on a small area before applying to the entire plant.

Monitoring and Regular Inspection

InIntegrated Pest Management (IPM), monitoring and regular inspection are crucial steps for early detection of pests and diseases. These inspections involve checking plants and their surroundings for signs of pests and diseases, such as damage, symptoms, or spores. Records of occurrence, severity, distribution, and impact on plant growth and yield should be kept. The frequency of these inspections should be at least once a week, depending on the crop and season.

Disease Resistance and Plant Selection

  • Disease resistance and plant selection are crucial factors in preventing or reducing disease problems in the garden.
  • Disease resistance ability of a plant to resist or tolerate infection by a specific pathogen or a group of pathogens.
  • Plant selection is the process of choosing plants that are suitable for the site, climate, soil, and pest and disease conditions of the garden.
  • Disease resistance and plant selection can be achieved by using certified disease-free seeds or transplants, choosing varieties or cultivars that have been bred or selected for disease resistance, and diversifying the plant species or families in the garden.

In case you missed it: The Growing Trend of Urban Terrace Gardening in India for Healthy Living and Sustainability

spraying tomato plant in greenhouse

Managing Weeds

Weed management is crucial for pest and disease control in gardens. These unwanted plants compete with crops for space, light, water, nutrients, and pollinators. They can also harbor pests, diseases that can spread to crops or interfere with management methods. To manage weeds, use mulch, landscape fabric, solarization, or pre-emergent herbicides, and remove existing weeds using hand-pulling, hoeing, mowing, or post-emergent herbicides.

Coping with Environmental Stressors

Environmental stressors, such as temperature, moisture, light, wind, hail, frost, pollution, or salinity, can affect plant health and reduce pest and disease problems in gardens. These stressors can weaken plants’ defenses against pests or create favorable conditions for disease development. To cope with these stressors, plants should be adapted to the region’s climate and weather patterns and protected from extreme conditions using methods like shade cloth, row covers, cold frames, greenhouses, irrigation, drainage, or mulch.

In case you missed it: Cultivating Plants in Recycled Plastic Bottles and Containers: New Art of Sustainable Gardening Practices

unripe, young tomato fruits affected by blossom end rot

Common Pests in Home Gardens

Pest NameControl Measures
AphidsSpray with water, soap, oil, neem oil, or insecticidal soap; release ladybugs or lacewings; prune infested parts; remove weeds
CaterpillarsHand-pick; spray with Bt (Bacillus thuringiensis) or spinosad; release parasitic wasps; use row covers; remove weeds
CutwormsHand-pick at night; use collars around seedlings; till soil before planting; remove weeds; use beneficial nematodes
Flea beetlesSpray with soap, oil, neem oil, pyrethrin, or kaolin clay; use row covers; interplant with garlic or basil; remove weeds
Japanese beetlesHand-pick; trap with pheromones or floral lures; spray with neem oil or pyrethrin; release parasitic nematodes; remove weeds
LeafminersRemove infested leaves; spray with spinosad or neem oil; release parasitic wasps; use row covers
Slugs and snailsHand-pick at night; trap with beer or yeast; use barriers of copper, diatomaceous earth, eggshells, or sand; sprinkle with salt or coffee grounds; release predatory beetles
Spider mitesSpray with water, soap, oil, neem oil, sulfur, or miticides; release predatory mites; prune infested parts; remove weeds
Squash bugsHand-pick; trap under boards or shingles; spray with soap, oil, neem oil, pyrethrin, or permethrin; use row covers; remove weeds
WhitefliesSpray with water, soap, oil, neem oil, insecticidal soap, or pyrethrin; release ladybugs or lacewings; use yellow sticky traps; prune infested parts

Common Diseases in Home Gardens

Disease nameTreatment
Powdery mildewRake up and destroy infected leaves, avoid overhead watering, spray with fungicide or baking soda solution
Downy mildewPlant resistant cultivars, remove and destroy infected foliage, avoid crowding plants or watering in the evening
Black spotRemove and destroy diseased canes and leaves, mulch beneath plants, water at the roots, plant resistant varieties, spray with fungicide
Mosaic virusRemove and destroy infected plants, avoid handling plants when wet, disinfect tools and hands, control insect vectors
Damping-offUse sterile potting mix and containers, avoid overwatering and overcrowding, provide good ventilation, apply fungicide
Fusarium wiltRotate crops, remove and destroy infected plants, plant resistant varieties
Verticillium wiltRotate crops, remove and destroy infected plants, plant resistant varieties

In case you missed it: Easy Homemade Recipes for Garden Plants: Natural and Organic Fertilizer for Vegetables, Flowers, and Houseplants

Whitefly pest on cabbage leaves in the garden

Conclusion

Effective management of pests and diseases in home gardens requires a multifaceted approach. By implementing preventive measures, such as cultural practices and natural remedies, and promptly addressing issues with targeted treatments, gardeners can achieve optimal control, maintain the health and productivity of their plants with confidence.