Potato is the most important food crop, and its scientific name is the Solanum tuberosum. The two main components of Potato production are tuber number per unit area and tuber size or weight. Increased yields are obtained by maximizing the number of tubers, maintaining a green leaf canopy, and increasing the size and weight of the tubers.
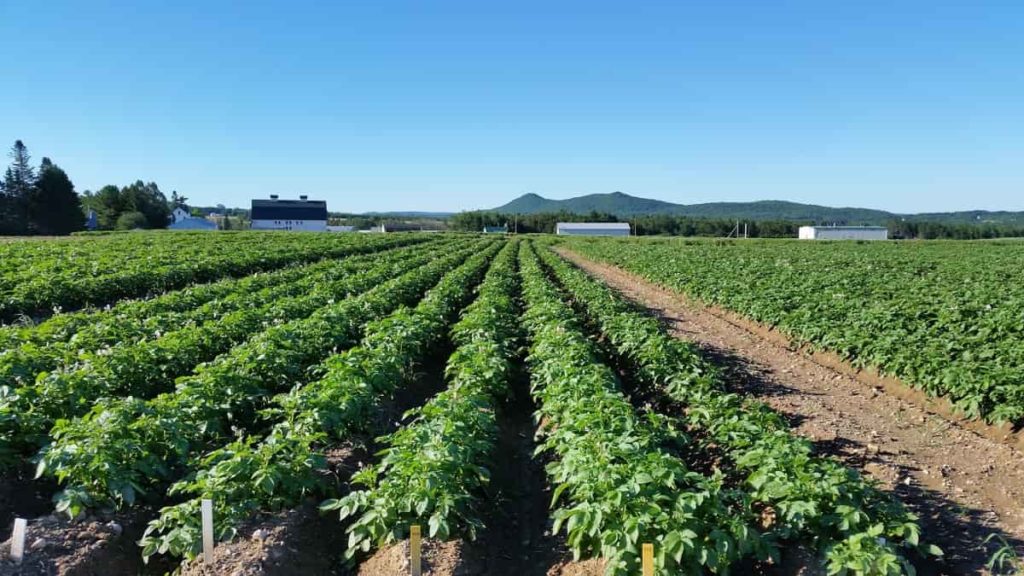
Potatoes are a simple, fun crop to grow, and their impressive shelf life can help you eat locally all year round. In addition to choosing suitable varieties for your needs, selecting a successful growing method is essential. Let’s take a look at the top 20 steps to boost Potato yield below.
Top 20 steps to boost Potato yield
Step 1: Factors that are important for Potato crop yield
Potato crop yields are determined by crop yield, seed age and quality, and crop management methods. Per capita consumption of Potatoes in developing countries has tripled due to;
- Potential crop yields
- High nutritional value
- Culinary diversity
Step 2: High yield Potato varieties
Varieties should best use agro-climatic conditions and produce high yields. Purple Abundance (PA), Purple Peru (PP), and Red Pontiac (RP) are some essential high-yield varieties. Potatoes vary widely in their shape, texture, and yield per plant. There are approximately 4,000 varieties of edible Potatoes available. Other high-yielding Potatoes include “White Rose,” “Kennebec,” “LaChipper,” “Red Lasoda,” and “Russet Norkotah.” “Chieftain” grows well in heavy, clay soils. Only buy certified disease-free seed Potatoes.
Step 3: Soil requirement for more yield
Potatoes will grow on most organic and mineral soils. However, light and medium-textured soils are recommended where mechanical harvesting is done to avoid difficulties in harvesting when the weather conditions are bad. The lowest possible soil pH is 5.5. Soil pH below 4.8 usually leads to poor growth.
Too many alkaline conditions can adversely affect skin quality and micronutrient deficiencies. Too little or too much water reduces productivity and promotes disease. The water requirement of Potato plants depends on the soil texture and moisture level.
In case you missed it: Greenhouse Potato Production – Farming, Cultivation, Growing In Winter
Step 4: Preventing soil compaction will improve crop yield
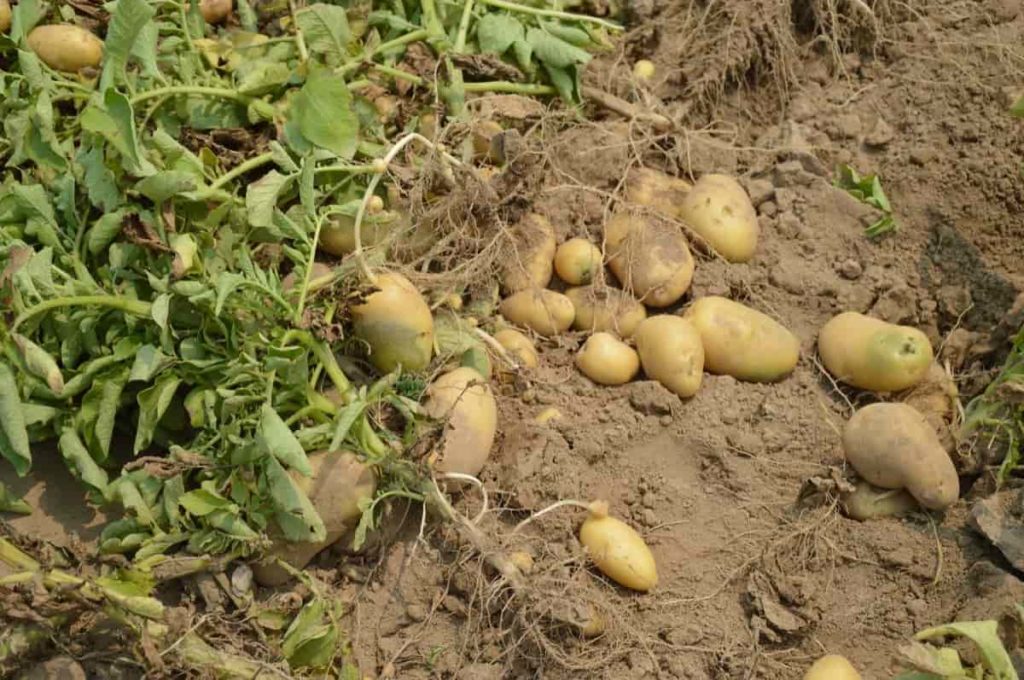
Potatoes are grown for their shoots that grow underground. Ensuring that there is no soil mixture is key to optimal Potato growth. When the soil is compacted, the soil particles erode densely together. This mixture makes it impossible for Potato stalks to grow because they do not have enough space to grow. If your soil is compact, your Potatoes will be quite small.
Step 5: Land preparation for more plant growth
The land is plowed to a depth of 24-25 cm and exposed to sunlight. The soil should have more drilling space and offer minimum resistance to tuber growth. During final plowing, well-decomposed FYM (25-30 tons per hectare) is added to the soil.
Step 6: Grow certified seed Potatoes
You are planting Potatoes produced by the plant last year when you plant Potato seeds. Any diseases or pests on the mother plant are carried in the seed Potato. Planting certified seed Potatoes ensure that you are starting with disease-free varieties.
Step 7: Seed tuber selection will improve yield
Tuber seeds should be disease-free, well sprouted, and weigh 30-40 grams each. It is desirable to use the entire seed tuber for planting. Hill tuber seeds are sown in pieces and planted late in the winter when they do not rot due to mild temperatures. Potatoes are grown mainly by planting tubers. Crop cleanliness and healthy seed blight are essential for a successful crop. However, seed tuber is the most expensive input in Potato cultivation. Tuber seeds should be disease-free, well sprouted, and weigh 30-40 grams each.
It is advisable to use whole seed tuber for planting. Mountain tuber seeds are sown in pieces and planted late in the winter when they do not rot due to mild temperatures. The primary purpose of cutting large tubers is to reduce seed costs and achieve uniform germination. Shoulders should be cut lengthwise with a crown eye, and the cut piece should weigh about 30-40 grams. Seed pods are usually cut with a knife and treated with fungicide before planting. Lack of good quality seed growers, high seed cost, heavy Potato seed transportation, and virus infiltration are major issues associated with seed tubers as planting material.
Step 8: Sowing time
The right planting time is essential for good yields. The best time to plant Potato is when the maximum and minimum temperatures are 30-32°C and 18-20°C, respectively. For medium-term crops, sowing should be done from the first week to the third week of October. For the late harvest, complete sowing from the third week of October to the first week of November. The second fifteenth of January is the best time to plant for the spring season.
Step 9: Tips for increasing the size of Potato tubers
- Crop management methods to increase the size and number of Potato tubers.
- Plant as soon as possible to increase the length of the growing season.
- Planting physically mature Potatoes that come out early.
- Use irrigation, crop nutrition, and crop protection methods to ensure maximum canopy life and unlimited tuber growth.
- Desiccation is at the right stage to meet market demand.
- Selecting the right variety
- Use crop protection inputs such as herbicides and nematicides – to ensure that the crop moves relatively smoothly.
In case you missed it: Potato Cultivation in Tamil Nadu, Seed Treatment, Spacing
Step 10: Irrigation for increasing Potato production
Irrigation is essential in Potato production as the plant root system is shallow and sparse. The first irrigation should be light and 5-7 days after planting and at intervals of 7-15 days after planting, depending on soil type and weather conditions. The drip irrigation system is the most economical, yields the most, and saves about 50% of water. It also enables the use of fertilizer through irrigation water. The sprinkler system distributes water evenly and reduces the damage caused by percolation and runoff.
Sprinkler irrigation is beneficial on cold nights as it reduces the damage caused by frost in Potatoes. It is recommended for areas with indole topography, sandy soils, and dehydration. In such cases, sprinkler systems increase water use efficiency by up to 40% compared to furrow irrigation.
Step 11: Fertilizer management for crop growth
Nitrogen is essential for leaf and tuber growth. The amount of nutrients varies with the stage of crop development. Macronutrients are in high demand during early spring growth; the plant needs to have adequate nutrients when needed. Both potassium and nitrogen are required during plant growth, tuber formation, and bulking. Potassium is the most commonly used in Potato crops and is needed in large quantities with nitrogen to achieve high Potato yields. A balanced crop nutrition strategy is essential.
Although very small amounts are necessary, the right balance of micronutrients must be added as these are vital elements in achieving high yields. The essential micronutrients in Potatoes are boron, copper, manganese, and zinc. A balanced crop nutrition program, including all macro and micronutrients, is essential to help regulate all of these components. A necessary effect of Potato production is the number of micronutrients. Potassium is the most commonly used in Potato crops and is required in large quantities with nitrogen to achieve high Potato yields.
Potato plants use large amounts of potassium during the growing season and are essential for high yields. Potatoes are sensitive to chloride anion. Chloride damage manifests by burning the leaf tips and margins, and the leaves turn yellow and distorted. Therefore, fertilizing with chloride-free fertilizers will help in increasing the yield and improving their quality. Nitrogen stimulates plant stem and leaf growth, although excess nitrogen can adversely affect tuber growth.
Step 12: Seed rate for more yield
Use a seed rate of 8-10 quintal/acre for small tubers, 10-12 quintal/acre for medium-sized tubers, and 12- quintal/acre for large sizes tubers. Use whole seeds to produce disease-free quality seeds.
Step 13: Increase Potato tuber number and yield
At the end of the tuber start phase, the main challenge for farmers is to get the maximum number of tubers over 15 mm. After the start of the tuber, the main challenge is to improve the reserves and get the best-selling tuber. Potato is a needy and cheap crop. Their P needs are higher during the tuberculosis stage. 50% of phosphorus requirement must be absorbed between 15 and 45 days after emergence to achieve maximum yield.
In case you missed it: Organic Potato Farming; Planting; Harvesting
Potato is also a crop with a poor root system. Therefore, phosphorus must be close to the roots, and the P content of the soil must be very high. Once the number of tubers is established, the quality of the filling will affect the yield. During this phase of tuber filling, N and K become necessary.
Step 14: Factors to increase production and double your earnings –
Potato production depends on many factors. Below are some ways to increase yield.
- Keep the number of Potato tubers per unit area as low as select tubers of increased size.
- Use only certified seeds instead of spoiled seeds obtained from local markets.
- Don’t worry about seed quality by storing your own collected tubers.
- Before transplanting the seedlings into the field, plant them in the seed plot. Growing Potatoes in raised beds is another easy and effective way.
- Planting straw, wire cylinders, or upside-down plants can reduce yields, so avoid these methods.
Step 15: Hilling improves Potato production
Once the new plants reach a height of 8 to 12 inches, you can start hilling your Potatoes. Start mounding the Potatoes with dirt with a hoe or your hands, leaving at least an inch of space between the dirt surface and the plant leaves. “Hilling” is defined as a mounding of dirt around the stems of growing Potato plants.
It has two main benefits. First of all, since there are more stems underground, you will get more stolons and more Potatoes from each plant. Second, as the tubers grow, they usually rise through the soil to expose to the sun. Hilling, then, gives you better yields with increasing yields and decreasing waste.
Step 16: Remove weeds
Reduce competition by keeping Potato plant beds full of weeds, especially when the plants are small. Keep the weed pressure down by pulling the manually, mulching too much, or both. Focus your efforts around the plant base and keep an eye on the weeds and the roots. Before planting Potatoes, remove all weeds and weed roots. Grow Potatoes on a new site each year to help reduce competition from weeds.
Step 17: Drip Irrigation will improve crop yield
Always water the roots and avoid watering the leaves as much as possible to reduce the incidence of disease and keep the plants healthy and strong. In dry areas (or when growing undercover), hand watering Potatoes can be a challenge. Drip irrigation can be an excellent way to ensure consistent watering and reduce water consumption. Another interesting option is the Potato growing bed, so there is a constant water supply from the reservoir. It is a way to integrate Potatoes into the hydroponic or aquaponic system.
In case you missed it: Potato Diseases and Pests, Symptoms, Control Methods
Step 18: Choose the perfect Potato companion plant
Potatoes are an easy crop to grow. But they can be affected by a range of pests and diseases. In organic farming, increasing the diversity of plants and wildlife is one of the most important things. It can help balance the farm ecosystem and prevent problems from spiraling out of control. One crucial step you can take to improve your Potato crop significantly is to plant companion plants. Potato companion plants include other vegetables, flowers, and herbs—these plants to grow with your Potato crop to reduce problems and increase yields.
Step 19: Keep plants free from diseases and pests
The best way to keep your Potato plants from diseases and pests is through prevention. Protect your Potatoes from pests and diseases for healthy plants and the highest yields. Growing Potatoes in a new place help prevent insect infections and diseases every year. To provide good air circulation and cover the floating cloth rows to protect the plants from pests and diseases. Water the Potatoes on a plant basis and avoid wetting the leaves, encouraging leaf diseases.
Step 20: Harvesting time will improve yield
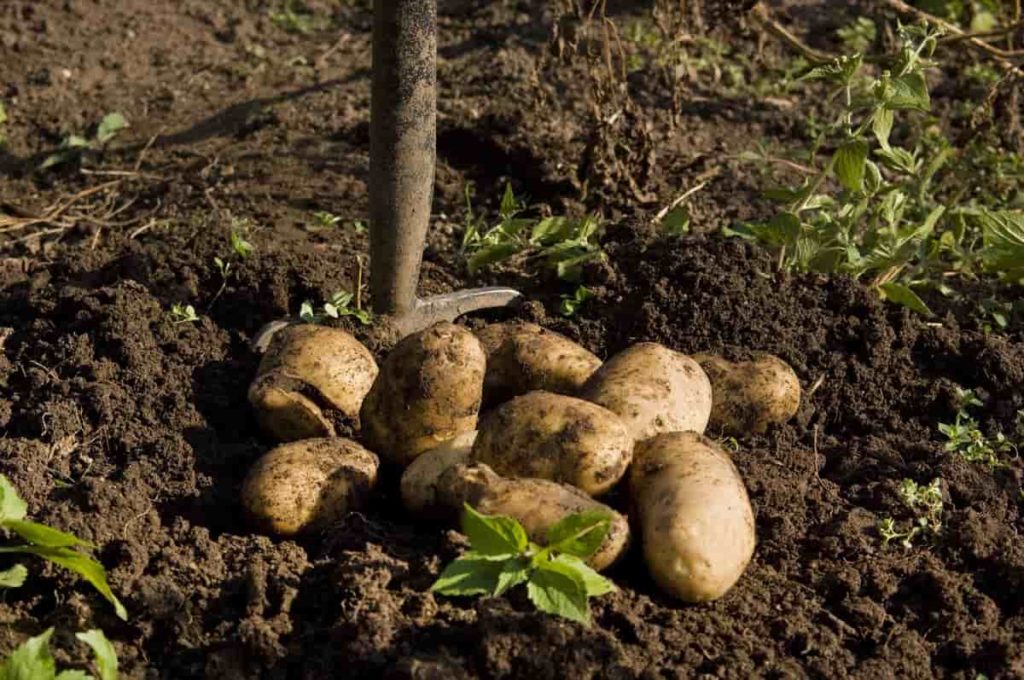
Harvesting Potatoes feel like digging a treasure, and you can increase the haul by providing moist, weed-free soil and increasing high-yielding varieties. If the plant leaves begin to turn yellow and fall to the ground, the Potato crop is ready for harvest. Potatoes are kept on the ground and allowed to dry in the shade after harvest. The typical yield of the Potato crop is between 20 to 30 tons per hectare.
Frequently asked questions about Potato farming (FAQ)
Is Epsom Salt Good for Potatoes?
Yes, adding Epsom salt to Potato plant soil can help. It gives plants a good boost of magnesium, which is beneficial in stimulating biochemical reactions. It helps to support the growth process.
In case you missed it: Frequently Asked Questions About Potato Farming, Planting
Are coffee grounds good for Potato plants?
Using enough coffee grounds on your Potatoes works perfectly. Adding coffee grounds to your plants helps them to grow well. You can add ground in a coffee compost mixture and mix coffee compost with leaf mold.
Does hilling Potatoes increase yields?
Reasons for hilling include better weed control, minimizing vegetation, better drainage, and increased soil temperature. Proper management of each of these factors can increase the quality and quantity of tuber production.
- Types of Pesticides Used in Agriculture: A Beginner’s Guide
- Economical Aquaculture: A Guide to Low-Budget Fish Farming
- 15 Common Planting Errors That Can Doom Your Fruit Trees
- How to Make Houseplants Bushy: Effective Tips and Ideas
- Innovative Strategies for Boosting Coconut Pollination and Yield
- Pollination Strategies for Maximum Pumpkin Yield
- The Complete Guide to Chicken Fattening: Strategies for Maximum Growth
- Natural Solutions for Tulip Problems: 100% Effective Remedies for Leaf and Bulb-Related Issues
- Revolutionizing Citrus Preservation: Towards a Healthier, Greener Future
- Natural Solutions for Peony Leaf and Flower Problems: 100% Effective Remedies
- Maximizing Profits with Avocado Contract Farming in India: A Comprehensive Guide
- Natural Solutions for Hydrangea Problems: 100% Effective Remedies for Leaf and Flowers
- The Ultimate Guide to Choosing the Perfect Foliage Friend: Bringing Life Indoors
- From Sunlight to Sustainability: 15 Ways to Use Solar Technology in Agriculture
- The Ultimate Guide to Dong Tao Chicken: Exploring from History to Raising
- The Eco-Friendly Makeover: How to Convert Your Unused Swimming Pool into a Fish Pond
- Mastering the Art of Delaware Chicken Farming: Essentials for Healthy Backyard Flocks
- 20 Best Homemade Fertilizers for Money Plant: DIY Recipes and Application Methods
- How to Craft a Comprehensive Free-Range Chicken Farming Business Plan
- Brighten Your Flock: Raising Easter Egger Chickens for Beauty and Bounty
- How to Optimize Your Poultry Egg Farm Business Plan with These Strategies
- Subsidy for Spirulina Cultivation: How Indian Government Schemes Encouraging Spirulina Farmers
- Ultimate Guide to Raising Dominique Chickens: Breeding, Feeding, Egg-Production, and Care
- Mastering the Art of Raising Jersey Giant Chickens: Care, Feeding, and More
- Ultimate Guide to Raising Legbar Chickens: Breeding, Farming Practices, Diet, Egg-Production
- How to Raise Welsummer Chickens: A Comprehensive Guide for Beginners
- How to Protect Indoor Plants in Winter: A Comprehensive Guide
- Ultimate Guide to Grow Bag Gardening: Tips, Tricks, and Planting Ideas for Urban Gardeners
- Guide to Lotus Cultivation: How to Propagate, Plant, Grow, Care, Cost, and Profit
- Agriculture Drone Subsidy Scheme: Government Kisan Subsidy, License, and How to Apply Online
- Ultimate Guide to Raising Araucana Chickens: Breed Profile, Farming Economics, Diet, and Care
- Bringing Hydroponics to Classroom: Importance, Benefits of Learning for School Students
- Ultimate Guide to Raising Polish Chickens: Breed Profile, Farming Economics, Diet, and Care
- Ultimate Guide to Raising Australorp Chickens: Profile, Farming Economics, Egg Production, Diet, and Care
- Silkie Chicken Farming: Raising Practices, Varieties, Egg Production, Diet, and Care
- Sussex Chicken Farming: Raising Practices, Varieties, Egg Production, Diet and Care