Mulberry Cultivation & Silkworm Rearing Guide:
The following article talks about Mulberry Cultivation practices, planting techniques, and growing ideas.
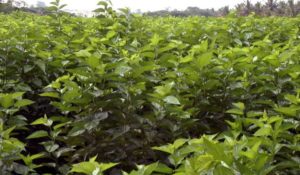
Introduction to Mulberry:
Sericulture is an agro-industry which means, combining both agriculture and industry, the final product is silk. It is a labor intensive activity is providing direct and indirect employment to a large number. India has the unique distinction of producing all the four varieties of silk viz., mulberry, muga, tasar and eri. About 14% of the global raw silk is produced in India, of which more than 50% is mulberry silk, mostly produced in Karnataka. Besides meeting the ever-growing domestic demand, silk in its various forms is also exported and this sector is one of the important foreign exchange earners for the country
Soil and Climate Requirement for Mulberry Plantation:
Mulberry can grow practically on any type of land except on very steep lands. Good growths, however, are obtained when it is raised on either flat land or gently sloping or undulating lands. On more sloppy or steep lands, necessary attention to proper soil conservation methods as contour drains, contour planting or even bench terracing should be given.
Mulberry Cultivation can be done in a wide range of soils, but best growth is obtained in loamy to clayey loam soils. The mulberry plant can tolerate slightly acidic conditions in the soil. In the case of too acidic soils with pH below 5, necessary corrective measures through application of Dolomite or Lime should be adopted. In the case of alkaline soils, application of Gypsum should be resorted to for correction of the soil alkalinity.
Since mulberry is a deep-rooted plant; the soil should be sufficiently deep up to about two feet in depth. In respect of elevation, mulberry thrives well up to about 4,000 feet, above growth will be retarded because of the cooler temperature.
Land preparation for Mulberry Plantation:
Mulberry falls under the category of perennial crops and once it is properly raised during the first year, it can come to full yielding capacity during the second year and lasts for over 15 years in the field without any significant deterioration in the yield of the leaf. Usually, flat lands are suitable for irrigated mulberry cultivation. If the slope is more than 15%, suitable land development measures such as contour bunding, bench terracing, etc. should be adopted.
In mulberry cultivation, the field should be prepared by deep plowing up to a depth of 30-45 cm in order to loosen the soil and thereafter with a country plow or tractor to bring the soil to a fine tilth. Weeds, stones should be removed during the preparatory stage. A basal dose of farmyard manure @ 20 tonnes per hectare is recommended, which has to be thoroughly incorporated into the soil. Farmlands along the highways, in the vicinity of factories, area irrigated by raw sewage and untreated effluents, plots abetting other gardens with intensive pesticide usage, waterlogged areas and tobacco grown land are NOT suitable locations for mulberry cultivation.
Selection of Variety for Mulberry Production:
The criteria for selection of variety includes fertility of the land, water availability, region specificity, the extent of the garden and problematic soils. The yield potential of high yielding varieties can be best realized in high fertility soils and they respond to intensive irrigation. Wherever the size of the operation is bigger, it is advisable to have a separate garden for chawki rearing for which a variety like S-36 can be chosen in addition to a high yielding variety for rearing late age worms (M-5, S-36 & V-1). In alkaline soils, the variety AR-12 is suitable. An improved selection namely K2 also referred to as M5 is a superior variety evolved by the Institute, which is a vigorous strain responding well to manuring and capable of giving about 25% more leaf yield. This variety thrives well both under dry as well as irrigated conditions. Quality wise also, it is superior to the local variety of mulberry and, therefore, could be used with great advantage in mulberry cultivation.
Planting material and Plantation of Mulberry:
Plantation in mulberry cultivation can be taken up both by cuttings and saplings. However, saplings are always better than cuttings as planting material for quick and better establishment. Two cuttings / one sapling are planted at each spot in desired spacing, Cuttings are planted keeping one bud exposed while the saplings are planted in pits opened at the spot.
Preparation of cuttings in Mulberry Farming:
Cuttings should be prepared from well-matured 6-8 months old shoots of about 1.5 cm in diameter. Cuttings of 15-20 cm length with 3-4 healthy buds are selected for plantation.
Raising of saplings for Mulberry Plantation:
Nursery beds with a dimension of 5 m X 1.5 meters are prepared. The land is dug to a depth of 30-40 cm and the soil should be pulverized well. FYM is applied @ 15 kg per bed and mixed well with the soil. Some quantity of sand is also added to heavy (clayey) soils to make the soil loose and friable, while some quantity of tank silt or other well decomposed organic matter has to be applied to sandy soils to increase the water holding capacity. Cuttings should be planted in nursery beds with a spacing of 15 cm x 10 cm. The full length of cutting is pushed into the soil keeping only one bud exposed above the ground. It should be irrigated twice a week. Fertilizer is applied @ 25:25:25 (N:P:K) kg per hectare after 5-6 weeks when plants sprout well and the root system is established. In mulberry cultivation, saplings of about 80-90 days old can be used for planting. While uprooting the saplings, maximum care should be taken to avoid damage to the root system.
The spacing Mulberry Plants:
In mulberry cultivation, spacing depends upon the soil conditions, slope, variety, and convenience for inter-cultural operations as detailed below:
In the case of rainfed mulberry gardens, the aim should be to raise the mulberry plant with a sturdier frame so that it is able to withstand prevailing drought conditions.
| Spacing (Cm.) | Suitability | No. of plants/ha. |
| 90 x 90 | Heavy soils, black soils, heavy rainfall areas | 12345 |
| 120 x 60 | Sloppy land (hilly areas) | 13888 |
| (90 + 150) x 60 | Suitable for mechanized farming | 13888 |
Planting of Mulberry:
Pit system is ideal in 90 x 90 cm spacing. Pits of 35cm3 are dug and left for one month, which is later filled with FYM and soil at 1: 2 ratio. Trenches of 35 cm x 35 cm are also convenient to take up plantation in mulberry cultivation. It is preferable to start the plantation during the rainy season.
In hilly areas, 3 cuttings of 20-22 cm length are planted in each pit at a spacing of 15 cm. Cuttings not sprouting in 4-5 weeks need to be replaced by saplings to ensure the required plant density.
Weeding and inter-cultivation in Mulberry Farming:
During the initial stage of mulberry plant establishment in the field, weed growth should be kept to the minimum, so that the growing young plants are not smothered by the weeds. At least two weedings should be carried out during the first six months after planting of cuttings, once after two months of planting and again after an interval of 2 to 3 months. The weeding operation should be thorough and the soil should be dug deep to eliminate the weeds with roots. This deep digging is carried out as part of the weeding operation and results in necessary loosening of the soil and stimulation to the plants to grow vigorously. Thus special care should be taken to reduce weed growth as much as possible in the first year of planting. Thereafter, the shade effect of the fully grown mulberry will tend to keep the weeds down. Similarly, periodical inter-cultivation should be carried out to particularly in the case of dry mulberry cultivation during the first year so that soil loosening results in better aeration and stimulation of plant growth. This also helps in catching the rainwater and its deep penetration for better retention of soil moisture.
Training and Pruning of Mulberry Plants:
In order to get good leaf yield for 15-20 years, it is necessary to give a good and sturdy frame to the plant. After the planting, the saplings need to be cut at 10-15 cm above the ground level within a week. After the growth period of six months, the plants are to be cut at a height of 25 cm above the ground level keeping 3-4 strong branches.
In leaf picking method, the first bottom pruning has to be taken up at a height of 20-25 cm from ground level and second bottom pruning is done (after 3 leaf harvests) again at 30 cm height from ground level. Afterward, in leaf harvest method, the middle pruning at a height of 60-70 cm has to be followed once in a year during Jan-Feb and in shoot harvesting method, each shoot harvest is done at 25 cm height which itself acts as pruning.
Manuring and Fertilizers of Mulberry Plants:
Application of a basal dose of organic manure like compost or cattle manure is necessary for the successful establishment of the garden. Thereafter, the young growing plants should be assisted to put forth vigorous and maximum growth through periodical fertilizer applications.
FYM has to be applied at 20 t/ ha/ year in two doses following the first bottom pruning and third pruning. Fertilizers have to be applied as per the recommended schedule and secondary and micronutrients have to be applied wherever necessary. Foliar sprays such as Boron (1%) Urea (0.5%), Zinc Sulphate (0.1%), etc. will improve the leaf quality. The recommended fertilizer dose (kg/ha) is indicated below:
| N | P | K | ||
| Rainfed Mulberry | ||||
| Ist year | 50 | 25 | 25 | |
| II year onwards | 100 | 50 | 50 | |
| Irrigated Mulberry | ||||
| Shoot harvest | Ist year | 100 | 50 | 50 |
| II year onwards | 300 | 120 | 120 | |
| Leaf Harvest | I year | 100 | 50 | 50 |
| II year onwards | 300 | 120 | 120 |
Irrigation requirement for Mulberry Plantation:
Among the various inputs, irrigation ranks high in giving quick and good results. Regular irrigation at an interval of 8-10 days is ideal. Usually, 1.5 to a 2-acre inch of water per irrigation is enough. It may be noted that there is only one irrigation channel for every two rows of mulberry plants. This helps in both saving and more effective use of irrigation water. In the case of water scarcity, drip irrigation can also be adopted for better production.
Harvesting of Mulberry leaves:
Picking of leaves should be carried out in time in mulberry cultivation, that is to say when the leaves are at the correct stage of maturity for harvest. Otherwise, part of the leaves will become over mature coarse and suffer in quality from the point of view of nutritive value for the silkworms. Also part of the leaves may turn yellow, shed and be lost. Therefore, timely harvest, as the leaves reach the required stage of maturity, will lead to a fuller harvest of the available leaves without wastage, and realization of maximum yield.
Yield in Mulberry Cultivation:
Normally the expected annual yield is 40-50 t of leaves per acre. In shoot harvest method, harvesting can be done at an interval of 70 days (5 harvests). In case of leaf harvest method, the first harvest is taken 70 days after 1st pruning and 2nd and 3rd harvest (coinciding with 2nd bottom pruning) at an interval of 55 days. The fourth harvest is taken 70 days after the 3rd harvest and 5th and 6th at an interval of 55 days.
Silkworm Rearing:
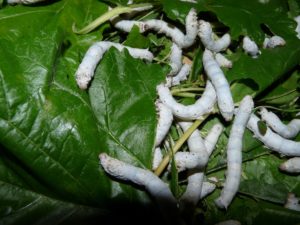
Now let us get into Silkworm rearing in details:
The silkworm (Bombyx mori) is the chief source for the production of fabulous mulberry silk in sericulture industry. Throughout its rearing period, it has to be looked after carefully and nourished with good quality mulberry leaves. Provision for optimum environmental conditions and protection from pests and diseases are the other essential requirements. Depending on the number of generations per year, the silkworms are classified into univoltine, bivoltine or multivoltine races. Univoltine and bivoltine races are specific for temperate areas whereas multivoltine are for tropical areas. Silkworm rearing involves both technical and commercial aspects. In tropical areas, where mulberry grows luxuriantly throughout the year, 5-6 rearings are conducted in a year while in temperate/ sub-tropical areas it is common to raise one/ two crops.
From hatching to its full-grown stage, the silkworms pass through five instars and the worms up to stage three are called young age worms or Chawki. As they are susceptible to infections and vulnerable to adverse weather conditions, special care is required for rearing of chawkis. The various stages involved in chawki rearing are indicated below:
- Obtain quality eggs: Disease-free layings (DFLs) to be used.
- Incubation & Brushing: Ideal storage conditions of 25 to 26o C. temperature and 85% RH, 16 hours of light and 8 hours of darkness ensures uniform hatching (normally between 9 -12 days from egg laying). Brush newly hatched larvae on to the rearing beds and sprinkle freshly chopped tender leaves of 0.5 to 1 cm2.
- Feed the right quality leaf: Highly nutritious leaves in adequate quantities at suitable intervals of time to be fed. Top 3-4 full grown leaves immediately below the growing buds are suitable.
- Provide right environment : 26-28 oC and 80-85% RH
- Feed management: Freshly chopped leaves are spread thinly on the dry beds
- Keeping the beds clean
- Care during molting: Provide with optimum temperature and humidity conditions and also necessary spacing and leaf feed. There has to be low to very low or no feeding during molting and maintain a temperature of 24-25oC and RH of 65-70%. The worms will attain maximum growth in minimum time and will take 3 to 3 ½ days in the first instar and 2 ½ to 3 days in the second instar to go into moult. The third instar is crucial as this is the intermediary stage between the chawki and late age worms.
Rearing of Late age Worms:
Begins from the third instar. These worms are voracious feeders. The various stages for rearing are indicated below :
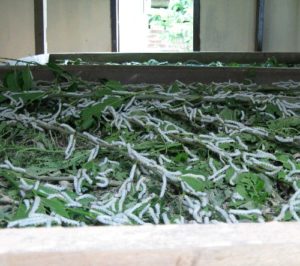
- Ensure disinfection two days before brushing of worms. The rearing room and equipment should be disinfected.
- Provide a sufficient quantity of leaf. The late age stage consumes 95% of the total feed. Mulberry leaves to be harvested with optimum maturity with relatively low moisture, high proteins, and fibers with less carbohydrate content.
- Ensure a good environment: Maintain 24-25o C temperature and 70-75% humidity. The space requirement for 100 DFLs of multi-voltine races is 100 -200 sq.ft and 200 – 400 sq.ft. for 4th and 5th instar, respectively: For bivoltine races, it is 115 -225 sq.ft. and 225 – 550 sq.ft. space for 4th and 5th instar, respectively.
- Ensure hygienic conditions
- Protect from natural enemies like Uzi fly
- Mounting of ripe worms: Ripe worms to be picked on completion of 6-7 days after passing 4th molt and provide 26-27 o C and 55-60% RH to ripe worms.
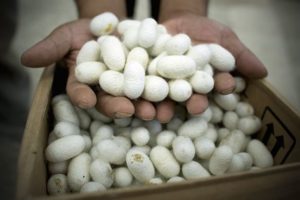
- Harvesting of Cocoons: Suitable mountages are used for mounting the optimum density of worms (40-45 worms/ sq.ft.). Mountages with worms are not to be exposed to direct sunlight and humid conditions are to be avoided. Cocoons are harvested on 5th to 6th day after mounting which ensures complete development of pupae. The qualities of good cocoons include uniform size and shape, rich silk content, less floss, more shell weight, uniform shape, the uniform build of cocoons.
- Cocoon Yield: The average yield is 40-45 kg. (CB) and 45-50 kg (BV) from 100 DFLs.
The entire process from egg hatching to cocoon in silkworm rearing takes about 26-27 days.
Construction of Rearing Shelter for Silkworms:
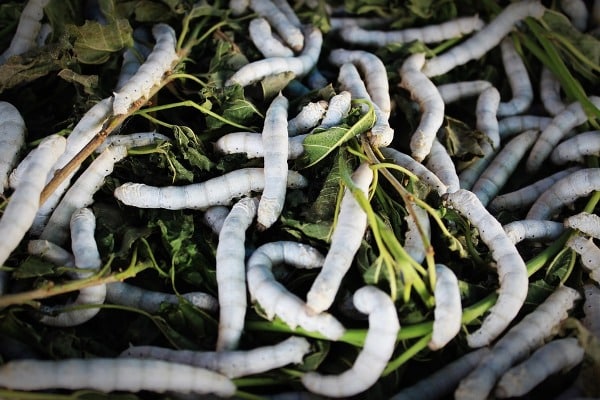
Mulberry silkworm rearing, being completely domesticated, demands specified environmental conditions like optimum temperature (24-28oC) and relative humidity (70-85%). It is, therefore, necessary to evolve measures for economic cooling through a selection of proper material for wall and roof fabrication, the orientation of the building, using the right construction method/design, etc. Further, enough space must be available to carry out leaf preservation, chawki rearing, late age rearing, and molting and also its effective cleaning and disinfection.
The size of the silkworm rearing house depends upon the quantum and type of rearing. The different types of rearing are shelf or stand rearing, platform rearing, and floor rearing. Shelf rearing requires minimum space and is most common in India. A floor area of 150 sft. can provide rearing space for 100 Crossbred(CB) DFLs or 75 Bivoltine(BV) DFLs.
In platform rearing, the larvae are shifted to shoot rearing platforms after a 3rd molt. The ideal size of each platform will be 5 x 25 ft. which can accommodate 50 DFLs up to the stage of spinning. Platforms can be arranged in two/ three tiers with a gap of 2-3 ft. A building floor area of 250-300 sft. is required to rear 100 DFLs of CB layings or 75 DFLs of BV layings.
Bottom Line of Mulberry Plantation:
Read: Growing Tomatoes from Seeds.
i want to enter into cultivation of silkworms industry please give me the full datails about that
We will update project report about silkworms (sericulture) soon.
Here some information about Silkworm Rearing Methods.
We need Mulberry leaves (Fresh/Dired)… Where I can get sir.
Try at indiamart dot com
I want mulberry plants for 2 acre. pls provide me these plant near Raebareli. Because I belong from Raebareli, U. p.
I Want To Enter Into Sericulture I Have 5 Acres Of Land It Is Black Soil. So, Please Send Me Details About Farming.
Please check this: Sericulture Project Report, Cost, Profits, Economics.
How much I can I make from 1 acre of land from this sector