Home Blog Page 187

A Comprehensive Banana Farming Guide for Beginners

13

Bananas are scientifically known as Musa spp., belonging to the fascinating family Musaceae. Banana farming starts with selecting the right variety based on market demand and climatic conditions. Once planted, proper care must be given to ensure healthy growth and high yields. Cultivating Bananas ensures food security and promotes sustainable farming practices.
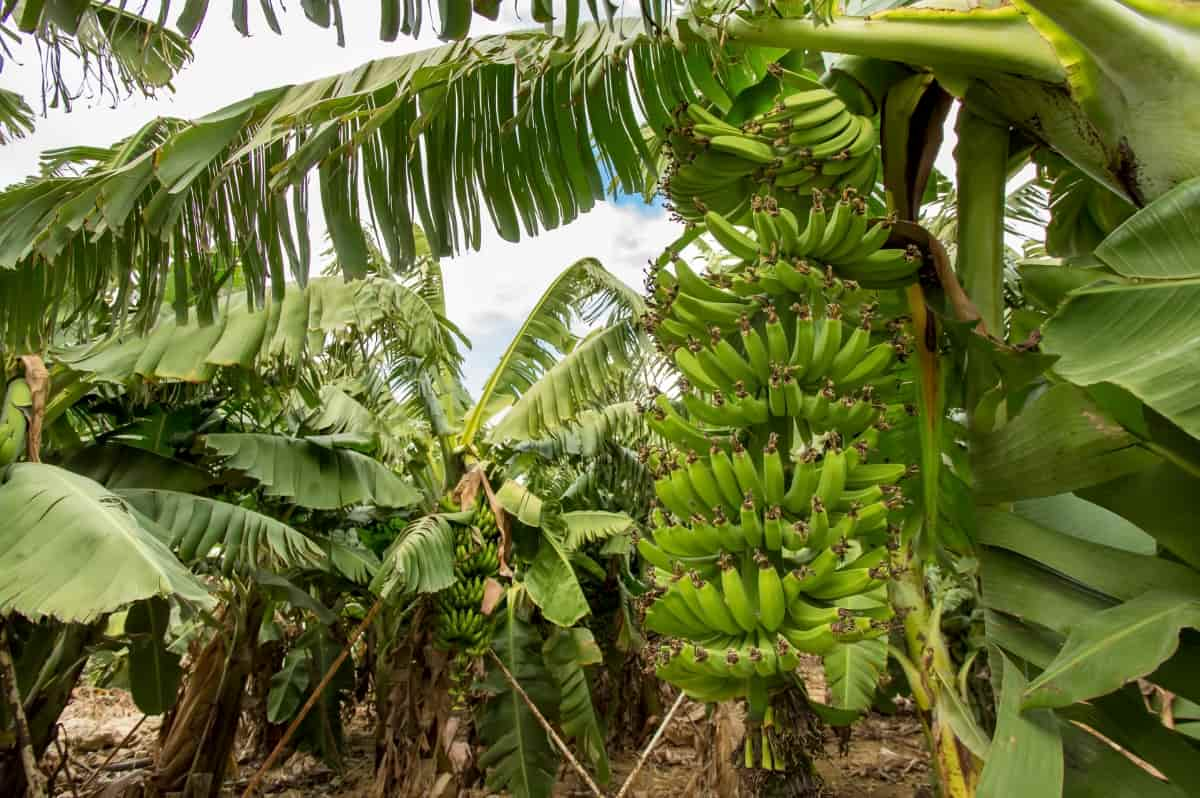
A Comprehensive Banana Farming Guide for Beginners

Types of Bananas

When it comes to Banana farming, there is a wide variety of Banana types to choose from. Some popular varieties include the Cavendish Banana, known for its sweet flavor in cooking. Pisang Raja Bananas are favored for their unique taste and aromatic qualities. Red Bananas are visually striking with their reddish-purple skin and have a sweeter taste compared to traditional yellow Bananas. Apple Bananas are small in size but pack a big punch when it comes to sweetness, often likened to apples.

The Abyssinian Banana is native to East Africa and boasts a tangy flavor profile that sets it apart from other varieties. Lady Finger Banana, slender in shape and delicate in taste, is perfect for snacking or adding to desserts. Blue Java Banana has a unique blue hue when unripe and offers a creamy texture similar to ice cream once ripe. Plantains are starchy Bananas commonly used in cooking due to their firm texture even when fully ripe. Burro Banana features lemony undertones that add brightness to dishes where it’s used as an ingredient.

Climate and Soil Requirements

Bananas thrive in tropical climates with temperatures between 20-30°C. They require plenty of sunlight and high humidity levels to grow well. The ideal soil for Bananas is well-draining, loamy soil rich in organic matter. Bananas are sensitive to waterlogging, so ensuring good drainage is essential. The pH level of the soil should be around 6-7 for optimal growth. Bananas need consistent moisture throughout the year but can tolerate short dry periods. A yearly rainfall of 1500-2500mm is considered suitable for Banana cultivation.

Site Selection and Preparation

Selecting the right site for your Banana farm is crucial for a successful harvest. Ensure the land has good drainage to prevent waterlogging and root rot. Bananas thrive in tropical climates, so select a location with sunlight and protection from strong winds that can damage the plants. Conduct soil tests to determine if the soil is rich in organic matter and nutrients.

In case you missed it: Banana Fertilizer Requirements and Recommendations: Schedule and Application Methods
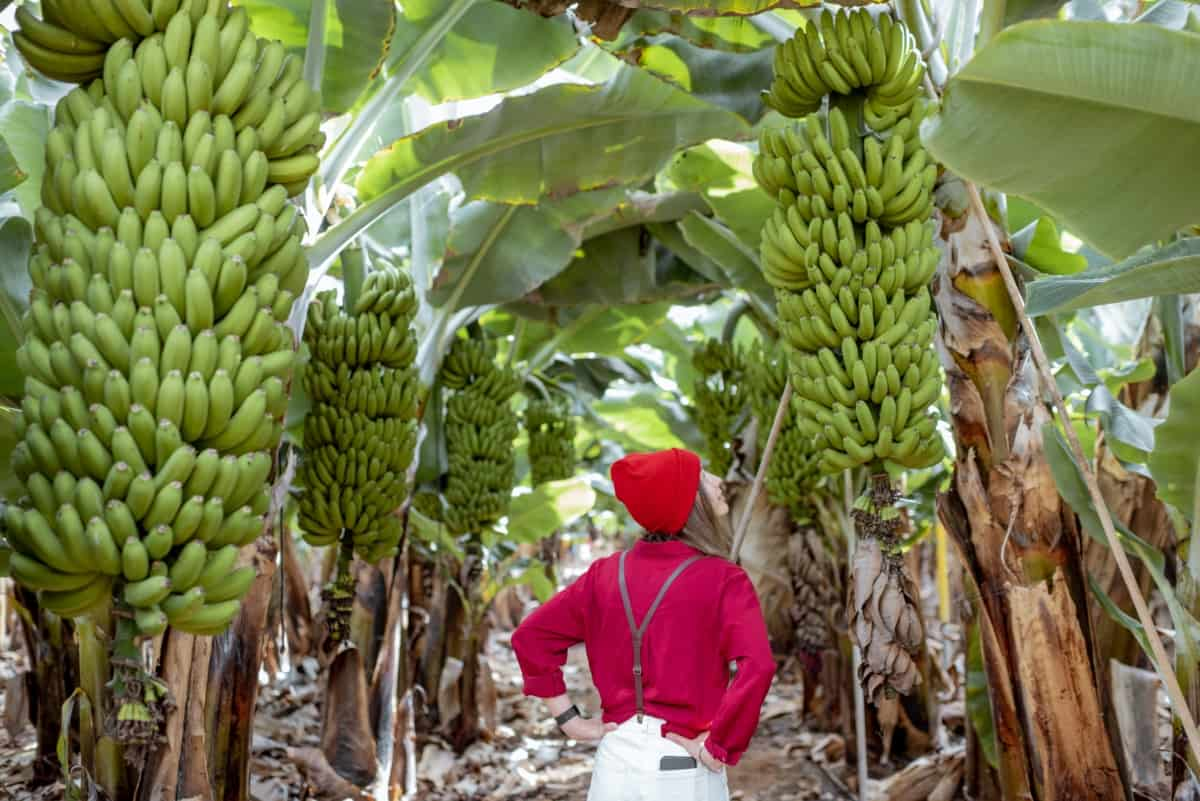
Banana Plantation

Prepare the site by clearing any debris or weeds that may hinder growth. Dig holes at appropriate distances based on the variety of Bananas you plan to cultivate. Consider planting windbreaks or barriers to shield your Banana plantation from harsh weather conditions and pests. Adequate spacing between rows allows for proper airflow and maintenance access.

Planting Material and Propagation

The most common method of propagation in Bananas is through suckers or offshoots. Suckers are small shoots that grow at the main plant base and can be carefully separated and replanted to establish new Banana plants. Another method of propagation is through tissue culture, which involves growing Banana plantlets in a controlled environment using tissue samples from healthy mother plants.

This technique helps maintain disease-free planting material and ensures uniform growth. Choosing healthy and disease-free planting material is essential to prevent pests and diseases in your Banana plantation. Before planting, make sure to inspect each sucker or plantlet carefully for any signs of damage or infection. Proper handling and care during the propagation stage will set the foundation for a thriving Banana farm with high-quality fruit production.

Planting Techniques

Planting Bananas starts with choosing healthy suckers or tissue-cultured plants from reputable sources. These planting materials should be disease-free and strong to ensure robust growth. Before planting, prepare the soil by digging holes that are spacious enough to accommodate the Banana plant’s roots. Ensure proper spacing between each plant to allow for adequate sunlight and airflow, promoting optimal growth.

Plant the suckers at a slight angle to prevent water accumulation in the center which can lead to rotting. Cover them with soil and press firmly around the base to provide stability. Water thoroughly after planting to help establish root systems effectively. Bananas thrive in well-draining soils rich in organic matter. Consider adding compost or manure during planting for added nutrients that will support healthy growth throughout the growing season.

Irrigation Management

Bananas thrive in moist soil conditions and require regular watering to ensure fruit production. Adequate irrigation helps prevent stress on the plants, leading to healthier and more robust Banana trees. The frequency and amount of water needed for irrigation depend on various factors, such as climate, soil type, and stage of plant development. Drip irrigation systems or sprinkler systems are commonly used methods to deliver water to Banana plants while efficiently minimizing wastage.

In case you missed it: High-Density Banana Plantation: Spacing, Plants Per Acre, Techniques, and Yield

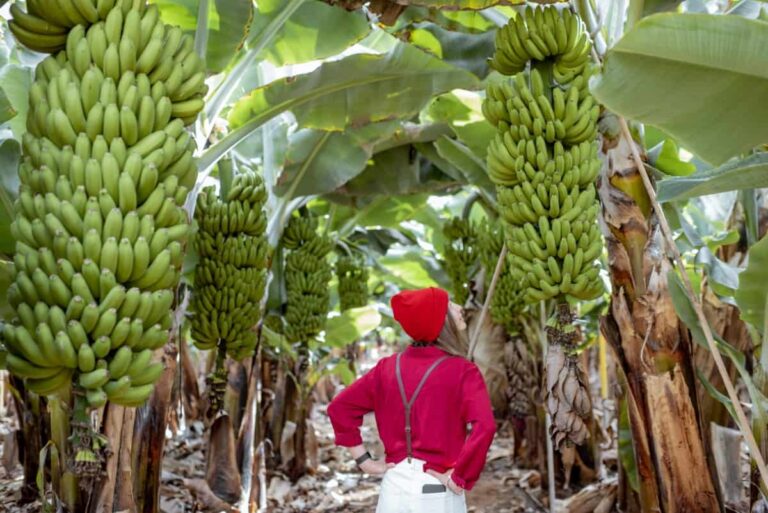
Green Bananas

Monitoring soil moisture levels regularly is essential to avoid under- and overwatering. Overly wet conditions can cause root rot, while insufficient water can stunt growth and reduce yield potential. Proper irrigation cycle scheduling based on weather patterns and plant requirements is key to successful Banana cultivation.

Fertilization and Nutrient Management

Proper fertilization and nutrient management are crucial for healthy plant growth and optimal yield. Bananas require a balanced supply of nutrients to thrive in the soil they are planted in. N, P, and K (Nitrogen, phosphorus, and potassium) are essential elements for Banana plants’ development. Nitrogen aids in leaf growth, phosphorus supports root development, and potassium contributes to overall plant health and fruit production.

Regular soil testing is necessary to determine your Banana plantation’s specific nutrient requirements. Then, you can adjust the fertilization schedule accordingly to ensure that the plants receive adequate nourishment throughout their growth stages. Organic fertilizers can improve soil fertility naturally without harmful chemical additives, which benefits the environment and enhances the quality of Bananas produced.

Pest and Disease Control

Various pests and diseases can affect Banana plants, leading to reduced yield and quality. Common pests in Banana farming include aphids, thrips, weevils, nematodes, and mites. These pests can damage the Banana plant by feeding on its tissues or transmitting diseases. Integrated pest management strategies are recommended to effectively control pests in Bananas.

These include using biological controls like beneficial insects, cultural practices, and organic pesticides when necessary. Diseases like Panama disease and black Sigatoka can also pose significant threats to Banana crops. Regular monitoring and timely interventions are essential to prevent the spread of these diseases.

Weed Management

Weed management is crucial to successful Banana farming. Weeds compete with Banana plants for nutrients, water, and sunlight, affecting their growth and productivity. Implement cultural practices like mulching and intercropping to suppress weed growth and effectively manage weeds in your Banana farm. 

In case you missed it: Nendran Banana Production in India: Cultivation Practices and Farming Management
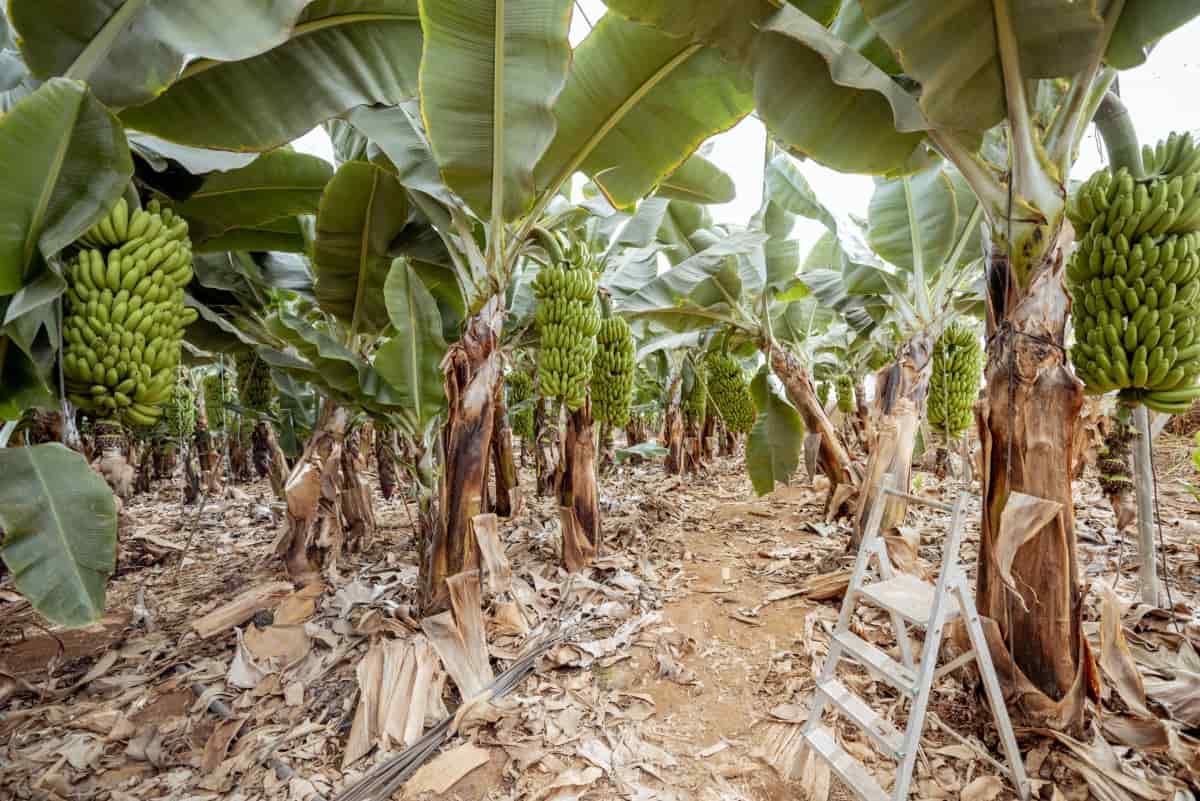
Banana Plantation with Harvest

Using organic mulches such as dried leaves or straw can help smother weeds while also improving soil health. Intercropping with cover crops like legumes not only helps control weeds but also adds nitrogen to the soil. Avoid using synthetic herbicides near Banana plants, as they can harm both the Bananas and the environment. Instead, opt for natural weed control methods to maintain a healthy growing environment for your Bananas.

Pruning and Crop Management

Pruning and crop management are crucial aspects of Banana farming to ensure optimal growth and yield. Regular pruning helps remove old leaves, promote air circulation, and prevent the spread of diseases. It also allows sunlight to reach all parts of the plant for photosynthesis. When it comes to crop management, monitoring the overall health of the Banana plants is essential. This includes checking for any signs of nutrient deficiencies, pests, or diseases.

Proper fertilization according to soil requirements plays a key role in maintaining healthy plants. Bananas require adequate water supply during their growth stages. Effective irrigation should be done to prevent waterlogging, which can lead to root rot. Mulching around the Banana plants can help retain soil moisture.

Harvesting at the right time is also part of crop management. Bananas should be harvested when they are mature but still green before they ripen on the plant. Post-harvest handling is important, too, ensuring proper storage conditions to maintain their freshness until they reach consumers’ hands.

Harvesting and Post-Harvest Handling

Once your Bananas are fully mature and ready for harvesting, they must be handled with care to ensure maximum quality and shelf life. Harvesting should be done when the fruit has reached its optimal size, color, and taste. It’s crucial to cut the entire bunch from the plant using a sharp knife. During post-harvest handling, it’s important to avoid damaging the Bananas, as this can lead to premature ripening and spoilage. The harvested bunches should be carefully transported to avoid bruising or crushing the fruit.

Proper storage facilities with controlled temperature and humidity levels are crucial for preserving the Banana quality after harvest. Sorting and grading are also key steps in post-harvest handling. Before packing for distribution, Bananas should be sorted based on size, shape, color, and ripeness. Fruit packaging materials must be sturdy enough to protect the fruit during transportation while allowing proper ventilation.

Expected Banana Yield

The yield of Bananas can vary depending on various factors such as the variety grown, climate conditions, soil fertility, and management practices employed. On average, a well-maintained Banana plantation can produce around 30-40 tons of fruit per hectare annually. However, this number can fluctuate based on how effectively the farmer implements proper irrigation, fertilization, pest control measures, and crop management techniques.

In case you missed it: Yelakki Banana Farming in India: Production and Cultivation Management Practices
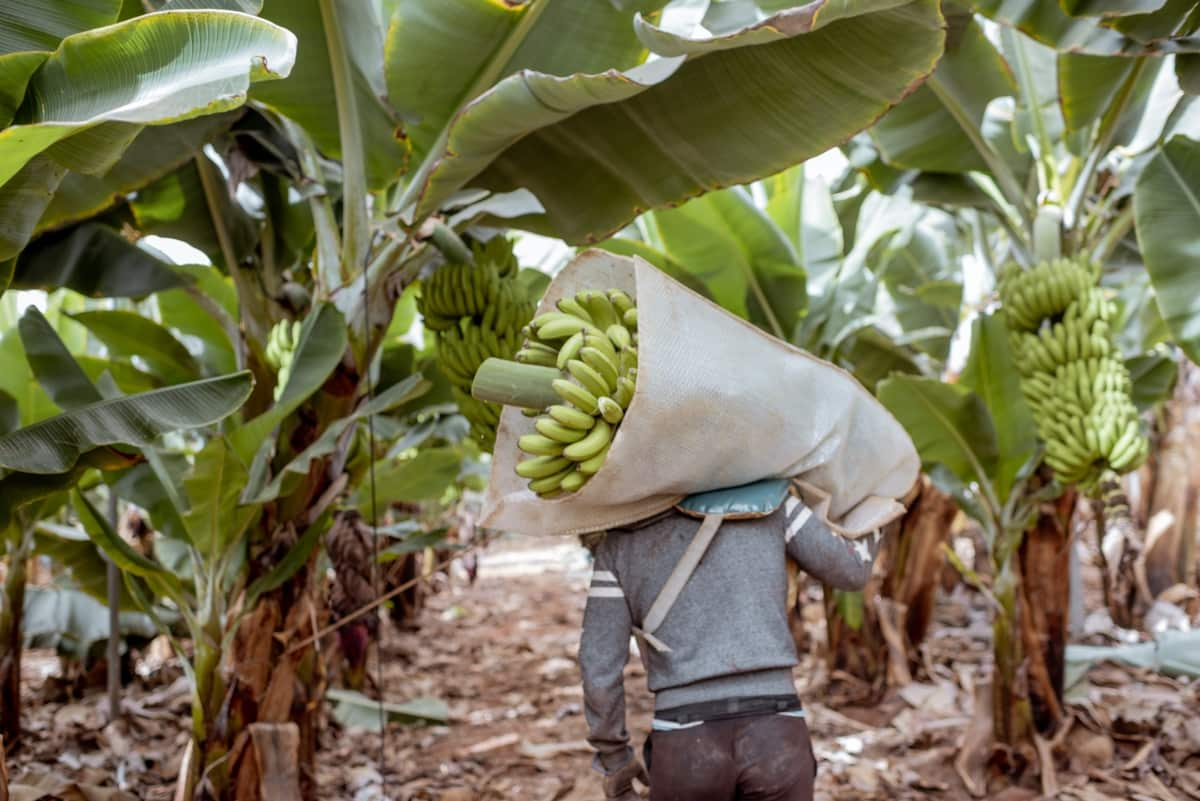
Harvesting on The Banana Plantation

Factors like choosing high-yielding Banana varieties and adopting sustainable agricultural practices can significantly impact the final yield. Additionally, timely harvesting and post-harvest handling play a vital role in ensuring maximum productivity from a Banana farm.

Tips to Boost Banana Yield

Firstly, ensure proper irrigation practices. Bananas require consistent moisture levels to thrive, so make sure they are adequately watered throughout their growth stages. Additionally, paying attention to fertilization is crucial. Providing the right nutrients at the right time can significantly boost Banana production. Consider using organic fertilizers for a more sustainable approach.

Pruning is another essential aspect of increasing yield. Regularly removing dead or diseased leaves can improve sunlight penetration and airflow, promoting healthier plant growth. Moreover, implementing pest and disease control measures is vital in safeguarding your crop. Be proactive in addressing any issues promptly to prevent yield losses due to infestations.

Marketing and Economics of Banana Farming

Conducting market research can find the best prices and strategies for selling your Bananas. Building strong relationships with local markets, supermarkets, and wholesalers can ensure a steady income stream for your Banana farm. Establishing direct connections with buyers can potentially increase profits and reduce dependency on middlemen. Diversifying your marketing channels by exploring options such as online sales platforms or farmers’ markets can open up new opportunities for reaching consumers directly.

This flexibility in marketing approaches can help boost sales and create a loyal customer base. Monitoring pricing trends, staying informed about industry news, and adapting to market conditions are essential components of successfully navigating the economic aspects of Banana farming. Being proactive and adaptable in your marketing strategies will position your farm for long-term success in the competitive agricultural marketplace. The market demand for Bananas remains strong globally, presenting promising prospects for those involved in commercial Banana production.

Organic Banana Cultivation

Organic Banana cultivation involves growing Bananas without the use of synthetic pesticides or fertilizers. It focuses on natural methods to maintain soil health and protect the environment. By avoiding harmful chemicals, organic farmers promote biodiversity and produce healthier fruits.

In case you missed it: Robusta Banana Farming in India: Cultivation Practices and Production Management
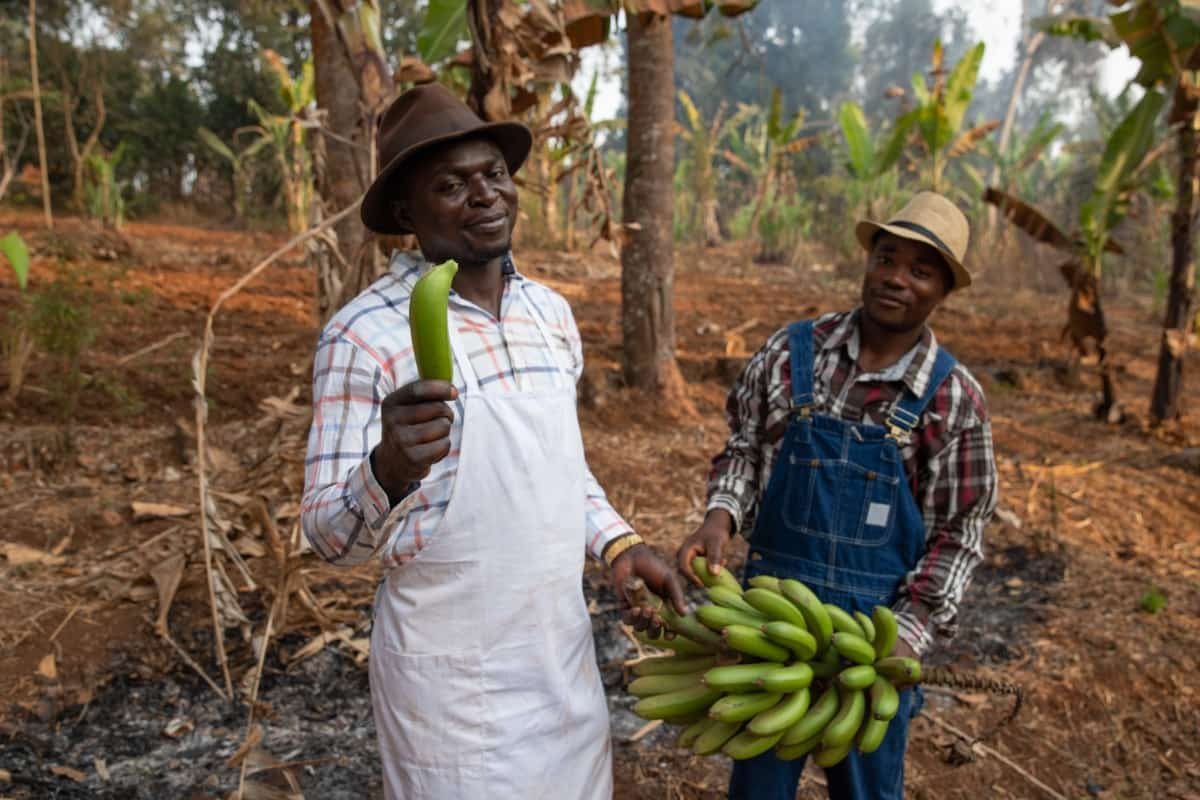
Farmer Holding Bunch of Bananas

To start an organic Banana farm, choose disease-resistant varieties suitable for your climate. Utilize compost and organic matter to enrich the soil, promoting strong root development. Implement crop rotation and intercropping techniques to control pests and diseases naturally. Proper irrigation practices ensure optimal growth without water waste. The plantation should be regularly monitored for signs of pest infestations or diseases, and any problems should be promptly addressed with natural remedies like neem oil or beneficial insects.

Banana Farming Innovations and Technology

One such innovation is precision agriculture, where farmers use drones and sensors to find crop health and optimize irrigation. Another exciting innovation is biotechnology, which has led to the development of disease-resistant Banana varieties through genetic modification. This helps reduce the impact of pests and diseases on Banana crops, ensuring higher yields for farmers.

Furthermore, digital platforms now offer tools for better farm management, from tracking weather patterns to monitoring soil conditions. These technologies empower farmers with real-time data to make informed decisions that maximize productivity. In addition, sustainable practices, such as using biofertilizers and organic pesticides, are becoming more prevalent in Banana farming. 

Following these tips can help you cultivate healthy Banana plants and achieve a fruitful harvest. Remember to choose the right Banana variety suited to your climate and soil conditions, provide adequate plant care and maintenance throughout the growing season, and implement pest and disease management strategies.

Meat Goat farming information Guide in India

Meat Goat farming info Guide in India

Boer - Premium meat goat
Boer – Premium meat goat.

Little about Meat Goat:

Goat meat consumption is very high and growing this as the population grows. This forced farmers to think of better breeds where they can produce more meat commercially in a short time. The goat breeds which are famous for meat production are known as meat goat breeds. Usually, meat goat breeds are mainly raised for their high meat production purpose. There are numerous meat producing goat breeds available throughout the world. Name and characteristics of some highly meat productive goat breeds are described below.

To raise meat goat economically consider these factors in feeding:

  1. Make use of pasture and browse – this will cut down on your feed bill.
  2. When and where to purchase the feed – buy a full year’s supply at one time or purchase as needed?
  3. Make sure you have excellent equipment for storage and feeding. Do not feed goats concentrates on the ground.
  4. Make sure you have adequate feeder space for all animals in a pen to eat at the same time. This will greatly reduce the chance of injuries and miscarriage.
  5. Consider the size of the goats you will have. Larger animals require more floor and feeder space.
  6. Know what stage of production your does are in so you can feed them accordingly.
  7. Separate pregnant does from nonpregnant as they approach kidding.
  8. Make sure all animals have Clean and fresh water at all times – check each day and clean all waters on a regular basis.
  9. Ideally, sweep feeders each day.

If you decide to start a meat goat farming, where you get your starter herd is critical. Be sure to purchase healthy animals. Also, don’t buy on pedigree alone – it is the performance of the goat that counts, not the papers that come with the goat.

Selection factors for meat goat farming:

  1. Educate yourself – visit other goat farms, read books, visit websites, and join goat organizations.
  2. Don’t be bashful – put your hands on the goat!
  3. Check for a sound mouth, two teats, no lumps or sores, healthy feet, no nasal or eye discharge, clean butt, good body condition, size fits with age.
  4. Ask to see the sire and dam.
  5. Ask its birth rank, how it was raised, and vaccines/deworming.
  6. Ask for its pre and postweaning average daily gain.
  7. Ask about their culling practices. Do not buy from a farm that sells everything as breeding stock.
  8. Make sure that they raise goats the way you will be raising them. Don’t buy a pampered show goat and expect it to survive on pasture with minimal care – it will die!
  9. Don’t buy from a sale barn or auction!
  10. EPD’s are just starting in goats.
  11. Start cheap – it’s better to make mistakes on less expensive goats that your high dollar breeding stock.

Meat Goat Breeds in India :

The key traits to be considered in selecting a breed for meat goat production include adaptability to environmental and production conditions, reproductive rate, growth rate, and carcass characteristics.

Famous Meat Goat Breeds : 

The main meat goat breeds in India are Boer, Beetal, Kashmiri, Matou, Angora, and Black Bengal.

  • Boer Goat:

    Meat Goat - Boer
    Meat Goat – Boer.
  • The Boer is a heavier goat that was developed in South Africa. This makes the Boer a good fit for drier climates such as Texas. Puberty is achieved early, at about 6 months for the males and 10-12 months for the females. Usually, a mature Boer buck weights about 110 to 135 kg and a mature doe weights about  90 to 100 kg. Read here for complete Boer profile information.

  • Beetal Goat :

    Beetal Goat -buck
    Beetal Goat -buck.
  • Beetal is a very important meat goat breeds in India and Pakistan. They are like Jamunapari goat. They are very famous for meat and milk production. Basically for meat production. They are mostly available in Panjab state of India and Rawalpindi and Lahore of Pakistan. Beetal goats are small and long in size. Their body color is black or brown with white spots. An adult male goat weights about 65 kg and female 45 kg. Read here about  Beetal Goat Information.
  • Kashmiri Goat:

    Kashmiri Goat - buck
    Kashmiri Goat – buck.
  • Kashmiri goat is another meat goat breeds, originated from Kashmir of India. They are of big sized and become very hardy. Kashmiri goats can tolerate hot weather and their Body color generally white, although you can see ash or brown colored goats. Kashmiri Goat is famous for meat production.
  • Matou Goat: 

    Matou Goat
    Matou Goat.

    Matou goat is one of the highly productive meat goat breeds in India, and they were originated from China. They are generally famous for their high meat production capability. Matou goat’s body is usually white colored and their legs are very long, ears are smaller in size and straight. They will not have any horn. Matou goat does give birth to a pair of baby goat each time

  • Angora Goat:

    Angora Goat - buck
    Angora Goat – buck.

    Angora is another meat goat breeds, and they were originated from China. They are also very popular for mohair production. The body of angora goat is covered with mixed color and they have long and bright hair in their body.angora does give birth to one baby goat each time. This goat breed also suitable for quality mohair production.


  • Black Bengal Goat: 

    Black Bengal Goat - buck
    Black Bengal Goat – buck.
  • Black Bengal goat breed basically originated from Bangladesh. This breed is also available in Assam, West Bengal, Meghalaya, and some other Asian countries. Their meat is very tasty and has a great demand and price in the market. They are very important livestock animal for the rural Bangladeshi poor people. They produce high-quality meat and skin. Black Bengal does give birth to baby goats twice a year, and each time gives birth of up to 2 to 6 baby goats. Their immune power is very higher than other meat and dairy goat breeds. Black Bengal is one of the best meat goats, and their products have a great demand in the world market. They also produce high-quality skin. Read here for a complete profile of Black Bengal goat.

Marketing of Goats:

As Goat meat always in full of demand and shortage in production, It is very easy to market.

Read: Sheep Farming Project Report.

Ultimate Guide to Strawberry Farming for Beginners

13

The scientific name of Strawberry is Fragaria × ananassa, and it belongs to the Rosaceae family. Strawberry farming involves growing these delicious fruits on a commercial or small-scale basis. Strawberries are a high-value crop with a strong market demand, offering great potential for profitability. Additionally, they require relatively little space, making them ideal for small-scale farmers or even backyard growers looking to turn a profit.

Ultimate Guide to Strawberry Farming for Beginners

Planning and Preparation

Start by selecting the perfect location that receives ample sunlight and has well-drained soil. Conduct soil tests to determine its pH levels and nutrient content, ensuring it’s conducive to growing healthy strawberries. Next, invest in high-quality planting materials such as disease-free Strawberry plants from reputable nurseries. Selecting the right varieties suited to your climate and market demand is important for a successful harvest. Prepare all necessary tools and equipment ahead of time, including irrigation systems, trellises for support, and protective covers if needed.

Site Selection and Soil Preparation

Select a Strawberry planting location with full sun exposure to promote healthy growth. Ensure the soil is well-draining, fertile, and slightly acidic for optimal Strawberry production. Perform soil tests to determine its pH level and nutrient content. Make any necessary amendments, like adding compost or organic matter to improve soil structure. Consider factors like water availability and proximity to markets when selecting the site. Properly preparing the soil sets a strong foundation for your Strawberry plants’ growth and productivity.

Choosing Strawberry Varieties

Some popular varieties include Elsanta, known for its high yield and excellent flavor profile. Elvira is another favorite among farmers due to its disease resistance and easy maintenance. Evita is prized for its large fruit size and sweetness, making it a hit with consumers. Flamenco is a versatile variety that performs well in different climates, while Albion boasts exceptional shelf life and firmness.

In case you missed it: How to Control Pests and Diseases in Strawberry Crop: Causes, Symptoms, Chemical, and Biological Management

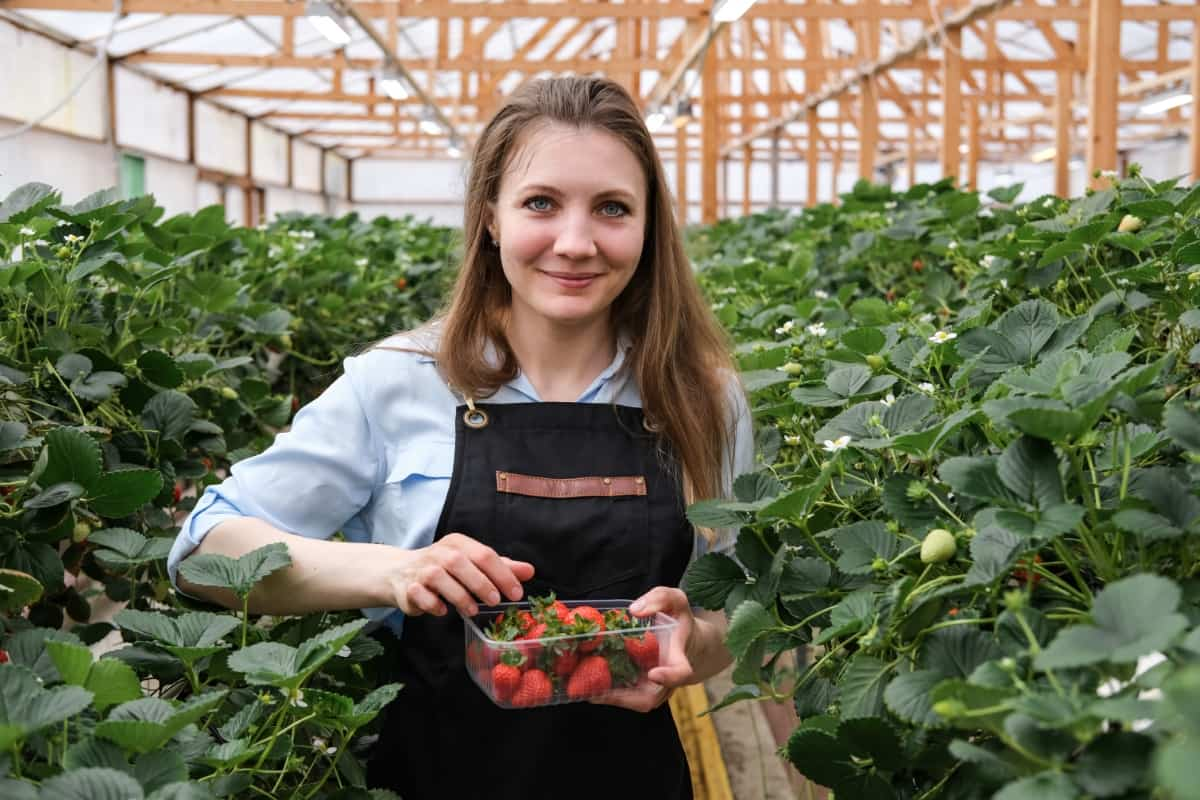
Strawberry Farm

Cabot is known for its early ripening period, which allows farmers to start harvesting sooner in the season. Camarosa is famous for its vibrant red color and juicy texture, which appeal to customers. Cavendish offers excellent disease resistance and adaptability to various growing conditions. Honeoye, Earliglow, Ozark Beauty, Chandler, Jewel Seascape, and Tristar are also popular choices, each with unique qualities.

Planting Techniques and Timing

Ensure you plant your strawberries in well-drained soil with plenty of sunlight. Avoid waterlogged areas that can lead to root rot. Planting should ideally be done in early spring or late summer, depending on your location. Make sure to select healthy seedlings from a reputable source. Next, consider the spacing between each plant. It’s important to give your strawberries enough room to spread out and grow properly. Typically, plants should be spaced about 12 to 18 inches apart in planting rows that are about 2 to 3 feet apart.

Proper soil preparation is also essential for healthy Strawberry plants. The popular method is the hill system, where plants are spaced out in rows with mounded soil. Another technique is the matted row system, allowing strawberries to spread and form dense beds over time. For those looking for a more innovative approach, vertical gardening has gained traction in recent years.

Vertical gardening involves growing strawberries upwards on structures like trellises or hanging baskets, maximizing space and airflow for healthier plants. Additionally, hydroponic systems offer an alternative way to cultivate strawberries without soil by using nutrient-rich water solutions. Don’t forget to water thoroughly after planting and continue regular watering throughout the growing season to keep your Strawberry plants healthy and thriving.

Irrigation and Water Management

Irrigation plays a major role in ensuring healthy plant growth and maximum yield. Proper watering is important to keep the soil consistently moist but not waterlogged. Drip irrigation systems are commonly used in Strawberry fields to deliver water directly to the roots, minimizing wastage and promoting efficient utilization.

Monitoring soil moisture levels regularly is key to adjusting your watering schedule accordingly. Strawberry plants need 1 to 2 inches of water per week, depending on weather conditions and soil type. Mulching around strawberries helps retain moisture and reduce evaporation, especially during hot summer months.

Nutrient Management and Fertilization

Providing the right nutrients at the right time is essential for healthy plant growth and high-quality fruit production. Before planting, conduct soil tests to determine nutrient deficiencies and pH levels. Based on the results, create a fertilization plan tailored to your specific needs. Applying organic matter to the soil to improve nutrient retention. During the growing season, regularly monitor plant health and adjust fertilizer applications accordingly.

In case you missed it: How this Farmer Earning 18 Lakhs from His Strawberry Farm: A Success Story  of a Fruit Farmer in India

Strawberry Field

Balanced fertilizers rich in nitrogen, phosphorus, and potassium are key for vigorous growth and optimal fruit development. Avoid over-fertilizing the Strawberry plants, as it can lead to nutrient imbalances and environmental pollution. Consider using slow-release fertilizers or organic alternatives for sustainable nutrient management practices. Remember, providing adequate nutrition through proper fertilization is vital for maximizing yields and ensuring long-term success in your Strawberry farm.

Pest and Disease Control

It’s important to stay proactive in controlling these threats to ensure a healthy crop. Some common pests you may encounter include aphids, spider mites, and slugs, while diseases like powdery mildew and gray mold can also impact your strawberries. Implementing integrated pest management strategies is key to keeping these issues at bay.

This involves using a combination of cultural practices, biological controls, and chemical treatments. Utilizing beneficial insects, practicing crop rotation, and maintaining proper sanitation in your field are all effective ways to prevent pest and disease outbreaks. It is also essential to regularly inspect your Strawberry plants for any signs of infestation or disease.

Weed Management

Weeds compete with Strawberry plants for nutrients, water, and sunlight, which can significantly impact their growth and yield. To effectively manage weeds in your Strawberry farm, it is essential to implement cultural practices such as mulching to suppress weed growth. Additionally, hand weeding or using mechanical tools can help control weeds without harming the strawberries. Apply organic mulches like straw or black plastic mulch to suppress weed growth.

Remove weeds regularly by hand to prevent them from competing with the crop. Regular cultivation between rows helps to disturb weed growth and prevent them from establishing. Mulching with materials like straw, wood chips, or plastic can also suppress weed growth by blocking sunlight and preventing weed seeds from germinating. Rotating strawberries with other crops can help to disrupt weed life cycles and reduce weed pressure.

Apply cover crops during the off-season can also help to improve soil health. Regular monitoring of the farm for any signs of weed infestation is key to preventing them from taking over. Implementing a proactive approach to weed management will save you time and effort in the long run.

Mulching and Row Covers

Mulching helps to retain soil moisture and regulate soil temperature. It also reduces fruit rot by preventing direct contact between berries and the ground. Mulching involves covering the soil around Strawberry plants with an organic or synthetic material layer. Common materials used for mulching strawberries include straw, pine needles, shredded leaves, plastic mulch, or landscape fabric.

Using organic mulch like straw or pine needles can improve soil structure and increase earthworm activity, promoting healthier plants. Row covers act as a physical barrier against pests while creating a microclimate that accelerates plant growth. They are lightweight, breathable fabrics draped over rows of Strawberry plants. These covers can be made of materials like polypropylene.

In case you missed it: Growing Strawberries Vertically from Scratch: Methods, Tips, and Ideas

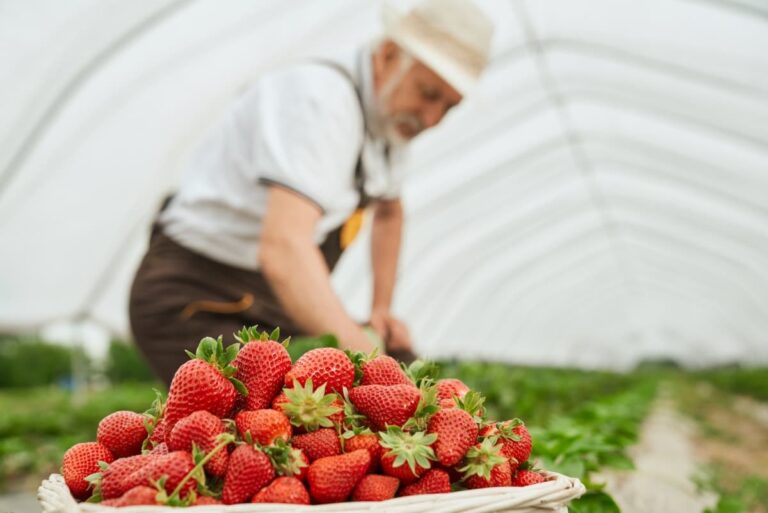
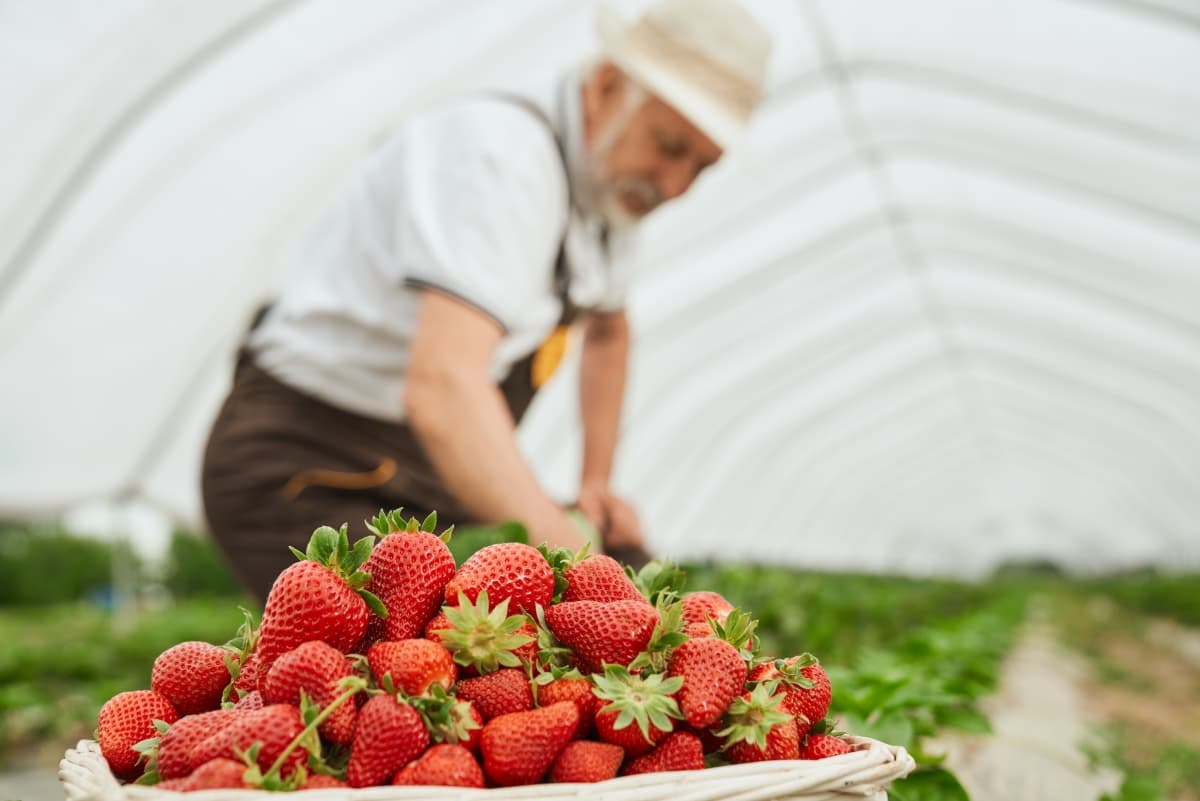
Picking Strawberries in Greenhouse

Row covers can reduce wind damage to plants by acting as a windbreak, preventing desiccation and physical damage to foliage. They can also be designed with openings or removed during flowering to allow bees and other insects to pollinate them. By covering rows with materials like floating row covers or plastic film, farmers can protect their crops to extend the growing season. This practice not only enhances yield but also minimizes the need for chemical pesticides.

Pruning and Runner Management

Pruning helps maintain plant health and productivity by removing old or diseased foliage. It also encourages new growth and improves air circulation within the plants, reducing the risk of diseases. Monitor your Strawberry plants for the formation of runners. Runners are long stems that emerge from the mother plant and produce new daughter plants at their nodes.

To propagate new plants, choose the healthiest and strongest runners. Look for runners with vigorous growth and well-developed roots. Proper pruning techniques involve cutting back excess runners and maintaining a compact plant structure. This process enhances fruit quality and simplifies harvesting by keeping the plants neat and organized.

When managing runners, it’s essential to control their spread to prevent overcrowding and ensure each plant receives adequate nutrients. By redirecting the runners or trimming them back, farmers can promote stronger root development and higher fruit yields. Effective runner management involves monitoring their growth regularly and taking timely action to prevent them from monopolizing space in the field.

Harvesting and Post-Harvest Handling

Harvesting strawberries is a rewarding task that requires careful attention to detail. When the fruits are ripe, it’s time to gently pluck them from the plants, being careful not to damage the delicate berries. Harvest strawberries when fully ripe, typically 4-6 weeks after flowering. Ripe berries will have a vibrant color and firm texture. Handle strawberries carefully to avoid bruising and damage, as they are delicate fruits.

In case you missed it: Top 20 Steps to Boost Strawberry Yield: How to Increase Strawberry Production

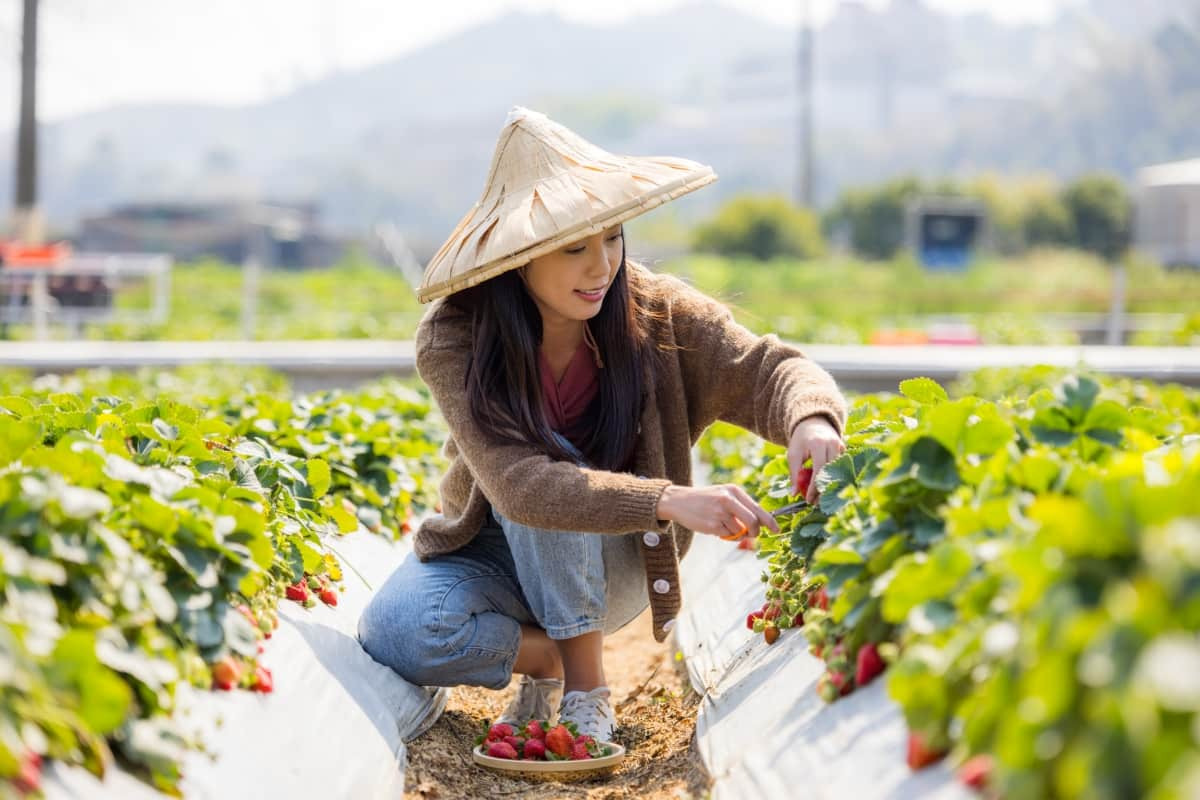
Harvesting Ripe Red Strawberry

Post-harvest handling is important for maintaining the fruit quality and freshness. Proper storage in cool temperatures can help prolong their shelf life and preserve their flavor. Sorting through the harvested fruits ensures that only top-quality berries make it to market. Packaging plays a key role in presenting strawberries attractively to consumers. Whether they’re sold fresh at farmers’ markets or processed into jams and preserves, packaging should be eye-catching and informative.

Marketing and Sales Strategies

Utilize social media stages like Instagram and Facebook to showcase your fresh strawberries in all their vibrant red glory. Connect with local farmers’ markets or grocery stores to establish partnerships and expand your reach. Consider hosting pick-your-own Strawberry events on your farm to attract families looking for a fun weekend activity. Create eye-catching packaging for your strawberries that stands out on shelves and entices customers to choose yours over others.

Offer promotions such as discounts for bulk purchases for returning customers. Don’t underestimate the power of word-of-mouth marketing—encourage customers to spread the word about your delicious strawberries. Explore online sales opportunities through e-commerce platforms or delivery services to reach a wider audience beyond your local area.

Sustainability Practices in Strawberry Farming

Sustainability practices in Strawberry farming are crucial for ensuring the health of both the environment and the business. By implementing sustainable methods, farmers can reduce their environmental impact while also improving crop quality. The key practice is integrated pest management (IPM), which involves using natural predators and organic pesticides to control pests instead of harsh chemicals. This not only protects beneficial insects but also reduces chemical residues on strawberries.

In case you missed it: How To Start Strawberry Gardening, Tips, Ideas

Strawberry Plants

Drip irrigation systems help conserve water by delivering it directly to the plant root, minimizing waste, and promoting efficient water usage. Additionally, crop rotation can help prevent soil erosion and nutrient depletion, maintaining soil health for future seasons. Implementing cover cropping techniques naturally reduces weed pressure while adding organic matter back into the soil. These sustainable practices benefit the farm and contribute to a healthier ecosystem overall.

Technology and Innovation in Strawberry Production

With advancements in agricultural technology, Strawberry production has become more efficient and sustainable. The innovative practice is the use of precision agriculture techniques, such as drones and sensors, to monitor crop health and optimize irrigation. These tools help farmers make data-driven decisions to improve yield and quality. Additionally, vertical farming systems have gained popularity in Strawberry cultivation. By growing strawberries vertically in stacked layers, farmers can maximize space utilization while reducing water consumption.

Genetic engineering is important in developing new Strawberry varieties with improved resistance to plant pests and diseases, as well as enhanced flavor profiles. Furthermore, precision agriculture techniques such as soil sensors and GPS-guided machinery allow growers to tailor their farming practices according to specific field conditions. This level of customization not only enhances efficiency but also minimizes resource wastage, making Strawberry farming more sustainable in the long run.

Digital platforms enable farmers to track their production processes, manage inventory efficiently, and connect with buyers directly for streamlined sales transactions. Strawberry farming can be a lucrative and rewarding venture for beginners. Like any agricultural endeavor, it requires careful preparation to ensure success. It involves systematically cultivating these delicate fruits to ensure optimal growth and yield. 

Profitable Potato Farming: Essential Tips and Strategies for Success

15

Potatoes, scientifically called Solanum tuberosum, are a versatile and beloved crop that belongs to the nightshade family (Solanaceae). They are primarily cultivated for their nutrient-rich and starchy tubers that serve as a staple food in many cuisines worldwide. Potato farming has become an essential agricultural practice globally due to the high demand for this versatile crop. 

Profitable Potato Farming

Commercial Potato Varieties

There are numerous varieties available, each with its unique characteristics and suitability for different growing conditions. Some popular commercial Potato varieties include Russet Burbank, known for its high yields and excellent storage capabilities. Yukon Gold is favored for its buttery flavor and golden skin, making it a favorite among chefs and consumers alike. Red Pontiac is another well-known variety recognized for its vibrant red skin and versatility in culinary applications.

Other popular varieties are Red Norland, Purple Majesty, Adirondack Blue, German Butterball, Bintje, Maris Piper, Charlotte, Desiree, etc. Kennebec potatoes are a reliable choice for those looking for early maturing options, with their smooth skin and white flesh. On the other hand, All Blue Potatoes stand out with their striking blue-purple skin and rich, nutty flavor profile.

Understanding Soil Requirements

Potatoes thrive in well-drained, loose, and fertile soil with a pH range of 5.0 and 6.5. This slightly acidic environment provides the ideal conditions for tuber development. Before planting Potatoes, it’s essential to conduct a soil test to assess their nutrient content and pH levels accurately. To ensure optimal growth, you can amend the growing soil by adding organic matter or fertilizers.

Potatoes require a good soil structure to allow tubers to develop without restrictions. Compacted soils can hinder root growth and lead to misshapen or undersized Potatoes. Regularly aerating the soil through tilling or other methods helps maintain proper drainage and air circulation.

Preparing the Land for Planting

It is a crucial step in successful Potato farming. The first step is to choose a well-drained field with fertile soil. Clear any debris, rocks, or weeds from the area to ensure optimal growing conditions. Next, plow and harrow the land to break up clods and create a fine seedbed. This helps with root penetration and water absorption. Consider conducting soil tests to determine nutrient levels and pH balance for proper fertilization later on.

In case you missed it: Weed Management in Potato: Common Weeds of Potato and Herbicides Safe for Use on Potatoes

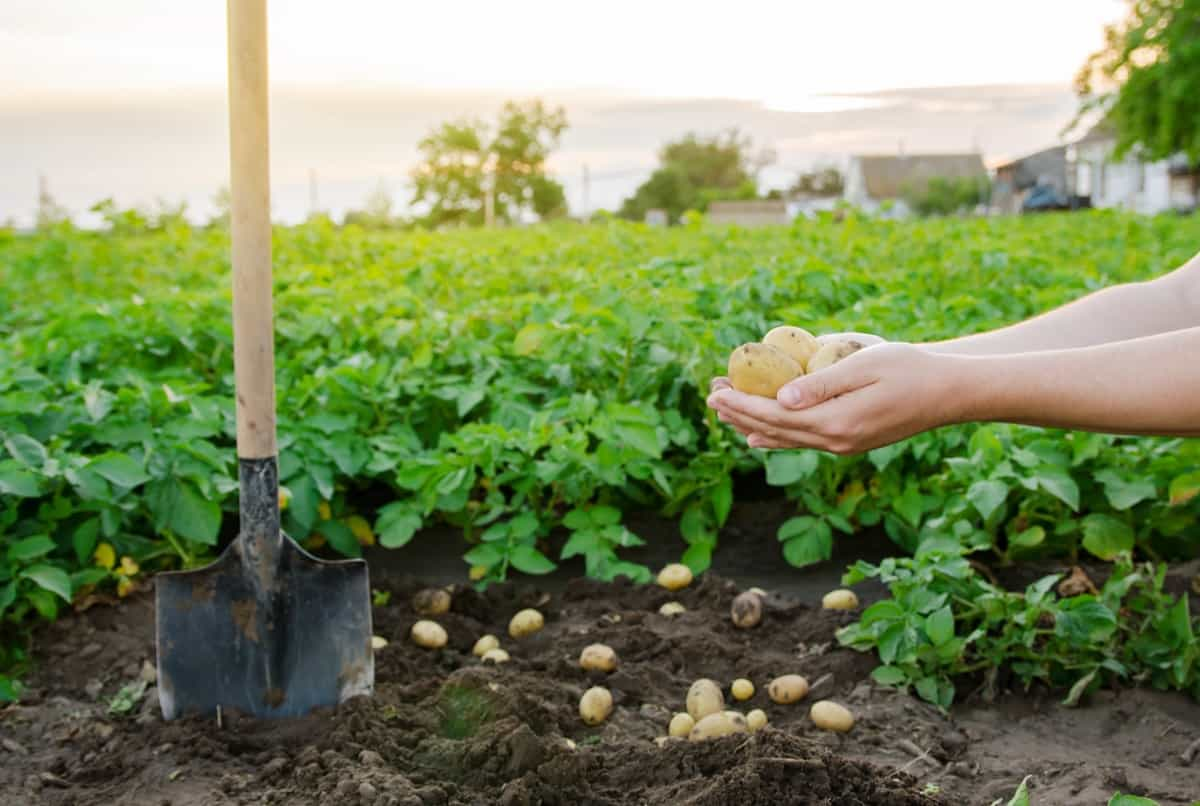
Harvesting potatoes on farm plantation

Once the soil is prepared, create ridges or furrows where you’ll plant your seed Potatoes. Ensure proper spacing between rows to allow for adequate growth space and airflow. Properly tilled soil will promote healthy tuber development throughout the season.

Planting Techniques and Timing

Potatoes are typically planted in early spring when the soil temperature reaches around 10°C. This is the optimal time for Potatoes to establish their roots and start growing. Before planting, make sure to prepare the soil by tilling it thoroughly and removing any debris or weeds. Potatoes thrive in loose, well-drained soil.

For planting, cut seed Potatoes into pieces with at least one eye each, allowing them to dry out before planting. Please place them in rows about 12 inches apart and cover them with soil. It’s essential to monitor weather conditions closely after planting to ensure proper growth. Adequate moisture is key during this stage, as dry conditions can hinder sprouting.

Watering and Irrigation Practices

Potatoes require consistent moisture levels to thrive, especially during the tuber formation stage. It is important to check soil moisture and adjust watering practices accordingly. Proper irrigation techniques can help prevent issues like cracking in Potatoes. Drip irrigation or soaker hoses are efficient methods that deliver water to the plant roots, reducing water wastage and promoting healthier growth.

Avoid overwatering the Potato plant as it can lead to diseases like late blight and rotting of tubers. On the other hand, underwatering can result in reduced yields and smaller tubers. Finding the right water balance is key to maximizing your Potato harvest. Consider some factors such as weather conditions, soil type, and plant growth stage when determining your watering schedule. By providing adequate hydration to your Potato plants, you can ensure a bountiful harvest at the end of the season.

Fertilization Strategies

Fertilization plays a crucial role in ensuring healthy crop growth and maximizing yields. Potatoes have specific nutrient requirements, with nitrogen, phosphorus, and potassium being essential elements for their development. Farmers need to carefully plan their fertilization strategies based on soil tests and the requirements of the Potato variety being grown. Applying organic matter like compost or manure can help improve soil structure, providing a gradual release of essential nutrients throughout the growing season.

In case you missed it: High-Yielding Potato Varieties in India: Hybrid Cultivars for Increased Profits

Fresh young potatoes in a potato farm

Additionally, using balanced chemical fertilizers at different stages of plant growth can supplement any nutrient deficiencies in the soil. Over-fertilizing can lead to nutrient imbalances and environmental pollution, so farmers need to follow recommended application rates and timings. Regular monitoring of plant health and adjusting fertilization practices accordingly is key to successful Potato cultivation.

Weed Management

Weeds compete with the Potato plants for nutrients, water, and sunlight, which can significantly reduce yield. To control weeds effectively, farmers can implement various strategies. One common method is manual weeding, where farmers physically remove weeds by hand or using tools like hoes. This technique is labor-intensive but can be effective in smaller fields. Another approach is mulching, which involves covering the soil around the Potato plants with organic materials like straw or grass clippings to suppress weed growth.

Mulching not only helps in weed control but also improves soil health. Using herbicides is another option for controlling weeds in larger-scale operations. However, it’s essential to select herbicides carefully to minimize negative impact on the environment and non-target plants. Implementing these methods based on the farm size and resources available can help farmers effectively manage weeds and ensure a successful Potato harvest.

Pest and Disease Control

These issues can significantly impact crop yield and quality if not managed effectively. The main strategy for pest control is to monitor the Potato plants for any signs of infestation regularly. By identifying problems early on, farmers can take prompt action to prevent further damage. Common pests include Potato beetles, aphids, and nematodes. These pesky insects can quickly multiply and wreak havoc on your crops if not properly managed.

Diseases like late blight and early blight are also common threats to Potato plants. Late blight is a fungal disease that thrives in humid conditions, causing dark lesions on leaves and tubers. Early blight, another fungal infection, leads to brown spots on lower leaves, which can spread rapidly if not treated promptly.

In case you missed it: Sweet Potato Fertilizer Requirements and Recommendations: Management Practices for Optimal Yield

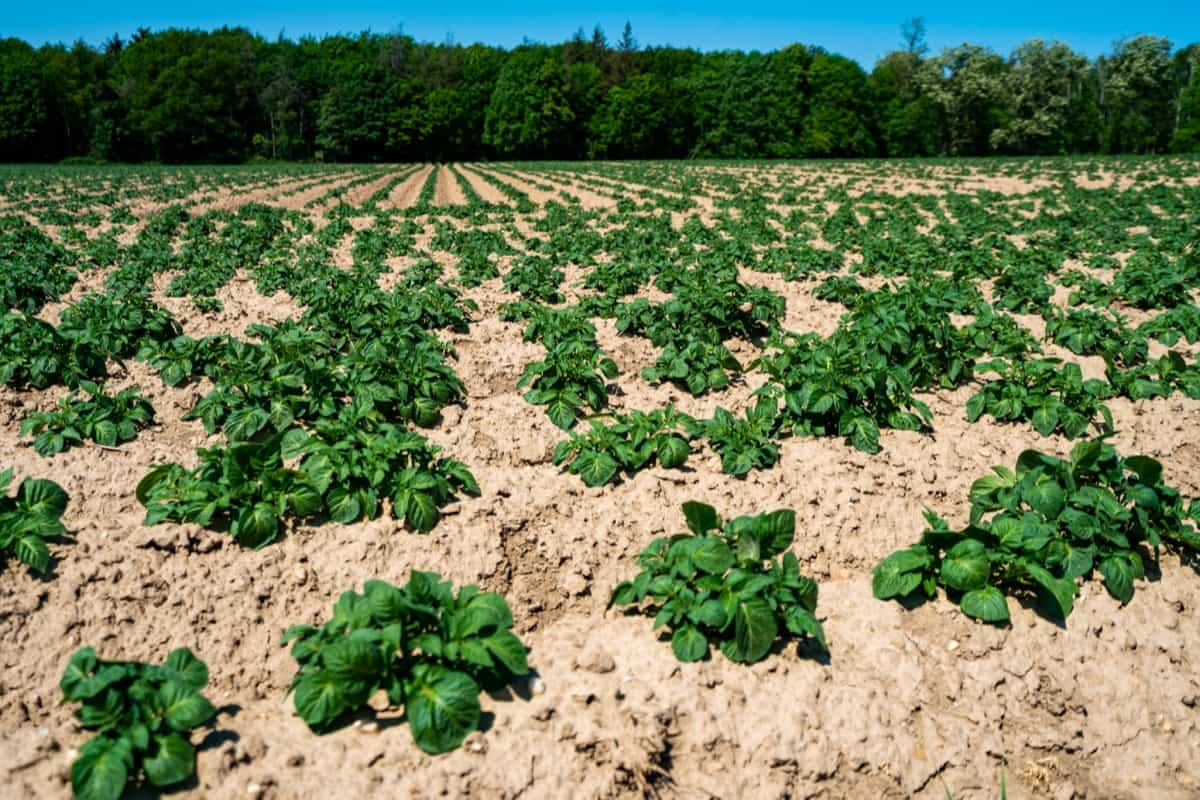
Young potato plants in a row

Implementing integrated pest management practices is essential in controlling pests while minimizing environmental impact. This approach involves using cultural, biological, and chemical methods to keep pest populations in check. For example, rotating crops can help disrupt the lifecycle of certain pests, while introducing beneficial insects can naturally control harmful ones.

When it comes to disease control, maintaining good hygiene practices, such as removing infected plant material and sanitizing tools between uses, can help prevent the spread of pathogens. Additionally, choosing disease-resistant Potato varieties can provide an added layer of protection against common infections.

Growth Monitoring and Care
Once your Potatoes are planted, it’s crucial to monitor their growth and provide the care they need to thrive. Regularly inspect your crops for any signs of nutrient deficiencies or pest infestations. Keep an eye on the development of the plants and adjust your watering and fertilization practices accordingly. Ensure that there is adequate spacing between the Potato plants to allow for proper air circulation.

This helps prevent diseases such as blight from spreading. As the plants grow, gently mound soil around them to protect developing tubers from exposure to sunlight. Regularly check soil moisture levels by inserting your finger into the ground near the roots. Water consistently but avoid over-saturation, as this can lead to rotting. Implement a schedule for weed control to reduce competition for nutrients and water.

Harvesting Techniques

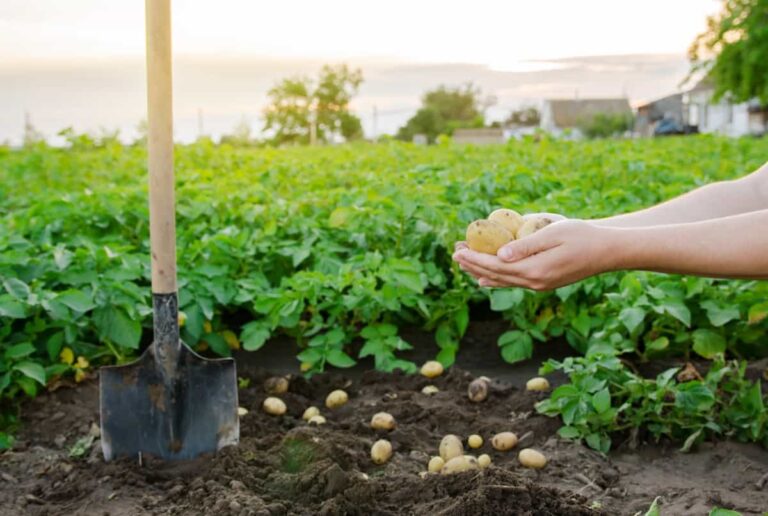
When the plants have reached maturity, it’s time to harvest the tubers. Start by loosening the soil around the Potato plant with a fork or spade to avoid damaging the Potatoes. Carefully lift the Potatoes from beneath the soil, making sure not to bruise or cut them during harvest. Take your time to gather all the tubers from each plant while being mindful of their delicate nature.

Once harvested, allow the Potatoes to dry on top of the soil for a few hours before storing them. Proper harvesting techniques help preserve the quality and shelf life of your Potato crop. Remember, a successful harvest sets the stage for profitable Potato farming endeavors.

Average Yield

The average Potato yield per acre can change based on soil quality, weather conditions, and cultivation practices. On average, a well-maintained Potato farm can produce anywhere from 15 to 30 tons per acre. This figure may fluctuate based on your location and the specific variety of Potatoes you are growing. Proper irrigation, fertilization, weed management, and pest control play crucial roles in determining your final yield. Monitoring the growth of your Potato plants throughout their lifecycle is essential for maximizing productivity.

Post-Harvest Handling and Storage

After the Potatoes are harvested, it’s crucial to store them to extend their shelf life. Post-harvest handling involves sorting out damaged or diseased tubers, separating different sizes for market preference, and cleaning any dirt or debris. Storing Potatoes in a cool and well-ventilated environment is essential to prevent sprouting and rotting. Ideally, they should be stored in a root cellar or a basement that maintains a consistent temperature of around 7-10°C. Avoid storing them near fruits that release ethylene gas, as this can accelerate spoiling.

In case you missed it: Organic and Chemical Solutions to Get Rid of Potato Scab: Symptoms, Causes, and Treatment

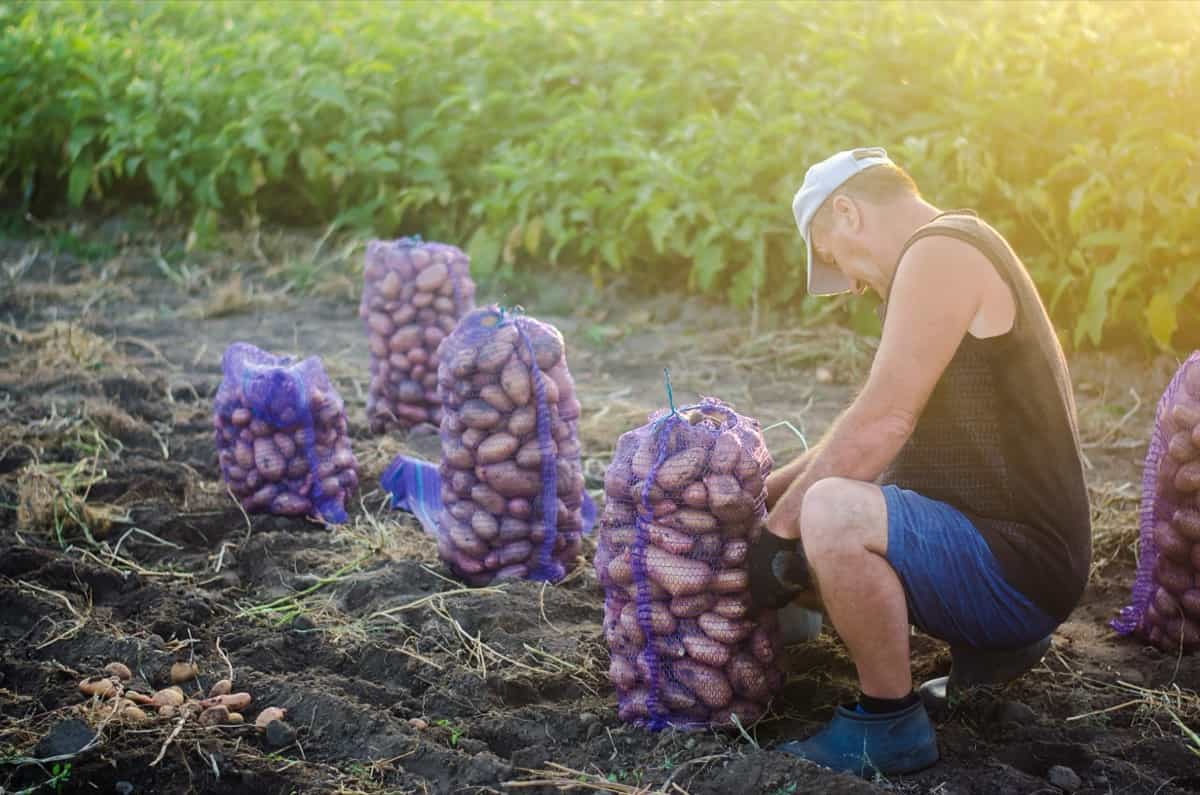
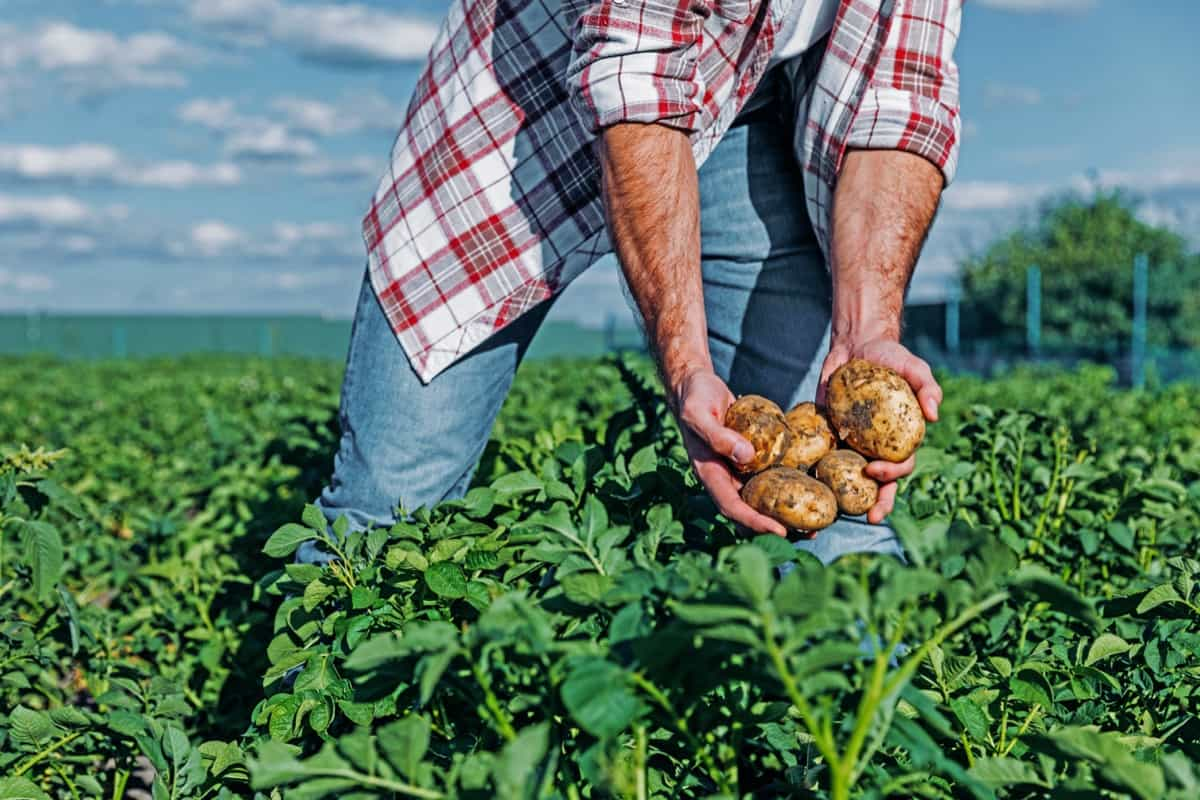
Freshly harvested potatoes

Proper storage containers like burlap sacks or perforated plastic bags help maintain the right humidity levels while allowing air circulation. Check stored Potatoes for any signs of decay or sprouting, and remove any affected ones promptly to prevent further spoilage.

Cost of Cultivation

Potato farming can be a lucrative venture, but it’s essential to have a clear understanding of the cost of cultivation per acre. The cost of Potato cultivation per acre can change based on factors such as location, agricultural practices, inputs used, labor costs, and market conditions. The cost of Potato cultivation per acre can range from Rs. 40,000 to Rs. 60,000 or more, depending on various factors.

Expected Profits

Potato farming can be a lucrative venture, with the potential for significant profits per acre. In India, the profit margins vary depending on factors like market prices, yields, and input costs. On average, farmers can expect to make anywhere from Rs. 50,000 to Rs. 1 lakh per acre through Potato cultivation. The key to maximizing profits lies in efficient management practices and strategic decision-making throughout the farming process.

By optimizing resources such as water usage, fertilizers, and pest control methods, farmers can increase their yield and, ultimately, their earnings. Farmers need to stay informed about market trends and demand fluctuations to capitalize on favorable selling opportunities. Additionally, investing in quality seeds and adopting modern farming techniques can lead to higher productivity levels and, consequently, higher profits at harvest time.

Sustainability Practices in Potato Farming

Sustainability is important for the long-term success of your Potato farm. Implementing sustainable ways not only benefits the environment but also improves the quality of your produce. The key practice is crop rotation, which helps to reduce the risk of Potato plant pests and diseases. Rotating Potato crops with other crops helps to reduce the risk of diseases and pests.

Implementing soil conservation techniques such as minimum tillage or conservation tillage helps reduce soil erosion, improve soil structure, and retain moisture. Mulching with organic materials also helps conserve soil moisture and suppress weeds. IPM strategies involve the use of biological controls, resistant plant varieties, crop rotation, and the use of pesticides to manage Potato plant pests and diseases while minimizing environmental impact.

In case you missed it: Cost of Cultivation of Potato Per Acre in India: Exploring from Seed Costs to Market Charges

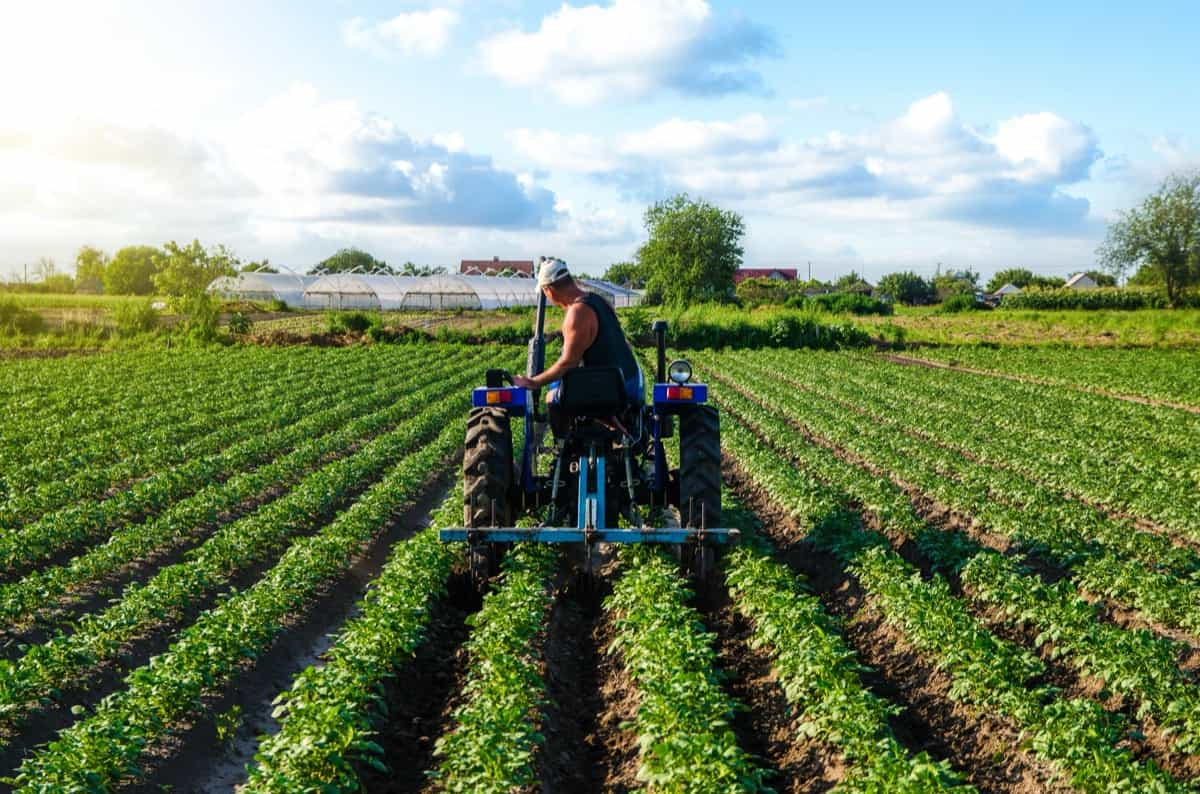
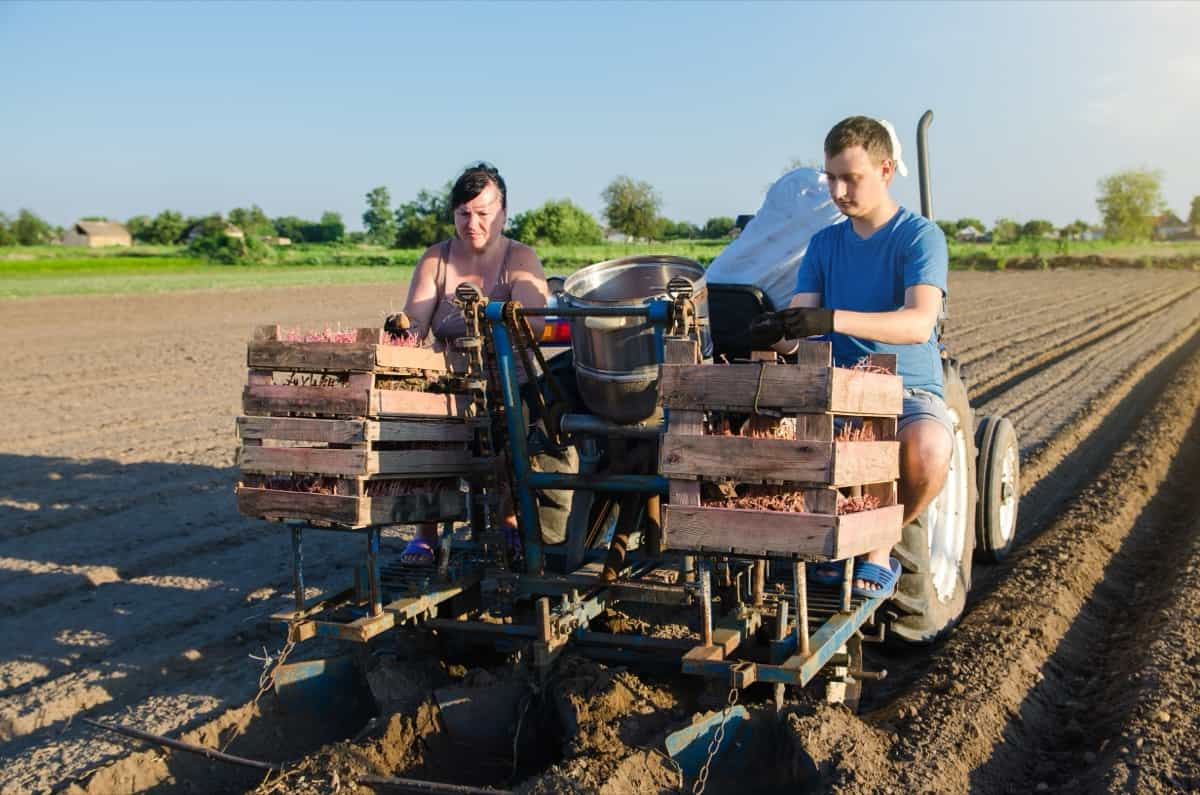
planting potatoes in a farming using automatic planting machine

Using organic fertilizers and avoiding chemical pesticides can help preserve the natural balance of ecosystems on your farm. Water management systems such as drip irrigation can conserve water resources while ensuring optimal growth conditions for your Potatoes. Also, applying renewable energy sources like solar power can lower operating costs on your farm.

Overall, by implementing these farming practices, Potato farmers can contribute to the long-term viability of Potato farming systems. Potato farming plays a crucial role in the agricultural industry, serving as a staple food for many around the world.

Rabbit Farming, Rearing – A Complete Project Guide

Rabbit Farming/Rearing & Project Guide for Beginners:

The following article details about “Rabbit Farming” or  “How to start a Rabbit Farm”.

Rabbit Farming
Rabbit Farming.

Little About Rabbit farming:

It can be a sustainable way to provide protein-rich high-quality meat to a family.  There is little space needed as opposed to a cattle farm, and from a small investment, a rabbit farm can create a decent income, even part-time.  Rabbits can be bred for their meat and also their hide and fur to make clothes or other items.

Rabbit production business is for anyone with the desire to raise livestock for a living.  A farmer with no land will enjoy this trade as little space is required.  Young adults not sure which path to take educationally can benefit from farming life.  A stay at home mother can tend to the rabbits and keep her children entertained at the same time.

There are two ways to rear the rabbits.   Both systems need a shed or shelter to protect the rabbits from predators and the elements.  A Deep Litter System is used when rearing a small number of rabbits.

Rabbit raising the scope and its national importance:

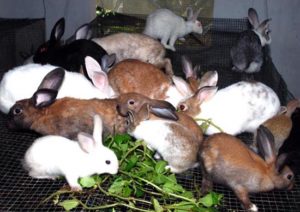
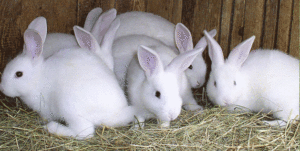
Rabbit production is another livestock activity with great scope as it is relatively easy, rewarding and takes little space compared to other livestock activities. Rabbit production can also provide a very valuable additional source of income in the hilly areas where opportunities for employment are very limited. Another important consideration is the food production cycle, which shows that the rabbit need not be in competition with a man for its food. For producing high-quality woolen, blending with other fine quality fibers is essential, which are produced in limited quantity in our country. Therefore, currently, we are importing the fine wool. The wool from Angora Rabbits is of very high quality and it’s blending with carpet wool of sheep and silk improves the quality of woolen to a great extent. Rabbit production is affordable.  It does not take many rabbits to start a farm.  They are excellent breeders and the farm will grow steadily with about 8-12 rabbits per litter.  Rabbits are easily fed with available greens from around the yard and waste vegetables and grains from around the house.  If compared to other meats, rabbit meat contains more protein and less fat than most.  It can be fed to small toddlers and aging adults because it is easy to digest.

Rabbit Farming Importance.

Read: How to Make Rosemary Oil.

Main Advantages of Rabbit farming:

  • Rabbits are highly prolific and a good female can produce 25 to 30 kits (young ones) per year.
  • Rabbits can be reared in small groups (up to 50 nos.) in the kitchen garden/backyard of farmer’s house with kitchen waste as feed. Family labor is adequate to take care of the labor requirements of the unit. The initial investment cost is low.
  • Quick returns i.e. within six months after the establishment of the farm.
  • Rabbit meat is rich in poly-unsaturated fatty acids and is categorized as white meat.
  • Rabbits are the best producers of wool on per kg body weight basis. They require 30 % less digestible energy to produce one kg of wool as compared to sheep.
  • Income generation at quarterly interval makes the repayment easy.
  • Apart from providing wool, rabbits also provide income from the sale of kits, meat, pelt, and manure.
  • Residual feed, together with rabbit manure is highly suitable for vermicompost which in turn provides excellent manure for fertilizing the agriculture fields.
  • Rabbit wool is 6 – 8 times warmer than the contemporary sheep wool. It can be mixed with silk, polyester, rayon, nylon, sheep wool and other fibers to make good quality handlooms as well as hand knitted apparels.
  • Rabbits consume a large amount of forage from diverse origins and hence, can be reared on roughage with very less quantity of costly concentrate feed.

Popular Rabbit Breeds:

There are numerous breeds available throughout the world. Some of them are highly productive. Some breeds are very suitable for farming in India according to our weather. Most productive and suitable rabbit breeds are listed below. You can choose any of those breeds.

  1. White Giant
  2. Grey Giant
  3. Flemish Giant
  4. New Zealand White
  5. New Zealand Red
  6. Californian
  7. Dutch
  8. Siviet Chinchilla.

Farming/Raising Methods:

Rabbits can be raised in both the deep litter system and cage system. You can easily make a small shed at the backyard with a very small investment. Good housing or shed is necessary for keeping the rabbits free from weather conditions, rain, sun and various types of predators like dogs or cats, etc.

A Black Rabbit.
A Black Rabbit.

Read: How to Make Lemon Grass Oil.

Feeding  of Rabbits

Good feed always ensures good health and proper growth. So, always try to feed your Rabbits with high quality and nutritious food. Rabbits can eat and consume all types of grains, legumes and green fodders like Lucerne, Agathi, Desmanthus and various types of kitchen wastes including carrots, cabbage leaves, and other vegetable wastes. In case of raising rabbits by feeding concentrate food, try to provide them some green food. For 1 kg body weight of rabbit, you can feed them about 40 grams of concentrate food and 40 grams of green food. Along with good and nutritious food try to provide them sufficient amount of fresh and clean water according to their demand. See full rabbit feeding management.

Breeding of Rabbits

Rabbits become suitable for breeding within their 5 to 6 months of age. You should use male rabbits for breeding purpose at their 1 year of age to get quality young rabbits. Always use healthy rabbits for breeding with proper age and body weight. Take extra care of the male rabbit used for breeding purpose and take good care of pregnant rabbits.

Rabbit Care and Management:
For better production, you must have to take good care of your animals. Generally, diseases are less in rabbits. Healthy rabbits become very active with a shiny hair coat. But if anyhow something goes wrong, then you have to take necessary steps immediately.

Marketing of Rabbits:

Marketing is still a big problem for commercial rabbit production in India. Although various govt. and non-govt. organizations are inspiring rabbit farming business. But the marketing problem is not still solved. Rabbit meat has good demand in some areas. You can try your local market and think about exporting in foreign countries.

Why Angora Rabbits are best for Farming?

Angora rabbits are mainly raised for their wool, which is known for its quality. Angora rabbits have their origin from Angora Province of Turkey from where they were taken to different parts of the world and various types of angora rabbits were evolved. The differences between these types of angora are mainly in the amount of wool produced and the percentage of guard hair in the wool. Among the various types, German Angora is the best and annually yields 1000 to 1800 gm of wool under ideal management practices. Angora rabbits require temperate climate and can be adapted to any set of circumstances right from a kitchen garden to a large intensive commercial enterprise. They produce 6.4 times more wool than sheep on per kg body weight basis and do not require vast grazing land. The wool produced by rabbits is the finest, lightest and warmest among all animal fibers and is preferred for manufacturing of high-value woolens which have got very good export potential. Rabbit wool also has medicinal properties and its garments are recommended in arthritis due to its electrostatic properties.

Now, We put down the Project Report in Angora Rabbit Farming:

Angora Rabbit Farming
Angora Rabbit Farming.

1) Financial assistance is available from banks/NABARD for Rabbit farming business in India.

Read: How to Find the Age of Farm Animals.

Bank loan Sanction and its disbursement:

After ensuring technical feasibility and economic viability, the scheme is sanctioned by the bank. The loan is disbursed in stages against the creation of specific assets such as the construction of sheds, purchase of equipment and animals. The end use of the fund is verified and constant follow-up is done by the bank.

Repayment Period of Loan:

Repayment period depends upon the gross surplus in the scheme. The loan will be repaid in suitable quarterly/half yearly/annual installments usually within a period of about 6-7 years with a grace period of one year. Quarterly repayments are preferred in angora units as the income is frequent and the interest burden on the borrower is reduced.

Insurance:

The animals may be insured annually or through long term master policy, where ever it is applicable. You can google it to see who are covering the rabbits.

A Wild Rabbit.
A Wild Rabbit.

Model Project Cost and Economics of Rabbit farming:

Project cost for a model of 10 female and 3 male Angora rabbits with economics is taken in this project.

Read: Laying Birds Care and Management.
Project Cost of Rabbit Farming table:
Sr.No. Particulars (Amount in Indian Rupees)
1 Cost of breeder shed 24150
2 Cost of wool rabbit shed 44850
3 Cost of cages  
(i) Breeders 9750
(ii) Kindling cages 5250
(iii) Wool producer cages 81250
4 Feeder and waterers 3000
5 Miscellaneous equipment 2000
6 Cost of breeders 13000
7 Insurance of breeders 1170
A Capital cost 184420
  Recurring Expenses (one-year expenses capitalized)  
8 Cost of feed  
(i) Concentrate 35720
(ii) Hay 1186
(iii) Vegetables/kitchen waste 792
9 Water and electricity cost 1440
10 Medicines and miscellaneous expenses 1440
B Recurring expenses 40578
  Total (A+B) 224998
  or say 225000
  Margin (10%) 22500
  Bank Loan 202500
Technical/Economic Parameters of Rabbit Production:
Sr.No. Particulars
1 Breed German Angora
2 Floor space for breeders shed – sqft 210
3 Floor space for wool rabbits shed – sqft 390
4 Cost of construction (/sqft) 115
5 Breeder cages required (No.) 13
6 Kindling cages (No.) 7
7 Wool producers cages (No.) 130
8 Cost of the breeder and kindling cages (/cage) 750
9 Cost of wool producers cages (Rupee symbol/cage) 625
10 Cost of feeders and waterers (/animal) 20
11 Miscellaneous equipment (Rupee symbol/animal) 5
12 Cost of breeders (Rupee symbol /animal) 1,000
13 Insurance – % of breeder cost – for 5 years 9%
14 Salvage value (Rupee symbol/animal) – average 400
15 Depreciation on sheds and equipment (% per annum) 10
16 Margin 10%
17 The gestation period (days) 30
18 Weaning period (weeks) 6
19 Inter kindling period (months) 4
20 Mortality  
(i) Weaners (up to 1.5 months) 10%
(ii) Growers (1.5 to 6 months) 15%
(iii) Adults (above 6 months) per annum 10%
     
21 Feed Consumption (grams per day) Concentrate Hay
(i) Breeding does and males 200 80
(ii) Weaners (1.5 to 3 months) 50 30
(iii) Growers (4 to 6 months) 70 40
(iv) Adults  (above 6 months) 100 75
22 Cost of concentrate feed for the breeder (Rupee symbol/kg) 17  
23 Cost of concentrate feed for others (Rupee symbol/kg) 16  
24 Cost of hay (Rupee symbol/kg) 1  
25 Vegetables and Kitchen waste  
(i) Rupee symbol per grower month 0.75
(ii) Rupee symbol per adult month 1.50
26 Water and electricity (Rupee symbol/animal month) 2
27 Veterinary and miscellaneous expenses (Rupee symbol/animal month) 2
28 Wool production per shearing (gm per rabbit)  
(i) A grower at the age of 3 months 75
(ii) A grower at the age of 6 months 175
(iii) Adult above 6 months 225
29 Shearing of adults is done at quarterly intervals
30 The sale price of wool (Rupee symbol/kg) 1,100
31 To maintain the strength of adult wool rabbits at 130, animals are sold after maintaining them for 18 months.
32 The sale price of rabbits (/animal) 800
33 Income from manure per grower 4
34 Income from manure per adult 8
 Feed /Fodder Consumption:
Year 1 2 3 4 5
Weaner months 180 180 180 180 180
Grower months 204 306 306 306 306
Adult months 180 990 1080 1080 1080
Breeder months 156 156 156 156 156
Wool production (Kg per year):
Year 1 2 3 4 5
Grower – 3 months 8.55 8.55 8.55 8.55 8.55
Grower – 6 months 11.9 17.85 17.85 17.85 17.85
Adults 6.75 67.5 81 81 81
Income and Expenditure Details:
Particulars Year
  1 2 3rd year onwards
Income
Sale of Wool 29920 103290 118140
Sale of Animals 0 46400 69600
Income from Manure 352 932 988
Sub Total 30272 150622 188728
Expenditure
Cost of Feed
Concentrate 35720 78040 82360
Hay 1186 3131 3333
Vegetables / Kitchen Wastes 792 2084 2219
Water & Electricity Cost 1440 3264 3444
Medicines & Misc. Expenses 1440 3264 3444
Sub Total 40578 89783 94800
Gross Surplus 30272 60839 93928
Financial Analysis:
Sr. No. Particulars Year
    1 2 3-6 7
1 Capital Cost 184420      
2 Recurring expenses 40578 89783 94800 94800
  Total capital costs 224998 89783 94800 94800
  Benefits        
3 Income 30272 150622 188728 188728
4 Salvage value of animals       36000
5 The residual value of sheds and equipment       49950
  Total Benefit 30272 150622 188728 274678
  Net Benefit -194726 60839 93928 179878
  Disc Cost @ 15% DF 503830      
  Disc Benefit @ 15% DF 650898      
  NPV 147068      
  BCR 1.29      
  IRR 39.2%

Loan Repayment Schedule:

Year Gross surplus Loan outstanding Interest Principal Total outgo Net surplus
1 30272 202500 24300   24300 5972
2 60839 202500 24300 12203 36503 24336
3 93928 190927 22836 33521 56357 37571
4 93928 156776 18813 37544 56357 37571
5 93928 119232 14308 42049 56357 37571
6 93928 77183 9262 47095 56357 37571
7 93928 30088 3611 30088 33699 60229
Interest Rate:

The interest rates will be decided by banks keeping in view RBI guidelines. However, for working out financial viability and bankability of the model project, we have assumed the rate of interest as 12% p.a.

Security:

Security will be as per NABARD / RBI guidelines issued from time to time.

Read: How to Grow Palakura (Spinach) in Pots.

Unlock the Secrets of Onion Farming: A Step-by-Step Cultivation Guide for Beginners

8

Onions, scientifically known as Allium cepa Linn, belong to the Alliaceae family and are a versatile ingredient used in various cuisines worldwide. Onion farming involves the cultivation of Onions, a versatile vegetable used in various cuisines worldwide. Onion farming provides employment opportunities for many people, supporting rural economies and livelihoods.
Onion Farming

Commercial Varieties of Onions

When it comes to commercial varieties of Onions, there are several options to choose from based on your specific needs and preferences. Some popular choices include Bhima Super, Bhima Dark Red, and Pusa White Flat. Bhima Raj and Bhima Shubhra are also commonly grown varieties known for their high yield potential and disease resistance. Udaipur 102 and Phule Safed are favored for their excellent storage qualities.

Additionally, Agrifound White is a reliable choice for farmers looking for a versatile Onion suitable for various culinary uses. Whatever variety you decide to cultivate, it’s essential to consider some factors, such as market demand, climate conditions, and soil quality, to ensure a successful harvest.  In addition to the Bhima series, other notable commercial Onion varieties include Udaipur 102, Phule Safed, N25791, and Agrifound White.

Soil Preparation and Requirements

Onions thrive in well-draining, fertile soil with a pH level between 5.8 and 6.8. Before planting, ensure the soil is free from debris and weeds that can hinder growth. To prepare the soil, plow or till the land to a depth of about 6-8 inches to loosen it up and improve aeration.  Onions require adequate nutrients like nitrogen, phosphorus, and potassium for healthy growth. Make a soil test before planting to determine any deficiencies and adjust fertilizer applications accordingly. Avoid waterlogged conditions by ensuring proper drainage in the field.

Seed Selection and Planting Techniques

Selecting high-quality seeds is the first step toward a bountiful Onion crop. Opt for certified Onion seeds from reputable suppliers to guarantee good germination rates and disease resistance. Before Onion planting, prepare the soil by tilling it thoroughly and adding organic matter for nutrient-rich conditions. Onions thrive in well-drained soils with good fertility levels.

In case you missed it: Weed Management in Onion Farms: Control with Organic, Mechanical, Biological, and Herbicides

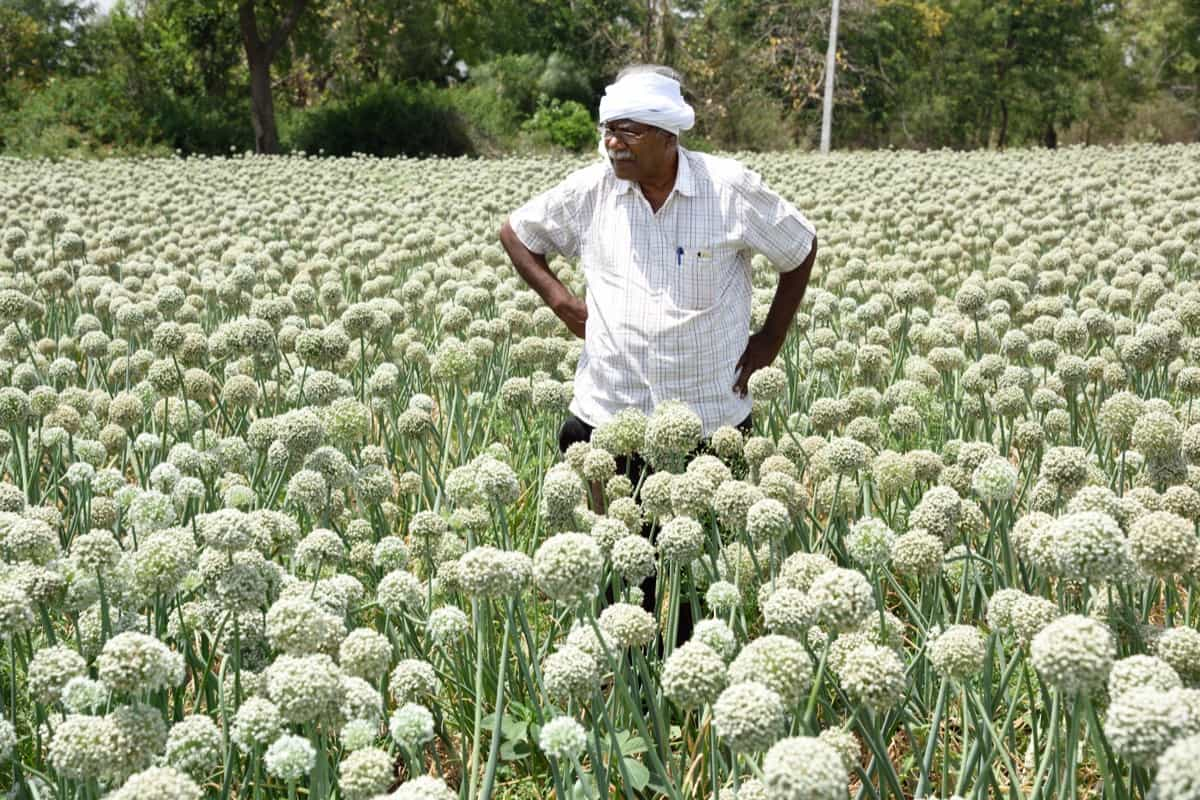
Onion Flowering Stage

Plant the seeds at the right depth around 1/4 inch deep – and space them adequately to allow room for bulb development. Consider using raised beds or rows for efficient cultivation. Ensure consistent watering after planting to support seed germination and early growth stages. Monitor moisture levels regularly to prevent both under-watering and over-watering issues.

Fertilization and Nutrient Management

Properly nourishing the soil ensures healthy growth and high yields. Before planting, it’s essential to conduct a soil test to determine its nutrient levels. Based on the results, you can then tailor your fertilization plan accordingly. Onions require nitrogen, phosphorus, and potassium for optimal growth. Nitrogen is vital for leaf development, phosphorus promotes root growth, and potassium enhances overall plant health.

Organic sources like compost or manure can be used alongside chemical fertilizers to provide a balanced nutrient supply. Applying fertilizers at the right time during different growth stages is key to maximizing crop productivity. Over-fertilizing can lead to environmental issues and reduced yield quality. Therefore, following recommended dosage guidelines is important for sustainable cultivation practices.

Irrigation Methods for Optimal Growth

Onions require consistent moisture levels to thrive, especially during their early stages. Drip irrigation is a popular method used by many farmers as it delivers water directly to the roots, minimizing water wastage and reducing weed growth in the field. Another effective irrigation method for Onions is furrow irrigation, where water is distributed along shallow channels between rows of crops. This technique helps maintain soil moisture levels while preventing excess water accumulation around the plants.

Weed Control Strategies 

Weeds compete with Onions for nutrients, water, and sunlight, affecting their growth and yield. To effectively manage weeds in your Onion field, consider implementing both cultural and mechanical methods. The main strategy is to practice regular cultivation to disrupt weed growth and prevent them from establishing deep roots.

In case you missed it: Best Season to Grow Onions at Home in India: in Pots, Terrace, Apartment Balcony, and Backyards

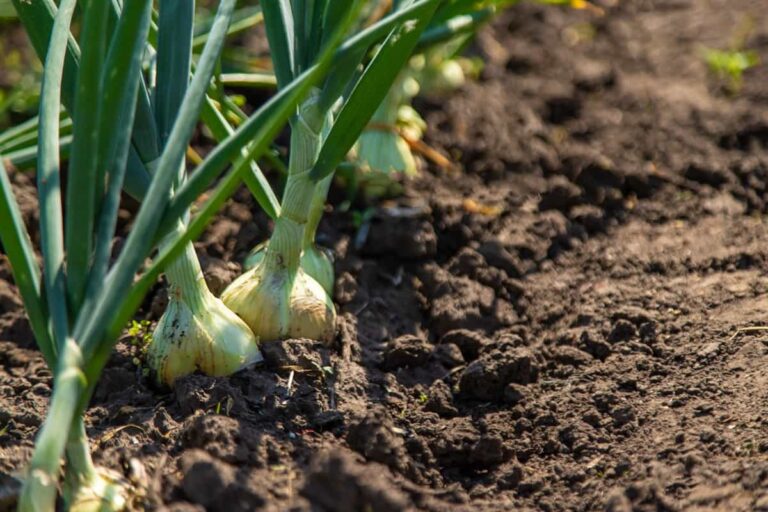
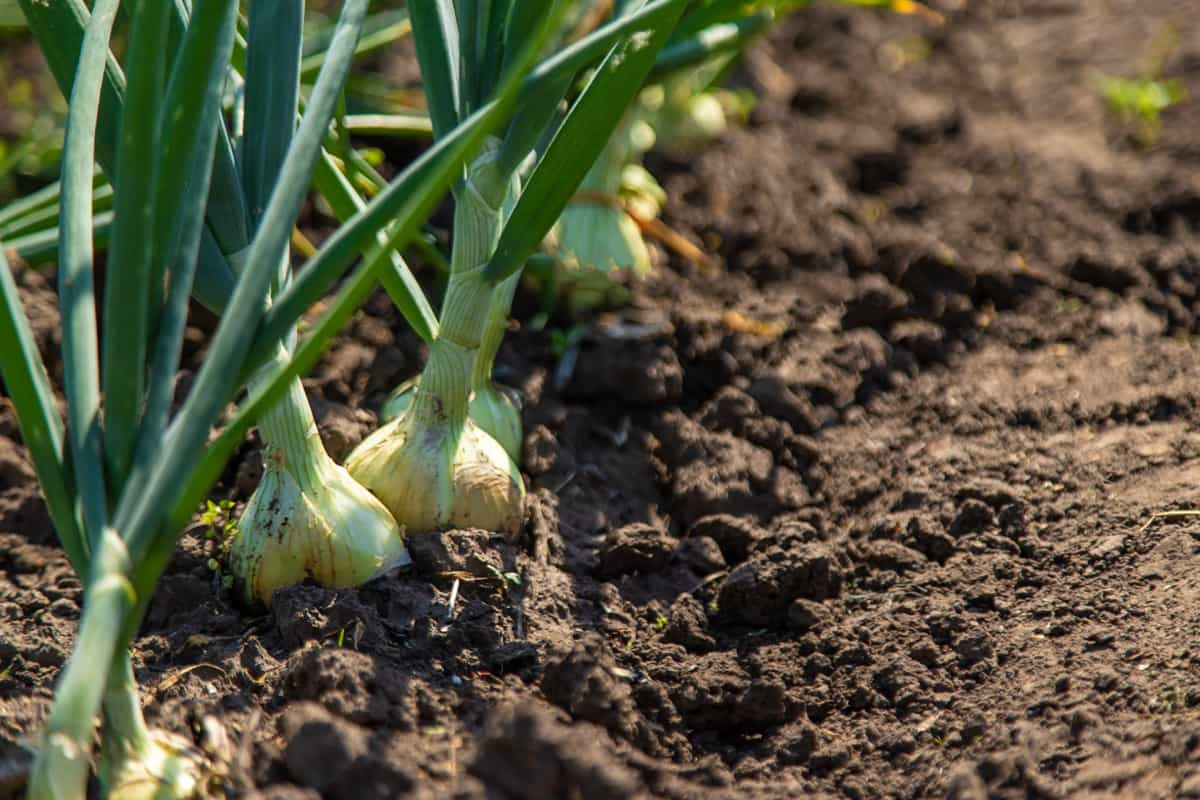
Onion bulbs in soil

Mulching can also help suppress weeds by making a barrier between the soil surface and sunlight. Additionally, using herbicides selectively can target specific weed species while minimizing harm to your Onion crop. Be sure to follow the instructions carefully when applying herbicides to avoid any negative impact on the environment or human health.

Pest and Disease Management

Pests and diseases can affect Onion yield and quality. It’s important to implement effective management strategies to safeguard your harvest. Some common pests to watch out for include Onion thrips, aphids, and Onion maggots. These small insects can cause significant damage if not properly controlled. Diseases such as downy mildew, white rot, and pink root can also pose a threat to your Onion crop. It’s crucial to monitor your plants regularly for any signs of discoloration, wilting, or unusual growth patterns that indicate the disease.

Regular scouting of your field can help in the early detection of any pest or disease infestations Utilizing integrated pest management techniques such as crop rotation, using resistant varieties, and practicing good sanitation can help reduce pests and diseases. Fungal diseases like downy mildew and bacterial infections such as Onion smut can be controlled through proper irrigation practices, ensuring good air circulation and avoiding overhead watering, which may promote disease spread.

Growth Stages and Crop Monitoring

Onions go through various stages, from seedling to maturity, each requiring specific care and attention. It starts with germination, followed by leaf development, bulb formation, and finally maturation.

Germination: This is the first stage, during which the seed absorbs water and begins to sprout. Given the right conditions of moisture, warmth, and light, it usually takes about 7-10 days for seeds to germinate.

Leaf Development: After germination, the Onion seedling will start to develop its first set of true leaves. During this stage, the seedling focuses on establishing a strong root system and developing its green foliage. Adequate watering and light are essential to support healthy leaf growth.

In case you missed it: How to Start Onion Farming in the USA: A Step-By-Step Guide to Planting to Harvesting 

Onion plantation

Bulb Formation: Once the Onion plant has developed a certain number of leaves, it begins to allocate energy towards bulb formation. This typically occurs when the days start to lengthen, triggering the Onion to transition from vegetative growth to bulb formation. Factors such as day length, temperature, and soil fertility play crucial roles in determining bulb size and quality.

Maturation: As the Onion bulb continues to grow, it gradually matures and reaches its full size. The foliage above ground will begin to yellow and wither as the bulb matures and prepares for harvest. The timing of maturation varies depending on the Onion variety and environmental conditions.

Monitor the foliage for any signs of discoloration or wilting, which could indicate nutrient deficiencies or pest infestations. Regularly check for weeds competing with your Onion crop for resources like sunlight and moisture. Remove any weeds to prevent them from affecting the growth of your Onions.

Crop monitoring involves regular inspection for signs of pests, diseases, or nutrient deficiencies that can hinder Onion growth. By keeping a close eye on the crop’s health and progress, farmers can take timely actions to address any issues that may arise. Proper monitoring also includes tracking environmental conditions such as temperature, moisture levels, and sunlight exposure.

Harvesting Techniques for Onions

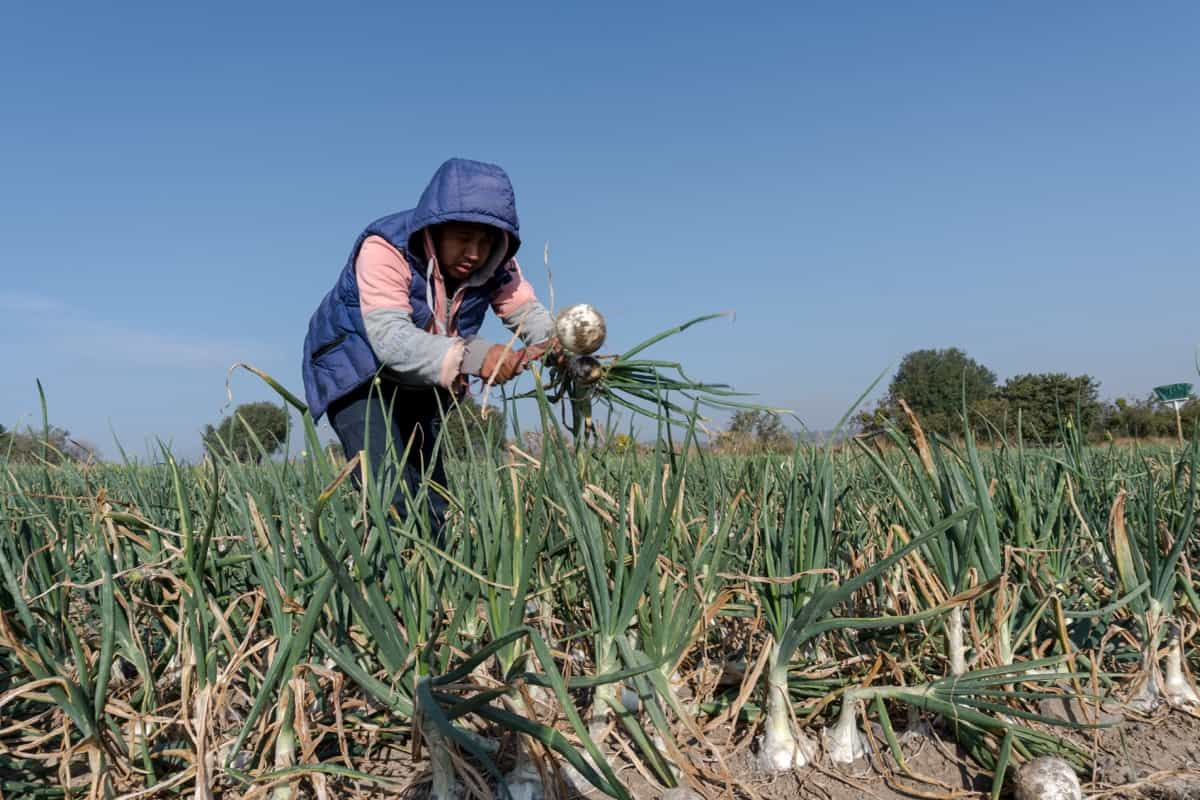
When the Onion tops start to bend over and dry up, it’s a sign that they’re ready for harvesting. To ensure proper curing, harvest on a sunny day when the soil is dry. Gently lift the bulbs using a fork or spade, being careful not to damage them.

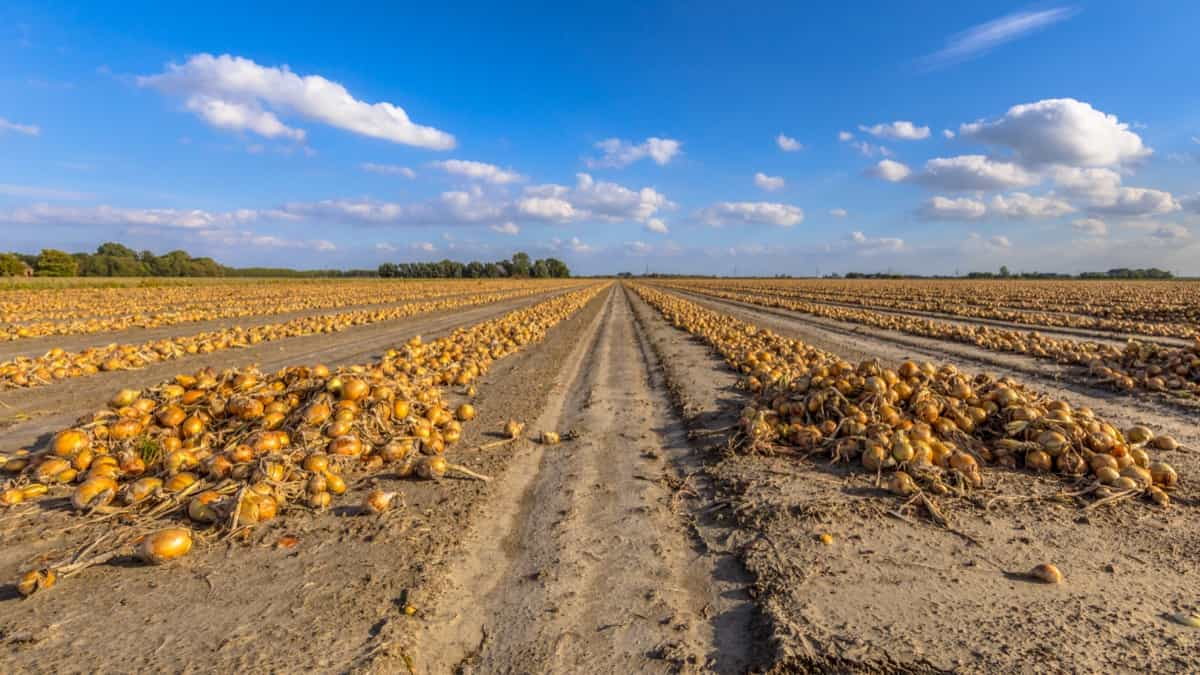
After harvesting, leave the Onions in the field for 2-3 days to dry out further. This helps improve their storage quality by allowing the outer layers to toughen up. Once dried, cut off any remaining roots and trim back the foliage before storing them in a cool, dry place with good air circulation. Proper handling during harvesting can help maximize your yield and ensure that your Onions last longer in storage.

Expected Yield of Onions

The yield of Onions per acre can change based on soil quality, climate conditions, and cultivation practices. On average, a well-managed Onion farm can yield around 15-20 tons per acre. However, with proper care and attention to detail in soil preparation, seed selection, irrigation methods, weed control strategies, and pest management techniques, this yield can be significantly increased.

It is essential to monitor the growth stages of the crop closely to ensure optimal development and maximize the harvest. By following best practices in Onion farming and implementing sustainable techniques, farmers can improve their yield potential.

Post-Harvest Handling and Storage

Once harvested, Onions should be cured in a well-ventilated area for 2-3 weeks until the necks are completely dry. This process helps them develop a protective layer that extends their shelf life. During curing, remove any damaged or diseased bulbs to prevent the spread of rot. After curing, trim off the plant roots and tops before storing them in mesh bags or crates with good airflow. Please keep them in a dry place, away from direct sunlight and humidity, to prevent sprouting or molding.

In case you missed it: Fertilizer Management for Onion: NPK Ratio, and Micronutrients

Onions growing in the garden

Regularly check stored Onions for any signs of spoilage and remove any affected ones promptly. Properly stored Onions can last for several months, providing you with fresh produce long after the harvest season is over. Mastering post-harvest handling techniques will maximize your Onion yield and profitability.

Economic Analysis and Profitability 

Analyzing the costs involved and potential profits can help you make decisions throughout the cultivation process. Calculating the cost of cultivation includes expenses such as seeds, fertilizers, irrigation, labor, and pest management. By keeping track of these costs, you can have a clear picture of your investment in Onion farming. On the other hand, estimating expected profits involves considering factors like market prices, yield per acre, and post-harvest handling.

This allows you to set realistic goals and plan for maximizing profitability in your Onion farm. Economic sustainability plays a significant role in ensuring the long-term viability of your Onion cultivation venture. By continuously evaluating your costs and profits, you can implement strategies to improve efficiency and increase overall profitability over time.

Cost of Cultivation

Onion farming costs can vary depending on factors like seed quality, fertilizer expenses, irrigation methods, and labor charges. On average, the cost per acre for Onion cultivation ranges from Rs. 50,000 to Rs. 70,000.

Expected Profits

The profitability of Onion farming varies depending on factors like yield, market demand, and cultivation costs. With proper management, farmers can expect a decent return on their investment. On average, the profit from cultivating Onions on one acre can range from Rs. 80,000 to Rs. 1,00,000, depending on input costs, market prices, and yields. On average, an acre of well-maintained Onion crops can yield a substantial harvest, translating to promising profits for growers. By optimizing production techniques and minimizing expenses, farmers can maximize their earnings.

Sustainable Practices in Onion Cultivation

Implementing techniques such as crop rotation can help prevent disease buildup and maintain soil fertility naturally. Using organic fertilizers and compost not only enriches the soil but also reduces chemical inputs, promoting a healthier ecosystem. Water management is a key practice of sustainability in Onion farming.

In case you missed it: Top 18 Steps/Ways to Boost Onion Yield: How to Increase Production, Size, and Quality

Rows of onions

Employing drip irrigation systems or rainwater harvesting methods can help conserve water resources efficiently while ensuring optimal crop growth. Integrated pest management strategies involving beneficial insects and natural predators can effectively control pests without harming the environment. Furthermore, mulching helps retain moisture, suppress weeds, and improve soil structure over time.

Innovations and Technology in Onion Farming

Advancements in agriculture have revolutionized Onion farming, introducing innovative technologies to enhance productivity and efficiency. The use of precision farming techniques such as drip irrigation systems and sensor-based monitoring has significantly improved water management, leading to optimal growth conditions for Onions. Moreover, the integration of drone technology allows farmers to survey their fields with ease, enabling them to identify potential issues like pest infestations or nutrient deficiencies early on. This approach helps in mitigating risks and ensuring a healthy crop yield.

In addition, the adoption of greenhouse cultivation methods provides a controlled environment that protects Onions from adverse weather conditions and pests. This technology also extends the growing season, allowing farmers to cultivate Onions throughout the year. Advancements in seed breeding have led to the development of hybrid Onion varieties that offer higher yields and better resistance to diseases. These innovations contribute towards sustainable Onion farming practices while meeting the increasing global demand for this versatile vegetable.

Tips to Boost Onion Yield

Ensure proper soil preparation by tilling the land and adding organic matter for nutrient-rich soil. When planting, space the Onion sets or transplants properly to allow room for bulb development. Adequate spacing helps prevent overcrowding and competition for resources. Water consistently, but avoid overwatering as it can lead to rotting. Monitor for pests and take prompt action if any issues arise.

Common problems include thrips, Onion maggots, and fungal diseases like white rot. Remember to monitor crop growth stages closely, address any pest or disease issues promptly, and optimize farming practices to ensure a successful harvest. By following these steps to the specific needs of Onion plants, beginners can successfully cultivate Onions and enjoy a bountiful harvest.

Unlock the Secrets of Groundnut Farming: A Step-By-Step Peanut Cultivation Guide for Beginners

26

Groundnut farming is also known as Peanuts, scientifically known as Arachis hypogaea L. It is an herbaceous plant belonging to the Fabaceae family. Groundnut farming is a rewarding agricultural practice that involves the growth of Groundnuts for commercial or personal use.

Unlock the Secrets of Groundnut Farming

Varieties of Groundnuts

The main Groundnut varieties produced are Kadiri-2, Chandra, Chitra, Kadiri-3, BG-1, BG-2, Kuber, GAUG-1, GAUG-10, PG-1, T-28, T-64, Kaushal, Parkash, Amber, etc. Understanding the specific needs of each Groundnut variety will help you optimize yield and quality come harvest time. Whether you’re looking for high yields or specific traits like early maturity or drought tolerance, exploring different Groundnut varieties can help you tailor your cultivation approach to maximize productivity while minimizing risks.

Farmers typically choose Groundnut varieties based on factors such as soil type, climate, pest and disease pressure, market demand, and their farming practices and preferences. Farmers need to select varieties that are well-suited to their specific conditions and requirements to maximize yields and profitability.

Soil Requirements and Preparation

Groundnut thrives best in well-drained sandy loam or sandy soils. These soils should have good water-holding capacity to prevent waterlogging. The ideal pH level for Groundnut is between 6.0 and 7.0. Soil pH outside this level can affect nutrient availability to the plant. Ensure the soil is free from debris before planting that may hinder growth. Ploughing and tilling the land thoroughly will help loosen the soil and promote better root development for the Groundnut plants.

In case you missed it: Groundnut Cultivation Income (Peanut), Cost, Yield

Peanuts with Shells

Adding organic matter can provide essential nutrients for healthy plant growth. It’s important to conduct a soil test beforehand to determine any deficiencies and adjust accordingly with fertilizers. Properly preparing the soil sets a solid foundation for your Groundnut crop, ensuring optimal conditions for germination and overall plant health throughout its growth cycle.

Climate Conditions

Groundnuts thrive in warm climates with temperatures ranging between 20°C to 30°C. They require ample sunlight for optimal growth and development. It’s essential to select a location with well-drained soil to prevent waterlogging, which can be detrimental to the crop. Groundnuts also prefer moderate rainfall during the growing season, ideally between 500 mm to 800 mm annually.

Planting should be timed according to the climate conditions of the region. Sowing should typically take place after the last frost date when soil temperatures are consistently above 18°C. In regions with unpredictable weather patterns, farmers may need to implement irrigation systems during dry spells to ensure proper moisture levels for the Groundnut plants.

Planting Techniques for Groundnuts

Ensure you choose a high-yielding and disease-resistant type that suits your region’s climate. Before planting, prepare the soil by plowing and leveling it properly. Planting should ideally be done during the dry season when there is enough sunlight. Create furrows about 20-25 cm apart and sow the seeds at a depth of 5 to 7 cm. Make sure to space the seeds around 10 cm apart within the rows.

Cover the seeds with soil gently and water them immediately after planting. Adequate moisture is essential for germination, so ensure regular watering during the initial growth stages. Monitor for pests or disease signs and take necessary actions promptly. During the growing season, monitor moisture levels closely as Groundnuts require regular watering, especially during flowering and pod development stages. Implement crop rotation practices to reduce pest and disease pressure in your fields.

Irrigation Methods for Groundnut Fields

Several methods can be employed to ensure successful cultivation. One common method is furrow irrigation, where water is directed through small channels between the rows of Groundnuts. Drip irrigation is another effective technique, which involves delivering water to the plant roots through a system of pipes and emitters. Sprinkler irrigation is also commonly used in Groundnut farming, where water is sprayed over the crop in a controlled manner.

In case you missed it: Groundnut Seed Germination, Time, Temperature, Process

Ground Nuts

This method helps in ensuring uniform distribution of water across the field. Farmers can also opt for sub-surface drip irrigation; in this method, water is applied below the soil surface through buried tubes. It’s essential to monitor soil moisture levels regularly and adjust irrigation schedules accordingly to meet the specific needs of Groundnut plants throughout their growth stages.

Fertilization and Nutrient Management 

Ensuring the right nutrient balance in the soil is essential for optimal plant growth and high yields. Before planting, it’s important to conduct soil tests to determine which nutrients are lacking. Based on the results, a suitable fertilizer program can be implemented. Nitrogen, phosphorus, and potassium are key nutrients required by Groundnut plants throughout their growth stages. Applying organic compost or manure can help improve soil fertility naturally. Additionally, using balanced chemical fertilizers in recommended quantities can supplement any deficiencies.

Proper nutrient management not only promotes healthy plant growth but also enhances disease resistance and improves overall crop quality. Over-fertilization must be avoided as it can lead to environmental pollution and waste resources. Monitoring of nutrient levels regularly in the soil is necessary to adjust fertilization practices accordingly. By adopting effective nutrient management strategies, farmers can maximize their yields while minimizing negative impacts on the environment.

Weed Control Strategies

An effective strategy is practicing timely weeding to remove unwanted plants competing for nutrients, water, and sunlight with Groundnuts. Mulching can help control weed growth by making a barrier between the soil and sunlight, hindering weed germination. Another method is using herbicides selectively to target specific weed species while minimizing harm to Groundnut plants. Hand weeding, in combination with other strategies, can be labor-intensive but effective in removing stubborn weeds that may resist other control methods.

Crop rotation can also aid in controlling weeds by disrupting their lifecycle and reducing their prevalence in the field. By incorporating diverse crops in the rotation cycle, farmers can prevent the buildup of certain weed populations that thrive on monoculture systems.

Pest and Disease Management 

Some of the most important pests to watch out for include aphids, thrips, and termites, which can cause harm to the plant leaves and pods. A common disease that affects Groundnuts is leaf spot caused by fungi. This disease can lead to defoliation and reduce photosynthesis in the plant, ultimately affecting its growth and productivity. Diseases like rust and leaf spot also pose a threat to Groundnut crops. Proper irrigation techniques, crop rotation, and the use of disease-resistant Groundnut varieties can help prevent these diseases from spreading.

In case you missed it: Best Fertilizer for Groundnut: Organic, NPK, Compost Manure, and Schedule

Farmer Holding Groundnuts

It’s important to stay vigilant and implement effective strategies to protect your plants. Regular monitoring of pests and diseases, along with integrated pest management (IPM) practices, is crucial for the effective control of Groundnut cultivation. Combining cultural, biological, and chemical control methods can help to control the impact of pests and diseases while promoting a healthy crop.

Growth Stages of Groundnut Plants

As Groundnut plants grow, they go through several distinct stages that are crucial for a successful harvest. The first stage is germination, when the seed sprouts and sends out roots into the soil. Next comes the vegetative growth stage, where leaves develop, and the plant grows taller. During this time, it’s important to ensure proper watering and nutrient supply to support healthy growth. Following vegetative growth, the Groundnut plant enters the flowering stage.

Here, delicate yellow flowers appear on the plant, eventually leading to pod formation. Pollination plays a vital role in this process as it determines how many pods will develop on each plant. Once pollination is successful, the pods start to mature, signaling the beginning of the pod development stage. At this point, regular monitoring is essential to determine when the pods are ready for harvesting. Understanding these growth stages can help farmers effectively manage their Groundnut crops for optimal yields.

Harvesting Techniques for Groundnuts

The best time to harvest is when the leaves start turning yellow and drying up. It’s important not to wait too long after this stage, as it can affect the quality of the nuts. To harvest Groundnuts, start by loosening the soil around the plants with a fork or shovel. Carefully pull out the plant from the ground, making sure not to damage the pods in the process.

Once you’ve harvested all your plants, lay them out in a well-ventilated area to dry for about 2-3 days. This helps in curing and preparing them for storage. After drying, please remove any remaining soil or debris from the plants and separate the peanuts from their shells. Store them in a cool, dry place until ready for consumption or sale.

Average Yield of Groundnuts

The average yield can vary depending on factors such as soil quality, climate conditions, and cultivation practices. On average, a well-managed Groundnut farm can produce around 1,500 to 2,500 kilograms of Groundnuts per acre. However, with proper plant care, some farmers have reported yields exceeding this range.

In case you missed it: High-Yielding Groundnut Varieties in India: Hybrid Cultivars for Increased Profits

Fresh Peanuts Plants with Roots

Factors like timely irrigation, nutrient management, and weed control strategies play a significant role in determining the final yield of Groundnuts. Farmers who follow best practices throughout the cultivation process are more likely to achieve higher yields and maximize their profits. Farmers need to keep track of their crop’s progress and make changes for a successful harvest.

Marketing Strategies

The effective approach is to establish relationships with local retailers, wholesalers, and food processors who may be interested in purchasing your harvest. Networking within the agricultural community can also lead to valuable partnerships and sales opportunities. Determine the specific market segments you want to target with your Groundnuts. This could include consumers, wholesalers, retailers, or processors. 

Utilizing online platforms such as social media, e-commerce websites, or farmer’s markets can help broaden your reach beyond traditional avenues. Creating a brand identity and promoting the nutritional benefits of Groundnuts can attract health-conscious consumers looking for quality products. Monitor market trends, consumer preferences, and competitor activities continuously to adapt your marketing strategies accordingly. Stay informed about industry developments and be proactive in identifying new growth opportunities.

Cost of Cultivation

The expenses involved in Groundnut cultivation include land preparation, seeds, fertilizers, pesticides, labor, irrigation, and machinery usage. The cost of Groundnut cultivation per acre can change based on factors such as soil quality, climate conditions, pest management practices, and market prices of inputs. On average, the cost ranges from Rs 20,000 to Rs 35,000 per acre

To optimize costs and maximize profits in Groundnut farming, farmers can adopt sustainable practices like integrated pest management techniques and efficient water usage strategies. By implementing these methods effectively, farmers can reduce input costs while maintaining high yields.

Expected Profits

The potential earnings from cultivating Groundnuts can change based on various factors such as the variety grown, yield per acre, market prices, and production costs. The profit per acre for Groundnut cultivation would range from Rs 15,000 to Rs 30,000. Achieving a good profit requires careful planning and attention to detail throughout the cultivation process. From selecting high-quality seeds and preparing the soil for planting to providing adequate water and nutrients during growth stages, every step plays a crucial role in determining the final harvest.

In case you missed it: Pests and Diseases Management in Groundnut (Peanut): Causes, Symptoms, Chemical, and Biological Control

Peanut Harvest

Sustainable Practices in Groundnut Cultivation

Implementing sustainable methods such as crop rotation, organic fertilizers, and integrated pest management not only ensures a healthier environment but also promotes long-term productivity and profitability for farmers. Sustainable practices in Groundnut cultivation play a crucial role in preserving the environment and ensuring long-term productivity. One key method is crop rotation, which helps prevent soil depletion by alternating Groundnuts with other crops to maintain soil fertility.

Another sustainable practice is intercropping, where Groundnuts are grown alongside complementary crops to maximize land use efficiency and biodiversity. This not only increases yield but also reduces the risk of pest infestations. Implementing integrated pest management techniques is essential for minimizing chemical inputs and promoting natural predator-prey interactions to control pests effectively. Additionally, utilizing organic fertilizers and biopesticides can enhance soil health while reducing environmental impact.

Water management through efficient irrigation methods like drip irrigation or rainwater harvesting can conserve water resources and reduce dependency on groundwater sources. Furthermore, Groundnut farming plays a crucial role in food security by providing a good source of protein and essential nutrients to communities worldwide. The high nutritional value of Groundnuts contributes to combating malnutrition and improving public health outcomes globally.

Unlock the Secrets of Organic Farming: A Comprehensive Guide for Beginners

8

The goal of organic cultivation is to make a self-sustaining ecosystem where crops, animals, and humans can coexist in harmony. By promoting biodiversity and conservation, organic farmers aim to produce healthy, nutritious food while protecting the environment for future generations. Choosing organic produce also means supporting local farmers who prioritize sustainable practices that benefit both the environment and human health.

Unlock the Secrets of Organic Farming

Principles of Organic Agriculture

The fundamental principle is promoting biodiversity, which means cultivating a variety of crops and utilizing natural ecosystems to maintain balance. This helps create resilient and sustainable agricultural systems that benefit both the environment and farmers. Another important principle is soil health preservation. Organic farmers focus on enhancing soil fertility through practices like crop rotation, cover cropping, and minimal tillage.

By prioritizing soil health, organic agriculture improves long-term productivity while reducing the use of synthetic fertilizers or pesticides. Furthermore, organic farming emphasizes animal welfare by providing livestock with access to pasture and ensuring they are raised in humane conditions. This not only supports the ethical treatment of animals but also contributes to healthier food products for consumers.

Soil Health and Management

Healthy soil is the main factor for successful organic farming. By focusing on soil health and management, farmers can ensure their crops thrive naturally without relying on synthetic chemicals. The key principle in organic agriculture is maintaining and improving soil fertility through practices like crop rotation, cover cropping, and adding organic matter such as compost or manure. These methods help enhance soil structure, water retention, and nutrient availability for plants.

In addition to enhancing fertility, managing soil health also involves minimizing erosion by using conservation practices like contour plowing or planting windbreaks. This helps protect the topsoil from being washed away during heavy rains or strong winds. Prioritizing soil health not only benefits the environment but also leads to healthier crops with higher nutritional value for consumers.

Organic Crop Rotation and Diversity

By rotating different crops seasonally, farmers can naturally control pests and diseases while replenishing soil nutrients. This technique helps break pest cycles and reduces the need for chemical pesticides. Diversifying crops not only improves soil health but also enhances biodiversity on the farm. Planting a variety of crops can attract beneficial insects, pollinators, and wildlife that contribute to a healthy ecosystem.

Sweet Corn

Additionally, diverse cropping systems help reduce soil erosion and improve water retention. Farmers practicing organic crop rotation often see improved yields and quality of produce over time. The balanced nutrient levels in the soil from varied crops lead to healthier plants with increased resistance to environmental stressors like drought or extreme temperatures.

Natural Pest and Weed Control Methods

The effective method is companion planting, in which certain plants repel pests or attract beneficial insects. For example, planting marigolds alongside vegetables can deter nematodes. Another eco-friendly approach is using physical barriers, such as row covers, to protect crops from unwanted intruders. Additionally, introducing predator insects like ladybugs and lacewings can help control pest populations naturally. This method not only prevents pests from reaching the plants but also promotes better air circulation and temperature control.

Implementing crop rotation also plays a vital role in preventing pest build-up by interrupting their life cycles. Moreover, mulching with organic materials helps suppress weed growth while enriching the soil. Additionally, introducing predatory insects such as ladybugs or lacewings can help to control pests in check naturally. These beneficial bugs feed on harmful pests without causing harm to the crops.

Composting and Organic Fertilizers

Composting involves the decomposition of organic matter like kitchen scraps, yard waste, and manure to create nutrient-rich humus for plants. By recycling these materials, farmers can reduce waste while improving soil structure and water retention. Organic fertilizers are natural sources like compost, manure, bone meal, or seaweed.

These fertilizers provide essential nutrients to crops without harmful chemicals or synthetic additives. They help promote microbial activity in the soil and enhance plant growth naturally. Using composting techniques and organic fertilizers not only benefits the environment by reducing chemical runoff but also results in healthier produce for consumers.

Water Conservation Techniques in Organic Farming

Utilizing techniques such as drip irrigation and rainwater harvesting can help reduce water usage while maximizing efficiency in crop production. Drip irrigation systems deliver water to the plant roots, minimizing wastage through evaporation or runoff. This targeted approach ensures that crops receive just the right amount of moisture they need to thrive. Rainwater harvesting involves collecting rainwater in storage tanks or reservoirs during rainy seasons for later use in irrigation.

Pepper Harvest

By harnessing nature’s gift, farmers can decrease reliance on traditional water sources and promote self-sufficiency on their farms. Implementing mulching techniques also aids in water conservation by reducing evaporation from the soil surface and maintaining moisture levels around plant roots. Organic farmers often use natural materials like straw or compost to create a protective layer that retains moisture and prevents weed growth.

Organic Seed Selection and Planting

Organic seed selection involves choosing non-GMO, untreated seeds that are in line with organic standards. Before planting, make sure the soil is well-prepared and enriched with compost or natural fertilizers. Follow planting instructions on the seed packets carefully to give your crops the best start possible. Consider companion planting to promote biodiversity and natural pest control in your garden.

Monitor your plants for disease or pest signs, and take proactive measures using organic methods like neem oil or beneficial insects. Stay connected with fellow organic farmers or local agricultural extension offices for tips on successful seed selection and planting techniques tailored to your specific growing conditions.

Integrating Livestock in Organic Systems

Integrating livestock into organic systems is a key aspect of sustainable agriculture. By incorporating animals into the farming process, farmers can create a closed-loop system where waste from animals becomes valuable inputs for crops. Raising livestock on organic farms allows for natural grazing practices that promote biodiversity and nutrient cycling. Animals like chickens, cows, and goats play a major role in maintaining the ecosystems on the farm.

Their manure provides essential nutrients for plants, reducing the need for synthetic fertilizers. Furthermore, integrating livestock can help control pests naturally by allowing animals to graze on weeds and insect populations. This reduces the reliance on chemical pesticides while promoting a good environment for both plants and animals alike.

Greenhouse and High Tunnel Organic Production

Greenhouses provide a sheltered space where you can extend your growing season, protect plants from extreme weather conditions, and regulate temperature and humidity levels. High tunnels are similar but usually have a simpler structure. By utilizing these structures, you can grow a wider variety of crops year-round while reducing the risk of pests and diseases. Plus, they allow for more efficient water usage and help conserve resources.

Harvesting Eggplants

Implementing organic practices within greenhouses and high tunnels involves careful planning, proper soil management, natural pest control methods, and sustainable irrigation techniques. With dedication and attention to detail, you can maximize your yields while minimizing environmental impact.

Certification and Regulations for Organic Farming

Understanding the certification and regulations for organic farming is crucial for farmers looking to establish themselves in this industry. Certification ensures that products labeled as organic meet specific standards set by governing bodies. These regulations vary between countries but generally focus on practices that promote biodiversity and animal welfare. To obtain certification, farmers must adhere to strict guidelines regarding the use of synthetic chemicals, genetically modified organisms (GMOs), and antibiotics.

Additionally, record-keeping is essential to track inputs used in production processes. Organic farmers must stay informed about any updates or changes in regulations to maintain their certification status. By following these guidelines, they protect the integrity of their products and also contribute to a sustainable agricultural system that benefits both consumers and the environment.

Market Trends and Opportunities for Organic Produce

Market trends show a rising demand for organic produce as consumers prioritize health and sustainability. People are more conscious of what they eat, seeking out organic options for their nutritional benefits and environmental impact. This shift has created opportunities for farmers to capitalize on the growing market. Organic produce is not only in demand at local markets but also in grocery stores, restaurants, and online platforms.

As more retailers offer organic products, there is greater accessibility for consumers looking to make healthier choices. This expansion opens up avenues for small-scale farmers to reach a wider audience with their sustainably grown goods. Furthermore, the rise of e-commerce has allowed organic producers to connect directly with customers through online sales channels. By leveraging digital marketing strategies and social media platforms, farmers can promote their products and engage with a larger customer base.

Community Supported Agriculture (CSA) and Direct Sales

By joining a CSA program, you can directly connect with farmers in your area and receive a weekly share of seasonal fruits and vegetables. Not only does participating in a CSA support small-scale agriculture, but it also allows consumers to enjoy a variety of freshly harvested produce that is packed with nutrients.

Fresh Strawberries

Additionally, by committing to a CSA share, you are investing in the sustainability of local farming practices. Direct sales are another key aspect of organic farming, allowing farmers to sell their products directly to consumers without the need for intermediaries. This direct connection fosters transparency and trust between farmers and customers.

Direct sales at farmer’s markets or through online platforms are another great way to access organic products while supporting local growers. By purchasing from farmers, you can build relationships with those who cultivate your food and gain insight into their farming methods. Embracing community-supported agriculture and direct sales benefits your health and contributes to the resilience of our food system.

Challenges and Solutions in Organic Farming

Challenges in organic farming can range from pest infestations to unpredictable weather patterns. Farmers often face the dilemma of maintaining soil fertility without synthetic chemicals. Insects and weeds can wreak havoc on crops, requiring innovative solutions for natural pest control. Market competition and pricing fluctuations present additional hurdles for organic farmers. Access to resources and funding for sustainable practices can also be limited, hindering growth opportunities.

Finding skilled laborers who understand the intricacies of organic agriculture poses another challenge. However, solutions are being developed to address these obstacles. Integrated pest management techniques help control pests while preserving the ecosystem. Crop rotation strategies improve soil health and reduce reliance on chemical inputs. Education and training programs empower farmers with knowledge to overcome challenges sustainably. Collaboration within the organic farming community fosters support networks and shared best practices.

Innovations in Organic Farming Technology

Innovations in organic farming have revolutionized the way farmers grow crops and raise livestock. From advanced machinery to precision agriculture tools, technology is helping organic farmers increase efficiency and productivity while minimizing environmental impact. The innovation is the use of drones for crop monitoring and pest management. Drones equipped with cameras can provide real-time data on crop health, allowing farmers to take timely action against pests or diseases without the need for harmful chemicals.

Potato Harvest

Another exciting development is the use of blockchain technology to track every step of a product’s journey from farm to table. This transparency not only builds consumer trust but also helps farmers streamline their operations and reduce waste. Furthermore, vertical farming techniques are gaining popularity in urban areas, allowing year-round production of organic produce in controlled indoor environments. By maximizing space and resources, vertical farms are paving the way for sustainable agriculture in densely populated regions.

Sustainability and Environmental Impact of Organic Farming

Organic farming goes beyond just producing food – it’s a way of cultivating the land while prioritizing sustainability and environmental health. By avoiding synthetic fertilizers, organic farmers help protect soil quality, promote biodiversity, and support ecosystem balance. Organic cultivation has a significant environmental impact. It reduces water pollution by eliminating harmful chemicals from entering waterways and minimizes soil erosion through practices such as cover cropping.

Embracing organic agriculture isn’t just about what we eat; it’s about nurturing our planet for future generations. The sustainable methods used in organic farming contribute positively to combating climate change, preserving natural habitats, and fostering a more resilient agricultural system overall. By adopting organic practices, farmers can improve soil fertility, enhance resilience to climate change, and produce nutritious food without compromising the future generations’ ability to meet their needs.

Unlock the Secrets of Mushroom Cultivation: A Step-by-Step Comprehensive Guide for Beginners

30

Mushroom cultivation is the art of growing mushrooms in controlled environments for optimal quality and growth. It involves creating the perfect conditions for these fungi to thrive and produce their fruiting bodies, which we commonly refer to as mushrooms. Mushrooms play a crucial role in various cuisines worldwide due to their distinct flavors and textures. 

Secrets of Mushroom Cultivation

Types of Mushrooms for Cultivation

When it comes to mushroom cultivation, there is a wide array of mushroom types that can be grown. Each type has its unique characteristics and requirements for successful cultivation. The popular choice for beginners is the oyster mushroom, known for its fast growth rate and versatility in different growing conditions. Another common option is the shiitake mushroom, prized for its rich flavor and medicinal properties.

For those looking to add a gourmet touch to their dishes, the morel mushroom is a sought-after delicacy with a distinctive nutty flavor. Another popular variety is the White Button Mushroom, known for its mild taste and versatility in various dishes. Some other varieties of mushrooms are Portobello Mushroom, Chanterelle Mushroom, Enoki Mushroom, Lion’s Mane Mushroom, Maitake Mushroom, and King Oyster Mushroom.

Understanding Mushroom Biology

Mushrooms belong to the fungi kingdom, distinct from plants and animals. They reproduce through spores rather than seeds, making their life cycle unique. Mushrooms require specific environmental conditions to grow, including moisture, temperature, and substrate composition. The mycelium, a network of thread-like structures, is the vegetative part of the fungus responsible for nutrient absorption.

In case you missed it: How to Control Pests and Diseases in Mushrooms: Best Way to Manage with Natural and Organic Remedies

Examining mushroom growth

It colonizes substrates before forming fruiting bodies we recognize as mushrooms. Different mushroom species have varying growth requirements and preferences. Mushroom biology encompasses complex processes like fruiting body formation and spore dispersal. Understanding these stages helps growers optimize cultivation conditions for maximum yield.

Setting Up the Cultivation Area

Select a well-ventilated location with controlled temperature and humidity levels. Make sure the area is free from contaminants that could harm the mushroom growth. Next, prepare your workstations and tools in advance. Have all necessary supplies, such as substrate materials, spawn, and containers, ready to go. Designate specific areas for each stage of the cultivation process to maintain efficiency.

Ensure proper lighting conditions are met by either using natural light or installing artificial grow lights if needed. Proper air circulation is also key to preventing mold or other issues that may arise in stagnant environments. Keep your cultivation area consistently clean and sanitized throughout the entire process to promote healthy mushroom growth.

Substrates for Mushroom Growth

Substrates are essentially the materials from which mushrooms grow and derive their nutrients. Common substrates include straw, wood chips, sawdust, and even coffee grounds. Each type of mushroom has its preferred substrate based on its nutritional requirements. For example, oyster mushrooms thrive on a mix of hardwood sawdust and wheat bran, while shiitake mushrooms prefer oak logs or supplemented sawdust blocks.

The substrate provides essential nutrients for mycelium colonization and subsequent fruiting body formation. Proper moisture content and pH levels in the substrate are key factors that influence mushroom growth. Experimenting with different substrates can help you understand which works best for your chosen mushroom species.

Inoculation and Spawn Preparation

It involves introducing the mushroom mycelium to a suitable substrate for growth. The spawn acts as the seed that kickstarts the growth of mushrooms. To prepare the spawn, you can use various methods, such as grain spawn or sawdust spawn. These act as carriers for the mycelium to colonize before transferring it to the final growing medium.

In case you missed it: How to Grow Cordyceps Mushrooms: Profitable Cultivation Practices and Cordyceps Mushroom Price

oyster mushroom farming

The inoculation process requires sterile conditions to prevent contamination from other microorganisms. This can be done in a clean and controlled environment using proper sterilization techniques. Once inoculated, it’s important to monitor the colonization progress of the mycelium within the substrate. This stage sets the foundation for healthy mushroom development and eventual fruiting.

Incubation Conditions and Parameters

During the incubation stage, maintaining optimal conditions and parameters is key to fostering mycelium development within the substrate. The temperature plays a major role during the incubation period, typically ranging between 21-23°C for most mushroom varieties. Humidity levels should be kept high to prevent drying out of the substrate and promote mycelial growth.

Proper air exchange is essential to provide fresh oxygen while removing carbon dioxide produced by the growing mycelium. This helps prevent contamination and ensures healthy mushroom formation. Light exposure should be minimal during this phase, as mushrooms thrive in darkness during their early stages of development. A consistent environment free from fluctuations in temperature, humidity, and light will support strong mycelial growth leading up to fruiting.

Controlling Environmental Factors

Maintaining the right temperature, humidity levels, and air circulation can significantly impact the success of your mushroom farm. Temperature plays a vital role in mushroom growth, with different species requiring specific ranges for development. Humidity levels must also be carefully monitored to prevent drying out or excessive moisture, which could lead to contamination issues.

In case you missed it: Mushroom Farming Business Plan: Investment, Profit, and Cultivation Steps

bunch of mushrooms growing in a greenhouse

Proper ventilation is important to provide fresh air and remove carbon dioxide produced during respiration. This helps prevent the harmful gases that can hinder mushroom growth. Light exposure should be controlled as mushrooms prefer darkness for fruiting. Using blackout curtains or maintaining a consistent light schedule can help regulate this factor effectively.

Mushroom Growth Phases

There are four stages to the life cycle of a mushroom: Spore germination, colonization, fruiting, and sporulation.

Spore Germination: The mushroom life cycle begins with the germination of mushroom spores. Spores are the reproductive units of fungi, similar to seeds in plants. When conditions are favorable, spores germinate, and a single spore develops into a structure called a hypha, which is a single filament of fungal cells.

Colonization (Spawn Run): During this stage, the hyphae grow and branch out, forming a network called mycelium. The mycelium colonizes the substrate, which is the material on which the mushroom grows. This phase is also known as the spawn run when mushroom spawn, which is essentially mycelium grown on a nutrient-rich substrate, is introduced to the main substrate to facilitate colonization.

Fruiting: Once the the mycelium and environmental conditions are fully colonized substrate are favorable, the mushroom enters the fruiting stage. This is when primordia, or tiny mushroom pins, begin to form on the surface of the substrate. These primordia develop into mature mushrooms, which emerge from the substrate and grow to full size.

Sporulation: The final stage of the mushroom life cycle is sporulation, where mature mushrooms release spores into the environment. Spores are typically released from the gills or pores of the mushroom cap. Spores are dispersed by various means, such as air currents, animals, or water, allowing the fungus to reproduce and continue its life cycle.

Harvesting Techniques

Harvesting techniques play a crucial role in mushroom cultivation, as they determine the quality and yield of your crop. When it comes to harvesting mushrooms, timing is key. Harvesting too early can result in underdeveloped mushrooms while waiting too long can lead to over-matured ones. To harvest mushrooms properly, gently twist or cut them at the stem base using a sharp knife.

In case you missed it: How this Farmer Earning 60 Thousand Rupees from Milky Mushroom Farm at Home

oyester mushroom farm

Be careful not to damage the surrounding mycelium or disturb other mushrooms in the process. Always handle harvested mushrooms with care to avoid bruising or damaging their delicate structure. It’s essential to monitor your crop for mature specimens ready for harvesting regularly. By picking them at their peak freshness and size, you ensure maximum flavor and nutritional value for consumption or sale.

Post-Harvest Handling and Storage

After successfully harvesting your mushrooms, the next crucial step is post-harvest handling and storage. This phase is essential to maintain the quality and freshness of your produce for longer periods. Proper handling methods can make a difference in the shelf life of your mushrooms. Once harvested, it’s important to gently clean any dirt or debris off the mushrooms using a soft brush or cloth.

Avoid washing them with water, as this can lead to spoilage. Trim any damaged or discolored parts before storing them to prevent contamination. For short-term mushroom storage, place the mushrooms in a paper bag or breathable container in the refrigerator. Make sure not to overcrowd them to allow proper air circulation. For long-term storage, consider drying or freezing the mushrooms for later use in recipes.

Pest and Disease Management

Pest and disease management in mushroom cultivation is crucial to ensure a healthy crop. Pests like mites, flies, and nematodes can wreak havoc on your mushrooms if left unchecked. Keeping a clean cultivation area and monitoring for any signs of infestation is key. Implementing preventive ways such as proper sanitation practices, using pest-resistant substrates, and maintaining optimal environmental conditions can help reduce pest and disease outbreaks.

Regularly inspecting your mushrooms for any abnormalities or unusual growth patterns can also aid in early detection. If pests or diseases are identified, immediate action is necessary to prevent further spread. Utilizing natural remedies or organic pesticides can be effective in controlling pests without compromising the quality of your mushrooms.

Quality Control and Safety Measures

It is crucial to produce high-quality produce while prioritizing the well-being of both consumers and workers. Implementing strict protocols for cleanliness, hygiene, and pest management helps prevent contamination during the growing process. Regular inspections of the cultivation area also help identify any potential issues early on. Proper training of staff members on handling mushrooms, as well as maintaining equipment properly sanitized, are key aspects of quality control.

By monitoring temperature and humidity levels consistently, growers can create an optimal environment while minimizing risks associated with pathogens or mold development. Adhering to food safety regulations and standards is essential to guaranteeing that the harvested mushrooms meet industry requirements. This includes proper packaging, labeling, and storage practices to maintain freshness and extend shelf life. Regular testing for contaminants ensures that only safe-to-consume mushrooms reach customers’ tables.

Marketing and Selling Mushrooms

There are various avenues you can explore to reach potential buyers to marketing and selling mushrooms. The effective strategy is establishing partnerships with local restaurants or grocery stores that value fresh, locally sourced produce. Networking within the culinary community can open up opportunities for your mushroom business to thrive. Utilizing social media can help showcase your products visually and attract a wider audience.

In case you missed it: How to Grow Mushrooms in Coffee Grounds at Home: Steps, Ideas, and Tips for Beginners

mushrooms growing in plastic bags

Engaging with customers through interactive posts, behind-the-scenes glimpses of your cultivation process, and recipe ideas can create buzz around your brand. Attending farmers’ markets or setting up a roadside stand can also be a great way to connect with consumers for high-quality mushrooms directly. Offering samples and sharing information about the health benefits of different mushroom varieties can pique interest and drive sales.

Exploring online marketplaces such as Etsy or specialty food websites can expand your reach beyond local markets. Creating an e-commerce website for your mushroom products allows customers to place orders for their homes conveniently. Collaborating with chefs for special events or participating in food festivals can generate excitement around your mushrooms and introduce them to new audiences.

Advanced Techniques in Mushroom Cultivation

The main technique is utilizing controlled-environment systems, such as climate-controlled rooms or greenhouses. These environments allow for precise regulation of temperature, humidity, and light to optimize mushroom growth. Another advanced method involves genetic selection and breeding of mushroom strains for desired traits like higher yields or resistance to diseases. This process requires expertise but can lead to significant improvements in your crop production.

Exploring innovative substrate formulations, such as incorporating supplements like coffee grounds or sawdust, can enhance the nutritional value of mushrooms and promote healthier growth. Additionally, adopting automated monitoring and irrigation systems can streamline the cultivation process by ensuring optimal growing conditions are consistently maintained.

Sustainability and Eco-Friendly Practices in Mushroom Farming

By utilizing agricultural waste products like straw, sawdust, or even coffee grounds as the substrate for mushroom growth, farmers can reduce waste and create a valuable product. Furthermore, mushrooms are known to have a low carbon footprint due to their effective use of resources. They require minimal water and land to grow, making them environmentally friendly for food production. 

In case you missed it: Top 22 Steps/Ways to Boost Mushroom Yield: How to Increase Production, Quality, and Size

Freshly harvested Mushrooms

Some farmers even implement innovative techniques like vertical farming or using renewable energy sources to power their operations. These practices not only contribute to sustainability but also promote biodiversity in the ecosystem. Promoting sustainability in mushroom farming is essential for creating a greener future for agriculture.

Mushroom growing can be done on a small scale for personal use or on a large scale for commercial production. It requires careful attention to detail, proper sanitation practices, and knowledge of the specific requirements of the mushroom species being cultivated.

Emu Farming Profits and Case Study in India

Emu farming Profits and Investment Details

The following article details about “Emu Farming Profits”.

Emu Farming Profits
Emu Farming Profits

Initial Investment Involved:

It really depends on the age factor of Emu chicks or birds you buy to start a with the emu farming and if a farmer wants to start with three months chicks then rate of investment per emu chick would be around 4500 to 5000 Rs per emu chick and need to establish the shed or shelter with a minimum 30 pairs and if they decide to buy 12 to 15 months of Emu chick then the price per emu chick would be around 20000 Rs to 24000 Rs and for infrastructure for emu chicks would cover around 60000 Rupees approximately. Again the infrastructure cost depends on the type of shelter you want to build. this also a minor factor that impact emu farming profits initially.

Read: Organic Peanut Farming, Cultivation Practices.

How much does it cost to feed the Emu chicks or emu birds?

Emu bird chicks feed cost depend on the consumption of the feed, Emu pair could consume around 4500 to 5500 Rupees yearly, as feed cost going up every year better check with the local market. Feed cost also depends on whether you will be going for company feed or locally made feed. Emu chick would roughly consume around 600 to 800 grams of feed . 1 KG of Emu feed would cost around 20 to 25 rupees and Feeding cost can be cut down drastically by providing alternate feeding methods like green leaves and which will increase profit rates, reducing the feed cost will play a major role in successful Emu farming. ultimately reflect in emu farming profits.

Emu chicks.
Emu chicks.

What is the Emu egg Laying Period? How many Emu eggs can we expect from Female bird?

Female emu breeders start to lay eggs after 24 to 28 months from its birth and it will lay 12 to 15 eggs for the first season, Emu egg-laying season is from December to march and, Emu birds will lay one egg for four to five days. From on every consecutive year, female will increase its laying capacity by 5 to 10 eggs and Emu birds will be excepted to lay eggs around 45 to 60 in Fourth and Fifth year.

Hatching Units Set up at your Farm:

Emu birds can’t hatch eggs on their own and it needs to be done through its equipment and without setting up hatching is not preferred in successful Emu farming. Maintaining hatching machinery requires very less manpower and it just requires proper training on how to maintain humidity and temperature of the hatching machine. Emu bird hatching machine may cost around 80,000 to 1,00,000(1 lakh) Rupees.

Marketing Emu eggs:

Emu eggs
Emu eggs

One should think of selling of emu eggs as the last and least option in successful emu farming and if you don’t find real buyers then it would a risk and loss of investment of your eggs, the best way would be setting up hatching units and hatching in your own Emu farm.

Returns and Emu Farming profits:

If you hatch your Emu eggs in your farm and you will get the return on investment on the first year of hatching eggs and around 80% of total investment can be obtained on the first year of hatching eggs.

Simple Case study for your reference to Emu farming Profits:

New Slaughter Business in Emu farming :

Emu bird slaughter is the second part of emu business and Emu chicks from your farm needs to be slaughtered at the age of 15 months and it emu meat, emu oil, and value-added products need to be sold by your own or you can sell the birds at the age of 15 months for slaughtering in the open market.

Model Project for 10 Emu bird Pairs.

Buy 10 Emu pairs of 6-year-old DNA Hybrid Breeders at75000: Rs. 7, 50,000.00.

Fencing / Infrastructure/Shed Cost per DNA Standards: Rs. 1, 00,000.00.

Cost of Hatchery Machine (100 Eggs) Rs. 1,00,000.00.

Total Cost Involved: 9.5 Lacks (This is Initial setup cost).
After 15 months:
15 Months Feeding and Vaccination Cost per One Emu Bird: 7000 Rupees.

For 200 birds it would cost (200 X Rs.7000) = Rs. 14 Lacs.

Approximate weight of the one Emu Bird in 15 Months would be around 60 Kgs.

Fixed price paid per kilo live bird Rs. 250 / per Kg (This may be high in some regions).
Income = (Total Number of Emu birds ) 200 X 60 Kg (Weight of the bird) X 250 (Price of the bird) = Rs. 30 Lacs.

Emu farming profits (exclude initial set up cost) after all Expenses for every 15 months = Rs.15 Lacs.

Read: Organic Potato Farming.

Rearing day old to one month Emu chick:

The major challenge in emu bird farming is rearing day old to 1-month chicks and this chick needs to be given proper vaccination and medication and attention. Also requires a clean and healthy environment. So the mortality rate would be low

Marketing Emu chicks:

Emu Farming
Emu Farming

The returns start to flow once your eggs are hatched and chicks can be sold at the age of 3 months and it can be sold to the farm which you have tied up and also you can directly focus on selling emu chicks through promoting emu farming to farmers who are interested in starting up an Emu farm.

Emu farming Profits are proven facts by farmers. It again depends on all the factors from rearing chick to marketing Emu birds.

Read: Raising Catfish In Tanks.

Essential Grape Farming Techniques for High Yields: Successful Grape Cultivation Tips

8

Grapes, scientifically known as Vitis vinifera, are fascinating fruits that belong to the Vitaceae family. Grape cultivation plays a vital role in the agricultural industry due to its economic significance and nutritional value. It is the practice of growing and nurturing Grapevines to produce high-quality Grapes.

Grape Farming Techniques

Grape Varieties and Selection

Grapes come in a wide array of varieties, each offering its unique characteristics and flavors. When it comes to selecting the right Grape variety for cultivation, there are several factors to consider. Some popular Grape varieties include Cabernet Sauvignon, Chardonnay, Merlot, Pinot Noir, Riesling, Syrah, Sauvignon Blanc, Zinfandel, Malbec, and Muscat.

Each Grape variety thrives in specific climates and soil conditions. It’s essential to select Grape varieties that are well-suited for your region’s weather patterns and soil type. Consider factors like temperature fluctuations and rainfall levels when making your selection.

Climate and Soil Requirements for Grapes

Grapes are sensitive to their growing conditions, requiring specific climate and soil characteristics to thrive. The ideal climate condition for Grapes is a temperate one, with warm summers and mild winters. Grapes prefer a Mediterranean-like climate with plenty of sunshine to ripen properly. Grapes do best in well-drained soils that are rich in organic matter. Sandy loam or loamy soils are preferred as they provide good drainage while retaining enough moisture for the vines.

pH levels between 6 and 7 are optimal for Grapevine growth, ensuring proper nutrient uptake. Additionally, Grapes need sufficient airflow to prevent diseases like mildew from spreading. Planting in elevated areas or on slopes can help achieve this airflow while also reducing the risk of frost damage during colder months. Selecting the right climate and soil conditions is crucial for successful Grape farming practices.

Site Selection and Land Preparation

The ideal location should have good sunlight exposure, well-drained soil, and protection from strong winds. Before planting, ensure the soil is tested for pH levels and nutrient content to make necessary adjustments. Clearing the land of any debris or weeds is essential before cultivation begins.

In case you missed it: Grapes Training Systems and Methods: A Comparative Analysis

Dessert white grapes

Properly tilling the soil helps improve aeration and drainage, creating an optimal environment for Grapevines to thrive. Additionally, installing trellises or support structures early on can aid in vine growth and management as they mature. Grapes thrive in warm temperate climates with well-drained soils, making it essential to choose a suitable location for your vineyard.

Grapevine Propagation Techniques

Grapevine propagation techniques are essential for expanding your Grape orchard. One common method is using cuttings from healthy vines to grow new plants. These cuttings need to be taken during the dormant season and planted in well-prepared soil. Another technique is grafting, where a cutting with desirable traits is joined onto a rootstock. This method helps control diseases and pests while promoting vigorous growth.

Layering involves bending a low-hanging vine stem into the ground, allowing it to develop roots before being severed from the parent plant. This technique is useful for hard-to-root varieties. Tissue culture propagation is a modern method that involves growing plants from individual cells in a laboratory setting. It allows for the mass production of disease-free Grapevines.

Planting and Trellising Systems

Proper spacing between Grapevines is essential to ensure adequate sunlight exposure and airflow, which are vital for healthy growth and optimal fruit production. Choosing the right trellis system is key to supporting the weight of Grape clusters as they mature. Common trellising methods include Vertical Shoot Positioning (VSP), High Wire Cordon, Geneva Double Curtain, and Scott Henry.

Each system has its advantages and is tailored to different growing conditions and Grape varieties. Factors such as climate, soil type, vine vigor, and desired canopy density should all be taken into consideration when selecting a trellising method for your vineyard. Proper installation of trellis posts, wires, and end assemblies is essential to ensure stability and longevity. Regular maintenance throughout the growing season will help support the vines as they develop and bear fruit.

Water Management in Grape Cultivation

Water management is crucial in Grape cultivation to ensure the plants receive adequate hydration throughout their growth cycle. Grapes require a consistent water supply, especially during flowering and fruit development stages. Proper irrigation techniques like drip or sprinkler systems help prevent water stress and promote healthy vine growth. It’s essential to monitor soil moisture levels regularly to avoid overwatering or underwatering.

In case you missed it: Top 20 Grape Varieties to Grow in India: List of Grape Varieties to Grow for High Profits

grapes on the vineyard

Overly wet growing conditions can lead to root rot, while drought stress can affect fruit quality and yield. Implementing mulching around Grapevines helps retain soil moisture and reduces evaporation rates. Timing of watering is key; it’s best to irrigate early in the morning or late in the evening to minimize water loss by evaporation. Additionally, adjusting watering schedules based on weather conditions can optimize water usage efficiency in Grape farming practices.

Fertilization Strategies

Fertilization plays a crucial role in Grape cultivation, ensuring the vines receive essential nutrients for healthy growth and high yields. Before applying fertilizers, it’s vital to conduct soil tests to find the specific nutrient requirements of the vineyard. Based on the soil test results, a tailored fertilization plan can be developed to address any deficiencies and optimize nutrient uptake.

Organic fertilizers like compost and manure are great options for improving soil structure and fertility while providing slow-release nutrients to the Grapevines. Inorganic fertilizers can also be used strategically to supplement specific nutrients lacking in the soil. Nitrogen, phosphorus, potassium, and micronutrients are key elements that should be included in the fertilizer regimen based on plant needs at different growth stages.

Proper timing of fertilizer applications is essential to ensure optimal absorption by the plants without causing nutrient imbalances or leaching. By following a well-planned fertilization strategy, Grape growers can promote robust vine growth, improve fruit quality, and ultimately enhance their yield potential.

Integrated Pest Management for Grapes

Some of the most common pests in Grapes include the infamous Grapevine moth, which lays its eggs on Grape clusters, leading to damaged fruit and reduced yields. Another pesky critter to watch out for is the Grape leafhopper. Integrated Pest Management (IPM) is a crucial aspect of Grape farming, as it focuses on sustainable methods to control harmful pests without relying solely on chemical pesticides. By combining biological, cultural, and physical controls with minimal pesticide use when necessary,

Grape growers can effectively manage pest populations while minimizing environmental impact. The effective IPM strategy for Grapes is using natural predators to control common pests such as aphids and mites. Additionally, planting cover crops can attract beneficial insects that prey on harmful pests, creating a balanced ecosystem in the vineyard. Regular monitoring of Grapevines for signs of pest infestations is key to early detection and intervention.

In case you missed it: Grape Vine Pruning, Defoliation, and Thinning for Great Yield

Harvesting grapes in the yard

This allows growers to take timely action through targeted treatments like pheromone traps or organic sprays derived from plant extracts. Implementing good cultural practices, such as proper pruning techniques and maintaining healthy soil conditions, also plays a significant role in preventing pest outbreaks. By promoting overall vine health, Grape farmers can reduce the susceptibility of their crops to diseases and pests naturally.

Disease Control in Grape Farming

Disease control is a crucial aspect of Grape farming to ensure healthy vineyards and high yields. Various fungal, bacterial, and viral diseases can affect Grapevines, leading to reduced productivity and quality. Preventive measures such as proper sanitation, planting disease-resistant varieties, and monitoring for early signs of disease are essential in managing Grapevine pathogens.

Regular scouting of the vineyard for symptoms like leaf discoloration, powdery mildew, downy mildew, or black rot can help detect disease early and intervene timely. Cultural practices like pruning to improve airflow and sunlight penetration can also reduce the risk of disease development. Additionally, using organic fungicides or biocontrol agents selectively can help combat diseases sustainably without harming beneficial organisms.

Pruning and Training of Grapevines

Proper pruning helps to maintain the vine’s health and ensure optimal fruit production. When it comes to training, selecting the right system will support the vines as they grow, making harvesting easier. Regular plant pruning encourages new growth and improves air circulation within the canopy, reducing disease risks. It also helps balance vegetative growth with fruit production.

Training systems like pergolas or vertical trellises provide support for the vines to climb and receive maximum sunlight exposure. Timing is important to pruning – typically done during dormancy in late winter or early spring. Each variety may require specific pruning techniques based on its growth habits and desired yield.

Growth Regulators and Their Use in Grape Production

Growth regulators play a crucial role in Grape production, helping to manage vine growth and fruit development effectively. By using these regulators strategically, farmers can enhance the quality and yield of their Grape harvests. One common growth regulator used in Grape farming is gibberellic acid, which promotes shoot elongation and can help improve fruit set. Another essential growth regulator is abscisic acid, which aids in regulating dormancy and stress responses in Grapevines.

Ethylene is also utilized to control ripening processes and ensure uniform maturation of Grapes across the vineyard. These regulators are applied at specific stages of plant growth to achieve desired outcomes without negatively impacting the vines’ health or productivity. When used correctly, growth regulators serve as valuable tools for Grape growers looking to optimize their cultivation practices.

Harvesting Techniques and Timing for Grapes

Grapes should be harvested when they reach optimal ripeness, which varies depending on the Grape variety and intended use. For table Grapes, harvesting usually takes place when they are at their peak sweetness and flavor. This is determined by taste-testing a few Grapes from different parts of the vineyard. For wine production, Grapes are typically harvested based on sugar levels measured through a refractometer.

In case you missed it: How this Farmer Making 60 Lakhs from 6 Acres Organic Grape Farm: Organic Grape Cultivation Sucess Story in India

harvesting red grape in vineyard

Harvesting can be done manually or mechanically. Handpicking ensures delicate handling of the fruit, while machines offer efficiency for larger vineyards. Whichever method you choose, gentle handling is crucial to preserve Grape quality. Factors like weather conditions and Grape maturity need to be considered to ensure an optimal harvest time for maximum flavor development and sugar content in the Grapes.

Expected Yield in Grape Orchard

The expected yield in a Grape orchard can vary greatly depending on how well the vines are cared for throughout the growing season. Proper pruning and training methods play a significant role in maximizing yields. On average, a well-maintained Grape vineyard can produce 5 to 15 tons of Grapes per acre. However, with proper care and attention to detail, some vineyards have been known to exceed these numbers significantly.

Yield Boosting Techniques

Proper canopy management is crucial for enhancing sunlight exposure and optimizing photosynthesis. By ensuring adequate spacing between vines and training them efficiently on trellises, you can improve air circulation and minimize disease risks. Implementing strategic pruning practices tailored to your specific Grape variety can stimulate plant growth and increase fruit production. Regularly thinning out excess shoots and clusters will redirect the plant’s energy towards developing high-quality Grapes.

Furthermore, employing precision irrigation methods such as drip systems can enhance water efficiency and provide consistent moisture levels essential for healthy vine growth. Monitoring soil moisture regularly allows you to adjust watering schedules accordingly. Additionally, utilizing organic fertilizers rich in nutrients like nitrogen, phosphorus, and potassium promotes strong root development and overall plant vigor. Supplementing with micronutrients as needed ensures balanced nutrition for optimal Grape yield potential.

Organic Grape Farming Practices

Organic Grape farming practices can help you grow delicious and healthy Grapes while minimizing the use of synthetic chemicals. One essential technique is to focus on soil health by using compost and natural fertilizers to nourish the Grapevines. This promotes a balanced ecosystem in your vineyard, enhancing Grape quality.

In case you missed it: How to Control Pests and Diseases in Grapes: Causes, Symptoms, Chemical, and Biological Management

Young vine plants ready for transplanting in a vineyard

Another key aspect of organic Grape farming is implementing integrated pest management strategies. This involves using beneficial insects, such as ladybugs and lacewings, to control pests naturally without relying on pesticides. Additionally, practicing proper canopy management by pruning and training vines helps improve air circulation and sunlight exposure for optimal Grape growth.

Grape cultivation involves a series of techniques and methods aimed at maximizing yield and ensuring the health of the vines. From selecting the right Grape varieties to preparing the soil, every step in Grape cultivation plays a major role in the success of the vineyard.

Lemon Cultivation Secrets: Proven Farming Practices to Grow Healthy and Productive Lemon Trees

35

Lemons, also known as Citrus ×limon, are not just your average fruit. They come from a small tree or spreading bush that belongs to the rue family (Rutaceae). This citrus fruit is not only delicious but also versatile in its uses. Lemon cultivation is the art of growing and nurturing Lemon trees to produce this vibrant citrus fruit.

Lemon Cultivation Secrets

Varieties of Lemon

Numerous lemon varieties are cultivated worldwide, each with its own characteristics in terms of flavor, size, color, and adaptability to different climates. The popular variety is the Eureka Lemon, known for its bright yellow color and tangy taste. Another well-known variety is the Lisbon Lemon, which is similar to the Eureka but tends to have fewer seeds. The Lisbon Lemon tree produces an abundance of fruit, making it a preferred choice for commercial growers.

Meyer Lemons are gaining popularity for their sweeter flavor compared to traditional Lemons. These Lemons have thin skins and are often used in desserts and cocktails for a unique twist on classic recipes. Considering these different varieties when planning your Lemon orchard can help you cater to specific market demands and diversify your product offerings. Other Lemon varieties include bearss lemons, Pink Variegated, Primofiori, verna, Gondhoraj, Pat Nebu, Rough Lemon, Nepali Round, Mausambi—sweet Lime, and Nemu Tenga.

Climatic Requirements

Lemons thrive in subtropical and tropical climates with temperatures from 21°C to 37°C. They require plenty of sunlight to grow healthy and productive trees. Lemons are sensitive to frost, so it’s essential to plant them in areas where temperatures do not drop below 10°C. Additionally, they prefer a humid climate but can tolerate dry conditions with proper irrigation.

In regions prone to strong winds or hurricanes, consider planting windbreaks around your Lemon orchard to protect the trees from damage. Adequate shelter will help ensure your Lemon trees remain healthy and continue bearing fruit throughout the year.

Soil Requirements and Preparation

Lemons thrive in well-draining, slightly acidic soils with a pH level between 5.5 and 6.5. Before planting your Lemon trees, take the time to prepare the soil properly by incorporating organic matter such as compost or well-rotted manure. This helps improve soil structure, fertility, and water retention capacity. Avoid waterlogged or compacted soils, as they can lead to stunted growth in Lemon trees. Make a soil test to determine nutrient levels and adjust accordingly with the appropriate fertilizers. 

In case you missed it: Best 20 Lemon Varieties: Sweet, Large, and Rare High Yield Cultivars

Picking Lemons in The Orchard

Propagation Methods

The common method is through seeds, but Lemon trees grown from seeds may not always produce fruits true to the parent plant. For more reliable results, consider using vegetative propagation techniques such as air layering or grafting. Air layering involves inducing roots to form on a branch while attached to the parent tree before cutting it off to create a new plant. Grafting involves joining a bud or shoot (scion) from a desired variety onto an existing rootstock.

Planting Techniques

Seed Propagation: Lemons can be grown from seeds, but this method is less common due to the variability in fruit quality and the time it takes for the Lemon trees to bear fruit.

Budding/Grafting: This is the most common method for commercial Lemon farming. Desired Lemon varieties are grafted onto rootstocks to ensure consistency in fruit quality and yield.

Cuttings: Lemon trees can also be propagated from stem cuttings, where a portion of a mature tree’s stem is planted in the soil to develop plant roots and grow into a new tree. Water your newly planted Lemon tree thoroughly and add mulch around the tree base to retain moisture and suppress weeds. Regular watering and care will help your tree establish strong roots for optimal growth.

Drip Irrigation in Lemon Orchard

This water-efficient method ensures that each Lemon tree receives the right amount of moisture directly at its roots. By minimizing water wastage and evaporation, drip irrigation helps conserve resources while promoting healthy growth. Installing a well-designed drip system in your Lemon orchard can significantly improve fruit quality and yield. It allows you to control the watering schedule more precisely, catering to the specific needs of your trees throughout different growth stages.

The consistent and targeted hydration provided by drip irrigation also reduces the risk of diseases caused by overwatering or uneven moisture levels in the soil. With this efficient watering technique, you can optimize nutrient uptake, leading to vibrant Lemon trees bursting with fruits ripe for harvest.

Fertilization and Nutrient Management

Providing the right nutrient balance is essential for the overall growth and development of the trees. Lemons require a mix of macro and micronutrients such as nitrogen, phosphorus, potassium, and calcium for optimal growth. Regular soil testing can help determine any deficiencies that need to be addressed through fertilization. Organic fertilizer management can be used to improve the soil naturally without harmful chemicals.

In case you missed it: High-Density Lemon Plantation: Spacing, Plants Per Acre, Techniques, Cost, and Yield

Green Lime Fruit

Additionally, incorporating mulch around the base of the trees can help retain moisture and slowly release nutrients into the soil. Proper timing of fertilizer application is key to maximizing nutrient absorption by the roots. It’s important to follow recommended guidelines based on tree age and growth stage to avoid over-fertilizing, which can lead to environmental pollution.

Pest and Disease Management

Pest and disease management is crucial in Lemon cultivation to ensure healthy and productive trees. Some important pests that can affect Lemon trees include citrus psyllids, scale insects, and aphids. These pesky pests can cause damage to the leaves and fruits if not controlled effectively. The effective method of pest control is through integrated pest management practices, which involve using cultural, biological, and chemical control methods. Regular monitoring of the orchard for signs of pests and diseases is essential to catch any issues early on.

Plant diseases such as citrus canker and root rot can also impact Lemon trees if proper precautions are not taken. Applying good agricultural practices such as maintaining proper spacing between trees, ensuring adequate drainage, and practicing crop rotation can help prevent disease outbreaks.

Weed Control

To keep your orchard healthy and productive, effective weed control is essential. One popular method is mulching around the base of the Lemon trees to suppress weed growth and retain soil moisture. Hand weeding is also crucial, especially in between rows where machinery can’t reach easily.

Regularly removing weeds by hand helps prevent them from spreading and choking out your Lemon trees. Herbicides are another tool in the weed control toolbox but should be used cautiously to avoid harming your citrus plants. It’s important to select herbicides that target specific types of weeds without damaging your valuable Lemon crop. 

Pruning and Canopy Management

Regular tree pruning helps maintain the shape of the tree, allows sunlight to penetrate throughout the canopy, and promotes better air circulation. This reduces the risk of diseases and pest infestation while enhancing fruit quality. When it comes to pruning Lemon trees, it is crucial to remove dead or diseased branches, water sprouts, and any overcrowded or crossing limbs.

It is important to prune during the dormant season to minimize stress on the Lemon tree and stimulate new growth in spring. Proper canopy management involves maintaining a balanced structure that allows for easy access to harvesting fruits. By strategically thinning out branches and shaping the canopy, you can improve overall tree health and increase productivity over time.

Flowering and Fruit Set

Lemon trees typically flower in clusters, with each bloom capable of turning into a fruit. Proper care during this stage is essential for a successful harvest. Factors like temperature, humidity, and pollination play significant roles in determining the fruit set. Adequate sunlight exposure also contributes to the healthy development of Lemons on the tree.

In case you missed it: How to Grow Lemon Tree from Seed: A Step-by-Step Guide for Beginners

Lemons on Tree

Pruning can help promote better air circulation among branches, leading to more efficient pollination and increased fruit production. Ensuring optimal conditions during flowering sets the foundation for a bountiful Lemon harvest later on. Paying attention to these details will ultimately result in healthier trees and higher yields in your orchard.

Boosting Lemon Tree Flowers

Boosting Lemon tree flowers is essential for a bountiful harvest. One effective way to achieve this is by ensuring proper nutrition and hydration for the trees. Make sure your Lemon trees receive adequate sunlight, water, and nutrients to promote healthy flower growth. By removing dead or unnecessary branches, you allow more energy to be directed towards flower production.

Regularly inspect your Lemon trees for any pests or diseases that may be hindering their ability to bloom abundantly. Consider incorporating organic fertilizers or compost into the soil around your Lemon trees to provide them with the necessary nutrients for optimal flowering. With proper tree care, you can enjoy a flourishing orchard filled with beautiful Lemon blossoms.

Harvesting and Post-Harvest Handling

Harvesting Lemons at the right time is crucial for their quality and taste. When the fruit reaches its peak color and size, it’s ready to be picked. Carefully hand-pick each Lemon to avoid bruising or damage. After harvesting, proper post-harvest handling is essential to preserve the Lemon’s freshness. Sorting them based on size and quality ensures a uniform product for market distribution. Clean any dirt or debris off the Lemons before packing.

Packaging plays a major role in the Lemons’ shelf life. Use ventilated containers to prevent moisture buildup that can lead to rotting. Store them in a dry place away from direct sunlight.

Average Yield of Lemons

The number of Lemons a tree can produce varies based on climate, soil quality, and farming practices. On average, a healthy Lemon tree can yield anywhere from 500 to 600 fruits per year. However, this number can fluctuate based on how well the tree is cared for throughout the growing season. 

Organic Lemon Farming Practices

By avoiding synthetic fertilizers, organic farmers prioritize the tree health and the surrounding ecosystem. Utilizing natural ways like companion planting and biopesticides helps control pests without harming beneficial insects. Soil health is crucial for organic farming. Organic practices such as green manure, crop rotation, cover crops, and composting help improve soil fertility and structure.

Utilize integrated pest management (IPM) techniques to control pests and diseases. This includes practices like crop rotation, beneficial insect habitat enhancement, and mechanical pest control methods. Use biological control agents such as predatory insects and microbial pesticides to manage pests organically.

In case you missed it: Top 15 Steps to Boost Lemon Yield: How to Increase Fruit Size, Production, and Quality

Picking Lemons

Maintaining soil health through composting and cover cropping enhances nutrient availability for Lemon trees, resulting in healthier fruit production. Additionally, implementing water conservation techniques like mulching and drip irrigation reduces water usage while promoting efficient growth. Organic Lemon farmers also focus on biodiversity by creating a balanced ecosystem that supports pollinators and beneficial organisms essential for a thriving orchard.

Integrated Farm Management

Integrated Farm Management is a holistic approach that focuses on maximizing efficiency and sustainability in Lemon cultivation. By integrating various farming practices such as crop rotation, intercropping, and natural pest control methods, farmers can enhance the health of their Lemon trees while minimizing environmental impact.

This method emphasizes the importance of maintaining a balanced ecosystem within the orchard to promote natural pest control and reduce reliance on chemical inputs. Farmers practicing Integrated Farm Management strive to create a biodiverse environment where beneficial insects thrive, helping to keep harmful pests at bay. Additionally, this approach encourages the use of organic fertilizers and compost to improve soil health and fertility naturally.

Cost to Setup a Lemon Farm

The cost to set up a Lemon farm can change based on on various factors such as land cost, location, scale of the operation, infrastructure, labor costs, and initial investments in equipment and inputs. Generally, setting up a Lemon farm could cost anywhere from ₹100,000 to ₹200,000 or more per acre, depending on several factors.

In case you missed it: Lemon Flower and Fruit Drop, Causes, Control Methods

Lemon on Tree

Profit Margins in Lemon Orchard

the profitability of Lemon orchards per acre varies depending on the region and market demand. Some areas may have higher selling prices for Lemons compared to others, influencing overall profit margins for farmers. The profit from a Lemon orchard per acre could be around ₹75,000 per year. The profit margins in a Lemon orchard per acre depend on various factors such as the quality of the soil, climate conditions, water availability, and pest control measures.

By implementing efficient farming practices and staying updated with market trends, farmers can maximize their profits from Lemon cultivation. Lemon cultivation is a fascinating practice that involves nurturing Lemon trees to yield delicious and tangy fruits. By implementing best farming practices and maintaining optimal conditions for growth, farmers can ensure a bountiful harvest each year.

Fish Farming for Beginners: How to Launch a Profitable Aquaculture Business

56

Fish farming, also known as aquaculture, involves raising fish in controlled environments for commercial purposes. It’s a sustainable way to produce high-quality seafood while contributing to economic growth. With the global population constantly growing, producing more fish can help meet the increasing demand for protein-rich food. It also promotes sustainability by reducing pressure on wild fish populations and ecosystems.

Fish Farming for Beginners

Fish Farming for Beginners

Do Your Homework for Planning

Start by familiarizing yourself with different fish species suitable for aquaculture. Consider factors like water temperature, oxygen levels, and feeding habits that best suit your chosen fish. Next, study market trends and demand in your area. Understanding consumer preferences will help you decide which type of fish to farm for maximum profitability. 

Create a detailed business plan outlining your goals, budget, marketing strategies, and production processes. This roadmap will guide you through each stage of setting up and running a successful fish farming operation.

Pick the Perfect Spot

The perfect location can significantly affect the success of your aquaculture business. Look for a site with access to clean water sources and good water quality. Make sure there are no pollutants or industrial activities nearby that could harm your fish. When selecting a location for your fish farm, consider factors like temperature, sunlight exposure, and natural shelter.

Optimal environmental conditions can promote healthy growth and reduce stress among the fish. Accessibility to transportation networks is also important for easy distribution of your harvested fish to markets or buyers. Choose a spot that is convenient for both you and potential customers.

Choose Your Fish Wisely

Conduct thorough research on different types of fish that can thrive in your chosen location’s water conditions. Some species grow faster than others, allowing for quicker turnover and potential profits. Additionally, take into account the feeding habits and diet requirements of each type of fish – some may be more cost-effective to feed than others. Select fish species that can be raised sustainably with minimal environmental impact.

In case you missed it: The Eco-Friendly Makeover: How to Convert Your Unused Swimming Pool into a Fish Pond

Cages for Fish Farming

Avoid species that are overexploited or listed as endangered or threatened. Choose fish species that are well-suited to aquaculture conditions, taking into account factors such as water temperature, pH levels, oxygen requirements, and feeding habits. Tilapia, catfish, salmon, trout, and shrimp are popular choices for aquaculture due to their adaptability and growth potential.

Moreover, consider the environmental impact of farming a specific type of fish. Opt for sustainable options that have minimal negative effects on the ecosystem. Balance profitability with sustainability when deciding which fish to raise in your aquaculture venture.

Know the Legal Requirements

Before starting an aquaculture business, you’ll likely need to obtain permits and licenses from regulatory authorities. These may include permits for water use, land use, environmental impact assessments, and aquaculture operations. Check with local government agencies or fisheries departments to ensure compliance with all legal requirements. Familiarize yourself with the legal requirements involved.

Each region may have specific regulations and permits you need to adhere to ensure your farm operates smoothly and within the law. Aquaculture operations must comply with environmental regulations to minimize impacts on water quality, ecosystems, and biodiversity. This may involve implementing measures to prevent pollution, manage waste, and protect sensitive habitats.

Researching and understanding these legalities will not only help you avoid potential fines or shutdowns but also demonstrate your commitment to running a legitimate and responsible operation. Knowing the legal landscape is essential for a successful fish farming venture, from obtaining necessary licenses to complying with environmental standards. Consulting with local authorities or seeking guidance from experienced fish farmers can provide valuable insights into what is required in terms of permits, zoning restrictions, water usage rights, and other relevant regulations.

Design Your Farm Smartly

Consider the layout of your enclosures, ensuring adequate space and proper water circulation for the optimal growth of your fish. Think about accessibility too; easy access will make daily operations smoother and more efficient. Additionally, plan for potential expansion in the future by leaving room for growth.

In case you missed it: Sustainable Biofloc Fish Farming: A Comprehensive Guide to Eco-Friendly Practices

Carps in A Pond

Utilize technology to monitor water quality and automate feeding systems where possible. This can help streamline processes and ensure the health of your fish. Consider sustainability in your design by implementing eco-friendly practices, such as water conservation techniques. Remember, a well-designed farm benefits your fish and contributes to the profitability of your aquaculture business.

Water is Key

Fish need clean and well-oxygenated water to thrive and grow successfully. Ensuring the right quality of water is essential for their health and productivity. Regular water parameter testing, such as pH levels, temperature, oxygen content, and ammonia levels, is crucial in maintaining a suitable environment for your fish. Understanding these factors will help you make necessary adjustments to ensure optimal conditions.

Investing in a reliable filtration system can help maintain water quality. Additionally, monitoring the flow of water within your enclosures is important to prevent stagnation or low oxygen levels. Remember that different fish species have specific requirements for water quality and temperature. It’s vital to research each type of fish you plan on farming to provide them with an environment where they can thrive.

Get the Right Equipment 

Invest in quality tanks or ponds that are suitable for the type of fish you plan to raise. Please make sure they are durable and easy to clean. Aeration systems are essential to ensure your fish have enough oxygen in the water. Consider installing pumps or aerators to maintain proper oxygen levels. Temperature control equipment is vital, especially if you live in an area with extreme weather conditions.

Heating or cooling devices can help regulate water temperature for optimal growth. Install heaters to maintain water temperature within the optimal range for your fish species, especially in colder climates. In warmer climates, consider cooling systems such as chillers or evaporative coolers to prevent overheating. Don’t forget about feeding equipment such as automatic feeders to ensure your fish receive proper nutrition consistently.

In case you missed it: 14 Biofloc Fish Farming Tank Suppliers in India: Top Aqua Products Manufacturers

Fish Playing on Surface of Water

Additionally, having nets, grading tools, and other handling equipment will make managing your fish farm easier and more efficient. Provide safety equipment such as life jackets, first aid kits, and emergency signage for workers. If transporting fish to market or other facilities, use transport tanks or containers equipped with oxygenation systems to ensure fish survival during transit.

Find Healthy Fish

Start by sourcing your fish from reputable suppliers who prioritize quality and health. Look for signs of good health in the fish, such as clear eyes, intact fins, and active swimming behavior. When selecting your fish, consider their specific needs regarding water temperature, pH levels, and tank size to ensure they thrive in their new environment.

Quarantine new arrivals to prevent diseases among your existing stock. Observe your fish’s behavior and appearance regularly to monitor their health. If you notice any unusual behaviors, seek advice from a vet or experienced aquaculturist. Providing a clean and well-maintained habitat will also help keep your fish healthy and disease-free.

Feed Them Well

Feeding your fish well is crucial for their growth and overall health. Different species have different dietary needs, so it’s essential to research what will work best for the type of fish you are farming. Providing a good diet rich in proteins, vitamins, and minerals will help them thrive. Pelleted or extruded feed is commonly used in fish farming as the fish receives all the necessary nutrients.

It’s important to monitor how much food you give them to prevent overfeeding, which can be affected by water pollution and health issues for the fish. Consider consulting with a nutritionist specialized in aquaculture to create a feeding plan tailored to your specific farm and fish species. By providing high-quality feed at regular intervals, you’ll support optimal growth rates and reduce the risk of diseases within your population.

Keep Them Healthy

Keeping your fish healthy is crucial for the success of your aquaculture business. The key aspect of maintaining their health is monitoring water quality regularly. Make sure the water is clean and well-oxygenated to prevent diseases and stress among your fish. Another important factor in ensuring their well-being is providing them with a balanced diet. Proper nutrition will help boost their immune system and overall health.

Regularly inspecting your fish for any signs of illness or abnormal behavior can also help you address any issues promptly. In case you notice any problems, consult with a veterinarian to provide proper treatment. Implementing good biosecurity measures on your farm can also prevent diseases from spreading among your fish population. To minimize risks, quarantine new arrivals, control access to ponds, and maintain strict hygiene practices.

Safety First

By applying safety measures on your fish farm, you not only protect yourself but also create a secure working environment. Invest in high-quality safety gear such as gloves, boots, and life jackets. Proper clothing can protect you from injuries while working on your farm. Regularly inspect all equipment for signs of wear or damage.

In case you missed it: Key Rules to Start Fish Farming in Denmark: Business Plan, Breeds, Setup Cost, and Profit

Lake with Colorful Fish

Malfunctioning tools or machinery can lead to dangerous situations, so maintenance is key to keeping everything running smoothly. Establish clear safety protocols for yourself and anyone else involved in operating the fish farm. Communicate these guidelines effectively to ensure everyone understands their role in maintaining a safe environment.

Manage Your Fish Population

You need to ensure that the number of fish on your farm is balanced with the resources available to support them. Overcrowding can lead to stress, disease outbreaks, and poor growth rates among the fish. Regular monitoring of your fish population is essential. Please keep track of their growth rates, health status, and behavior. This will help you identify any issues early on and take necessary actions to address them.

When managing your fish population, consider factors like water quality, oxygen levels, and feeding habits. Adjust as needed to maintain optimal conditions for their growth and well-being. If overcrowding becomes an issue, consider implementing strategies like thinning out the herd or expanding your farming area. By carefully managing your fish population, you can ensure a healthy environment for your aquatic livestock.

Harvest at the Right Time

Harvesting at the right time ensures that you maximize profits and deliver high-quality products to your customers. The key factor in determining the right time to harvest is the size of the fish. Make sure they have reached their optimal weight for market demands while still maintaining good flesh quality.

Monitoring water temperature and oxygen levels can also help you decide on the best timing for harvesting. Fish tend to grow faster in warmer water, so consider this when planning your harvest schedule. It’s important to handle harvesting with care to minimize stress on the fish, which can affect their quality. Use proper equipment to ensure a smooth process from pond or tank to market.

Sell Your Fish

Selling your fish can be an exciting part of your aquaculture business journey. Consider different sales channels such as local markets, restaurants, or setting up an online store to reach a wider audience. Build relationships with potential buyers and wholesalers to secure consistent sales.

In case you missed it: Key Rules to Maintain Water Quality in Aquaculture: Parameters, Management, Effects of Water Quality on Fish Growth

Fish Farm

Create attractive packaging that showcases your fish’s quality and highlights any unique selling points. Comply with all regulations regarding labeling and food safety standards. Promote your products through social media, flyers, or collaborations with other businesses in the food industry. Offer discounts to attract customers and retain existing ones.

Be Eco-friendly

By applying eco-friendly practices, you not only contribute to the health of the environment but also enhance the sustainability and profitability of your operation. Utilize renewable energy sources, minimize waste production, and implement responsible water management strategies to ensure a greener approach to aquaculture.

Being eco-friendly is not just a trend – it’s a responsibility we all share in safeguarding our planet for future generations. Fish farming provides economic opportunities for entrepreneurs and local communities. It creates jobs along the supply chain, from hatcheries to processing plants, boosting rural economies. Plus, it offers a steady income source once your farm is up and running successfully. 

The Ultimate Guide to Greenhouse Farming in India: Explore from Setup to Cultivation

12

Greenhouse farming is crucial to ensuring food security by providing a controlled environment for crops to thrive. It allows farmers to cultivate high-quality produce throughout the year, regardless of external weather conditions.

Greenhouse Farming in India

Overview of Greenhouse Farming in India

The importance of greenhouse farming is evident in its ability to increase crop yield and protect plants from pests and diseases effectively. With the rising demand for high-quality produce, Indian farmers are increasingly turning to greenhouse farming as a viable solution. The practice involves growing plants inside structures that allow sunlight in while trapping heat, creating an optimal growing environment.

Infrastructure and Types of Greenhouses

A greenhouse’s infrastructure includes materials like glass, plastic, or polycarbonate panels that allow sunlight to enter while retaining heat. Additionally, ventilation systems help regulate temperature and humidity levels inside the greenhouse. There are various types of greenhouses suited for different needs, such as traditional glass greenhouses, polyethylene film greenhouses, and even high tunnels.

Each type has advantages depending on factors like climate, crop type, and budget constraints. Choosing the right greenhouse infrastructure can greatly impact the productivity and sustainability of your farming operations.

Key Crops Cultivated in Indian Greenhouses

When it comes to greenhouse farming in India, the various crops that can be cultivated are truly diverse. The options are abundant, from luscious fruits like raspberries, strawberries, and muskmelons to juicy peaches and tropical papayas. Grapes, pomegranates, and bananas thrive well in controlled greenhouse environments. In terms of vegetables, greenhouses provide the perfect conditions for growing capsicums, tomatoes, chillis, English cucumbers, and various leafy greens.

In case you missed it: Integrated Pest Management for Greenhouse Crops: IPM Strategies for Greenhouse Plants

cucumber greenhouse plantation

Additionally, flowers such as chrysanthemums, gerberas, orchids, roses, and carnations bloom beautifully in Indian greenhouses. For nursery plantations, you can grow cacti, colorful exotic plants, mini species, and ornamental indoor plants with ease. The controlled environment ensures optimal growth throughout the year, resulting in high-quality produce ready for market or personal use.

Climate Management in Greenhouses

Controlling temperature, humidity, and ventilation are key factors to consider. In India, where the climate varies significantly across regions, it’s important to adapt greenhouse conditions accordingly. Using shade nets can help regulate sunlight exposure and prevent overheating during hot weather.

Additionally, installing cooling systems like fans or misting systems can help maintain optimal temperatures inside the greenhouse. Proper irrigation practices are essential for monitoring and adjusting humidity levels, which prevent diseases and ensure healthy plant growth. Proper ventilation systems also play a vital role in maintaining air circulation and preventing moisture stagnation.

Soil Preparation and Nutrient Management

Before planting, the soil must be tested to determine its pH levels and nutrient content. Based on the results, the soil should be amended with organic matter or fertilizers to provide the necessary nutrients for plant growth. Proper soil preparation involves tilling the land, removing debris, and ensuring good drainage to avoid waterlogging. Additionally, incorporating compost or vermicompost into the soil can improve its structure and fertility. This allows for better root development and nutrient uptake by plants.

Nutrient management is key in greenhouse farming, as plants rely on a supply of macronutrients and micronutrients. Regularly monitoring nutrient levels through soil tests helps adjust fertilizer applications accordingly. By maintaining healthy soil conditions through proper preparation and effective nutrient management practices, greenhouse farmers can ensure optimal plant growth and maximize yields for their crops.

Irrigation Techniques for Greenhouse Crops

Drip irrigation is a popular method used by many greenhouse farmers in India. This system delivers water to the plant roots and reduces the risk of diseases. Another effective technique is fogging or misting systems that help maintain humidity levels inside the greenhouse, especially during hot weather conditions. 

In case you missed it: Natural Pollination in Greenhouse Crops Using Bumblebees and Other Beneficial Insects

growing tomatoes in the greenhouse

These systems can cool the temperature and create an ideal growing environment for crops by providing a fine mist of water droplets. Furthermore, hydroponic systems are gaining popularity among greenhouse farmers for their ability to deliver nutrients directly to plant roots without using soil. This method conserves water and allows for precise control over nutrient levels, promoting healthy plant growth.

Pest and Disease Management in Greenhouses

With a controlled environment, greenhouses can be susceptible to pests and diseases that can harm crops. Farmers commonly use integrated pest management techniques to minimize the chemicals and maintain ecological balance within the greenhouse. The most important pests include aphids, whiteflies, thrips, and mites. These tiny insects can quickly multiply and wreak havoc on your crops if not managed effectively.

Due to the warm and humid conditions, diseases like powdery mildew, botrytis, and bacterial leaf spots are also common in greenhouses. Greenhouse farmers must regularly monitor their crops for signs of pest infestations or disease outbreaks. Regular monitoring of crops is essential to identify signs of pests or diseases early on. This proactive approach allows for timely intervention, reducing the risk of crop damage.

Biological control ways, such as introducing beneficial insects or using natural predators help keep pest populations in check without harming the environment. Furthermore, proper hygiene practices within the greenhouse, such as cleaning equipment, removing plant debris, and practicing crop rotation, can also prevent diseases. When necessary, organic pesticides are utilized to ensure minimal impact on both crops and the surrounding ecosystem.

Remember to regularly inspect your crops for disease signs, such as yellowing leaves, spots, or unusual growth patterns. To control pests effectively while minimizing environmental impact, implement integrated pest management strategies, such as using beneficial insects, traps, and organic pesticides.

Use of Technology in Greenhouse Cultivation

Technology is crucial in modern greenhouse cultivation, revolutionizing crop cultivation. Automated climate control systems ensure optimal temperature, humidity, and ventilation for plant growth. Drip irrigation systems deliver water and nutrients to the plant roots, maximizing efficiency and reducing waste. Additionally, sensors monitor soil moisture levels and nutrient content, allowing farmers to make data-driven decisions.

LED lighting can be tailored to specific crop needs, enhancing photosynthesis and growth rates. Advanced pest management techniques, such as biological controls and integrated pest management, reduce reliance on harmful chemicals. Furthermore, drone technology is being used for aerial surveys to monitor crop health and detect potential issues early on. This technology improves productivity and promotes sustainable practices by minimizing resource wastage.

Government Support and Subsidy Schemes

Subsidy schemes play a crucial role in promoting greenhouse farming in India. Various state and central government initiatives aim to provide financial assistance, training programs, and subsidies to encourage farmers to adopt modern greenhouse technologies. These schemes help reduce farmers’ initial setup costs, making greenhouse farming more accessible for small-scale growers.

These benefits allow farmers to invest in infrastructure improvements, purchase quality seeds and equipment, and implement sustainable practices. Additionally, government support enhances the overall productivity of greenhouse farms by offering technical guidance on crop management techniques and pest control measures.

The availability of subsidies also incentivizes farmers to explore new markets for their greenhouse produce while ensuring food security and economic growth at a national level. The best subsidy scheme available for greenhouse farmers is the National Horticulture Mission (NHM), which provides financial assistance for setting up greenhouses and purchasing necessary equipment.

In case you missed it: Management of Greenhouse Pests and Diseases: Management, Control, Prevention, and Treatment

greenhouse flower farming

Additionally, the Rashtriya Krishi Vikas Yojana (RKVY) offers subsidies for implementing advanced technologies in agriculture, including greenhouse cultivation. Furthermore, under the Pradhan Mantri Fasal Bima Yojana (PMFBY), farmers can insure their crops against natural calamities at affordable premium rates. This scheme provides an added layer of security for greenhouse growers, ensuring protection against unforeseen losses.

Market Opportunities for Greenhouse Produce

With an increasing demand for fresh, high-quality fruits, vegetables, flowers, and exotic plants year-round, greenhouse farmers have a significant advantage. Due to its consistent quality and availability throughout the year, greenhouse-grown produce often commands higher prices. Restaurants, supermarkets, and wholesalers are constantly seeking out suppliers who can provide them with a steady supply of locally grown greenhouse produce. Consumers increasingly value fresh, pesticide-free produce, which greenhouse farming offers.

This presents an opportunity for farmers to meet this growing demand while also maximizing their profits. Because greenhouse farmers can grow crops year-round regardless of seasonal changes, they have a competitive edge over traditional open-field agriculture. Moreover, the export market for Indian greenhouse products is also on the rise. Countries around the world are looking to import premium-quality crops grown sustainably in controlled environments like greenhouses.

Where to Get Training for Greenhouse Farming?

For individuals looking to delve into the world of greenhouse farming in India, acquiring proper training is essential. There are various institutes and organizations across the country offering specialized courses and workshops on greenhouse cultivation. The popular option is the National Horticulture Board (NHB), which frequently organizes training programs focusing on modern agricultural practices, including greenhouse farming.

Additionally, agricultural universities such as IARI in Delhi, IIHR in Bangalore, and others offer diploma and certificate courses specifically tailored for greenhouse enthusiasts. Online platforms like AgriAcademy also provide valuable resources through webinars and online courses accessible to aspiring farmers nationwide. Moreover, connecting with local agricultural extension offices can lead to information on upcoming training sessions or workshops within your region.

Sustainability Practices in Greenhouse Farming

To ensure long-term viability, farmers are adopting eco-friendly ways like drip irrigation to conserve water and reduce wastage. Recycling organic waste into compost for soil enrichment is another common practice among greenhouse farmers. Integrated pest management ways are implemented to minimize chemical pesticide use and promote natural pest control methods within the greenhouses. Crop rotation and companion planting strategies aid in maintaining soil fertility and biodiversity, leading to healthier plant growth without depleting resources excessively.

In case you missed it: Greenhouse Chrysanthemum Farming Cost and Profitability Analysis

Farmer watering flowers in a greenhouse

Challenges Facing Greenhouse Farmers in India

The significant challenge is the initial investment required to set up a greenhouse, which can be daunting for small-scale farmers. Additionally, managing the climate inside the greenhouse to ensure optimal crop growth conditions can be tricky, especially during extreme weather conditions. Pest and disease management also pose a challenge, as enclosed environments can sometimes create ideal breeding grounds for harmful insects and pathogens.

Furthermore, access to technology and technical know-how can be limited in some regions, hindering farmers from fully harnessing greenhouse cultivation’s benefits. Market fluctuations and pricing uncertainties add another layer of complexity for greenhouse farmers in India. Balancing production costs with market demand requires careful planning and strategy to ensure profitability. Despite these challenges, many Indian farmers are embracing greenhouse farming as a sustainable solution for food security and economic stability.

Financial Planning for Greenhouse Farming

Setting up a greenhouse can be a significant investment, but with proper planning, it can be highly profitable. To reduce your financial burden, carefully estimate the initial setup costs, including infrastructure, equipment, seeds, and other essentials. Conduct thorough research on government subsidy schemes and support available for greenhouse farming.

When creating your budget, consider ongoing operational expenses such as labor costs, utilities like water and electricity, pest control measures, and maintenance. Additionally, factor in market fluctuations and crop yields when projecting your potential profits. Seek advice from agricultural experts or attend training programs to enhance your financial literacy in greenhouse farming.

Cost to Setup a Greenhouse in India

The cost of setting up a greenhouse typically ranges from Rs.600 to Rs.2000 per square meter, depending on the construction type chosen. Factors like the size of the greenhouse, materials used for construction, and technology integrated into the structure can impact overall costs.

Average Profit from 1 Acre Greenhouse Farming

With the right crops and management practices, farmers can earn a significant income from just one acre of greenhouse cultivation. The average profit margin can range anywhere between 6 lakhs to 20 lakhs per acre annually. This cost is due to the diversity of crops that can be grown in greenhouses, each with its own market demand and pricing fluctuations. Factors such as crop selection, market conditions, resource utilization efficiency, and effective pest control measures all affect the profitability of greenhouse farming ventures.

In case you missed it: Rice Cultivation in Greenhouse: A Profitable Business Plan for Sustainable Farming

Gglasshouse

Conclusion

Greenhouse farming in India is a modern agricultural technique that involves cultivating crops under controlled environmental conditions within a structure made of transparent materials like glass or plastic. This method allows farmers to regulate temperature, humidity, light exposure, and ventilation to create optimal growing conditions for plants. It promotes sustainable agricultural practices by maximizing resource efficiency and reducing water usage.

The Complete Guide to Tomato Farming: Cultivation for Seed to Harvest

11

Tomatoes, scientifically known as Solanum lycopersicum L., are a staple in many households around the world. Belonging to the nightshade family, these flowering plants are cherished for their vibrant and juicy fruits. Tomato farming is a popular agricultural practice worldwide, and Tomatoes are one of the most widely consumed vegetables.

The Complete Guide to Tomato Farming

Best Right Tomato Varieties for Commercial Farming

Numerous tomato varieties are available in the market, but selecting the best variety can significantly affect yield and profit margins. The top choice for commercial farming is the Roma Tomato variety. Known for its high productivity and disease resistance, Roma Tomatoes are ideal for processing and preserving due to their low seed count. For those looking to capitalize on cherry Tomatoes’ popularity, Sweet 100 or Sun Gold varieties are excellent options.

These small, flavorful Tomatoes are perfect for fresh consumption and have a longer shelf life compared to other types. If you’re aiming for larger beefsteak Tomatoes, consider growing Big Beef or Celebrity varieties. These cultivars produce hefty fruits with exceptional taste, making them sought after in both local markets and supermarkets. Some other popular Tomato varieties are Beefsteak Tomatoes, Heirloom Tomatoes, Plum Tomatoes, and Grape Tomatoes.

Soil Preparation and Requirements

Tomato plants grow well in well-draining soil with a pH level between 6 and 7. Before planting, ensure the soil is rich in organic matter by incorporating compost or manure. Apply a soil test to find nutrient levels and make amendments based on the results. This will help provide your Tomato plants with the nutrients they need to grow healthily.

Properly preparing the soil by tilling and removing debris or weeds will create an optimal environment for root development and water absorption. Remember to space out your Tomato plants to prevent overcrowding, which can lead to disease issues. Additionally, mulch retains moisture throughout the growing season.

Climate and Environmental Conditions

Starting with selecting the right Tomato varieties suitable for your region’s climate and soil conditions is crucial. Tomatoes thrive in warm temperatures ranging from 23°C to 29°C during the day and above 15°C at night. Tomato plants require plenty of sunlight, at least 6-8 hours per day, so choose a location with good sun exposure. Additionally, Tomatoes prefer well-drained soil to prevent waterlogging, which can lead to root rot.

In terms of humidity, Tomatoes do best in moderate levels, around 65-75%. High humidity levels can increase diseases such as blight, while low humidity may hinder fruit development. Understanding your local climate patterns will help you plan irrigation schedules accordingly. Consistent watering is important for healthy Tomato plants, but be cautious not to overwater as it can cause issues like blossom end rot.

Average Seed Rate of Tomatoes Per Acre

The recommended seed rate for traditional varieties is around 200 grams for every acre of land dedicated to Tomato cultivation. Hybrid varieties require a lower amount of seeds, ranging from 60 to 80 grams per acre. Investing in good-quality Tomato seeds is crucial for a successful harvest. The cost of obtaining high-quality seeds for one acre of cultivation typically amounts to approximately Rs. 300. This initial investment plays a significant role in determining the overall yield and success of your Tomato crop.

In case you missed it: Tomato Hornworm Management: Overview, Control, Prevent Five-spotted Hawk Moth

Colorful Tomatoes for Sale in Greenhouse

Seedling Preparation and Planting

Start by selecting healthy seeds from a reliable source. To prepare the seedlings, sow the seeds in trays or pots filled with well-draining soil mix. Keep them warm and moist until they germinate. Once the Tomato seedlings have sprouted, ensure they receive plenty of sunlight to grow strong.

When the seedlings have developed a few true leaves, it’s time to transplant them into your prepared field. Space them appropriately to allow for proper growth and airflow. Gently handle the delicate roots during transplantation to minimize shock. Water the newly transplanted seedlings thoroughly. Monitor their growth closely and provide support like stakes or cages as they mature.

Irrigation and Water Management

Irrigation is a crucial aspect of Tomato farming, ensuring that the plants receive an adequate water supply to thrive. Proper water management plays a significant role in tomato growth and development. Tomatoes require consistent moisture levels to prevent issues such as blossom end rot or cracking. Drip irrigation or soaker hoses are efficient methods for delivering water directly to the roots, reducing evaporation and water wastage.

It’s essential to monitor soil moisture regularly and adjust irrigation schedules accordingly based on weather conditions. Overwatering the Tomato plant can lead to diseases like root rot while underwatering can stunt plant growth and reduce yieldsAdditionally, scheduling irrigation during early morning or late evening hours can minimize water loss due to evaporation under intense sunlight.

Fertilization Schedule for Tomato Crop

Tomatoes are heavy feeders, so they require the right balance of nutrients at different growth stages. Before planting, prepare the soil with organic matter and apply phosphorus-rich fertilizer. As the plants grow, they switch to nitrogen-rich fertilizers for healthy foliage development. During flowering and fruiting stages, potassium is essential for strong fruit production. Regularly monitor the plant’s nutrient needs and adjust your fertilization schedule accordingly.

In case you missed it: Top 24 Steps to Boost Tomato Yield: How to Increase Production, Quality, and Size

Basket Full of Fresh Tomatoes

Organic options like compost, manure, or organic fertilizer are great choices for sustainable farming practices. Chemical fertilizers can also be used but should be applied carefully following instructions to avoid over-fertilization, which can harm the plants. Regular soil testing can help determine any deficiencies in the soil and guide you on the type and amount of fertilizer needed.

Pest and Diseases Management in Tomato Crop

Some of the pests that can affect Tomato crops include aphids, whiteflies, and cutworms. These insects can cause damage to the Tomato plants by feeding on their stems. Diseases such as blight, leaf spot, and powdery mildew are also common in Tomato crops. These fungal infections can spread quickly if not properly managed, leading to reduced yield and quality of the harvest. It is important to monitor their crops regularly for pest infestation or disease development signs.

Implementing IPM (integrated pest management) practices and using organic methods like neem oil or garlic spray can help control pests effectively while minimizing environmental impact. In addition, practicing crop rotation and maintaining proper spacing between plants can reduce the risk of disease outbreaks in Tomato fields. Additionally, using resistant Tomato varieties can be a game-changer in preventing diseases.

Regularly scouting the plants for any signs of infestation or infection is essential to catching problems early on. Natural predators can also be introduced to control pest populations organically. Neem oil and other biopesticides are eco-friendly options to keep pests at bay without harming beneficial insects. By staying vigilant and proactive in managing pests and diseases, you can protect your Tomato crop and ensure a healthy yield at harvest time.

Weed Management Practices

Weeds compete with Tomato plants for nutrients, water, and sunlight, reducing their productivity. Manual weeding can be effective but labor-intensive. Mulching is a great way to suppress weeds while retaining soil moisture and regulating temperature. For best results, use organic mulches like straw or grass clippings.

Crop rotation, which involves planting different crops each season, helps disrupt weed life cycles. This practice also improves soil health and reduces the buildup of weed populations. Herbicides are another option for controlling weeds, but caution must be taken to choose products safe for Tomatoes and follow application guidelines carefully. Regularly monitoring your fields for any signs of weed growth is essential to catch them early before they become a problem.

How to Prune and Train Tomato Plants

Tomato plants require proper pruning and training to ensure optimal growth and fruit production. Pruning involves removing unnecessary branches or leaves to promote better air circulation and sunlight penetration. This helps prevent diseases and improves overall plant health.

In case you missed it: Weed Management in Tomato Crop: Common Weeds of Tomato and Herbicides Safe for Tomatoes

Tomatoes in The Hothouse

When pruning Tomato plants, focus on removing suckers that grow in the leaf axils. These are small shoots that can divert energy away from fruit production. Training Tomato plants involves supporting them as they grow. You can use stakes, cages, or trellises to keep the plants upright and prevent them from sprawling on the ground.

Best Practices for Pollination and Fruit Set

The best practice for enhancing pollination is by attracting pollinators to your farm. You can do this by planting flowers nearby or setting up beehives. Another effective practice is shaking the Tomato plants gently during flowering to mimic the buzzing of bees, helping with pollen transfer. Additionally, avoiding excessive pesticide use during flowering periods can also promote natural pollination.

To ensure a good fruit set, make sure that there are enough healthy blossoms on each plant. Thinning out excess blossoms can redirect energy towards developing quality fruits. Providing adequate water and nutrients throughout the growing season will also support proper fruit development.

How to Boost Tomato Flowers for More Yields

Ensure proper nutrition for your Tomato plants. Please provide them with adequate amounts of potassium and phosphorus to promote healthy flower development. Make sure to use organic fertilizers such as manure to enrich the soil and enhance overall plant health. This will encourage more robust flower production.

Additionally, consistent watering practices are crucial for promoting flower formation. Tomatoes require regular moisture to thrive and set fruit successfully. Furthermore, pruning Tomato plants can also boost flower production. Remove any unnecessary growth or leaves that may be hindering optimal sunlight exposure. Consider introducing beneficial pollinators like bees into your garden to help increase flower pollination and ultimately improve fruit yield.

Average Yield of Tomatoes per Acre

A farmer can expect a total yield of 8 to 12 tonnes per acre. However, this yield can vary depending on various factors, such as soil quality, climate conditions, and proper crop management techniques. Achieving a high yield requires careful planning and consistent monitoring throughout the cultivation process.

In case you missed it: Tomato Farming Business Plan: A Production and Cultivation Guide for Beginners

Tomato Harvest

From seed selection to post-harvest handling, each step plays a major role in finding the final output. Farmers need to pay attention to irrigation practices, fertilization schedules, pest control measures, and weed management strategies to optimize their Tomato production.

Harvesting and Post-Harvest Handling

Tomato harvesting must be done carefully to avoid damaging the fruits. Gently twist or cut the stem using pruning shears to separate the Tomato from the plant. Make sure to handle the harvested Tomatoes with care to prevent bruising or spoiling. Sort out any damaged or overripe Tomatoes, as they can affect the quality of your produce during storage.

Post-harvest handling is crucial in preserving the freshness and flavor of your Tomatoes. Store them in a dry place away from direct sunlight. Remember to avoid storing Tomatoes in the refrigerator as it can affect their texture. Consider selling or consuming your harvested Tomatoes promptly to enjoy them at their peak freshness.

Organic Tomato Farming Practices

Implementing natural pest control methods, such as introducing beneficial insects or using neem oil, can help manage pests effectively. Cover cropping and crop rotation are also common practices in organic Tomato farming to maintain soil fertility. Organic Tomato farming practices focus on sustainable methods to grow Tomatoes without using synthetic chemicals.

Instead, organic farmers rely on natural inputs like compost, manure, and bio-fertilizers to nourish the soil and promote plant growth. Crop rotation is a major practice in organic Tomato farming to prevent pest and disease buildup in the soil. By rotating crops regularly, farmers disrupt pest life cycles and maintain soil fertility naturally.

Weed management in organic Tomato farming involves manual weeding or mulching with materials like straw or grass clippings. This helps suppress weed growth without resorting to herbicides. Natural predators are encouraged in organic Tomato farms to control pests organically. This biological pest control method reduces the need for chemical pesticides while maintaining a balanced ecosystem.

Cost of Cultivation of Tomatoes in 1 Acre Land

The cost of cultivating Tomatoes on one acre of land typically ranges from Rs. 50,000 to Rs. 80,000. These values change based on different factors like seeds, fertilizers, labor costs, and pest control measures. It’s important to budget wisely and plan for any unforeseen costs that may arise during the cultivation process. Remember, your investment in quality inputs and proper care for your Tomato crop can significantly impact your overall yield and profit margins at harvest time.

Expected Profit Returns in 1-acre Tomato Crop

The expected profit returns of Rs. 1,20,000 – Rs. 1,50,000 per acre and can vary widely depending on various factors such as location, market demand, cost of production, weather conditions, and farming practices.

In case you missed it: How to Stake Your Tomato Plants: With Simple Steps, Step-By-Step Process, Methods, and Different Ways

Tomatoes

Tomatoes, with their juicy flavors, are not just a kitchen staple but also a profitable crop for farmers. Due to their versatility, tomato farming plays a vital role in the agricultural sector. It provides employment opportunities for many individuals worldwide, contributing to economic growth. Additionally, cultivating Tomatoes helps increase crop diversity and promote sustainable farming practices.