Home Blog Page 186

Ultimate Guide to Organic Garlic Farming: Cultivation Practices for Beginners

6

Garlic, scientifically known as Allium sativum and belonging to the amaryllis family, this perennial plant boasts not only its distinctive aroma but also its flavorful bulbs that add depth and richness to dishes worldwide. Organic Garlic farming involves cultivating Garlic using natural methods that promote soil health and biodiversity. This approach focuses on sustainable techniques to grow Garlic while preserving the environment.
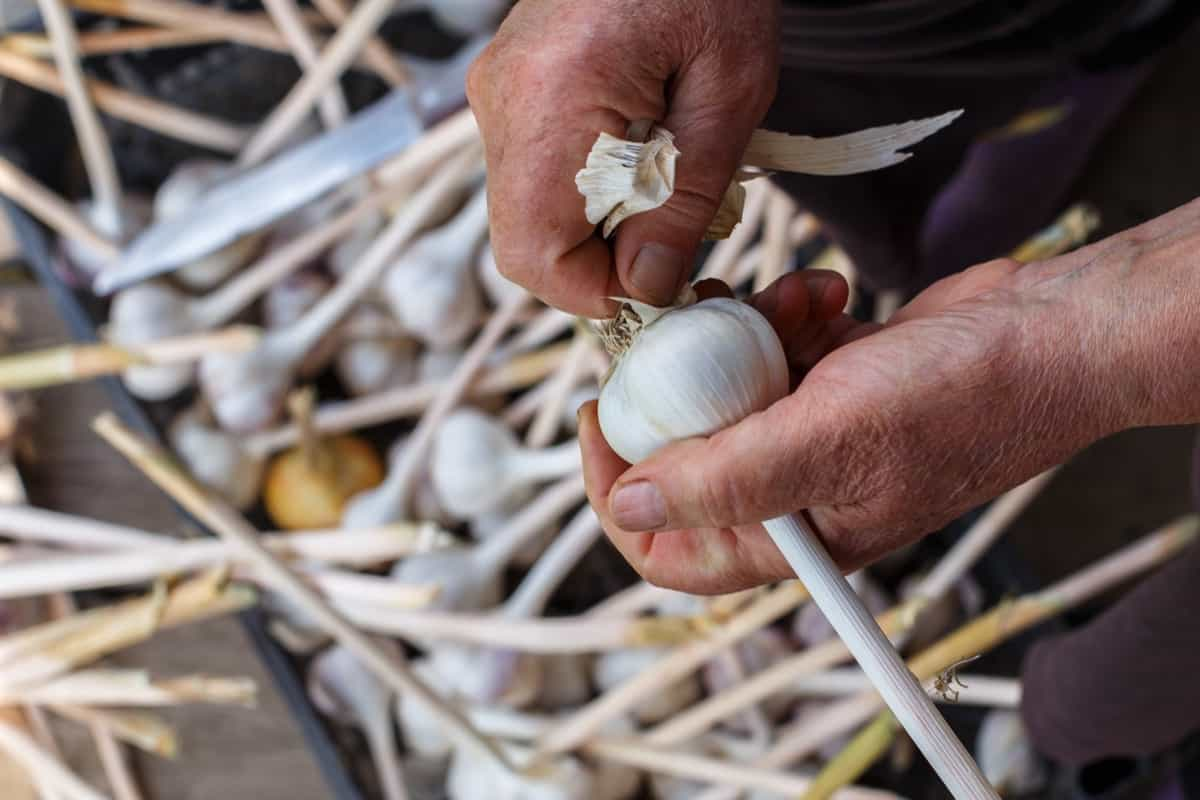
Organic Garlic Farming

Benefits of Growing Garlic Organically

By choosing organic methods, you’re not only producing healthier and tastier bulbs but also contributing to a more sustainable environment. Organic Garlic farming avoids synthetic chemicals, pesticides, and fertilizers that can harm both the soil and your health. Organic Garlic is free from harmful residues often found in conventionally grown produce. This means you can enjoy the full flavor of fresh Garlic without worrying about ingesting any unwanted chemicals.

Additionally, organic farming practices promote biodiversity and support beneficial insects that help control pests naturally. Furthermore, by opting for organic Garlic cultivation, you are investing in long-term soil health. Organic methods focus on building nutrient-rich soil through composting and crop rotation, which leads to improved yields over time.

Furthermore, organic Garlic farming supports biodiversity by encouraging natural pest control ways instead of relying on synthetic insecticides. This helps maintain ecological balance within the farm environment. Additionally, growing organic Garlic can contribute to sustainable agriculture practices by reducing pollution and preserving water quality.

Understanding Garlic Varieties

Choosing the right Garlic variety is essential for successful cultivation. There are two main Garlic types: hardneck and softneck. Hardneck varieties typically have fewer cloves but larger bulbs and are better suited for colder climates. Softneck varieties, on the other hand, have more cloves per bulb and a longer shelf life. Numerous cultivars with unique flavors and growth characteristics exist within these categories. Some popular hardneck varieties include Rocambole, Porcelain, and Purple Stripe. Softneck options include Artichoke and Silverskin.

Consider factors like climate, soil type, and intended use when selecting the best Garlic varieties for your farm. Some thrive in colder climates, while others prefer warmer weather. Experimenting with different varieties can help you determine which ones grow best in your specific farming conditions. By diversifying your crop selection, you can cater to a wider range of customer preferences.

Soil Requirements for Organic Garlic

Garlic plant thrives in well-draining soil that is rich in organic matter. Ideally, choose a sunny location with loamy or sandy soil for optimal growth. Avoid waterlogged areas, as Garlic bulbs can rot if the soil is too wet. Before planting Garlic cloves, it’s essential to test the soil’s pH level. It prefers acidic soil with a pH range between 6 and 7.  Remember to avoid using chemical fertilizers or pesticides, which can harm beneficial microorganisms in the soil. Organic practices promote sustainability and the long-term health of the ecosystem.

In case you missed it: Weed Management in Garlic Farming: How to Control With Organic, Cultural, and Mechanical Methods
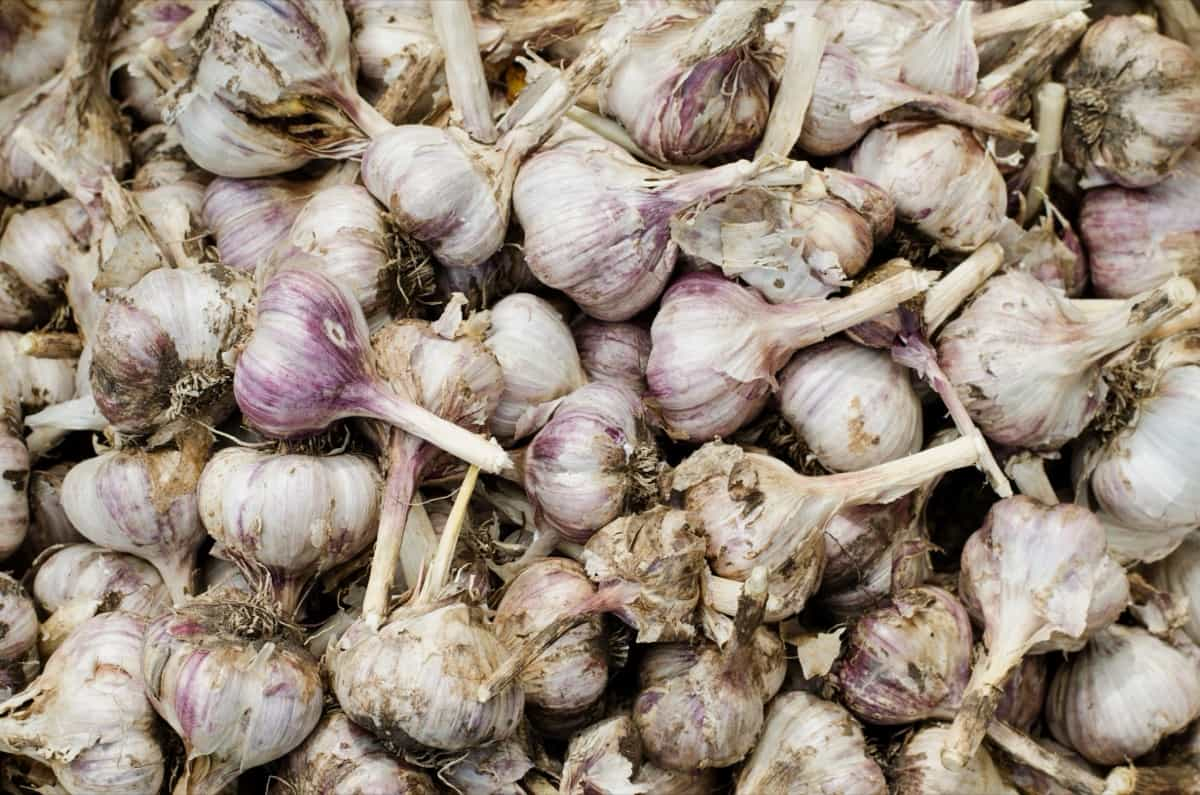
Garlic Harvest

Preparing the Soil for Garlic Planting

Start by selecting a sunny place with well-draining soil; garlic loves sunlight and doesn’t like soggy roots. Next, use a garden fork to loosen the soil about 8 to 10 inches of depth. This will help the Garlic bulbs develop properly and prevent them from rotting in compacted soil. Adding organic matter is crucial for providing essential nutrients to your Garlic plants. Work the organic matter into the soil thoroughly before planting. Consider making a soil test to determine if any specific nutrients are lacking and amend accordingly.

Consider making a soil test to determine if any adjustments are needed in terms of pH levels or nutrient deficiencies. Once you’ve amended the soil, use a garden fork to loosen it up and create a friable texture that promotes healthy root development. Avoid compacted soil, as it can hinder plant growth and bulb formation.

Organic Seed Clove Selection

Look for large, healthy cloves from disease-free bulbs, as they will produce strong and vibrant plants. Avoid small or damaged cloves, as they may result in weak growth. For optimal yield, select varieties well-suited to your climate and soil conditions. Popular varieties include Rocambole, Porcelain, Purple Stripe, and Artichoke.

Each type offers unique flavors and sizes, so pick based on your preferences and market demand. Inspect each clove carefully before planting to ensure they are firm and free of mold or rot. Properly selected seed cloves will give you a head start in growing robust Garlic plants that will reward you with flavorful bulbs at harvest time.

Planting Techniques for Garlic

For optimal results, choose large, healthy organic seed cloves. Before planting, separate the cloves carefully and ensure they are free from damage or disease. Push each clove into the ground until it’s just covered with soil. Water carefully after planting to help settle the soil around the cloves.

In case you missed it: Garlic Fertilizer Requirements and Recommendations: How and When to Apply
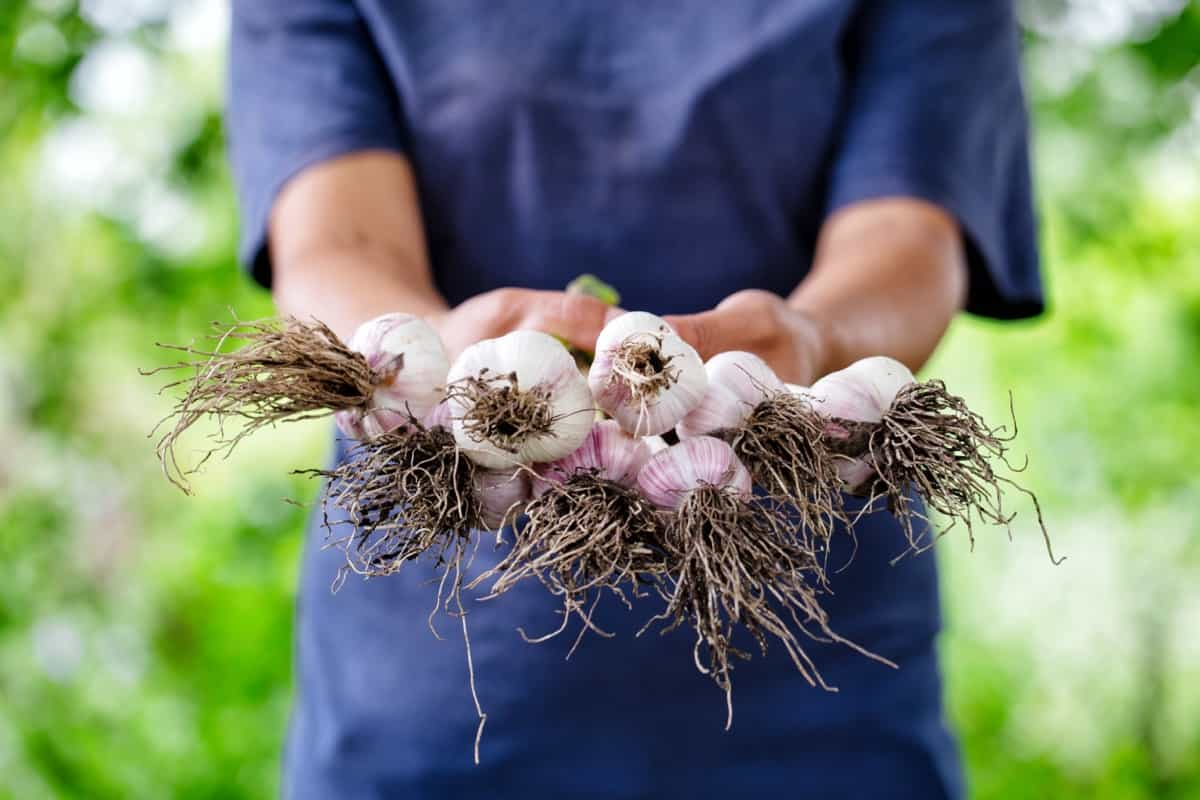
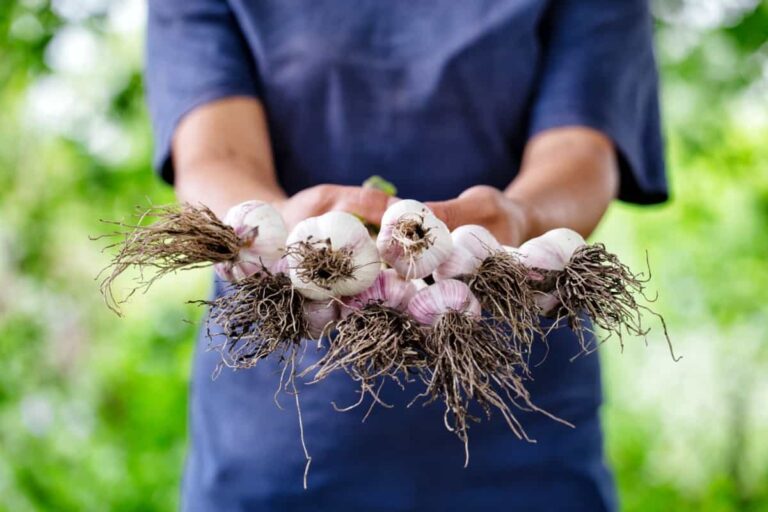
Freshly Harvested Garlic

Garlic requires consistent watering throughout its growing season. Keep an eye on your crop’s progress and adjust watering accordingly. Mulch around your Garlic plants to help retain moisture and suppress weeds. Water consistently throughout the growing season, especially during dry periods. With these planting techniques in mind, you’ll be harvesting a bountiful crop of delicious organic Garlic at harvest time.

Water Management in Garlic Farming

Proper irrigation is important for the healthy growth of Garlic plants. The key is to maintain soil moisture, as excessive water can affect rot and disease. It’s important to water consistently, especially during the growing season when Garlic plants require adequate hydration for bulb development. Mulching can help to reduce evaporation, ensuring that your Garlic crop receives sufficient water.

Soil moisture levels should be monitored regularly to adjust watering schedules accordingly. Soaker hoses can be an efficient method of delivering water to the root zone while minimizing wastage. Avoid overhead watering as it can promote fungal diseases in Garlic crops. Watering early in the day allows foliage time to dry before evening, reducing the risk of issues like mold or mildew developing. By implementing proper water management practices, you can support robust growth and yield in your organic Garlic farm.

Organic Fertilization Strategies

Choosing the right fertilization strategy is crucial for healthy crop development. Organic fertilizers such as compost, manure, and vermicompost provide nutrients to the soil without harmful chemicals. Compost is a fantastic option as it enriches the soil, improving its structure and fertility.

Manure from livestock animals like cows or chickens also adds valuable nutrients while enhancing microbial activity in the soil. Vermicompost, produced by earthworms breaking down organic matter, is a nutrient-rich fertilizer that boosts soil health and promotes robust Garlic growth. These natural fertilization methods nourish the plants and support biodiversity in the ecosystem.

Natural Weed Management

Organic Garlic farming requires effective weed management to ensure the healthy growth of your crops. Weeds compete with Garlic plants for nutrients, water, and sunlight, hindering their development. Utilizing natural methods can help control weeds without harming the environment or compromising the organic integrity of your farm.

Mulching is a popular natural weed management technique that involves covering the soil around Garlic plants with materials like straw, leaves, or grass clippings. This helps suppress weed growth by blocking out sunlight and preventing weed seeds from germinating. Hand weeding is another efficient way to control weeds in your Garlic farm.

Regularly inspecting and manually removing weeds by hand ensures they do not overcrowd or overshadow your Garlic plants. Crop rotation is a sustainable way that can also help manage weeds naturally. By rotating crops seasonally, you disrupt the life cycles of pests and weeds that may specifically target your Garlic crop.

Organic Pest Control Methods

Some common pests that can affect Garlic crops include aphids, thrips, nematodes, and onion maggots. To combat these pests organically, you can introduce beneficial insects to your farm.  Another effective method is using homemade Garlic spray or neem oil to deter pests from attacking your Garlic plants. Additionally, practicing crop rotation and intercropping with companion plants can disrupt the breeding cycles of pests and reduce their impact on your Garlic crop.

Disease Prevention in Garlic Crops

Several common diseases can affect Garlic crops, impacting both yield and quality. The most prevalent disease is white rot, which causes white fungal growth on the bulbs and roots. Another issue to watch out for is downy mildew, characterized by yellow spots on leaves that eventually turn brown. Garlic rust is another concern, manifesting as orange-brown pustules on the leaves.

In case you missed it: Garlic Farming Business Plan: Cultivation and Production Guide for Beginners
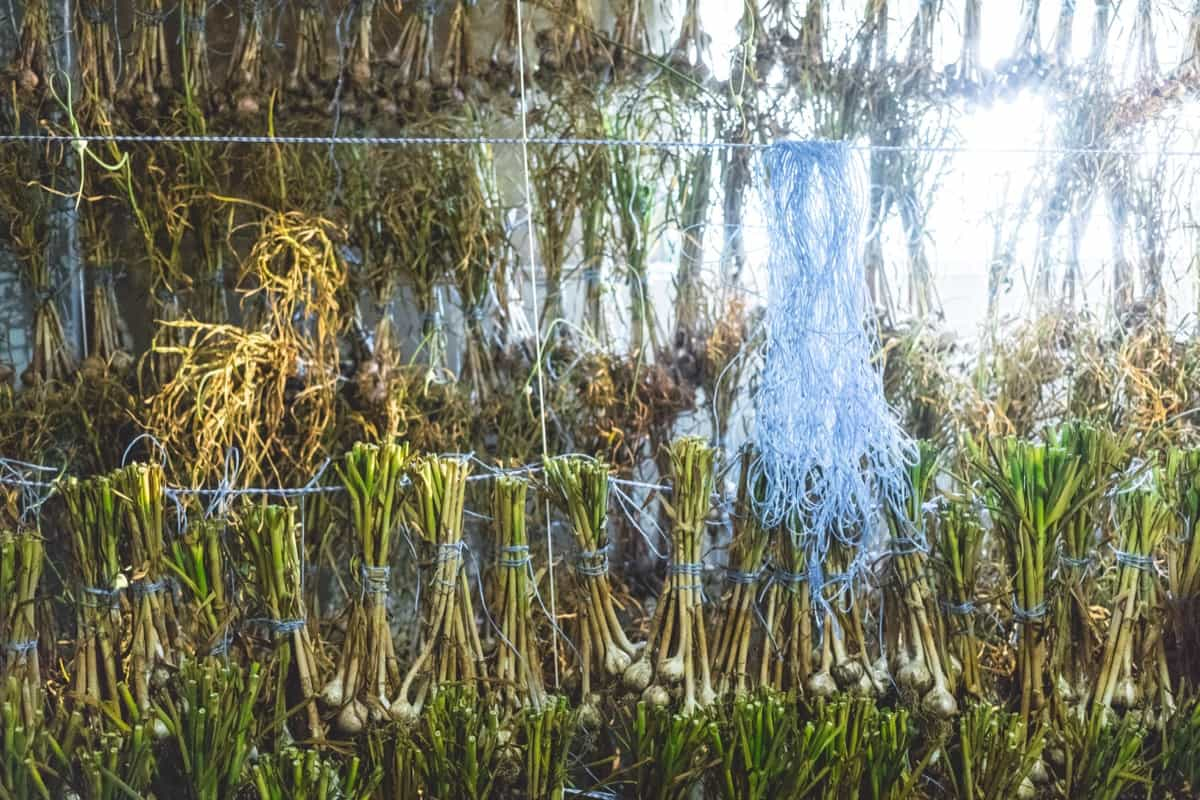
Garlic Farm

Fusarium basal rot attacks the base of the plant, leading to wilting and decay. Leaf blight can also be problematic, causing brown lesions on foliage. To prevent these diseases, practicing crop rotation, ensuring proper spacing between Garlic plants for air circulation, and avoiding overhead watering can help maintain healthy Garlic crops throughout the growing season. Organic solutions such as using compost tea or neem oil sprays can help prevent and manage white rot effectively.

The Growth Cycle of Organic Garlic

The growth cycle of organic Garlic is a fascinating journey that begins with planting the cloves in well-prepared soil. Once planted, the cloves start to develop roots and establish themselves in the ground. As they grow, green shoots emerge from the soil, reaching for sunlight and nutrients. During the growing season, Garlic plants require consistent watering to ensure proper development. It’s essential to monitor moisture levels in the soil and adjust watering accordingly.

As the plants mature, they form bulbs underground, which gradually swell over time. Garlic plants go through different stages of growth, from bulb initiation to bulb maturation. Each stage is crucial for producing high-quality organic Garlic bulbs rich in flavor and nutritional benefits. Patience is key as you observe your Garlic crop progress through these stages. When the time is right, harvest your organic Garlic bulbs carefully to preserve their freshness and taste.

Harvesting Organic Garlic

It is an exciting time for farmers as it marks the culmination of months of hard work and dedication. When the lower leaves of Garlic plants start to turn yellow and dry out, it’s a sign that the Garlic bulbs are ready to be harvested. Once lifted from the ground, allow the Garlic bulbs to dry in a well-ventilated area for a few weeks. This curing process helps enhance their flavor and ensures they can be stored properly.

In case you missed it: Ginger Fertilizer Requirements and Recommendations: A Step-By-Step Guide
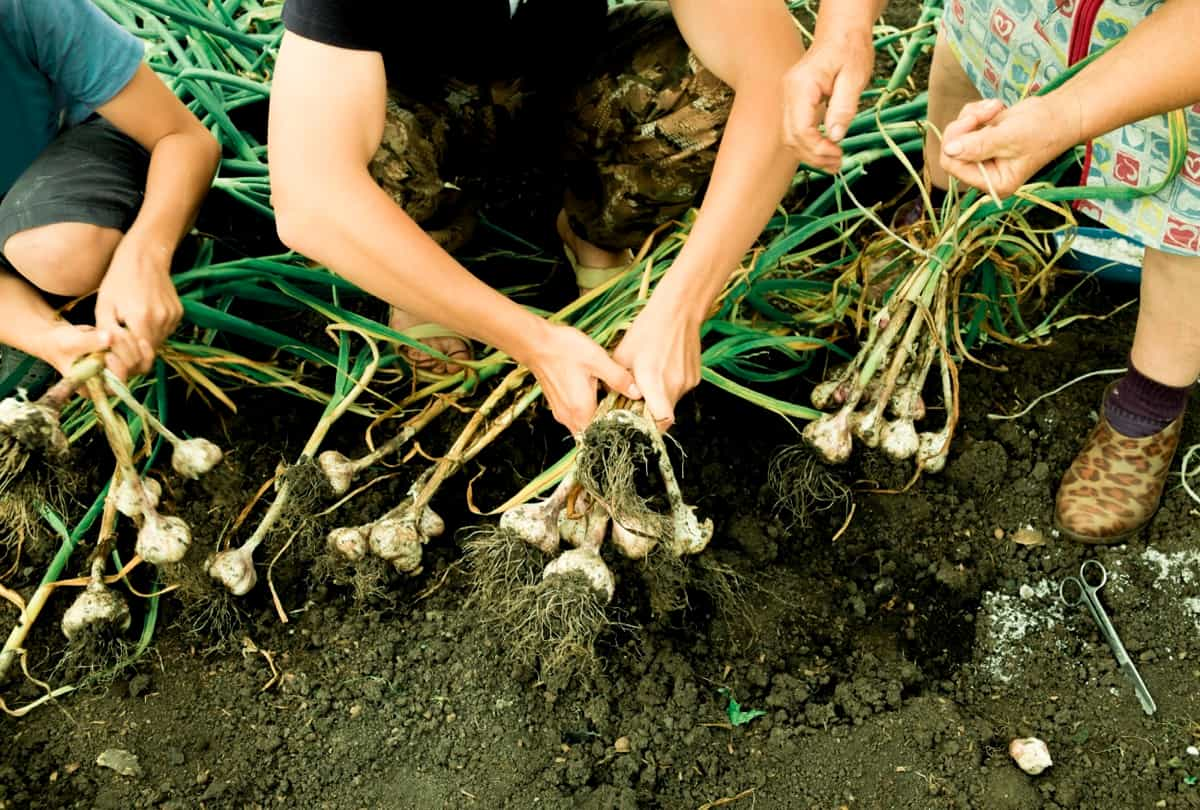
Harvesting Garlic in a farm

Trim off any excess roots before storing your Garlic in a cool, dark place. Properly cured organic Garlic can last several months when stored correctly. Remember, harvesting is just one step in your journey towards growing delicious and sustainable produce on your farm.

Curing and Storage of Garlic

After harvesting your organic Garlic, the next crucial step is curing and storage. Curing allows the Garlic bulbs to dry out gradually, enhancing their flavor and extending their shelf life. To cure Garlic properly, hang them in a well-ventilated area with low humidity for about 2-3 weeks. Avoid exposing the Garlic bulbs to direct sunlight during this process to prevent them from sprouting prematurely.

Once they are fully cured, trim any excess roots before storing them in a cool, dark place with good airflow. When storing Garlic, aim for temperatures between 15-18°C and relative humidity of around 60-70%. Avoid storing it in the refrigerator, as it can cause premature sprouting or mold growth. Instead, opt for a mesh bag or an open container that allows air circulation.

Marketing Organic Garlic

One popular option is selling directly to local markets, including farmers’ markets and grocery stores that prioritize organic produce. These venues offer a great opportunity to connect with consumers who value the quality and sustainability of organically grown Garlic.

In case you missed it: How to Start Dragon Carrot Farming: A Step-by-Step Growing Guide
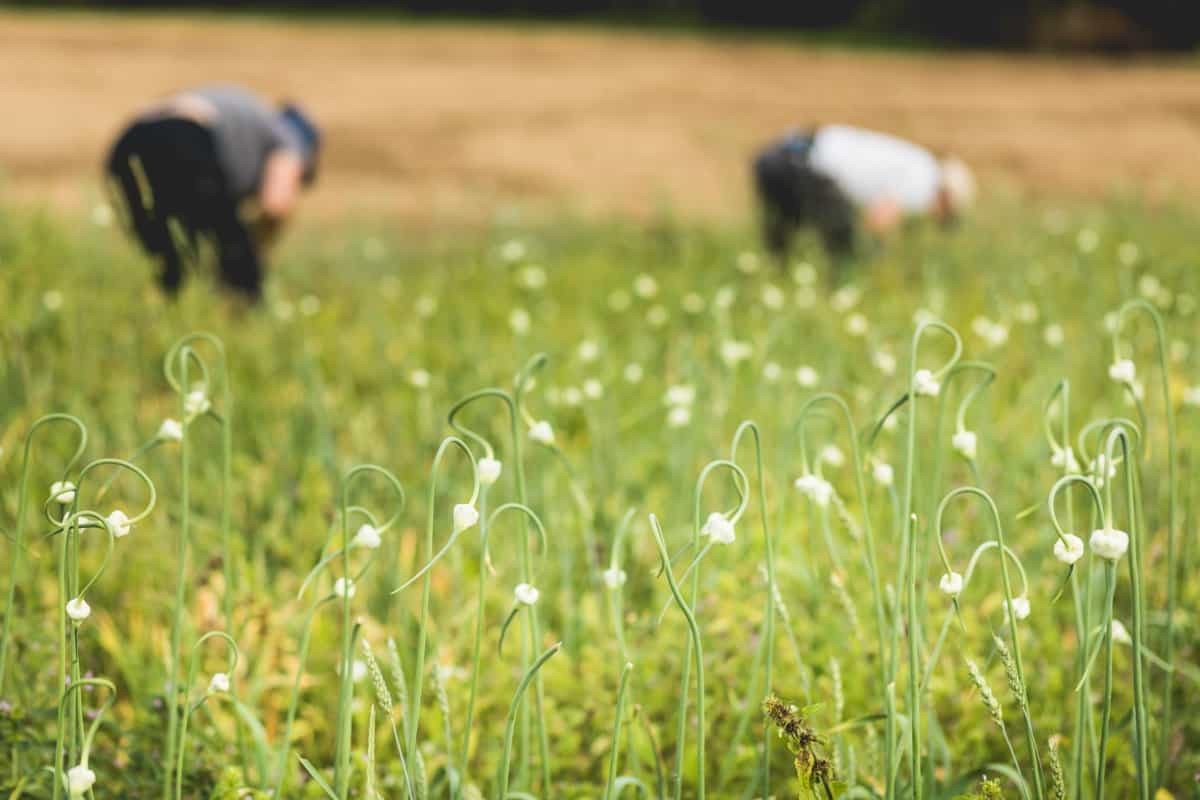
Farmers Picking Garlic in the Field

Another strategy is developing relationships with restaurants and chefs who appreciate the unique flavors of organic Garlic in their culinary creations. By supplying these establishments with fresh, high-quality Garlic, farmers can showcase the superior taste and aroma of their products while building lasting partnerships in the food industry. Additionally, online sales platforms provide a convenient way for farmers to reach a wider audience beyond their local community.

Creating an engaging website or utilizing e-commerce platforms can help attract customers looking for premium organic Garlic products delivered straight to their doorstep. Growing Garlic organically ensures that you are providing your family and customers with a clean and chemical-free product. Organic Garlic farming not only contributes to sustainable agriculture but also promotes environmental health and personal well-being.

Ultimate Guide to Organic Ginger Farming: Cultivation Practices for Beginners

15

Ginger (Zingiber officinale) is an herbaceous flowering plant that belongs to the family Zingiberaceae. Organic Ginger farming is a sustainable agricultural practice that cultivates Ginger without the use of synthetic chemicals or pesticides. It involves nurturing the Ginger plants using natural and environmentally friendly methods to ensure high-quality yields.

Organic Ginger Farming

Benefits of Growing Ginger Organically

Organic Ginger farming involves cultivating this root crop without the use of synthetic chemicals or pesticides. The advantage is that organic Ginger cultivation promotes environmental sustainability by avoiding synthetic chemicals and pesticides. This helps maintain biodiversity, ensuring a more natural growing process. In addition, choosing organic Ginger means supporting local farmers who prioritize ethical farming practices and care for the well-being of their crops and surrounding ecosystems.

By opting for organic Ginger, you are not just getting a high-quality product; you are also contributing to a sustainable food system overall. Furthermore, organically grown Ginger tends to have higher nutritional value compared to conventionally grown Ginger. This means consumers can enjoy a healthier product with potentially greater flavor and medicinal properties.

Selecting the Right Ginger Variety

There are several popular varieties of Ginger that you can select from based on specific needs and location. Some popular Ginger varieties include Maran, Nadia, Rio de Janeiro, and Mahima. Each Ginger variety has its unique characteristics in terms of flavor profile, size, and growth requirements. One common variety is Yellow Ginger, known for its strong flavor and medicinal properties.

In case you missed it: Ginger Fertilizer Requirements and Recommendations: A Step-By-Step Guide

Freshly harvested ginger

Another popular choice is White Ginger, which is milder in taste and commonly used in cooking. The Blue-Ring Ginger variety stands out with its unique blue rings on the rhizomes. For those looking for a more pungent option, the Black Ginger variety might be the best fit. When deciding on the right Ginger variety for your organic farm, consider factors like climate conditions, soil type, and market demand.

Climate and Soil Requirements for Ginger

Ginger thrives in warm and humid conditions, making it ideal for tropical and subtropical regions. Ginger plants prefer soil rich in organic matter with a pH level between 6.0 and 8.0. Sandy loam or loamy soil types are perfect for Ginger cultivation, as they allow proper root development and prevent waterlogging.

Ensure your Ginger farm receives ample sunlight of around 4-5 hours daily while also providing partial shade to protect the Ginger plants from extreme heat during peak hours. Water the Ginger plant regularly to maintain consistent moisture levels in the soil but avoid water stagnation, which can lead to the rotting of rhizomes. 

Preparing the Soil for Organic Ginger

Ginger thrives in loose, well-draining soil with plenty of organic matter. Start by clearing the land from any weeds or debris that may hinder growth. Next, ensure the soil is rich in nutrients by incorporating compost or well-rotted manure. This will provide essential nutrients for your Ginger plants to flourish. Remember to conduct a soil test to determine any deficiencies and adjust accordingly.

To improve aeration, you can add sand or perlite to the soil mixture. Mix everything thoroughly to create a uniform blend before planting your Ginger rhizomes. Clear any weeds or debris from the planting region to reduce competition for nutrients and water – giving your Ginger plants the best chance to flourish. Break up clumps of soil and create raised beds if needed for better drainage.

Organic Propagation Methods

The common method is through rhizome division. This involves carefully separating sections of the Ginger rhizome with buds or eyes to plant in the soil. Another organic propagation technique is tissue culture, in which small pieces of Ginger tissue are used to grow new plants under controlled conditions. Some farmers also opt for seed propagation, although this method may take longer and require specific environmental conditions for successful germination.

In case you missed it: Ginger Farming Business Plan: A Guide to Production and Cultivation for Beginners

Organic Ginger

Planting Techniques for Ginger

Start by selecting healthy Ginger rhizomes from a reputable source. Look for firm, plump rhizomes with plenty of buds or “eyes” for sprouting. Before planting Ginger, it’s important to prepare the soil properly. Ginger thrives in well-draining soil rich in organic matter. Avoid waterlogged conditions to prevent rotting.

Plant the Ginger rhizomes shallowly, about 2 inches deep, and space rhizomes at least 8 inches apart to allow room for growth. Ensure the planted rhizomes receive adequate sunlight and regular watering without over-saturating the soil. As the Ginger plants grow, mulch around them to retain moisture and suppress weed growth. Regularly check for pests and diseases to address any issues promptly.

Organic Fertilization Practices

Organic fertilizers are natural sources like compost, manure, and organic matter. These fertilizers help replenish essential nutrients in the soil without harming the environment or compromising the quality of the produce. They improve soil structure, increase water retention capacity, and promote beneficial microbial activity. Organic fertilization practices involve applying compost or well-rotted manure to the soil before planting Ginger rhizomes.

This provides a slow release of nutrients throughout the growing season, feeding the plants gradually. Additionally, organic farmers can use organic liquid fertilizers made from seaweed or fish emulsion to provide an extra boost of nutrients during key growth stages. By adopting sustainable fertilization practices, organic Ginger farmers can ensure long-term soil productivity while producing high-quality Ginger crops for consumers.

Irrigation Strategies for Ginger

Ginger plants require consistent moisture levels to thrive and develop those flavorful rhizomes. The effective irrigation strategy for Ginger is drip irrigation, which means it delivers water to the root zone, ensuring efficient water usage. This method helps prevent diseases caused by excess moisture on the leaves. Mulching around Ginger plants can also help retain soil moisture and reduce evaporation rates. Organic mulches like straw or compost not only conserve water but also improve soil structure over time.

In case you missed it: Pest Control Cost Per Acre in India: Organic vs Chemical Cost Comparison

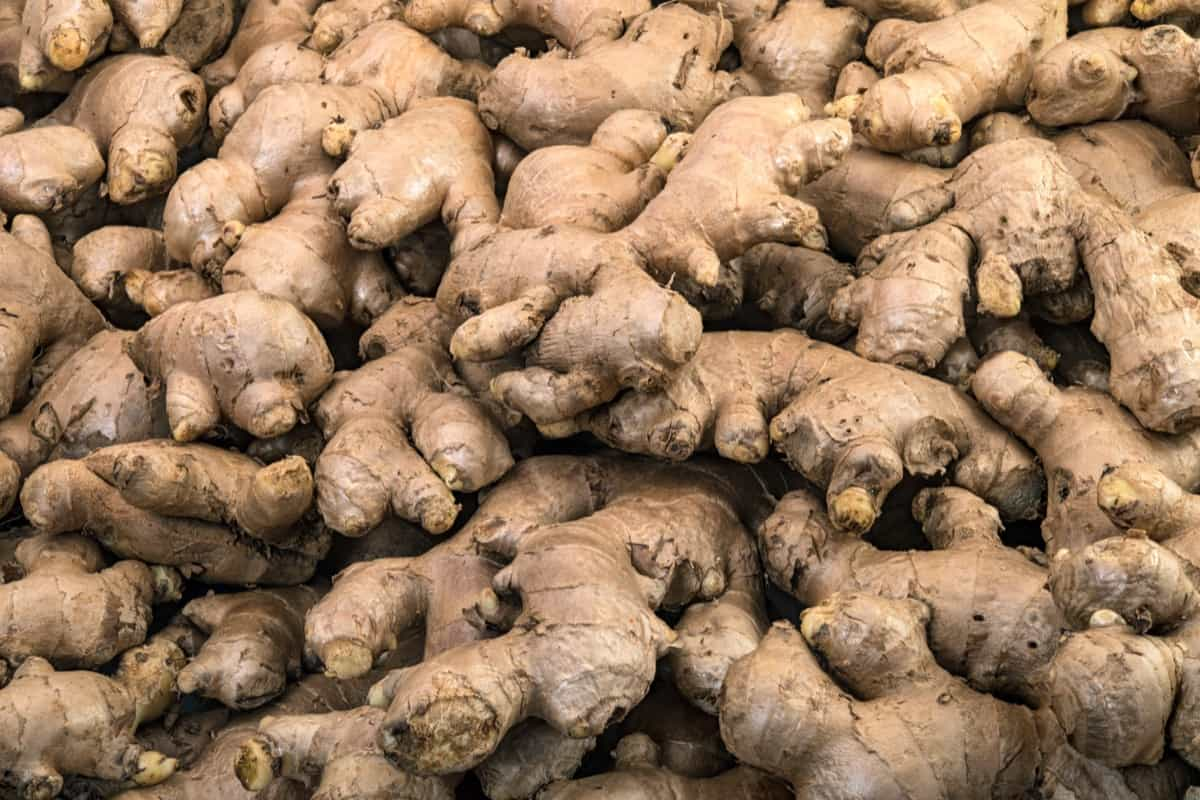
Ginger roots

Monitoring soil moisture levels regularly is essential in determining when and how much to water your Ginger crop. Avoid overwatering the Ginger plant as it can lead to root rot, while underwatering can stunt growth and reduce yields. By implementing these smart irrigation strategies, you’ll be well on your way to growing healthy, robust organic Ginger crops that will impress even the most discerning taste buds.

Managing Weeds Organically

It is crucial in maintaining the health and productivity of your Ginger crop. Weeds compete with Ginger plants for nutrients, water, and sunlight, inhibiting their growth. To control weeds naturally, consider using mulch to suppress weed growth while retaining soil moisture. Hand weeding is another effective method to remove weeds without the use of synthetic chemicals. Regularly inspect your Ginger field and manually pull out any unwanted plant growth.

This not only prevents competition but also allows for better aeration around the Ginger roots. Crop rotation can manage weeds by disrupting their lifecycle. Planting cover crops like legumes can smother weed seeds and add nitrogen back into the soil naturally. Additionally, practicing proper spacing between Ginger plants promotes healthy growth while minimizing weed infestation.

Organic Pest Control Measures

Some common pests that can damage your Ginger crop include aphids, spider mites, and root-knot nematodes. Aphids cause yellowing and distortion of leaves. Spider mites are arachnids that suck plant juices, leading to webbing and stippling on the leaves. Root-knot nematodes are microscopic worms that infect the roots, causing stunted growth and wilting. To combat these pests organically, you can introduce beneficial insects to prey on aphids and mites.

Additionally, using neem oil spray can help deter pests while being gentle on the environment. Crop rotation practices also play a vital role in preventing nematode infestations by disrupting their life cycle. By implementing organic pest control measures effectively, you can protect your Ginger crop naturally without relying on harmful chemicals that may harm beneficial organisms in the ecosystem.

Disease Management in Organic Ginger

Several diseases can affect Ginger crops, potentially impacting the yield and quality of the harvest. One common disease is bacterial wilt, which causes wilting and yellowing of leaves. Another threat is fusarium wilt, leading to stunted growth and yellowing leaves as well. Rhizome rot can also pose a risk, causing decay in the Ginger roots. To combat these diseases organically, farmers can implement cultural practices such as crop rotation and ensuring proper drainage to prevent waterlogging. Using disease-resistant Ginger varieties can also help mitigate risks.

In case you missed it: Weed Management in Onion Farms: Control with Organic, Mechanical, Biological, and Herbicides

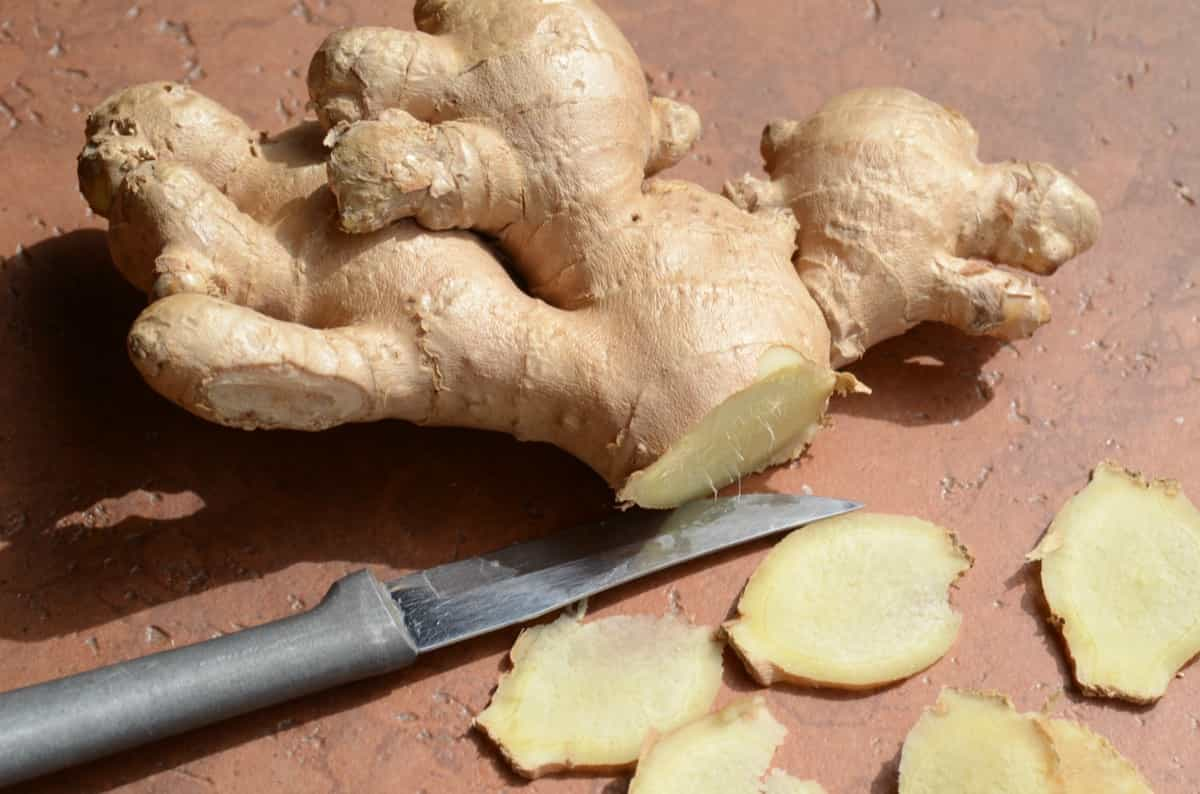
Cut Organic Ginger

Regular monitoring of the Ginger crop for disease signs is important for detection and prompt action. Neem oil, garlic spray, or homemade botanical insecticides are eco-friendly options for managing pests organically. Implementing good sanitation practices by removing plant debris promptly can also prevent the spread of diseases. By promoting biodiversity on your farm through companion planting and maintaining healthy soil, you create a balanced ecosystem that naturally resists pests and diseases while supporting overall plant health.

Harvesting Your Ginger Crop

When it comes to harvesting Ginger, timing is crucial. The best time to harvest is when the Ginger leaves turn yellow and dry out. To harvest your Ginger, gently loosen the soil around the plant base with a spade or fork. Be careful not to damage the rhizomes as you dig them up. Once unearthed, carefully remove excess soil from the roots before washing them thoroughly under running water.

After harvesting, allow your freshly dug Ginger rhizomes to air-dry in a shaded area for a few days. This helps cure them and improve their flavor profile. Once dried, trim off any remaining roots and foliage before storing them in a dry place. Remember, proper handling and storage are key to preserving the quality of your organic Ginger crop until it reaches consumers’ tables.

Post-Harvest Processing and Storage

After months of hard work and dedication, it’s time to reap the rewards of your organic Ginger farming efforts through post-harvest processing and storage. Once the Ginger rhizomes are harvested, it’s crucial to handle rhizomes with care to maintain their quality and maximize shelf life. Curing is an essential step in post-harvest handling techniques for Ginger. Place the cleaned rhizomes in a well-ventilated area with low humidity for about a week or until they are fully dried.

Once dried, trim off any remaining roots or foliage before storing your Ginger in a cool, dark place. Proper Ginger storage conditions help extend the shelf life of your organic Ginger so you can enjoy its freshness for longer periods. Start by washing the Ginger rhizomes thoroughly to remove dirt or debris. Then, allow them to dry naturally before proceeding to the next step. Sorting is an essential part of the process; separate healthy rhizomes from damaged ones to prevent spoilage during storage.

Proper storage is important to preserving the freshness of your organic Ginger. Store the rhizomes in a cool and well-ventilated place away from direct sunlight. Consider using wooden crates or mesh bags for optimal air circulation. Regularly inspect stored Ginger for any signs of decay or mold. Remove any affected rhizomes immediately to prevent further contamination.

Marketing Organic Ginger

The effective way is to tap into the growing demand for organic products by selling directly to local markets, health food stores, or even through online platforms. Creating a strong brand identity for your organic Ginger can help you stand out from competitors and attract consumers looking for high-quality, sustainably grown produce. 

Consider participating in farmers’ markets or food festivals to showcase your organic Ginger and interact with customers face-to-face. Building relationships with chefs, restaurants, and food cooperatives can also open up opportunities for bulk sales or collaborations.

Challenges and Opportunities in Organic Ginger Farming

The significant challenge is managing pests and diseases without synthetic chemicals, requiring vigilance and proactive measures. Additionally, the labor-intensive nature of organic cultivation can be demanding but rewarding in terms of producing high-quality Ginger. On the other side, there are also ample opportunities in the organic Ginger market due to increasing consumer demand for chemical-free produce.

In case you missed it: Leaf Spot Management in Plants: Causes, Symptoms, and How to Treat With Natural and Organic Remedies

fresh ginger

Farmers have the chance to tap into this growing trend by positioning their organic Ginger as the best product that stands out in a crowded marketplace. Moreover, adopting sustainable practices not only benefits the environment but also opens doors to certifications and partnerships with eco-conscious retailers. Organic Ginger farming can be integrated into regenerative agricultural systems that focus on restoring ecosystem health and resilience.

Staying adaptable and continuously learning about new techniques will help farmers overcome challenges while seizing opportunities in the dynamic landscape of organic Ginger farming. Organic Ginger farming offers several benefits, from promoting sustainability to producing high-quality, chemical-free Ginger.  This farming approach aims to promote soil health, biodiversity, and overall ecosystem balance by avoiding harmful chemical inputs.

Ultimate Guide to Organic Carrot Farming: Cultivation Practices for Beginners

0

Carrots, scientifically known as Daucus carota, are versatile biennial vegetable plants that belong to the Apiaceae family. Organic Carrot farming is a sustainable agricultural practice that cultivates Carrots without the use of synthetic chemicals or pesticides. It involves working in harmony with nature to produce healthy and nutritious crops while preserving the environment for future generations.

 Organic Carrot Farming

Benefits of Growing Carrots Organically

Growing Carrots organically offers a myriad of benefits for both the environment and your health. By opting for organic methods, you contribute to sustainable farming practices that promote biodiversity. Organic Carrot farming avoids the use of synthetic pesticides and fertilizers, reducing chemical runoff into water sources. Organically grown Carrots are richer in nutrients and flavor compared to conventionally grown ones due to the absence of artificial additives.

This results in tastier dishes and healthier meals for you and your family. Additionally, organic farming promotes better animal welfare practices as it minimizes exposure to harmful chemicals that can impact wildlife habitats. Moreover, consuming organic produce reduces exposure to harmful chemicals found in conventional agriculture, leading to better overall health for consumers.

Choosing the Right Carrot Varieties for Organic Farming

Some popular Carrot varieties for organic farming include Napoli, Scarlet Nantes, Cosmic Purple, and Atomic Red. Other popular organic Carrot varieties include ‘Bolero,’ known for its sweet flavor and uniform shape, ‘Scarlet Nantes,’ which is great for both fresh eating and processing; and ‘Atomic Red,’ with its vibrant red color that adds a pop to any dish.

When selecting your Carrot varieties, consider factors such as soil type, climate conditions, and intended use. Whether you prefer short or long Carrots, heirloom or hybrid options, there’s a variety out there to suit your needs.

Soil Health and Preparation for Organic Carrots

Before planting, it’s essential to ensure that the soil is rich in nutrients and well-drained. Carrots thrive in loose, well-aerated soil with a pH level between 6.0 and 7.0. To prepare the soil, start by eliminating weeds and debris. Incorporate organic matter to improve fertility and structure. This will provide the Carrots with the necessary nutrients for healthy growth. Avoid using synthetic pesticides, as they can harm beneficial microorganisms in the soil.

In case you missed it: How to Start Dragon Carrot Farming: A Step-by-Step Growing Guide

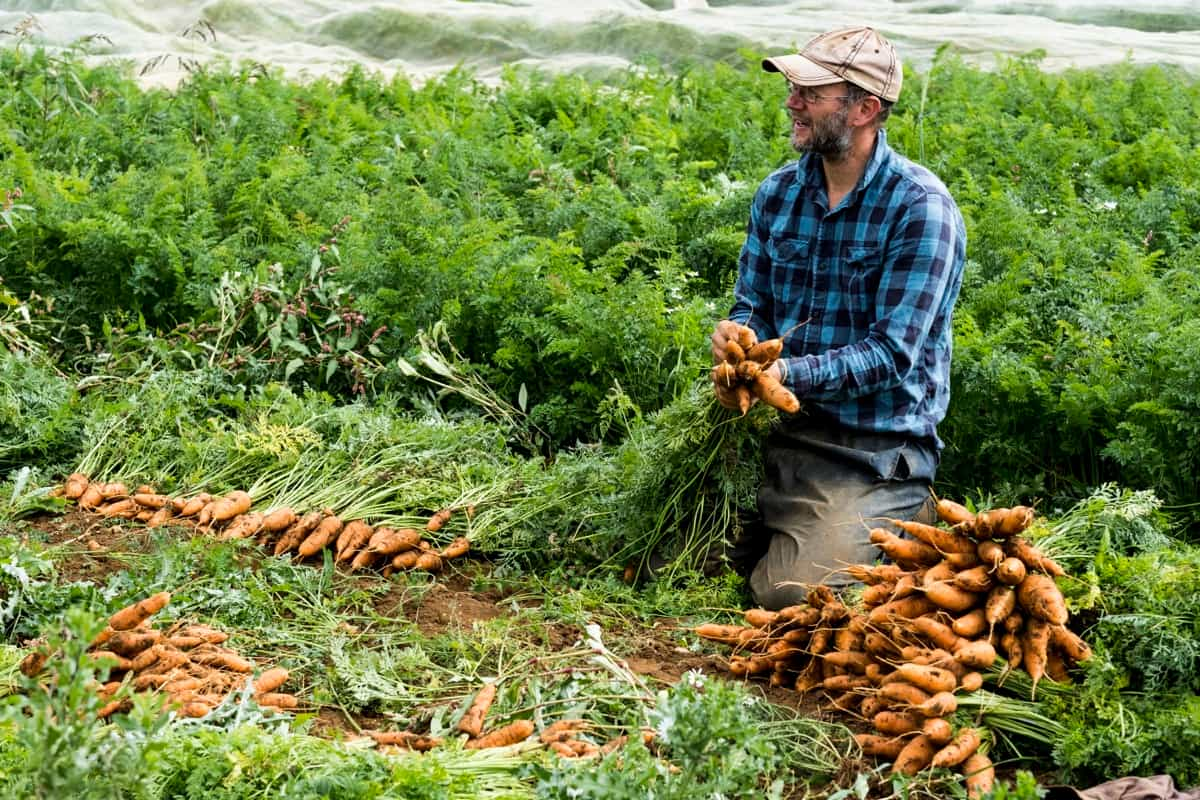
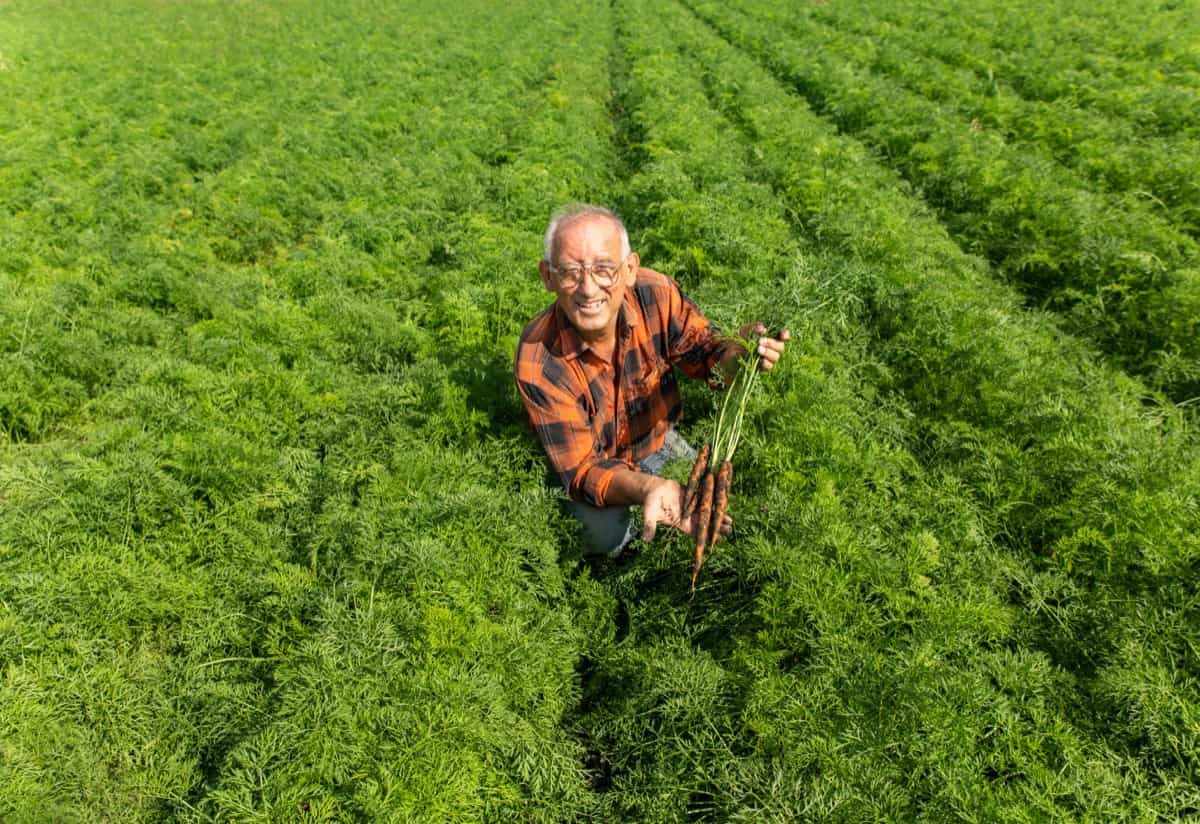
Harvesting carrots in a farm

Instead, focus on natural alternatives such as bone meal or fish emulsion to nourish your crops organically. Regularly testing the soil for nutrient levels can help you adjust your fertilization plan accordingly. Healthy soil leads to healthy Carrot plants, so investing time in preparing your soil adequately will pay off in bountiful harvests of flavorful organic Carrots.

Before planting, remove any weeds and work the soil using a garden fork or tiller. This will help break up clumps and improve drainage so that your Carrots’ roots can grow deeply. Consider adding aged manure to enrich the soil with essential nutrients. Choose natural alternatives like organic compost or mulch to nourish your Carrot crop naturally.

Organic Seed Selection and Treatment

Selecting the right organic seeds is crucial for a successful Carrot farming venture. Choose Carrot varieties that are suited to your soil conditions and climate. Look for reputable seed suppliers who offer organic and non-GMO options to ensure the quality of your crop. Treating organic seeds before planting can help improve germination rates and overall plant health.

Consider using natural methods such as soaking seeds in compost tea or seaweed extract to boost their vitality. Avoid using chemical treatments on your organic seeds, as this goes against the principles of organic farming. Instead, focus on enhancing seed vigor through natural means like proper hydration and temperature control during storage.

Planting Strategies for Organic Carrots

Ensure you choose a sunny spot with well-draining soil for optimal growth. Carrots thrive in loose, friable soil that allows them to develop long, straight roots. Before planting your Carrot seeds, make sure the soil is free of rocks and debris that could hinder their growth.  When sowing Carrot seeds, aim for a depth of around half an inch and space them out accordingly to avoid overcrowding. Thin seedlings as they grow to prevent competition for nutrients and promote healthy root development.

Watering is crucial during the germination period to keep the soil moist but not waterlogged.  Regular watering is essential for healthy Carrot growth, especially during dry periods. Mulching around Carrot plants can help retain moisture in the soil and suppress weeds. Watch for pests like Carrot rust flies and practice crop rotation to prevent diseases from taking hold in your garden.

Water Management in Organic Carrot Farming

Carrots require consistent moisture, especially during germination and root development. Proper irrigation techniques such as drip or soaker hoses can help deliver water to the roots without wasting resources. Monitoring soil moisture levels regularly is essential to avoid under and overwatering, which can lead to issues like rotting or stunted growth. Mulching around Carrot plants helps retain soil moisture, reduces evaporation, and suppresses weed growth.

In case you missed it: Growing Carrots Organically in Punjab: Cultivation Practices and Production Management

carrot farming

Consider implementing rainwater harvesting systems or utilizing sustainable water sources to reduce reliance on traditional irrigation methods. By efficiently managing water in your organic Carrot farm, you not only promote healthy plant growth but also contribute to environmental sustainability.

Organic Fertilization Techniques

Organic fertilizers like compost, manure, fish emulsion, and bone meal are excellent choices for enriching the soil with essential nutrients naturally. Compost is a fantastic option that provides nutrients and also improves soil structure and water retention—it’s like giving your Carrots a nutrient-packed meal.

Animal manure from animals like cows or chickens is another great organic fertilizer option. Rich in nitrogen, phosphorus, and potassium, it helps promote overall plant health. A bone meal is perfect for supplementing calcium and phosphorus levels in the soil – important minerals for developing sturdy Carrot roots.

Natural Weed Control Methods

The effective method is mulching with organic materials like straw or grass clippings. This helps suppress weed growth while also retaining moisture in the soil. Another natural weed control technique is hand weeding. Though labor-intensive, removing weeds by hand ensures that they are eliminated without the use of chemicals. It’s a great way to keep your Carrot crop healthy and thriving.

Crop rotation can also help control weeds organically. By planting different crops in succession, you disrupt weed growth cycles and reduce their prevalence in the soil. Utilizing cover crops such as clover or buckwheat can smother out weeds and improve soil health simultaneously. These companion plants not only suppress unwanted vegetation but also attract beneficial insects to your farm.

Organic Pest Management

Some common pests that can affect Carrot crops include aphids, cutworms, and Carrot rust flies. If not properly controlled, these pesky intruders can damage the leaves, roots, and overall health of your plants. The effective method for managing pests organically is to introduce beneficial insects that prey on harmful pests without the need for harsh chemicals.

Additionally, practicing crop rotation and intercropping can help disrupt pest cycles and reduce their impact on Carrots. For more stubborn infestations, consider using natural remedies such as neem oil spray or garlic pepper tea to deter pests from your crops. Regular monitoring of your Carrot plants is key to catching any pest issues early on before they escalate into larger problems.

Disease Prevention in Organic Carrot Cultivation

Carrots are susceptible to various diseases that can affect their growth and overall yield. The main disease is powdery mildew, which manifests as a white powdery substance on the leaves. To combat this, proper ventilation and spacing between plants are essential.

In case you missed it: Fertilizer Management in Carrot Farming: Organic, NPK, How and When to Apply

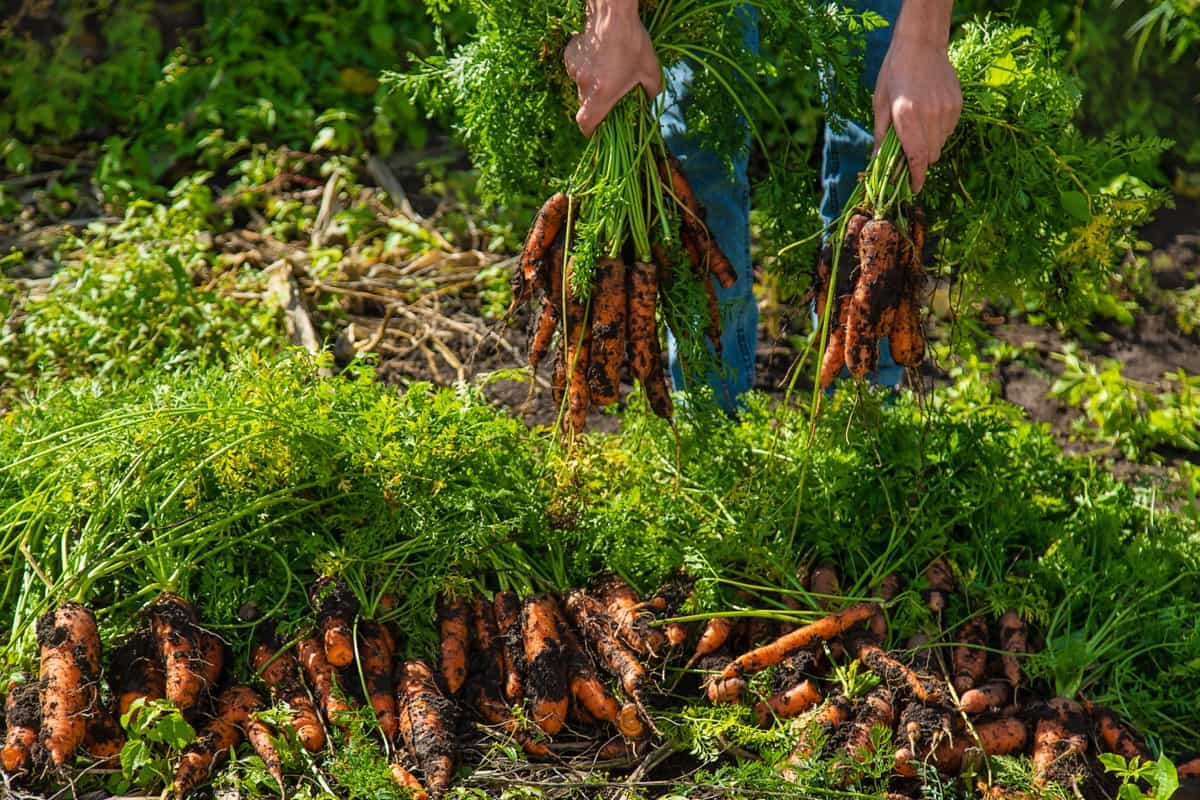
Freshly harvested carrots

Another issue to watch out for is bacterial soft rot, which causes decay in the Carrots’ roots. Ensuring good drainage in the soil can help prevent this disease from taking hold. Additionally, leaf blight can be a concern, leading to yellowing and wilting of the foliage. Regularly inspecting your crop for any signs of disease and promptly addressing them is crucial for maintaining healthy plants.

Monitoring and Maintaining Crop Health

Regularly inspect your Carrot plants for any signs of nutrient deficiencies, pests, or diseases. Watch for yellowing leaves, stunted growth, or unusual spots on the foliage. Utilize organic pest management techniques to control common pests like aphids, nematodes, and Carrot rust flies. Consider companion planting with beneficial insect-attracting flowers to deter harmful bugs naturally.

Implement crop rotation practices to prevent soil-borne diseases and maintain soil fertility levels. Rotate your Carrot crops with other vegetables, such as legumes or leafy greens, to break disease cycles and replenish nutrients in the soil. Regularly test your soil pH levels and adjust as needed to ensure optimal growing conditions for your Carrots. Proper pH levels help maximize nutrient uptake by the plants and promote healthy root development.

Harvesting Organic Carrots

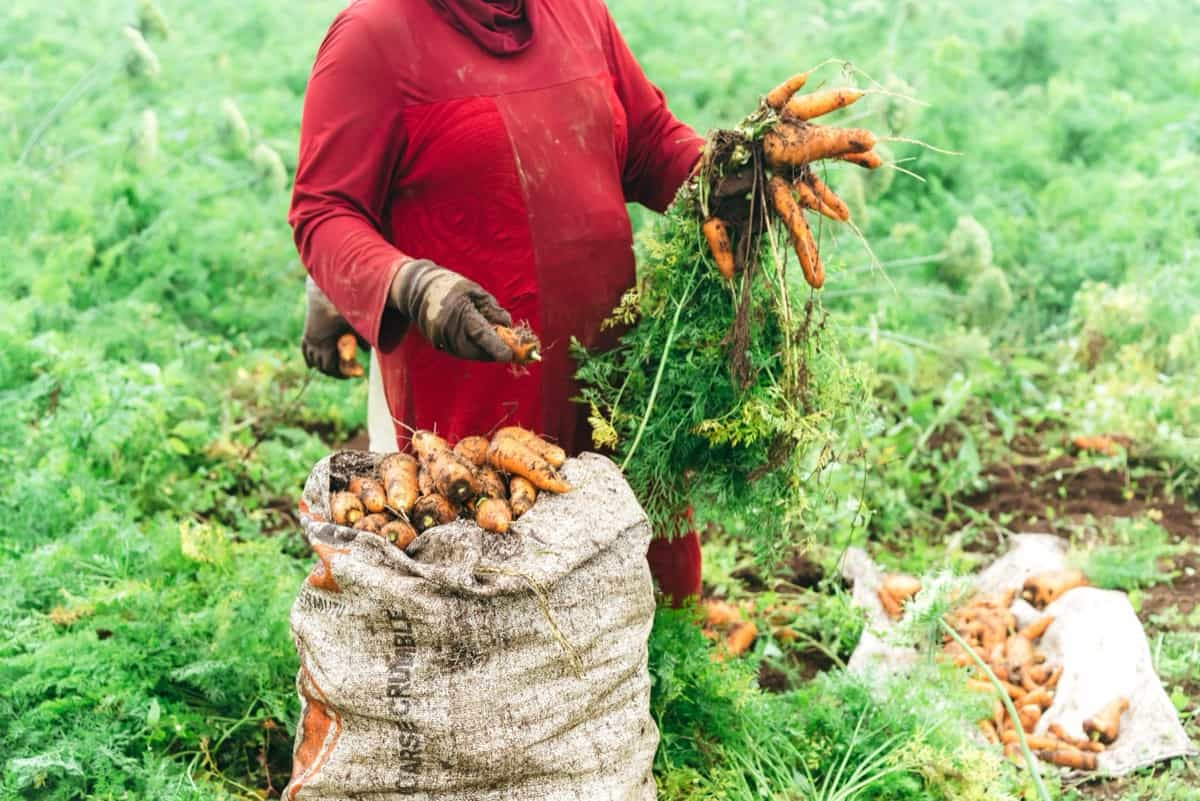
Carrots are best to harvest when they reach the desired size, typically around 1 inch in diameter. Carefully loosen the soil around the Carrot tops before pulling them out to avoid breaking the roots. To harvest, grasp the green tops and pull upwards with a steady motion. Be careful not to damage or bruise the Carrots during this process.

In case you missed it: How to Start Carrot Farming in the USA: A Step-By-Step Production Guide for Planting to Harvesting

carrot harvest

Remove excess soil clinging to the roots, but avoid washing them immediately, as dampness can lead to decay. Once harvested, trim off the foliage about an inch above the root and discard any damaged or misshapen Carrots. Store your freshly picked organic Carrots in a cool, dark place with high humidity levels to maintain their crispness and flavor.

Post-Harvest Handling and Storage Solutions

After months of hard work and dedication to cultivate your organic Carrots, it’s crucial to handle the post-harvest stage with care. Proper handling and storage solutions can ensure that your harvest stays fresh and retains its nutritional value for longer periods. Once harvested, gently brush off excess soil from the Carrots before storing them. Avoid washing Carrots, as moisture can lead to rotting during storage. ‘

Trim any damaged or wilted greens, but leave about an inch of the green tops intact to help retain moisture. For short-term storage, place unwashed Carrots in a plastic bag in the refrigerator’s crisper drawer. The perforations allow for airflow while preventing excessive moisture buildup. Carrots stored this way can stay fresh for up to a few weeks.

If you have a larger harvest intended for long-term storage, consider options like root cellars or sand pits, where temperature and humidity levels are naturally controlled. These methods can keep your organic Carrots crisp and flavorful throughout the winter months.

Marketing and Selling Organic Carrots

When it comes to marketing and selling organic Carrots, there are several avenues you can explore to reach your customers. One option is to sell directly at farmers’ markets or through a CSA (Community Supported Agriculture) program. This allows you to connect with consumers who value locally grown, organic produce. Another strategy is to partner with local restaurants and grocery stores that prioritize sourcing from sustainable farms. Building relationships with these businesses can help increase the visibility of your organic Carrots in the community.

Online platforms also offer opportunities for selling organic Carrots. Setting up an e-commerce website or utilizing social media channels can attract a wider audience beyond your local area. Don’t forget about the word-of-mouth marketing. Encourage customers to talk the word about your delicious, organic Carrots to their friends and family members.

Future Trends in Organic Carrot Farming

One emerging trend is the use of technology to monitor soil health and optimize water usage, leading to more sustainable practices. Additionally, there is a growing interest in regenerative agriculture techniques that focus on improving soil fertility and biodiversity. This approach not only benefits Carrot crops but also contributes to overall ecosystem health.

In case you missed it: Ginger Farming Business Plan: A Guide to Production and Cultivation for Beginners

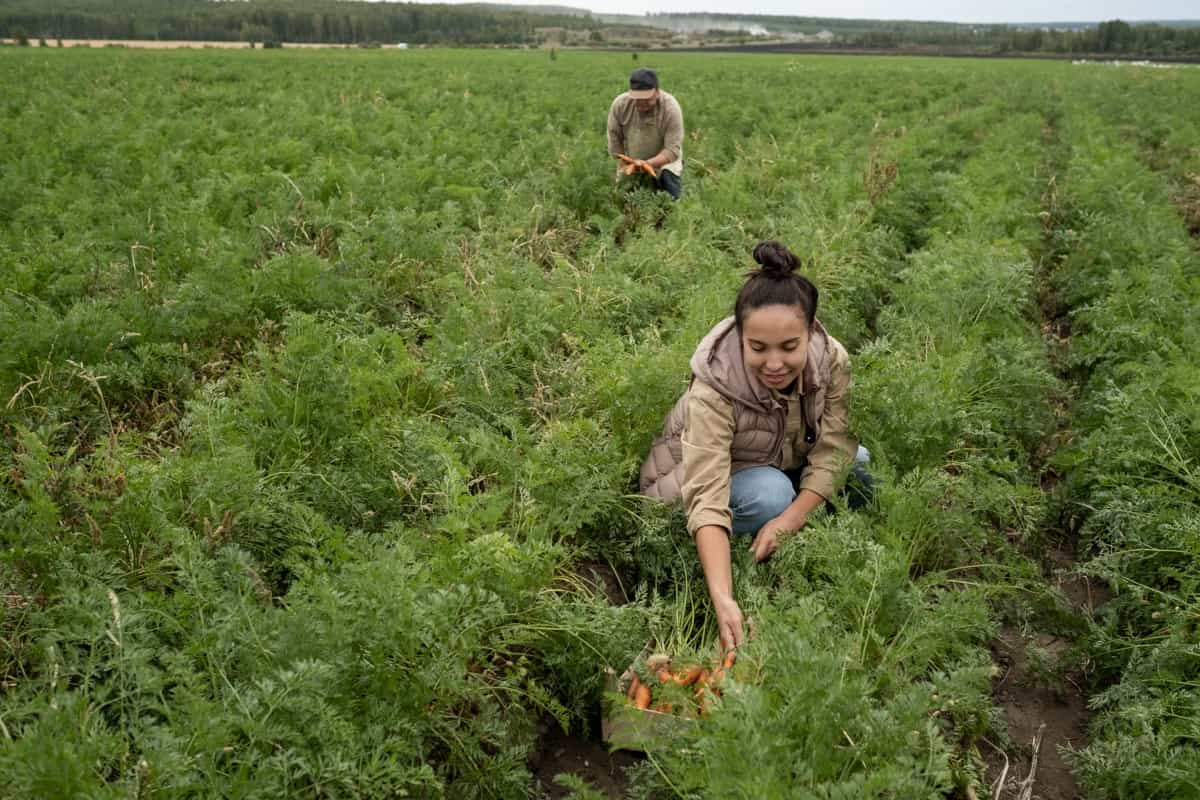
Large scale carrot farm

Another trend shaping the future of organic Carrot farming is consumer education and transparency. More consumers are seeking information about where their food comes from and how it is grown, driving farmers to adopt even higher standards of sustainability. Furthermore, with advancements in breeding programs, we can expect to see new varieties of Carrots developed specifically for organic cultivation.

These varieties may offer improved disease resistance or enhanced flavor profiles, catering to evolving consumer preferences. Organic Carrot farming offers a sustainable and rewarding way to cultivate this nutritious root vegetable. By following organic practices, farmers can produce high-quality Carrots while also promoting environmental health and biodiversity.

Ultimate Guide to Bitter Gourd Farming

3

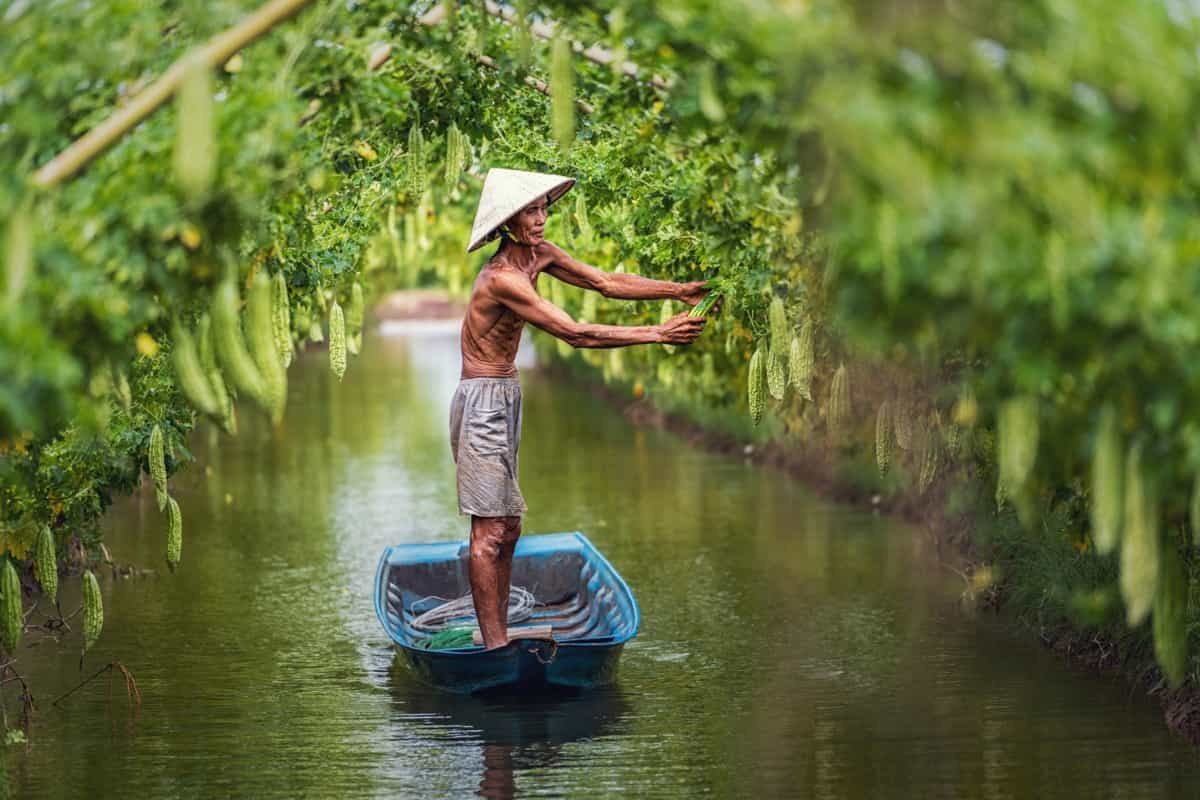
Bitter Gourd farming is the art of cultivating this unique and nutritious vegetable, also known as bitter melon or karela. It belongs to the Cucurbitaceae family and is characterized by its distinctively bitter taste and oblong shape. Its scientific name is Momordica charantia. Monitoring growth and development allows farmers to make timely adjustments as needed to maximize yields. 

Bitter Gourd Farming

Bitter Gourd Varieties

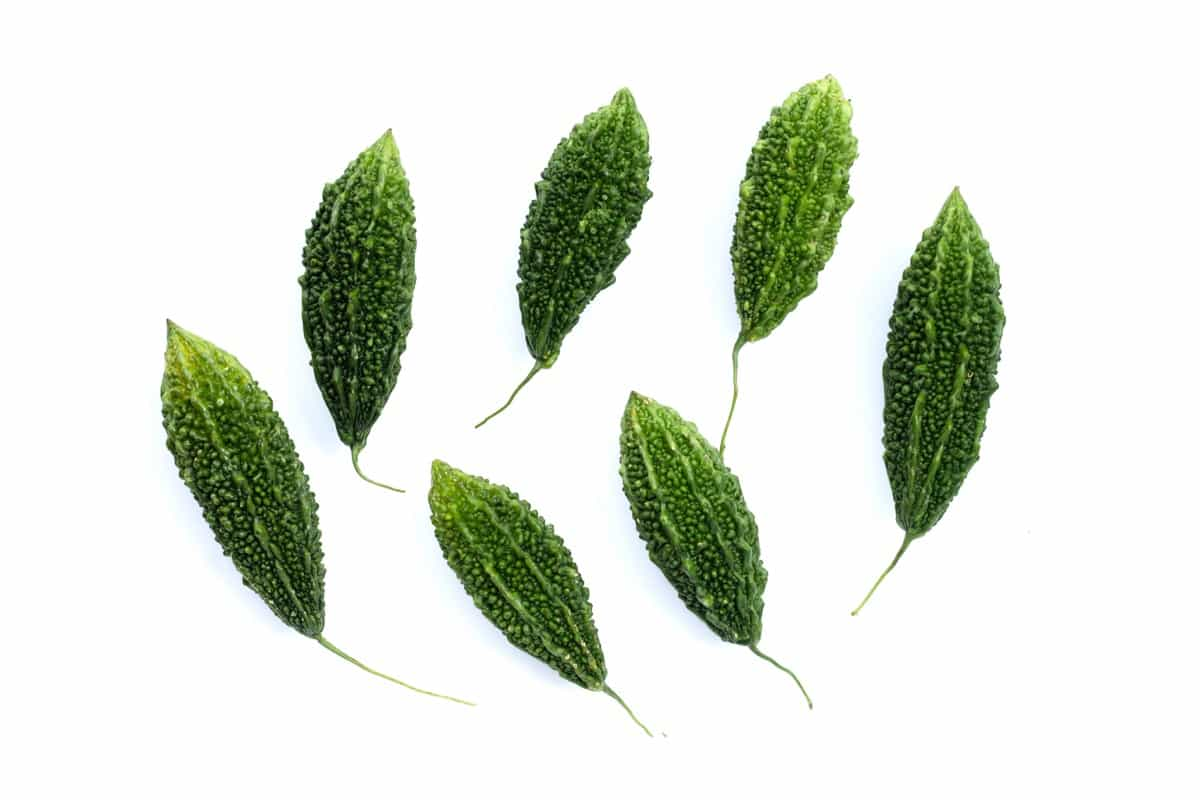
Several varieties of Bitter Gourd are available, each with unique characteristics and benefits. Some popular varieties include Indian Round, Chinese Long, Hybrid Green Gold, and Taiwan Bitter Gourd. The Indian Round variety is well-known for its round shape and dark green color. It has a slightly bumpy surface and is commonly used in various culinary dishes for its bitterness that adds depth to recipes. On the other hand, the Chinese Long Bitter Gourd features an elongated shape with light green skin.

This variety is preferred for its mild bitterness compared to other types of Bitter Gourds. Hybrid Green Gold is a hybrid variety that combines the best traits of different Bitter Gourd types. It boasts high yields and disease resistance, making it a popular choice among farmers. Taiwan Bitter Gourd is another sought-after variety known for its slender size and intense bitterness. Its different flavor makes it a favorite ingredient in Asian dishes.

Climate Requirements for Bitter Gourd

Bitter Gourd, also known as bitter melon, thrives in warm and humid climates. It is a sun-loving plant that needs plenty of sunlight to produce healthy fruits. The ideal temperature for Bitter Gourd farming is 25°C and 30°C during the morning and not below 15°C at night. Extreme temperatures can hinder the plant’s growth and development.

Additionally, Bitter Gourd plants are sensitive to frost, so it is essential to avoid planting them in areas prone to sudden temperature drops. In cooler regions, it is recommended that Bitter Gourds be started growing indoors or in a greenhouse before transplanting them outside once the weather warms up.

Soil Requirements for Bitter Gourd

Bitter Gourd thrives in well-drained soil with a pH level between 6.0 and 7.0, rich in organic matter. To ensure proper nutrient availability for the plant’s growth, it is important to prepare the soil by applying compost or well-rotted manure before planting. Avoid waterlogged areas, as Bitter Gourd plants are susceptible to root rot under excessive moisture conditions.

In case you missed it: Best Fertilizer for Bitter Gourd: Organic, Natural, Homemade, NPK Ratio, When and How to Apply

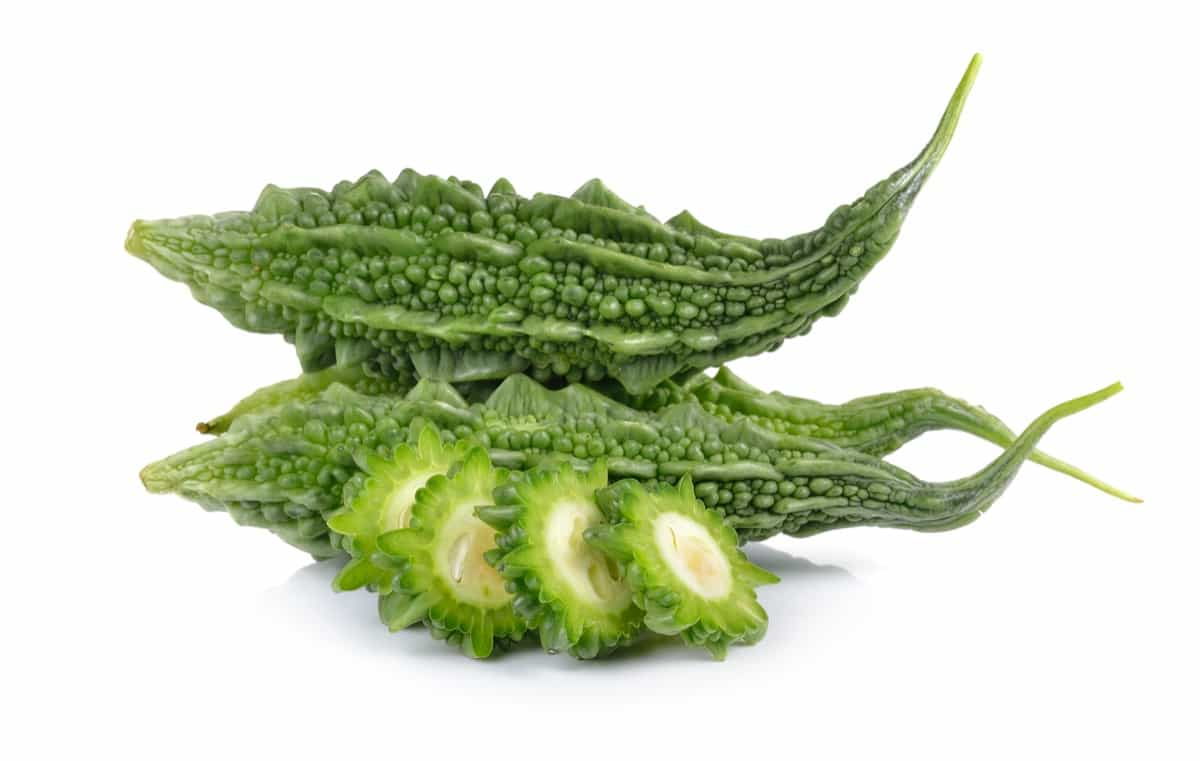
Cut Bitter Gourd

Sandy loam soil is preferred for Bitter Gourd cultivation due to its good drainage properties, which help prevent water stagnation around the roots. To maintain consistent moisture without overwatering, regularly check soil moisture levels and adjust irrigation practices accordingly. Monitor the soil’s nutrient content regularly throughout the growing season and supplement with balanced fertilizers as needed to promote healthy vine development and fruit production.

Seed Selection and Treatment

Start by choosing high-quality seeds from reputable suppliers known for their superior genetics and germination rates. Before planting, consider treating the seeds with fungicides or biocontrol agents to protect them against soil-borne diseases. This step can help ensure healthy seedlings and robust plant growth throughout the season.

Seed treatment methods such as soaking in water or using natural stimulants can also improve germination rates and promote strong root development. Experimenting with different treatments may lead to higher yields and better overall plant health. Remember that each crop is unique, so it’s essential to research specific seed selection and treatment techniques tailored to Bitter Gourd cultivation.

Planting Techniques for Bitter Gourd

Start by preparing the soil well, ensuring it is rich in organic matter and has good drainage. Select healthy seeds for planting; soaking them in water overnight can help with germination. Plant the Bitter Gourd seeds directly into the soil or start them indoors before transplanting. Make sure to space out the seeds or seedlings adequately to allow for proper growth. Bitter Gourd plants thrive in sunny locations with plenty of sunlight, so choose a spot accordingly.

Provide regular watering, especially during dry periods, but do not overwater the Bitter Gourd, as this can lead to root rot. Use mulch around the plant base to retain moisture and suppress weeds. As the Bitter Gourd plants grow, provide support such as trellises or stakes for them to climb on. Regularly monitor their progress and adjust care practices as needed throughout the growing season.

Irrigation Methods for Bitter Gourd

Bitter Gourd thrives in moist soil, so proper irrigation is crucial. One common method is drip irrigation, which delivers water to the plants’ roots. This method helps conserve water by minimizing evaporation and runoff. Another effective technique is furrow irrigation, where shallow trenches are made between rows of plants, and water flows through them.

This method allows for efficient watering while reducing weed growth around the plants. Sprinkler irrigation can also be utilized, especially in larger-scale Bitter Gourd farms. Water is distributed overhead in a controlled manner to ensure even coverage across the field.

Nutrient Management

Bitter Gourds are heavy feeders, requiring a balanced supply of nutrients throughout their growth stages. Nitrogen, phosphorus, and potassium are crucial for Bitter Gourd plants’ development. Nitrogen promotes leafy growth, phosphorus supports root development and flowering, and potassium enhances fruit quality. Organic fertilizers can be beneficial in enriching the soil with necessary nutrients.

In case you missed it: Growing Bitter Gourd Organically in Karnataka: Farming Practices and Production Management

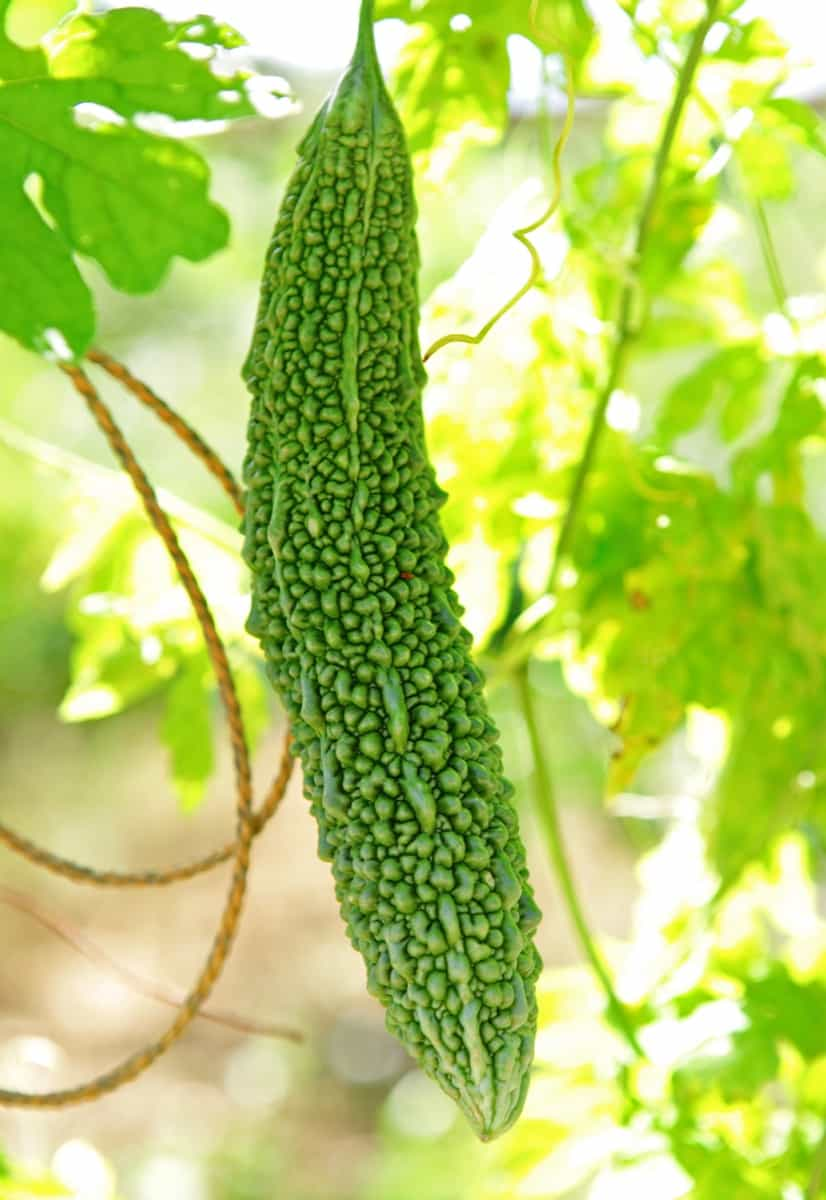
Bitter Gourd in the home garden

Additionally, using foliar sprays containing micronutrients like iron and zinc can help address any deficiencies that may arise during the growing season. Regular soil testing is important to assess nutrient levels accurately and adjust fertilizer applications accordingly. By maintaining a well-balanced nutrient regimen, farmers can optimize their Bitter Gourd production and ensure healthy crops year after year.

Pest Control Strategies

Some common pests that may affect Bitter Gourd include aphids, fruit flies, and spider mites. If left unchecked, these invaders can wreak havoc on your crops. Aphids cause yellowing and distortion of leaves. Fruit flies are attracted to ripe vegetables, laying eggs that hatch into maggots inside the produce. Spider mites are known for their webbing on plants and sucking the juices from leaves, leading to wilting.

To combat these pests, consider using natural predators like ladybugs or lacewings. Also, neem oil or insecticidal soap can help control aphids and spider mites effectively. Regular monitoring of your crops is essential to catch pest infestations early before they cause significant damage. Implementing integrated pest management practices can help maintain a healthy balance in your Bitter Gourd farm ecosystem while minimizing the harmful chemicals.

Disease Management

Like any agricultural venture, Bitter Gourd farming is susceptible to various diseases that can hinder crop productivity. Some common diseases that farmers need to watch out for include powdery mildew, downy mildew, bacterial wilt, and viral infections. Powdery mildew appears as white powdery spots on the leaves of the plant, affecting photosynthesis and nutrient absorption. Downy mildew causes leaves to yellow with fuzzy growth underneath. Bacterial wilt leads to wilting and death of vines in severe cases.

Viral infections can cause mosaic patterns on leaves or stunted growth. Implementing proper sanitation practices, crop rotation techniques, and disease-resistant Bittergourd varieties can help manage these issues effectively. Regular monitoring of the plants for early detection of symptoms is crucial in preventing widespread outbreaks that could drastically impact harvest yield.

Weed Management Techniques

Various techniques can be employed to effectively control weeds without harming the crop. One common method is hand weeding, which involves manually removing weeds from the soil. This labor-intensive technique is effective for small-scale farms. Another approach is mulching, which involves covering the soil around the Bitter Gourd plants with a layer of organic material like straw or grass clippings. Mulching helps control weed growth by blocking sunlight and preventing weed seeds from germinating.

Crop rotation is also a useful strategy to reduce weed pressure. By alternating Bitter Gourd with other crops, it disrupts the life cycle of weeds that thrive on monoculture systems. Additionally, using cover crops can help smother weeds and improve soil health simultaneously. These companion plants act as living mulch, suppressing unwanted vegetation while adding nutrients back into the soil. Implementing a combination of these weed management techniques can help maintain a healthy environment for Bitter Gourd plants and maximize farm productivity.

Training and Pruning Practices

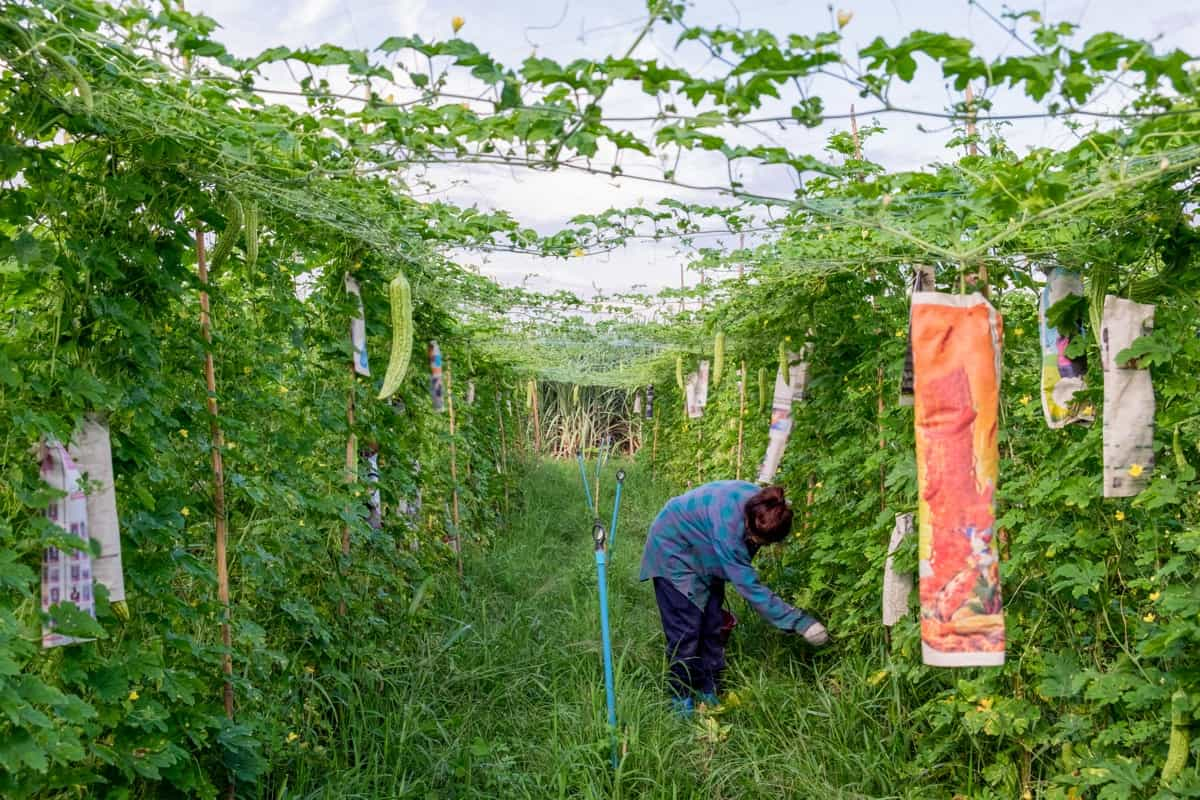
By carefully training the vines to grow along trellises or supports, you can maximize space utilization and facilitate proper air circulation around the plants. Pruning helps remove damaged parts of the plant, allowing for better nutrient distribution to healthy areas. Regularly trimming excess foliage encourages the development of strong stems and promotes flowering, leading to increased fruit yields.

In case you missed it: How this Farmer Earning 25 Lakh Rupees from his Bitter Gourd Farm: A Success Story to Inspire

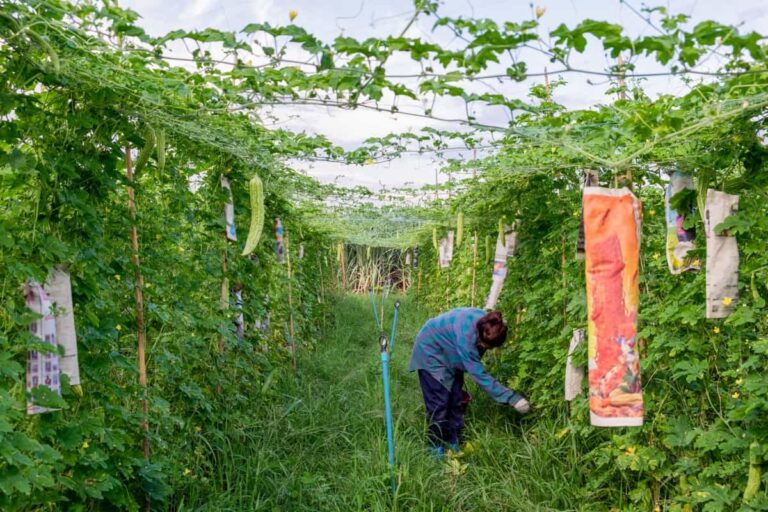
Harvesting Bitter Gourd in a Farm

Pruning selectively, focusing on removing overcrowded or tangled branches while preserving vital leaves for photosynthesis, is important. Additionally, training the vines vertically can help prevent diseases by reducing ground contact and improving sunlight exposure.

Monitoring Growth and Development

Once you have planted your Bitter Gourd crop, it is essential to monitor its growth and development closely. Regularly check the Bitter Gourd plants for any signs of nutrient deficiencies, pests, or diseases. Keep an eye on the vines as they grow and ensure proper spacing to avoid overcrowding. Measuring the growth rate of your Bitter Gourd plants can help you anticipate their needs for water, nutrients, and support structures.

Observing the flowering patterns can give insights into potential fruit production levels. Take note of any abnormalities in plant growth early on to address issues promptly. Tracking the development of fruits is crucial for determining the optimal time for harvesting. Monitor their size, color, and firmness regularly as they mature. Adjust your cultivation practices based on how the plants are progressing throughout their lifecycle.

Harvesting Bitter Gourd

Timing is key when it comes to Bitter Gourd harvesting. Bitter Gourds should be harvested when they reach a mature size but are still tender. To harvest Bitter Gourd, use a sharp knife to cut the fruits from the vine carefully. Be gentle to avoid damaging the plant and ensure a clean cut for better healing post-harvest. Remember not to pull or twist the fruit off the vine as this can harm both the fruit and plant.

Inspect each Bitter Gourd for firmness, color, and size before harvesting. Ideally, they should be bright green with no signs of yellowing or browning. Harvest regularly to encourage continuous production throughout the growing season. Once harvested, handle Bitter Gourds with care to prevent damage that could affect their shelf life and market value. Store Bitter Gourds in a cool place away from direct sunlight until ready for sale or consumption.

Post-Harvest Handling and Storage

After all the hard work put into growing Bitter Gourds, it’s crucial to handle and store them properly post-harvest to maintain their quality. Once harvested the Bitter Gourd, remove any dirt or debris from the gourds. Avoid bruising them as it can lead to spoilage. Before storing, sort the gourds based on size and ripeness. Discard any damaged or overripe ones, as they can affect the rest. Choose a well-ventilated area with low humidity for storage to prevent mold growth.

Bitter Gourds should be stored at 10-15°C for optimal freshness. Avoid storing Bitter Gourd near fruits that produce ethylene gas, as this can accelerate ripening. Regularly check stored Bitter Gourds for signs of spoilage like soft spots or mold. Use up any ripe gourds first before moving on to less ripe ones.

Marketing and Economics of Bitter Gourd Farming

Consider selling directly to consumers at farmers’ markets or grocery stores. Explore online platforms for wider reach and visibility. Building relationships with local restaurants and chefs can also be a lucrative avenue for sales. In terms of economics, the profitability of Bitter Gourd farming depends on factors like yield per acre, input costs, and market prices. Conducting thorough research and staying updated on industry trends can help maximize profits.

In case you missed it: Types of Pesticides Used in Agriculture: A Beginner’s Guide

Bitter Gourd Farm

Implementing cost-effective practices such as efficient irrigation methods and integrated pest management can contribute to overall economic sustainability. Diversifying your product offerings by creating value-added products like pickled Bitter Gourd or powdered supplements can open up new revenue streams. Collaborating with other farmers or agriculture organizations for joint marketing efforts can further enhance the economic viability of your Bitter Gourd farm.

Stay adaptable to changing market conditions to thrive in the competitive agricultural landscape. Bitter Gourd farming can be a rewarding venture for farmers looking to diversify crops and tap into the demand for this nutritious vegetable. By following these techniques, farmers can successfully cultivate Bitter Gourd while maximizing yields and quality.

A Step-By-Step Guide to Sugarcane Farming

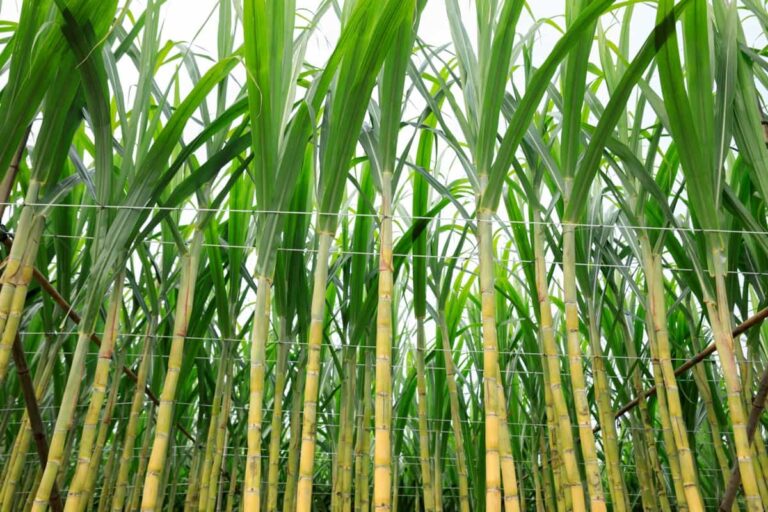
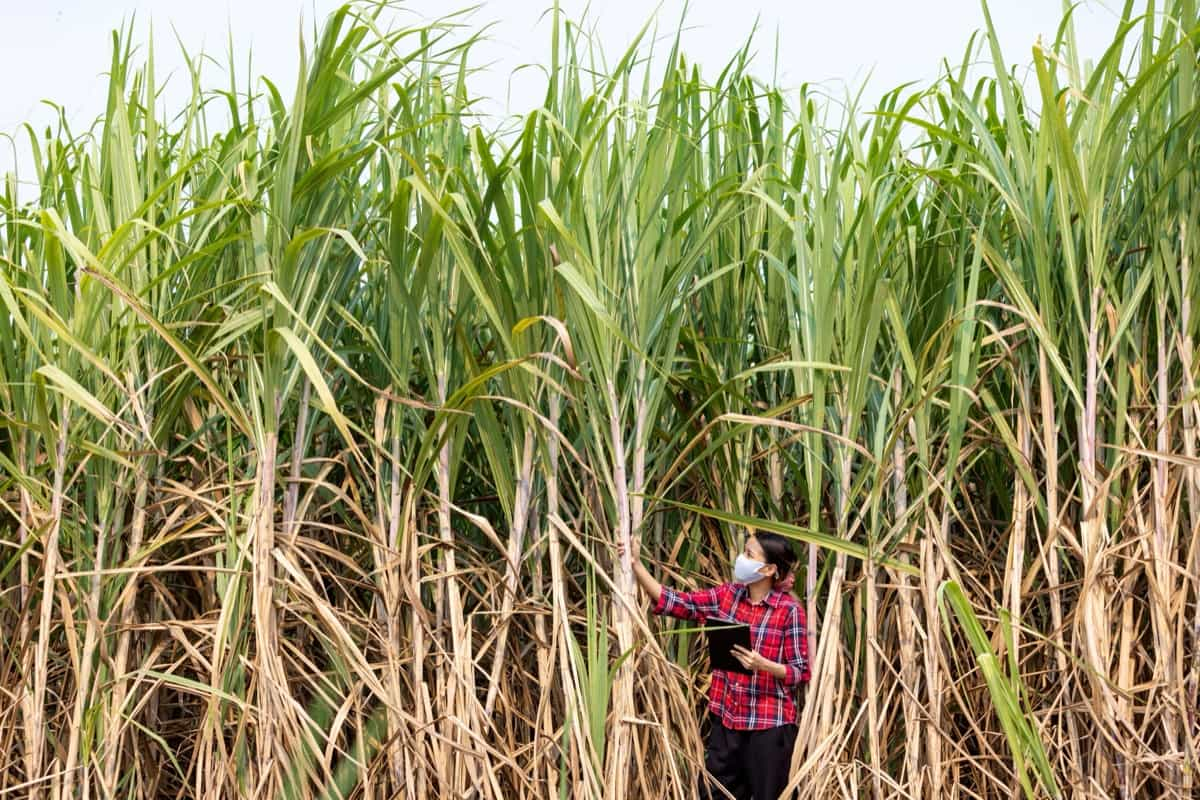
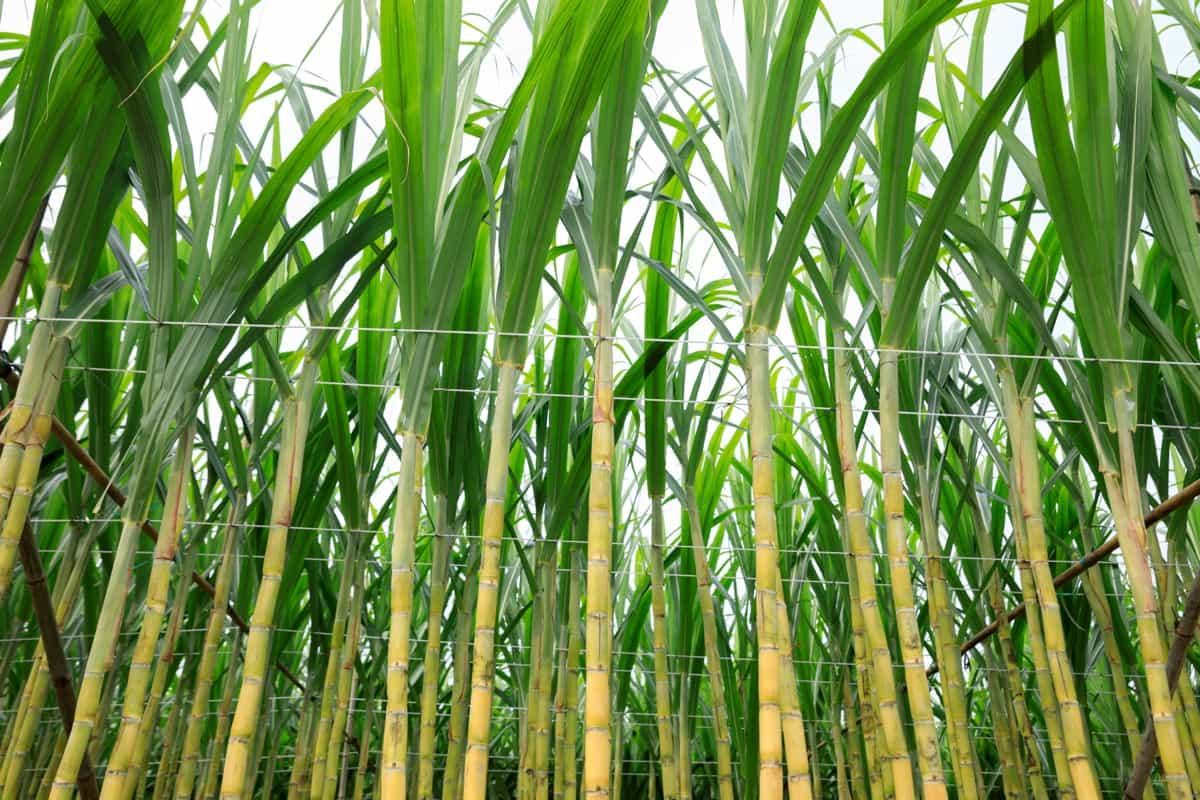
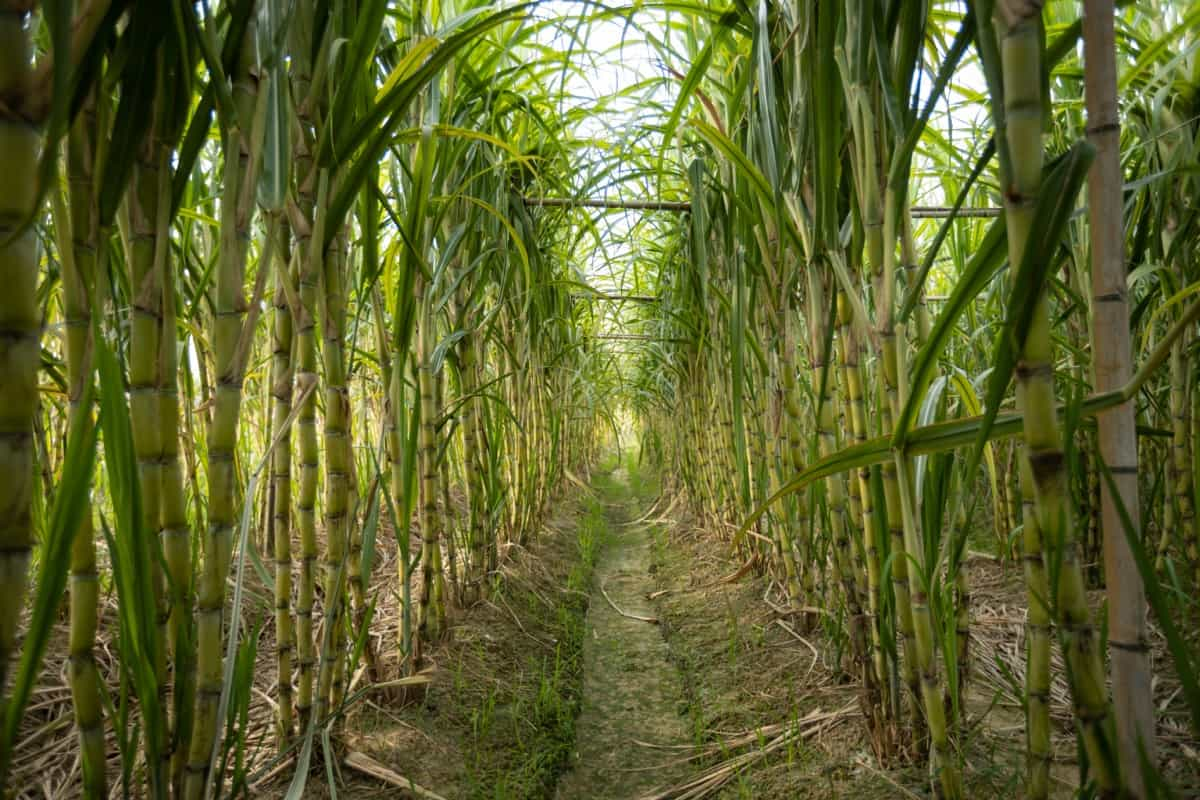
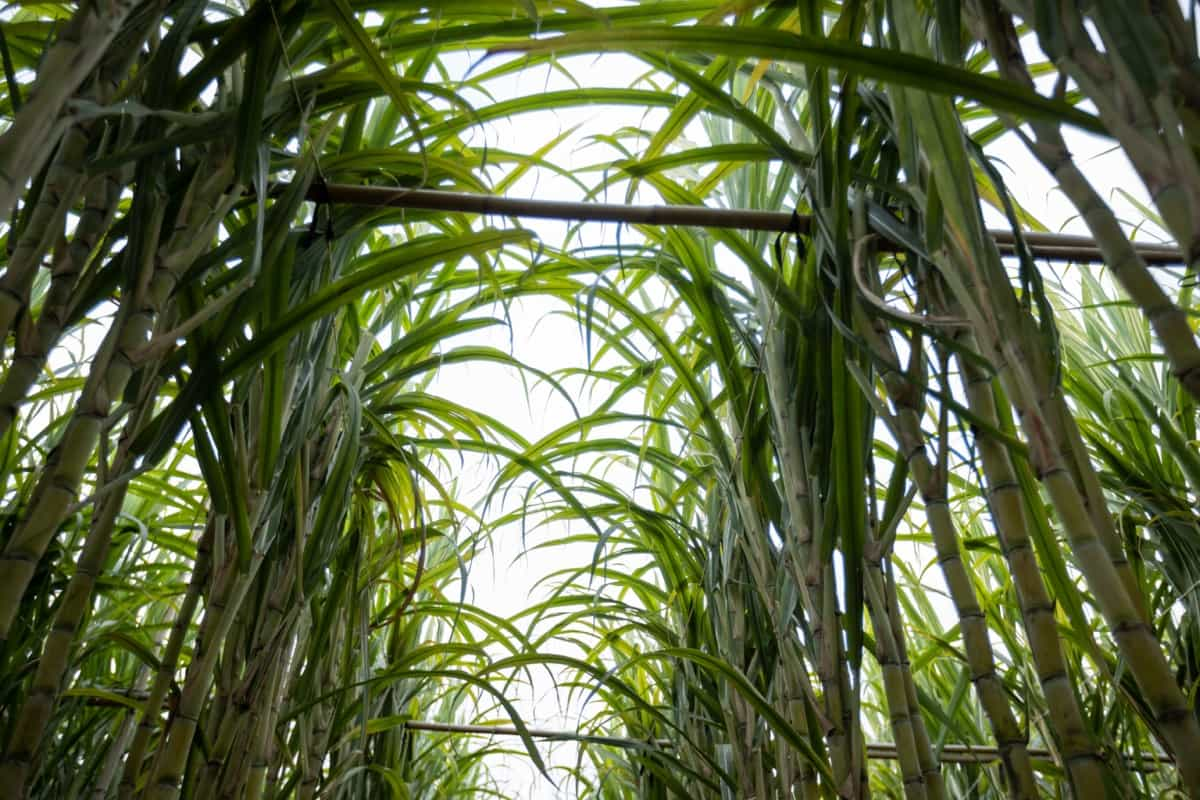
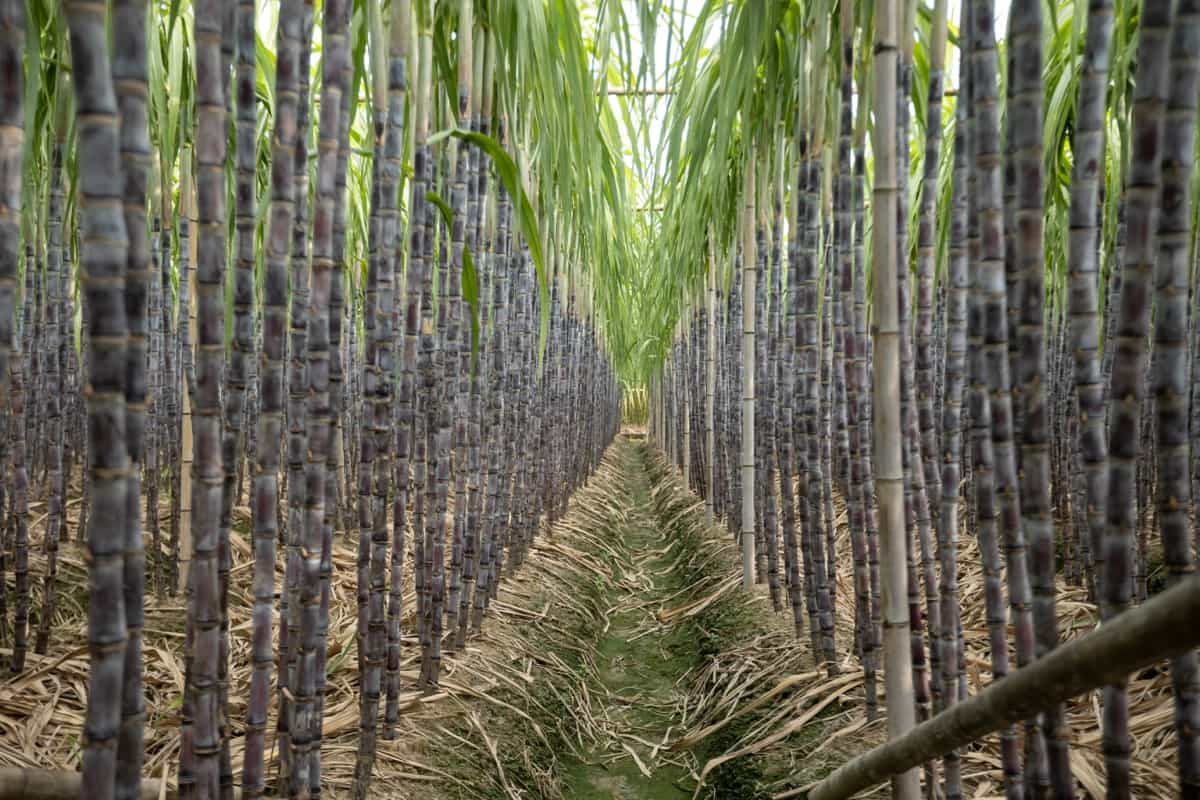
Sugarcane farming is a fascinating agricultural practice that involves cultivating Sugarcane, a tall perennial grass known for its sweet juice. The botanical name for Sugarcane is Saccharum officinarum. It belongs to the Saccharum genus and the Poaceae family. Sugarcane cultivation supports rural economies, creating jobs and stimulating local businesses.

Guide to Sugarcane Farming

Varieties of Sugarcane

There are various varieties of Sugarcane available, each with its unique characteristics and benefits. Some popular varieties include R570, Co 86032, NCo 310, and CoC 671. These varieties are known for their high sugar content, disease resistance, and adaptability to different climates. Farmers need to carefully select the right variety based on soil type, climate conditions, and market demand.

To choose the most suitable variety for their farm, they must conduct thorough research or seek advice from agricultural experts. Experimenting with different varieties can also help farmers improve their yield and quality over time. By diversifying the types of Sugarcane grown on their farms, farmers can mitigate risks associated with pests or diseases that may target specific varieties.

Climate Requirements for Sugarcane

Sugarcane thrives in warm and humid regions, ideal for regions with temperatures from 20 to 30°C. It requires an average annual rainfall of about 1000-1500 mm, evenly distributed throughout the growing season. Excessive moisture can lead to waterlogging, affecting root development and overall plant health. Alternatively, prolonged dry spells can hinder growth and reduce sugar content in the stalks.

Sugarcane also prefers well-drained soils with good fertility levels. It can tolerate a wide range of soil types, but sandy loam or clay loam soils are considered most suitable for cultivation. Due to consistent temperatures, Sugarcane can be grown year-round in tropical areas. However, in subtropical regions, planting usually takes place at the beginning of the rainy season to ensure optimal growth conditions throughout the crop cycle.

Soil Preparation for Sugarcane

Before planting your Sugarcane, it’s essential to ensure that the soil is well-drained and has good fertility levels. Start by testing the soil pH level to determine if any amendments are needed. Sugarcane thrives in slightly acidic soils with a pH range of 5.5 to 6.5. If adjustments are necessary, consider adding lime or sulfur accordingly.

In case you missed it: High-Yielding Sugarcane Varieties in India: Hybrid Cultivars for Increases Profits

Sugarcane Farming

Next, plow the land thoroughly to break up any compacted soil layers and promote better root growth. Remove any weeds or debris that could hinder the development of your Sugarcane plants. Incorporate organic matter like compost or manure into the soil to improve its nutrient content. This will help provide nutrients for healthy plant growth throughout the growing season.

Planting Techniques

There are key techniques that can make a difference in the success of your crop. Selecting healthy, disease-free seed cane for planting is essential. This ensures a strong start for your crop. Next, prepare the soil thoroughly by tilling and adding organic matter to provide vital nutrients for the growing Sugarcane.

Planting should be done during the optimal season when temperatures are warm and rainfall is consistent. Plant each set or bud at an adequate depth with proper spacing between plants to allow room for growth. After planting, ensure proper irrigation practices to keep the soil moist but not waterlogged. Regular monitoring of moisture levels is crucial throughout the growth stages.

Irrigation Practices

Irrigation practices play a major role in ensuring optimal growth and development of the crop. Adequate water supply is essential for Sugarcane plants to thrive and produce high yields. Sugarcane requires consistent watering throughout its growing cycle, especially during dry periods. Drip irrigation or sprinkler systems are commonly used methods to provide the necessary moisture directly to the plants’ roots. Proper irrigation scheduling is key to preventing water stress and optimizing Sugarcane plant nutrient uptake.

Monitoring soil moisture levels regularly can help farmers adjust their irrigation practices accordingly. Overwatering must be avoided as it can lead to waterlogging, which may result in root rot and decreased oxygen availability for the plant roots. Finding the right balance in watering frequency and volume is essential for healthy Sugarcane crops.

Fertilization Strategies

Fertilizers provide essential nutrients like nitrogen, phosphorus, and potassium that are necessary for the development of strong Sugarcane plants. Different varieties may require varying fertilizer formulations, so it’s important to understand the specific needs of your chosen variety. Soil testing is key in determining the nutrient levels in your soil and identifying any deficiencies that need to be addressed through fertilization.

By applying the right fertilizers at the right time and in the right amounts, you can optimize plant growth and maximize sugar production. Organic fertilizers can also benefit Sugarcane. They improve soil health by promoting microbial activity and enhancing plant nutrient availability.

In case you missed it: Weed Management in Sugarcane Farming: How to Control with Organic, Chemical and Cultural Practices

Sugarcane Field

Balancing chemical and organic fertilizers can create a sustainable approach to nourishing your Sugarcane crop while minimizing environmental impact. Remember, a well-planned fertilization strategy tailored to your specific growing conditions can make all the difference in achieving a successful Sugarcane harvest.

Pest Management

Pests can pose a threat to your Sugarcane crop, causing damage and reducing yield. Implementing effective pest management strategies is crucial to ensure a healthy harvest. The common pest in Sugarcane farming is the Sugarcane borer, which tunnels into the stalks and weakens the plant. Integrated pest management practices can be utilized to combat these pests. These practices involve using cultural, biological, and chemical control methods to minimize pest populations.

Cultural practices such as maintaining proper field sanitation can help reduce pest habitats. Biological controls involve introducing natural predators or parasites that feed on pests without harming the crop. Additionally, selective pesticide application can target specific pests while minimizing environmental impact. Regular monitoring of pest populations is essential for early detection and intervention before infestations occur.

Disease Control

If not managed effectively, diseases can significantly impact the yield and quality of Sugarcane crops. The common disease in Sugarcane is smut, which can cause deformed growth and reduce sugar content. To combat this, farmers can use resistant varieties or fungicides as preventive measures. Another prevalent disease is rust, characterized by orange pustules on leaves. Proper sanitation practices and timely application of fungicides can help prevent its spread. Leaf scald is yet another concern for Sugarcane farmers.

It causes leaves to turn yellow, leading to reduced photosynthesis. Monitoring plant health regularly and implementing appropriate treatments are essential for controlling leaf scald. By being proactive in identifying potential diseases early on and implementing effective control measures, farmers can protect their Sugarcane crops from devastating losses.

Weed Management

Weed management is a crucial aspect of Sugarcane farming that requires careful attention and proactive measures. Weeds compete with Sugarcane plants for nutrients, water, and sunlight, which can significantly impact the yield and quality of the crop. The effective method of weed control in Sugarcane fields is through manual weeding, where weeds are physically removed by hand or using tools. This method helps prevent weed growth from overtaking the Sugarcane plants.

In case you missed it: Top 24 Steps to Boost Sugarcane Yield: How to Increase Production, Size, and Quality

Sugarcane Rows in a Field

Another approach to weed management is to use herbicides that target weeds while minimizing harm to the Sugarcane crop. Proper application guidelines are essential when using herbicides to ensure effectiveness and safety. Additionally, practicing good crop rotation and maintaining proper spacing between Sugarcane rows can help reduce weed infestations by limiting opportunities for weed growth.

Growth Monitoring and Care
Keep an eye out for any signs of nutrient deficiencies or pest infestations that could hinder its growth. Check the soil moisture to ensure your Sugarcane plants are getting adequate water. Adjust irrigation practices accordingly based on weather conditions and plant needs. Prune any dead or diseased leaves to promote healthy growth and prevent diseases in your Sugarcane crop.

Consider implementing organic fertilizers to provide essential nutrients for optimal growth and yield. Monitor the effectiveness of your fertilization strategies through plant observation and soil testing. Stay proactive in weed management by regularly removing unwanted plants that are competing with your Sugarcane for resources like sunlight, water, and nutrients.

Harvesting Techniques

The ideal time to harvest is when the cane reaches optimal maturity, usually around 12-18 months after planting. Harvesting Sugarcane too early can result in lower sugar content, while waiting too long can lead to deteriorating quality. The common method of harvesting Sugarcane is manual cutting using machetes or specialized knives. This traditional approach requires skilled laborers who carefully cut the stalks close to the ground without damaging them.

Another modern technique involves mechanical harvesters that streamline the process and increase efficiency on larger farms. After harvesting, it’s essential to transport the Sugarcane quickly to processing facilities for extraction. Proper storage is key to preserving sugar content and preventing deterioration before processing begins. Efficient harvesting techniques not only ensure a successful yield but also play a vital role in maintaining the quality of the final product – sugar!

Post-Harvest Handling

After the hard work of growing and harvesting Sugarcane, post-harvest handling is crucial to maintain quality. Once harvested, the Sugarcane stalks need to be transported quickly to processing facilities to avoid deterioration. The stalks are then cleaned and stripped of leaves before being crushed to extract the juice. This juice goes through various stages of purification to obtain raw sugar crystals. The leftover fibrous material, known as bagasse, can be used for producing biofuels or as a renewable energy source in cogeneration plants.

Moreover, molasses, another by-product obtained during sugar production, is often used in animal feed or alcohol distillation processes. Efficient post-harvest handling ensures maximum resource utilization and minimizes waste and environmental impact. By carefully managing this stage of the Sugarcane farming process, farmers can contribute to sustainable agricultural practices and the industry’s economic viability.

Sugarcane By-Products

Sugarcane farming yields sweet, juicy stalks and various valuable by-products that are utilized in different industries. The most common by-product is bagasse, the fibrous residue left after extracting Sugarcane juice. Bagasse has multiple uses, including as a renewable source for bioenergy production and as a material in paper and pulp manufacturing.

Molasses is another important by-product of Sugarcane farming. This thick, dark syrup obtained during sugar processing is widely used in food production as a sweetener and flavor enhancer. Additionally, molasses serves as an essential ingredient in the distillation of rum and other alcoholic beverages.

In case you missed it: Best Fertilizer for Sugarcane: Organic, Biofertilizers, NPK, Compost Manure, and Schedule

Sugarcane Cultivation

Moreover, Sugarcane farming generates press mud or filter cake, which contains organic matter beneficial for soil improvement when used as fertilizer. This by-product helps enhance soil fertility and structure while reducing the need for synthetic fertilizers. Furthermore, ethanol produced from Sugarcane fermentation plays a crucial role in renewable energy production worldwide. 

Sustainability Practices in Sugarcane Farming

Sustainability practices in Sugarcane farming are crucial for the long-term health of both the environment and the crop itself. The key practice is implementing integrated pest management strategies to reduce reliance on chemical pesticides. By utilizing natural predators and beneficial insects, farmers can minimize their environmental impact while effectively managing pests.

Another important aspect of sustainability in Sugarcane farming is soil conservation. Implementing techniques such as minimum tillage and cover cropping helps to prevent erosion and maintain soil structure, promoting healthier crops for years to come. Water management is also a critical component of sustainable Sugarcane farming. Efficient irrigation, such as drip irrigation or scheduling water applications based on plant needs, can help conserve water resources and optimize crop yields.

Furthermore, adopting organic fertilization methods like composting or using biofertilizers reduces reliance on synthetic chemicals while improving soil health and fertility naturally. Integrating these sustainable practices not only benefits the environment but also ensures the viability of Sugarcane farming for future generations.

Future Trends in Sugarcane Agriculture

The emerging trend in Sugarcane farming is the integration of precision agriculture techniques. Farmers are increasingly utilizing drones and sensors to monitor crop health and optimize inputs effectively. Furthermore, sustainable practices are becoming a focal point for the industry. More farmers are adopting eco-friendly methods such as organic farming and IPM to reduce environmental impact and meet consumer demands for ethically produced sugar products.

In case you missed it: Sugarcane Cultivation in Tamil Nadu: Crop Profile, Management, Cost, Profit, and Yield

Use of Technology in Sugarcane Farming

Innovations in genetic engineering also hold promise for enhancing Sugarcane varieties with improved yields, disease resistance, and stress tolerance. Scientists are working on developing genetically modified strains that can thrive in changing climate conditions while maintaining high productivity levels.

Sugarcane farming offers a promising opportunity for farmers to cultivate a versatile crop with various uses. By adopting best practices and embracing innovation, farmers can help meet the growing demand for sugar while safeguarding the environment and promoting long-term agricultural viability.

Ultimate Guide to Kiwi Farming – A Beginner’s Guide

16

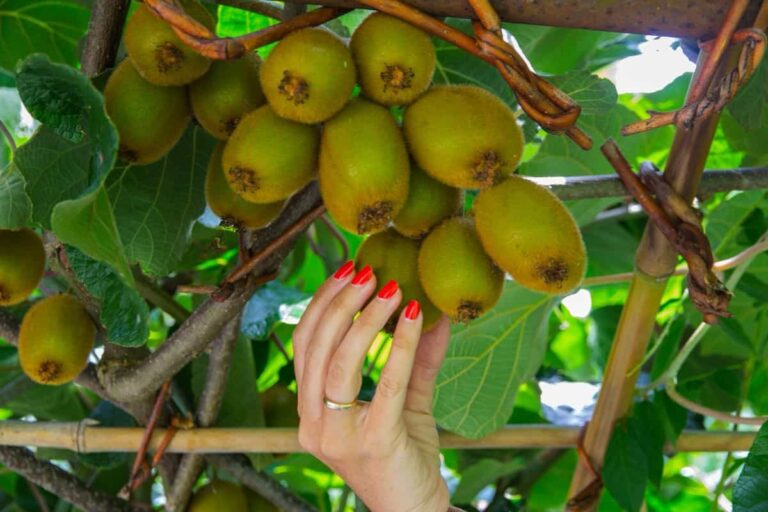
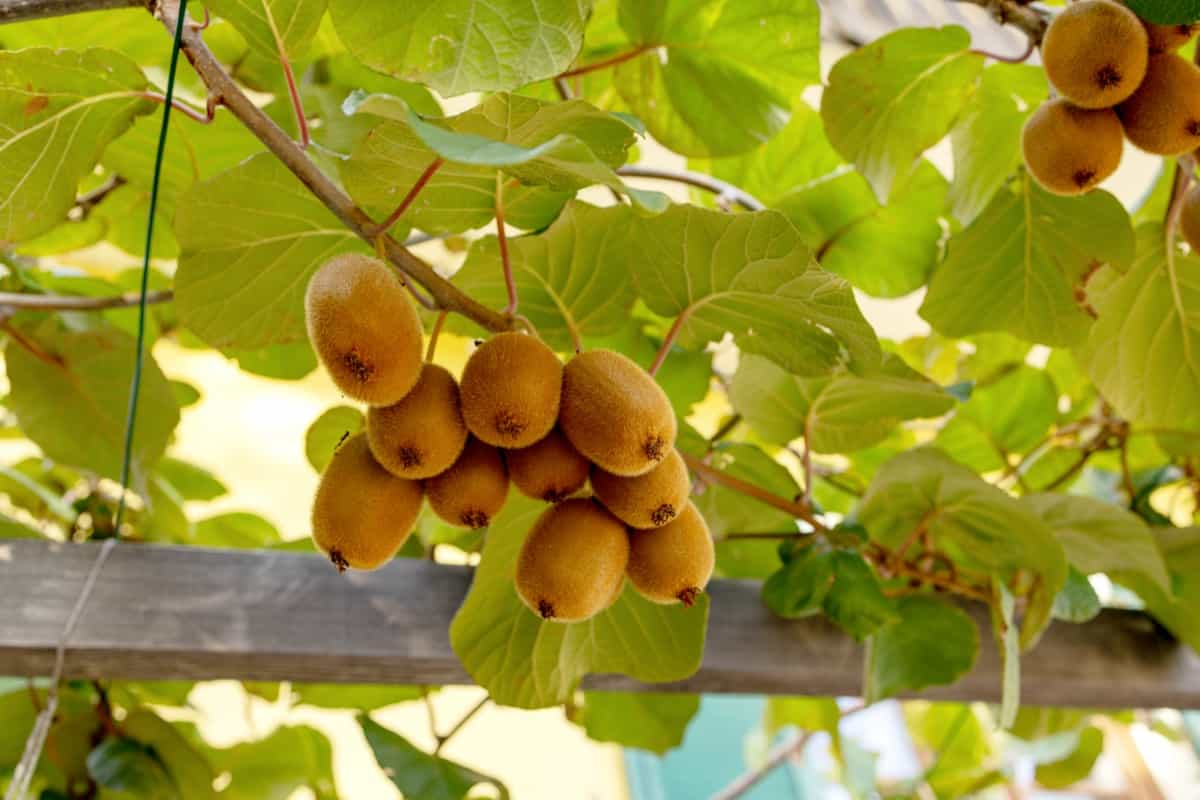
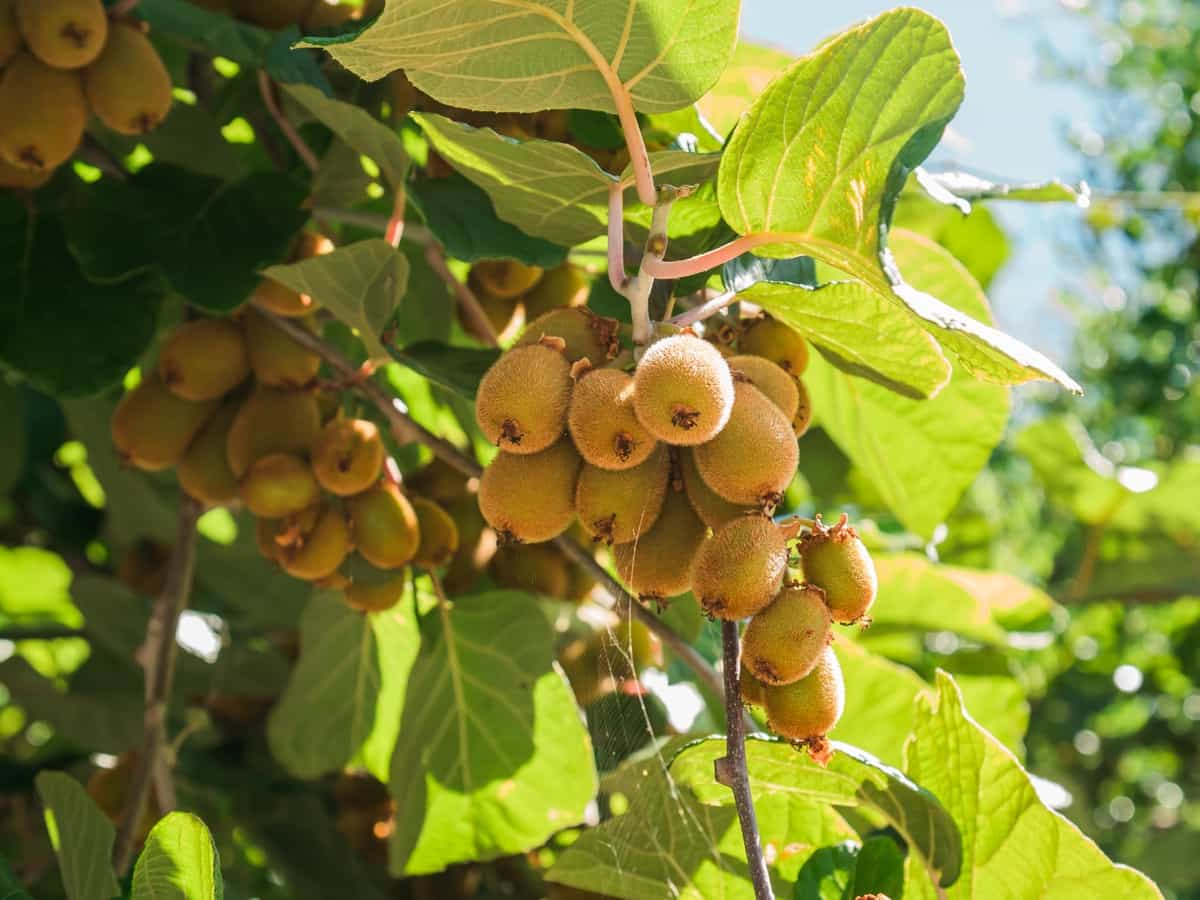
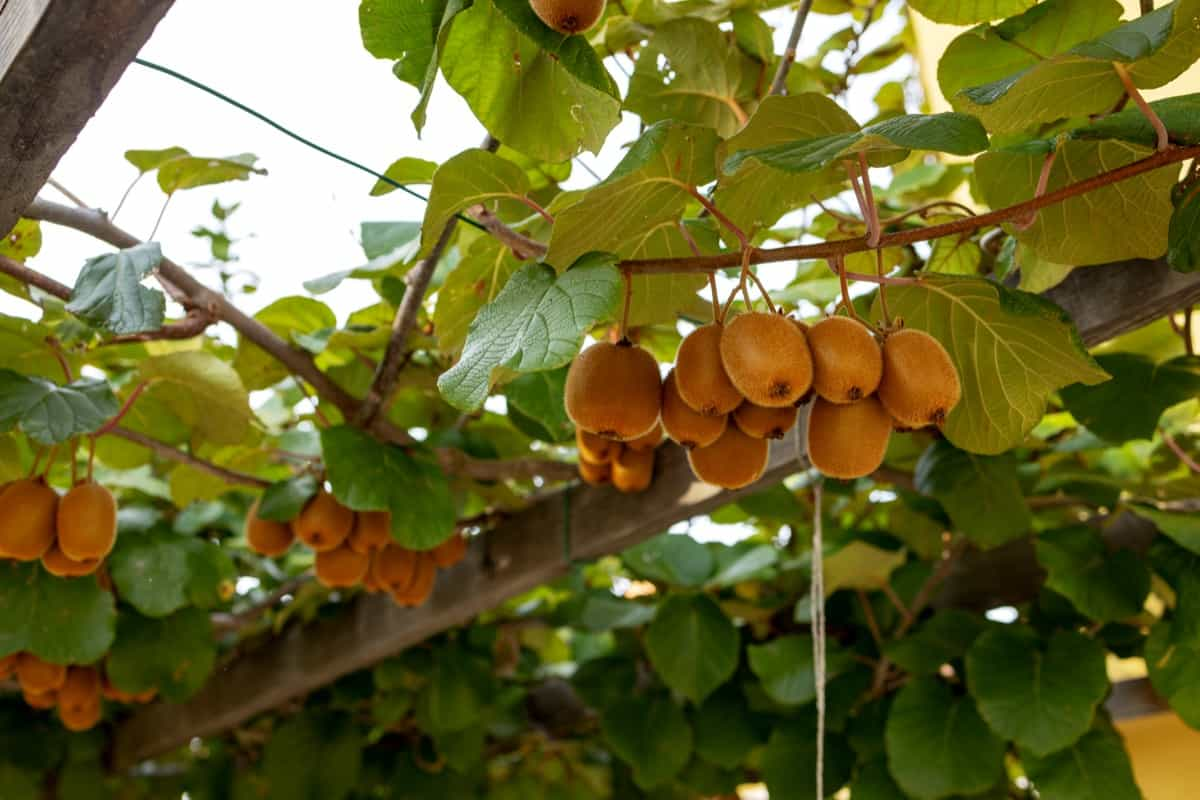
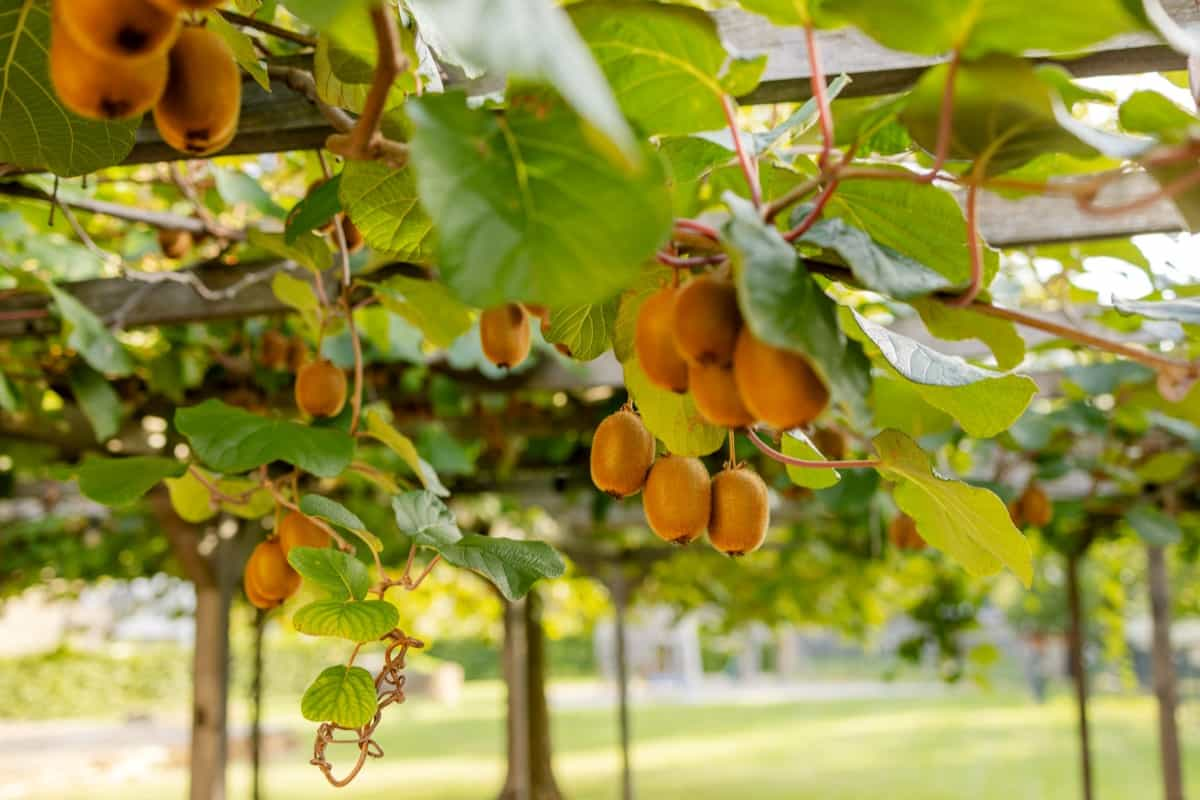
Kiwi farming is the cultivation of Kiwifruit, a delicious and nutrient-rich fruit that grows on woody vines. The Kiwi plant, scientifically known as Actinidia deliciosa, belongs to the family Actinidiaceae.

Ultimate Guide to Kiwi Farming

Overview of Kiwi Farming

Kiwi farming is significant in the agricultural sector due to its high nutritional value and economic potential. Cultivating Kiwi fruits provides a sustainable income source for farmers while also contributing to local and global food supply chains. Kiwi farming is a fascinating venture that involves cultivating delicious and nutritious fruit.

Best Varieties for Commercial Cultivation

The best-known variety is the Hayward Kiwi, known for its delicious flavor and high yield potential. Another excellent choice is the Bruno variety, prized for its large fruit size and disease resistance. For those looking for something unique, the Blake variety offers a sweeter taste profile compared to traditional Kiwis.

Additionally, the Abbott variety is favored for its early maturation period, allowing farmers to capitalize on an extended harvesting season.  If you’re interested in organic farming practices, then the Monty’s Surprise variety could be a great fit due to its resistance to pests and diseases. Other popular varieties include Monty, Allison, and Matua.

Site Selection and Soil Requirements

Kiwi vines thrive in well-drained soils with good fertility levels. It’s important to choose a site that receives sunlight and is protected from strong winds. Ideally, the soil should have a pH between 5.0 and 6.5 for optimal growth. Avoid areas prone to waterlogging, as Kiwi plants are sensitive to excessive moisture, which can be affected by root rot. Additionally, selecting a site with proper air circulation can help prevent diseases and promote healthy vine growth.

Climate Considerations for Kiwi Growth

Kiwis thrive in temperate climates with mild winters and warm summers. They need a long growing season with ample sunlight to produce high-quality fruits. Kiwi plants are sensitive to extreme temperatures, especially frost. It’s important to select a place that offers protection from harsh weather conditions. Adequate airflow is also important to prevent diseases and promote healthy plant growth.

Ideally, Kiwi vines should be planted in areas with well-draining soil to avoid waterlogging. Excessive moisture can lead to some issues that may negatively affect fruit production. In regions where winters are too cold, consider planting cold-hardy varieties or providing winter protection, such as mulching around the base of the plants.

In case you missed it: High-Density Kiwi Plantation: Spacing, Plants Per Acre, Techniques, Cost, and Yield

Kiwi Farming

Propagation Techniques

Propagation involves creating new Kiwi plants from existing ones, ensuring a healthy and sustainable orchard.

Seeds

Kiwi seeds can be collected from ripe fruits and cleaned and dried. They can then be sown directly into a prepared seedbed or pots filled with a suitable growing medium. Compared to some other methods, Kiwi seeds may take longer to germinate, and not all seeds will produce plants with desirable traits. However, this method is straightforward and can yield new plants.

Cuttings

Semi-hardwood or hardwood cuttings are taken from healthy Kiwi plants during the dormant season (usually late autumn or winter). Cuttings are typically 8-12 inches long and include several nodes. Remove any leaves from the lower part of the cutting and dip the cut end in a rooting hormone to encourage root growth. Plant the Kiwi cuttings in a well-draining rooting medium, keeping them moist and providing bottom heat to stimulate root development. Once roots have developed, the cuttings can be transplanted into pots or the field.

Grafting

Grafting is a common technique used in commercial Kiwi production, especially for cultivars that do not grow true to type from seeds. Typically, a rootstock is selected for its vigor and disease resistance, while the scion (the upper part of the plant with desired traits) is selected from a desirable cultivar. The two are joined together using grafting techniques such as cleft grafting or whip and tongue grafting. Grafted plants are then grown until they are ready for planting in the field.

Planting Methods and Layout

Kiwis are typically planted in rows with sufficient spacing between each vine to allow for proper growth and development. Before planting, ensure that the well-drained soil and rich in organic matter to provide optimal conditions for the roots to establish themselves. Planting during the spring or fall seasons when temperatures are moderate is ideal for promoting healthy growth.

When laying out your Kiwi farm, consider factors such as sunlight exposure and access to water sources. Vines should be positioned to receive adequate sunlight throughout the day while also being mindful of irrigation needs. To maximize yield potential, follow recommended guidelines for spacing based on the specific variety of Kiwi you are cultivating.

Irrigation Management

Proper watering is essential for supporting growth and fruit development throughout the season. Kiwi plants require consistent moisture levels, especially during periods of active growth and fruit set. Drip irrigation systems are commonly used in Kiwi orchards to deliver water directly to the roots, minimizing wastage and promoting efficient resource utilization.

It’s important to monitor soil moisture levels regularly and adjust irrigation schedules according to plant needs. Overwatering the Kiwi plant can lead to root rot, while underwatering can result in poor fruit quality.

Fertilization and Nutrient Requirements

Fertilization is a crucial aspect of Kiwi farming, as it directly impacts the growth and productivity of the vines. Kiwi plants have specific nutrient requirements that need to be met for optimal health and fruit development. Soil testing should be done to determine deficiencies and adjust the fertilizer accordingly to ensure proper fertilization. Nitrogen, phosphorus, and potassium are major macronutrients and micronutrients that are essential for Kiwi plant growth.

In case you missed it: How to Grow Kiwi in USA: A Farming and Production Guide to Planting to Harvesting for Beginners

Kiwi Fruits Ready to Harvest

Organic fertilizers like compost or manure can improve soil fertility naturally. Regular monitoring of plant nutrient levels is important to prevent deficiencies or excesses that may hinder plant growth. Applying fertilizers at the right time and in the correct amounts is key to promoting healthy vine growth and high fruit yields.

Pest and Disease Management

Pests and diseases can be a real problem for Kiwi farmers. They can affect your crop if not managed properly. Some common pests that you might encounter include aphids, mites, and scale insects. These creatures can suck the life out of your vines if left unchecked. To combat these pesky intruders, integrated pest management strategies are key. This involves using a combination of biological controls, cultural practices, and targeted pesticide applications when necessary.

By monitoring your vines regularly, you can catch any issues early on and take action swiftly. Fungal infections like powdery mildew and bacterial canker are common culprits in Kiwi farming. Regular monitoring of the vine’s health is essential to catch any signs of infestation early on. By staying vigilant and proactive in pest and disease management, farmers can effectively protect their Kiwi crop investment.

Pruning and Training Kiwi Vines

Regular pruning helps maintain vine health and allows for better sunlight penetration, leading to higher yields. When it comes to training Kiwi vines, the goal is to create a strong framework that supports the weight of the fruit. The common method is using a T-bar trellis system or pergola-style trellis to support the vines as they grow. This not only helps with structural support but also makes harvesting easier.

Additionally, proper pruning techniques involve removing dead or diseased wood, thinning out crowded areas, and shaping the vines for better air circulation. It’s important to prune during dormancy in late winter or early spring. By following these practices diligently, farmers can promote healthy vine growth and maximize fruit production come harvest time.

Pollination Requirements

Kiwi plants are dioecious, meaning there are separate male and female vines. This makes it necessary to have both genders nearby for successful pollination. Bees play a vital role in pollinating Kiwi flowers. To ensure effective pollination, it’s recommended to place beehives near the orchard during flowering season. Some growers also opt for hand-pollination techniques by collecting pollen from male flowers and manually transferring it to female flowers using a small brush. This method can help increase fruit yield in cases where natural pollinators may be limited.

Tips to Boost Flowering and Yield

Ensure your Kiwi vines receive adequate sunlight. Kiwis thrive in full sun, so make sure they have access to at least 6-8 hours of sunlight daily. Pay close attention to irrigation practices. Consistent watering is crucial for healthy growth and fruit production. Avoid overwatering or underwatering, as both can negatively impact flowering and yield.

In case you missed it: Top 15 Steps to Boost Kiwi Yield: How to Increase Production, Fruit Size, and Quality

Kiwi Plantation

Additionally, consider implementing a regular fertilization schedule. Providing the necessary nutrients will support vigorous growth and abundant fruit production. Pruning is another key aspect of boosting flowering and yield. Regular pruning helps maintain plant health, encourages new growth, and enhances fruit quality.

Monitoring Plant Health

Monitoring plant health is crucial in Kiwi farming to ensure the vines thrive and produce quality fruit. Regularly inspecting the leaves, stems, and fruits for any signs of disease or pest infestations helps prevent issues from escalating. Look for yellowing leaves, wilting, or unusual spots that could indicate a problem.

In addition to visual inspections, it’s essential to monitor soil moisture levels and pH balance regularly. Another aspect of monitoring plant health is observing the vine’s overall growth pattern throughout the season. Look for any stunted growth or lack of new shoots, which could signal underlying issues such as nutrient deficiencies or root rot.

Harvesting and Yield Optimization

When it comes to harvesting Kiwi fruits, timing is key. Ensure the fruits are ripe but firm before picking them – soft Kiwis won’t hold up well during transportation. Gently twist the fruit off the vine to avoid damaging both the fruit and the plant. Yield optimization starts with proper handling post-harvest. Sort the fruits based on size and quality for better marketability.

Store them in a cool, humid environment to extend their shelf life. Maintaining consistent irrigation and fertilization practices throughout the growing season can significantly impact your overall yield. Monitor plant health regularly to catch any issues early on and prevent potential crop loss.

Expected Yield

The amount of fruit you can harvest per acre can vary depending on various factors. Factors such as the variety of Kiwi grown, soil quality, climate conditions, and proper management practices play a crucial role in finding fruit yield. On average, a well-maintained Kiwi vine can produce between 100 and 400 pounds of fruit per season.

However, with optimal farming techniques and care, some farmers have reported yields reaching up to 600 to 800 pounds per acre. This impressive yield not only brings financial benefits but also showcases the potential of successful Kiwi farming.

Post-Harvest Handling and Storage

Post-harvest handling and storage are crucial steps in ensuring the quality and shelf life of Kiwi fruit. After harvesting, it is important to sort the fruit based on size, shape, and ripeness to maintain uniformity. Proper packaging is essential to protect the delicate skin of Kiwis during transportation. Storage conditions play a major role in preserving the freshness of Kiwi fruit. Kiwis should be stored at specific temperatures and humidity levels to prevent premature ripening or decay.

In case you missed it: How to Increase Flowering in Fruit Trees: Step-by-Step Guide for Beginners

Kiwi Farm

Cold storage facilities with controlled atmospheres can significantly extend the shelf life of Kiwis. Regular monitoring of stored Kiwis is necessary to identify any signs of spoilage or deterioration early on. It’s vital to remove any damaged or rotting fruits promptly to prevent further contamination.

Marketing and Selling Kiwi Fruit

A strong marketing strategy is essential to reaching potential customers. To showcase your fresh Kiwis, utilize social media platforms, farmer’s markets, and local grocery stores. Highlight the unique health benefits of Kiwi fruit to attract consumers looking for nutritious options. Creating eye-catching packaging can also help differentiate your product on the market shelves.

Consider offering promotions or discounts during peak seasons to drive sales and increase brand visibility. Building relationships with retailers is key to ensuring a flow of sales throughout the year. Watch market trends and consumer preferences to adjust your marketing strategies accordingly.

Sustainability Practices in Kiwi Farming

Implementing sustainable techniques benefits the environment and contributes to the long-term success of the farm. The key practice is water conservation—using drip irrigation systems can reduce water wastage and promote efficient usage. Additionally, incorporating organic fertilizers and natural pest control methods helps maintain soil health and biodiversity on the farm. Furthermore, integrating renewable energy sources like solar panels can help reduce carbon footprint and lower energy costs.

In case you missed it: 14 Natural Ways to Treat Fruit Rot: Organic Homemade Recipes for Preventing Fruit Rot

Harvesting Kiwi Fruits in a Farm

Supporting local communities with fair labor practices and ethical sourcing adds another layer of sustainability to the operation. Kiwi farming is a rewarding and profitable venture that requires proper planning, management, and care to produce high-quality fruits.  Regular maintenance, including pruning, fertilizing, and pest management, will help ensure abundant fruit production.

Ultimate Guide to Capsicum Farming – A Beginner’s Guide

4

Capsicum farming is an exciting venture that involves cultivating Capsicum annuum, a flowering plant belonging to the nightshade family (Solanaceae). This vibrant and flavorful vegetable comes in various colors, shapes, and sizes, making it a popular choice among farmers and consumers alike.

Ultimate Guide to Capsicum Farming

Choosing the Right Varieties

When starting Capsicum cultivation, it’s crucial to choose the right varieties that suit your climate and market demand. With a wide variety available, selecting the best variety can make all the difference in your farm’s productivity and profitability. When deciding which Capsicum varieties to cultivate, consider factors like climate conditions, market demand, and your own farming goals.

Some Capsicum varieties may be more resistant to pests and diseases, while others may have higher yields or better taste profiles. Popular Capsicum varieties include Bell Peppers, Banana Peppers, Poblano Peppers, Jalapeños, Cayenne Peppers, Pimientos, and Cubanelle Peppers. Each variety has unique characteristics that cater to different consumer preferences and culinary uses.

Soil Preparation and Requirements

Capsicums thrive in well-draining soil rich in organic matter. Before planting capsicums, ensure the soil is loose and aerated to allow for good root development. Testing the soil’s pH can help determine if any adjustments are needed. For optimal growth, capsicums prefer acidic soil with a pH range between 6.0 and 6.8. Adding compost can improve soil fertility and provide essential nutrients for your Capsicum plants.

Mulching around the plants helps retain moisture, suppress weeds, and regulate soil temperature – all beneficial factors for healthy Capsicum growth. Regularly monitoring the condition of your soil throughout the growing season will help you make necessary adjustments to ensure your Capsicum plants continue to thrive.

Climate Conditions for Optimal Growth

Capsicums thrive in warm temperatures between 20-25°C during the morning and 15-20°C at night. They require plenty of sunlight, ideally around 6-8 hours a day, for photosynthesis and fruit development. Capsicums are sensitive to extreme weather conditions like frost or high humidity, which can stunt growth and affect yield. Therefore, choosing the right location with good air circulation and protection from strong winds is essential.

In case you missed it: Bolting Management in Plants: Prevention for Premature Flowers and Seeding in Crops and Vegetables

Red Capsicum in the Home Garden

In areas where temperatures drop below 10°C, consider using greenhouses or tunnels to create a controlled environment for your Capsicum plants. This will help extend the planting season and protect them from adverse weather conditions. By providing the right climate conditions for your Capsicum crop, you can ensure healthy plant growth, higher yields, and better-quality fruits.

Seedling Preparation and Plantation

Start by selecting high-quality seeds from reputable suppliers to ensure the best germination rates. Properly sow the seeds in trays filled with good soil mix, keeping them moist but not waterlogged. Once your seedlings have sprouted, ensure they receive adequate sunlight and warmth for optimal growth.

When they have developed sturdy stems and true leaves, transplant them into larger sized containers or directly into the prepared field. Plant your seedlings at the recommended spacing to allow room for proper air circulation. Water them regularly, avoiding overhead irrigation that can lead to fungal diseases.

Irrigation Techniques for Capsicum

Capsicum plants require consistent moisture levels to thrive and produce high-quality fruits. Overwatering the Capsicum can lead to root rot, while underwatering can stunt growth and reduce yield. Drip irrigation is a popular method among Capsicum farmers as it delivers water directly to the plant’s roots, minimizing water waste and reducing the risk of disease. Mulching around the Capsicum plants helps retain soil moisture and suppresses weed growth, further optimizing irrigation efficiency.

Monitoring soil moisture levels regularly is essential in determining when and how much water your Capsicum plants need. Adjusting irrigation according to weather conditions and plant growth stages ensures optimal hydration without wastage. Implementing efficient irrigation practices not only promotes healthy Capsicum plants but also contributes to sustainable farming practices by conserving water resources. 

Nutrient Management

Providing the right nutrient balance ensures healthy plant growth and high-quality fruit production. Capsicums require various essential nutrients like nitrogen, phosphorus, potassium, calcium, magnesium, and sulfur for optimal development. Regular soil testing helps determine the specific nutrient requirements for your crop.

In case you missed it: How to Increase Flowering in Vegetables: Best Ways to Induce and Enhance Flower Set  

Yellow Capsicum

Organic fertilizers can improve soil structure and nutrient availability to plants naturally. Inorganic fertilizers can be used judiciously based on soil test recommendations. Applying fertilizer at the right time during different growth stages is vital to prevent deficiencies or excesses that may harm plant health. Monitoring leaf color and overall plant vigor aids in adjusting nutrient applications accordingly.

Pest and Disease Control

It is crucial in Capsicum farming to ensure healthy plant growth and high yields. Protecting your crop from harmful pests and diseases requires proactive measures. Aphids are the main pests that affect Capsicum plants. These insects cause wilting and stunted growth. To combat aphids, consider using insecticidal soap or introducing natural predators like ladybugs.

Another common pest is whiteflies, which can spread harmful viruses to your Capsicum crops. Neem oil sprays or yellow sticky traps are effective methods to control these pesky insects. Capsicum plants are also prone to fungal diseases such as powdery mildew and leaf spot. Proper air circulation and avoiding overhead watering can help prevent these issues from taking hold in your garden.

Implementing integrated pest management techniques can help to control the use of chemical pesticides while effectively managing pests. Regular scouting of plants for early detection of any signs of infestation is key. Natural predators like ladybugs can be introduced to your farm as a biological control method to keep pest populations in check. Additionally, rotating crops, practicing good sanitation, and using resistant varieties can all contribute to reducing pest pressure.

Weed Management Strategies

Weed management is crucial in Capsicum farming to ensure optimal growth and yield. Utilizing mulching techniques can help suppress weed growth around the plants. Mulch acts as a protection barrier, preventing sunlight from reaching weed seeds. Hand weeding is another effective strategy for controlling weeds in Capsicum fields. By manually removing weeds, you can prevent them from competing with your Capsicum plants for nutrients and resources.

Regular inspection and timely removal of weeds are essential to maintaining a clean growing environment. Using herbicides cautiously and selectively can also help control stubborn weeds that are difficult to manage manually. To prevent damage, it’s important to follow label instructions carefully and avoid spraying herbicides near Capsicum plants. Implementing integrated weed management practices like crop rotation can further reduce weed pressure on your farm over time.

Pruning and Training Plants

Pruning and training plants play a crucial role in Capsicum farming. By removing excess growth, you allow the plant to focus its energy on getting high-quality fruits. Pruning helps improve air circulation, reduce disease incidence, and increase sunlight exposure to all parts of the plant. Training your Capsicum plants involves guiding their growth patterns for optimal productivity.

This can be done by using cages to support the plants as they grow heavier with fruit. Additionally, training helps prevent branches from breaking under the weight of ripening peppers. Regularly inspecting your Capsicum plants for overcrowded areas or diseased branches is essential for maintaining plant health and maximizing yields. Remember that each cut you make during pruning should be clean to avoid causing unnecessary damage to the plant.

In case you missed it: Management of Cutworms in Chilli: Prevention and Control With Organic, Chemical, Cultural Practices

Red Capsicum Harvest

Greenhouse Cultivation Methods

The use of greenhouses allows farmers to regulate temperature, humidity, and light exposure, leading to higher yields and better-quality produce. By utilizing greenhouse structures, farmers can extend the growing season of Capsicum plants, enabling year-round production. This method also protects against adverse weather conditions, pests, and diseases that can impact traditional outdoor crops.

The selection of the right greenhouse design is crucial for successful Capsicum farming. Factors such as ventilation systems, irrigation methods, and shading techniques play a significant role in creating an ideal microclimate for the plants to thrive. Additionally, greenhouse cultivation allows for efficient water usage through drip irrigation systems that deliver water directly to the plants’ roots. This not only conserves water but also reduces the risk of fungal diseases caused by overhead watering methods.

Implement a drip irrigation system to water your Capsicum plants while avoiding water wastage efficiently. Maintain temperature and humidity levels within the greenhouse to create an ideal growing environment for Capsicums. Consider using organic fertilizers to promote healthy plant growth without harmful chemicals. Regularly monitor your crop for pests or disease signs and take immediate action to prevent infestations.

Harvesting Techniques

Timing is important when it comes to harvesting. Capsicums should be harvested when they have reached their full size and color but are still firm to the touch. Using scissors or pruning shears, cut the fruits carefully from the plant to avoid damaging the stems or other parts. It’s essential to handle Capsicums delicately during harvesting to prevent bruising; this can affect spoilage during storage. For bell peppers, wait until they reach their mature color – whether green, yellow, orange, or red – before picking them.

Remember not to pull on the fruit, as this can damage both the pepper and the plant itself. For most varieties, harvesting can begin around 60-90 days after transplanting seedlings into the field or greenhouse. It’s essential to check the specific maturity indicators for each type of Capsicum you’re growing to avoid picking them too early or too late. Harvesting regularly encourages new growth and ensures a continuous supply of fresh Capsicums throughout the growing season. Proper post-harvest handling is equally important to maintain freshness and prolong shelf life.

Post-Harvest Handling and Storage

After a successful harvest of your vibrant Capsicums, the next crucial step is post-harvest handling and storage. This process ensures that your produce remains fresh and market-ready for an extended period. Properly handle the harvested Capsicums with care to avoid bruising or damage. Sort them based on size, color, and quality before moving on to storage methods. When it comes to storing Capsicums, maintaining optimal temperature and humidity levels is key.

Consider using ventilated containers or perforated bags to allow proper air circulation. Avoid exposure to direct sunlight or heat during storage, as this can lead to premature ripening and spoilage. Regularly check stored Capsicums for any signs of decay or rotting. Implementing good post-harvest practices will preserve the quality of your Capsicums and enhance their shelf life, making them more appealing to potential buyers.

In case you missed it: Management of Black Thrips in Chilli Peppers: Symptoms, Treatment, Chemical, Biological, Natural, and Organic Control

Yellow Capsicum Harvest

Marketing Strategies for Capsicum

The effective approach is to establish partnerships with local grocery stores, restaurants, or farmers’ markets to sell your fresh Capsicums directly to consumers. By building relationships with these outlets, you can ensure a steady demand for your products. Another strategy is to use social media platforms and online marketplaces to promote your Capsicum farm. Create engaging content showcasing the quality of your produce, share recipes featuring Capsicums, and interact with potential customers through comments and direct messages.

This digital presence can help increase brand awareness and attract new buyers. Additionally, consider participating in agricultural fairs or food festivals where you can showcase your Capsicum varieties and connect with individuals passionate about fresh, locally grown produce. These provide an excellent opportunity to network with other farmers and potential buyers while gaining exposure for your farm.

Economic Analysis and Profitability

By conducting a thorough economic analysis, farmers can make informed decisions that maximize profitability. Factors such as initial investment costs, production expenses, and market prices all play a major in determining the financial viability of Capsicum cultivation. Calculating the potential return on investment requires careful consideration of various factors, such as yield per acre, labor costs, input expenses, and selling prices.

Monitoring market trends and demand fluctuations is also essential for adapting strategies to optimize profits. Efficient resource management and cost-effective practices are key elements in enhancing profitability in Capsicum farming. Implementing sustainable techniques not only benefits the environment but also contributes to long-term economic stability.

Future Trends in Capsicum Farming

The key trend is the integration of technology into cultivation practices. From automated irrigation systems to data-driven crop monitoring, farmers are embracing innovation to enhance efficiency and yield. Another emerging trend is sustainable farming practices. With a growing focus on environmental conservation, many growers are adopting organic methods and reducing chemical inputs. This shift towards sustainability not only benefits the environment but also responds to consumer demand for healthy and eco-friendly produce.

In case you missed it: Sucking Pests in Chilli Crop: Symptoms, Causes, Control, and Treatment

Red and Yellow Capsicum Harvest in the Garden

Additionally, there is a rising interest in specialty Capsicum varieties with unique flavors and colors. Consumers are increasingly seeking out exotic peppers for culinary experimentation, creating new market opportunities for farmers willing to diversify their crops. Capsicum farming is significant in the agriculture industry due to its versatile nature and high demand for culinary uses. With proper care, attention to detail, and dedication, you can optimize your crop yield and maximize profitability.

The Complete Guide to Sunflower Farming: From Seed to Sale

The Sunflower, scientifically known as Helianthus annuus L., belongs to the Asteraceae family. It has been cultivated for centuries for various purposes, ranging from ornamental decoration to culinary uses and oil production. Their versatility and adaptability make them a good plant choice for farmers looking to diversify their crops or add aesthetic appeal to their fields.

The Complete Guide to Sunflower Farming

Sunflower Varieties

The popular variety is the Giant Sungold Sunflower, known for its large blooms and vibrant golden petals that can reach up to 14 inches in diameter. Another favorite is the Velvet Queen Sunflower, with rich burgundy petals that add a dramatic flair to any garden or field. For those looking for a more classic look, the Russian Mammoth Sunflower is a top choice.

With its tall stalks reaching heights of up to 12 feet and traditional yellow petals, this variety never fails to make a statement. Other popular Sunflower varieties include Lemon Queens, Autumn Beauty Sunflowers, and Teddy Bear Sunflowers. Each offers its unique charm and beauty to brighten up any landscape.

Soil Requirements and Preparation

Sunflower plants thrive in well-drained soil with a pH level between 6.0-7.5, rich in organic matter. Before planting Sunflowers, it’s essential to test the soil for nutrient levels and make any necessary adjustments by adding compost or fertilizers to ensure optimal growth. Properly preparing the soil by tilling and removing any debris or weeds will create an ideal environment for Sunflower seeds to germinate. Sunflowers prefer loose, sandy loam soil that allows for good root development and efficient water drainage.

Climate and Environmental Conditions

Sunflowers thrive in warm climates with plenty of sunlight. They are known for their ability to withstand dry conditions, making them a popular crop choice in many regions. Sunflowers require well-drained soil and do best in areas with good air circulation. When selecting a location for your sunflower farm, consider factors like temperature fluctuations and wind patterns. Monitoring weather patterns and adjusting irrigation practices accordingly can help ensure optimal growth for your Sunflowers. 

In case you missed it: Best Fertilizer for Sunflower Crop: Organic, NPK, Compost Manure, and Schedule

Agronomists Inspecting Sunflower Plant

Seed Selection and Germination

The quality of your seeds will directly impact the overall growth and yield of your Sunflowers. Choose certified Sunflower seeds from reputable suppliers to ensure they are disease-free and have high germination rates. When making your selection, consider factors like seed size, oil content, and resistance to pests. Prioritize hybrid varieties if you’re looking for specific traits like increased yield or disease resistance. Opt for open-pollinated varieties if you want to save seeds for future plantings.

To germinate Sunflower seeds effectively, provide them with adequate moisture, warmth, and oxygen. Sunflower seeds germinate within 7 to 14 days under optimal conditions. Monitor germination progress regularly to identify any issues or delays. Plant the seeds at the recommended depth in well-draining soil and keep them consistently moist until they sprout. Monitor the germination process closely to address any issues promptly and ensure strong seedling development.

Planting Techniques and Spacing

Sunflower seeds should be planted directly into well-prepared soil. The common planting method is direct seeding, which is simple and cost-effective but requires proper soil preparation and weed control. Another approach is transplanting seedlings that have been started indoors. This can help extend the planting season in colder climates and give your Sunflowers a head start on growth. For those looking to maximize space or productivity, square-foot gardening techniques can be employed.

By carefully spacing out seeds within a designated area, you can optimize sunlight exposure and nutrient uptake for each plant. Before planting Sunflower, ensure that the soil is loose and well-drained to promote healthy root development. Planting too closely can result in competition for nutrients and sunlight, leading to stunted growth. On the other hand, planting too far apart can waste valuable growing space.

Sunflowers are typically planted in rows, with a spacing of 12-24 inches between each plant. This allows enough room for the plants to grow and spread out their large root systems. Proper spacing allows each plant to receive adequate resources for optimal growth and flower production. Take time to plan out your planting layout based on the needs of your chosen Sunflower variety.

Irrigation and Water Management

Sunflowers require consistent moisture levels, especially during critical growth stages. Proper irrigation techniques, such as drip or sprinkler systems, can help deliver water efficiently to the plants’ root zones. Monitoring soil moisture levels regularly is essential to prevent overwatering and underwatering.

In case you missed it: Organic Sunflower Production – Cultivation, Farming

Sunflower Field

It’s important to adjust watering according to weather conditions and plant needs. A well-drained soil structure is vital for preventing waterlogging, which can lead to issues. Water management practices should aim at maximizing water use efficiency while minimizing wastage. By implementing smart irrigation strategies, Sunflower farmers can promote healthy plant development and ultimately increase their crop yields.

Nutrient Management and Fertilization

Sunflowers require specific nutrients to thrive, including nitrogen, phosphorus, and potassium. Before planting, it’s essential to test the soil to determine its nutrient content accurately. Based on the results, you can then tailor your fertilization plan accordingly. Nitrogen is vital for leafy growth in Sunflowers, while phosphorus supports strong root development. Potassium helps with overall Sunflower health and disease resistance. Organic fertilizers can also be beneficial in providing a slow release of nutrients over time. Applying fertilizers at the right time during different growth stages is key to maximizing Sunflower yield.

Weed Control Methods

Weed control is crucial in Sunflower farming to ensure the plants have ample space, nutrients, and sunlight to thrive. There are various methods that farmers can employ to manage weeds effectively without harming the Sunflowers. One common approach is manual weeding, where farmers physically remove weeds by hand or using tools like hoes. This method is labor-intensive but ideal for smaller farms or areas with limited weed infestation.

Another method is mulching, which involves covering the soil around Sunflowers with organic materials like straw or wood chips. The mulch process helps suppress weed growth by blocking sunlight and reducing moisture availability for weeds. Crop rotation is a strategic technique where different crops are grown in succession on the same land. This practice disrupts weed life cycles and reduces their prevalence in Sunflower fields. Using herbicides is a more chemical-based approach to weed control.

Pest and Disease Management

It is crucial in Sunflower farming to ensure a healthy crop. One common pest that affects Sunflowers is the Sunflower moth, which lays eggs on the flower heads. To combat this, regular scouting of the field is important to detect signs of infestation early on. Another pesky pest is the banded Sunflower moth, which feeds on developing seeds inside the head. Implementing proper crop rotation practices can help reduce their populations naturally.

In case you missed it: Sunflower Seed Germination, Time, Temperature, Process

Sunflowers

Downy mildew and rust are common diseases in Sunflowers. Proper spacing between plants can promote air circulation, reducing humidity levels that favor these diseases’ development. Using resistant varieties and practicing good sanitation by removing debris from fields after harvest can also help prevent disease outbreaks.

Monitoring Sunflower Growth

Keep a close eye on your Sunflowers’ development from seedling to maturity. Check for nutrient deficiency, pests, or disease signs that could hinder their growth. Regularly inspect the leaves and stems for discoloration or unusual spots. Ensure that your Sunflowers are receiving adequate sunlight and water based on their specific needs.

Monitor the height and overall health of the plants as they grow taller and begin to form buds. Note any changes in flowering patterns and pay attention to how well pollination is occurring within your crop. By staying vigilant throughout the growing season, you can address any issues promptly and maximize your Sunflower yield at harvest time.

Flowering and Pollination

Sunflowers are known for their vibrant yellow petals, which attract bees and other pollinators. As the Sunflower plant grows, it eventually forms flower buds that bloom into beautiful flowers. Pollination plays a major role in the reproduction of Sunflowers. Bees are the primary pollinators for Sunflowers, transferring pollen from one flower to another, which allows fertilization to occur. This process is essential for seed production in Sunflower farming.

Ensuring proper pollination can lead to higher crop yields and healthier plants. Farmers often rely on natural pollinators like bees, but some also use techniques like hand pollination to ensure thorough fertilization.

Flower Boosting Ideas

Try companion planting with beneficial flowers like marigolds or nasturtiums to attract pollinators and deter pests naturally. Adding an organic mulch layer around the base of your Sunflowers can help retain moisture in the soil, promoting healthier blooms. Consider using natural fertilizers to provide essential nutrients without harmful chemicals. Deadheading – removing spent blooms – encourages new flower production, prolonging the blooming period for your Sunflowers.

In case you missed it: Sunflower Cultivation Income, Yield, Project report

Examining  Sunflower

Experiment with foliar sprays containing seaweed extracts or fish emulsion to boost plant health and stimulate flowering. Don’t forget about providing adequate sunlight; positioning your Sunflower patch where it receives full sun will ensure optimal growth and abundant blossoms.

Harvesting Sunflowers

Once your Sunflowers have reached maturity, it’s time to harvest them. Harvesting at the right time is crucial for optimal seed production. To check if they are ready, gently press a few seeds – if they’re firm and dark-colored, it’s go-time. To harvest Sunflowers for their seeds, you can cut the heads off with pruning shears or a sharp knife once the back of the flower head turns yellow and begins to dry out.

Hang them upside down in a well-ventilated area to finish drying before extracting the seeds. Leave some heads on the plants after flowering to attract birds that will help with seed removal naturally. For decorative purposes like bouquets or floral arrangements, harvest Sunflowers when fully bloomed but still vibrant in color.

Expected Yield

The yield of Sunflowers can vary depending on various factors such as the variety grown, soil quality, climate conditions, and farming practices implemented. On average, a well-maintained Sunflower field can yield around 1,500 to 2,000 pounds per acre. However, some experienced farmers have reported yields of up to 3,000 pounds per acre with proper care and management.

Post-Harvest Handling and Storage

After the hard work of harvesting Sunflowers, it’s crucial to store them properly for their quality. Post-harvest handling involves removing any debris or damaged flowers to ensure only the best ones are stored. Sunflowers should be dried in a well-ventilated area to prevent mold growth.

Once dried, Sunflowers can be stored in a cool, dry place away from direct sunlight. Proper storage helps retain the seeds’ freshness and nutrients for longer periods. Consider using tight containers or vacuum-sealed bags to prolong shelf life. Check stored Sunflowers regularly for any signs of moisture or pests that could compromise their quality. Monitor temperature and humidity levels in storage areas to prevent spoilage.

Marketing and Selling Sunflower Products

When it comes to marketing and selling Sunflower products, there are various avenues you can explore to reach your target audience. One option is to set up a stand at local farmers’ markets or craft fairs where you can showcase your Sunflower products, such as seeds, oil, or even handmade soaps. Online platforms like social media provide a great opportunity to promote and sell your Sunflower items to a wider audience. Utilize visually appealing photos and engaging content to attract potential customers.

In case you missed it: Sunflower Oil Extraction Process, Methods – A Full Guide

Summer Sunflower Field

Collaborating with local stores, cafes, or restaurants is another effective way to get your Sunflower products in front of interested buyers. Consider offering samples or hosting special events to create buzz around your offerings. Don’t forget the power of word-of-mouth marketing. Building a strong brand reputation can help drive sales and loyalty in the long run.

Challenges and Future Trends in Sunflower Farming

One challenge faced by Sunflower farmers is the unpredictable weather patterns, which can affect crop growth and yield. Adapting to climate change by implementing sustainable practices will be crucial for the future of Sunflower farming. Another challenge is pest and disease management. Staying up-to-date on effective control methods and investing in preventative measures will be essential to protect Sunflower crops from potential threats.

Additionally, market fluctuations and competition can pose challenges for farmers looking to sell their products at competitive prices. Looking ahead, future trends in Sunflower farming may include advancements in technology, such as precision agriculture tools for improved efficiency and productivity. Sunflower farming can be a rewarding and profitable venture for farmers of all levels. By utilizing different planting techniques, such as direct sowing or transplanting, you can maximize your Sunflower yield.

Sapota Farming (Chiku), Planting, Care, Harvesting

2

Sapota Farming (or) Chiku Farming Info Guide:

The following article is about ” Sapota Farming (Chikoo)” or “How to grow Chikoo Fruit”.

Sapota Farming
Sapota Farming.

About Sapota:

Sapota fruit is a native of Mexico and other tropical countries of South America. Sapota commonly known as Chiku fruit is mainly cultivated in India for its fruit value, while in South-East Mexico, Guatemala and other countries it is commercially grown for the production of chickle which is a gum-like substance obtained from latex and is mainly used for the preparation of chewing gum. In India, It has become a very popular fruit crop in Gujarat, Maharashtra, Karnataka, Tamilnadu, Andhra Pradesh, and Kerala.

Varieties cultivated in different states of India:

State in India   Varieties of Sapota grown
Andhra Pradesh Cricket ball, Kalipatti, Calcutta round, Kirthibharathi, Dwarapudi, Pala, PKM-1, Jonnavalasa I & II, Bangalore, Vavi Valsa
Bihar Baramasi
Gujarat Kalipatti, Pilipatti, Cricket Ball, PKM-1
Karnataka Cricket ball, Kalipatti, Calcutta round, DHS-1, DHS-2
Maharashtra Kalipatti, Dhola Diwani, Cricket ball, Murabba
Orissa Cricket ball, Kalipatti
Tamil Nadu Pala, Cricket ball, Guthi, Co 1, Co 2, PKM-1
Uttar Pradesh Baramasi
West Bengal Cricket ball, Calcutta round, Baramasi, Baharu, Gandhevi Barada

Suitable soil for Sapota plantation:

Sapota fruit can be grown in a variety of soils but deep alluvium, sandy loam, and well-drained medium black soils with pH 6.0-8.0 are ideal for sapota farming. However, shallow clay soils underlaid with hardpan or high calcium contents does not support sapota farming.

Climate required for growing the Sapota fruit:

Climate Requirement for Chikoo.

Sapota is a tropical fruit, which likes warm and humid (>70% RH) climate. It grows well up to an altitude of 1, 000m however, coastal climate is ideal for sapota farming. Temperature range of 10-38°C and annual rainfall between 1250-2500 mm is suitable for sapota cultivation where it flowers and fruits throughout the year. Temperatures exceeding 43°C leads to flower drop resulting in a poor crop.

Land preparation methods for Sapota plantation:

The land is ploughed two to three times and then levelled. Undulating land is divided into terraces and levelling is done. Tall and thick growing trees viz. mango, Jamun, tamarind, silver oa, and casuarinas are established on the windward side or on all sides of the orchard. The plants for windbreak may be planted at a distance of 1.5 to 1.8 m. in a row.

Planting material in Sapota crop:

Sapota is commercially propagated by vegetative methods such as air layering or gootee layering, grafting and budding.

Ready to Harvest Sapota.

You can read about Watermelon Profits, Yield Per Acre.

The best season for planting Sapota:

Planting can be done in any season provided irrigation facilities are available. Grafts are usually planted at the beginning of the rainy season. In areas where heavy rainfall is present the crop can be planted as late as September.

The spacing of Sapota plants:

The land should be thoroughly plowed at 30-45 cm depth and levelled. Usually planting is done at a distance of 10mx10m. As the growth of sapota plant is slow it takes a longer period to occupy the allocated space. Therefore, a spacing of 6mx6m is maintained until the canopies meet. Subsequently, alternate trees are removed to reduce the plant’s population.

Pit digging for Sapota plantation:

Pits of 90cm3 are opened during the summer and exposed to the sun for a period of 2-3 weeks. While opening the pits, the topsoil and subsoil are to be heaped separately. Each pit is filled with topsoil first followed by subsoil mixed with well-decomposed farmyard manure (FYM), 1kg Superphosphate and 500g Sulphate of potash. Lindane powder @100g/pit is added to control termites.

Sapota planting method:

At the time of planting in the hole, just sufficient to accommodate the root ball of the grafted plant should be dug in the center of the pit. The grafts are planted in the hole in such a way that the graft union remains just above the soil surface. The grafts are staked immediately after planting to protect from strong winds. The young graft is protected from heat by erecting temporary shade covered with grass or plastic sheets.

The polythene strip used for securing the graft joint should be removed a month after planting so as to reduce mortality of the graft. The new sprouts emerging on the rootstock below the graft joint should also be removed immediately.

Irrigation/Drip Irrigation for Sapota plants:

Irrigation is provided at an interval of 30 days in winter and 15 days in summer. This system has been found to be beneficial in saving 40% water with 70-75 % higher income. This system is laid out with 2 drippers spaced 50 cm. from the tree at an initial stage during the first two years and then 4 drippers about 1 m. away from the tree until it attains five years of age.

Inter-cultivation in Sapota orchard:

Intercropping with banana, papaya, pineapple and cocoa; French beans, peas, tomato, brinjal, cabbage, cauliflower, cucurbits is recommended depending upon the climate and irrigation facilities available.

You may read the Smart Farming in India.

How to control weeds in Sapota plantation:

Weeds should be regularly removed from the basin. In young plantations pre-emergence application of Bromacil 2kg a.i./ha or Diuron 2kg a.i./ha has been found effective in controlling the weed population for 10-12 months.

How to prune Sapota plants:

Pruning is normally done during winter to give shape and reduce the overcrowding of branches. Pruning is important as the flowers and fruits are borne on those branches, which receive maximum air sunlight.

Pruning of Sapodilla Plant.

Insect pests and diseases of Sapota:

Most common pests in Sapota Farming are Leaf Webber, hairy caterpillars and budworm . Spraying with phosalone 35 EC (2 ml./l.), chloropyriphos 20 EC or endosulfan 35 EC have been found to be effective in controlling the pests. The main diseases reported are leaf spot (Phleopheospora indica), base rot (Ceratocystis paradoxa), heart rot (Phytophthora parasitica) and anthracnose (Colletotrichum gloeosporioides). Application of Dithane M-45, copper oxychloride (3 g./l.), etc. have been found to be effective.

You may be interested in reading the Sapota Grafting Methods.

Manuring and Fertilization for Spota plants

The nutrient requirement of sapota is very high, as it is an evergreen tree in a continuous state of growth and fruiting. The fertilizer requirement of sapota varies from the age of the tree and soil nutrient status. The recommended fertilizer schedule is as follows -Under rainfed conditions, the nutrient application should be done on the onset of monsoon. However, under irrigated conditions, it should be applied in two splits.

You may be interested in Growing Sapodilla in Containers.

The total quantity of organic manure and half the dose of chemical fertilizers should be applied at the beginning of monsoon and the remaining half in the post-monsoon period (September-October). Since most of the active roots are distributed within the depth of 30cm, nutrients should be applied under the tree canopy and mixed thoroughly in the soil.

Harvesting and the yield of Sapota crop:

Sapota starts bearing from the third year of planting but economic yields can be obtained from 5th year onwards. The two main seasons of flowering are October- November, and February-March and the two corresponding harvesting seasons are January-February and May-June. Sapota takes four months from flowering to maturity of fruits. The fruits are hand-picked or harvested with special harvester which has a round ring with a net bag fixed onto a long bamboo.


Ready to Harvest Sapota
Ready to Harvest Sapota.

The crop bearing commences from the fifth year.  As such intercropping like vegetables may be taken up in the first four years of the project make it viable.  In high-density plantation, the production increases from 4.0 tonnes/acre in the fifth year to 6.0 tonnes/acre in the 7th year. Thereafter, the yield stabilizes at 8.0 tonnes/acre from 8th to 15th year.

Post-harvesting of Sapota crop:

Grading:

Grading is mainly based on the size and shape of the fruits. The fruits are graded into three categories depending on their size viz. large, medium and small.

Storage:

The fruits are highly perishable and can be stored under an ordinary condition for a period of 7-8 days after harvesting. At a storage temperature of 200 C, the storage life can be increased for a period of 21-25 days by removing ethylene and adding 5-10% CO2 to storage atmosphere.

The fruits are dipped in GA (300 ppm.) and Bavistin (1000 ppm.) solution at a pre-packing stage in order to extend the storage life of the fruits. Sapota being a climacteric fruit has to be ripened artificially.  Unripe fruits can be ripened by applying ethephon (1000 ppm.) at 20-25 0 C and can be stored for five weeks. Ripened ones can be stored at 2-30 C and 90-95% RH for a period of six weeks.

Packaging, transportation, and marketing of Sapota fruits:

For local markets, the graded fruits are packed in bamboo baskets containing straw as padding material. This helps in reducing the bruising and promotes even ripening of fruit. For distant markets fruits are packed in cardboard boxes.

Corrugated trays are equally effective as packaging material while transporting the fruits. Use of such trays is cost effective due to its re-usability. Road transport by trucks/lorries is the most popular mode of transport due to the easy approach from orchards to the market.

Several intermediaries like wholesalers and commission agents are involved in the marketing of the fruit.  The farmer realizes around 35% of the wholesale price in the secondary market.

The bottom line of growing Sapota fruits:

Sapota farming is very profitable even for small scale farmers under well farming practices and sapota farming business plan.

Read: How to Grow Moringa from Cuttings, and Seeds.

The Complete Guide to Pineapple Farming: From Seed to Sale

11

The Pineapple (Ananas comosus) is a tropical plant with edible fruit, and it belongs to the family Bromeliaceae. The cultivation of Pineapples not only contributes to food security but also adds diversity to crop production.

The Complete Guide to Pineapple Farming

Choosing the Right Pineapple Variety

With a wide range of Pineapple varieties available, each with its unique characteristics and flavors, it’s essential to select the one that suits your climate and soil conditions. Different varieties have varying characteristics, such as taste, size, and resistance to diseases. Some popular Pineapple varieties include the Smooth Cayenne, Queen Victoria, and Sugar Loaf. Each variety requires optimal growth and productivity. Contact experts to make an informed decision that suits your farming goals.

Understanding Soil Requirements

Understanding the soil requirements is crucial for a successful harvest in Pineapple farming. Pineapples thrive in well-drained, sandy loam soils with a pH level between 5.0 and 6.0. Soil rich in organic matter helps Pineapple plants grow healthy by providing essential nutrients and aiding in water retention. Prior to planting, it’s important to ensure that the soil is free from any compacted layers that may hinder root development.

Proper soil preparation involves loosening the ground and incorporating organic compost or fertilizer to improve fertility levels. This sets the foundation for robust plant growth and optimal fruit production. Soil testing throughout the planting season can help monitor nutrient levels and adjust fertilization practices accordingly. By paying attention to your soil’s needs, you can ensure a bountiful Pineapple harvest year after year.

Climate Considerations for Pineapple Cultivation

Pineapple plants thrive in tropical and subtropical climates with warm temperatures all year round. These plants require plenty of sunlight for optimal growth, so choose a location that receives ample sunshine throughout the day. Additionally, Pineapples prefer well-drained soil that retains moisture but doesn’t become waterlogged.

In case you missed it: Pineapple Farming, Cultivation Techniques – A Full Guide

Farmer Collecting Ripe Pineapples

Rainfall plays a significant role in Pineapple farming as these plants need consistent moisture to develop properly. Extreme weather conditions like frost or prolonged periods of drought can harm Pineapple crops, affecting their growth and fruit production. Therefore, selecting a location with stable weather patterns is essential for cultivating healthy Pineapples.

Land Preparation and Plantation Setup

Before Pineapple planting, ensure that the soil is rich in organic matter to support healthy plant growth. Clear the land from debris or weeds that could hinder the development of your Pineapples. A clean and fertile environment is essential for optimal results. Once the land is cleared, prepare beds or ridges where you will plant your Pineapple suckers.

Make sure there is enough spacing between each plant to allow for proper airflow and sunlight exposure. Consider incorporating compost or fertilizer into the soil before planting to provide essential nutrients for your Pineapples’ growth. This step can significantly impact the yield and quality of your produce.

Planting Techniques for Pineapples

Planting Pineapples requires careful attention to detail to ensure a successful crop. Before planting Pineapple, it’s essential to make the soil by loosening it and removing weeds. One common technique is using Pineapple suckers, which are small offshoots from mature plants. These suckers can be planted directly into the soil and will eventually grow into full-sized Pineapple plants. Another popular method is planting Pineapple crowns, which are the leafy tops of harvested Pineapples.

By allowing these crowns to dry out for a few days before planting them in well-draining soil, you can encourage root growth and establish healthy new plants. For those looking for a quicker method, tissue culture propagation offers a fast and efficient way to produce large quantities of disease-free Pineapple plantlets. This method involves growing plant cells in a nutrient-rich medium before transferring them to soil for further growth.

Irrigation Management in Pineapple Farming

Pineapples require consistent moisture levels to thrive, but they are also susceptible to waterlogging if the soil is excessively wet. Drip irrigation is often preferred for Pineapples, as it delivers water directly to the roots while minimizing water wastage. It helps maintain optimal soil moisture levels and prevents diseases that can arise from overwatering.

In case you missed it: Pineapple Farming in the Philippines: Exploring Varieties to Cultivation Economics

Pineapple Field

It’s essential to monitor the soil moisture regularly and adjust the irrigation schedule based on weather conditions. During dry periods, more frequent watering may be necessary to ensure the Pineapples receive adequate hydration. Overhead sprinklers should be avoided, as excessive moisture on the foliage can lead to leaf rot and fungal diseases. Proper drainage must be in place to prevent water stagnation in the fields.

Fertilization Practices for Optimal Growth

Fertilization is a crucial aspect of Pineapple farming to ensure optimal growth and yield. It involves providing the necessary nutrients for the plants to thrive. Pineapples require a balanced combination of nitrogen, phosphorus, and potassium, along with other micronutrients like magnesium and calcium. These elements are essential for healthy plant development.

Organic fertilizers for Pineapple plants can be used to enrich the soil naturally. Chemical fertilizers can also be utilized but should be applied in moderation to prevent over-fertilization. Regular soil testing helps determine the specific nutrient requirements of Pineapple plants at different growth stages. Adjusting fertilization practices accordingly can maximize productivity while minimizing environmental impact.

Pest and Disease Management

Some common pests that can affect Pineapples include mealybugs, scales, and mites. These pests can weaken the plants by feeding on them, leading to stunted growth and reduced fruit quality. Implementing IPM (integrated pest management) techniques, such as using beneficial insects or natural predators, can help control pest populations effectively without relying heavily on chemical pesticides. Regular scouting of the plantation for signs of infestation is essential to catch any issues early on before they escalate.

Diseases like fusarium wilt and bacterial heart rot can also impact Pineapple crops if not managed properly. Proper sanitation practices, crop rotation, and fungicide applications, when necessary, are key strategies in preventing disease outbreaks. Implementing proper sanitation practices and using disease-resistant varieties can help mitigate these risks.

Regular monitoring of your Pineapple plants is key in identifying any pest or disease issues before they escalate. By staying proactive with preventive measures like proper irrigation management and keeping a clean plantation environment, you can protect your crop from potential threats.

Weed Control Strategies

Weed control is a crucial aspect of Pineapple farming to ensure optimal growth and yield. To effectively manage weeds in your Pineapple plantation, consider implementing both pre-emergent and post-emergent herbicides. Preparing the soil before planting can help reduce weed pressure during the growing season.

In case you missed it: Pineapple Farming/Production in USA: How to Start, A Step-by-Step Guide to Planting to Harvesting

Pineapple

Utilizing mulch around Pineapple plants can also prevent weed seeds from germinating. Hand-weeding is another method that allows for targeted removal of weeds without harming the Pineapple crop. Regularly monitoring your plantation for any signs of weed infestations is essential to address them promptly. Proper spacing between Pineapple rows can deter weed competition for nutrients and water, promoting healthier plant growth.

Monitoring Pineapple Growth and Development

Monitoring Pineapple growth and development is crucial to ensure a successful harvest. Keep a close eye on the plants as they progress through different stages. Look for any signs of nutrient deficiencies or pest infestations early on. Regularly inspect the leaves, stem, and fruit for any abnormalities. Ensure that the Pineapples are receiving adequate sunlight and water. Adjust irrigation practices accordingly based on the plant’s needs.

Measure the height and width of the Pineapple plants regularly to track their growth rate. Monitor flower development closely to anticipate when fruits will start forming. Keep detailed records of your observations and note any changes in growth patterns over time. This data can help you make informed decisions about adjusting fertilization or pest management strategies if necessary. By actively monitoring Pineapple growth and development, you can intervene promptly to address any issues that may arise, ultimately maximizing your yield at harvest time.

Flowering and Fruit Set

Pineapples typically flower about five to six months after planting, with the fruit starting to develop shortly after pollination. The flowering stage is a sight to behold as vibrant colors emerge from the center of the plant before transforming into small fruits. Proper care during this stage is essential to ensure healthy fruit development. Pineapples rely on pollinators like bees and hummingbirds to transfer pollen between flowers for fertilization. Once pollinated, each flower develops into an individual fruitlet that eventually fuses to form the Pineapple.

Harvesting Pineapples

Timing is crucial when harvesting Pineapples. You need to wait until the fruit reaches its optimum ripeness for the perfect balance of sweetness and tanginess. The color of the Pineapple’s exterior can be an indicator of ripeness; it should be golden and give off a sweet aroma. Additionally, the leaves near the center of the crown should be easy to pull out.

In case you missed it: Top 17 Steps/Ways/Methods to Boost Pineapple Yield: How to Increase Production, Size, and Quality

Harvested Pineapples

To harvest a Pineapple, grasp the fruit firmly and twist it gently until it breaks away from the plant. Make sure not to damage the surrounding leaves or other fruits on the same plant. Once harvested, Pineapples should be handled with care to avoid bruising or damage. They can be stored at room temperature for a few days or refrigerated for longer freshness.

Expected Yield

The expected yield can vary depending on various factors, such as the variety of Pineapples you’re cultivating, soil quality, climate conditions, and proper farming practices. Typically, a well-maintained Pineapple plantation can yield around 40-80 tons per hectare. However, this figure is just an estimate, and actual yields may differ based on how effectively you manage your farm. Proper irrigation, fertilization techniques, pest control measures, and timely harvesting all play crucial roles in determining the final yield of your Pineapple crop.

Post-Harvest Handling and Processing

Once your Pineapples are ready for harvest, it’s essential to handle and process them carefully to maintain their quality. Post-harvest handling involves a series of steps, from harvesting the fruit to getting it ready for market. After harvesting, Pineapples should be cleaned and sorted based on size and quality. This helps ensure uniformity in the final product that reaches consumers.

The next step is processing, where Pineapples can be turned into various products like canned slices, juice, or dried snacks. Each processing method requires specific equipment and techniques to preserve the Pineapple’s flavor and nutrients. Proper packaging is crucial during post-harvest handling as it protects the fruit from damage during transportation and storage. Whether using boxes or crates, ensuring proper ventilation is key to preventing spoilage.

Marketing Your Pineapple Produce

Once your Pineapples are harvested and ready for sale, it’s important to have a solid marketing strategy in place. One way to market your Pineapple produce is by partnering with local grocery stores, farmers’ markets, or restaurants looking for fresh, locally grown fruits.

Making an online presence through social media platforms can help to attract potential customers interested in buying directly from the farm. Utilize eye-catching imagery of your juicy Pineapples and share interesting facts about your farming practices to engage consumers.

Consider offering unique packaging options or value-added products like Pineapple salsa or jams to diversify your product offerings and appeal to different customer preferences. Building relationships with wholesalers or distributors can also help get your Pineapples into larger retail chains or export markets.

In case you missed it: Organic Pineapple Cultivation – Farming In India

Tropical Pineapples

Sustainable Practices and Innovations in Pineapple Farming

Sustainable practices and innovations in Pineapple farming are crucial to ensure the longevity of the industry. One innovative approach is the use of organic fertilizers made from natural sources like compost or manure, reducing reliance on chemical inputs. Implementing integrated pest management techniques can help minimize pesticide usage while controlling pests effectively. Utilizing drip irrigation systems can optimize water usage by delivering precise amounts directly to the plant’s roots, conserving water resources.

Intercropping Pineapples with other compatible crops not only maximizes land use but also promotes biodiversity and reduces soil erosion. Utilizing technology such as drones, GPS, and remote sensing to collect data on soil fertility, crop health, and water availability can enable farmers to make informed decisions and optimize resource use, leading to higher yields and reduced environmental impact.

From its adaptability to various climates to its relatively low maintenance requirements, Pineapple cultivation can be a profitable venture. However, success in Pineapple farming requires careful attention to soil preparation, irrigation, pest and disease management, and post-harvest handling. By applying these techniques, farmers can enhance their Pineapple yields, improve fruit quality, and ultimately achieve greater profitability.

The Complete Guide to Papaya Farming: From Seed to Sale

28

Papaya is the tropical fruit Carica Papaya L. It belongs to the Caricaceae family and offers an excellent opportunity for agricultural enthusiasts due to its fast growth, high yield potential, and increasing demand in both local and international markets.

The Complete Guide to Papaya Farming

Selecting the Right Variety

Several factors should be considered when selecting Papaya varieties for farming, including climate, soil conditions, disease resistance, and market demand. Before choosing a variety, it’s essential to assess your specific farming conditions and market preferences to ensure the best possible yield and quality.

Certain varieties may be more popular among consumers due to their taste, size, or shelf life. It’s essential to grow a variety that has good market potential. The important varieties are Red Lady, Maradol, Tainung #1, Sunrise Solo, Hawaiian, Caribbean Red, Coorg Honey Dew, Golden Papaya, Waimanalo, and Kapoho.

Climate and Soil Requirements

Papayas thrive in tropical and subtropical climates with temperatures around 21-32°C. For optimal growth, they require well-drained, sandy loam soil rich in organic matter. Papayas are sensitive to frost and strong winds, so planting them in a sheltered location is recommended. The ideal pH level for Papaya cultivation ranges from 5.5 to 7. To ensure healthy growth, monitor the temperature and humidity levels regularly.

Preparing the Land

Before starting your Papaya farm, it’s essential to prepare the land properly. Begin by clearing the area of any debris or weeds that could hinder growth. Make sure the soil is rich in organic matter to provide optimal conditions for Papaya plants.

In case you missed it: Honey Dew Papaya Farming in India: How to Start, Care, Pest, and Disease Management

Farmers Working in Papaya Plantation

Consider making a soil test to determine if any amendments are needed before planting. This will ensure that your Papayas have access to the nutrients for healthy growth. Plowing or tilling the land can help improve soil structure and aeration, promoting root development. Papayas thrive in warm climates with plenty of sun, so selecting a sunny spot is crucial for their success.

Planting Techniques

Start by selecting healthy seedlings from a reputable source. Make holes twice as wide and deep as the seedling’s root ball. After preparing the soil with compost and organic matter, gently place the seedlings in the hole and backfill with the soil. Ensure that the plant is positioned at ground level to prevent rotting or waterlogging.

Water thoroughly after planting to help establish root growth. Mulch around the base of the plant to retain moisture and suppress weeds. Papayas thrive in warm climates, so select a sunny place with well-draining soil for optimal growth. Monitor your Papaya plants regularly for signs of stress or nutrient deficiencies. Proper spacing between plants is essential for good air circulation and sunlight exposure.

Drip Irrigation Management

Drip irrigation is an essential component of successful Papaya farming. It involves delivering water directly to the plant’s roots, so they receive the right amount of moisture. This method helps conserve water and prevents wastage by reducing evaporation. By using drip irrigation, farmers can control the timing and quantity of water provided to their Papaya plants, optimizing growth and fruit production.

Proper maintenance of drip irrigation systems is crucial for efficient operation. Adjusting the system according to weather conditions and plant needs will help maximize its benefits. Implementing a well-managed drip irrigation system in your Papaya farm can lead to healthier plants, increased yields, and cost-effective resource use.

Fertilization Strategies

Fertilization is a crucial aspect of Papaya farming, ensuring the plants have the necessary nutrients to thrive and produce high-quality fruits. When it comes to fertilization strategies, it’s essential to consider both organic and inorganic options. Organic fertilizers can help improve soil fertility over time.

In case you missed it: Red Lady Taiwan Papaya Farming in India: How to Start, Yield, Care, and Management

Papaya Fruits

On the other hand, inorganic fertilizers provide a quick boost of essential nutrients like nitrogen, phosphorus, and potassium. Applying fertilizers at specific growth stages of Papaya plants is also critical for optimal results. For example, providing a balanced mix during flowering can enhance fruit set and development.

Pest and Disease Control

Pests and diseases can be a major problem for Papaya farmers, affecting the growth and quality of the fruit. To keep these nuisances at bay, implementing effective pest and disease control measures is crucial. The common pest that attacks Papaya plants is the Papaya fruit fly. To combat this, traps and biological controls like parasitic wasps can help reduce their population.

Another threat to Papayas is powdery mildew, a fungal disease that appears as white patches on leaves. Regularly inspecting plants for signs of infection and applying fungicides when necessary can prevent its spread. In addition to pests and diseases, proper sanitation practices such as removing diseased plant material can also help in preventing future infestations.

Weed Management

Weed management is a crucial aspect of Papaya farming to ensure the healthy growth and development of your plants. Weeds compete with Papaya trees for nutrients, water, and sunlight, hindering their growth if left unchecked. Implementing mulching techniques can help suppress weed growth around your Papaya plants. Organic mulches not only deter weeds but also retain moisture in the soil.

Regular manual weeding is necessary to remove any persistent weeds that pop up near your Papaya trees. Consider using herbicides sparingly, as they can potentially harm your Papaya trees if not applied correctly. Always follow recommended guidelines when using chemical weed control methods on your farm.

Growth Monitoring and Care
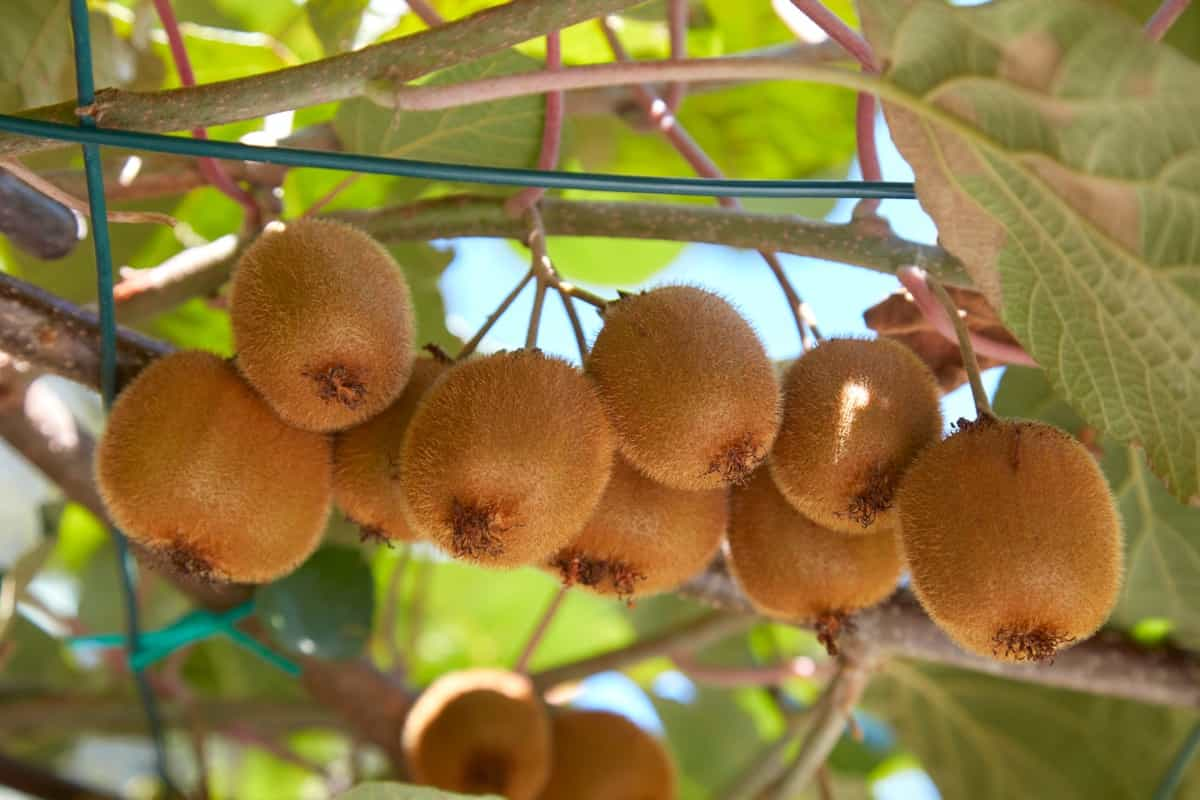
Growth monitoring is essential for ensuring healthy plant development in Papaya farming. Regularly inspecting the Papaya plants for signs of nutrient deficiencies or pests can help prevent potential issues. Keeping a close eye on the growth rate and overall health of the Papaya plants allows farmers to intervene promptly if needed.

In case you missed it: How this Farmer Earning 30 Lakhs from Papaya Cultivation in 6 Acres: An Indian Farmer Success Story

Papaya Tree

Careful attention should be paid to water management, as Papayas require consistent moisture levels to thrive. Proper irrigation techniques ensure that the plants receive adequate hydration without being overwatered. Additionally, providing sufficient sunlight and maintaining proper spacing between plants contributes to optimal growth.

Flowering and Pollination

When it comes to flowering, timing is everything. Papaya plants typically start flowering within 4-6 months after planting, with the first flowers being male. These male flowers help attract pollinators like bees to transfer pollen to the female flowers. Ensuring proper pollination is key for a successful fruit set. Since Papayas have separate male and female plants, having a good ratio of both is important for optimal pollination.

You can also manually assist by gently shaking the plants or using a brush to transfer pollen between flowers. Weather conditions can also impact flower production and pollination success. Be mindful of temperature fluctuations and ensure adequate moisture levels to support healthy flower development.

Tips To Boost Flowering

Ensure your Papaya trees receive adequate sunlight. Position them in a spot where they can soak up plenty of natural light throughout the day. Consider applying a balanced fertilizer with higher potassium levels during the flowering stage. This nutrient is crucial for promoting healthy flower development.

Additionally, regular pruning can help stimulate new growth and encourage more flowers to bloom. Remove any damaged branches to allow for better air circulation around the plant. Moreover, maintaining consistent watering practices is essential. Keep the soil moist but not waterlogged to support optimal flowering conditions for your Papayas. Consider using organic supplements like compost or manure to provide nutrients that can help boost flower production naturally.

Fruit Development and Ripening

Once the Papaya flowers have been successfully pollinated, the small fruits begin to develop. As they grow, you’ll notice the green color start to change into a vibrant yellow or orange hue, depending on the variety. This transformation indicates that the fruit is ripening and nearing harvest time.

In case you missed it: Best Fertilizers for Papaya Trees

Pawpaw Plant

During this phase, it’s crucial to monitor the Papayas closely to ensure they reach optimal ripeness. A gentle press near the stem should indicate a slight give without being too soft – a sign that it’s ready for picking. Avoid waiting too long, as overripe Papayas can become mushy and lose their flavor. Harvesting at just the right moment ensures that your Papayas are flavorful and have a desirable texture when consumed. Time your harvest carefully based on visual cues and tactile feedback from gently testing each fruit’s readiness.

Harvesting Techniques

Harvesting Papayas at the right time is crucial for their quality and taste. The best indicator of ripeness is when the fruit turns yellow or orange, depending on the variety. To harvest, gently twist the fruit until it breaks off from the tree, ensuring you don’t damage the stem. Avoid picking unripe Papayas, as they won’t ripen after harvesting.

Harvest early in the morning when temperatures are cooler to prevent heat stress on the fruits. Use sharp tools to cut through stems instead of pulling them off, reducing potential damage. Handle harvested Papayas with care to avoid bruises or cuts that can impact shelf life. If not immediately processed or sold, store them in a cool and dry place. Proper handling post-harvest ensures that your Papayas reach consumers fresh and delicious.

Expected Yield

The yield of Papayas can vary depending on various factors such as the variety chosen, climatic conditions, soil quality, and proper care throughout the growth stages. On average, a single Papaya tree can produce anywhere from 50 to 100 fruits per year once it reaches maturity. However, this number can fluctuate based on how well you maintain your farm and provide adequate nutrients and water to the plants.

Post-Harvest Handling and Storage

After the Papayas are harvested, proper post-harvest handling is essential to extend shelf life. The important step is to handle the fruits carefully to avoid bruising or damage. Papayas should be sorted based on maturity and size before moving on to storage. To ensure optimal freshness, it’s recommended to store Papayas in a cool, well-ventilated area away from direct sunlight. The ideal temperature for storing ripe Papayas is around 10-12°C.

In case you missed it: Top 20 Steps to Boost Papaya Yield: How to Increase Fruit Size, and Production

Fresh Green Papaya

Additionally, maintaining relative humidity levels between 85-90% can help prevent dehydration of the fruits. Proper packaging plays a major role in preserving the quality of Papayas during storage and transportation. Using breathable packaging materials like perforated plastic bags can help reduce moisture buildup while still allowing for adequate air circulation.

Regularly inspecting stored Papayas for signs of spoilage or rotting is necessary to remove any affected fruits and prevent further contamination. Implementing good sanitation practices in storage areas can also help minimize the risk of mold growth and decay among stored Papaya batches.

Marketing and Selling Papayas

The effective strategy is to establish partnerships with local grocery stores, markets, or restaurants that value fresh produce. Another approach is to utilize social media platforms and online marketplaces to promote your Papayas directly to consumers. Creating engaging content, sharing recipes featuring Papayas, and offering special promotions can help generate interest in your product and attract new customers.

Additionally, participating in farmer’s markets or agricultural fairs can provide a good opportunity to connect with customers face-to-face and educate them about the benefits of consuming locally grown Papayas. Building a strong brand presence and reputation for delivering high-quality fruits will set you apart from competitors in the market.

Challenges and Solutions in Papaya Farming

The common challenge faced by Papaya farmers is pest infestations, such as aphids and fruit flies, that can damage the crops. To combat this issue, integrated pest management strategies involving natural predators or organic pesticides are recommended. Another challenge in Papaya farming is disease outbreaks, such as powdery mildew, damping-off, or black spot disease.

Prevention measures, such as maintaining proper spacing between plants for good air circulation and regular monitoring for early signs of disease, are crucial to mitigate these risks. Unfavorable weather conditions, such as excessive rainfall or drought, can also impact Papaya production. Implementing efficient irrigation systems and providing adequate shelter during extreme weather events can help safeguard the crop’s health.

Market fluctuations and competition from imported Papayas pose marketing challenges for small-scale farmers. Building strong relationships with local markets or exploring export opportunities can help overcome these hurdles and ensure a steady income stream for growers. Being proactive, staying informed about best practices, and adapting to changing circumstances are key to navigating the challenges in Papaya farming successfully.

Papayas thrive in tropical and subtropical climates with warm temperatures, ample sunlight, and well-draining soil. By following these steps and adapting to your specific growing conditions, you can establish a successful Papaya farming.

Shrimp Cultivation Mastery: A Complete Guide from Hatchery to Harvest

Shrimp cultivation involves the controlled breeding and farming of shrimp for commercial purposes. It is a methodical process that requires expertise in various aspects of aquaculture. Farmers carefully manage the environment, nutrition, and health of the shrimp to ensure optimal growth and quality. Shrimp cultivation can range from small-scale operations to large commercial farms producing millions of pounds of shrimp annually.

 Shrimp Cultivation Mastery

Understanding Shrimp Biology and Life Cycle

Shrimp undergo various developmental stages, from larvae to postlarvae, before reaching adulthood. Each stage requires specific environmental conditions and nutrition for optimal growth. The molting process is essential for shrimp as they shed their exoskeletons to grow. Proper nutrition rich in proteins and vitamins supports this growth phase. Maintaining water quality is vital throughout the life cycle to ensure healthy development and minimize stress.

Breeding practices aim to produce robust offspring with desirable traits for commercial cultivation. By selecting the right broodstock, farmers can enhance genetic diversity and resilience in their shrimp populations. Monitoring the life cycle closely allows farmers to intervene when necessary, ensuring a successful harvest later on.

Selecting the Right Shrimp Species for Cultivation

When it comes to shrimp cultivation, selecting the right species is crucial for success. Each species has unique characteristics that can impact growth and yield. Some popular choices for cultivation include Pacific white shrimp, giant tiger prawns, and freshwater prawns. Pacific white shrimp are known for their fast growth rate and adaptability to various farming conditions. Giant tiger prawns are prized for their large size and premium taste. Freshwater prawns thrive in inland farms and are resistant to diseases.

Before choosing a species, consider factors like water temperature, pond depth, and market demand. It’s essential to research each species thoroughly to ensure they align with your goals and resources. For those looking for smaller-sized shrimps, the Kuruma prawn (Marsupenaeus japonicus) or Northern pink shrimp (Pandalus borealis) could be suitable choices. The Blue leg shrimp (Litopenaeus stylirostris) is also a favorite among farmers due to its taste and color.

Site Selection for Shrimp Farms

The selected location can greatly impact the success of your cultivation venture. Ideally, a suitable site should have access to a clean and ample water supply and good-quality soil for pond construction. Proximity to markets for easy distribution is also key to reducing transportation costs.

In case you missed it: How to Start Your Own Backyard Freshwater Prawn/Shrimp Hatchery from Scratch

Fresh Raw Shrimp

Consider factors like temperature, salinity levels, and water depth when choosing a site for your shrimp farm. Shrimp thrive in specific environmental conditions, so ensure that these requirements are met. It’s important to conduct thorough research and feasibility studies before finalizing a site for your shrimp farm. Consulting with experts or experienced farmers can provide valuable insights into selecting an optimal location.

Designing and Constructing Shrimp Ponds

The layout of the pond plays a crucial role in maximizing shrimp growth and yield. Proper sizing, depth, and water circulation are essential elements to take into account during the design phase. Selecting the location for a shrimp farm is vital. Some factors like access to clean water sources, suitable soil composition, and proximity to markets should all be considered when choosing a site for pond construction.

Constructing sturdy pond walls and ensuring proper drainage can help prevent flooding and maintain optimal water levels throughout the cultivation cycle. Investing in quality materials and equipment upfront can save time and resources in the long run. Efficient pond design not only promotes healthy shrimp development but also contributes to overall farm productivity.

Water Quality Management in Shrimp Farming

Maintaining optimal water quality is crucial in shrimp farming to ensure healthy growth and maximize yields. Regular monitoring of parameters such as temperature, pH levels, dissolved oxygen, and ammonia levels is essential. Proper aeration and filtration systems help to maintain the right balance of nutrients and oxygen in the water.

Avoiding overstocking ponds can prevent stress on shrimp due to overcrowding, leading to disease outbreaks. Implementing regular water exchanges or using probiotics can improve water quality by reducing harmful bacteria levels. Sustainable practices like utilizing natural wetlands or mangroves can act as biofilters for wastewater treatment. Investing in water testing kits and training farm staff on best practices for water management are key steps toward successful shrimp cultivation.

Feed and Nutrition for Healthy Shrimp Growth

Shrimps are omnivores, meaning they consume both plant and animal matter. Providing a good diet rich in protein is essential for their optimal growth. Commercial shrimp feeds are available in the market, formulated specifically to meet the dietary requirements of various shrimp species. These feeds typically contain a mix of vitamins, carbohydrates, proteins, fats, and minerals to support overall health.

In case you missed it: A Comprehensive Guide to Sustainable Shrimp Farming

Heap of Raw Shrimps

In addition to commercial feeds, supplementary feeding with natural sources like algae, plankton, or even kitchen scraps can enhance the nutritional profile of shrimps. It’s important to monitor feed consumption closely to prevent overfeeding or underfeeding, which can impact growth rates. Proper nutrition not only promotes faster growth but also helps in disease resistance and the overall well-being of the shrimp population.

Managing Shrimp Health and Disease Prevention

Shrimp diseases can pose significant challenges to shrimp farmers, affecting the health and productivity of their crops. One common disease is White Spot Syndrome Virus (WSSV), which causes white spots on the exoskeleton and can lead to high mortality rates. Another troublesome disease is Infectious Hypodermal and Hematopoietic Necrosis Virus (IHHNV), resulting in slow growth and deformities in infected shrimp.

Enterocytozoon hepatopenaei (EHP) is a microsporidian parasite that affects the hepatopancreas of shrimp, leading to reduced nutrient absorption and weak immune systems. Taura Syndrome Virus (TSV) is another viral pathogen that causes discoloration, lethargy, and eventual death in affected shrimp populations.

Understanding these diseases’ symptoms and preventive measures is crucial for successful shrimp cultivation. Disease prevention plays a significant role in maintaining the well-being of your aquatic creatures. Implementing biosecurity measures within your farm can also reduce the risk of introducing pathogens.

Proper nutrition is key to boosting shrimp’s immune systems, making them more resilient against diseases. A good diet rich in essential nutrients can contribute to overall health and vitality. Consulting with aquaculture experts or veterinarians specializing in aquatic animals can help identify the cause and provide appropriate treatment options.

Breeding Practices and Hatchery Management

Breeding practices involve selecting healthy broodstock and creating optimal reproduction conditions. Proper genetic selection can lead to improved growth rates and disease resistance in the offspring. Breeding shrimp involves meticulous planning and careful management to ensure successful reproduction. In hatcheries, maintaining optimal water quality, temperature, and salinity levels is crucial for the health and development of shrimp larvae.

Selective breeding practices are implemented to improve traits like growth rates and disease resistance in shrimp populations. Hatchery managers play a key role in monitoring breeding cycles, ensuring proper nutrition for broodstock, and overseeing larval-rearing protocols.

Proper egg handling, hatching techniques, and nursery management are essential steps in the early stages of shrimp cultivation. Ensuring a controlled environment with sufficient food supply is vital for the survival and growth of young shrimp. Hatchery management also involves disease prevention strategies such as regular health checks, biosecurity measures, and quarantine procedures to minimize the risk of infections spreading among breeding stock.

Hatchery management focuses on providing the right environment for shrimp larvae to develop into juveniles. This includes maintaining water quality, temperature control, and feeding schedules tailored to each developmental stage. Successful hatchery management requires attention to detail and constant monitoring of pH levels, oxygen saturation, and ammonia concentrations.

Natural and Artificial Stocking Methods

Natural stocking involves introducing post-larvae or juveniles directly into the ponds, allowing them to grow naturally in their environment. On the other hand, artificial stocking methods involve hatchery-raised shrimp being stocked into ponds once they reach a certain size. This method provides more control over the initial stock density and can help prevent diseases and improve growth rates.

In case you missed it: Best Techniques to Increase Vannamei Shrimp Farming Yield

Prawn

Both natural and artificial stocking methods have their advantages and considerations. Natural stocking may be more cost-effective but carries higher risks of disease transmission, while artificial stocking requires careful monitoring of water quality and feeding practices to ensure optimal growth.

Monitoring and Managing Shrimp Growth

By closely observing the growth patterns and behavior of the shrimp, farmers can make informed decisions to optimize their development. Checking water quality parameters is essential in ensuring a healthy environment for shrimp growth. It’s important to keep track of feed consumption rates and adjust feeding regimes accordingly to prevent overfeeding or underfeeding.

Monitoring the overall health of the shrimp by observing any signs of disease or stress helps in early intervention and treatment if necessary. Regularly measuring growth rates through sampling techniques allows farmers to assess the progress of their stock accurately. Adjusting stocking densities based on growth rates ensures optimal space utilization within the ponds.

Harvesting Techniques in Shrimp Cultivation

Harvesting shrimp is a crucial step in shrimp cultivation that requires precision and care. The timing of the harvest plays a major role in the final product quality. Shrimp are typically harvested using nets or traps, depending on the size of the farm and the type of shrimp being cultivated. Once harvested, it’s essential to quickly transport the shrimp to processing facilities to maintain their freshness. Proper handling techniques during harvesting help ensure minimal stress on the shrimp, preserving their texture and flavor.

Harvesting methods may vary based on whether you’re cultivating freshwater or saltwater shrimp species. Each technique has its nuances that farmers must master to maximize yield and quality. Efficient harvesting practices not only benefit farmers by increasing productivity but also contribute to sustainable farming practices by reducing waste and environmental impact.

Post-Harvest Handling and Processing

Proper post-harvest handling and processing are crucial to maintain quality. Once harvested, shrimp should be quickly chilled to preserve freshness and prevent bacterial growth. Proper storage conditions ensure that shrimp retain their flavor and texture. Processing methods like cleaning, grading, deveining, and packaging play a significant role in preparing shrimp for market.

In case you missed it: Tiger Prawn Cultivation Techniques; Prawn Breeding

Water Turbines Machine on Lake

Each step contributes to ensuring that customers receive high-quality products. Whether fresh or frozen, shrimp must be handled with care to maintain their delicate taste. Utilizing modern processing techniques can enhance shelf life while preserving nutritional value.

Marketing Strategies for Shrimp Products

Utilize social media to showcase mouth-watering images of your succulent shrimp dishes. Engage with customers through interactive posts and promotions to create a buzz around your brand. Consider collaborating with local restaurants or seafood markets to expand your reach and introduce your shrimp products to a wider audience. Attend food festivals or farmers’ markets to give out samples and create awareness about the superior taste of your shrimp.

Create an online marketing store where customers can easily purchase your shrimp products for convenient home delivery. Offer discounts or special deals for first-time buyers to incentivize them to try out your offerings. Utilize influencer marketing by partnering with food bloggers or chefs who can endorse your shrimp products and attract their followers’ attention. Remember, effective marketing strategies can help differentiate your brand in the competitive seafood market.

Sustainability and Environmental Considerations

Sustainable practices benefit the environment and also ensure the long-term viability of shrimp farming operations. The key aspect of sustainability is water management. Properly managing water quality and quantity not only ensures healthy shrimp growth but also protects surrounding habitats from pollution. Another crucial consideration is reducing waste production. By implementing efficient processing techniques and recycling organic matter, farms can decrease their environmental impact significantly.

Furthermore, sustainable shrimp farming involves maintaining biodiversity in aquatic environments by avoiding the use of harmful chemicals and preserving mangrove habitats that serve as essential breeding grounds for many species. Implementing eco-friendly techniques like mangrove restoration, water recycling systems, and responsible feed sourcing can help reduce the industry’s carbon footprint. By promoting biodiversity in and around shrimp farms, we create a healthier ecosystem that supports both marine life and local communities.

In case you missed it: 16 Key Rules for Effective Shrimp/Prawn Farm Management: From Planning to Reduce Production Cost

Fresh Seafood

Future Trends in Shrimp Farming Technology and Practices

The major trend is the implementation of AI and machine learning algorithms for enhanced farm management. These technologies can analyze data on water quality, feed efficiency, and shrimp health in real-time, optimizing production processes. Innovations in recirculating aquaculture systems (RAS) are also gaining traction. These systems offer sustainable solutions for water usage and waste management.

RAS technology allows farmers to control environmental parameters more precisely, leading to higher yields and better resource utilization. Additionally, genetic research is paving the way for selective breeding programs that produce more resilient and productive shrimp varieties. This targeted approach aims to enhance growth rates, disease resistance, and overall yield without compromising on flavor or texture.

Proper pond preparation, water quality management, and disease prevention are key factors in maximizing yield and ensuring a successful harvest. By following these techniques, shrimp farmers can increase their chances of success and enjoy a lucrative and sustainable business for years to come. You can watch this for sustainable backyard shrimp farming.

Mastering Pomegranate Farming: A Handbook for Cultivation Practices

8

The Pomegranate, scientifically known as Punica granatum, is a delightful fruit-bearing deciduous shrub in the family Lythraceae. Its rich history and captivating taste have made it a favorite among farmers and consumers alike. Pomegranate farming is the practice of cultivating Pomegranate trees to harvest their fruits. It plays a crucial role in agriculture due to the fruit’s high demand and numerous health benefits.

Mastering Pomegranate Farming

Best Commercial Varieties

Some of the best commercial varieties known for their productivity and quality include Wonderful, Hicaz Nar, Parfianka, Ariana, and Eversweet. Wonderful Pomegranates are favored for their large size, deep red color, and sweet-tart flavor. They are popular in both fresh fruit markets and juice production because of their rich antioxidant content. Hicaz Nar is a Turkish variety valued for its vibrant red arils with a balance of sweetness and acidity. It has good storage qualities, making it suitable for export markets.

Eversweet Pomegranates live up to their name by offering exceptionally sweet arils with low acidity levels. This variety is ideal for fresh consumption or processing into juices and concentrates. For those looking for a versatile option, consider planting the Parfianka variety with its soft seeds and rich taste. The Ariana variety is also highly sought after due to its high productivity and tolerance to various climates.

Site Selection and Preparation

Choosing the right site for Pomegranate farming is crucial for a successful harvest. The first step is to select a location with full sunlight exposure, as Pomegranates thrive in sunny conditions. Ensure the site has well-drained soil to prevent waterlogging and root rot. Before planting, it’s essential to prepare the land by clearing any debris or weeds that may hinder growth.

Then, conduct soil tests to determine its pH levels and nutrient content and make any amendments. Proper spacing between trees is vital for good airflow and sunlight penetration into the canopy. This helps reduce diseases and ensures optimal fruit development. Consider windbreaks if your site is prone to strong winds that can damage young trees.

Soil Requirements and Management

Pomegranates thrive best in well-drained sandy loam soils with a pH level of 5.5 to 7.2. Before planting, ensure the soil is rich in organic matter for optimal growth. Monitor the soil’s moisture levels regularly to prevent waterlogging, which can lead to root rot. Mulching around the plant base helps retain moisture and suppresses weed growth, promoting healthier Pomegranate trees.

In case you missed it: Pomegranate Pests, Diseases, and Control Methods

Plantation of Pomegranate Trees

To ensure proper nutrient uptake, conduct soil tests periodically and fertilize accordingly using organic or balanced fertilizers. Adjusting nitrogen, phosphorus, and potassium levels based on the test results will help maintain healthy tree growth and fruit development. Implementing good soil management practices not only benefits your current harvest but also ensures sustainable production for years to come.

Climate and Environmental Conditions

Pomegranates thrive in regions with hot and dry summers, as they require plenty of sunlight to grow and ripen properly. These fruit-bearing shrubs can tolerate a wide range of temperatures but do best in areas with mild winters. Pomegranates are sensitive to frost, so it’s essential to protect them during colder months if you’re cultivating them in regions prone to freezing temperatures.

Additionally, strong winds can damage delicate flowers and young fruits, affecting the overall yield. Good air circulation is important for preventing Pomegranate diseases. Planting trees with enough space between them helps reduce humidity levels around the plants, decreasing the risk of fungal infections or other issues that thrive in damp environments.

Planting Techniques and Spacing

Before planting Pomegranates, ensure the soil is well-drained and fertile. Pomegranate trees thrive in full sun, so choose a sunny spot. Spacing between Pomegranate trees should be around 15-20 feet apart to allow ample room for root development and air circulation. Make a hole carefully twice as wide as the root ball. Place the tree carefully in the hole, backfill with soil, and water thoroughly. Regular watering during establishment is crucial to helping roots establish themselves.

Drip Irrigation and Water Management

Drip irrigation is a game-changer in Pomegranate farming. It delivers water to the roots, promoting optimal growth and fruit development. This method ensures that every drop counts, leading to efficient water usage and cost-effectiveness. Proper water management is crucial for healthy Pomegranate plants. Monitoring soil moisture levels and adjusting irrigation can prevent both under-watering and overwatering issues. Pomegranates thrive in well-drained soils, making drip irrigation an ideal choice for maintaining the right moisture balance.

In case you missed it: High Density Pomegranate Cultivation – In India

Pomegranate Trees

Drip irrigation encourages deep root penetration by providing a consistent supply of water at the root zone, enhancing plant stability and nutrient absorption. This precision watering technique reduces weed growth and minimizes water wastage through evaporation or runoff. With drip irrigation systems, farmers have greater control over how much water each tree receives. This approach not only conserves resources but also promotes higher yields of quality fruits. Efficient water management practices are key to sustainable Pomegranate cultivation.

Fertilization and Nutrient Management

Providing the right nutrient balance is essential for the healthy growth of Pomegranate trees and optimal fruit production. Fertilization should be based on soil analysis results to ensure that the specific needs of the Pomegranate plants are met. A well-balanced fertilizer application can help improve tree vigor, flowering, and fruit quality. Macronutrients like nitrogen, phosphorus, potassium and micronutrients like zinc and iron play a major role in Pomegranate cultivation.

It’s important to monitor nutrient levels throughout the growing season and adjust fertilization practices accordingly. Organic fertilizers can also enhance soil health and promote sustainable farming practices. Compost or manure applications can help increase the soil’s organic matter content, improving its structure and fertility over time.

Pruning and Canopy Management

Proper pruning helps maintain the plant’s shape, encourages fruit production, and improves overall plant health. Regularly removing dead or diseased branches promotes airflow within the canopy, reducing fungal diseases. Pruning also allows sunlight to reach the lower parts of the plant, aiding in uniform fruit development. Pruning Pomegranate plants during their dormant season is essential to avoid disrupting flowering and fruiting cycles. Removing excessive growth helps balance vegetative growth with fruit production.

Maintaining an open canopy structure through strategic pruning enhances pollination by allowing easier access for bees and other pollinators. Additionally, a well-managed canopy facilitates pest control measures by improving visibility and accessibility for monitoring. Proper pruning techniques contribute significantly to maximizing yield potential while promoting overall orchard health in Pomegranate cultivation practices.

Pest and Disease Control

Pomegranate trees are susceptible to various pests like aphids, whiteflies, and thrips that can damage the fruit and foliage. To combat these pests, integrated pest management practices should be implemented. Using natural predators like ladybugs or releasing beneficial insects can help control pest populations without harming the environment. Regular monitoring of the orchard for any infestation signs is essential for early detection and prevention of widespread damage.

Additionally, practicing good sanitation by removing fallen leaves and fruits can reduce diseases such as fungal infections. Applying organic fungicides, when necessary, can further protect the trees from common diseases like powdery mildew or bacterial blight. By implementing proactive measures and staying vigilant against potential threats, farmers can effectively manage pest and disease issues in their Pomegranate orchards for a successful harvest season.

Pollination and Fruit Set

 Pollination and fruit set play crucial roles in ensuring a successful harvest. Pomegranate flowers are typically self-pollinating, but cross-pollination can lead to higher yields and better-quality fruits. Encouraging pollinators to visit your orchard can significantly improve the fruit set. To enhance natural pollination, avoid using pesticides that may harm these beneficial insects.

In case you missed it: Growing Dwarf Pomegranate – From Seed, Winter Care
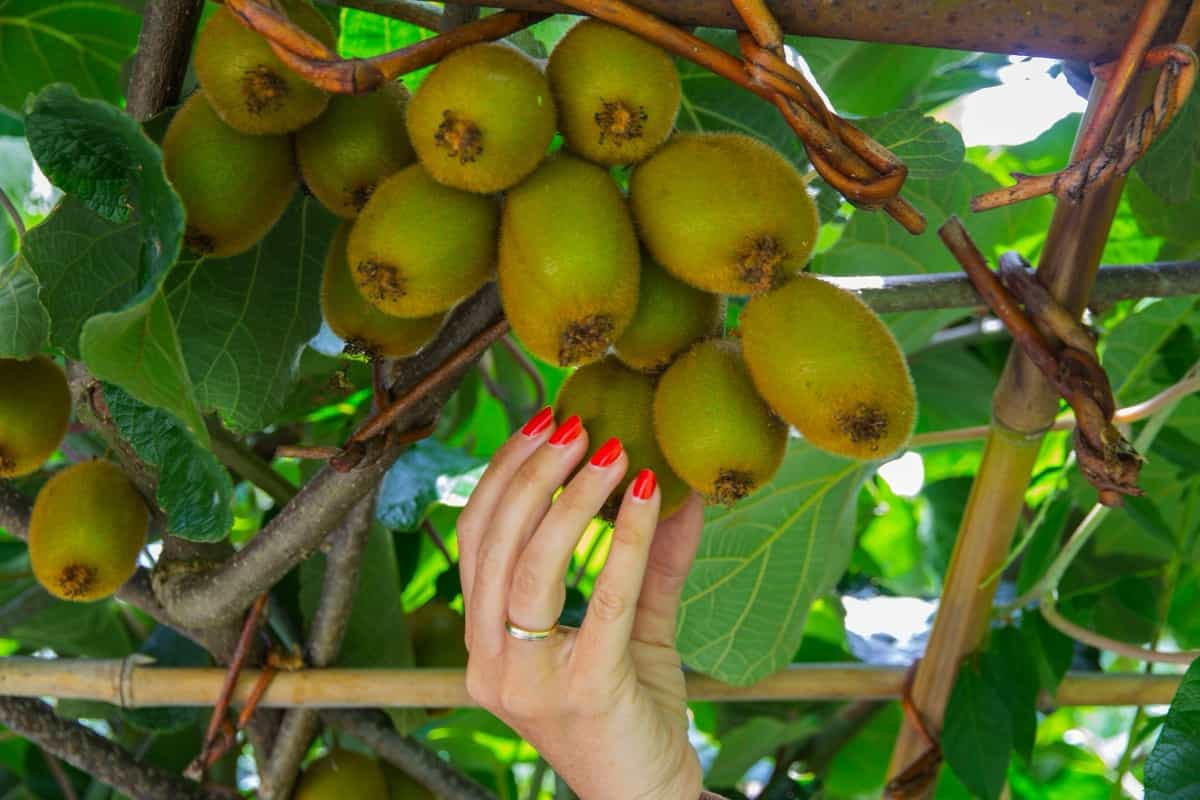
Pomegranates

Timing is key to pollination. For an optimal fruit set, flowering should occur during periods when pollinators are active. Additionally, proper nutrition and irrigation throughout the growing season can support healthy flower development and increase the chances of successful fertilization. By understanding the importance of pollination and taking steps to promote effective fruit set, Pomegranate farmers can maximize their crop yield and quality.
Tips to Boost Flowers and Yield

Firstly, ensure proper pruning practices by removing dead or crowded branches to promote healthy growth and better fruit production. Another tip is to maintain optimal soil moisture levels through regular irrigation. Pomegranates thrive in well-drained soil with consistent watering, especially during dry periods. Additionally, applying organic mulch around the base of the plants helps to suppress weed growth.
Furthermore, adequate sunlight is crucial for flower bud formation and fruit development. For optimal results, make sure your Pomegranate trees receive 6-8 hours of direct sunlight daily. Consider investing in quality fertilizers rich in potassium to encourage flowering and increase overall yield.

Monitor your Pomegranate plants regularly for signs of pests or diseases and take correct measures to prevent infestations. Implement a consistent watering schedule, especially during the fruiting season, to promote healthy tree development. Prune your Pomegranate trees regularly to encourage better fruit production and improve overall tree health. Stay informed about best practices for fertilizing your orchard to provide essential nutrients at the right time.

Harvesting Techniques and Timing

Pomegranates are typically ready for harvest in late summer to fall, depending on the variety and geographical location. One way to determine if a Pomegranate is ripe is by its color; a deep red hue signals readiness. Harvesting too early can result in underripe Pomegranate fruits with a lack of sweetness and vibrant color. On the other hand, waiting too long may lead to overripe fruits that are prone to splitting.

Harvesting techniques involve gently twisting the fruit until it breaks off from the tree or using shears to cut the stem close to the calyx. Be careful not to bruise or damage the fruit during harvest, as this can affect its shelf life and market value. By knowing harvesting techniques and timing, farmers can ensure a bountiful yield of delicious and nutritious Pomegranates each season.

Expected Yield

The average Pomegranate yield per acre can change based on factors such as variety, climate, soil quality, and management practices. Commercial varieties like Wonderful, Hicaznar, and Mollar de Elche are known for their high yields. With proper care and attention to detail during cultivation, farmers can achieve a bountiful harvest of Pomegranates.

In case you missed it: Top 20 Steps to Boost Pomegranate Yield: How to Increase Pomegranate Fruit Size, Quality, and Production

Pomegranates

In ideal conditions, a well-established Pomegranate orchard can produce 15 to 25 tons per hectare. However, yields may fluctuate from season to season due to weather fluctuations or pest infestations.

Post-Harvest Handling and Storage

Post-harvest care is essential for prolonging shelf life and ensuring customer satisfaction. Once harvested, Pomegranates should be carefully sorted to remove any damaged or spoiled fruits. Proper handling techniques, such as avoiding rough treatment and storing at optimal temperatures, can prevent bruising and extend freshness.

Storage conditions play a major role in maintaining the fruit’s taste and appearance. Pomegranates are best stored in cool, dry environments with good air circulation to prevent moisture that can lead to decay. Packaging also matters in post-harvest handling. Using suitable containers that protect the fruits from physical damage during transportation is key to preserving their quality until they reach consumers’ hands.

Marketing and Sales Strategies

Utilizing social media can help reach a larger audience. Sharing engaging content such as recipes, fun facts, or behind-the-scenes farm stories can create buzz around your Pomegranate products. Collaborating with local markets, restaurants, or juice bars can also be beneficial in promoting your Pomegranates. Offering tastings or special promotions can entice customers to try your products.

In case you missed it: Bahar Treatment in Pomegranate for High Quality and Yields: A Step-by-Step Guide to Implementation

Pomegranate Trees

Packaging plays a crucial role in attracting buyers. Eye-catching labels and eco-friendly packaging can set your Pomegranates apart from competitors on the shelf. Building relationships with distributors and wholesalers is key to expanding your market reach. Attend trade shows or farmers’ markets to network and establish connections within the industry.

Sustainability Practices in Pomegranate Farming

Implementing sustainable methods helps conserve resources and reduce environmental impact. One key aspect of sustainability is using organic fertilizers and natural pest control ways to minimize chemical usage and promote soil health. Incorporating cover crops can also help improve soil structure, prevent erosion, and enhance biodiversity on the farm.

Water management techniques such as drip irrigation not only save water but also optimize its use by delivering it directly to the roots where it’s needed most. This practice reduces water wastage and promotes efficient growth without over-saturating the soil. Furthermore, practicing crop rotation can help prevent soil depletion, control pests naturally, and maintain a balanced ecosystem within the farm.

From understanding the ideal climate and soil conditions to selecting the right variety for your farm, every planting step plays a crucial role in the success of your harvest.  Proper harvesting, storing, and selling practices are essential to preserving the quality of your fruit and maximizing profits.

From Seed to Shelf: The Complete Guide to Coconut Farming

18

Cocos nucifera (L.) is a vital member of the palm family. Coconut farming is the cultivation of the versatile and beneficial Coconut palm. It involves growing these tall, graceful trees for their various products, such as Coconuts, Coconut water, oil, and husks. This agricultural practice plays a crucial role in many tropical regions worldwide.

The Complete Guide to Coconut Farming

Understanding Coconut Botany

The Coconut palm, scientifically known as Cocos nucifera (L.), belongs to the Arecaceae family. It is a versatile plant with various parts used for different purposes – from the fruit for consumption to the leaves for roofing material. The Coconut tree has a tall, slender trunk topped with long, pinnate leaves that can grow up to 20 meters in height. Its flowers are small and white, and it produces large spherical fruits known as Coconuts.

Each part of the Coconut palm serves a unique function in sustaining its growth and reproduction. Coconut palms thrive in tropical climates due to their high tolerance for salty soil conditions and coastal environments. They require adequate sunlight, warm temperatures, and consistent rainfall throughout the year to flourish.

Optimal Climatic Conditions for Coconut

Coconut thrives in tropical climates with consistent warmth and humidity. The optimal climatic conditions for Coconut cultivation include temperatures from 20 to 30°C throughout the year. These palms require ample sunlight for proper growth, making regions near the equator ideal for their cultivation.

Rainfall is crucial; a well-distributed annual rainfall of around 2000 to 2500 mm ensures sufficient moisture for healthy Coconut trees. Coconuts are vulnerable to strong winds and storms, so planting them in areas shielded from such harsh weather conditions is essential. Coastal areas provide the perfect combination of sandy soil and saline water necessary for robust Coconut growth.

Soil Types and Preparation for Coconut Cultivation

Coconuts thrive in well-drained sandy or loamy soils with good water-holding capacity. Before planting, ensure the soil is rich in organic matter and pH level of 5.0 and 8.0. Properly preparing the soil involves clearing weeds or debris, tilling the land to loosen compacted soil, and incorporating organic fertilizers like compost or manure.

In case you missed it: Coconut Production – A Month Wise Practices

Coconut Tree at Coconut Farm

This helps improve soil fertility, providing a healthy environment for Coconut trees to grow. Coconut cultivation also benefits from adding micronutrients like boron, zinc, and magnesium based on soil test results. Additionally, maintaining optimal moisture levels in the soil through irrigation practices is essential for healthy Coconut tree growth.

Coconut Varieties/Types

Various Coconut varieties are cultivated worldwide, each with unique characteristics and uses. Some popular varieties include the Malayan Dwarf, King Coconut, and Jamaica Tall. The Malayan Dwarf is known for its high-yielding capacity and resistance to diseases.

The King Coconut is famous for its sweet water content and bright orange husk color, making it a favorite in tropical regions. On the other hand, the Jamaica Tall variety is preferred for its strong resilience against harsh weather conditions. Other notable types include the West Coast Tall, Chowghat Orange Dwarf, and Vanimo Green.

Propagation Techniques for Coconut Trees

One common method is through seed germination, where mature Coconuts are collected for planting purposes. The seeds should be soaked in water for a few days before sowing to promote sprouting. Another technique is to use seedlings or nursery-raised plants. These young Coconut plants are carefully nurtured in controlled environments until they are ready to be transplanted into the field. This method ensures quicker establishment and uniform growth across the plantation.

In some cases, vegetative propagation techniques like stem cutting or tissue culture may also be employed for specific purposes, such as maintaining desirable traits or rapid multiplication of elite varieties. Each propagation technique has its own set of requirements and benefits, allowing farmers to choose the most suitable method based on their goals and available resources.

Planting Methods and Spacing

Planting can be done using either seedlings or direct seeds, with seedlings being the preferred choice for better quality control. Proper spacing between Coconut trees is essential to allow each tree enough space to grow without competing for sunlight, nutrients, and water. The recommended spacing between Coconut trees varies depending on the variety and soil fertility but generally ranges from 7-9 meters apart.

This ensures adequate airflow and sunlight penetration while also facilitating ease of maintenance activities such as pruning and harvesting. Before planting, it is important to prepare the soil by loosening it up to promote root development and incorporating organic matter for improved nutrient uptake. Proper planting depth is key to preventing root suffocation while allowing for the stable anchorage of the tree.

Irrigation Management in Coconut Farming

Irrigation management plays a crucial role in Coconut farming, ensuring the trees receive adequate water for optimal growth and productivity. Coconut trees require consistent moisture levels, especially during dry periods, to thrive. Proper irrigation helps in maintaining soil moisture balance and prevents water stress. Drip irrigation is commonly used in Coconut plantations as it delivers water directly to the roots, promoting efficient water usage and reducing wastage.

In case you missed it: Innovative Strategies for Boosting Coconut Pollination and Yield

Fresh Coconut on The Tree

Monitoring soil moisture levels is important to adjust irrigation schedules accordingly and prevent both overwatering and underwatering. Rainfall patterns should also be considered when planning irrigation schedules to supplement natural precipitation effectively. Proper drainage systems are necessary to prevent waterlogging, which can lead to root suffocation and nutrient deficiencies. By implementing effective irrigation management practices, Coconut farmers can ensure healthy tree growth and maximize yield potential.

Nutrient Requirements and Fertilization Practices

Coconuts require a balanced supply of nutrients to thrive and produce high-quality yields. Key nutrients for Coconut trees include nitrogen, phosphorus, potassium, magnesium, calcium, and sulfur. Fertilizers can help replenish the soil with these essential nutrients that may be lacking naturally. Organic fertilizers are beneficial for long-term soil health and sustainability. Inorganic fertilizers can provide a nutrient boost when needed.

Conduct soil tests regularly to determine the specific nutrient needs of your Coconut plantation. You can tailor your fertilizer application to meet those requirements accurately. Over-fertilization of Coconut can lead to nutrient imbalances and environmental issues like water pollution. Therefore, it’s essential to follow recommended dosage guidelines and fertilize responsibly for optimal growth and productivity in your Coconut farm.

Integrated Pest and Disease Management

Pests and diseases can wreak havoc on Coconut farms, affecting both the quality and quantity of the harvest. Some common pests include Coconut mites, rhinoceros beetles, and red palm weevils. These insects can cause significant damage to Coconut trees if not properly managed. Coconut trees are susceptible to fungal infections like root wilt disease and leaf blight. Proper monitoring and timely treatment are essential in preventing these diseases from spreading throughout the plantation.

Integrated pest and disease management is crucial in maintaining a healthy crop without relying solely on chemical interventions. By combining biological, cultural, and chemical pest control methods, farmers can effectively manage pests while minimizing environmental impact. Additionally, practicing good sanitation by removing diseased plant material can help prevent the spread of infections. Crop rotation with non-host plants can also disrupt pest life cycles.

Inter-cropping and Crop Rotation Strategies

By planting compatible crops between Coconut trees, farmers can maximize land use efficiently. These inter-crops can provide additional income while the Coconut trees mature. Crop rotation involves rotating different crops on the same land to enhance soil fertility and reduce pests and disease buildup. It helps maintain soil health by preventing nutrient depletion.

In case you missed it: Best Fertilizer for Coconut Trees: Organic, NPK, Compost Manure, Dose, and Schedule

Green Coconuts

Some popular inter-crops for Coconut farming include legumes like beans and peas, root vegetables such as sweet potatoes, or even fruits like papaya and banana. These plants not only complement each other but also benefit from the shade provided by the taller Coconut trees.

Pruning and Maintenance of Coconut Trees

Pruning and maintenance of Coconut trees are essential tasks to ensure healthy growth and optimal yield. Regular pruning helps in removing dead or diseased fronds, allowing for better air circulation and sunlight penetration. It also promotes the growth of new fronds and facilitates easier harvesting. When it comes to maintenance, keeping the area around the Coconut tree free from weeds is crucial.

Weeds compete with the Coconut tree for nutrients and water, potentially hindering its growth. Regular weeding is necessary to prevent weed infestation. Monitoring for Coconut pests and diseases is another important aspect of maintenance. Early detection can help prevent widespread damage to the Coconut plantation. Implementing integrated pest management techniques can effectively control pests without harming the environment. 

Harvesting and Yield Optimization

The ideal time to harvest Coconut fruits is when they are about 10-12 months old. At this stage, the Coconut will have maximum water content and a soft kernel inside. Harvesting Coconut too early or too late can affect the quality of the Coconut. To optimize yield, use sharp tools for harvesting to avoid damaging the tree or fruits. It’s also important to handle the Coconuts with care during harvesting, as bruises or cuts can lead to spoilage.

After harvesting, it’s crucial to store the Coconuts properly in a cool and dry place to maintain their freshness and prevent mold growth. Proper storage conditions also play a significant role in optimizing yield and extending shelf life.

Average Yield of Coconuts

Coconuts are known for their high-yield potential. Each tree can produce an average of 50 to 80 Coconuts per year. However, the yield can change based on various factors, such as the age and health of the tree, environmental conditions, and proper management practices. Young Coconut trees may take several years to reach full production capacity, but once matured, they can sustain consistent yields for decades.

In case you missed it: Growing Dwarf Coconut Trees – A Complete Guide

Bunch of Coconuts

Regular pruning and fertilization play a crucial role in maintaining optimal production levels. In some regions with favorable growing conditions, Coconut plantations have been reported to achieve even higher yields, exceeding 100 Coconuts per tree annually. This demonstrates the resilience and productivity of this tropical crop when well cared for.

Tips to Boost Coconut Yield

Firstly, consider investing in high-quality seeds or seedlings from reputable sources. Starting with healthy and disease-resistant plants can set the foundation for a successful harvest. Proper irrigation is crucial for Coconut trees. Ensure they receive sufficient water, especially during dry periods, but be cautious of overwatering, which can lead to root rot. Monitor soil nutrient levels regularly and provide appropriate fertilization based on soil tests. Balanced nutrition is key to promoting growth and increasing yields.

Implement effective pest and disease management practices to protect your Coconut trees from common threats. Regular scouting and prompt action are essential. Pruning old or diseased fronds helps improve air circulation around the tree canopy, allowing for better sunlight penetration, which promotes fruit development. Maintain good hygiene practices in your orchard by removing fallen leaves and debris regularly to prevent the spread of diseases.

Post-Harvest Handling and Processing

After harvesting the Coconuts, they need to be handled carefully to maintain quality. The first step is to remove the husk and shell to access the white flesh inside. Harvesting can be done manually or using machinery, depending on the scale of production. Once extracted, the Coconut flesh can be processed into various products like desiccated Coconut, Coconut milk, oil, and water.

Each product requires specific processing methods to ensure quality and taste. Desiccated Coconut involves drying the grated flesh while making Coconut oil involves pressing it for extraction. Proper storage is essential for post-processing to prevent spoilage. Products are stored in a dry place away from direct sunlight. Packaging also plays a major role in maintaining freshness and extending shelf life.

Marketing Strategies for Coconut Products

Utilize social media platforms to showcase the versatility of Coconuts – from skincare products to culinary delights. Consider packaging design that reflects the natural and eco-friendly qualities of Coconuts. Participate in trade shows and farmer’s markets to connect directly with consumers and educate them about the benefits of Coconut products.

In case you missed it: High Density Coconut Plantation – Spacing, Yield

Branch of Fresh Green Coconuts

Offer sample sizes or trial packs to encourage first-time buyers to experience the goodness of Coconuts. Partner with local stores or specialty shops for distribution, making it easier for customers to access your Coconut offerings. Stay updated on consumer preferences to tailor your marketing strategies accordingly, ensuring sustained interest in Coconut products.

Sustainability in Coconut Farming

Sustainability in Coconut farming is crucial for the long-term health of both the environment and the industry. Farmers are increasingly adopting sustainable practices to ensure a balance between productivity and environmental stewardship. Implementing organic farming methods, such as using natural fertilizers and pesticides, helps reduce chemical runoff into water sources. Additionally, practicing crop rotation can help maintain soil fertility and prevent diseases.

Investing in renewable energy sources can decrease reliance on fossil fuels, reducing greenhouse gas emissions. Water management techniques like drip irrigation also play a significant role in conserving water resources. Coconut farming presents numerous opportunities for small-scale and large-scale growers alike. However, successful Coconut farming requires careful attention to detail at every stage, from selecting quality seeds to implementing effective cultivation practices and post-harvest management.

The Golden Root: A Comprehensive Guide to Turmeric Farming

Turmeric farming plays a crucial role in the agricultural sector due to its various benefits and uses. Not only is Turmeric a staple ingredient in many cuisines worldwide, but it also holds significant medicinal properties. The demand for Turmeric and its by-products continues to rise, creating opportunities for farmers to generate income and contribute to economic growth.

The Golden Root

Botanical Profile of Turmeric

Turmeric, scientifically known as Curcuma longa and belonging to the Zingiberaceae family, is a fascinating plant with a rich botanical profile. With its vibrant yellow-orange rhizomes and lush green leaves, Turmeric adds not only flavor but also color to dishes around the world. This herbaceous plant can grow up to 1 meter in height and thrives in tropical climates. The flowers of the Turmeric plant are a sight to behold, with their cone-like spikes boasting shades of white or pink. It’s intriguing how such an unassuming plant holds so much potential for culinary and medicinal purposes.

Climate and Soil Requirements

Turmeric farming thrives in warm and humid climates. It needs a temperature of 20-30°C to grow successfully. The plant also needs well-draining soil rich in organic matter and a soil pH level between 5.5 and 7.5. Loamy or sandy loam soil works best for Turmeric cultivation. Avoid waterlogged areas, as they can lead to root rot and other diseases.

Turmeric plants do not tolerate frost, so it’s essential to plant them at the right time, according to your region’s climate. When it comes to soil fertility, adding compost or well-decomposed manure before planting can significantly improve yield. Regularly testing the soil for nutrient levels helps ensure the plants have everything they need to thrive.

Land Preparation and Soil Fertility Management

Land preparation is a crucial aspect that can significantly impact the success of your crop. Before planting Turmeric, make sure to prepare the land by removing any weeds and debris.  Soil fertility is key in ensuring healthy plant growth and high yields. Conduct soil tests to determine if any nutrients are lacking and amend the soil accordingly with organic matter or fertilizers. Maintaining proper soil pH levels is also important for optimal Turmeric growth.

In case you missed it: Turmeric Farming, Planting, Care, Harvsting Guide

Turmeric Agriculture Field

Turmeric Varieties

Turmeric varieties vary in their characteristics, such as yield potential, disease resistance, and flavor profile. Some popular varieties include Alleppey Finger, Erode Local, Rajapore, and Sangli Pasand. Each variety has unique traits that cater to different growing conditions and end uses. Alleppey Finger Turmeric is known for its high curcumin content, making it ideal for medicinal purposes and spice production.

Erode Local variety is favored for its strong aroma and bold flavor profile in culinary applications. Sangli Pasand stands out for its adaptability to various soil types and climates. Farmers carefully consider their specific needs and growing conditions when selecting a Turmeric variety to cultivate.

Propagation Methods

Turmeric propagation methods are crucial in ensuring a successful harvest. One common method is rhizome division, in which healthy rhizomes are carefully separated to be replanted. Another effective technique is tissue culture, which involves growing Turmeric plantlets in a controlled environment before transferring them to the field.

Rhizome cutting is also popular among farmers. Sections of the rhizome with at least one bud are used for planting, allowing multiple plants to be grown from a single rhizome. Additionally, some growers opt for seed propagation, although it is less commonly used due to lower success rates compared to other methods.

Planting and Spacing Guidelines

Before planting Turmeric, the soil is rich in organic matter and free from pests or diseases that can harm the crop. Plant the rhizomes about 5-7 cm deep into the soil with adequate spacing between each plant. The recommended spacing between Turmeric plants is around 30-45 cm apart in rows that are about 45-60 cm apart. Proper spacing promotes better air circulation, which in turn makes it easier to manage weeds and apply fertilizers effectively throughout the growing season.

In case you missed it: Growing Turmeric In Pots, Containers, Indoors

Turmeric Field

Irrigation and Water Management

Turmeric plants require consistent moisture to thrive, especially during the initial stages of growth. Adequate watering is essential to ensure proper root development and nutrient absorption. Drip irrigation systems are highly recommended for Turmeric farming. Drip irrigation helps in delivering water directly to the roots, minimizing water wastage and ensuring efficient utilization by the plants.

It also helps in controlling weed growth and reducing disease incidence. Monitoring soil moisture levels regularly is key to optimizing irrigation practices. Adjusting watering based on plant requirements can help prevent both under-watering and over-watering issues that may affect Turmeric yield. Implementing good water management practices not only promotes healthy plant growth but also contributes to higher yields during harvest time.

Nutrient Management

Ensuring proper nutrient management is crucial in Turmeric farming to achieve optimal growth and yield. Turmeric plants require essential nutrients like nitrogen, phosphorus, potassium, and micronutrients for healthy development. Soil testing is key to determining the specific nutrient requirements of your Turmeric crop. Based on the results, you can apply organic manures or fertilizers to meet these needs.

Maintaining a balanced nutrient supply throughout the plant’s growth stages promotes strong root development and overall plant health. Regular monitoring of soil fertility levels is necessary to adjust nutrient applications as needed. Organic fertilizers can provide the soil with these necessary nutrients. Additionally, micronutrients like iron, zinc, and manganese play vital roles in the overall health of Turmeric plants.

Regular soil testing can help determine any deficiencies that need to be addressed through targeted fertilizer applications. Over-fertilization of the Turmeric plant can lead to potential harm to the environment. It’s important to follow recommended dosage guidelines and adjust based on specific soil conditions. By implementing effective nutrient management practices, farmers can optimize their Turmeric yield and quality sustainably.

Pest and Disease Control

Pests and diseases can affect your Turmeric crop if not properly managed. To ensure a healthy harvest, it’s essential to stay vigilant and proactive in controlling these threats. Pests like rhizome scale, shoot borer, and leaf roller can wreak havoc on Turmeric crops if left unchecked. These pests can cause damage to the Turmeric plant’s leaves and rhizomes, affecting overall yield and quality.

Turmeric is also susceptible to various diseases, such as rhizome rot, leaf blotch, and bacterial wilt. If not properly managed, these diseases can spread quickly through a crop. Implementing integrated pest management practices is crucial in controlling pests and diseases in Turmeric farming.

Crop rotation is an effective method for disrupting pest cycles and reducing disease pressure. Using organic pesticides and fungicides made from natural ingredients can be a sustainable way to combat pests without harming the environment. Implementing integrated pest management strategies that combine cultural, biological, and chemical control methods can provide comprehensive protection for your Turmeric plants.

Weed Management

Weeds compete with Turmeric plants for nutrients, water, and sunlight, affecting their overall yield. To effectively manage weeds in your Turmeric field, regular monitoring is essential. Manual weeding using tools like a hoe or hand pulling can help remove weeds without damaging the Turmeric plants.  Herbicides are also used for controlling weeds in Turmeric fields; however, it’s important to choose herbicides that are safe for both the environment and your crop.

In case you missed it: Turmeric Diseases, Pests, Symptoms, Control Measures

Observing Turmeric Agriculture Field

Proper application following manufacturer guidelines is key to preventing damage to your Turmeric plants. Crop rotation practices can also help reduce weed pressure in future planting seasons by disrupting weed life cycles. By applying these strategies, you can maintain a weed-free environment for your Turmeric plants to thrive and produce high-quality yields.

Caring Turmeric Plants

Caring for Turmeric plants is essential to ensuring a healthy crop. Regularly inspect the plants for pests or disease signs and take prompt action to address them. Provide adequate water to the plants, ensuring they are consistently moist but not waterlogged. Maintain weed-free surroundings around the Turmeric plants to prevent competition for nutrients and sunlight. For optimal growth, fertilize the Turmeric plants with organic compost or balanced fertilizers at regular intervals. Monitor the soil nutrient levels and adjust fertilizer applications accordingly.

Harvesting Techniques

The best time to harvest is when the leaves start turning yellow and drying up, indicating that the rhizomes are ready for harvesting. Use a digging fork or shovel to lift the Turmeric rhizomes from the soil carefully. Gently remove excess soil from the rhizomes by hand, being careful not to damage them.

Once harvested, allow the rhizomes to dry in a shaded area for a few days before processing further. After drying, trim off any roots and foliage from the rhizomes. Wash them with clean water and let them dry again before storage or processing. Proper handling during harvesting ensures that you get high-quality Turmeric for consumption or sale.

Average Yield of Turmeric

The amount of Turmeric harvested per acre can vary based on factors like soil fertility, climate conditions, and farming practices used. On average, a well-managed Turmeric farm can yield 25-30 tons of fresh rhizomes per hectare, which translates to approximately 10-12 tons of dried Turmeric per hectare once processed. Achieving a high yield requires proper land preparation, nutrient management, irrigation techniques, and disease control throughout the growing season. Farmers who implement sustainable practices and invest time in caring for their crops typically see higher yields.

Ideas to Boost Turmeric Yield

  • Crop Rotation: Rotate your Turmeric cultivation with other crops to reduce the risk of diseases.
  • Inter-cropping: Plant companion crops like ginger or legumes alongside Turmeric to optimize field space and nutrients.
  • Mulching: Use organic mulch to retain moisture, suppress weeds, and regulate soil temperature.
  • Organic Fertilizers: Natural fertilizers like compost or manure enhance soil fertility without harming the environment.
  • Bio-fungicides: Apply bio-based fungicides at crucial growth stages to prevent fungal infections and promote healthy plant growth.
  • Pruning: Regularly prune yellowing leaves or pest-infested stems to redirect energy to the plant’s productive parts.

In case you missed it: Turmeric Fertilizer Requirements and Recommendations: How And When to Apply

Farmer in Green Turmeric Agriculture Field

Post-Harvest Handling and Processing

After the Turmeric plants have been harvested, it’s crucial to handle and process them correctly to maintain their quality. The first step is to carefully clean the roots and remove any debris or soil particles. Once cleaned, the roots can be dried in the sun or using a mechanical dryer. Proper drying ensures that the Turmeric retains its vibrant color and potent flavor. Once dried, the Turmeric roots can be ground into powder. This powder can then be stored in airtight containers away from moisture and sunlight to preserve its freshness.

Some farmers also choose to extract essential oils from Turmeric for various purposes, such as health supplements or cosmetics. Proper post-harvest handling and processing not only ensure the quality of Turmeric but also increase its market value. By following these steps diligently, farmers can maximize their profits and meet consumer demands for high-quality Turmeric products on a large scale.

Market and Export Opportunities

With the increasing global demand for this golden spice, there is a growing opportunity to tap into international markets and boost profitability. Turmeric’s versatility as both a culinary ingredient and a medicinal herb opens doors to various industries worldwide. From food manufacturers seeking high-quality spices to pharmaceutical companies exploring the health benefits of curcumin, there is no shortage of potential buyers for Turmeric products.

Exporting Turmeric can not only bring economic benefits but also help promote sustainable farming practices. By meeting the quality standards set by importing countries, farmers can establish long-term partnerships with international buyers and create a niche for their products in the global market.

In case you missed it: Top 20 Steps to Boost Turmeric Yield: How to Increase Production, Quality, Size, Methods, and Tips

Turmeric

With proper marketing strategies and an understanding of market trends, Turmeric farmers can seize the opportunities available in the competitive international marketplace. As consumer awareness about natural remedies and healthy ingredients continues to grow, Turmeric remains a valuable commodity with promising prospects on the global stage.

Sustainability Practices in Turmeric Farming

Sustainability in Turmeric farming is crucial for the environment and future generations. One sustainable practice is crop rotation, which helps prevent soil depletion and maintains soil fertility naturally. Another important aspect is using organic fertilizers and avoiding harmful chemicals that can harm the ecosystem. Integrated pest management techniques reduce reliance on pesticides, promoting a healthier environment.

Water conservation methods such as drip irrigation not only save water but also improve yield efficiency. Implementing cover crops helps control erosion, retain moisture, and enhance soil structure. Adopting agroforestry practices by planting trees alongside Turmeric crops can provide shade, conserve water, and diversify farm income sources. Turmeric farming represents a promising opportunity for agricultural entrepreneurs seeking sustainable growth and profitability. With careful planning and diligence, it can be a golden opportunity for agricultural success.