Home Blog Page 60

Top 17 Steps/Ways to Boost Pumpkin Yield: How to Increase Production, Size, and Quality  

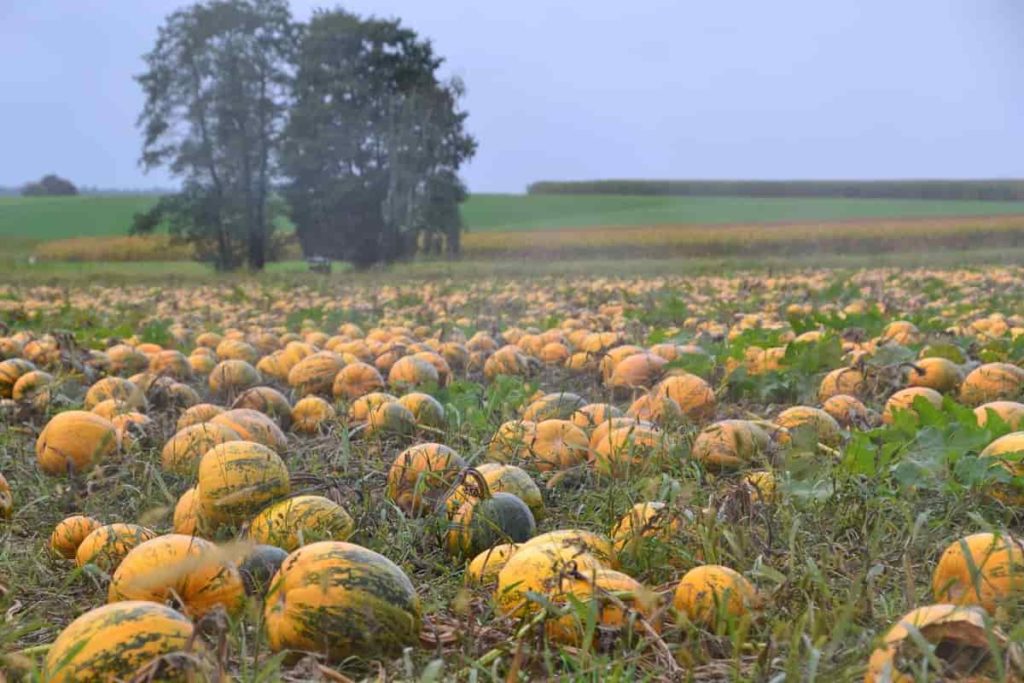
Pumpkins belong to the Cucurbitaceae family. To get the maximum yield, your soil should prepare well for Pumpkin cultivation. Pumpkin is a popular vegetable crop grown in the rainy season. Below are the steps/ways to boost Pumpkin yield.
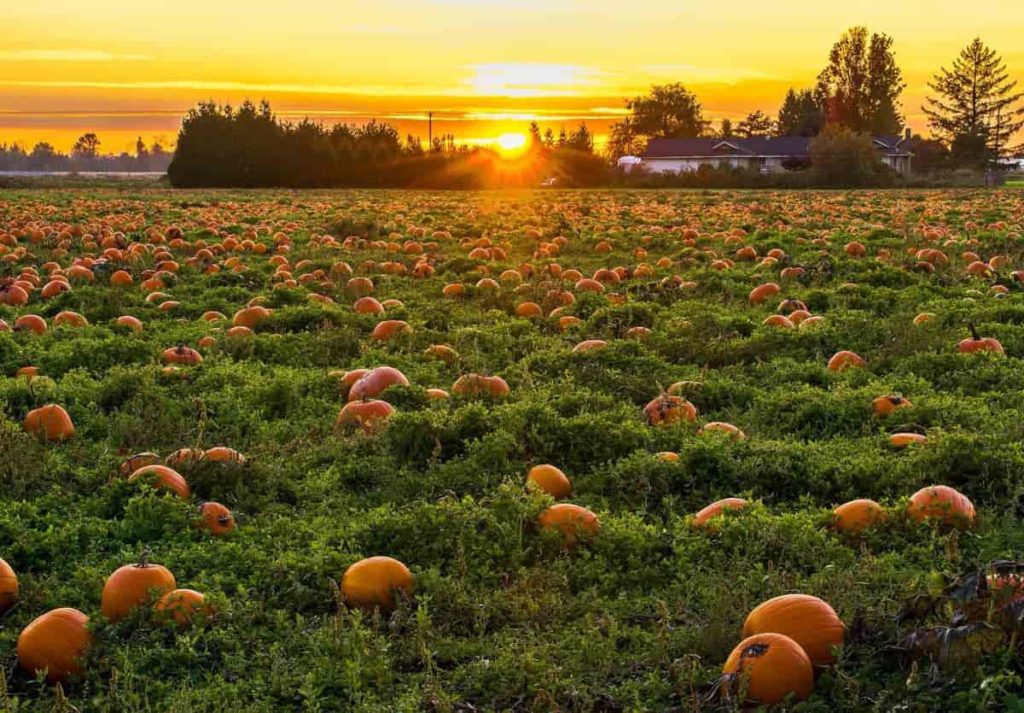
Steps/Ways to Boost Pumpkin Yield
Image Source

Steps/Ways to boost Pumpkin yield

Step 1: Factors that affect the growth of Pumpkins

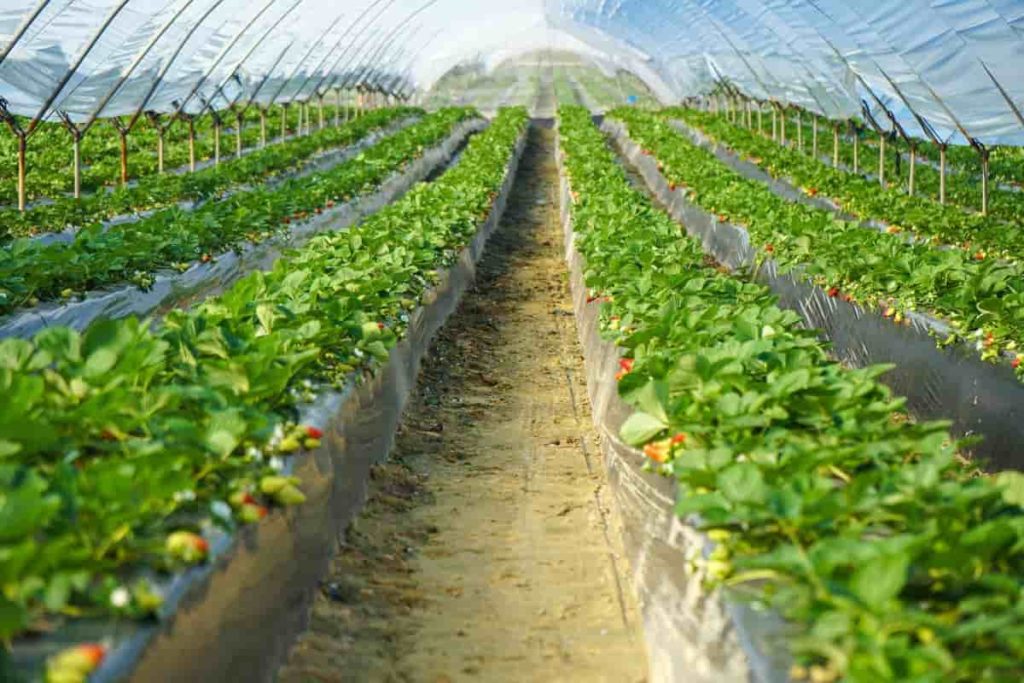
Pumpkins can be grown as transplants on beds raised with black or silver plastic mulch and drip irrigation for optimal plant growth and production. The use of plasticulture in Pumpkin farming will;

  • Increase the soil temperature.
  • Maintain water availability in the soil. 
  • Reduce weeds. 
  • Improve soil tilth. 
  • Reduce fertilizers and pesticides under the beds. 
  • The use of drip irrigation also allows the use of fertilizers during the growing season. 

Growing Pumpkins using plasticulture will double the production of Pumpkins grown on bare soil or no-till production. Once some Pumpkins are formed, pinch the fuzzy ends of each vine to stop the vine’s growth and to concentrate the plant’s energy on the fruit. Vines pruning can help space and fruit formation. 

Step 2: Select high yield Pumpkin Varieties 

There are wide varieties of Pumpkins available. However, hybrid varieties are preferred by farmers when it comes to commercial cultivation, as these varieties yield more than regular varieties. Here are some common types: 

  • Ambili – It is high yielding variety. The average fruit weight is about 4-6 kg. Medium-sized flat round-shaped fruits.
  • Arka Suryamukhi – This type of fruit is round with thick ends. They are also orange in color, and as soon as they mature, white stripes appear on them. The average weight of the fruit will be about 1 kg. 
  • Arka Chandan – It is a medium-sized fruit in this variety that is light brown, and each fruit weighs about 2-3 kg. The crop ripens in about 120 days. 
  • PAU Magaz Kaddu-1 – There are also fruits of this type that are round in shape and medium-sized fruits which turn yellow as soon as they are ripe. 
  • Punjab Samrat – This type of fruit is small and green in color but turns brown as it grows. 
  • PPH-1 – This is the early type of maturation that comes with bony vine. The fruits are small and round, turning green to brown when ripe.
  • PPH-2 – This type of crop grows fast. The fruits are green but turn brown as they grow. In addition, these fruits are round and light green. The only difference between PPH-1 and PPH-2 is the softening of the fruit’s skin, and the production of PPH-2 is better than before. 

In case you missed it: Organic Pumpkin Farming, Cultivation Practices
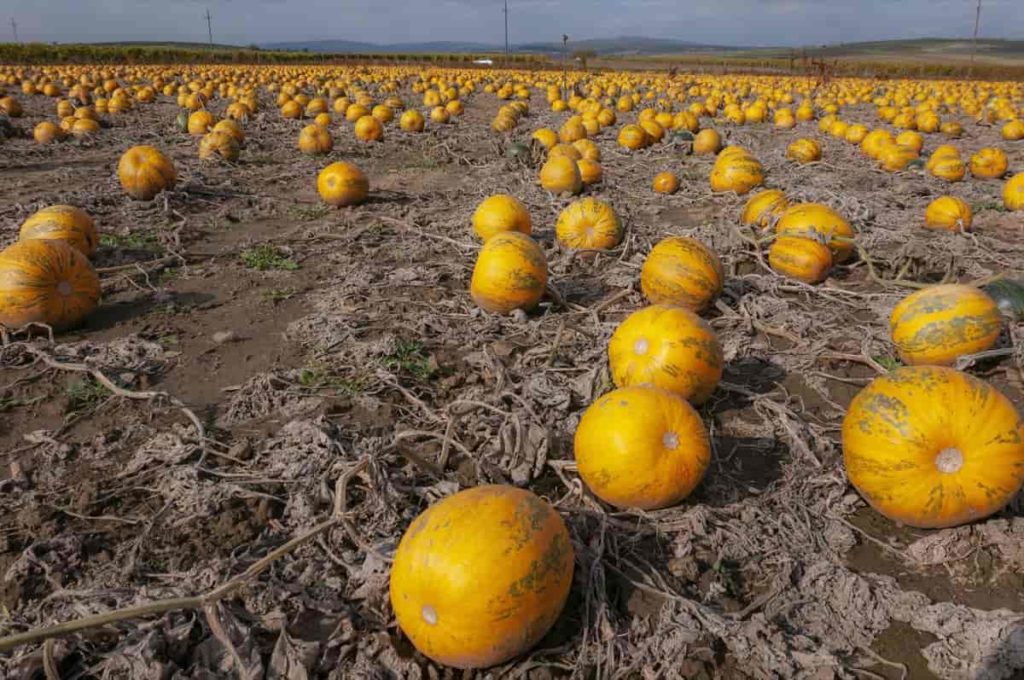
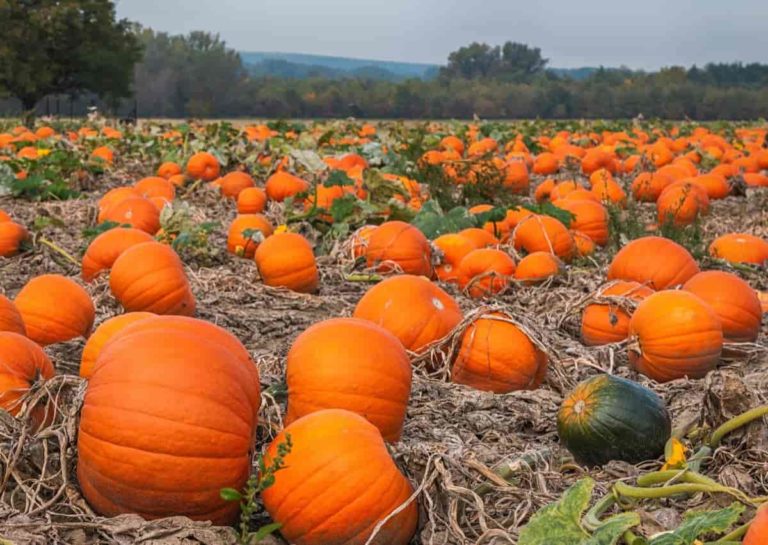
Pumpkin Yield
Image Source

Step 3: Soil to increase Pumpkin quality

Pumpkins prefer well-drained soils with a pH of 6 to 6.5, which are rich in organic matter. This commercial crop can thrive on a variety of soils. Sandy loam soil with good drainage and all the essential organic matter is considered the best soil for Pumpkins. The most suitable soils for growing are sandy soils with about 10% organic matter. It is because the soil will heat up faster and drain faster.

If your soil is heavy, you can help your Pumpkins grow by adding sand and organic matter. Choose a sunny spot with well-drained soil. Add neem cake or neem solution to the soil one week before planting. Pumpkins grow best when sown at the base of the topsoil with a depressed ring at the bottom to keep it moist but well-dried. Like other types of squash, Pumpkins need full sun (at least six hours of light per day) to produce and ripen their fruit. 

Pumpkins should be grown on soils with good water intake and holding capacity. If Pumpkins are grown on sandy soils, access to irrigation is essential for optimal plant growth, uniform fruit set, and growth. Pumpkins need a constant supply of available moisture during the growing season. Water deficiency or stress, especially during flowering and fruit set periods, can cause flowers and fruits to fall off, resulting in reduced yields and smaller fruits. Pumpkins need a constant supply of moisture during the growing season. 

Step 4: Agricultural climate conditions for increasing Pumpkin production

Pumpkin is a very hot vegetable that can also withstand cold temperatures. Pumpkin fruit is cultivated worldwide due to its abundant use and benefits. There are wide varieties of Pumpkins that can grow in various climatic conditions. However, a temperature. Temperatures between 20 and 30°C are considered ideal. 

To grow Pumpkins for their best plant growth. Remember that it is not beneficial to grow Pumpkins in hot and cold areas as Pumpkin plants are very sensitive to cold, and Pumpkin seeds do not grow well in cold soil at higher ambient temperatures. Sometimes male flowers predominate over female flowers, resulting in lower fruit production this season. 

Step 5: Spacing for maximizing fruit production

In planting Pumpkins, the spacing varies according to the size of the field and the vine size. For higher yields, grow short vined or bush Pumpkin variety. Planting them at a spacing of about one meter between the plants and about 1.5 to 2 meters in rows is considered best for growing Pumpkins commercially. 

Step 6: Pollination accelerates the growth of Pumpkins

Honey bees are essential for proper pollination and fruit set. One hive per acre is the recommended honey bee population for maximum Pumpkin production. A population of pollinating insects can be severely affected by pesticides applied to flowers or weeds in bloom. 

Step 7: Plant density and sowing for maximum fruit production 

Pumpkin crops are usually planted by direct seeding but can be sown as transplants. Transplants are usually considered only when establishing a very early season crop or using a permanent bed. Good soil preparation is essential for high yields. Plant density will affect fruit size, yield, and the number of fruits per plant.

The higher the density of plants, the smaller the average fruit size, the higher the total yield, and the lower the fruit per plant. Pumpkins are sown between raised beds, and the distance between the plants along these beds depends on the vigor of the type of Pumpkin grown. 

Step 8: Seed rate and seed treatment to get a high yield

Usually, about 2 kg of Pumpkin seeds is sufficient for cultivation on one hectare of land to get a high yield. Benlate or Bavistin by 2.5 gm/kg of seed treatment is used to treat soil-borne diseases.

Step 9: Manures and fertilizers application in Pumpkin growth 

Proper manure and timely application of fertilizers directly increase the yield. In Pumpkin cultivation, add a balanced amount of manure and fertilizer to get higher yields. It requires about 50 tons of ordinary manure to be applied during the soil preparation, usually up to the topsoil in the last plow. The use of nitrogen and potassium is beneficial in increasing yield. Therefore, when preparing the soil, add 30 kg potash with about 50 to 60 kg nitrogen.

In case you missed it: Pumpkin Farming in Polyhouse (Gummadikaya) for Profit
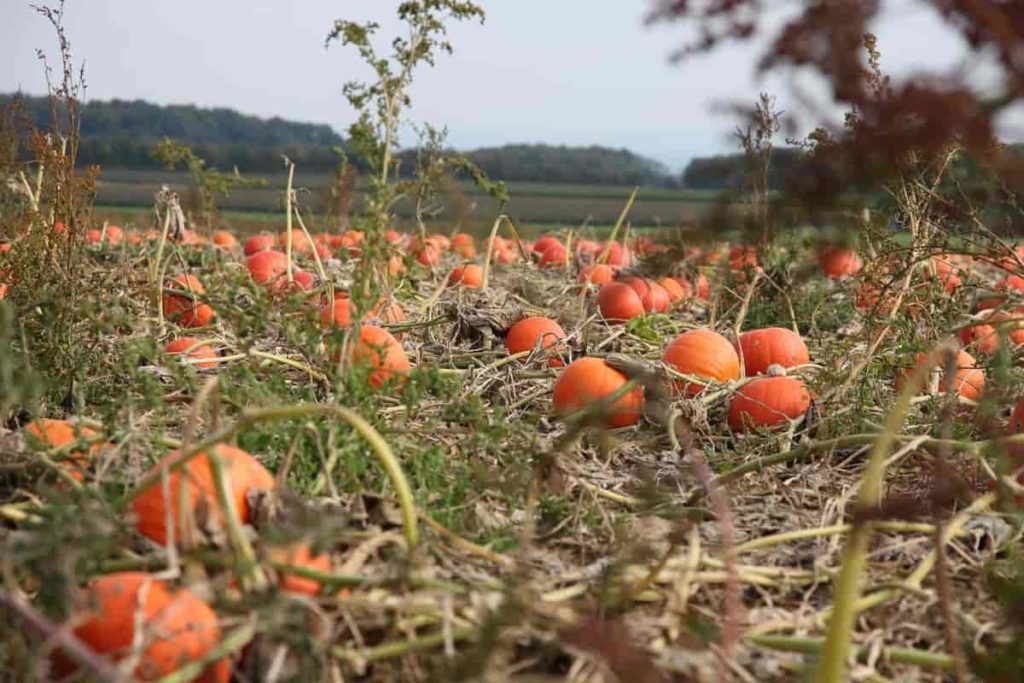
Pumpkin Harvest
Image Source

Use caution when using nitrogen. It must be applied in two equal doses; 1/2 at the time of land preparation and the other in about a month of planting. Pumpkin plants have two types of flowers, male and female, which appear in early July. Male flowers appear first, followed by females. Find the first female flowers. Before the female flowers bear fruit, look for the vines to be strong and well established. It would help if you had a big vine to grow a big Pumpkin, so in a sense, you are choosing a vine before the Pumpkin. 

Step 10: Weed control for more plant growth

To control weeds, frequent weeding or earthing-up operations are required. The weeding is made with the help of a hoe or by hand. The first weeding is done 2-3 weeks after sowing. A total of 3-4 weeding is required to clear the field of weeds. 

As they begin to spread, Pumpkins naturally prevent the formation of many weeds. However, to prevent and stop the growth of weeds, apply mulch to your Pumpkin. Hand weeding and hoeing are also suggested forms of control, and herbicides may also be helpful, depending on growing preferences.

Step 11: Irrigation to achieve maximum yield

Proper irrigation is required at regular intervals. Immediate irrigation is required after the sowing of seeds. Depending on the weather, irrigation is required at 6-7 days intervals. A total of 8-10 irrigations are required. To consistently maximize yields of high-quality Pumpkins, farmers need to irrigate their crops. Pumpkin ferro irrigation is a preferred option for most domestic farmers.

Furrow irrigation requires a uniform, light slope and soil type that allows water to spread later without penetrating too deep into the soil. Overhead irrigation is another option in the country and can be implemented through travel irrigation, center pivots, lateral mowers, or fixed sprinkler systems. 

Step 12: Pruning to maximize crop yield

Initially, the best way to control overpopulation is to thin the plants as they grow. When the newly formed plants are well prepared, thin each mound until two or three plants are left on each one. Keep the best-looking or fastest-growing Pumpkins based on individual preference. Finally, use pruning to remove diseased fruit and other parts of the plant that have the potential to spread and infect other Pumpkins. 

Step 13: Tips for getting more Pumpkin production

  • Use row cover at the beginning of the season to protect plants and avoid pest problems. However, remember to remove the cover before flowering to prevent pollination. 
  • Bees are essential for pollination, so be careful when using pesticides or fungicides to control the fungus. If you must use it, apply only in the late afternoon or early evening, when the flowers are closed for the day. To attract more bees, try planting a bee house in your garden. 
  • Pumpkins need 1 inch of water every week. Give deep water in the morning and on very hot afternoons, especially during fruit sets. Avoid watering plants and fruits unless it is a sunny day. Wetness invites rot and disease. 

In case you missed it: Pumpkin Farming, Planting, Care, and Harvesting
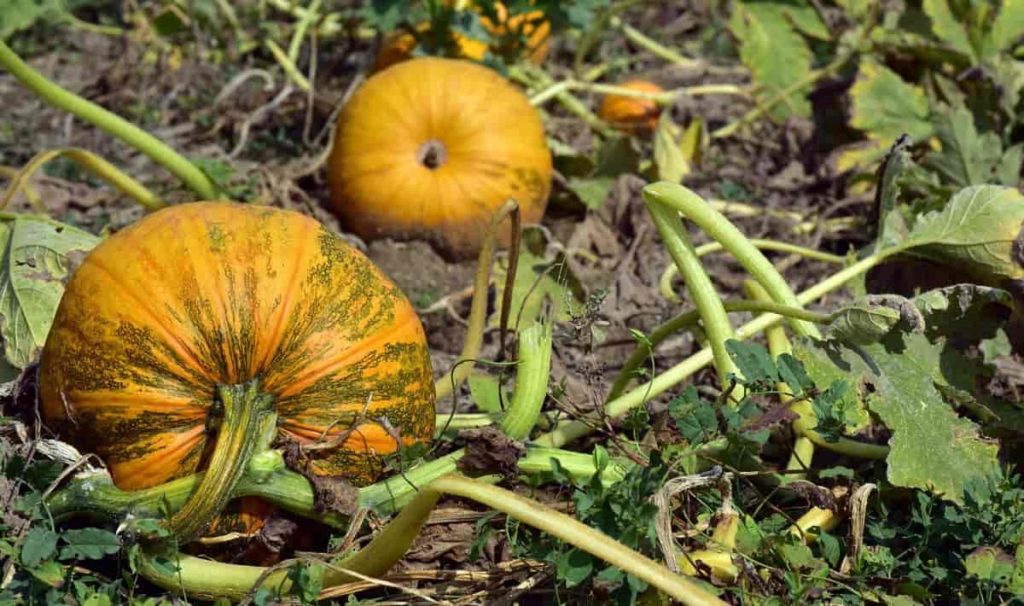
Pumpkin Farm
Image Source
  • Put mulch around your Pumpkins to retain moisture, suppress weeds and discourage pests. 
  • If the plants show signs of yellowing, apply a side dressing of nitrogen fertilizer and magnesium sulfate. Fruits can be large, pale green, or dark green. Varieties of hybrids produce very large fruits, ranging in shape from globular to oblong.
  • Unfavorable growing conditions can also cause Pumpkins to turn yellow and die. Lack of water causes the plant leaves to wither and fall off. Plant growth slows down, and the growing fruit may wither, turn yellow and die. 
  • Pumpkins are pollinated by bees, spreading pollen from male to female flowers. In the cold, rainy weather, flowers cannot have pollen or cannot have pollen at all. Incomplete pollen can cause young Pumpkins to fall off. Cold weather in autumn kills grapes and leaves. The Pumpkins left in the garden will also fail to ripen and die. 

Step 14: Problems and their solutions for growing Pumpkin

Pumpkin is highly susceptible to pests and diseases, and many pests and diseases attack its crop. To get good quality and high yield from Pumpkin cultivation, it is necessary to prevent them. Yellow leaves in a Pumpkin plant can be a sign of nutrient deficiency.

Pumpkins need high levels of nutrients and constantly moist, well-drained soil. Nitrogen, an essential plant nutrient, dissolves in water, and repeated use of water removes nitrogen from the soil so that it is no longer available to the plant. Feed Pumpkins with 18-18-21 fertilizer at the rate of 1 tablespoon per gallon of water weekly or per the manufacturer’s instructions. 

Step 15: Pests, diseases, and their control for more plant growth

Although the plant is hardy, it can be affected by various diseases, especially powdery mildew. Keep plants away from walls to prevent infection. Pumpkin is highly susceptible to pests and diseases, and many pests and diseases attack its crop. To get good quality and high yield from Pumpkin cultivation, it is necessary to prevent them. Crop rotation is the best method to reduce crop pests and diseases.

Also, avoid growing Pumpkins in a previously used field to plant cucurbit crops. Pumpkins can compete with weeds when they make their mature canopy, if they are planted in a large plant population, or if they are planted on a plastic mulch. Pumpkins are labeled with several pre-transplant and post-emergency herbicides, depending on the specific grass problems required to control and stage the Pumpkin’s growth. In addition, under mild infection levels, early planting can reduce weed problems.

In case you missed it: Watermelon Farming in Texas: How to Start, A Step-By-Step Growing Guide for Beginners
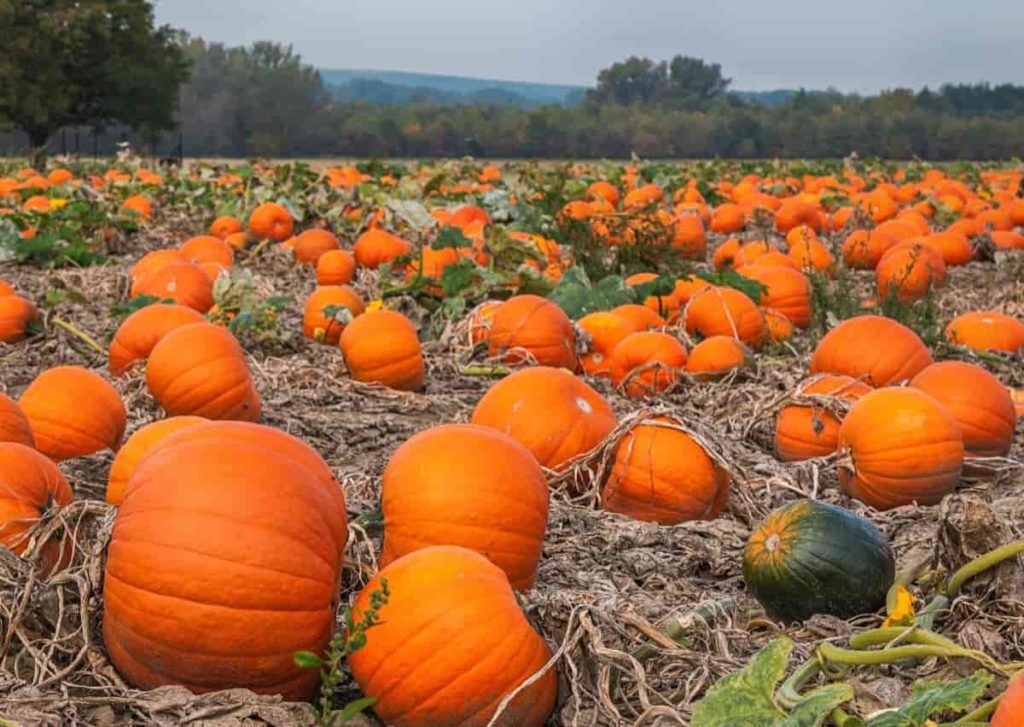
Pumpkin Farming
Image Source

Insects can be a big problem in Pumpkin production. Cucumber beetles, aphids, squash vine borers, seed corn maggots, squash bugs, and spider mites can potentially reduce or damage the salable crop in any given year. Monitoring insect populations through scouting will help farmers determine when they should start and stop spraying Pumpkins and the interval between uses.

Many Pumpkin diseases can cause a decline in crop yields, especially bacterial wilt, viruses (powdery mildew, downy mildew), and scab. The crop’s best yield and the fruit’s color can only be possible if a fixed fungicide program is used to prevent leaf damage from mildew. Pumpkin vines suffer from many diseases, such as powdery mildew, bacterial wilt, phytophthora blight, and cucumber mosaic virus.

Crop rotation, good soil, and resistant varieties (where possible) can help reduce the incidence of these diseases in the field. Pumpkins are cut by hand at their maturity stage, color (orange or white), and size. Because fruits are pollinated at different times, more than one crop in the field is very common. To ensure high-quality products, pumpkins must be graded for size, maturity, and pest damage before marketing. 

Step 16: Harvesting Pumpkins for more production and yield

Pumpkins are generally harvested by hand when the fruit is fully ripe. The Pumpkin harvesting season begins when the plant’s stem begins to rot. However, harvesting can vary from crop to crop and also to market demand. It is better to start harvesting based on market demand at a young age. 

Pumpkins should be grown when they have a deep solid woody color and are hard. Harvesting will also help in collecting some seeds for further cultivation. When you see the uniform color change and the hardness of the rind, it means that the fruit is ripe. It is best to prune the fruit with a portion of the stem. It helps keep the Pumpkin fresh for longer.

In case you missed it: Watermelon Seed Germination, Time, Temperature, Process
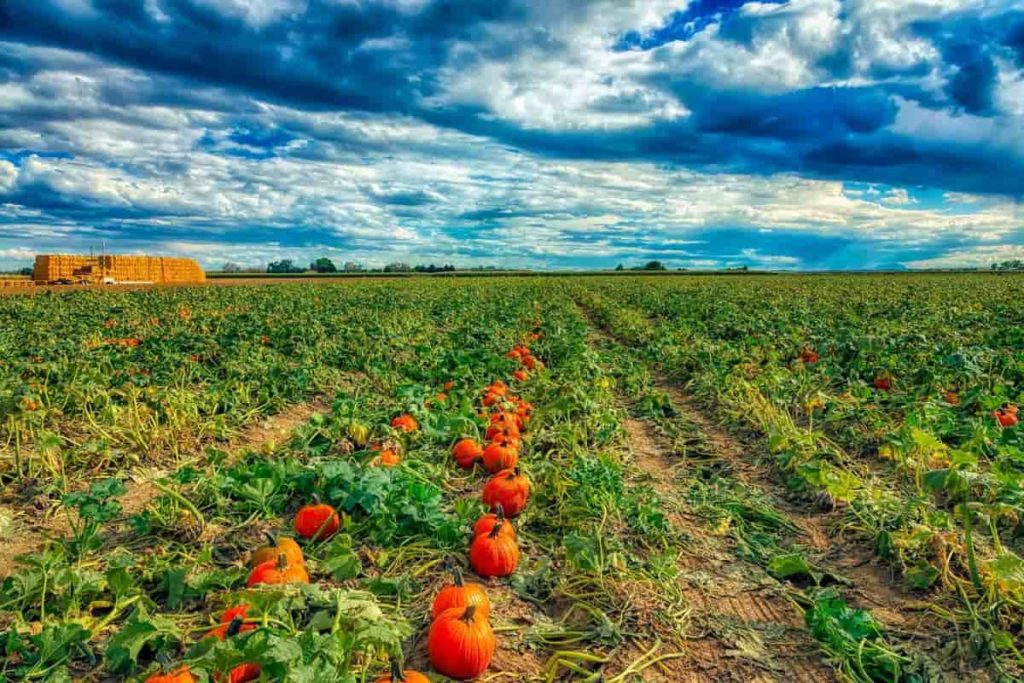
Pumpkin Field
Image Source

Step 17: Pumpkin yield per acre and their affecting factors

It gives an average yield of 100 quintal/acre. The variety gets mature in 135 days. Maximum fruit yields are achieved on medium-textured soils with high water-holding capacity and good internal drainage. Production of your Pumpkin farming depends on several factors like cultivar, climate condition, proper care, variety, planting date, soil fertility practices, insect and control, planting equipment, cover crop type, etc.

Dates Farming in the USA: How To Start, A Step-By-Step Guide to Planting to Harvesting

0

The Date Palm’s scientific name is Phoenix dactylifera. Date Palms are very popular as landscape specimens in sub-tropical areas worldwide, especially in Southern California. Palms are famous for their great appearance, natural beauty, and easy care. Below are details about Dates farming in the USA below.

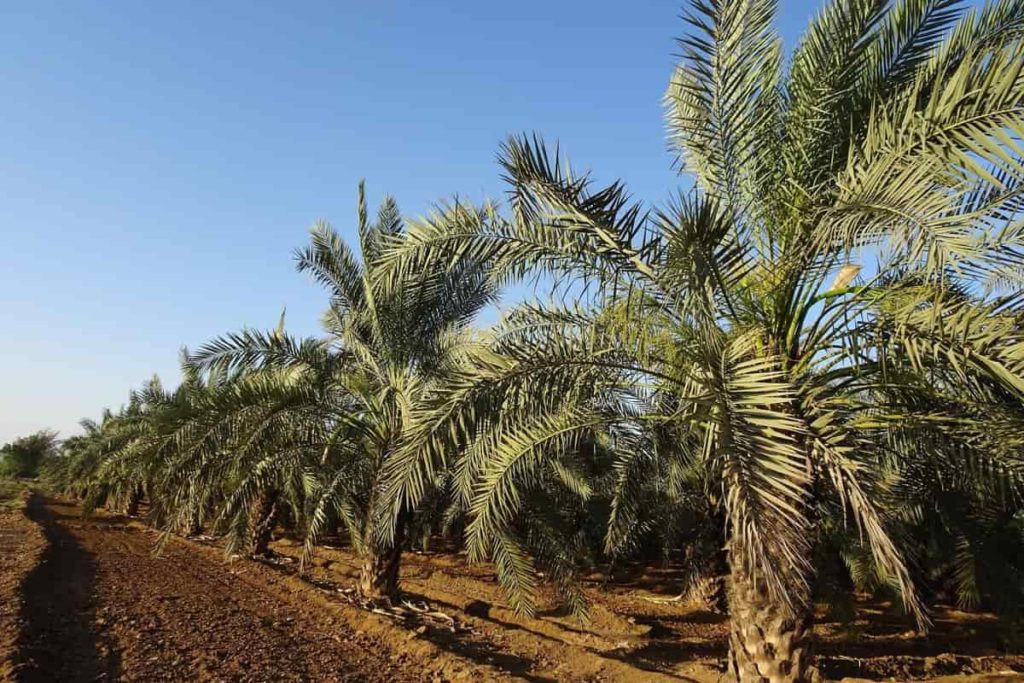
Dates Farming in the USA
Image Source

Commercial Date Palm production in the USA

A Palm can be very impressive as a specimen, and group planting can be wonderful. Date Palms grow well throughout Southern California, primarily used in landscaping. Date Palms grow taller yearly, and pruning Palms become more expensive and dangerous because they are taller. Commercial Date Palm growers in California usually sell their old Palms that have grown too long to be harvested.

These large Palm specimens are ideal for many landscaping projects. Palms are also very popular in landscape design for commercial buildings. California grows most of the Dates grown in North America. The Palm is the sweet fruit of the Palm tree and is believed to have originated in the Middle East centuries ago. They were brought to the United States, especially to California and Mexico.

Although the popularity of Dates in the United States has recently reached new heights due to their healthy but naturally sweet quality, the extensive history of Dates is not only in Arizona and the United States. They are staying and will be for years to come. The Date Palm, grown by home gardeners primarily for its decorative fronds, is grown as a landscape tree in zones 9 through 11 in the United States. The tree needs a shelter to grow in Zone 8 to protect it from frost damage.

Palms are a favorite in the desert southwest of Southern California. They are native to hot, dry climates and require very little water to thrive once established. The USA has become one of the most prominent exporters of Dates worldwide, known as the king of Dates. In the western part, California is the largest cradle of these histories. 

Soil and climate conditions for Date farming in the USA

Drainage is the most important factor when choosing where to plant the soil. This Palm performs well in sandy or clay soils and tolerates salt. The Palm must have full sun. It cannot live in the shade. It will thrive in all warm climates where temperatures rarely drop to -6.67°C. When the Palm is inactive, it can tolerate lower temperatures, but the average temperature in a flower or fruit should be above 17.78°C. 

Commercial fruit production is possible only when there is a long, hot growing season with a maximum daily temperature of 32.22°C and virtually no rain – 1/2 in the ripening season less than an inch (1.25 cm). Palms can withstand prolonged drought, although they require more water for heavy impact. It is best provided by periodic flooding from North African rivers and subsurface water rather than rain.

Dates varieties available in the USA

An estimated 3,000 varieties of Dates worldwide, but only a few are important in the global market. ‘Medjool’ is probably one of the most popular and highest dating Dates available. The fruits are large, soft, and well-shipped, which makes them the most preferred for export. Deglet Noor is a high-yielding, semi-arid crop, popular in North Africa and large in California. Barhi is another high-yielding crop. 

In case you missed it: How to Grow Curry Leaves in the USA: From Seeds in Containers at Home, A Step-By-Step Guide for Beginners

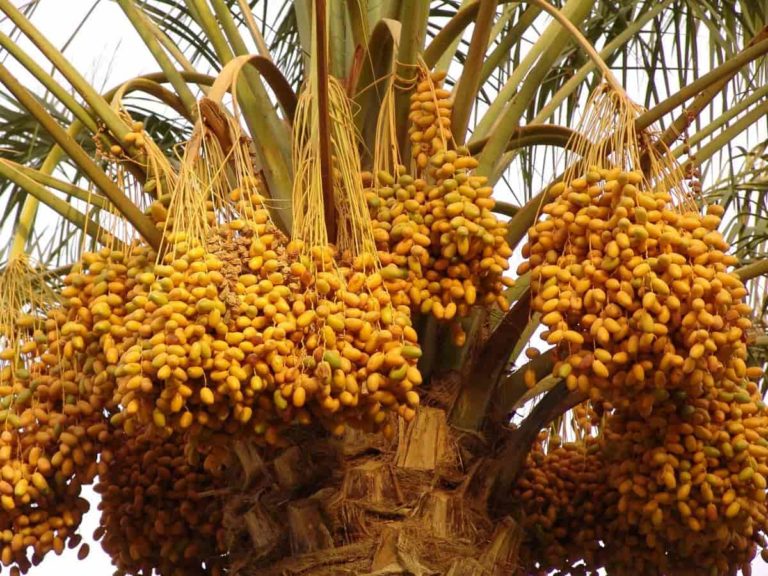
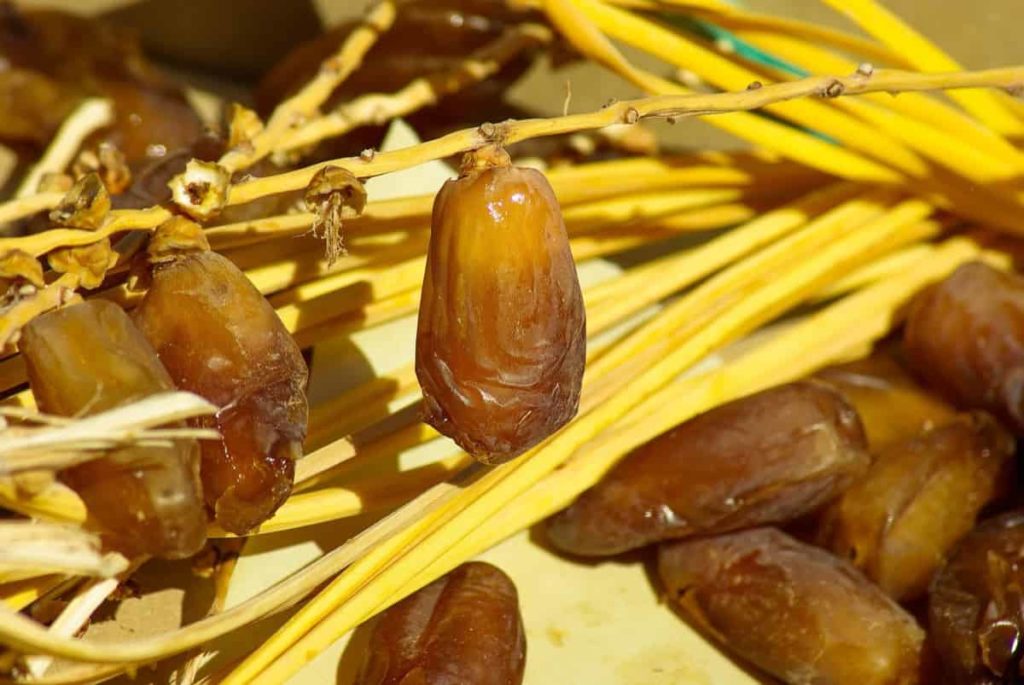
Dates
Image Source

Amri, Dayri, Deglet Noor, and Khalsa are well-known Medjol (very popular in the USA). Hundreds of varieties of Palm are available; however, the two most widely grown in the United States are “Daglet Noor” and “Medjool.”

  • Medjool is the best-selling history in the United States. They are large with a maple flavor, making them perfect for cooking and baking. 
  • Deglet Noor Dates are the second most available history in the United States. They taste better than medallions with a few nuts. 
  • Sweet Bahri Dates are commonly eaten as a snack or dessert and are popularly grown in Southern California. They are very delicate, which makes them difficult to cook. 
  • Confectionery Dates are small fruits that taste like caramel. 
  • Mozafati is a medium-sized Date Palm with a sweet taste and a soft, fleshy texture. 
  • Kadrawi Dates have a syrupy taste and texture, which makes them a popular choice for baking. 

When to plant Date Palm

Date Palm trees grow in warm, dry, or humid climates. It performs best in USDA hardiness zones 8-11 and requires full sun. If you live in the cold season, it is advisable to put your Palm in a container to move it inside when the winter comes. 

Dates farming in California

California is responsible for most of the Palm production in the United States, accounting for 90% of the total US Palm production. Most American Palms are grown in the Coachella Valley of California, north of San Diego, in the far southwest of the United States, and parts of western Arizona due to its high temperature and low humidity. 

Some California farms use traditional methods of planting and fertilization to obtain organic products. There are many certified brands of different types of organic Dates in the valleys of California. These products are globally recognized and are being exported to many countries of the world.

Different Dates farming states in the USA

In the USA, Southern California produced the most amounts of Dates followed by Arizona. Other USA states that produce Date Palms are Florida, Nevada, Southern Utah, and Texas, which also grow Palms on a much smaller scale. In the USA, California is the leading state in history, producing more than 90% of the country’s total production. Most of this production takes place in the Coachella Valley of Southern California.

In case you missed it: Dates Farming Information Guide

Dates Farming
Image Source

Propagation method in Date farming

  • Off-shots or suckers: This is the most common propagation method. The offshoots must be picked from the mother tree base. 4-5 years after planting, you must separate the sucker. A Palm tree can produce 10-25 offshoots throughout its productive life. It is a slow multiplication way that produces great crop yields. 
  • Seeds: Farmers avoid using this propagation method because the fruits are of poor quality. More than half of the Dates produce males that cannot be used for future multiplication. 
  • Tissue culture: This method encourages rapid multiplication of the Palm. 

Date Palm cultivation conditions in the USA

Palms can absorb a lot of water. Palms can withstand very cold weather and are known to survive in freezing temperatures. Palms are usually free of insects and parasites but can be attacked from time to time by fungi and scale insects. Palm cultivation was very labor-intensive and continues to be labor-intensive and dangerous. Large holes measuring eight feet deep and eight feet square were dug before planting.

Most of the holes were drilled on hard materials, including limestone. The holes were then filled with about five feet of compost and topsoil, and the rest was slowly filled around the newly planted Palm trees. The Palm was below ground level but had better water content and protection from hot winds and sun.

In many American farms, pre-harvest Dates are made by cutting the amount of fruit on each cluster to allow air to circulate and the Date to ripen more evenly. It means that the history of cultivation and harvesting on American farms will inevitably cost more and will inevitably cost more. Imported Dates are generally not as good as American-grown Dates because of the more labor-intensive farming techniques used on USA farms, but this is not always the case.

Water requirement for Dates farming in the USA

The Date Palm tolerates drought, especially once it is established. However, it must also have moisture during its flowering and fruiting season to produce a healthy crop. Young trees will also need more water than mature trees. Please do not allow the soil to dry completely, but always keep it from getting wet. 

Planting tips for Date Palms in California 

It can grow in many different regions, but for a Palm to bear quality fruit, it is necessary to have a climate with very little rainfall and a warm climate. In addition, the Palm requires a large amount of water. In many American fields, the fruit of the Palm tree is protected from possible rain, birds, and insects by placing a paraffined paper bag around the Palm cluster. It was done because of the ease with which rain can ruin Dates.

In case you missed it: Dates Farming Project Report, Cost, Profit Guide

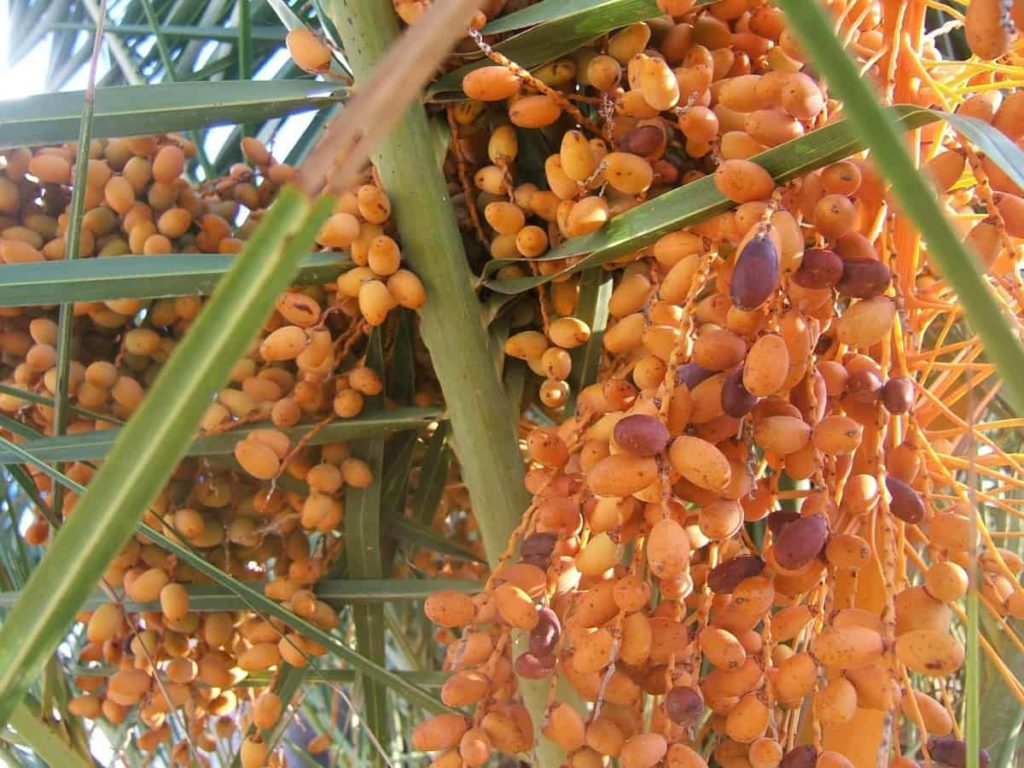
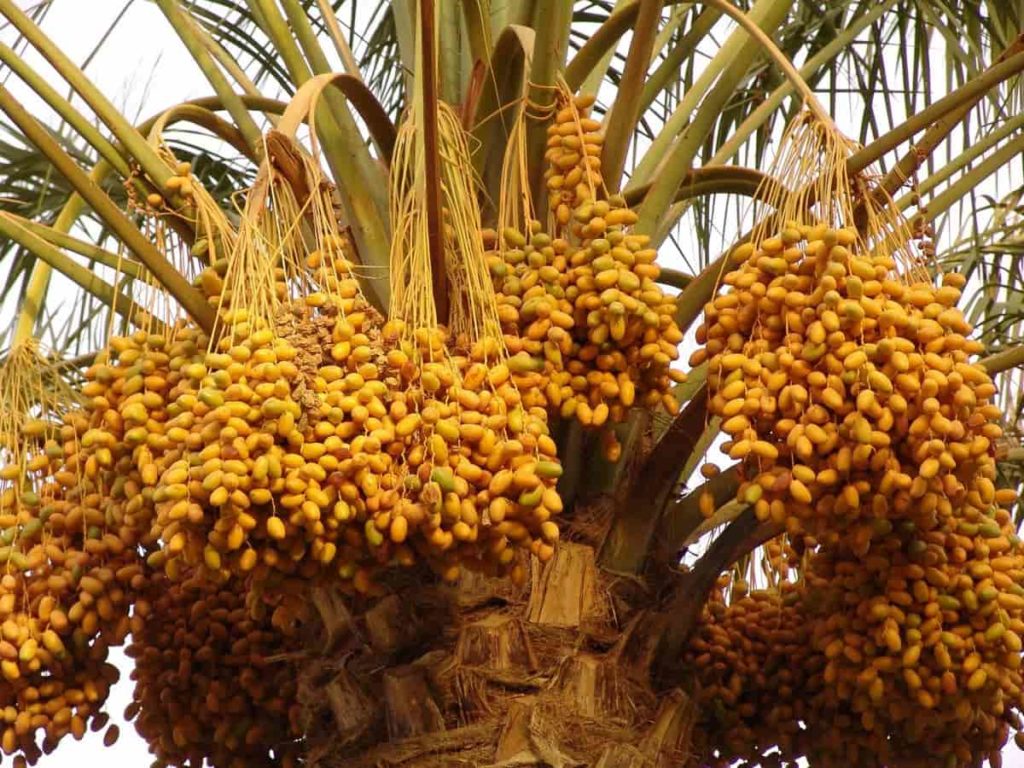
Dates Harvest
Image Source

There is a hole around the wrapping to allow air to circulate inside the wrapping so that the Palms can ripen properly. In California Palm farms, a bell-shaped paper sheet is placed around the fruit. Almost all Palm farms in California use this technique to preserve history. Date Palms in the United States are the offspring of these original eleven mediocre Palm branches.

Over the past few decades, the amazing Palm has been planted extensively from the coasts of Southern California to the deserts across the state along the California-Arizona and Nevada borders as landscape Palms and Palm trees. Date Palms are also grown in many other US states, including Texas, Louisiana, Florida, Arizona, and Nevada. Many California homeowners are planting Palms in their yards for the annual harvest of home-grown Dates.

Date Palms are also being planted on a large scale today to appeal to their tropical landscape. These Palms have become a very popular choice for both residential and commercial building landscape designs. Palms grow well in most parts of Southern California and even further north in some parts of the state. Dates are often used in landscaping because, once ripe, they do not produce an annual crop that can sometimes attract insects.

Three main palms commonly grown in California are the Zahidi Date Palm, the Medjool Date Palm, and the Deglet Noor Date Palm. Another type of Palm that is also very desirable for its Palm and landscape is the Halawi Palm, which is even larger than the Medjool Palm. Medjool Dates in California like full sun in summer and lots of water.

They are very drought and salt-tolerant; once established, they can live long without water. Adult Date Palms can withstand temperatures falling from freezing to several degrees for a short period. To produce Dates, Date Palms need a lot of heat in summer and a little moisture, sun, and air. To get a large Palm crop in the summer, Date Palms also need frequent irrigation. 

Pruning for Date Palm tree 

Palm cultivation requires pruning to maintain a sufficient number of green leaves for optimal growth and harvesting. Scientists predict that the tree should have 75-100 leaves at the impact stage. No pruning is required for the first 4-5 years as only 20 leaves emerge annually. To improve the fruit quality, it is important to maintain a proper proportion of leaf clusters. The moisture is high when the ratio is high, leading to blacknose disease in the Palm. 

Pollination in Dates farming 

Successful Date Palm farming requires artificial pollination to ensure good pollination. In places where labor is relatively expensive, pollination is mechanized. Mechanized pollination reduces the number of male Palms required for pollination. In modern commercial Palm orchards with mechanized pollination, the ratio of males/to females is usually about 40 females per male Palm.

The most common pollination technique in cheap labor areas is to cut the male flower wires with a freshly opened male spatula and place two to three in the longitudinal direction and the inverted position, followed by the female flower wires. Place between pollen has been shaken on female flowers.

Pests and diseases problems and their control in Dates farming

Since most Palms grow in hot, dry areas, major pest problems are rare. Some examples include scale, which affects leaves, fruit stalks, or roots. Heavy infections can completely cover leaf surfaces and prevent growth. Carob moths lay eggs on the Palms, and the larvae bore into the fruit, while other types of moths are found in the Palms that cause damage.

In case you missed it: Frequently Asked Questions About Dates Farming (FAQs)

Dates Farm
Image Source

Beetles feed on leaves and fruit stalks, affect growth, and can kill the Palm, while termites can eat roots and make their way through branches, killing them, and stems can tunnel through, and weaken the Palms so that they eventually fall off. Other insects can include mites, mealybugs, Palm weevils, and worms. Black scorch is evidenced by black leaves and will stop the growth and cause rot in the stems and buds.

Diplodia forms yellow-brown lines on leaves and can weaken and kill new, young leaves. Leaf spot also affects the leaves, which can halve yield and age. Different types of Fusarium can cause leaf wilting and other diseases. Root rot disease is responsible for the premature death of Palm trees, which stops their growth.

Lethal yellowing is a pathogen is a common disease of coconut trees, but in Date Palms, the brown ones become thin with brownish brown and soft rot, eventually falling off the tree. Heavy rains or excessive moisture can cause fungal growth, although uncommon. Other diseases may include blight and white rot. 

How to take care of Date Palm

After planting Palm trees, you will want to take good care of the Date Palm trees. In addition to irrigation, Palm trees need good nutrition and pest and disease control. Manure makes an excellent fertilizer for Date Palm growth in the early spring season. Keep an eye on pests and disease problems and deal with them as soon as they are born. Once the Palm trees are planted, you rarely need to water them. Date Palms prefer dry soil, and excess moisture can prevent growth. 

Harvesting Tips for Date Palms

Generally, Dates ripen in six to seven months and are harvested from September to December. Palm harvesters either climb up the stairs, pick up the fruit by hand with mechanical lifts, or cut the ripe clusters into containers that shake the fruit vertically.

Yield 

Normally, in 5- to 8-year-old Palms, the first crop will be 17.5 to 22 pounds (8-10 kg) per Palm; at 13 years old, 132 to 176 pounds (60-80 kg). Some improved crops at higher densities have yielded more than 220 pounds (100 kg) per year. In California, Daglet Noor can produce 4.5 to 7 tons per acre (11-17 tons per acre). 

In case you missed it: Organic Dates Farming, And Cultivation Practices

Dates Tree
Image Source

Frequently Asked Questions about Dates farming (FAQ)

Will you grow Dates in the United States? 

Southern California produces the most Palm oil in the United States, followed by Arizona. Other states, such as Florida, Nevada, South Utah, and Texas, also grow Palms on a much smaller scale. 

Where are Medjool Palms grown in the United States? 

In the United States, Palms are grown in southern California, southwestern Arizona, and around Las Vegas, Nevada. The Date Palm is grown in parts of Mexico and South America. 

Can Dates grow in Florida? 

Many different species of Palms are planted in fields all over South Florida just for their beauty. Some species are Canary Island Palms, small Palms, and Senegal Date Palms. 

Can I grow Dates in California? 

Palm Palms grow well in most parts of Southern California and even further north in some parts of the state. Male Palms are often used in landscaping because once matured, they do not produce an annual Palm crop which can sometimes attract insects. 

Which soil is good for Palm? 

Date Palm trees tolerate the salinity of the earth. For best growth and high fruit production, sandy loam soil with good moisture retention, ventilation, and proper drainage is preferred. Calcium carbonate soils should be avoided. 

Top 16 Steps/Ways to Boost Broccoli Yield: How to Increase Production, Size, and Quality

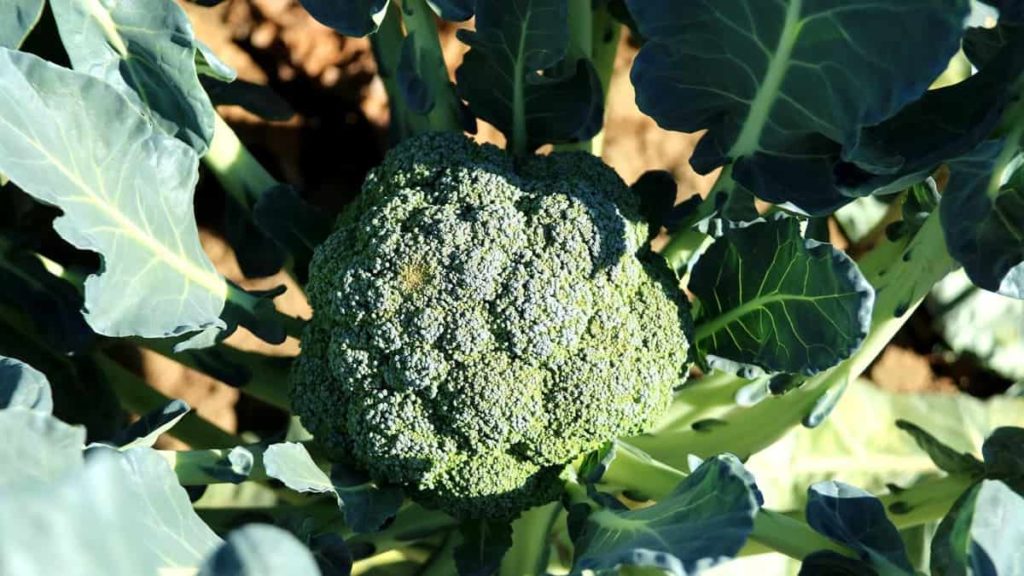
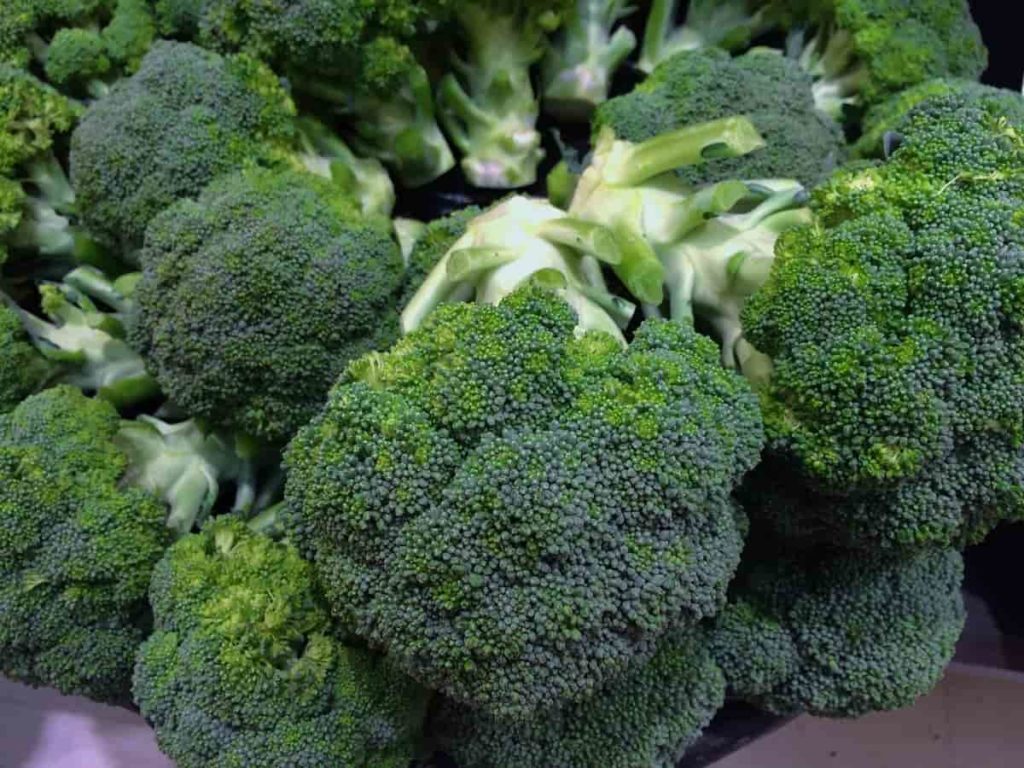
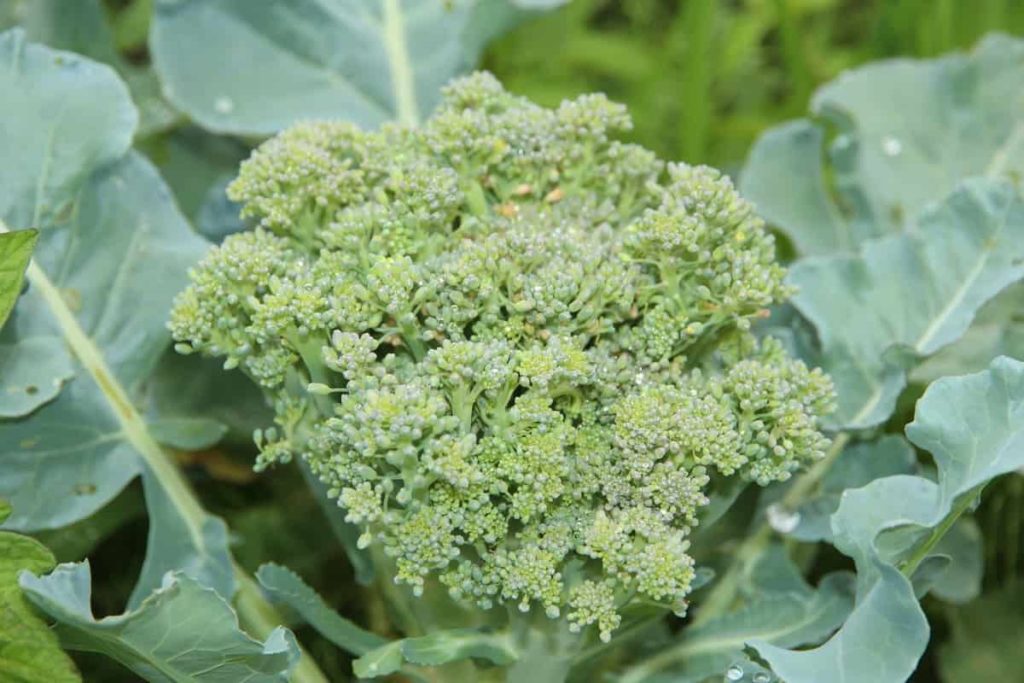
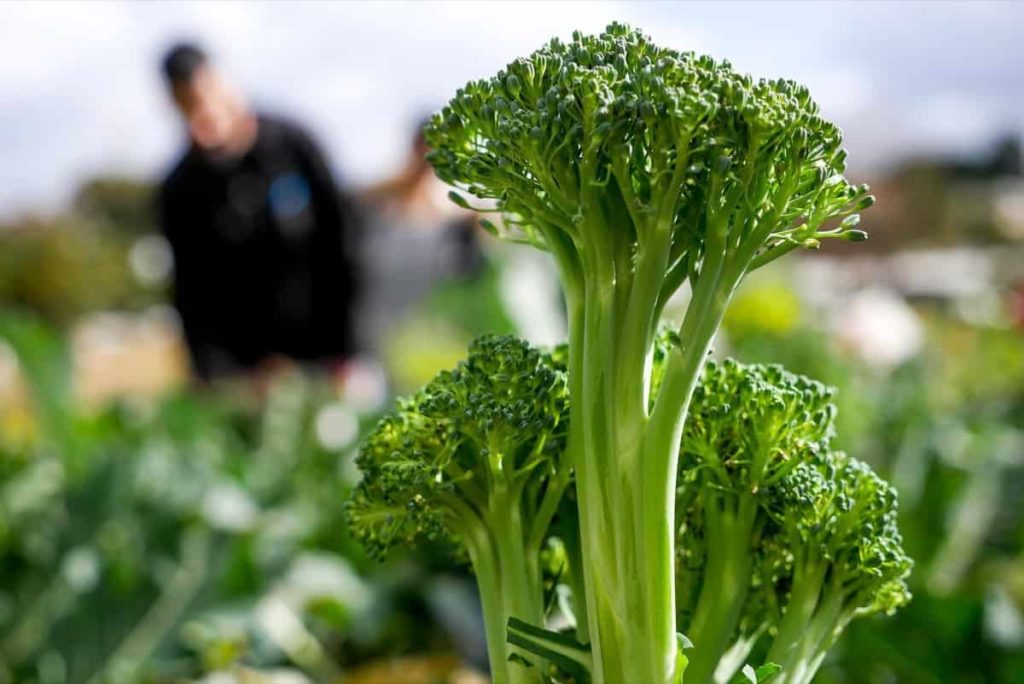
Broccoli is a delicious member of the Brassica family and is packed with healthy vitamins. It requires very little care throughout the growing season. Broccoli can be grown twice a year, in late spring and autumn. Broccoli is a cold-season vegetable. Therefore, it should be applied in the year’s colder months for best results. 

Steps/Ways to Boost Broccoli Yield
Image Source

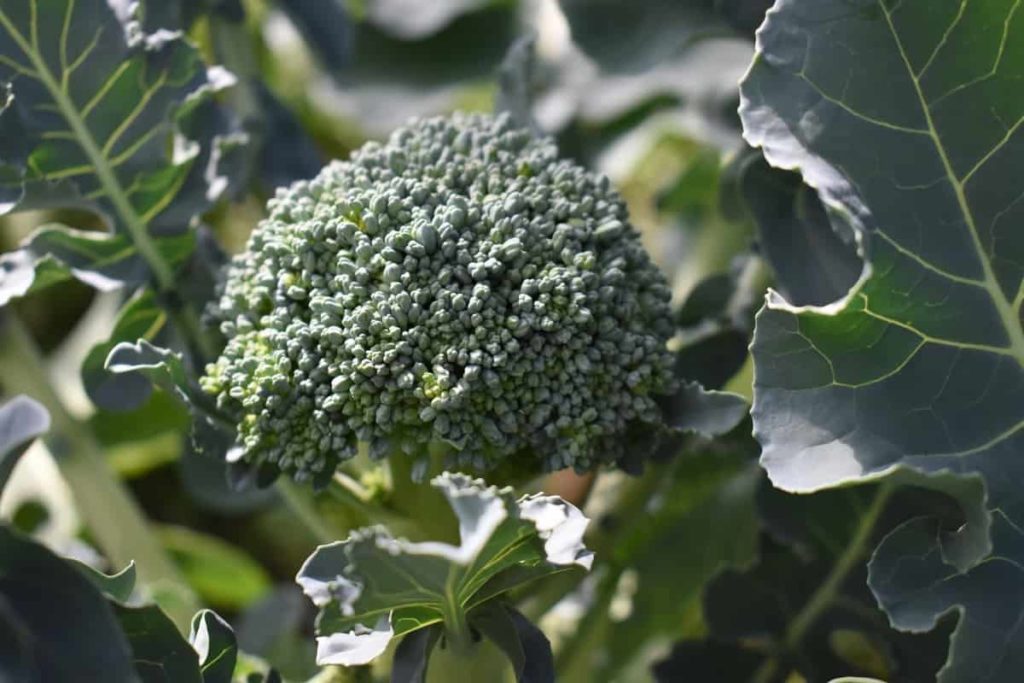
The growth of the Broccoli plant will be affected by the high temperatures of the summer months. Broccoli is an annual herbaceous or biennial herb grown for its flower heads and used as a vegetable. The Broccoli plant has a dark green stalk, or stem, which gives rise to thick, leathery, long leaves ranging from gray to blue to green. The plant produces many large, branched green flower heads covered with white or yellow flowers. Here are some common tips and steps most people use to get more Broccoli yield. 

Top 16 steps/ways to boost Broccoli yield

Step 1) Select high yielding Broccoli varieties

Some high-yielding varieties are Calabrese, Black Broccoli, Green Goliath, Purple Cap Broccoli, White Sprouted Broccoli, Palam Samridhi, Punjab Broccoli-1, Roylegreen, Evergreen, Danube, Yugren, Salinas Pilgrim, Green Mountain, and Central, Premium Crop, Premium Pusa Broccoli. Choose a variety of Broccoli that suits your climate;

  • Imperial: Grows best in hot weather. Growth slows down as the temperature cools. 
  • Green Magic: It tolerates hot temperatures; A small plant with smooth heads. 
  • Calabrese: Italian heritage with a large head and many side shoots. This variety has large heads and performs well with autumn planting.
  • Belstar: A heat-tolerant variety with many sides shoots that grow well in mild winters. 
  • Green Magic: This type is heat tolerant. 
  • Green Goliath: It has good heat tolerance and very large heads. 
  • Flash: This type is known for its relatively fast growth rate. 

Step 2) Land preparation for Broccoli growth

The first basic thing every Broccoli grower should know to grow Broccoli is to start preparing the land a few weeks before showing the seeds. All Broccoli growers remove all weeds from the field, plowing twice to three times to improve soil aeration and drainage. It is essential because we can grow Broccoli as an annual plant indoors and outdoors. If you plan to farm outside, this can be done either in early spring or fall.

If you plant them in the spring, they will be ready for harvest in the summer. On the other hand, planting in the fall will make Broccoli ready for harvest in the winter season. Choose a land with full sunshine as lack of sunlight can cause many disorders in Broccoli, such as thin-leggy plants and sub-heads. To increase soil fertility, combine soil with basal fertilization with organic-rich compost and crop boosters. 

In case you missed it: Growing Broccoli in Greenhouse – Planting, Farming

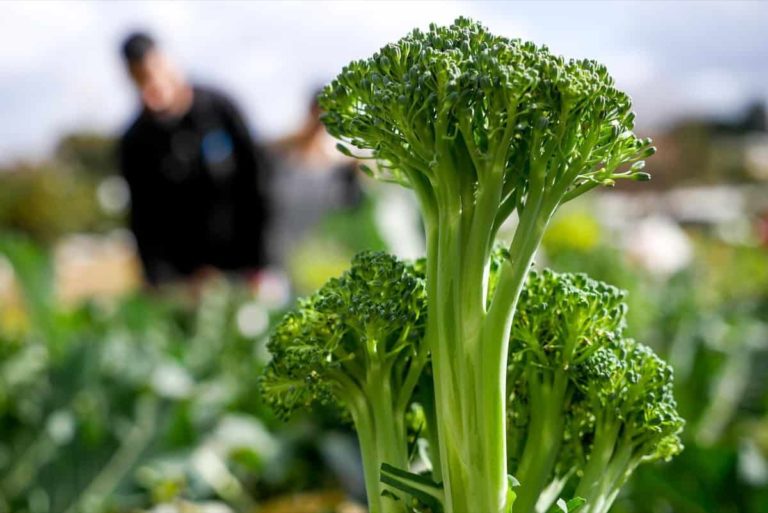
Broccoli
Image Source

Because Broccoli is a cold-season crop, it is usually planted in the spring. It would help if you started planting when the soil temperature reaches at least 10°C and the possibility of hard frosts passing in your area. Flower heads (edible part of Broccoli) thrive against ambient temperature. In the summer heat, Broccoli heads ripen in July faster than heads ripened in cold spring (4-6 days). The Broccoli heads should be closed and hard (no yellow petals are visible) to be considered good quality. 

Step 3) Plant in rich, tight soil for best growth

Broccoli needs a lot of nutrients, so be generous with compost and balanced organic fertilizer when preparing the planting space. Large Broccoli plants flutter in the wind, but only when firmly anchored in their favorite soil type, a soil-based loom with a dense, almost neutral pH. It can grow in various soils, but clay loam and sandy loom soils are best for Broccoli cultivation. Most farmers use slightly acidic soils for growing Broccoli, which has a pH range of 6 to 7.

It would not recommend choosing alkaline soils because some soil conditions can cause root cancer in plants, affecting plant growth and productivity. Also, Club Root is caused by a pathogen called Plasmodiophora brassicae. When growing plants in acidic soil, the plant can tolerate soil and water with high salinity levels. Farmers and many agronomists recommend using pre-planted fertilizers for the proper growth and development of plants, such as well-decomposed organic fertilizers or slow-release fertilizers.

After preparing the field, made rows 70-80 cm (27.5-31.5 inches) apart. Make sure the soil is well-drained and very fertile. If your soil test shows that you have poor quality soil, or if your soil drainage is very poor, there are several things you can do to prepare your garden for planting Broccoli: 

  • If your soil is flooded, consider making a garden box to lift your soil off the ground. If possible, use cedar wood to make your planter box, as it does not rot when exposed to water. 
  • Add up to four inches of solid fertilizer to your soil to increase soil fertility. If soil is in poor condition, add organic fertilizers with high nitrogen to enrich the soil. 
  • Organic fertilizers such as alfalfa, cottonseed meal, and manure are good choices for Broccoli.

In case you missed it: Organic Broccoli Cultivation, and Growing Practices

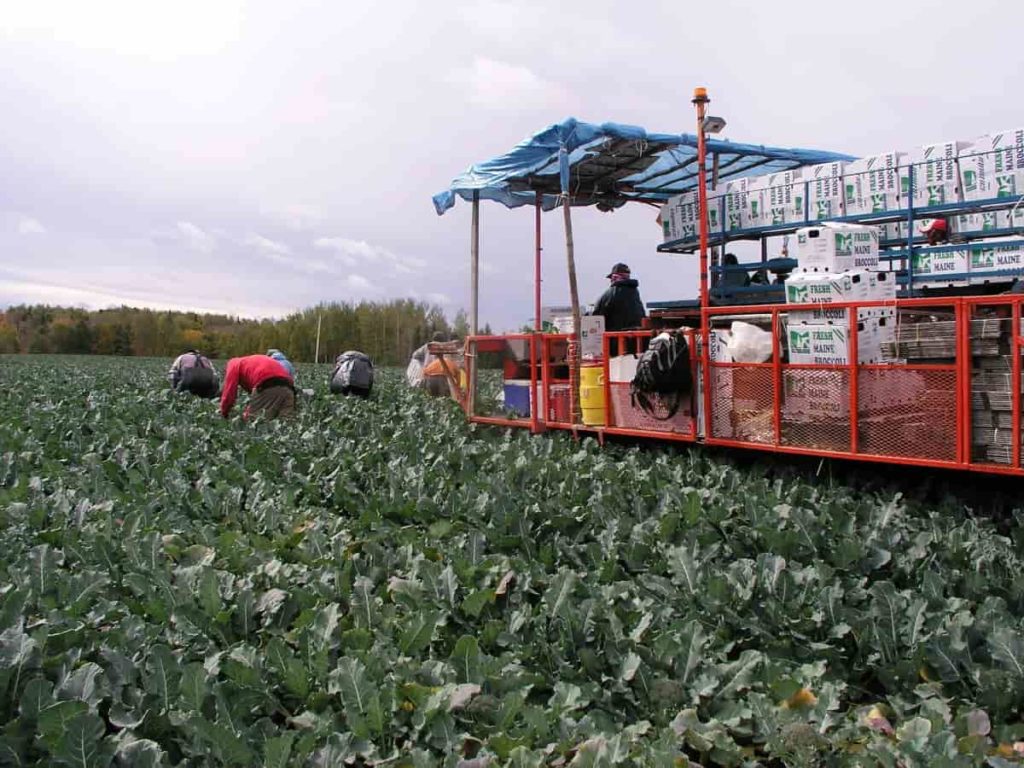
Broccoli Harvesting Machine
Image Source

Step 4) Broccoli seed germination tips for better yield

Broccoli seeds usually germinate in 10 to 14 days. This germination period is measured from the initial planting to forming the first set of real leaves rather than radical. Broccoli seeds can be germinated outdoors or started indoors and transplanted after they have grown. 

Step 5) Water management to improve crop yield and quality

Drip irrigation is very beneficial for Broccoli crops. It improves crop yield and quality. Depending on the weather conditions, light and frequent irrigation should be done after 10-15 days intervals, and soil moisture should be maintained around the roots. 

Step 6) Fertilizer management for better growth

Before fertilizing the Broccoli crop, the soil should be analyzed, and then the amount of fertilizer should be determined. Before planting, add plenty of compost, blood feed, or cotton seed feed to the soil. Consider watering with fish emulsions or other organic fertilizers every three to four weeks during the growing season. 

It usually needs 150 kg nitrogen, 100 kg phosphorus, and 170 kg potassium per hectare. At the time of transplantation, 120 kg of nitrogen, 80 kg of phosphorus, and 60 kg of potash should be added. Then, use the remaining half nitrogen in two divided doses about 30 and 45 days after transplantation. Provide micronutrients as required by the crop. The Broccoli plant has a congenital deficiency, so if it appears in the field, apply boron with foliar spray or water fertilizer.

Firstly, you want to keep in mind the soil condition of the field through semi-annual or annual soil testing before using any method of fertilizer application. No two fields are alike. No one can advise you on fertilizer application methods without considering your soil test data, tissue analysis, and crop history of your field. However, we will list many farmers’ most common fertilization schemes. In most cases, Broccoli requires heavy fertilizer to thrive and produce more than one head per plant. 

In case you missed it: Broccoli Farming in Polyhouse for Profit – A Full Guide

Broccoli Plant
Image Source

Step 7) Weed management to get more production

Weed control in the Broccoli plant can be achieved with herbicides, mechanical control, and a good crop rotation system. Broccoli competes well with weeds but should be kept free of weeds until the plants have already reached the pre-heading stage. Many pre-transplant and post-emergency herbicides are available for Broccoli, depending on the problem and the Broccoli’s growth stage.

If the level of infection is mild, cultivation can be used to reduce weed problems. Weed management 30 days after transplanting, remove the weed. This weed competes with the crop, which is important for food, sunlight, and wind, keeping the crop free from weeds. Also, rack the soil on the bed, which helps raise the oxygen level to the root zone.

Step 8) Pest and disease management for more Broccoli production

Pests and diseases are a major potential problem in Broccoli production. Some pests in the Broccoli plant are flea beetles, cabbage loopers, imported cabbage worms, diamondback moths, and aphids that damage crops. Monitoring insect populations by traps or scouting will help you determine when you should use pesticides and how often to spray. Many diseases of Broccoli can damage the crop.

Common problems in the Broccoli plant are Black rot, bacterial head rot, blackleg, downy mildew, and Alternaria. These plant diseases can be prevented by developing a good crop rotation program and using disease-resistant varieties. Many pesticides used to produce Broccoli are limited and require a pesticide applicant’s license to purchase them.

Pesticide applicant tests are usually conducted at county extension offices, so you should contact your local office for the dates and times of these tests. When using any pesticide in your enterprise, remember to follow all label recommendations regarding application rates and personal protection equipment (PPE) requirements. Ensure that Worker Protection Standards (WPS) apply to owners and employees.

Step 9) Tips for Broccoli growing taller and flowering (Broccoli bolting)

Broccoli grows taller and begins to bloom at maturity to form seeds and complete its reproductive cycle. It also occurs in response to stress and extreme soil temperatures. Sometimes, Broccoli grows long and bolted before it has a chance to grow big. The Broccoli will grow taller and flower in response: to high soil temperature (much higher than 21°C) and low soil temperature (much below 10°C). 

In case you missed it: Growing Broccoli In Pots, Containers, Indoors Guide

Broccoli Farm
Image Source

Step 10) Tips for growing large Broccoli heads 

  • Broccoli needs well-fertilized soil to grow correctly. Broccoli plants need their place to grow well because they are a heavy feeder. 
  • Applying them too close will hinder their development. Keep a plant distance of about 3 feet between rows of Broccoli plants. The Broccoli is ready to land on your plates when they become heads. 
  • The Broccoli plant needs many nutrients to grow as a fast-growing plant. Your plant will benefit from a monthly dose of rich manure or tea compost. 
  • Like other vegetables, Broccoli needs to be well hydrated. Water the plant roots to a depth of about an inch per week. 

Step 11) Why isn’t my Broccoli blooming? 

Timing is one of the reasons why Broccoli doesn’t have a head or a small head. Broccoli likes to be kept cool. Broccoli should be planted early spring for a summer harvest and early fall. 

Step 12) Causes of small Broccoli heads

Broccoli needs constant moisture from the time of sowing to the time of harvest for easy transition from the plant stage, when the plants are growing, to the reproductive stage, when the head is formed. Irregular watering can put pressure on plants, causing them to form small, individual flowers with a bitter taste.

Step 13) Broccoli yield per hectare 

After years of experience, a good yield will be 20 tons per hectare (1 hectare = 2,47 acres = 10,000 square meters). The weight of each Broccoli plant depends on the variety and growing conditions. Broccoli farming, though demanding, can offer significant profits. 

Step 14) Why are my Broccoli plants so tall? 

Broccoli grows taller and begins to bloom at maturity to form seeds and complete its reproductive cycle. It also occurs in response to stress and extreme soil temperatures. 

Step 15) Problems and their control on the Broccoli leaves 

Yellow color spots on the upper leaf surfaces and gray powder on the underside. If there are irregular yellow-brown spots on the upper surfaces of the leaves on your plants and also gray powder or mold on the underside, it is a sign of mold on the underside. A fungus causes the disease. To prevent this problem, you want to improve air circulation and keep your garden free of plant debris. In addition, you can choose to plant resistant varieties and rotate crops. 

Pale yellow leaves – If the leaves turn pale and yellow, and if they bend, the plant may die. It is caused by the so-called “yellow cabbage” fungus Fusarium soil. It affects plants where the soil is warm and is often spread by leafhoppers. To treat this problem, remove infected plants and control the leafhoppers. Also, ensure your garden is free of weeds, as they can prevent disease. It is essential to keep the soil evenly moist but not wet. Make sure to rotate crops. 

Yellow leaves and stunted plants – This symptom shows root cyst nematodes with small shiny springs on the roots. These microscopic, insect-like animals live on a water film that wraps up dust particles. In mid-summer, solarize the soil with clean plastic and rotate the family cabbage crops to prevent this problem. 

In case you missed it: Broccoli Farming; Planting; Care; Harvesting – A Full Guide

Broccoli Farming
Image Source

Deformed leaves with white or yellow spots – This could signify a Harlequin bug or a stink bug. The symptoms are black, with bright red, yellow, or orange color markings. Harlequin worms are insects that suck liquid from plant tissues, causing yellow and white blotches. You can handpick and destroy insects and eggs. You should keep the garden free of weeds and crop residues, as these are where these insects grow. Stink bugs are green shield-shaped insects that eat fruit. You should remove weeds and garden debris, so they do not attack your plants.

Step 16) Broccoli harvesting tips for more production

Harvest Broccoli in the morning. Cut the Broccoli before it heats up, when the buds are firm, just before the scalp swells. Most varieties of Broccoli are ready for harvest when their heads reach the size of a large fist. If you wait for too long, the buds will open. You can still eat the stalks, but they will be harder. 

The best harvesting time for Broccoli is in the morning, as the head and stalks will be the strongest. Cut about 6 inches of stalks along the heads. Make an angled cut so that water does not accumulate on the cut surface and any side shoots still growing rot. 

The Broccoli is ready to be harvested when the flowers are tightly closed in the middle but begin to loosen slightly around the edges. If the buds start to turn yellow, prune immediately. After that, cut the stem at an angle to prevent rot. Sometimes, the plants produce another head, so keep watering after harvesting. Broccoli heads are usually larger in fall than in the spring crop.

How to Start Organic Farming in New Zealand: A Step-By-Step Production Guide for Beginners

Organic farming produces crops or meat without synthetic chemicals or pesticides to ensure that these foods do not contain harmful residues. The skills and techniques developed in vegetable gardens and orchards began to be applied to large commercial enterprises. Organic production refers to products made without genetic modification (GMO), routine use of synthetic pesticides or herbicides, fair treatment of animals, and the unification and empowerment of rural communities.

How to Start Organic Farming in New Zealand
Image Source

Organic production is the only sustainable option to benefit yourself, your environment, and future generations. Organic producers in New Zealand who want to export their products must comply with national or international standards for their market. Let’s check out more information about how to start organic farming in New Zealand below.

How to start organic farming in New Zealand

Methods of organic farming in New Zealand

  • Compost and animal manure are added to the soil as fertilizer. 
  • Non-chemical sprays, including boiling water, are used to kill weeds. 
  • Some biological methods are used to control pests and diseases (for example, to kill insect predators). 
  • Stocks are grazed in ways that make them less susceptible to internal parasites. 

Organic farmers start by focusing on creating healthy soil. It forms the basis of strong, naturally healthy plants and animals and healthy food. Organic foods consistently contain high levels of healthy antioxidants. Organic milk also has a better health profile than non-organic milk. Organic production benefits our ecosystem in many important ways. Organic farms are less polluting, contributing to biodiversity while protecting the health of our waterways.

Well-organized organic soil can also store large amounts of carbon, stabilize climate and make the planet habitable for future generations. Organics also support strong economies. The organic market in New Zealand and around the world is growing yearly. New Zealand’s organic producers are taking advantage of this impressive trend as more and more consumers are looking for healthy, safe food, beverages, and personal care products. 

Certification under organic farming in New Zealand

Organic certification usually involves a farmer who avoids using artificial sprays, antibiotics, and pesticides and applies crop rotation, specific soil management, and animal husbandry practices. It is important to have good records for this process. Although all commercial producers in New Zealand are subject to requirements under the Fair-Trading Act, which covers misleading behavior, there is no specific legislation in New Zealand regulating organic certification, but several, including Demeter International, IFOAM, and BioGro. 

In case you missed it: Dairy Farming in New Zealand: How to Start, Breeds, A Step-By-Step Guide for Beginners

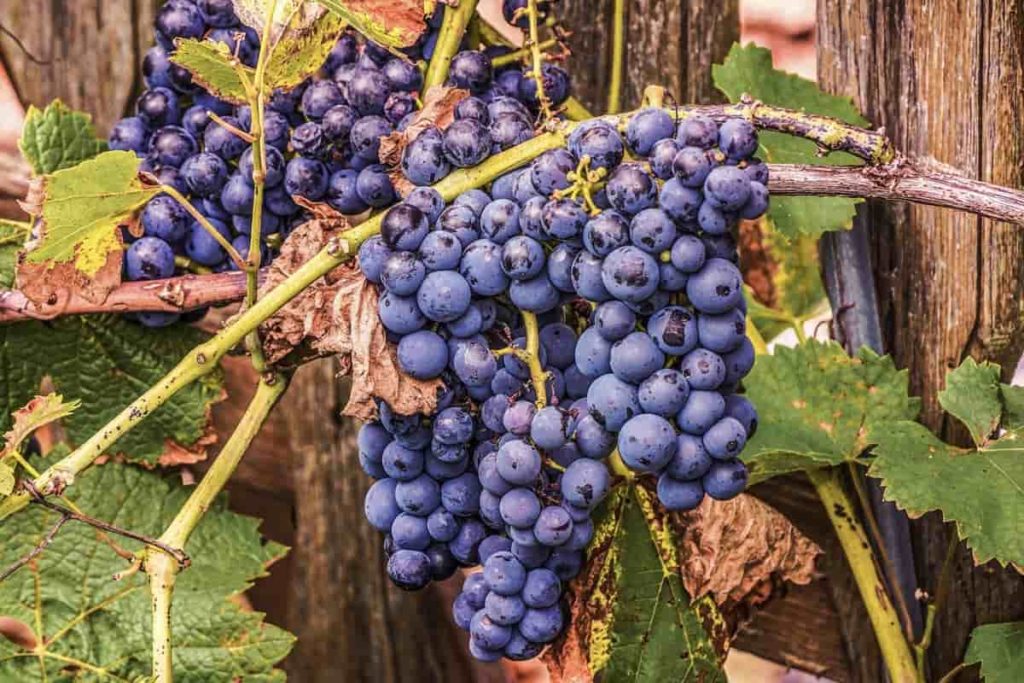
Grape Farming
Image Source

Organic certification standards mustn’t be food safety standards. Organic products must meet the same food safety standards as all foods for sale in New Zealand. Organics Aotearoa New Zealand’s strategy was to bring New Zealand production in line with the global average growth rate, increasing exports, converting more farms to organic produce, and increasing the volume generated by existing organic farms.

The department produces products worth $ 623 million from approximately 86,000 hectares of certified organic land, while approximately 6,000 hectares of land were in the process of organic conversion, which took three years. The conversion will increase the number of organic producers by 54%. 

Organic certifiers in New Zealand 

To achieve its goals, OFNZ provides an organic certification system for producers supplying the New Zealand market. There are currently five organic certifiers in New Zealand. For organic products grown and manufactured in New Zealand, find one of these logos as a guarantee of organic certification:

  • OrganicFarmNZ certification is designed to be low-cost, educational, and supportive for small farmers. Proceeds from the certification process help educate and encourage more people to adopt organic principles in horticulture and farming. OrganicFarmNZ supports local organic food production. It is food grown by the locals for the locals. OrganicFarmNZ provides low-cost organic certification aimed at small producers that sell only in the local New Zealand market
  • BioGro has been an important certifier of Organic farming. The goal is to simplify organic certification through innovation that allows producers to display NZ’s most trusted organic logo, allowing consumers to choose a truly organic product. Serve over 860 certified organic producers with a team of organic experts who are committed to helping your business achieve organic certification through our strict organic standards. BioGro provides organic certification for export and local markets.
  • Demeter provides biodynamic certification.
  • AsureQuality provides organic certification for export and the domestic market.
  • Hua Parakora is the world’s first indigenous organic certification.

Types of organic production in New Zealand

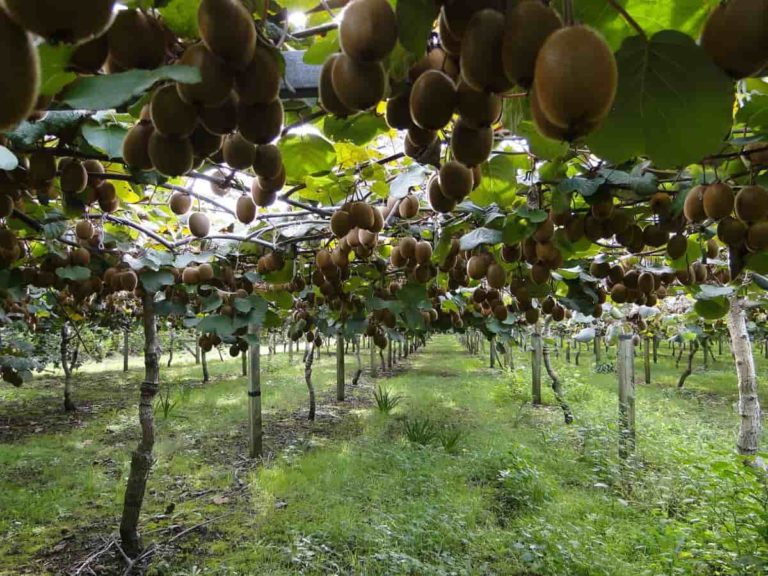
Corn and Peas are the major organic crops in New Zealand. Kiwi fruit is the most popular organic fruit. It is challenging to grow apples organically because it is difficult to control insects and black spot fungus without spraying. Organic dairy produces milk, yogurt, and cheese. A small amount of organic meat is prepared, and children’s clothes and blankets are made from organic wool. 

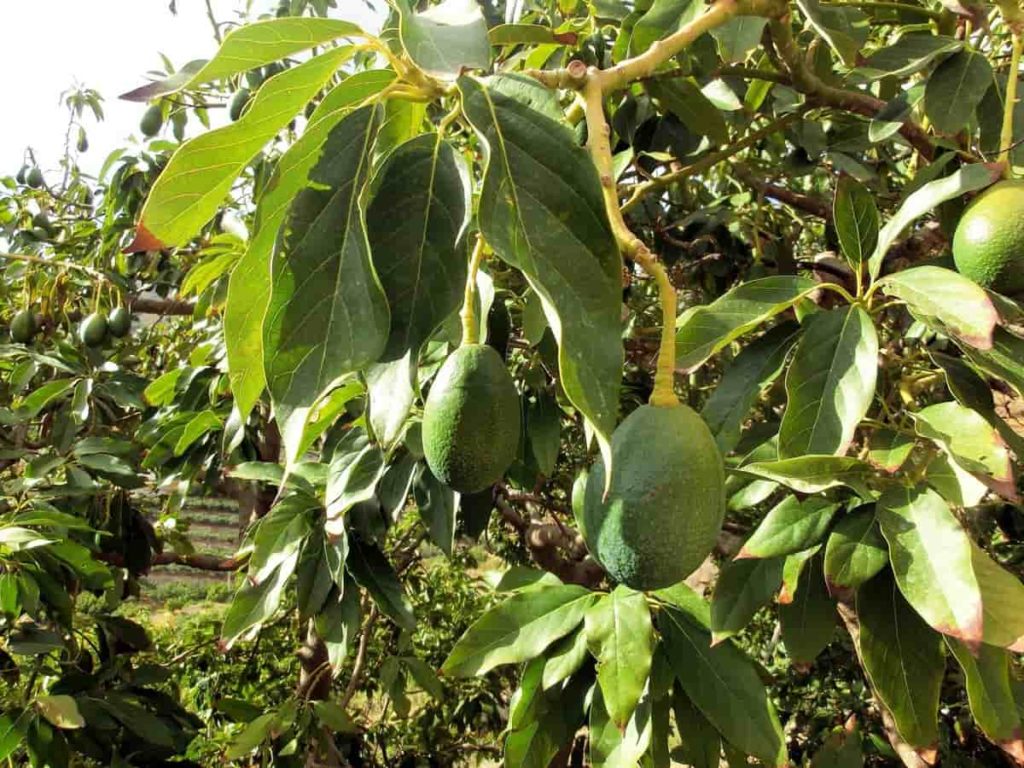
Most horticultural crops are in constant demand in the local market and some in the export market. These crops include fresh and processed Vegetables, Grains, Pulses, Avocados, Berries, and other fruits and nuts. Other areas of development include organic wine, juice, honey, seafood, and cosmetics. 

Organic farming practices in New Zealand

Soil Health

Healthy soil is the main foundation of every organic system and is the cornerstone of organic farming methods. In general, every handful of dynamic organic soil contains billions of microorganisms. These creatures support the health of plants and animals and are silent heroes of every organic farm. Soil management in organic farming can include many techniques to support soil biology, increase fertility and increase organic matter.

Some important organic methods include cover cropping, composting, crop rotation, and grazing management. They also permanently release nutrients to plants, prevent erosion, and host a strong population of beneficial microorganisms. Healthy soil is essential for sustainable crop production and support for our ecosystem. 

Cover crops

Covering crops offers an easy, cost-effective way to use the power of plants to create soil fertility. New Zealand’s organic production system grows core crops from dairy farms to vineyards. The core crop can be any crop – such as cereals, beans, or flowering herbs – whose main purpose is to improve farm health. After growing a covering crop, the farmer can dig it into the soil to improve soil nutrition or crush it as mulch to protect the soil surface. 

In case you missed it: Poultry Farming in New Zealand: Breeds, How to Start

Greenhouse Setup
Image Source
Crop rotation

Biodiversity is the basis of a dynamic organic farm. Organic annual crop farmers practice crop rotation, arranging different crops in the same place over time. Crop rotation helps maintain soil health, as each plant extracts different nutrients from the soil. It also prevents crop-specific pests and diseases from accumulating in one place. 

Compost

Modern agriculture sector uses compost and mulch on annual crops, perennials, orchards, vineyards, and grasslands. Compost improves soil properties, provides nutrients in a stable organic form, promotes plant growth and health, and conserves water. It is important in organic farming, where synthetic fertilizers are not allowed.

Compost improves soil texture, provides a wide range of plant nutrients, and adds beneficial microbes to the soil. The maximum benefits of fertilizers on soil structure (better accumulation, hole spacing, and water storage) and crop yields are usually found after many years of use. Composting is another amazing way for many New Zealand organic farmers to grow naturally.

Fertilizer piles recycle crop and livestock resources, turning farm waste into the ‘black gold’ of soil health. There are numerous benefits to adding solid compost to the soil: it introduces beneficial microorganisms, provides nutrients to plants, and improves the soil’s ability to retain water and nutrients in the future. 

Pest management

According to organic standards, insect pests can be controlled in cultural, mechanical, or physical ways. Addition or introduction of insect predators or parasites; habitat development for natural insect pests; and non-artificial controls, such as lures, traps, and repellent. 

Organic farmers can use chemical tracers to trap insects, disrupt their reproductive cycle, and monitor their population levels. Some traditional cultural methods can be used to protect the crop from pests. It includes crop rotation, intercropping, etc. Mechanical and physical control includes coverage and barriers to farming, harvesting, harvesting, mulching, and organic soil. It turns the soil between crops to include crop residues and soil modification. It also destroys herbs and disrupts insect life cycles. 

Biological pest control in the protection of plants is a method of controlling pests and diseases using other organisms that rely on predation, parasitism, herbivory, or some other natural mechanism with the interaction of active farmers. Natural enemies of terrestrial insects, known as biological control agents, are predators, parasites, and pathogens.

Agents for biological control of weeds are seed predators, herbs, and plant pathogens, while biological agents for plant diseases are antagonists. Biological agents in organic farming can be imported to places where they are not naturally occurring, or farmers can release additional natural enemies by increasing the naturally occurring population.

Number of organic farms are there in NZ

New Zealand’s organic sector, comprising 1,200 organic producers, brands, and stores, grew at an average annual rate of 6.4%.

Future of organic farming in New Zealand 

  • The continued expansion of export markets 
  • The continued increase in the number of farmers replacing organic products 
  • Food processors, distributors, retailers, and exporters are ready to handle organic production
  • Researchers researching organic farms, orchards, and horticultural solutions and strategies for organic farms, gardens, and orchards
  • Education providers involved in the organic sector

In case you missed it: Pig Farming in New Zealand: Breeds, How to Start

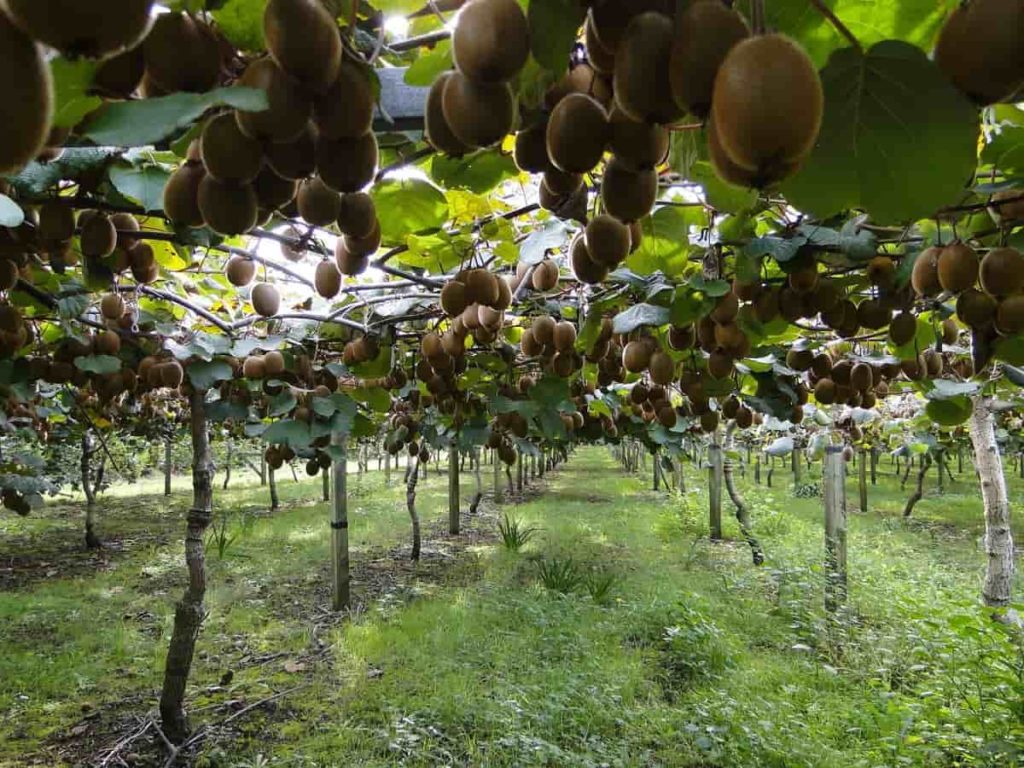
Kiwi Fruit Farming
Image Source

Requirements for organic products in New Zealand

‘Organic’ is a labeling term used for products manufactured to organic production standards, which a certification body or authority can verify. It is mainly based on minimizing the use of external inputs. For example, they are avoiding or eliminating the use of synthetic fertilizers and pesticides, antibiotics, growth promoters, genetic modification, and irradiation.

Organic handlers, processors, and retailers follow voluntary standards to maintain the integrity of organically manufactured products. Your organic operation requires “comply with depending” on the organic products market. 

Selling 
  • Meet the standard regulatory requirements for product types (e.g., dairy, honey, and meat) and 
  • Comply with the Fair-Trading Act 1986 when using the term ‘organic’ in labeling and marketing claims. 
Exporting 
  • Meet New Zealand standard regulatory requirements for product type – for example, dairy, honey, or meat 
  • Meet the requirements of the Official Organic Assurance Program (OOAP) if it is being exported under OOAP
  • Meet the export market requirements of the exporting country, which is not covered under OOAP. 
Importing 

All imported organic products must meet New Zealand legal requirements for imported food. Additional requirements depend on the imported organic product type and its final use. 

New Zealand standards for organic production 

New Zealand standards were developed with NZFSA staff and 23 other organizations interested in organic matter. It aims to “find the minimum production requirements, processing, and organic products labeling, that includes plant and plant products, and animal and animal products.”

Although the organic standard is relatively comprehensive, it has not been updated since its publication. Many organizations, including the New Zealand Qualification Authority and the Commerce Commission, use it as a reference document. However, the standard must be updated to apply export certification in context.

Difference between organic and certified organic

Organic products have been certified, checked, and audited by reputable certification agencies such as BioGro. In New Zealand, you can’t count on an organic product to be authentic unless it has an organic certification logo like the BioGro logo on its packaging.

It is essential to be wary of imitations – products that say they are organic and sustainable but can go a long way. New Zealand is currently an unregulated organic market, which means greenwashing is common. Greenwashing is more than just marketing or promoting a more sustainable and organic product. 

The Organics Movement and Organics Advocacy Network 

Trends point to increased demand and productivity of organic food in New Zealand and overseas. In addition to the obvious benefits of market development to organic producers, it challenges the philosophical principles of organic farming and food. The organic sector’s persistent core is called the ‘Organics Movement.’ In contrast, the vast food sector extends to large retail chains and exporters that can carry organic products across a wide range of traditional foods.

In case you missed it: Goat Farming in New Zealand: Breeds, How to Start, Tips, and Ideas

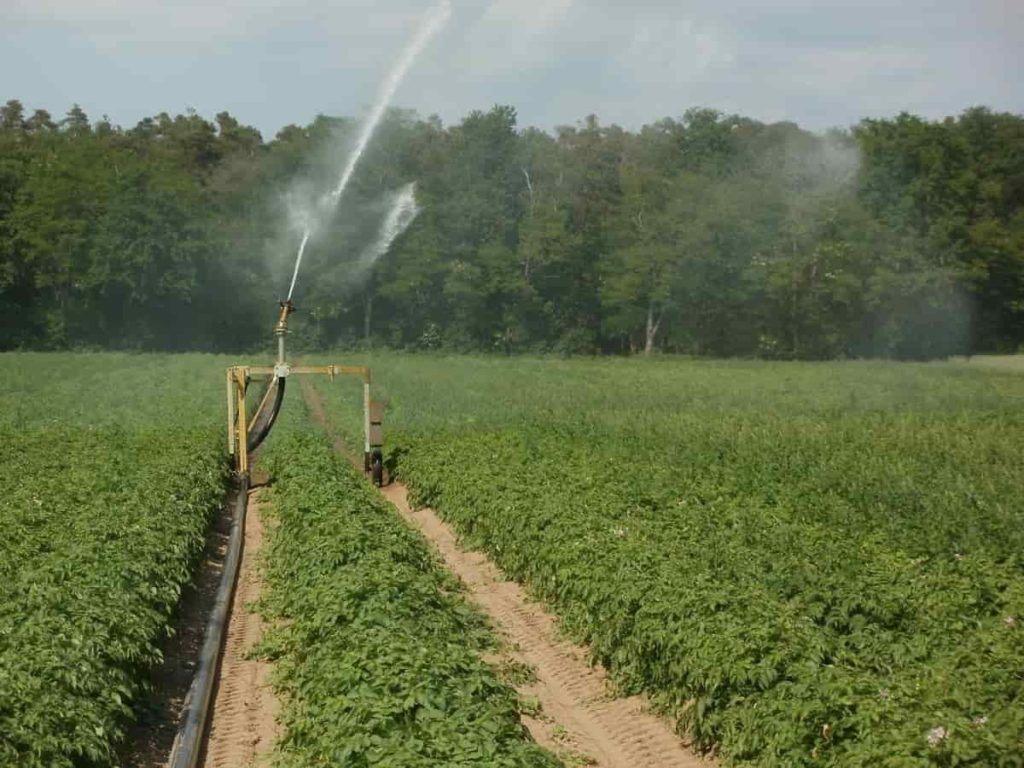
Irrigation Technique
Image Source

This broad field is called the Organics Advocacy Network. The Organics Movement is philosophically based, while the vast Organics Advocacy Network includes businesses and organizations primarily interested in the demand for premium prices for organic products in the market. The Organics movement may conflict with broader Organics Advocacy Network participants on some issues.

Although not yet particularly clear in New Zealand, this is becoming a challenge in the United States and Europe, where large companies, such as Walmart in the United States and Tesco in the United Kingdom, benefit from consumer demand picking up and offering a range of organic products in their stores.

Some in the organic movement, whose philosophical foundations include the preference for local and small-scale distribution, view it as the ‘occupation’ of the organic market by large corporations. It is viewed as the development of a natural market in response to consumer demand for products with a specific set of additional values.

New Zealand Organics sector

Organic farming is more than just ‘spray-free’ or ‘residue-free.’ Organic food is cultivated naturally without the use of synthetic pesticides or fertilizers. Organic farmers aim to produce healthy food from balanced living soil, and any processing is designed to maintain its natural goodness. Organic food production takes care of the environment. Organic farming has treated animals humanely, and rural communities have been united and empowered. 

New Zealand’s organic sector is growing rapidly. Organics has a market share of $ 280 million or 2.5% of the domestic food and beverage market, with exports adding another $480 million with a total sector value of $ 760 million. Apple is second with $67 million in receipts. Kiwi fruit ranks third with $66 million, and organic wine exports have reached $65 million. 

In case you missed it: Farming In New Zealand – Questions and Answers

Wheat Farming
Image Source

As exporters of agricultural products, New Zealand takes its reputation for safety and quality seriously – with a strong regulatory system and an internationally recognized and respected organic certifier. Most of New Zealand’s organic products are transported by highly efficient sea freight.

New Zealand has two IFOAM-approved organic certifiers, working with the Ministry of Basic Industries to verify compliance with environmental standards. Certified organic products from New Zealand are exported to major markets worldwide, including Europe, the United States, Australia, Japan, South Korea, Taiwan, China, and other Southeast Asian countries.

How to Grow Curry Leaves in the USA: From Seeds in Containers at Home, A Step-By-Step Guide for Beginners

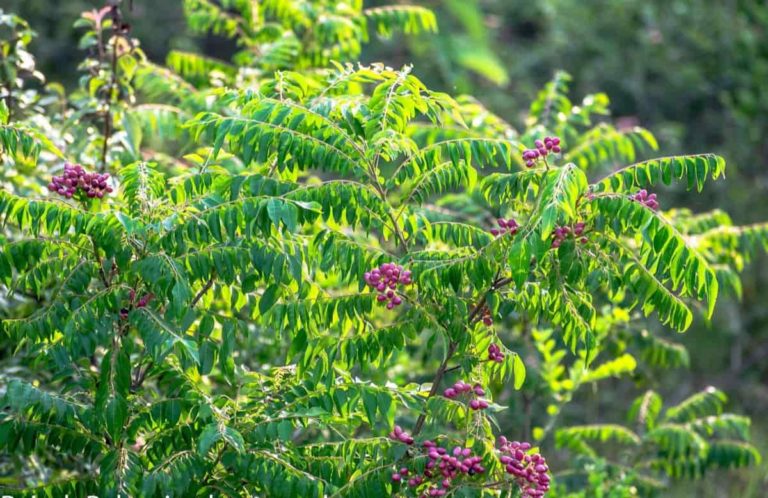
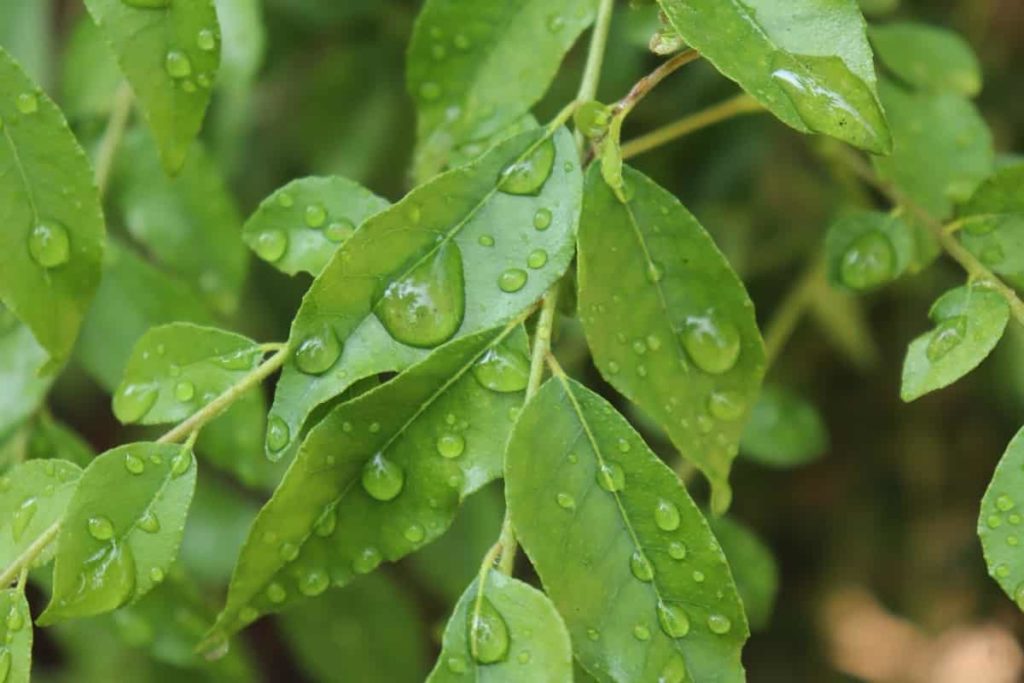
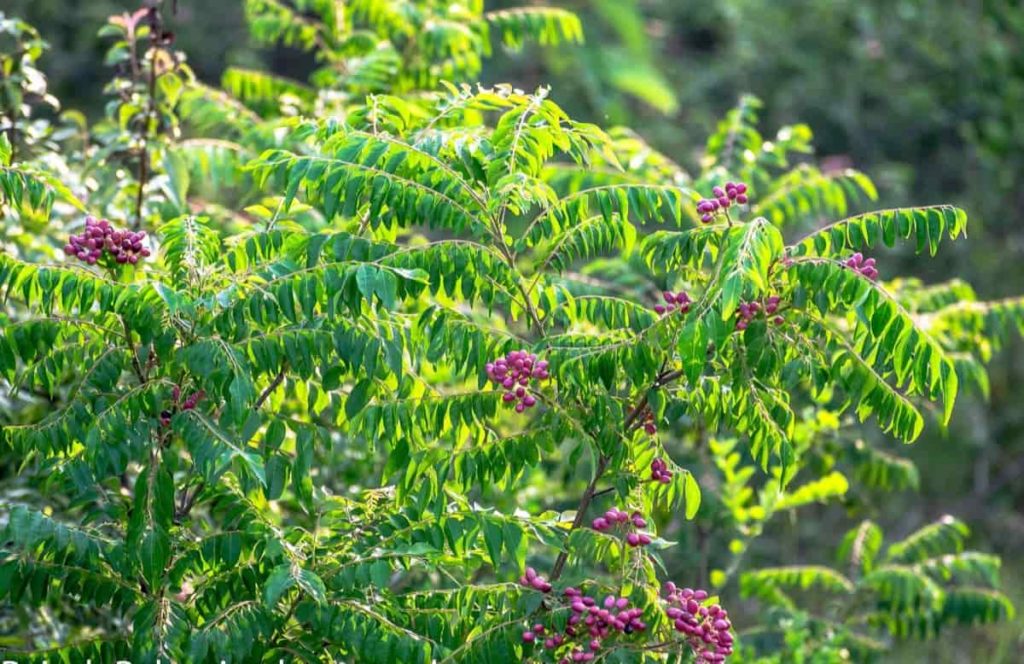
Curry Leaf is one of the most popular herbs around the world. Curry Leaves are small in size and long, slender, and oval up to a point, averaging a length of 2-4 cm and a width of 1-2 cm. The Curry Leaf plant belongs to the family Rutaceae. These leaves are very fragrant. Curry Leaves have a soft surface, but they are usually removed before serving. 

How to Grow Curry Leaves in the USA
Image Source

Curry Leaves is a unique flavor that comes from various spices. It has a beautiful, open growth pattern that makes it attractive in an ornamental garden. If it is a plant in a container, you can take it inside and keep it in a warm place. Let’s check out how to grow Curry Leaves in the USA below.

How to grow Curry Leaves in the USA

Curry Leaf varieties in the USA

In the USA, it will grow outdoors in USDA Hardiness Zones 9-11. Dwarf and miniature plants can be grown indoors if your climate is not sweet and neem-friendly. Dwarf leaves are longer which is slightly lighter in color than full-size plants. They are 12 to 24 inches long and 12 inches wide at maturity.

It is an excellent choice for growing houseplants or containers to decorate your yard, which can also be kept indoors during the winter. Suckers can spread them, and in the right conditions, they can be invasive, so planting in containers or regular pruning of suckers may be necessary. The dwarf variety can be grown year-round in 9-11 zones. 

Gamthi (miniature) varieties grow slowly, and their leaves are dense and fragrant. This variety is about six to eight inches long at maturity, and the leaves are more palatable than the larger varieties. As a dwarf variety, Gamthi grows best in Zone 9-11 or can be grown indoors in cold areas or all year round. 

In case you missed it: Curry Banana Cultivation Income (Raw Banana), and Yield

Curry Leaves
Image Source

Gamthi is smaller than the bony variety and reaches a height of 6-8 inches at full maturity. Although it does not spread quickly, it compensates by producing the most fragrant leaves of all Curry plants. Gamthi Curry plants only need full sun, well-drained soil, and light fertilizer during summer. 

Soil requirement for growing Curry Leaves in the USA 

Plant your Curry plant in well-drained soil. Soil pH between 6.0-7.0 is best for Curry Leaves plant growth. 

Best Curry Leaves planting tips for best results 

When choosing and preparing a place for your Curry plants, choose a place with full sunlight, warm conditions, and well-drained soil. Also, it is not a picker plant to provide. It does not need much water and is semi-drought tolerant. Curry Leaf plants do not need high-quality soil or depend on any specific soil pH level to survive. Stacking may be necessary if airborne plants are planted.

The Curry tree is an overall strong plant that once thrives in ideal sunny, tropical conditions. In cold weather, the Curry tree can only be grown in containers. Let her spend the summer outside and bring her indoors when the cold weather starts. Make sure you have a suitable place indoors for most winters. 

How much sunlight does a Curry plant need? 

The Curry Leaf plant grows well in about 6 to 8 hours of direct sunlight. So, where you want to plant has airflow and direct sunlight for most of the day. It should be moved to the sunny part in the hot summer months.

If the Curry Leaf plant does not get enough sunlight, it will not be able to grow properly. Without enough light, the Curry Leaf plant will not be able to produce enough food to survive. As a result, Curry Leaves may turn pale yellow or fall off the plant. In addition, the leaves lose their aroma and can be thin and pointed. 

Grow Curry Leaves from seed 

You can propagate Curry Leaf trees by planting seeds, but remember that this is not a fast process. Buy fresh, dried seeds for the best chance of the germination process. Old seeds do not grow well. The seed of the Curry plant is the original pit of the fruit, which can be peeled and cleaned, or the fruit can be sown directly into the ground without any effort. Be sure to get fresh seeds for a better success rate. 

Rub the seeds between your hands, which are berry pits, to remove the hard outer shell. If that doesn’t work, put the Curry Leaf seeds in a plastic bag and then roll a rolling pin over them. If using fresh berries, soak them for 24 hours to remove seeds from the inside. After soaking, you can gently rub the flesh and pulp around the seeds. To start the seeds indoors, sow them in one-third of an inch of soil and keep them moist.

In case you missed it: Growing Curry Leaf Plant from Cuttings, Seed (Kadi Patta)

Curry Leaves Plant
Image Source

You can help retain moisture by covering the container with plastic wrap and drilling holes, effectively creating a small greenhouse. A soil temperature of at least 20°C is required for seeds to germinate, so use a heat mat if necessary. The seed germination rate for Curry Leaf is very low, so try to plant several seeds on each tray cell to improve the chances of producing a healthy plant.

After the plants emerge, dilute them to one plant as needed. Outside, sow directly into the ground when daytime temperatures are above 18°C. Standard-sized plants should be planted at a distance of four to five feet or the same distance from any structure. Keep the soil moist until the plants appear, in about two to three weeks.

When your Curry Leaf plant is about six months old, it’s time to start harvesting. When a healthy plant forms six or more branches with several developed leaves on each, pinch or cut two of the branches from behind to encourage bush growth. The purpose is to encourage the plant to become bushy with lots of offshoots instead of spindly and tall.

Planting a Curry Leaves tree in warmer regions 

If you live in USDA Zone 9-11, grow it outside. Apply it in a sunny spot in your garden, watering regularly for the next two months. Fill in the white flowers in the first two years to appreciate healthy growth. Once fixed, it will start to grow faster. 

Planting a Curry Leaves tree in cold areas 

Gardeners below USDA Zone 9 or where the winters are harsh should grow it in a container. The best spring for planting. Please put it in a 5-gallon container and upgrade its size as the growth increases. It can tolerate mild freezing temperatures but requires a lot of care in winter; in extreme cold, it sheds its leaves, remains dormant till spring, and starts growing again. 

Field preparation and planting of Curry Leaves in the USA

The main field should be plowed repeatedly. Usually, a distance of 90 to 120 cm is maintained on both sides. One month before planting, pits of 30 x 30 x 30 cm dimensions are dug, and at the time of planting, well-decomposed farm yards are filled with topsoil and compost. Healthy seedlings are planted in the middle of the pits. Then, the pits are joined together to form long edges to facilitate easy irrigation. 

The seedlings are irrigated once every five to seven days for three years and then once every 15 days. Curry plants are generally not fertilized by farmers with inorganic sources. However, for better growth and yield, 20 kg of farmyard manure can be added to each plant in addition to 150 grams of nitrogen, 25 grams of phosphorus, and 50 grams of potash per year. 

Watering the Curry Leaves plant for better growth and yield

Curry Leaf plants do not require much water and are partially tolerant of drought conditions. Giving too much water to the Curry plant is a death sentence. Then, allow the soil to dry completely during watering. During the spring and the less warm months of the year, this plant will thrive if watered once a week.

In case you missed it: Curry Leaf Farming Project Report, Cost, Profits Guide

Curry Leaves Tree
Image Source

During the hot summer season, it may need water every day to ensure that the soil is not too dry in the heat. You will want to reduce the water given to the plant when it is cold outside, as it will be mostly dormant. With this plant, you need to ensure that the roots of the plant do not get stuck in the water. It can cause some problems that will stop its growth.

Young Curry plants are at high risk of root rot. Do not over-water the Curry Leaf plant. Visually inspect to make sure the plant needs water before each watering. Dry soil feels lighter in color, and the container feels lighter in weight. In the spring, just watering once a week is enough. If the plant is watered by rain, delay watering it until it touches the soil above and feels dry. 

Tips for growing Curry Leaves in containers 

Using pots or containers instead of gardens to grow Curry Leaves is better. Most Curry Leaf seedlings and cuttings grow fast and grow well when planted in pots. In addition, placing Curry Leaves in pots allows you to change your position to meet growth needs. Remember that you must select a deep, wide container; otherwise, you will need to transplant your herbs into larger containers as they grow.

This herb will need at least 30-gallon containers by the age of 10. Curry Leaf is a delicate aid that does not correspond to poor-quality soil. Therefore, for your seeds to grow and your plants to grow, you must use well-drained soil. It is recommended that the soil be slightly acidic. Curry Leaves need regular watering in spring and other mild seasons. Fill the container halfway with potting soil.

Remove the Curry Leaf plant from the existing container. If the plant roots grow in a circular direction, gently shake the roots. Put the plant in a new container. Fill the 1.5 to 2 inches below the edge of the container with the rest of the pot mixture and compost mixture. Gently press around the plant base to expel air bubbles trapped under the soil.

In case you missed it: Growing Curry Leaf Plants in Pots / Containers

Curry Leaves Flowering
Image Source

Sprinkle the fertilizer like Blood Meal on the top later. Mix the topsoil well. Gently water around the plant base until you see water run out through the drainage hole in the pot. Place the pot and container in a warm and sunny place. Ensure the Curry Leaf plant gets 6 to 8 hours of direct sunlight daily.

Fertilizer and pruning requirement Curry Leaves plant growth

Curry Leaves do not need a regular dose of fertilizer. Use nitrogen-rich fertilizers in a month or two to increase growth. Also, do not apply fertilizer during the dormant phase of the plant, which occurs in cold areas in winter. Regularly pruning or picking leaves is essential for the growth of fresh plants. Cut dead Leaves and branches from the Curry Leaf plant to preserve it. 

Pests and disease management in Curry Leaf plants

Although the scent of Curry Leaves repels various insects, many insects can stop the plant’s growth. These are scales, aphids, mealybugs, and psyllids. Due to its strong aroma, Curry Leaves manages to keep away many pests and diseases. It usually grows without being affected. However, some pests and diseases can bother you, depending on your climate. It is easy for your plant to become infected; you will see white, brown, or black spots on its leaves and stems. When the leaves become sticky or curly, it also means that your plant is affected. 

Curry plants are generally free of pests and diseases. The strong scent from the plant usually works well to keep away diseases and garden pests, but in some adverse weather conditions, a few problems can arise. Spraying diluted neem or gardening oil on your plants will help prevent pests and diseases. Also, if you notice bugs, spots, bite marks, or other signs of infection, use a saline shower every two weeks instead of regular watering. 

Plant dying or not growing – If your Curry plant is dying, chances are it is not getting hydration problems, pest infestations, soil problems, or too much sunlight. Curry Leaf plants are easy to care for, but if you want to revive them, you must take care of the dying plant as soon as possible.

Things like dry soil, too little light, fungal problems, or neglect quickly lose their strength and wither. Curry Leaves are due to the plant’s growth during the winter (the plant is preparing for the winter), low exposure to sunlight, or low temperatures. Other reasons would be unsuitable soil for plants, above or under water. They usually grow slowly.

Tips for growing Curry Leaf plants faster

Dissolve Epsom salt (magnesium sulfate) by one teaspoon in 1 liter of water and feed the plant when it is dry. Give Epsom salt to the plant every three months. Your plant will grow fast and very well. The Curry Leaf plant will grow green leaves throughout spring, summer, and autumn. 

In case you missed it: Curry Leaves Farming a Profitable Business (Kadi Patta)

Curry Leaves
Image Source

Tips for harvesting Curry Leaves

Since harvesting Curry Leaves encourages the growth of new leaves, you can prune the leaves whenever you want. Choose leaves from herbs and use them to add flavor to your cooking. The taste of fresh leaves is stronger than that of dried leaves. 

Do you grow Curry Leaves in California? 

The Curry Leaf tree works well in Southern California and is easy to start and maintain. It prefers a warm, sunny place.

Conclusion

Curry Leaves are a wonderful aromatic herb that is used in many dishes. It is accustomed to growing in the subtropical region, so if you live in the USA, this is a plant that will work best in vital areas from 9 to 11. The plant can still be grown there if you live outside of these regions but will need to be planted in a pot or container where it can be moved inside when it is too cold for the Curry Leaf plant. The above are the steps you can take to grow Curry Leaves in the USA.

How to Start Organic Farming in Switzerland: A Step-By-Step Guide for Beginners

Switzerland is one of the pioneers in organic farming. Organic production minimizes human environmental impact while ensuring that the agricultural system works as naturally as possible. The area under organic farming is expanding rapidly. Before the EU Regulation on Organic Farming came into force, Switzerland was undoubtedly a leader in organic farming and is still so in many areas.

How to Start Organic Farming in Switzerland
Image Source

The development of organic farming varies greatly from mountainous areas (10 to 30% of the agricultural area) to plains (about 5%). Let’s check out more information about how to start organic farming in Switzerland.

How to start organic farming in Switzerland

Is Switzerland suitable for organic agriculture? 

Organic agriculture has been growing rapidly in Switzerland for the past ten years. The area under organic farming is expanding rapidly. In terms of area, the most essential organic crops cultivated in Switzerland are vegetables, bread cereals, fodder cereals, and potatoes. The organic products of animal origin are eggs, dairy, milk, and meat, the latter being the most important group of products. Organic products are grown with an average size of about 16 hectares on private family farms. 

Organic production is based on; 

  • A farming system maintains and replenishes soil fertility without using toxic and persistent pesticides and fertilizers. 
  • Organic foods and beverages are minimally processed without artificial ingredients, preservatives, or irradiation. 
  • The use of Genetically Modified Organisms is prohibited in organic farming. “Certified Organic” means that the item is grown according to strict uniform standards certified by an independent state or private organization. 
  • Depending on the country, such products are called ‘organic,’ ‘biological,’ or ‘ecological’: to include organic products under Euromonitor definitions, to make the organic aspect part of product positioning/marketing Required. It combines organic food, bakery, confectionery, dairy, ice cream, oil and fat, ready meals, rice, sauces, dressings and spices, snack bars, soups, spreads, sweet and savory snacks, and other organic foods. 

Horticulture products under organic farming in Switzerland

The main products are Carrots, Cabbage, Beets, and Celery. The area allocated for organic greenhouse production is only 26 hectares, of which about two-thirds is used for tomato production. Another important greenhouse crop is cucumber. 

The most important vegetables suitable for organic farming in Switzerland are Aubergine, Broccoli, Carrots, Fennel, Courgette, Cucumber, Pepper, Tomato, Cherry Tomato, Celery, Lakes, Cress, Cauliflower, Radish, Brussels sprouts, Chinese Cabbage, Beetroot, Celery, Red Cabbage, White Cabbage, Green Cabbage, Large Onion.

In case you missed it: How to Start Organic Farming in Australia: A Step-By-Step Guide for Beginners

Grape Farming
Image Source

The most important fruits are Apples, Apricots, Pears, Cherries, Mixed fruit areas, Peaches, Plums, Blackberries, Strawberries, Blueberries, Raspberry, Elderberry, and Blackcurrants, Red currants, Kiwi fruit, Gooseberry.

Organic farming ordinance in Switzerland 

The organic food demand is growing rapidly in Switzerland. The Swiss Federal Organic Farming Ordinance contains state regulations regarding the production and processing of organic products in Switzerland. It sets minimum standards for organic farming and processing, storing, importing, and exporting organic products.

The processing, marketing, import, and export of organic products and storage are subject to the relevant organic inspection. Organic farm holdings consider natural cycles, keep and feed their livestock ethically, and avoid using chemically synthesized inputs and genetically modified organisms. 

Organic farming organizations in Switzerland

BIOSUISSE Switzerland 

Bio Suisse is a leading organic farming organization in Switzerland. The organic label “Bio Suisse” is distributed in Switzerland. For example, chains of organic food stores, farmer’s markets, and the largest supermarkets like Coop Naturaplan (2,500 products) and Migros Bio (natural products with origin Swiss come from Bio Suisse farms). 

Bio-Swiss Certification – The basis for certification under Bio Suisse Directives is based on an organically valid certification equivalent to the Swiss Organic Ordinance (e.g., EU Reg. Or NOP). In general, the name of the importer of the product in Switzerland who accepts the cost of Bio Suisse certification should also be indicated. 

Government policy on organic farming

Swiss law requires that all agricultural subsidies be at least subject to environmental standards. The minimum environmental standards require: 

  • Crop rotation with at least four crops; 
  • Measures against soil erosion; 
  • Balance in nutritional balance; and 
  • High biodiversity at 7% of agricultural area.

In addition, Swiss farmers can choose from various special programs, such as hedges and fallow lands and animal welfare programs. Further reduction in prices will reduce the income of farmers. Therefore, further development of organic farming in Switzerland will not be based on policy. However, the following two factors will remain or become important: 

Organic market growth rate: The total organic food market is growing at an annual rate of twenty to thirty percent. Domestic production is growing at less than 10 percent a year. It should encourage Swiss farmers to meet the domestic demand for organic products. 

In case you missed it: How to Start Organic Container Gardening: A Step-By-Step Growing Guide for Beginners

Backyard Farming
Image Source

Development of Organic Premium: If producer prices for organic and conventional food are reduced parallel, there will be no additional drive. If organic producer prices fall slower and organic premiums rise (as is common in the EU), conversions will accelerate.

Two forms of direct assistance are available to Switzerland farmers: direct payments to all farmers – organic and non-organic – and payments to organic farmers that produce environmentally and animal-friendly. The Federal Office of Agriculture is responsible for managing this organic system of payments.

The Direct Payments Ordinance in Agriculture contains provisions relating to payments for organic farming. It forms the basis for the distribution of environmentally incentive direct payments in Switzerland and expresses the purpose of Swiss agricultural policy to promote organic farming. There is no federal funding for change. However, five cantonments assist. The gap between regular farm payments and payments available to organic farmers has recently narrowed significantly in recent years.

The number of farms converted to organic farming is hoped to decrease due to market conditions. The amount paid per hectare of land for organic growing farms will not increase much, but the increase in the area under organic farming will increase the total cost. It is expected that due to financial pressures, some cantons will reduce their payments for conversions. 

Swiss Market for Organic Fruits and Vegetables – In the last few years, the supply of organic vegetables in Switzerland has grown exponentially. Rising domestic production and high demand for organic fruits and vegetables have positively impacted the growth of the organic sector. The German-speaking part of Switzerland found that vegetables and fruits were one of the most sought-after organic products before eggs, meat, and milk.

The growing demand for organic food is predicted by several key factors, including food safety concerns, environmental awareness, animal welfare concerns, media attention, the credibility of organic farming, availability of supply, and level of consumer education.

Organic farming practices in Switzerland

In organic farming, farmers choose not to use some of the simpler chemical tools available to other farmers. Production system design and management are critical to farm success. Choose businesses that complement each other and choose crop rotation and cultivation methods to avoid or reduce crop problems. 

The yield of each organic crop varies depending on the manager’s success. Production yields are lower than conventional levels during the change from conventional to organic farming. Still, after three to five years, organic yield generally increases after a transition period of three to five years. 

Soil Health – Soil is the foundation of the organic system and the cornerstone of organic farming methods. Every handful of dynamic organic soil contains billions of microorganisms. These invisible creatures support the plant’s health on every organic farm. 

In case you missed it: How to Start Organic Kitchen Gardening: Tips, Ideas, and A Step-By-Step Guide for Beginners

Tomato Farming
Image Source

Organic soil management can include many methods to support soil biology, increase organic matter, and increase fertility. Key methods include cover cropping, composting, crop rotation, and grazing management. Organic farmers maintain their soil health using fertilizers or other organic matter instead of synthetic fertilizers. Biological fertilizers, such as compost, slowly release nutrients, produce soil organic matter, and increase the soil’s ability to retain moisture. 

Crop rotation – Crop rotation refers to cultivating different crops on a particular land over time. The crop continuity is carefully designed to ensure that soil nutrients are maintained, pest populations are controlled, weeds are suppressed, and soil health is maintained. Crop rotation will cycle through cash crops (such as vegetables), cover crops (grasses and grains), and green manure (mostly legumes).

The exact order of the crops will vary depending on the local conditions, with the key elements of the design being understanding what each crop contributes to the soil. For example, a nitrogen-reducing crop should be applied before a nitrogen-fixing crop. Crop rotation improves the physical and chemical condition of the soil and thus improves the overall fertility. Crop rotation helps control common root and stem diseases that affect row crops.

In Switzerland, as in other countries, the production of organic vegetables in greenhouses is characterized by limited crop rotation and greater reliance on external inputs. It is not only because greenhouses are expensive but also because there are strict regulations for building and using greenhouses. Therefore, farmers use only greenhouses to grow crops with high market demand. 

Cover crops – Cover crops are grown to improve the farming system. Cover crops are usually planted between the rotation of income-generating crops, but they can also be planted simultaneously. Cover crops serve various management purposes and are an integral part of the organic farming system. 

Cover crops mainly add organic matter to the soil and nitrogen in a slow-release way that plants can handle, reducing nitrogen volatilization. Cover crops can also act as mulch if properly managed, improving the physical properties of the soil in just one growing season and attracting beneficial insects and pollinators. 

Green manures – Green manure means mixing green plants with soil enriches them with organic matter. It increases moisture levels and nutrients for microorganisms, thus improving soil quality. 

In case you missed it: Organic Farming in Germany: How to Start, A Step-By-Step Guide for Beginners

Wheat Farming
Image Source

Pest management – Synthetic pesticides harm bees and native species. So, organic farmers manage crop pests and diseases in natural ways. The first defense is to grow organic crops from healthy soil, making the plants more flexible. Many organic farmers plant flowers to attract beneficial insects, which feed on ‘insect’ species. Also, safe sprays made from natural materials are allowed. 

Main constraints to market growth in organic farming

Swiss import restrictions are major barriers to market growth in general: Domestic production is protected by trade duties during good domestic supply phases. However, by law, high-duty stages must be combined with low-duty stages. These periods of low trade duty often coincide with periods of inadequate domestic supply (between November and April) and represent the best opportunity to enter the market. There is a parallel range of consumer-related factors that limit the growth of the organic food market:

Price: A price difference between organic products and traditionally prepared food is the most powerful limiting factor on demand. 

Trade and Processing Structure: One of the reasons for the high prices of organic produce is that distribution is often inefficient and involves many intermediaries (minimum storage for a minimum amount of organic produce). With the increasing availability and more efficient distribution, prices will fall compared to conventional production. 

Availability: Many large-scale retail chains still lack a full selection of organic products (such as fruit). The organic range is incompatible with every general consumption trend (e.g., deep-frozen foods or convenience products). There are also products whose potential demand far exceeds the available supply. 

Quality: In some product groups (for example, fruits), organic products do not always meet visual quality standards like conventional products. Organic products are more likely to show aging due to their lower turnover rate. 

Important opportunities and constraints for organic farming in Switzerland

The quotas set by the government limit imports into Switzerland. So, exporters and importers want to understand how these quotas work and identify seasonal opportunities for supply to specific markets where domestic supply may decline. Domestic demand for organic fruits and vegetables will continue to increase. It is unclear whether an increase in domestic supply will meet domestic demand.

In case you missed it: How to Start Organic Backyard Gardening: A Step-by-Step Guide for Beginners

Wheat Field
Image Source

Therefore, the quota may be increased over time. It is especially so because supermarket chains are more involved in increasing demand to meet their organic fruit and vegetable limit and reduce seasonal shortages. The constraint is that Swiss consumers currently prefer locally manufactured products. 

Access to the Swiss market for organic products from developing and transition countries is regulated by equivalence. The production, processing, inspection, certification, and labeling of organic products in these countries must meet the requirements of the Swiss Organic Farming Ordinance. It does not mean that the same procedure has been implemented. It is important to adapt the standards of organic farming to local conditions and use certification bodies in these countries.

How to Start Free-range Chicken Farming: A Step-By-Step Guide, Advantages, and Disadvantages

2

It is a very lucrative business, and many people make money worldwide by raising free-range chickens. However, to build a successful, sustainable, free-range poultry farming business, you need sufficient knowledge, good management skills, and a business plan to raise free-range organic chickens effectively. Let’s check out how to start free-range chicken farming below.

Free-range Chicken Farming

What Does Free-range Chicken Mean?

When chickens or other livestock are “free-range,” they can roam freely, with free access to outlying areas and fewer restrictions on their overall movement and housing. These animals are not limited to a small coop, warehouse, or pen; they have a much larger, more enriched space to explore. Since some legal regulations on how free-range can be officially labeled for chickens, various farmers, commercial agricultural workers, or urban homesteaders can consider their poultry free-range in different ways. 

The main difference between regular chicken production farms and free-range bred chickens is the environment in which they are reared. Common farms keep chickens in tight spaces with many other chickens; this is a large-scale factory breeding environment. The same is true of chickens raised for their eggs. Their diet and conditions may or may not be purely organic. Free-range chickens can roam in low-pressure environments, outside and away from chicken coops or common residential areas. This arrangement allows the chickens to roam in nature with plenty of air, sunshine, and no stress.

In case you missed it: Earning More than 3 Lakh Per Month: A Success Story of Kadaknath Chicken Farmer

Chickens and rooster feeding in rural barnyard field.

Benefits of Free-range Chickens

There are several benefits to raising free-range chickens. Because birds are not confined to small areas, they get more exercise; their flesh has more muscle and protein in their limited habitat than these birds. Free-range chickens generally have lower fat and calorie content in their meat and eggs, and many consumers believe that free-range chickens and their eggs taste better and fuller.

Better health helps birds be more resistant to pests and diseases, although they may be more susceptible to predators. With more room to roam, free-range chickens have anxiety, aggression, and territoriality problems, even with large flocks. The cost of caring for free-range chickens can also be less than that of a confined flock. Because birds naturally feed on a wide range of food, there is less need for expensive feed or extra pellets.

Free-range chickens will also control natural pests in gardens or landscapes as they snatch away all kinds of insects, weeds, and seeds, and their natural beaks, scrapes, and digs will sprout into the soil. Their pulp becomes the best fertilizer. A large flock can lead to a dirty or bad rebel area; however, be aware of the consequences before releasing the birds. Free-range chicken tastes better and has more protein due to better breeding conditions. The best breeding equals the best health.

Chickens that spend free time outside with better exercise, clean air, clean water, and plenty of sunshine are the best sources of natural meat products. On the farm or in, the free-range chickens on your farm can benefit your landscape. Farmers use mobile chicken pans to move chickens on their farmland.

Chickens feed on insects and eat leftover crops such as lettuce and other vegetables that fertilize the soil simultaneously. It creates a symbolic relationship between animals and the land. A few free-range chickens can help reduce pests in the garden and provide you with a fertilizer source. 

  • Broader diet – Free-range chickens can feed on insects, grasses, and weeds. Their diet will be much more diverse than that of captivity. It makes them happy and healthy chickens.
  • Low feed cost – Since chickens are foraging, this will increase some of their feed. You will need to give them chicken feed, but free-ranging will reduce the amount. Saving money is always a good thing in life.

In case you missed it: How this Farmer Made 24 Lakh Profit from Country Chicken Farming – A Success Story

chickens on the grass in the farm

Land, House, and Equipment Needed

The type of housing you need and the size of this property will depend on your poultry endeavor. When choosing a poultry business location, you want to balance the cost of the property, labor costs, safety, and the need to be close to the market, along with excellent water sources. 

When you plan to build a free-range chicken house, you must choose a well-drained place with lots of fresh air circulation. Proper housing must have adequate ventilation and proper lighting. Ventilation is necessary to allow adequate air exchange. To make eggs all year round, you must put proper lighting in your facility. You must have the equipment, including feeders, drinkers, lighting systems, and nest boxes. 

Housing Requirements

As well as choosing the right site and providing enough space for chickens, adequate housing management is an important step in starting a chicken farming enterprise. Ideally, just like outdoor pastures, you should aim for one square foot per hen according to the density of your stock. However, two hens per square foot are also acceptable if you have limited space. The chicken house should be open both inside and outside so the chickens can easily access the outside pasture. Preferably, it should be high and well-ventilated. 

Chicken Breeds Suitable for Free-range Farming

  • Local chicken breeds or crossbreds of Rhode Island x local chickens
  • Chinese chicken breeds such as Tam Hoang or Luong Phuong 
  • The Israeli Kabir chickens

There are many different chicken breeds, and choosing the right breed will depend on your needs. You can sell meat and eggs or run a free-range chicken business for meat and eggs. 

  • Rhode Island Red Chicken can be raised with both meat and eggs. They lay about 250 eggs a year. The Light Sussex chicken breed is a dual-purpose breed for meat and egg production. 
  • White Leghorns are commonly used as layer birds. They can lay 300 eggs yearly, weighing at least 55 grams. The Boschveld chicken breed is commonly found in Africa and can withstand various climatic conditions.
  • Welsummer can be a little taller with his beautiful plumage. But if picked up correctly, they will be quite friendly and attentive. They are also good herdsmen and prefer to stay out during the day instead of sitting in the coop. 
  • Buckeye is a hardy chicken breed and can be a little aggressive. They do not incarcerate at all and need free-range. These chickens are fine even if it is written as long as they can move. 
  • Minorca is the largest breed of chicken in the Mediterranean. They are also easy to handle and more friendly than the rest of the class. They will endure imprisonment, but doing so may hurt them a little. They prepare fodder on top and happily pecking, scratch, and eat insects. 
  • Many other breeds exist, including the Golden Comet, Ameraucana, Barred Plymouth Rock, Golden Laced Wyandottes, Australorp, and more. 
  • The breeds used in free-range chicken farming are also different from these chickens. The most commonly used breeds in free-range chicken farming are Kabir and Sasso chickens, and they grow a little slower than those living inside the poultry house but are bigger and heavier. 

In case you missed it: Broiler vs Layer – Chicken Differences, Management

Flock of egg laying hens roaming outdoors on farm

Equipment for free-range chicken farming 

In addition to fencing and building a house for just one range of chickens, you will also need to purchase various equipment to help the chickens. It would help if you bought drinkers, feeders, brooding equipment, heaters and heating bulbs, and chicken plucker machines. 

Feed and nutrition for free-range chickens

Free-range chickens must be fed to increase meat and egg production. Lack of water or feed will reduce resistance to diseases and parasites and increase flock mortality. In a free-range poultry system, adult chickens should be given ample time and space to clean the surrounding environment daily. 

The best time to clean is in the early morning and late afternoon, when there are plenty of insects and the heat, is low. Generally, supplementary feeds must be offered in the morning and evening when free-range chickens return for the night. For birds’ growth, clean water should be provided in shaded regions during the day to avoid heat stress. You will also need appropriate vaccines and medications to prevent disease and promote the breeding of your free-range chickens. 

In case you missed it: Using Chicken Manure In Garden – As Fertilizer

Brown Chicken breed

The advantage of raising free-range chickens is that they will get most of their food from the cleanliness of the surroundings. It reduces feed costs. However, keeping free-range chickens for commercial purposes is insufficient to feed on the surrounding fodder. You will want to supplement the free-range chickens’ diet with commercial stock feeds or home feed. You can also give them corn, millet, wheat, rice, etc. 

Tips for Free-range Chicken Care

Provide shelter: Even free-range chickens need shelter at night and protection from bad weather. A strong coop should be available for the flock; a large herd or several coops can be planted in different areas to allow more bird choice. 

Provide supplemental food: Free-range chickens will feed on their own, but providing supplemental food can provide good nutrition and vitamins needed for a healthy flock. The feed can also train the chickens and return them to the coop at night for safety. 

Keep vaccinations current: Free-range chickens are more likely to contact other wildlife, ticks, or insects that can transmit the infection. Keeping birds up-to-date on vaccinations and worms will keep the whole flock healthy. 

Management and Labor Required

The number of farm workers will depend on the free-range chicken size. If you run a small business like 100 birds/cycle, you and your family may have enough to take care of the chickens. However, if you are raising 2,000 birds per cycle, you will need full-time staff to manage free-range chickens. Business success requires good technical knowledge of free-range poultry farming techniques. You also need good management skills. 

The Market for Free-range Chicken Meat and Eggs

The free-range chicken market is increasing as more people move towards organic and healthy food. People mostly prefer organic free-range chicken meat to broiler chicken meat. Thus, the free-range organic chicken meat demand is constantly increasing. Free-range chickens cost more than broiler chickens because they are considered higher. Free-range hen eggs are also considered better than commercial indoor-layer hen eggs. Free-range chicken eggs are highly nutritious, delicious, organic, and healthy.

In case you missed it: 1000 Broiler Chicken Farming Project Model Report

White and brown chickens in the fields

The price of free-range organic eggs is higher compared to that of ordinary chicken eggs. You can deliver free-range chicken meat and eggs to individual households, butchers, schools, restaurants, companies, supermarkets, organizations, events, and more. You can sell your free-range chickens as live birds, slaughter them, and freeze and sell them as dressed chickens. You can export your free-range organic products as you grow your chicken farming business.

Disadvantages of Free-range Chicken Farming

Free-range chickens can mess with your backyard – Chickens like to scratch the ground in search of insects or while bathing in the dust. It is common in chickens, but when they scratch the ground too much, it can damage your landscape, yard, or garden. So, before you let your birds roam, ensure your landscape is well protected. 

Eating unwanted plants (garden, flowers, herbs, etc.) – If you or your neighbor has a garden and your chickens find it, they will benefit from free food. Also, they will eat some flower pedals and herbs if you are not careful. By giving their birds home-grown produce, they will be tempted to seek out this kind of invitation and create even greater heights to go to the garden.

Free-range chickens as soon as possible make it difficult to collect eggs – Although these birds are known to produce nutritious eggs, they make it difficult to collect these valuable commodities. Most choose to lay their eggs in hidden places around the yard. Hunting eggs can be frustrating if you don’t know where to start. It would help if you had several much-needed areas around the yard to overcome this problem. This way, you will save time as your hens will be left in special places where you can easily find their eggs.

Raising free-range chickens can be challenging, but it can benefit a stronger, healthier, more productive flock. The free-range system is best suited for small-scale farmers who raise chickens for domestic and commercial use. This low-cost free-range system increases the commercial value of poultry products. The above steps are useful for starting free-range chicken farming.

How to Start Organic Farming in Australia: A Step-By-Step Guide for Beginners

Organic farming is defined in the Australian National Standard for Organic and Biodynamic Products (National Standards) as ‘systems that include what is called biodynamics or biological.’ The basic principle is to produce high-quality food and get the maximum amount of food without using artificial fertilizers or synthetic chemicals. Let’s check out how to start organic farming in Australia

Grapes Farming
Image Source

Organic farming requires nurturing and caring for the land for future generations. Emphasis is placed on using renewable resources, conserving energy, soil, and water resources, and maintaining environmental standards. With this standard’s limited use of external inputs allowed, the production cycle is as close as possible. The reason for the growth of the organic farming business is;

  • Its health benefits, environmental benefits, 
  • Improved agricultural cycles, 
  • Reduced pesticide imports and other foreign fertilizers, and 
  • Increased employment generation

Consumer demand for chemical-free and environmentally high-quality products is growing in organic farming. Organic food and farming are now widely recognized as economically viable options to meet this demand. With a 25 percent annual increase in organic food retail sales domestically and globally, the market is growing faster than any other food and beverage industry sector. 

The principle of care in organic agriculture encourages the relentless use of resources with future generations and nature in mind. The negative consequences of applied farming technologies should be carefully considered. Careful and timely risk management should control any decision-making. Although innovations may prove useful, followers of organic farming prefer traditional methods of farming that are time-accurate. They combine common sense, reliable knowledge, practical innovations, and pre-chemical local experience.

Choosing a site for organic farming in Australia

The location of your project plays an essential role in any project. The area of ​​your organic farming usually decides how the effort will pay off. The selected sites should be close to clean water sources. Water is the most critical asset in organic farming for crop growth and health. 

The proximity of the organic farming area to the commercial center adds an important dimension to farm management. The organic farm’s proximity to the market includes easy communication for sale. Similarly, it helps spare costs while delivering materials to the farm. 

In case you missed it: Top 50 Flower Farming Tips, Ideas, and Techniques

How to Start Organic Farming in Australia
Image Source

Soil management for organic farming in Australia

Healthy soil is an integral part of any farming system. In organic farming, an era of effective nutrition becomes even more important as producers can use only certain approved fertilizers. However, by properly managing inorganic elements and organic matter in their soil and ensuring adequate air and moisture, organic farmers can grow as healthy crops and pastures as any other farmer.

Many inorganic elements have permissible input on certified organic forms, and an extensive range of commercial compounds or single elements is available. Organic matter can be supplied to the soil through compost, green manure or cover crops, well-composted animal or poultry manure, or composted industrial waste free from unallowable contaminants. 

Control of weeds, pests, and diseases for organic farming in Australia

Likely, weed and pest problems will already be identified from experience. It is often the case that dependence on agrochemicals, particularly, increases pest problems, exacerbated by the destruction of potentially beneficial predatory insect populations. Crop rotation is essential for pest control, and using natural predators to cultivate herbaceous plants should be encouraged. The use of plant sprays may be considered.

However, any chemical use by individuals seeking organic certification must be verified by organic standards or in consultation with a certification agency. Removing current agrochemicals to overcome problems such as weeds should now be used primarily through good circulation. However, planting density, stock grazing, and mechanical and thermal weed controls can also be used. 

Equipment requirements for weed and pest control must be met at the transformation planning stage. Although organic farming is generally a low-input system, compost and mineral fertilizers are sometimes used in horticulture. These resources and biological preparations, such as seaweed sprays and fish emulsions, will help with crop nutrition and health. 

Organic standards insist that all off-farm waste be composted before use to reduce contamination and convert nutrients into more acceptable forms. It is important to plan for the transfer to determine what information is needed and how it will be provided. Pest and disease management is achieved through proper circulation, cultural practices, increasing soil fertility, promoting biological control, and direct action with occasionally approved low-toxic pesticides. 

A planned management program will help organic farmers control pests, diseases, and weeds without synthetic fertilizers. Active management and planning are essential to ensure that conventional farmers’ ‘last resort’ chemical control is not required on organic farms. Organic farmers have access to many management tools and methods, some of which are standard practice on any well-organized Australian farm; others are at the forefront of adopting traditional methods (pre-chemical) or new research and technology. 

Good observation skills, willingness to experiment with new methods, and focus on local conditions, including internal variations within a paddock, are common characteristics of successful organic farmers. Management of weeds, pests, and diseases often poses the most problems for organic farmers, during the transition period and after establishing the organic system. Instead of replacing synthetic herbicides and pesticides with naturally occurring products, system design, and management is the key to success.

Methods of controlling weeds for organic farming include cultivation, competition, thermal weeding, solarization, crop selection, sowing density, fertilization, irrigation, hand weeding, suppression, mechanical control, crop rotation, surface mulching, livestock, and biological control. In some cases, natural herbicides such as acetic acid, pine, or citrus oil may be allowed. 

In case you missed it: Top 20 Steps to Boost Rice Yield: How to Increase Paddy Production and Quality

Oat Field
Image Source

It is essential to reduce a load of weeds before production, and timely control of weeds when they are small is very important for effective management. Insects are always a major cause of concern on any farm. Organic farms deal with pests through manual pest control, whether planting crops that repel or obstruct certain types of pests or expelling certain pests or other species that minimize the spread of pests on farms. 

Practices of organic farming in Australia

Soil fertility: Crops fight disease more easily, survive droughts, and tolerate pests when they grow in good soil. Organic crop growers add soil fertilizer, animal manure, or green manure to improve soil quality. As soil organisms break down these inputs, they convert nutrients into forms that plants can absorb and produce humus that maintains soil quality.

Organic producers should not apply sewage sludge or biosolids to the soil. In addition, organic crop growers use core crops to protect the land from wind and water erosion. Soil conservation methods include the use of cover crops, mulches, protection crops, contour plowing, and strip crops. 

Crop rotation: Organic crop producers practice crop rotation to interrupt insect life cycles of organic crop-producing insects, suppress soil-borne plant diseases, prevent soil erosion, build organic matter, fix nitrogen, and enhance farm biodiversity. To effectively reduce pests and diseases, farmers usually bring one crop from another crop family, and then wait several years before replanting the initial crop. 

This farming approach means covering the field with any plant for a particular season or perennial, partially between crop rows, or completely. Covering crops deal with soil erosion, improving water filtration and air with their roots. They also remove weeds from the upper parts by hiding unwanted plants from sunlight. 

Intercropping – Many organic farms rely on the natural balance of crops and their environment to produce the best results. Intercropping refers to the interconnection of mutually beneficial crops. Crops can produce different results for the farm, from maximizing crop yields to pest management. Much of the success of an organic farm depends on careful planning and respect for the balance of nature.

Green manures – Mixing green plants with soil enriches them with organic matter, especially nitrogen. It also increases moisture levels and nutrients to microorganisms, thus improving soil quality. The described method of agriculture also reduces the growth of weeds. 

The organic farming industry in Australia

The organic farming industry is encouraged by the shift in consumer preferences towards organic product consumption. Organic product demand in Australia and abroad has increased as consumers increasingly understand the effects of food choices on their health. Another important concern on the choice of organic consumption is the environmental impact because organic production is more environmentally friendly. 

A mature organic industry in Australia that lowers the cost and enhances the quality of the supply of organic products helps make organic food accessible and popular. Another motivation for organic consumption growth in Australia is the high-end organic industry, driven by improvements in the supply chain, improved economies of scale, and higher growth in industry revenue, production, and investment.

In case you missed it: Top 22 Succulents to Grow at Home: in Pots, Indoors, Greenhouse, Problems, and Care
Organic Farm Vegetables
Image Source

The availability of organic products in general supermarkets and specialty organic retailers is also responsible for this growth. In addition, competition in the industry increases, allowing consumers to enjoy quality products at lower prices. With the global advocacy of the healthy benefits of organic consumption and the growing preference for reliable products with organic certification marks, Australia’s organic industry is predicted to continue the rapid growth trend.

These factors open up huge growth prospects as Australia’s organic industry focuses on the sustainable development of certified organic production. Currently, the fastest-growing organic category in Australia is among the products that are popular in terms of high nutritional value. 

Fertilizer management for organic farming in Australia

It is one of the most important aspects of organic farming. This process involves using the best nutrients to boost your crop growth. Using organic farming methods such as fertilizers, mulching, and biofertilizers will help promote healthy crop growth and soil fertility. Vermicomposting is another great way to introduce important nutrients naturally into the soil.

Because organic farms cannot use chemical fertilizers, they need to know how to fertilize themselves. An interesting way to accomplish this is to use cover crops and green manures. These crops are grown not to sell but to support the rest of the farm. Crops can be composted into organic fertilizer to promote soil health. Of course, other more common organic methods, such as fertilizer and mulching, are used to maximize soil fertility and crop yields. 

Organic certification in Australia

Reasons for Organic Certification are: 

  • Protecting consumers from market fraud and deception. 
  • Protecting producers of natural organic produce from misrepresenting the organic nature of agricultural produce. 
  • Ensure that all production, processing, and marketing stages are subject to inspection and meet pre-determined requirements. 

The organic standards used in Australia are usually owned and managed by private organizations. The paperwork required for certification is difficult for many farmers entering the organic industry. However the rewards of quality assurance and the fact that consumers easily recognize a product as being organic make it worth the effort. 

The National Standard regulates the production and manufacturing of organic products in Australia for Organic and Biodynamic Production. It generally agrees with the definition of organic farming and is a guideline for processing Australian organic certification agencies to develop their own more specific standards. 

An industry organization must be accredited by the Australian Quarantine and Inspection Service (AQIS) before certifying organic work. The organization must demonstrate that its certification program meets all national standard requirements. A certified certifying body must certify all organic products for production, processing, handling, transportation, storage, and sale. The two major certifying organizations are the Biological Farmers of Australia (BFA) and the National Association of Sustainable Agriculture, Australia (NASAA). 

In case you missed it: Organic Pumpkin Farming, Cultivation Practices

Pumpkin Farming
Image Source

Certification bodies in Australia 

  • Aus–Qual is a relatively new certifier of organic products and products based on the QLD. 
  • The Australian Certified Organic is the largest certifier of organic produce and the most recognized by consumers. This logo may only appear on products that meet strict organic standards and are audited annually for compliance testing. While audits are scheduled, 5% of audits are unscheduled so that they can happen at any time. 
  • The National Association for Sustainable Agriculture, Australia Limited is the second oldest and second-largest. NASA certifies production as organic or biodynamic. Labels indicate that the product is either ‘Certified Organic’ or ‘Certified Conversion.’

Policies under Organic Farming in Australia

Government policy options generally relate to certification and market promotion, farm conversion stage, and research and development. Many countries also consider subsidizing established organic farms as a good investment, as the environmental costs are lower than the continuity of traditional management practices. 

Organic food processing in Australia 

The two main standards now govern Australia’s production, processing, and labeling of organic food. These are: 

  • National Standards for Organic and Biodynamic Production (for Exported Foods) 
  • Australian Standards for Organic and Biodynamic Products (Domestic and Imported Foods). 

These organic standards provide an agreed set of procedures for complying with organic food production. It helps ensure the integrity and traceability of organic food products from paddock to plate. The standards include the requirements for the production, manufacture, transportation, marketing, and labeling of organic products in Australia.

Although exported organic products must be certified and meet national organic and biodynamic production standards, Australian standards (for domestic and imported foods) are not required, and certification is voluntary. It aims to help the Australian Competition and Consumer Commission (ACCC) ensure that claims about organic products are not false or misleading. ‘Organic certified production’ means that food is grown, harvested, stored, and transported without synthetic chemicals, irradiation or fumigants.

In case you missed it: Wheat Farming in the USA: By State and Production

Wheat Farming
Image Source

Conclusion

Australia has more certified organic hectares of land compared to any other country. It makes up 32% of the world’s total. Australia is a global leader in organic farming based on several factors, with the most impressive being 5,645,000 certified organic hectares – more than half of the world’s certified organic hectares (54%).

The organic industry’s growth in Australia is noticed for its vital connection with the production of certified organic products derived from a widely regulated production process through various organic standards. It indicates the sustainable development of the industry as much attention is paid to product quality. The above information is more helpful for starting organic farming in Australia.

Dairy Farming in New Zealand: How to Start, Breeds, A Step-By-Step Guide for Beginners

Dairy farming is an agricultural business involving milk production from domestic animals. Animals used to produce milk on dairy farms are called dairy animals. The dairy business covers 1.74 million hectares and plays an essential role in every regional economy. Let’s check out more information about dairy farming in New Zealand below.

Dairy Farming in New Zealand
Image Source

Dairy farming is a major New Zealand business and is New Zealand’s largest exporter. Dairy farms can vary in size – the average number of cows per farm is over 400. Some dairy farms may have more than 1,500 cows. In addition to milking the cow, you will have to do many other things around the farm. For example, you may need to: 

  • Monitor the health of the cow and treat the sick animal
  • Measure the amount of grass and supplements available 
  • Put up temporary fences
  • Use tractors and machinery to feed cows
  • Feed the animals

NZ dairy features 

The dairy farm business in New Zealand began from small beginnings in the early days of European colonization. New Zealand’s dairy industry is almost entirely based on livestock, with a population of 4.92 million dairy cows. Dairy farmers have been found to have higher levels of anxiety and irritability, depending on how they are measured, than the general population. New Zealand has a Dairy Farmer Wellness and Wellbeing Program funded by Dairy NZ and the Ministry of Primary Industries in New Zealand. 

NZ Dairy features include;

  • One of the lowest production costs in any major region producing milk globally; 
  • The industry leader in innovation and technology; 
  • Among the most efficient and efficient processing industries and supply chains; 
  • Favorable climate (ideal temperature and rainfall for growing grass); and 
  • Good access to emerging markets. 

The dairy industry in New Zealand 

New Zealand Dairy Farming is known for its low-cost, high-quality pasture production system and high technical expertise. Recently, this position has come to an end as a result of rising land and labor costs. There are less than 5 million dairy cows in New Zealand’s more than 11,000 dairy herds. They bring about ً 19 billion annually to the national economy. Dairy farms in New Zealand are now more sophisticated, with business operations using high-tech systems to assist in decision-making, budgeting, and overall productivity.

The New Zealand Dairy Career Program is unique because it is a fully inclusive training program that provides settlement and ongoing care. It combines industry best practices and practical and formal study programs on job learning that give you industry knowledge and valuable expertise. With an annual export of over $17 billion, the dairy industry is New Zealand’s largest exporter.

New Zealand’s 12,000 dairy farms produce more than 18 billion liters of milk annually, with a total of 1.7 billion kilograms of milk solids (protein and fat). The dairy industry in New Zealand is a major partner in the national economy (7% of GDP). The current major problem for the industry is the lack of cheap, highly nutritious feed for high genetically qualified cows for milk production. Poor productivity of these high-capacity Holstein-Friesian cows; quantity and skill of farm labor; and the environmental consequences of deep dairy farming. 

Benefits of dairy farming in New Zealand

  • Longevity: Cow herd life in New Zealand is one of the longest in the world, averaging more than 4.5 milking per cow, and unlike most countries, the phenotypic trend is to increase herd life. 
  • Production efficiency: Production per kg / live weight continues to increase. Modern New Zealand cows, despite being about the same size, produce 50 kg of solid milk yearly compared to cows a decade ago. High genetic cows are more profitable for farmers. 
  • Environment and well-being: Animals with high genetic makeup divide most of the food they eat into solid milk and less waste. It means more nitrogen in cow’s milk is converted into protein instead of excreted as urine or feces.

In case you missed it: Equipment Needed for Dairy Farming: Small Dairy Machinery Details

Dairy Cow Shelter
Image Source

Climate conditions for dairy farming in New Zealand

New Zealand has a temperate climate that favors a variety of pastures and crops grown for dairy. Improvements in technology and irrigation have allowed dairy to spread to non-traditional dairy areas such as Canterbury. They have improved pastures and crops in arid areas such as the Northland. New Zealand dairy farms work with cows that live outside all year round.

So, whatever the weather, you must work out all year round. New Zealand’s weather is different in the summer and winter seasons. Because in the Southern Hemisphere, summers are between December and February, and our winters are between June and August. The northern regions are warmer than the southern regions – but not always. If you work on a dairy farm near the mountains, it will be much cooler than when you work on a dairy farm near the sea.

If you come from a tropical country, getting used to our changing climate and cold, wet and windy weather can be difficult. Dairy farming requires land that grows enough food to sustain the animals, with most farms supplying some feed and nitrogen during the season. The amount of food for your herd depends on the time of year. The cow milks an average of 250 days a year. It means that cows need milk, calves, and paddock in their winter diet. The land can be used: 

  • As part of a central farm around the milking shed and infrastructure, or 
  • As a support block that allows cows to graze that is not in the milk. 

It is often the case for ground blocks separated from the main farm. 

Farm operations in dairy farming in New Zealand

Dairy cattle feed mainly on grass, supplemented by hay, grass, and other crops during the winter and other times of slow pasture growth. Traditional dairy production areas are the country’s wetlands, including Waikato, the Bay of Plenty, Taranaki, Manawatu, Nelson, Tasman, and the West Coast. Still, increased irrigation has established dairy farms in arid areas such as Canterbury and Otago.

Approximately 56% of dairy farms in New Zealand are run by owners, while dairy farmers run 29%, and contract dairy farmers run 14%. The herd owner is the shareholder who owns the herd and is responsible for employing farm workers to receive a percentage of milk income (usually 50%). Variable order milkers do not own their herd and receive a low percentage (usually 20-30%) of milk income, while contract milkers pay a fixed price per unit of milk.

Land selection for dairy farms in New Zealand

  • Select land or area for dairy farms that is elevated from the surrounding. 
  • Avoid low ground and waterlogged regions. 
  • The soil of the selected land must be fertile as most of the land will be used for fodder cultivation. 
  • There must be a good communication for the dairy farm. 
  • The selected site should be close to the veterinary hospital or artificial insemination center. 
  • The proposed dairy farm must be supplied with electricity. 

In case you missed it: Dairy Farming in Germany: Breeds, and How to Start

Dairy Feeding
Image Source

Why dairy farming is important in New Zealand

Dairy farming is widely used in New Zealand and is a major partner in our economy. However, cattle adversely affect the environment; the impact depends on the animal’s type, size, and density. Dairy cattle have an environmental impact than cattle, and both have more impact than sheep. Cattle, especially livestock, emit methane, which contributes to climate change. Cattle can adversely affect local biodiversity and soil health.

Water quality can be affected, as nutrients, sediments, and bacteria from urine and feces can flow into rivers, lakes, and groundwater. It can affect the aquatic ecosystem’s health and the recreational and cultural values ​​of rivers and lakes. It is well known that over the next 50 years, food production must double to meet the world’s growing population and demand for high-protein foods.

On top of that, in emerging economies like Asia, there is a growing demand from the growing middle class, demanding more high-quality dairy foods. New Zealand is a pioneer of performance on the farm, and its products are well regarded as world-class. This demand underpins tremendous growth in dairy production in New Zealand. 

Dairy breeds in New Zealand

Today in New Zealand, different breeds of dairy are used for farming. Finding a breed of cow suitable for your business can depend on many factors like the type of milk, the amount of fat and protein in their milk, the longevity, and hardness of the cow, milk production, feed intake, farm size, and the resources available. 

Some important dairy breeds are Holstein-Friesian (47%, though declining), Jersey (15%), Ayrshire (2%), and some minor breeds such as Guernsey, Brown Swiss, and Meuse Rhine Issel. 

Ayrshire 

Ayrshire cattle originate in southwestern Scotland’s Ayrshire and are found in dairy herds worldwide. Ayrshire is usually red and white, ranging from deep to light shades. They are considered a medium breed, with cows weighing between 500 and 600 kg. 

Brown Swiss 

Brown Swiss cattle, also called Braunvieh, are the oldest of all dairy cattle, dating to about 4,000 years old. Brown Swiss breeders benefit from the best proportion of protein in any breed of dairy milk, which is ideal for cheese production. 

Fleckvieh 

They are known for their longevity, udder health, somatic cell count, fertility, and lactation rate, as their lactating properties have been emphasized in recent years. They also provide an excellent calf for the meat industry, either purebred or more likely to cross with other dairy breeds. They are an applicable breed and have spread all over the world. They are known for their teat health, longevity, somatic cell count, adaptation, fertility, and breastfeeding speed. 

Through breed development in recent years, Fleckvieh’s milk production has begun to compete with pure milk-producing breeds. These cattle are widely used in the meat industry, either purebred or crossbred with other breeds. 

Jersey cows 

Jersey cows make up about 10% of all dairy cows in New Zealand today. Jersey cattle are famous for dairy farming in many countries of the world. 

Guernsey 

They are known to be effective in converting grass into milk, a rich yellow color, and their softness, ease of calving, health characteristics, adaptation to different seasons and management systems, and their due to excessive flow of milk. Guernsey produces high-quality milk while consuming 20% ​​to 30% less feed per kg of milk produced than large dairy breeds. Other characteristics include good adaptation to the management system and climate, ease of calving, easy-going temperate nature, and high milk flow. 

In case you missed it: Dairy Farming In Indonesia: How to Start, Industry, Market, and Breeds

Advanced Dairy Farming
Image Source

Holstein Friesian 

The Holstein Friesian is the most common purebred dairy cow, with about 10 million of the 270 million dairy cows registered globally. Holstein Friesian is the most popular purebred breed in the world and makes up 35% of all dairy cow breeds in New Zealand. The most popular dairy cow, Jersey, yields less than half the average of Holstein Friesian. 

Milking Shorthorn 

The Milking Shorthorn herd was established by 1840 and remained the most popular dairy breed in New Zealand until the 1920s, when Jersey overtook it. Their numbers have dwindled since the breed’s rise, but they can still be found in all parts of the country and worldwide. They are known for their longevity, durability, ease of hatching, and fertility, proving to be versatile animals suitable for various production environments.

Health and welfare for dairy animals in New Zealand

New Zealand’s dairy systems already meet the need for breastfeeding in good health, but constant vigilance is needed at both the genetic and managerial levels. Farmers are already adopting technology to reduce environmental stress using dairy and stand-by sprayers, although some people provide shade protection even though it provides physical protection. 

Long walks in large herds can be partially solved by milking once a day while grazing remote paddocks. Using stand-by pads or other forms of housing requires caution as they can exacerbate health and well-being problems if not properly designed and used. Most farmers want to ensure the well-being of their cows and work hard to get it, but they need technology that will enable them to grow herds and well-trained workers and grow. Enable to meet this responsibility in terms of input costs. 

There are specific requirements around taking and allocating water in each area, but as a rule: 

Dairy animals need access to fresh water in all paddocks, and shelter from heat and weather conditions are all permanent. Waterways need to be fenced to ensure that animals are kept out; nutrient management is very important for dairy farms to minimize the potential effects of fertilizers on water quality. Some farms rely on rain as a water source to grow plants and crops, while others have irrigation systems to grow their pastures and crops.

Milk supply in New Zealand

New Zealand Dairy Farming has traditionally used a spring-centered calving pattern to synchronize herd food demand with pasture development and grazing on milk peak production. But all the cows have to be fed completely. This system ensures efficient use of pastures and gives a full break to milking cows for 1-3 months in late autumn and winter.

However, this system creates an unequal flow of milk to processing plants. The spring peak volume means New Zealand uses the plant capacity less efficiently than other countries producing year-round milk. New Zealand’s dairy processing factories use state-of-the-art equipment and economies of scale to achieve high levels of manufacturing efficiency.

However, factories still have a great opportunity to increase efficiency through a year-round milk supply further. New Zealand milk plays an important role in global food security as one of the world’s leading exporters of pure food; New Zealand plays a key role in global food security. New Zealand produces about 21 billion liters of milk each year.

That’s about 3% of the world’s milk production or the equivalent of two and a half million daily dairy surveys for 90 million people. As the world’s eighth-largest milk producer with a population of only five million, it exports more than 95% of New Zealand-produced milk to more than 130 different countries worldwide. 

Investing in New Zealand dairy farms 

NZ offers qualified investors the opportunity to invest directly in dairy farming in the best dairy areas of the country. The core business strategy is to buy quality land and invest in addressing factors limiting productivity, including soil fertility, drainage, irrigation, buildings, and management while achieving environmental growth. The dairy industry in New Zealand encourages smart self-starters who want to start a satisfying career.

In case you missed it: Dairy Farming in Poland: Breeds, How to Start

Cow Shed
Image Source

Like most successful people in any industry, successful dairy farmers are willing to try their best. For those who are determined and want to succeed, a career in dairy farming is an option that can be extremely satisfying, enjoyable, and financially rewarding. The recent trend towards large farms and large herds means that everyone who wants to enter the dairy industry has more employment and career options.

Problems and issues for dairy farming in New Zealand

The current major problems for the industry are the lack of cheap, highly nutritious feed for high genetically qualified cows for milk production. Poor productivity of these high-capacity Holstein-Friesian cows; quantity and skill of farm labor; and the environmental consequences of intensive dairy farming. The agriculture industry has responded to these challenges in the following ways. 

  • The increasing use of nitrogen fertilizers has increased pasture production, nitrate leaching, and nitrous oxide emissions from fields, leading to research on wintering pads, dietary changes, and nitrification inhibitors. 
  • Increasing the use of supplementary feeds has improved milk production per cow but has also increased the total variable cost of the farm, labor requirements, and nutritional losses, thereby improving feed utilization. Research for affordable feeds and Roman modifiers has been promoted. Poor reproductive performance of Holstein-Friesian cows with foreign genetics initially led to the greater treatment of reproductive interventions. Still, greater awareness of welfare issues has encouraged increased use of crossbred Holstein‐Friesian × Jersey cows to improve reproductive performance by heterosis.
  • Using large herds and dairies initially allowed for more efficient use of labor. Still, persistent labor costs and availability problems led to some farms adopting once-daily milk and automatic milking system for animal systems. 
  • Future developments will include continuous improvement in quantity and feed quality for high-breed cows. Still, more emphasis will be placed on features such as feeding efficiency, health, and survival in the herd. 
  • Automating all farm work will be a major feature of future farms to reduce labor costs. Environmental compliance costs will increase in the short term unless research provides ways to reduce carbon and nitrogen losses from grazing and crop systems.

Some other challenges in dairy farming in New Zealand;

Firstly, the challenges of the farm are related to cow, pasture, environment and farm financing, and related breeding issues. Despite tremendous advances in dairy genetics, the industry is concerned about evidence of declining NZ dairy herds and rising levels of mastitis.

Secondly, environmental concerns also pose challenges to the industry. Problems range from competition for water resources, political challenges related to access to resources, determining the appropriate production response to climate change policies, and the growing concentration of farming with large real estate and property groups. 

In case you missed it: How this Farmer Made 1 Lakh Per Month from His Dairy Farm: A Success Story

Dairy Farming
Image Source

Thirdly, capital structure issues are currently debated with capital aspirations for global growth. Some New Zealand farmers are unwilling to reduce their property rights. The challenge of getting rid of the cooperative has increased. There seems to be more flexibility in expanding, artificially growing, and considering a range of property systems in agriculture than in processing and marketing.

Conclusion

In New Zealand, dairy farming plays an important role. It accounts for about 70% of New Zealand’s export earnings, and within the agribusiness sector, the dairy business is one of New Zealand’s largest rural industries. The above steps help to start dairy farming in New Zealand.

Agriculture Farming in Australia: How to Start, Sustainable Practices, and Statistics

The agriculture sector is a big part of the Australian economy. The Department of Agriculture helps connect all Australians, both urban and rural, through what it does and provides. The industry’s ability to adapt, innovate, and successfully collaborate will continue to support a strong and prosperous Australia with sustainable food security. Aridity or semi-aridity is predominant in most of Australia.

Agriculture Farming in Australia
Image Source

The importance of small operations has also steadily declined. Nearly half of the country’s farm companies now contribute less than a fifth of Australia’s total agricultural output, but about one-tenth of the agribusiness accounts for half of the production. Let’s check out more information about agriculture farming in Australia below.

Importance of agriculture farming in Australia

Historically, agriculture has been as important to Australia’s development as it was to the United States. Australia’s traditional dominance of Wheat and sheep continues into the 21st century. Recently, Australian agriculture has become increasingly diverse. The proliferation of arable land has helped Australia become a leading global exporter of grain, meat, and wool. Australia’s exports dominate the worldwide grain (mainly Wheat and Barley) and wool markets. 

The high productivity of Australian agriculture has largely been due to the development of new technologies and methods. Australia tops the world with 35 million hectares of certified organic matter, accounting for 8.8% of Australia’s agricultural land. Australia now accounts for over half (51%) of the world’s certified organic farming hectares. Despite its difficulties, Australia’s success in becoming a major agricultural power is facilitated by the promotion of its long-term vision policies and agrarian reforms that have greatly boosted the country’s agro-industry.

Badly affected, but also contributes to it. Australian farmers are already exploiting strategies to mitigate the effects of climate change. New research and development of new technologies are underway in Australia and internationally to mitigate the effects of climate change on agriculture and the effects of agriculture on the climate. Australian consumers are becoming more aware of the environmental issues associated with livestock production and are looking for alternative protein sources. 

Agriculture includes cultivating and breeding livestock and crops to support or improve human life. In Australia, with its wide variations in climate and altitude, farmers can produce a wide range of cold, warm, and tropical foods. Recent government estimates show that major agricultural commodities are grains and oilseeds (29.8%), meat (24.0%), industrial crops (Sugar, Cotton, and Wine) (13.5%), wool (7.0%), milk (6.6%) and horticulture (4.5%).

In case you missed it: Growing Okra in Australia: At Home, Planting Season, and Guide

Agriculture Farming
Image Source

Australia’s leading agricultural commodities 

Australia is a major exporter of cereals, meat, sugar, milk, and fruits. Landholdings are exclusively large, specialized, owner-managed, capital-related, export-oriented, and connected through the activities of producers’ associations and government organizations. Farmers in Australia provide most of the country’s food, and agricultural products are major exports.

In addition, livestock rearing and crop cultivation are symbolically crucial for a country proud of its vast area, abundant resources, and stable settlers. Australian agriculture is also important internationally. Australia’s leading agricultural commodities are Corn, Cotton, Dairy, Dried fruits, Forestry, Cereals, Rice, Sheep Meat, Sugar, and Wool. 

Benefits of farming in Australia 

Farmers spend many hours cultivating land, planting seeds, and harvesting agricultural products to ensure healthy food for all. It produces food not only to meet their needs but also for many others, not only in Australia but all over the world. 

Low input cost – The initial cost is low due to the rapid development and advancement in technology and science. It mainly applies to farming equipment. For example, large manufacturers are no longer the first choice of many people. Other brands have significantly improved their agricultural machinery, such as cultivators, balers, combine harvesters, small farm tractors, etc. Many small farm tractors are as durable as the world-famous brands. They are powerful, tactful, easy to maintain, and loaded with various features. 

Economic benefits – The economic benefits of being a farmer in Australia are enormous. The importance of farming can be seen every year as it contributes 3% to GDP or 50 billion dollars to the Australian economy. High demand equals high food production, which increases GDP, and the higher the GDP, the stronger the economy. It encourages the Australian Government to allocate significant funds to the sector. There are various government programs designed to support Australian farmers financially. 

Environmental benefits – As a clean environment is essential, many farmers are implementing what is known as natural resource management. Farmers use more organic fertilizers, seeds, and other essential products to grow quality crops. As a result, the negative effects of greenhouse gas emissions have been reduced. In addition, the soil is more fertile, which ensures fruitful harvests. 

Addressing global trends and challenges in Australia

Australia is developing and implementing agtech and foodtech solutions that enable farmers and food producers to manage key challenges. These include increasing productivity while managing limited resources and responding to the ever-changing consumer demand for healthy, easy, and searchable food.

Climate has a significant impact on farm production in Australia. With the recent drought’s end, agricultural produce’s value increased significantly. The impact on some commodities is huge, with rice and cotton production expected to increase by up to 50 percent after the recent heavy rains.

Trends affected agriculture consumers in Australia

Climate change and rainfall trends affect food prices, which vary in agricultural profits and global prices. For example, when livestock fodder prices are high during severe droughts, farmers reduce their stock (de-stock), and meat prices go up. If the more severe predictions come true, climate change will affect where some nuts, fruits, and pastures may grow, affecting livestock and milk production. 

In case you missed it: How to Start Beekeeping in Australia: For Beginners, Courses, Rules, and Regulations

Drones in Farming
Image Source

Encouragingly, the negative effects of agriculture on climate change are leading to a shift in consumer preferences. The market demand for plant-based protein has been growing in recent years. Farmers are embracing the change, and Australians have greater access to plant products that mimic meat and dairy products. 

Australian consumers are deeply interested in the authenticity of their food – called food provenance. For example, consumers who want to minimize their environmental impact and contribute to climate change can find information on the environmental impact of production and subsequent processing and transportation on the farm. Reducing fraud in food labeling will require reliable technology for food product certification. Australia’s agricultural sector is a world leader in developing and adopting these technologies. 

Australia generally has little effect on market prices, the main exception being wool. Cycles in commodity prices have a significant impact on Australia’s economic situation. The biggest fluctuations have been in commodity prices in the agricultural sector, and the underlying trend has been downward in the last 20 years. The farming industry has also developed more attractive products for consumers and their changing needs. 

Australian farmers are innovative and have adopted new technologies and methods to drive continuous productivity growth and respond to the sometimes difficult physical environment. They accept science and technology-based solutions, and their appetite is demonstrated. Farmers and businesses in Australia have developed innovations such as drought-tolerant crops, robust irrigation systems, and technology that can predict yields and recommend better pastures and storage densities.

Impact of climate change on Australian agriculture 

In recent decades, extreme and severe droughts, floods, and the increasing prevalence of temperature changes due to climate change have put more pressure on Australian farmers. In addition to market fluctuations, farmers must now adapt their farming practices to climatic conditions to be more productive and economical. Although climatic trends are complex across Australia, rainfall has generally increased in the north over the past century and decreased in the south.

These trends are accompanied by seasonal events such as increasing periods of drought and increasing frequency of extremes in different rainfall distributions. Climate change is testing Australian farmers, who will have to constantly adapt their methods to maintain the productivity of Australian agriculture. Farmers are already using strategies to mitigate the effects of climate change.

These include non-arable agriculture, where the land is not cultivated before sowing, reducing soil erosion, and maintaining crop pegs, resulting in increased carbon input into the soil. In addition to capturing carbon and reducing greenhouse gas emissions, these approaches improve soil structure and fertility, increase water efficiency, and reduce input costs.

Crops cultivated in Australia

The main crops grown in Australia are Wheat, Coarse Grains (Barley, Oats, Millet, Maize, and Triticale), Rice, Oilseeds (Canola, Sunflower, Soybeans, and Peanuts), Cereal Beans (Lupine and Peas, Sugarcane, Cotton, Fruits, Grapes, Tobacco, and Vegetables. The main livestock products are sheep (wool and sheep), beef, pork, poultry, and dairy products. Exports account for 90% of wool and cotton production, about 80% of Wheat, 50% of barley and rice, 40% of beef and cereals, 30% of dairy products, and 20% of fruits.

Cereals, oilseeds, and grain legumes are widely grown in Australia for human consumption and animal feed. Wheat is the most productive grain in terms of area and value for the Australian economy. Sugarcane is also an important crop grown in tropical Australia. However, the non-subsidized industry is struggling to compete with Brazil’s much larger and more efficient sugarcane industry. 

Australia is a major global producer of many agricultural products, including Wheat, wool, and beef. Large commercial crops include a wide range of grains, Oilseeds, and Beans, including more hardy crops like Rice, Sugar, Cotton, Grapes, Bananas, and Potatoes. Food, wool, dairy, sheep, pig, and poultry are major livestock products. It is accepted that Australia has a strong competitive advantage in agricultural production.

In case you missed it: Goat Farming in Australia: Breeds, How to Start, and Guide

Irrigation Method
Image Source

It results from our size, geography, use of technology, and manpower expertise. As a result, agriculture is one of the Australian economy’s most productive and internationally competitive sectors. Other major crops include Cotton (the second most valuable crop after Wheat), Rice, Tobacco, soft and tropical fruits, Corn, Millet, Oilseeds, and many other items widely used in farming. Horticulture is the growing of horticultural crops that make a valuable contribution to Australian agriculture.

It includes cut flowers such as fruits, nuts, vegetables, and ornamental crops. Most products are sold in Australia, but some are exported. Farmers grow tropical fruits such as Bananas, Mangoes, Avocados, and Oranges, as well as soft fruits such as Apples, Pears, and Grapes. Most cultivated vegetables are Asparagus, Potatoes, Tomatoes, Carrots, Mushrooms, and Onions. Australian macadamia nuts are sold all over the world. 

Agricultural production statistics in Australia 

The physical environment and climate determine the agricultural product distribution in Australia. The traditional large-scale Wheat and sheep production system is fairly evenly distributed between New South Wales, Victoria, South Australia, and parts of Western Australia. Queensland, New South Wales, and Victoria produce mostly beef, and New South Wales has the largest and most numerous poultry farms.

Sugarcane and large-scale vegetable production are almost entirely in the tropical state of Queensland, while Cotton is grown in both New South Wales and Queensland. Tropical fruits like Mangoes and Bananas are grown in New South Wales, Queensland, Western Australia, and parts of the Northern Territory. Farm sizes range from small part-time farms to operations over 5,000 hectares.

Australian farming is generally characterized by large-scale, highly mechanized, and efficient operations, partly because only a small part of the workforce is employed in the sector. Due to its importance in the economy, environmental factors have long been overlooked in the production of agricultural commodities.

In the past, the agricultural sector has carried considerable political weight, represented by Labor and national political parties. Political pressure is mounting to end subsidies and other protections given to farmers by urban dwellers. Australian farmers do not already receive many subsidies from farmers in the United States and Europe. 

Australian farmers manage agriculture with significant risks and variations 

Australian agricultural producers manage significant variability, including highly variable climates and volatile commodity prices. These factors lead to significant variations in farm production and income, more than the experience of farmers in other countries and the experience of business owners in other areas of the Australian economy. In recent decades, Australia has seen a trend toward higher temperatures and lower winter rainfall, directly affecting industry performance.

Estimates of the climate model provide some insight into the extent of the climatic future and the adaptation pressures that farmers may face. Rising input costs and drought were the biggest obstacles to crop development, with only 21 and 27 percent of farmers pointing out that these were not challenges on their farms in the last three years. Rising water costs and low availability ranged from moderation to major challenges for most irrigation.

Challenges in Australian Agriculture 

Agriculture is the most efficient and technologically advanced industry in Australia. Australian farmers have achieved this despite facing significant challenges. Australia is the driest continent and has the world’s oldest, shallowest, and most climactic soil. Farmers adapt to these conditions by developing unique and efficient farming methods. They have been helped by technological advances, which have increased agricultural production and even reduced the number of agricultural workers.

Nevertheless, Australian agriculture still suffers from climate change, which has already negatively affected production. Climate change due to global warming, water scarcity, and land degradation – declining land prices – are serious concerns. Australian agronomists face many challenges, such as climate change, rainfall changes, the need to invest in infrastructure and technology, falling commodity prices, and a severe shortage of skilled labor.

For graduates, an imminent challenge will be to increase agricultural productivity. Already, two-thirds of Australia’s land is devoted to farming, and 90% of that land is used for grazing cattle and sheep. One approach is to increase the amount of arable land available to Australian farmers by thinking creatively about introduced species management, restoration of low-nutrient areas, and the relative sustainability of different crops. 

Agriculture loans in Australia

Agristarter loans

Agristarter loans provide farmers to either help them start their own farming business or plan and implement succession arrangements. 

In case you missed it: Pig Farming in Australia: Breeds, How to Start, Tips, and Ideas

Harvesting Machine
Image Source

There are two types of loans: 

  • First Farmer – Loans for those who want to buy, set up, or develop a farm business in which they will keep a single or controlling interest. 
  • Succession – Loans can be used for planning or starting a farm business for succession arrangements.

Loans may be used to:

  • Buy an existing farm business 
  • Set up a new farm business 
  • Buying relatives after a farm business succession 
  • Pay the costs associated with the classification process
  • Pay legal costs or stamp duty.

Individual applicants must: 

  • Become an Australian citizen or permanent resident. 
  • Intend to contribute at least 50% of their labor to the farm business. 
  • Earn or plan to earn at least 50% of your income from the farm business. 

Farm business applicants must:

  • Operate as a sole trader or partnership. a trust or a corporation
  • Registered in Australia with the Australian Business Number (ABN) for tax purposes and the Goods and Services Tax (GST). 
  • Able to repay the loan. 
  • Become an Australian citizen or permanent resident. 

Farm Investment Loans in Australia

Farm investments provide loans to the farm business to make the loan farm stronger, more flexible, and more profitable. 

Loans can be used: 

  • Strengthen your farm business. 
  • Access interstate or markets outside of Australia.
  • Prepare for drought, manage it, or recover. 
  • Refinance of existing debt
  • Repay operating costs or capital. 
  • Increasing productivity 
  • Funding drought-related activities

What are the eligibility criteria? 

  • Become a permanent resident or Australian citizen. 
  • Contribute at least 75% of your labor to the farm business (under normal circumstances) 
  • Earn at least 50% of your income from the farm business (under normal circumstances) 

Market opportunities in Australian agriculture 

The agricultural sector in Australia is highly productive despite serious challenges. Large areas of the country are unsuitable for farming. Australia receives less rainfall than any other continent except Antarctica, with an average annual rainfall of 16.5 inches (42 cm). Deserts and semiarid landscapes cover much of western and central Australia. The best-watered areas are the east and south coasts of the mainland and the slopes of Tasmania.

In case you missed it: Top 10 Agriculture Universities of Australia

Wheat
Image Source

In addition, most of the country’s land is mediocre or poor in terms of world standards. Unlike the great farming areas of other major countries, there is no vast area of ​​rich, adaptable soil. Soil chemical deficiencies are particularly common in Australia. Farmers should apply fertilizers frequently, including large amounts of phosphate and traces of many other nutrients. Export markets account for a large share of Australian Wheat, beef, cotton, sugar, and wool production.

Domestic markets are more important than export markets for mutton, dairy products, coarse grains, pulses, and horticultural crops. About 70% of Australia’s agricultural output is exported. Strong food export opportunities have emerged in the Asian region, with rising living standards and changing food preferences creating more food and a wider demand. For many years, small-scale farming and market gardens have been an important way for Australian families to meet their needs and earn an income.

Although major operations have largely replaced this self-sufficiency, some market gardens still exist on the city’s outskirts, providing perishable vegetables in the local market. The rise of responsible farming and ethical consumerism means that Australians are now more interested in growing their food and understanding where their food dollars are going by making responsible, informed choices in stores or markets.

Conclusion

Agriculture is a very sophisticated and high-tech industry today and has been one of Australia’s most advanced and efficient industries. Please follow the above steps for more information on agriculture in Australia.

How to Start Perch Fish Farming: Raising in Ponds, and Cages, A Step-By-Step Guide for Beginners

0

The Nile Perch, locally called Mputa, is a native of Lake Albert. The Nile Perch is a large fish species that live in the Nile, along with numerous lakes and rivers in the Great Rift Valley. The Nile perch can weigh up to 200 kg and feed on other fish species. Its carnivorous diet and large body size made it difficult for farmers to think about raising it.

How to Start Perch Fish Farming
Image Source

With the increasing demand for aquaculture products, new breeds are being recruited permanently for agricultural purposes. It is one of Africa’s most valuable foods and rustic species. It was cultivated by the Egyptians at least 4,000 years ago in fish ponds (along with tilapia). It has been widely introduced in other areas, sometimes with devastating consequences for indigenous species.

The Nile perch is a freshwater fish in most parts of the Afro-Tropic Ecozone. The body of the Nile perch fish is long, compressed, and deep. It is mainly silver with blue color. It has distinctive black eyes with a bright yellow outer ring. Let’s check out on more information about how to start perch fish farming below.

How to Start perch fish farming

Conditions for Nile perch farming

Nile perch are attractive freshwater fish, but keep in mind when buying a tank for a large variety of fish; you are buying for long-term care and, therefore, should plan for the largest community you want. A 90-gallon tank is recommended for carrying a perch, as they are large, functional, and can grow to fit around you. The tank will need a heater to maintain a temperature between 23-25°C. They live in Africa and prefer warm waters. 

Nile perch habitat

Perches can be large, but they are quite hearty. Like any pet, you want to minimize risk, so use only good-quality fake or real plants. They are predators, but all animals like to have places to rest and hide, so be sure to make a little topography with rocks and inscriptions. Often these fish can also be used for small, decorative ponds, so things like plants, almond leaves, and overgrown wood are great ways to make a natural habitat.

The Nile perch is silver with blue. It has a distinctive deep black eye with a bright yellow outer ring. Females grow larger than males. In the wild, there are usually twice as many males as females. The fish it feeds grows in size as it grows. The best time to feed it is evening or dawn, as it is very sensitive to light. The Nile perch pond should be deeper than the tilapia.

It should be about three meters deep because the Nile perch grows in deep water. You need at least one of them per square meter of water. The basics of starting Nile Perch Farming include a 50-to-100-meter pond if one is going to do medium farming. The pond should be in an area that can retain water even in dry weather. Other expenses include obtaining fishnets from the lake and transporting them to the pond. 

Diet and food for Nile perch farming

Perch will eat anything that might fit their mouths, so keep that in mind when choosing your food and tank mates. Also, remember that these are hearty fish and prefer to eat live. You can keep separate feeders for raising fish or buy cheap feeders, but for proper maintenance of your perch, you need to provide a variety of food, which can be expensive if not properly planned.

They can eat crabs, beef, earthworms, and anything else that is usually sold as live feed or bait. Nile perches are extremely predatory, which they must become to reach their large size. Any abundant small fish is targeted, and tilapia is considered a primary food source, although it will eat other perch. 

In case you missed it: Carp Fish Farming in India: How to Start, A Step-By-Step Guide for Beginners

Perch Fish
Image Source

Nile perch fish behavior 

Nile perch will eat anything that fits their mouths, so they are not good companions for small fish breeds. Ornamental tanks can be great for keeping large species together. Nile perch is relatively easy to care for if you are comfortable providing live food. They will eat everything they can chew, so as long as you keep their diet different, they are like caring for another large freshwater carnivore. Keep in touch with favorite sellers, as it can be difficult to find them regularly. 

Cage culture in Nile perch farming

In cage aquaculture, the Nile perch is reared in enclosed areas inside the lake. The cages use metal bars, wire mesh and nets, and ordinary plastic cans to keep them afloat and act as wave breakers. Farmers strategically place cages inside the lake and feed the fish daily. But carnivorous Nile perch need to find a way to lure other small fish into the cage. One way to do this is to light the cages. 

Cage fish culture involves stocking fingerlings in floating cages and feeding them nutritious food. The fish that will take the feed pellets are usually suitable for culture in floating cages. The biggest advantage of cage culture is that it requires much lower startup costs than other systems. Cages work well on a small scale, but they have several issues that must be considered before making a significant investment. Growing Nile perch in cages is sustainable because you don’t have to feed the fish, as with other species such as tilapia.

Because the Nile perch is large, their cages have nets that allow the surrounding small fish to swim freely in and out, becoming food for the larger fish. Diseases can spread rapidly through fish cages and are difficult to treat with chemicals. Because of this, many smaller cages are recommended over a few larger ones. Stress-related diseases are common when fish are kept in cages during winter, making year-round production difficult. 

In case you missed it: Basic Equipment and Tools Required for Fish Farming: A Beginners Guide

Perch Fish Farming
Image Source

Advantages of Nile perch farming

  • There’s a very high fish production per unit volume of water. 
  • Requires relatively less investment per unit of production than pond or land culture. 
  • The cost of starting a cage industry, including cage material feeds, fingerlings, security, a boat to access cages, and labor – can range from US $ 4,300 to the US $ 590,000. 
  • Using existing water bodies reduces the demand for water on land, which means less industry. 
  • There is also ease in moving cages from one site to another and access to operational methods, such as feeding and cleaning nets. 
  • Ultimately, the profits of cage farming depend, among other things, on the species culture, management level, input costs, and market prices. 
  • The first maturity of the Nile perch is about three years, and it can last up to 16 years, with each individual being able to grow several times and give many fry/fingers. 
  • The Nile perch can be an important habitat for this fish species in brackish (inland saline areas) and freshwater bodies such as lakes, rivers, reservoirs, and irrigation routes. Also, this fish is raised artificially from natural aquifers to man-made aquifers for aquaculture and fishing purposes, where adults live in deep water. At the same time, juveniles are found in shallow water.
  • Food hygiene and safety is a technological order in the modern science and scientific community that points to and focuses on the entire food chain, starting with food production, handling, processing and storage, and the incidence of foodborne infections. If not used properly in food production, handling, and processing, many food-related diseases can result in human health, including loss of life, due to negligence. Food hygiene, safety, and quality are critical global fish trade and market issues.

Stages of Nile Perch fish growth

Nile perch is big, and it is not uncommon for a mature Nile perch to be more than 195 cm long and weigh more than 200 kg. They need warm water for such large growth, and in a tropical lake like Lake Victoria, they will occupy all the lake’s habitats. However, juveniles are found only in shallow waters, usually near the coast. The Nile perch is usually found in high densities and eats fish, insects, and large crustaceans. They eat young Nile perch and fry plankton. 

The Nile perch becomes mature at three years of age, and since it can live up to 16 years, each individual can reproduce multiple times and produce more offspring. They also grow for most of the year, and a single female perch can lay up to 16 million eggs at a time. The female Nile perch begins to grow when it grows to 50-80 cm. When the female collects the eggs and is fertilized by the male, the eggs are left alone. Nile perches do not guard eggs or raise fry.

Adult Nile perch shows silver with a blue tinge. Their eyes are black and very distinct, with a bright yellow outer ring. The adult Nile perch is somewhat similar to the adult Barramundi fish, but the Barramundi is not capable of breeding in freshwater lakes. Many disproportionately wide marks hide juvenile Nile perch on their body, and many black marks spread from the area around their eyes. These markings will gradually disappear as they get bigger. 

In case you missed it: Fish Farming in USA: How to Start, Breeds, Business Plan, and Guide for Beginners

Perch Fish
Image Source

Nile perch fishing 

Small-scale fishing boats are driven mostly by sailing, and paddles are used on the smallest boats. However, the number of boats powered by outboard engines is increasing, indicating a high investment in local Nile perch fishing. One to three fishermen use one boat. Fish are caught mainly by flower nets, hand lines, and sometimes (short) long lines. Those caught in the gill nets usually die when the nets are lifted.

The fish are kept in unsecured or ice boats and taken to landing sites, mostly on beaches, where company buyers weigh them and buy them by boat or vans insulated with ice, or fish are bought by local women. Fishing also creates indirect employment for additional fish processors, transporters, factory workers, and others. Across the lakeshore, ‘Boom Towns’ has been developed in response to demands from fishing crews who have the money to spend a day fishing. 

Fishing for the Nile perch is primarily done with live bait or catching fish and trolling with large plugs or spoons. There may be some casting, especially in small areas of rivers where fish are more likely to be in ponds. The bait can include any common fish up to a pound, especially tilapia and a tiger fish. In lakes, anglers focus on rocky bays and inlets. The Nile perch is a good fighter for small and medium sizes and is very brute in the heavyweight class.

They make a lot of regular runs, and if they are big enough, they can take a lot. Anglers who fish with large natural baits often use very heavy tackles and lure large specimens. It is more difficult for river dwellers to land than for those living in lakes, especially for anglers who have to catch fish off the coast; boats do not help chase fish, and you have to deal with currents and edges. Large numbers of water hyacinths increase the difficulty of catching large fish in some rivers and lakes.

Nile perch raising in Ponds

The culture of ponds involves stocking fish in specially designed ponds filled with standing water. When properly managed, it is a proven and reliable source of fish production. All fish species suitable for aquaculture can be grown in standing water ponds. It is the most common method of fish culture. Water is maintained in an enclosed area by artificially created ponds where aquatic animals are reared.

In case you missed it: Earning 1.5 Crores from Rohu Fish Farming: A Success Story of a Fish Farmer in India

Perch Fish
Image Source

Ponds can be filled with canal water, rainwater, bore water, or other water sources. An efficient inlet and outlet system is essential for the successful operation of the pool system. It is the form of a pipe through which water enters and exits the system. The internal system of the pond should be slightly higher than the output system to get maximum water flow. A proper inlet and outlet system prevents the pond from overflowing in the event of heavy rains or minor flooding. It is very beneficial for the proper management of water quality. 

Digging your fish farm pond depends on the size of your fish farm pond; you will need either: 

  • A big shovel, a lot of energy, and a lot of time for hard work or; 
  • A bobcat or excavator can handle digging the area and the size of the pond. 

Filling the Pond with Water – To ensure the liner stays in place when filling the pond, you can place a good-sized stone in the center. It helps prevent the tarp from lifting and floating when there is minimal water in the pond. You must place some stones around the outer edge of the tarp to help prevent the water from falling as it gains weight. 

Once the fish pond is full, the weight of the water will help keep it in place. You can set up a pump system (if applicable). If you do not intend to use the pump system, you can work on introducing your fish. However, do not forget that fish need some oxygenated water to survive and grow healthy. You can give them oxygen by placing a running hose in the pool 2-3 weekly at 15–30-minute intervals. 

When introducing your fish from a fish pond, it’s a good idea first to let the water and dirt residue settle. Once ready, slowly start mixing the pond water into the bucket of water in which your fish are for 10 minutes; this will help them adjust to the new pH levels of the water. The fish farming business is a great way to provide you and your family with a sustainable food source. As your fish breed, you will know that you will have more than enough food to live on for years.

As the first month progresses, check your fish regularly to see if you can improve any part of the pond. It will help keep the fish pond running well for a long time. Ponds have generally proved to be the most economical means of fish production and obtaining the highest production of fish per unit of available water.

In case you missed it: Earning 1 Lakh Per Month From RAS Fish Farming: A Success Story From India

Perch Fish in Hand
Image Source

Like cage culture, a regular program monitoring dissolved oxygen and other water quality variables is essential. Still, pond culture fish can avoid many water quality problems that kill caged fish. The Nile perch is housed in the same structure as the other small fish species. In this case, we allow both species of small fish to reproduce in large quantities, thus naturally providing food for the Nile perch.

The pond where the Nile perch is kept, however. Under normal circumstances, when fish species such as tilapia are bred, farmers resort to avoiding overproduction, which is difficult to manage, but Nile perch fish ponds. In other words, breeds of carnivorous fish prey on reproductive fingerlings, which makes it possible to control the parent stock population while at the same time feeding the larger fish.

Cereal Farming in the USA: How to Start, Crops, Production, A Step-By-Step Guide

The United States is a market leader in many of the world’s largest crops. Cultivation of cereal crops for other uses, including cereals, human food and livestock feed, industrial starch, and biofuels. Cereal cultivation varies widely in different countries and depends on the degree of economic growth. Other factors include soil type, rainfall, and techniques to promote growth.

Cereal Farming in the USA
Image Source

Under grain production, land refers to the cultivated area, although some countries report only sown or cultivated areas. Cereals include Wheat, Rice, Corn, Barley, Oats, Rye, Buckwheat, and mixed grains. Cereal production figures relate only to crops harvested for dry grain. Cereal crops harvested for grass or green for food, feed, or silage and used for grazing are excluded. 

There are many reasons why cereal crops are such an important crop. One more of these grasses is available in the world’s different climates. In the northern region, Barley and Rye; in temperate regions, Wheat and tropical regions and in temperate regions, Rice and Maize. They can be cultivated with less effort and yield more. 

Cereals are relatively easy to handle and store because they are low in water, and their food is very expensive. Cereals contain a lot of carbohydrates, plenty of protein, some fats, and any other food plant. There are even vitamins. In modern times the quest for greater crop yields has sometimes sacrificed flavor, and low crop-yielding varieties that may possess quality characteristics are gradually being ignored or even lost.

Cereal farming in the USA

Cereal cultivation practices in the USA

Cereal cultivation varies widely in different countries and depends on economic development. Cereal production depends on the nature of the soil, rainfall, irrigation, quality of seed, and techniques used to promote growth. In developed countries, grain crops are usually harvested by machine, using a combine harvester, which harvests, threshes, and winnows grain in a single passage across the field.

In many industrialized countries, especially in the United States and Canada, farmers usually deliver their freshly harvested grain to a grain lift or storage facility that strengthens many farmers’ crops. In developing countries, various harvesting methods are used to grow grain, depending on labor costs, from small combined harvesters to hand tools such as the scythe or cradle. Crop production systems have developed rapidly over the past century.

As a result, crop yields have increased significantly, resulting in soil degradation and erosion, pollution from chemical fertilizers and agrochemicals, and biodiversity loss. There are also unwanted environmental side effects. Factors such as the Green Revolution have made impressive progress in increasing grain production over the past few decades. However, this development is not the same in all regions.

Sustainable development depends on maintaining agricultural research and education. Grain cultivation varies widely in different countries and depends on the development of the economy. Yield depends on soil type, rainfall, irrigation, seed quality, and techniques used to promote growth. Agriculture is a major sector in many economies, and agricultural activities give food and income to developing countries.

In case you missed it: Post-Harvest Technology of Cereals, Pulses, and Oilseeds

Wheat Farming in the USA
Image Source

But agricultural activities can also damage natural resources. Efforts to increase productivity through chemical fertilizers, pesticides, and intensive irrigation have environmental costs and health effects. Salting irrigated land reduces soil fertility. Thus, improper use of input for agricultural farming has far-reaching effects.

Then, there is no correct mix of inputs in agricultural land, as it depends on the local climate conditions, land quality, and economic development. Appropriate application rates vary over time and depend on crop type, climate, soil, and the production process used. 

Cereal crops cultivated in the USA

The grass family includes more than 9,000 species worldwide. Thirty-five of them have been cultivated as cereals. Of these, the following are important cereals in the USA. 

Barley farming in the USA

Idaho produced the most Barley in the United States, followed by Montana and North Dakota. In the United States, about three-quarters of what is currently cultivated is used to produce malt. The rest is used for livestock feed or human feed. The human food segment is small (~ 4%) but growing in importance. Barley is also grown as fodder.

In most cases, there are specific types of Barley that are best suited for each of them. Some Barley varieties can be used for more than one purpose, and in many cases, their final use will depend on how they have been managed and the characteristics of the harvest time. High-quality feed barley with high protein levels and test weight is essential for low protein levels and plumpness.

Barley varieties are classified into either six rows or two rows, depending on the physical arrangement of the kernels on the plant. Barley is also called hulled or hull-less because of the beards covering the kernels. Although the six-row barley varieties traditionally grown in North Dakota, Minnesota, and Idaho were predominant, the two-row varieties are currently dominant in those states, as is the rest of the United States, where winter and spring are prevalent.

There are both types of Barley. Most production in the United States uses spring varieties. Growing winter varieties is not an option in the northern United States because the available varieties do not survive the winter. Some important cereal cultivating places in the USA are Idaho, North Dakota, Montana, Colorado, Wyoming, and Washington.

Corn farming in the USA

Corn production has increased over time as more production technologies (seed varieties, fertilizers, pesticides, and machinery) and production methods (reduced tillage, irrigation, crop rotations, and pest management systems). Strong demand for ethanol production has led to higher maize prices and has incentivized farmers to increase maize acreage.

In many cases, farmers have increased the area under maize by adjusting crop rotation between maize and soybeans, which has reduced soybean cultivation. Corn is an essential part of the United States in the significant Cereal group. Maize was thought to have originated in a wild state in the lowlands of southern Mexico and Central America, from where it spread to the Andes, where its cultivation dates back to prehistoric times.

In case you missed it: Corn Farming in USA: How to Start, Production by State, and Cultivation Guide

Wheat Farming
Image Source

As annual summer corn, certain environmental conditions are required for proper growth. This plant performs best in fertile, weak, well-drained alveoli, deep, warm river layers, and dry swamps. These soils should be high in organic and nitrogen and should not be cooked. Furthermore, temperature, sunlight, and humidity are limiting factors. Corn primary growing areas are Illinois, Nebraska, Minnesota, Indiana, Kansas 

Oats framing in the USA

Many producers grow oats because they fit into most crop rotations, perform well on various soils, cultivate the soil, and help prevent soil damage. The major oat-producing states are South Dakota, North Dakota, Iowa, Minnesota, Wisconsin, and Nebraska. Oats are usually grown in summer or autumn. Like most crops, a good plant starts with good soil preparation. Oats grow best when planted in dry soil.

Like Wheat, some farmers prepare the soil through cultivation, and some do not depend on the size of their farm. They use machines like tractors and heroes to sow seeds till the soil. Oat seeds are usually planted in early summer or early fall and remain dormant in winter. Because oats require cold weather to grow, they are mostly grown in the northern parts of the Midwest. During the winter, the seeds germinate to store energy until it is time to germinate.

Oat plants finally begin to grow in the spring when the weather is warmer. Oats can be grown under different crop patterns. They can be planted as a companion crop to grass or bean seeds, as a cover crop to prevent wind and water erosion, or for pasture, grain, straw, or all three. Spring or northern white oats are the most common variety in the United States.

Other species are red oats (grown in the south) and gray oats (grown in the northwest). Spring oats are usually planted in April and May. Seedbeds can be prepared with a disc, moldboard, or chisel plow, and the soil must be well-drained. 

Rice farming in the USA

The Rice crop prefers a climate with an average summer temperature of less than 25°C. It grows best on moist soil below with semi-immature subsoil in areas where it can flood. The United States produces abundantly in the southeastern states and California, Arkansas, and Louisiana. American long-grain rice production is concentrated in the south (Arkansas grows about 56–58% of the US long-grain crop.).

California is a major producer of rice, which grows 69-76 percent of the crop. However, Arkansas grows plenty of medium-sized grains, especially in the years when California is experiencing a drought. Louisiana usually grows very small amounts of medium rice. Short-grain rice is grown exclusively in California. All American rice is grown in irrigated fields, which have the highest yields in the world.

In the United States, producers can plant seeds in the air in flooded fields or drill or broadcast seeds in dry fields. California producers sow mainly in flood-affected fields, mainly through the air. In the Delta, most producers drill or broadcast the seed in dry seed, while farmers in southwest Louisiana and the Gulf Coast of Texas sow the seed in the air in flooded fields and drill or broadcast the seed in the dry seed. USA Rice represents rice growers in Arkansas, California, Louisiana, Mississippi, Missouri, and Texas, the six largest rice-producing states.

In California, production is dominated by short- and medium-sized japonica varieties, including crops grown for local climates, such as Calrose, which makes up 85% of the state’s crop. The broad range of rice grown includes long-grain, medium-grain, and small-grain rice. Each year, rice farmers in the USA sustainably grow roughly 20 billion pounds of rice in Arkansas, California, Louisiana, Mississippi, Missouri, and Texas.

Half of the rice crop is eaten in the United States, where 80% of the rice is consumed locally. However, the other half of the crop is exported to more than 120 countries worldwide. The American rice industry provides important jobs in rural areas across the country. The rice industry contributes more than $34 billion annually to the US economy and employs more than 125,000 people in the United States. 

In case you missed it: Ways Wheat Farming Make You Rich in a Short Time

Wheat Field
Image Source

Sorghum farming in the USA

Sorghum is an important hot crop in the grass family. Sorghum is grown in over a dozen US states but is a major crop in Kansas, Texas, Colorado, Oklahoma, Nebraska, and South Dakota. The average yield for the United States was 69 bu per acre, although production limits change from state to state.

The most commonly planted genotypes in the United States are hybrids, which means that farmers cannot use the saved seeds and expect to retain the genotype performance. Farmers should use impartial ground grant university trial data when choosing a hybrid. In addition to production, resistance to pests and diseases and length of maturity should also be considered.

A desiccant may be recommended to facilitate early harvesting to avoid weather-related damage and bird damage. The USA is the largest exporter of millet, accounting for about 75% of world trade. In the United States and other countries worldwide, millet grains are used primarily for livestock feed and ethanol production but are gaining popularity in the consumer food industry.

The stems and foliage are also used for green harvesting, hay, silage, and pasture. About one-third of the American sorghum crop is used to produce renewable fuels. Sorghum is more tolerant of wet soil and flooding than most grain crops – an interesting phenomenon in terms of its drought tolerance. However, mostly poorly drained, wet soil is too cold for grain sorghum in Wisconsin and Minnesota. 

The nutritional requirements of sorghum are similar to the requirements of com in that sorghum uses relatively high amounts of nitrogen and moderate amounts of phosphorus and potassium. Almost all grain sorghum is harvested with a combine as a standing crop. Combination time will depend on the fall season and the availability of grain drying facilities.

Sorghum grains can be cleaned head-free when the moisture content of the seeds is 20-25%. The seed matures physically at even higher moisture levels. Frost usually kills the tops of the plants and helps reduce moisture. Some hybrids have loose, open heads that speed up field drying. 

Wheat farming in the USA

Wheat is the third-largest crop grown in the USA. The United States produces hard red, soft red, and white winter wheat and hard red and dorm spring seed varieties. Very small amounts of white spring wheat are also grown. Wheat is a staple food grown in the United States. The three main types of locally sown grains are winter wheat, spring wheat, and durum wheat. 

North Dakota, Kansas, and Montana were the top wheat-producing states in the United States. In the spring, plant growth resumes and grows rapidly until the summer harvest. Winter wheat production averages about 70% of total US production. Wheat is best suited to moderate dry temperate climates and is not grown in hot, humid areas.

A climate of at least 90 days and annual rainfall of not less than 9 inches is required. More than 30 inches of rain is harmful. Areas where cool, moist springs merge into warm, bright, dry harvest periods, are usually the best, but different types of Wheat vary in their needs. The major Wheat-producing states are Kansas, North Dakota, Montana, Washington, Oklahoma, Idaho, Texas, Oregon, Minnesota, South Dakota, and Colorado.

In case you missed it: Top 20 Steps to Boost Wheat Yield: How to Increase Wheat Production

Wheat
Image Source

Further Wheat classification can be as follows: 

  • Hard red winter wheat (HRW), which produces 40%, is mainly used in flour production, which is grown in the highlands. It grows from Texas to the largest producing state, Kansas, and continues throughout the north to Dakotas and Montana. 
  • Hard red spring (HRS) wheat (including Dark Northern Spring Wheat is also subdivided) high protein value, and approximately 20% production is preferred for making high-quality bread from North Dakota, Montana, Minnesota, and South Dakota. 
  • Soft red winter (SRW) wheat with an average production of 20%, raised in the states of Ohio, Kentucky, Indiana, Washington, Oregon, Idaho, Michigan, New York, and the Southeast; the flour from this type is used in making cakes and crackers.
  • White Wheat variety accounts for an average of about 12.5% of production in Washington, Oregon, Idaho, Michigan, and New York states with its flour used in making products of soup noodles, crackers, cereals, and white-crusted bread.
  • Durum wheat is the preferred variety for making pasta, grown mostly in the states of Arizona, North Dakota, and Montana, with an average production level of 4%.
  • The byproducts from milling the above varieties are used to feed animals.

Rye farming in the USA

The USA is a major Rye producer. Rye is grown here in the USA as a cereal crop, mainly in Georgia and Oklahoma. Cheap and easy to establish, rye outperforms all other core crops on barren, sandy, acidic soils or poorly prepared soils. It is widely adaptable but grows best in cold, temperate regions. Growing taller and faster than Wheat, rye can break the wind and trap snow or prevent rain in winter. For example, rye is one of the easiest crops you can choose to grow. 

It grows well even in very poor soil, which requires little work. It is also much cooler than Wheat. Rye can be grown in wider environmental conditions than any other small grain. Winter rye is the hardest of all grains in winter. Rye usually grows well during the colder temperatures in late autumn and begins to grow much faster in early spring. However, rye cannot survive the winter in potholes or other wet areas where water accumulates form.

In case you missed it: Growing Wheatgrass In Containers, Indoors Information

Wheat Farm
Image Source

Cereals planting tips 

The warm-season cereals are grown year-round in tropical lowlands and under temperate climate conditions during the frost-free season. Rice is usually grown in flooded fields, although some varieties are grown on dry land. Grains from other warm climates, such as millet, adapt to dry conditions. Cold cereals are well suited to mild climates.

Most species of a particular species are either winter or spring species. Winter varieties are sown in the fall; sprouts grow and grow vegetatively, then become dormant in the winter. They begin to sprout again in the spring and mature in late or early summer. This cultivation system maximizes water and frees the land for another crop early in the growing season. 

Winter varieties do not bloom until spring because they require vernalization: exposure to low temperatures for a genetically determined time. Where winters are too hot for vernalization or too severe for the crop (which varies by variety), farmers grow spring varieties. Spring cereals are planted in early spring and mature later in the summer without vernalization. Spring cereals generally require more irrigation and produce less than winter cereals.

Conclusion

Cereals have excellent demand in the United States, Cereal farming in the USA is a profitable venture.

How to Start Organic Container Gardening: A Step-By-Step Growing Guide for Beginners

0

Organic container gardening is an environmentally safe way to grow fruits, vegetables, and other plants in containers. Follow the principles of organic gardening; you can grow plants safely in various containers. It includes knowing the history of your containers and choosing materials that do not release toxic materials into the soil. Let’s check out how to start organic container gardening below.

How to Start Organic Container Gardening
Image Source

Organic Container Gardening – It represents gardening in containers using organic ingredients. In other words, a plant is grown using natural or organic fertilizers to make good soil. It acts as a plant lifeline when all this is done in containers; hence it is called container gardening. Gardening uses seed fertilizer and soil to grow a plant in a container or garden. Through gardening, you get in touch with nature.

Organic means natural without any harmful chemicals. It comes from living things or things that are good for man’s and nature’s health. Use the wasteful things which come from living things. Container gardening is ideal for those with only a small space for their plants. If you only have a small yard or deck, or if your garden is small, container gardening is the best choice. The main focus on containers for organic gardening is to choose something completely free of pesticides, herbs, fungicides, or other synthetic chemicals.

Benefits of organic container gardening 

Organic container gardening is growing in popularity. The benefits are: 

  • No yard required. 
  • Anyone can do it. 
  • Some tools and materials are needed. 
  • It is relatively inexpensive to start and maintain. 
  • No digging or tilling is necessary. 
  • Containers can be placed and put in virtually any desired location. 
  • Choose to place the garden in the most beneficial place. 
  • Better control of growing conditions.
  • It is easier to protect plants from extreme or adverse weather conditions. 
  • Grow edible herbs and vegetables. 
  • It saves space – This means that it is ideal for people who have small gardens and courtyards. 
  • It’s cheap – Almost anything can be used as a container. It is practical. Container gardening reduces workload. 
  • More varieties – You can grow plants that may not be suitable for growing in your garden soil, and plants may grow close to each other even though they may have different soil requirements. 
  • No weeding: Due to the small surface region, it is unlikely that grass seeds will find their way into pots. 
  • No heavy garden tools: saves money with less care.

Locations to place organic container garden plants

  • Balcony – Another place you can place containers because the sun doesn’t shine all day long. 
  • Kitchen – You can also hang organic containers in the kitchen window to get fresh air or give people fresh food to meet their needs. 
  • Organic container planting places include decks, balconies, driveways, sidewalks, window boxes, and hanging boxes.

Principles of organic container gardening

The principle of organic gardening is to improve the health of plants and the people who use them. But it also encourages using renewable resources that conserve soil, water, and energy to improve the quality of the environment. Organic gardeners can prevent toxins from contaminating plants when using containers. Safe container gardening means doing everything you can to avoid using containers that may contain chemicals that can get to your plants through the soil. 

What type of container is used for organic gardening?

In organic container gardening, you can use these containers like terracotta, clay, plastic, or wooden box. 

In case you missed it: How to Start Organic Kitchen Gardening: Tips, Ideas, and A Step-By-Step Guide for Beginners

Organic Container Gardening2
Image Source

Terracotta or clay – It is the most people use because it looks like a beautiful and traditional way of planting. Both containers have good drainage holes for soil and plant growth. 

Plastic container – Plastic is a reusable product found mainly in our homes. It is another method to grow a plant. Just make a hole in the bottom of the bottle and add some soil; this way, you can grow the plant. 

Natural stone and concrete – Natural stone containers like clay or terracotta are an attractive and safe option for organic gardening. However, stone utensils are fragile, so they may not be as durable as wooden or plastic utensils on the outside. Concrete is safe container material, but it can be heavy, so it is not suitable for the plants you will need to rotate. 

Recycled plastic containers – Recycled plastic containers are lightweight and durable and contribute to a healthy environment. Plastic is also cheaper and available in different colors, sizes, and shapes. Look for a container-based recycling symbol to determine if a container is made of recycled plastic. Pay close attention to the recycling numbers on the container, which can tell you there is more or less risk of chemicals leaking into used plastic. 

Wooden box – Wooden boxes or trays are the best way to grow plants in large quantities. It gives you the best results when you want to grow food in a wooden pot as it can be kept out due to the large space. 

Vegetables growing in organic container gardening

You can grow these vegetables through Organic Container Gardening as follows: – Peepers, Baby Onion, Radishes, Peas, Mushroom, Bell peppers, Beets, Carrots, Broccoli, Green beans, Tomatoes, Kale, etc.

Fruits and herbs growing in organic container gardening

Fruits – Apples, Blackcurrants, Blueberries, Gooseberries, Pears, Raspberries, Redcurrants, Strawberries, White currants.

Herbs can also be grown in organic container gardening. Some include Thyme, Savory, Dill, Mint, Basil, Parsley, Chives, and Sweet Marjoram.

How to start organic container gardening: A Step-by-step guide for starting organic container gardening

Step 1: Carefully select your soil

Soil should contain essential nutrients for the soil when you want to do organic gardening. For this, we will use dry and light soil. You can use garden soil, dung manure, animal waste, plant residues, vermicompost, and fertilizer for organic food. Do not use harmful chemicals in organic food. Soil is the ‘home’ of your plant. In the same way, they get access to most of their food and water, so choosing good soil is essential for good growth.

In case you missed it: Organic Farming in Germany: How to Start, A Step-By-Step Guide for Beginners

Organic Container Gardening1
Image Source

Soilless mixes are the best option for container gardens, with good drainage and aeration. However, some store-bought clay mixtures may contain synthetic ingredients that interfere with your organic growth mission. Make sure to buy only soil mixtures that are organically marked. Alternatively, you can create your soil mix or source from responsible and reliable sources.

Soil mix is ​​perfect for growing in containers, according to the weather and the needs of your plants, and contains the best mix for your vegetable selection. When selecting what to use to fill containers, don’t use garden soil on your own, no matter how well things grow in it. Container soils are often called soilless or artificial media because they have no soil.

When these mixtures are used, they should be slightly moistened before planting. Fill a tub with media, add water and lightly moisten the media. When filling containers with media, do not overfill the container. Leave an inch of space between the clay’s top and the pot’s edge. Containers require well-ventilated and well-drained soil while retaining enough moisture for plant growth. 

Step 2: Sun and light requirements

When choosing plants, consider the light available for a particular location and read the light requirements on individual seed packets and plant labels. If you are planting many plants in one container, or one pot, in an area, do not mix the plants with different lighting needs. 

At the same time, it is surprisingly easy to provide plants with the light they need when you use pots. If you see that they are not getting enough sun, pick them up and take them to a sunny place. If they are in too much sun, take them to a shady place. It is also important to change the container’s location as the amount of sunlight available varies with the seasons. 

Step 3: Select the container carefully

Going the container way saves space and helps control pests and soil problems, making it possible to have fresh produce grown at home without a yard. But it is important to select a seed or plant specifically designed for compact container space. With the growing interest in container gardening, seed companies are producing vegetable seeds explicitly designed for container gardening.

Anything with soil and drainage holes at the bottom can be turned into a container garden for ground plants. For vibrant plant growth, containers should provide adequate space for roots and soil sources, allowing the plant to flourish. Cover the drain by placing gravel or newspaper under the container to make sure the water drains but not the dirt.

When choosing a container, it is best to use one large enough to support the plant’s root system and keep it healthy. Before you use a container, you must ensure it is clean. It means that no soil or any other material from previous seasons should be left on the walls. The container should be sterile so that it does not endanger your plants. When looking for containers for use in organic container gardening, you should make sure of two important things: 

  • Containers have holes or slots at the bottom to draw water out. 
  • That you have space to accommodate containers. 

In case you missed it: Organic Raised Bed Gardening: How to Start from Scratch, A Step-By-Step Guide for Beginners

Organic Container Gardening3
Image Source

Step 4: Choosing organic planting medium 

Never use a garden soil mix in pots or containers for growing plants. These products are designed for use in garden beds; when used in pots, they retain too much moisture. All of this leads to a water-filled root system and the ideal growth of plants. Organic potting mix for growing plants is ​​a certified organic product that maximizes aviation and water retention. 

Step 5: Planting process

Plant seeds or seedlings according to the instructions on the planting packet. Seeds work very well because the mixture provides good conditions for seed germination. Since plants start very small, a common mistake is to place them very close to each other. However, as the plant matures, they become crowded and do not perform, nor do they taste as good as if they had enough space. Tomatoes will do best with a strong plant per pot. Beans and peas will work evenly with 2 to 3 plants per pot. Remember to water well.

Step 6: Feed your plants consciously

Feeding your plants well is especially important when growing in a container garden. Due to drainage holes, nutrients can be washed away and never reach your plant. Firstly, make sure you add organic matter to your soil before planting. It will help in priming the soil for the growth of your plant.

Step 7: Fertilizer requirement for organic container garden plants

Fertilize plants organically that are chemical-free. Follow the instructions carefully on the fertilizer you buy to feed your garden plant as much as possible. A regular fertilizer program is required to keep the plants growing and attractive in all seasons. The fertilizer choice analysis will depend on what type of plants you grow. More nitrogen sources would be good for plants that are grown for their plants, while flower and vegetable crops would prefer varieties with less nitrogen and more phosphorus. 

Container-grown vegetables are best fed by mixing fertilizer and balanced organic fertilizer each time you re-pot, followed by a liquid fertilizer procedure when the roots begin to fill the container. Most well-known brand pottery soils already contain starter fertilizer, and organic pottery soils contain nutrients from the fertilizer used to make them. Fish emulsion or kelp compounds are popular with organic gardeners or make your liquid fertilizer.

When it comes to organic container gardening, fertilize with things that are organic and as natural as possible. Organic fertilizers mixed with water and applied around plants include liquid sea kelp, compost tea, and fish manure. Worm casting, composted chicken manure, blood meal, nitrate of soda, alfalfa meal, and cottonwood meal are organic fertilizers that can be applied around your garden plants. They are a dry organic fertilizer and can be added to the growing medium when planting. They can be re-applied as needed.

In case you missed it: Organic Farming in USA: Crops, How to Start, A Step-By-Step Guide for Beginners

Organic Container Gardening4
Image Source

Step 8: Watering the container garden plants

Water in the morning (or as soon as possible). Ideally, container plants should be watered as soon as possible during the day. Watering the plants early in the day gives enough moisture to warm in the afternoon. It also ensures that their leaves dry out by night. Moisture on the leaves at night can encourage the spread of the disease.

Potting soil is lighter and less compact than ordinary garden soil; you will want to water more often when growing in pots. To test the soil moisture, let your fingers move. Press one finger into the potting mix to a depth of at least two inches. If your containers are outside, check the humidity level often, they dry quickly in all this sun and wind. 

The easiest watering potted plants is a watering can or a gentle hose. However, when you water, ensure you water the soil, not just the leaves. Continue watering until the drainage holes in the bottom of the vessel are closed. The idea is to water well but give enough time to dry the soil. 

Caring for your organic container garden plants 

  • Containers offer the advantage of being portable. As weather, temperature, and lighting conditions change, you can move your containers to maintain the desired conditions for optimal performance. 
  • Most fruit vegetables such as Tomatoes, Peppers, Cucumbers, Squash, and Eggplant need full sun. 
  • Leafy vegetables like Mustard Greens, Spinach, Lettuce, Cabbage, Collards, and Parsley can tolerate more shade than root vegetables like Radishes, Carrots, Turnips, Beets, and Onions. 
  • There are fast rules when it comes to watering. So, you should always look at your containers and understand the needs of the plants you choose to put in the containers. 
  • The best way to tell if a container growing plant requires water is to feel the soil. Use enough water each time so that water starts dripping from the drain holes. 

Pest and disease control in organic container plants

Growing container plants make it easier to keep pests and diseases to a minimum. Because plants are raised above ground level, they are less susceptible to damage from slugs, rabbits, and other critters that damage garden plants, soil-borne bacteria, and fungi. Keeping containers close to your home also reduces the risk of harming the deer.

And since you often look closely at your container plants when watering, fertilizing, and nurturing them, you’ll probably find some insects before they do more than chew one or two leaves. The quickest and easiest way to control organic pests is at your fingertips: pick the insect leaves, buds, or shoot tips, or pick large insects individually, and wash them with soapy water. If you feel you need to spray, find an insecticide spray in the center of your local garden and apply it according to the instructions on the label. 

Harvesting tips for container growing plants

Early in the day is usually the best time to harvest as it is cold, and your fruits and vegetables will still be well hydrated. It is also recommended not to harvest during the rainy season as water can encourage the spread of diseases among plants. Do not cut any produce that is contaminated by bird or animal droppings. Also, beware of anything that is hurt or damaged by animals or the sick.

This type of production should be kept away from healthy production. You can put in a pile of compost, harmful to use in your next growing season but otherwise healthy. When harvesting leafy greens, be sure to prune outside to extend the life of your plant. It will encourage your plant to grow further and grow the crop! Some leafy vegetables are best harvested when they are small and tender. When harvesting fruits and vegetables, make sure they are ripe and ready. 

In case you missed it: Organic Vegetable Farming in USA: How to Start, and Top Production States

Organic Container Gardening6
Image Source

Conclusion

Organic container gardening is planting and maintaining any organic vegetable or herb in temporary or permanent containers. For individuals to start organic container gardening, all the information they need to know about it, such as its benefits, growing plants, containers to use, media to use, and vegetables. Please follow the above steps to start organic container gardening successfully.

Top 18 Steps/Ways to Boost Onion Yield: How to Increase Production, Size, and Quality

Onions are amazingly easy to grow. Onion is a high-yielding crop. Onion (Allium cepa L.), also called bulb Onion or common Onion, is a vegetable that is the most cultivated variety of the Allium genus. Let’s check out the top 18 steps/ways to boost Onion yield below.

Top 18 Steps/Ways to Boost Onion Yield
Image Source

Top 18 steps/ways to boost Onion yield

Step 1: Select the best varieties of Onions for higher yield and profit

Top varieties of Onions are Pusa Red, Pusa Ratnar, Hisar – 2, Pusa White Flat, Pusa Madhvi, Bhima Raj, Bhima Super, Bhima Kiran, Bhima Shweta, Akra Pragati, etc.

Step 2: Selection of quality Onion seeds for good production

Several varieties of Onions are generally grown for commercial purposes. The type of cultivation depends on the type of seed. Some popular Onions include Nasik Red, Prerana, XP Red Onion, Gulmohar, Prema Onion, and Marshall Onion. However, the best-selling varieties of Onion in recent times are Ganga Putra and Ganga Prabha. It is also important to prioritize high-quality seeds to get better yields.

Mahyco seeds, Kaveri seeds, Nuziveedu seeds, Rasi seeds, Krishna Sandhan seeds, Bayer and Syngenta seeds are some of the top seed companies that provide high-quality seeds. The largest varieties of Onions include Ailsa Craig, Expression, Kelsae, Rossa di Milano, Scout, Sierra Blanca, T-448, Walla Walla, Yellow Granex, and Zoey. With proper care, these Onions can grow up to 4 to 6 inches in diameter and weigh up to a pound or more. 

Step 3: Soil management for high Onion growth

Onions can be grown extensively in clay, loamy and heavy soils. Ideally, Onions grow well in red to black clay soils with good drainage capacity. The best soil for Onion crops is deep, greasy loam, moisture retention, and burnt soil with sufficient organic matter. The Onion crop can be successfully grown on heavy soils using organic fertilizer before planting, and the field must be well prepared for Onion farming. Regardless of the soil type, the optimum pH range is 6.0-7.5, but Onions can also be grown in light, alkaline soils. 

Step 4: Onion planting method for more plant growth

Planting Onion sets rather than seeds, simply because the sets are quick to set up and easy to plant. Onion sets are small Onions that ripen in about 14 weeks. They can withstand mild frostbite and have a higher success rate than directly sown seeds or transplants. In general, Onion sets look like small bulbs and are sold at gardening stores. Once they mature, they take on the shape of a full-size bulb.

Choose Onion sets with bulbs 3/4 inch in diameter. Adults develop stiff necks and go into seed. Of course, starting Onions from seed is feasible and may be necessary for colder regions (Zone 5 and above). Seeded Onions need at least 10°C of soil to grow, so they should be started indoors about six weeks before transplanting. 

Step 5: Sowing time for getting more high-quality Onions

Onion is sown from June-July to October-November as the Kharif season crop. In contrast, from November-December to April as the Rabi season crop, Onion is sown as a summer crop from January-February. 

In case you missed it: Fertilizer Management for Onion: NPK Ratio, and Micronutrients

Onion Gardening
Image Source

Step 6: The easiest way to fertilize Onions for crop development

Onions are heavy feeders with shallow root systems, so proper soil fertilization is essential for high yields of high-quality Onions. Adequate soil fertility is especially important in areas where the length of the day should be reduced to allow the Onion to grow faster before it becomes a bulb. Different fertility requirements will allow you to easily provide Onions with the nutrients they need.

Onions need timely nutrient utilization for maximum growth and productivity of plants. Choose the fertilizer type and rate to ensure that all the important nutrients are sufficient for high yields. High-quality Onions and the best fertilizer are essential for production. Onions need moderate nitrogen, but nitrogen fertilization is still important because Onions have weak, shallow root systems.

Decaying organic matter provides some nitrogen, so as your soil organic matter increases, your nitrogen requirements will decrease. For Onions grown in moderately organic soil, use 5 1/4 ounces of applied nitrogen per 100 square feet of growing space. You can provide this amount of nitrogen with 4.7 pounds of cotton seed meal, 2.7 pounds of blood meal, or 3.3 pounds of commercial 10-10-10 fertilizer. 

Nitrogen is a major component of various amino acids and proteins important for the protoplasmic constitution, its function, cell division, growth, and photosynthetic activity. Nitrogen fertilizers always increase Onion production. Onions are relatively high in potassium and phosphorus.

Fertilizers provide these nutrients to crops in the form of potash and phosphate. Apply about 2.2 ounces of phosphate and 4.8 ounces of potash per 100 square feet. You can provide adequate amounts of these nutrients with 3 pounds of 10-10-10 fertilizer or 1.1 pounds of the bone meal plus 6 pounds of hardwood ash. 

Step 7: Factors for maximum growth and productivity of Onion plants

Plant density and spacing are essential to determine the size and number of Onion bulbs. Yields are higher where the early leaf cover is prepared and maintained for long before the bulb is formed. Onions have relatively low nutrient efficiency due to their shallow root system with short, short-hairy thick roots. S, it is important to implement a fertilizer program according to these conditions to help achieve maximum yield. Nutrients must be used as frequently and readily available as possible in the root zone. 

Step 8: Crop rotation to maximize yield

Being a shallow-rooted crop, efficient and maximum utilization of all the soil minerals is impossible. Unused nutrients will come out of the bottom and settle in the subsoil. Planting legumes in the next growing season will ensure the use of these nutrients. Thus, it is recommended to cultivate Onions and beans to maintain soil health, maximize nutrient utilization and maximize yields. 

Step 9: Irrigation management to improve bulb yield

The need for irrigation for Onion cultivation depends on various factors, including weather, soil type, irrigation method, and crop age. When the Onion crop reaches maturity (10-15 days before harvest) and begins to fall, irrigation should be stopped, which helps reduce rot during storage.

Modern irrigation techniques such as drip and micro-sprinkler irrigation help save irrigation water and significantly improve bulb production. The Onion crop needs water or moisture to survive and grow. Irrigation for Onion crops starts immediately after planting or sowing and three days after planting or sowing. Then Onions need to be watered periodically to provide adequate moisture for growth and development.

In case you missed it: How To Start Onion Farming, Questions, Answers

Onion farming
Image Source

A sudden supply of irrigation to the Onion crop can cause the bulbs to burst and reduce the quality of the crop. The Onion crop should be stopped ten days before the last irrigation. Recent irrigation techniques such as spraying and drip can be adapted to provide adequate water to the Onion crop as it will help maintain the required moisture level in the soil.

Step 10: Tips to get big Onions 

Fertilize with nitrogen every few weeks to get larger bulbs. Stop fertilizing when the Onions push the soil, and the bulbing process starts. Do not put the soil around the Onion; the bulb needs to rise above the soil. Onion crops are heavy feeders and need constant nutrition to produce large bulbs. Apply nitrogen fertilizer when planting. Many organic gardeners will apply an inch of fertilizer under each row before planting. Or, dig a trench about 2 inches deep and 3 inches wide in the soil, and then fill the trench with about an inch of compost. 

Feed your Onions a lot of nitrogen to increase the size of the bulb. Since it is a root vegetable, many people think that Onions need a lot of phosphorus; however, nitrogen is your key nutrient to increase the number of Onions. Each leaf that produces an Onion plant means an extra ring on the Onion. In other words, the more plant leaves, the bigger the Onion bulbs. 

For getting bigger Onions, avoid Onion sets and start with seeds. Growing Onion sets can be easy because they have already begun, but when it comes to growing large bulbs, Onion growing from seed is the only way to get the size you want. 

Step 11: How to increase the size of the Onion bulb

Plant density is a very important administrative factor in determining the size of bulbs in Onion crops. However, good crop nutrition can help farmers achieve the desired diameter. Nitrogen, phosphorus, and sulfur are essential for good Onion bulb size. Nitrogen increases leaf area and bulb size – the maximum nitrogen supply is important for Onion size. Nitrogen helps produce leaves and therefore increases the number of Onion bulb scales and the size of the cut bulb.

Because these crops have shallow roots with defective roots, it is common practice to use split nitrogen applications to the maximum. Then, positioning has proven to be more effective than broadcasting. Calcium nitrate is the effective nitrogen source – Trials with calcium nitrate confirm that it is the most efficient form of nitrogen for high yields. It is also the most effective formulation for increasing the size of Onion bulbs.

In case you missed it: Growing Spring Onions – Farming Tips, Ideas, Secrets

Onion Plant
Image Source

Phosphorus allows an increase in the size of the bulb – it is important to have enough phosphorus available to balance the potential storage losses resulting from a high N application rate. It can be used in such a way as to ensure high yields through high nitrogen rates, yet at the same time, there is a slight deterioration in crop quality.

Trials with calcium nitrate confirm that it is the most effective form of nitrogen for higher yields and larger bulbs. Potassium deficiency will reduce Onion production – Onions respond well to potassium, limiting production if limited and better use of nitrogen is allowed. 

Step 12: Thin plants for healthy growth

When Onions compete for sunlight, water, and nutrients, they often fail to produce leaves because they need to grow large bulbs. Each leaf of Onion is equal to a ring on a bulb, so a large number of healthy leaves means a big Onion. If Onions are planted too close, they will compete, resulting in smaller bulbs. Whether it is direct sowing, planting, or Onion sets, Onions should be spaced 3-4 inches apart for maximum growth. 

Step 13: Weed control to maximize crop growth

Onions have very shallow root systems, making them a weak competitor to neighboring herbs. The purpose is to keep the soil around the Onion free from weeds by mulching it with a thick layer of grass clippings, cut leaves, or clean straw. Repeated shallow cultivation between rows of Onions can also be useful. Simple hand tools are often needed; be careful not to disturb the Onion plants. Shallow root systems will break out of the soil with a little provocation, especially when young. 

Step 14: Folding Onion stems for bigger bulbs

Folding Onion stems at the end of summer accelerates the ripening of the bulbs but does not necessarily produce large bulbs. Folding the stems reduces the water that can travel upwards from the bulb, causing water to form as the roots continue to feed the plant. As water forms, it fills the cells in the bulb, spreading faster than leaving them on their own devices.

Although technically, it will not increase the overall size of the bulbs, it will accelerate their growth once they are fully formed, and the plant will often do this on its own in strong autumn winds because the leaves also begin to weaken. Another advantage of folding the leaves is that it produces bulbs that dry more efficiently and last longer.

In case you missed it: Hydroponic Onion Farming – Growing Guide

Onion Farm
Image Source

Step 15: Problems and their control for growing Onion plants

The main problems growing onions may include stunted growth due to poor soil, pests, Onion diseases, bad weather conditions, colorless leaves, withered or withered plants, and poor shape. 

The leaves fade, wilt, and turn yellow; the leaf tips turn brown – Tunnels and cavities in the bulb; the plant may die. Destroy damaged plants after harvesting. Destroy flies during the growing season. 

The leaves turn yellow and wilt; leaf tips die back – Seedlings thicken and become deformed. The base of the bulb is swollen. Nematodes of stem and bulb insects are microscopic insect-like animals living in water encircle soil particles. They enter the roots of plants and emit a toxic substance. Do not plant Onions in locations where Onions, garlic, leeks, or chives have grown in previous years. Parsley and celery are also hosts. Remove and destroy infected plants immediately. Use certified seed. 

The leaves are yellow; the bulbs are soft, watery rot, decay; bulbs can be dark spots. Bulb rot, also known as white rot, is a fungal disease caused by soil. Remove and destroy infected Onion plants. Rotate crops. Plant Resistance Types: Elba, Globe, Grandee, Hickory. 

Step 16: Pests and diseases control for more plant development

Insects can be a major problem in Onion production. Onion maggots and thrips have the potential to reduce or destroy crops in any year. Allium Leaf Miner is a new invasive worm increasingly found in Onions. Monitoring insect populations will help you determine when to use pesticides and how often to spray. 

Numerous diseases of Onions can cause crop damage, especially bottom mildew, purple spots, and white rot. Many diseases can be prevented using good crop circulation systems, high-quality soil with good ventilation, and disease-resistant Onion varieties. Many pesticides needed to grow Onions are used sparingly and require a pesticide license to purchase.

Pesticide application tests are usually conducted in extension offices. When using any pesticide in your enterprise, remember to follow all label recommendations regarding application rates and personal safety equipment requirements. Also, remember that worker safety standards apply to both owners and employees.

Step 17: Harvesting tips for more Onion growth and getting more yield

Bulbs Onion harvesting can begin when the top of the Onion falls off naturally and turns brown. When the Onions reach usable size, they are ready for harvesting. However, for storage, your signal to start the pruning process is when the leaves begin to bend or turn brown at the edges.

The Onion bulb is ready for harvest in 3 to 4 months after transplanting. The falling neck is an important maturity index for Onion harvesting. The best time to harvest Onions is to check if the tops are broken by 60%. Harvesting is done by removing the plants when the tops fall and are still green.

In case you missed it: Onion Seed Germination, Time, Temperature, Procedure

Onion Farming
Image Source

Step 18: Onion yield per acre

Yield is higher when the early leaves are covered, and the fields are maintained long before the bulbs are formed. Generally, the Kharif season yields up to 80-100 quintals per acre and the rabi season yields up to 120-140 quintals per acre. Most dry Onions are usually harvested when one-third to one-half of the tops fall off.

Bulbs are usually removed from the soil after being loosened with a disc. Then they are about 1 inch above the bulb. To prevent rotting organisms from entering the bulb, Onions must be properly treated in the field, in open shade, or by artificial means before storing. Depending on the weather, curing may take two to four weeks.

How to Start Organic Kitchen Gardening: Tips, Ideas, and A Step-By-Step Guide for Beginners

0

An organic kitchen garden is where you grow your food organically, such as herbs, vegetables, and fruits, for use. Kitchen farming promotes better health in urban areas. It is a pleasure to harvest vegetables on windows, balconies, and vertical walls; any such space can be used for a kitchen garden. Not only is homemade produce delicious and healthy, but when your vegetable plot thrives properly and genuinely, it can also reduce your grocery bills. Let’s check out how to start organic kitchen gardening below.

How to Start Organic Kitchen Gardening
Image Source

The kitchen is the holy place from which everything comes out for our language. The kitchens are designed to do the cooking, mixing, and blending experience useful. However, many chefs and cooks have difficulty obtaining the herbs and spices often used in various recipes. There are different ways to grow vegetables in your backyard, but the perspective remains the same when planning the best garden plants. You want to understand the plot and climate to know what you can grow successfully. 

Why is it called a kitchen garden?

A kitchen garden includes vegetables, fruits, herbs, and leafy vegetables that can be used immediately for cooking. You can make the kitchen garden more visual and practical by growing some edible flowers. The kitchen garden is usually compact enough to provide the family with a moderate supply of fresh produce without waste. Organic gardening does not use any artificial fertilizers or pesticides.

The food prepared is 100% pure, made from homemade ingredients, completely fresh, and easy to pocket. Organic kitchen gardening can be done in small apartments, especially with the popular concept of terrace gardening. It does not need a large piece of land. As with any garden, growing food in your home requires preparation and planning. If homeowners are lucky enough to have a balcony, they should ensure it gets adequate sunlight.

If not, they should choose another window area as their gardening area. The organic kitchen garden is a great step toward building an environmentally conscious community; as many residents as possible in high-rise buildings should be encouraged to take up the practice. If every homeowner decides to grow a specific vegetable, a group of people will grow almost all the necessary products in their community together. 

Components for starting organic kitchen gardening

  • Seed and propagation pots, containers, or seed trays, but you can buy a plug from your local garden center or order online. 
  • Grow quality compost and grow bags with added fertilizer. If you do not add it yourself, well-rotted fertilizer may be a good option. 
  • Watering can 
  • Gardening Tools: Compost Scoops, Dibber, Sectors, Gloves 
  • A range of containers of different sizes is preferably plastic because they are lightweight and easy to move. 

Benefits of organic kitchen gardening

You will find more home-grown seasonal vegetables and herbs free from harmful pesticides. What is done in your diet is better controlled when growing it yourself, making it a healthy option. Organic kitchen gardening or urban farming provides homeowners with fresh, pesticide-free food and can also be a self-healing process.

The best benefits of a home kitchen garden are that it provides a fresh variety of vegetables free of harmful chemicals that can cause health problems. The importance is that you also reduce the waste that goes into landfills by compiling from kitchen waste at home and helping the environment.

In case you missed it: Organic Farming in USA: Crops, How to Start, A Step-By-Step Guide for Beginners

Composting
Image Source

Gardening in the kitchen positively affects our well-being – it is a relaxing activity that can help overcome anxiety Anyone can be creative through recycling and painting and use old pots, containers, plastic bottles, milk cartons, etc., as planters. The home kitchen garden improves the air quality, enhances the place’s aesthetics, and gives a sense of success and happiness. Some other benefits include;

  • Kitchen gardening is a healthy way to get the whole family involved in physical activities. 
  • It helps clean up a lot of air around your home. 
  • A kitchen garden goes a long way in improving the environment around you. 
  • You can get fresh vegetables and fruits whenever you want. 
  • You know exactly what you are growing. 
  • It is cost-effective. 
  • You have a chance to be healthy. 

Choose crops that grow fast 

Grow high-yielding plants. It is going to inspire you initially. Choose crops that do not require much care and are less susceptible to pests. Grow plants in a kitchen garden that can give multiple crops and allow you to increase the growing season.

For example, tomatoes will produce many crops during the season, but planting cabbage will give you only one crop. Plants can be harvested regularly, and growing them is a great method to save on expensive, store-bought options. Cut and come varieties of vegetables like Spinach is excellent and easy to grow.

Some places for having your kitchen garden 

Backyard – Backyard kitchen gardens are the most preferred area for cultivation because of their easy access to sunlight, water, and other associated elements. The backyard size doesn’t matter because you can go to the kitchen garden. In addition, you will have layers of plants on the walls (also called vertical gardening). It is a real space saver and adds to the overall aesthetics of the place. 

Terrace – Terrace is another place to consider having your kitchen garden. Only one issue will get their attention, and you must do extra rounds to get your supplies. Then, the more effort, the sweeter the result. 

Window Sill – If you have a problem with space, window sills are just as promising for your kitchen garden. In addition to beautifying the most unusual area, you will have fresh produce. 

Pots – If you are going to use pots (soil or plastic) to grow your produce, you need to keep the following two points in mind: 

  • Proper space or place to help the plants grow
  • Pots must have drainage holes 

How to start organic kitchen gardening: Steps to start organic kitchen gardening for beginners

Step 1: Start your kitchen garden at the right time

Early spring is ideal for kitchen gardening, but you can certainly start planning well in advance. Decide on the size of the plot for the kitchen garden you want. Make sure you maintain the extent you can manage. A large vegetable garden with room for everything to grow will take a lot of work, both preparation and maintenance. Small plots with dwarf varieties, mixed yields between flower beds, or planting in containers will work best if you don’t have much time for gardening. 

In case you missed it: Top 40 Ways to Increase Crop Yield/Production: For Vegetables, Fruits, Flowers, Herbs, Tips, Ideas, and Techniques

Herb Gardening
Image Source

Step 2: Site selection for growing plants in kitchen gardening

The site selection is the perfect place for a kitchen garden with plenty of sunshine and a specific area that is partially shaded so that you can grow all your shady herbs and vegetables there. It must have good drainage and quality soil. One way to check drainage is to check the area after rain.

If pits are formed, it is not suitable for kitchen gardens, but if the water seems to seep in or flow out. Choosing a flat area free of roots and rocks makes it easier to compile and prepare the soil before planting. If the soil lacks good drainage, consider making high beds that allow plants to grow above ground level.

Step 3: Assess the sunlight

The critical requirement for growing edible plants is sunlight. Each plant is a small factory that converts solar energy into nutrients for us through its leaves and fruits. Observe which room or wall is the maximum and how it moves from morning till sunset. Your kitchen does not have to be in the garden kitchen. It can be on a small balcony, a window grill, or even in the living room. Sometimes the wall stays in the sunlight for a long time. In such cases, consider a vertical herb garden. 

Step 4: Make your soil 

The important step in kitchen gardening is to make your soil (nutrient-rich soil), which has abundant and diverse microbial life that helps in the healthy growth of plants. It is easy to prepare, and the results are effective. Start with what you have. Just turn your kitchen waste into a resource. The most important step in organic gardening in the kitchen is nutrient-rich soil.

It is made from soil, which has abundant and diverse microbial life that helps in the healthy growth of plants. It is easy to prepare, and the results are very effective. You can start with whatever you have—no need to buy mud or other equipment. Just turn your organic kitchen waste into a resource. Sprinkle some red soil in the pots from time to time. Make a mixture of compost and red earth in a ratio of 1:1. You can collect the top layer of soil from the garden. 

In case you missed it: Avocado Gardening, How To Start, Tips, and Ideas

Garden Pots
Image Source

You can also get seeds from any nursery in your city. Always go for open-pollinated seeds, not hybrids. You can start by growing different vegetables, such as curry Leaves, Mint Leaves, Basil, Peppers, Lemongrass, and Spinach. They are the easiest to grow. They do not need too much sunlight; the plant can be kept indoors or near a window. 

Step 5: Start a small garden

Choose hybrid and heirloom seeds and seedlings for planting. Start identifying the types and varieties of vegetables you like according to your taste and which grow best in your kitchen garden. Initially, it is best to start with easily grown herbs and vegetables such as Mint, Basil, Parsley, Lettuce, Spinach, Tomato, Pepper, Eggplant, Beans, Cucumbers, Radishes, Asian Greens, etc.

Get over the basics of growing these most popular and easily grown vegetables. Start growing edibles that need care like Cabbage, Brussels Sprouts, Onions, Cabbage, Artichokes, Rhubarb, Bitter Melons, Carrots, Melons, etc. For fruit, you will need a grafted plant. Growing them in the kitchen garden is also a great idea.

Step 6: Test and prepare the soil for your kitchen garden

Determining what kind of soil you have will also determine your plans – not only what type of plants you can grow but also what they can grow. If, for example, the soil is heavy, you may want to grow vegetables. Although soil structures can be improved and changed over time, dealing with heavy soils or poor, sandy soils are a difficult battle, and the alternative approach to growing is a sensible one, and ultimately time. Maybe a saving option. 

So, to get the best home crops from your kitchen garden, you must ensure that your soil is up to scratch. It is helpful to check the soil’s pH level in your vegetable garden to help you choose crops accordingly. Aerate the soil before fertilizing to make sure the soil is rich in oxygen, well-drained, and allows the fertilizer to be saturated as much as possible. 

Step 7: Succession planting 

Succession planting can help you improve the productivity of your kitchen garden and provide a steady supply of vegetables.

Work on how to get the best value from the kitchen garden 

Grow high-value crops that take up very little space. Tomatoes are very caring and require a lot of water and food, but they grow vertically and produce a lot of fruit. You can also look for different types available in stores – different varieties to minimize your time, space, and money while getting maximum results. 

It aims to increase productivity compared to store-bought products and improve taste and value—by exchanging seeds with family and friends. Homemade salad leaves are a cheaper alternative to the supermarket – and less wasteful. Sow cut-and-come-again varieties every few weeks for continuous cropping.

Choose crops that are more expensive to buy than growing them yourself – for example, herb gardens such as Mint, Sage, Thyme, Parsley, and Rosemary. They are easy to grow, and you can harvest them fresh for nine months of the year. Many herbs are perennial and will return year after year. Swiss chard is easy to grow, is plentiful almost all year round, and is not readily available in most supermarkets. 

In case you missed it: Kohlrabi Gardening For Beginners, How To Start

Kohlrabi
Imageurce

Grow crops that taste fully ripe and fresh from the plot, such as Strawberries. Fruit trees will give good yields once established, and try cordons or spoilers against a sunny fence if space is limited. Choose the types that are not usually found in supermarkets. 

Grow a kitchen garden in raised beds

If the soil in the garden is not of good quality, then small vegetable plots with raised beds filled with clay from a local garden are a good option. They provide good drainage, prevent soil compaction, increase soil temperature, and are accessible. The sides of the bed prevented the soil from being washed away in heavy rains and acted as a barrier to insects, such as snails, slugs, and weeds along the way. 

You can buy ready-made raised beds for the kitchen garden or make your own raised beds. Old railway sleepers or wooden planks look good and are often used to make vegetable beds. Brick or stone enclosures are long-lasting, while woven willows look rustic but must be replaced every six years. Wooden beds should be covered with black polythene to keep the wood dry and prolong its life. 

Start your home kitchen garden with microgreens

Include microgreen in the kitchen garden as your starting point, and add coffee leaves to a healthy salad. Anyone can grow nutritious microgreens such as Wheat Grass, Radish, Fenugreek, Beetroot, or Spinach. Micro vegetables are edible, and herbs are harvested less than 14 days after germination. They have a fragrant taste and are full of nutrients.

Microgreens are about one to three inches long. Growing microgreens requires a shallow container (the larger the area, the higher the yield). Mix the cocoa peat (a mixture of dust and the ends of unusable fiber) or coconut husk, if available, with the soil. Soak fenugreek seeds or wheat seeds in it overnight.

Place an inch of potting soil on the bottom of the container and smooth it out. Scatter the soaked seeds evenly on the ground. Carefully cover the seeds with a thin layer of soil and then sprinkle the soil with water. Micro vegetables will be ready for harvest after 10-12 days. 

Maintenance and care for your kitchen gardening

Care of your kitchen garden begins with spacing between plants. Know that you must plant them to have enough space to grow and flourish. Plants that are kept together die because of the moisture each produces. Another tip for maintaining your kitchen garden is to prune the plants well. Do this regularly to ensure healthy production.
For those who don’t know, pruning is the process of cutting dead or withered leaves. It helps to improve the health of plants, so they grow healthier and faster. You can start pruning at any time of the year. The more you cut your plants, the more they will bloom. It is best to use pruners, called clippers, for quick clean cuts. 

Vegetables to grow in the kitchen garden 

Tomatoes, Brinjal, Onions, Peppers, Okra, Bitter Gourd, Black Pepper, Cabbage, and Cucumbers are vegetables in the kitchen garden.
Herbs to grow in the kitchen garden 

Coriander, Peppermint, Basil, and Lemongrass are easy herbs to grow in the kitchen garden. 
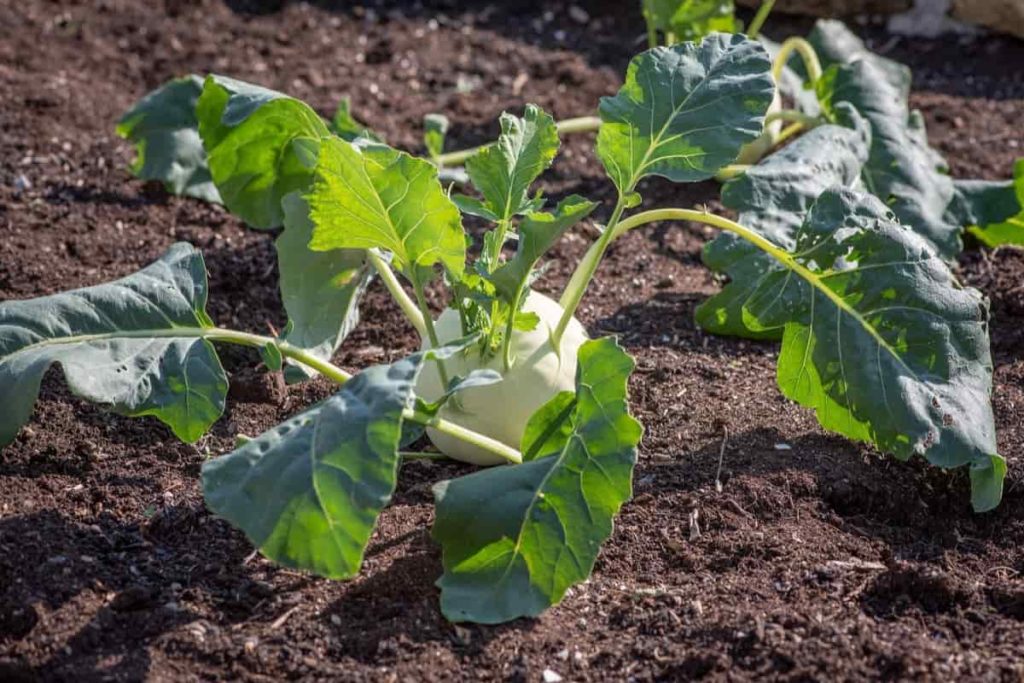
In case you missed it: How to Grow Lettuce at Home with Seeds and Without Seeds

Lettuce Gardening
Image Source

Easy kitchen gardening tips for beginners 

  • The kitchen garden plants need some care and maintenance. So, start small and initially choose six to eight types of vegetables and then gradually add more types of vegetables. 
  • Apply the seed about three times the diameter unless written on the packaging. Cover the seeds with soil and water them well, ensuring you do not expose them. Also, do not spray the seeds too close to each other. 
  • The nutrients in the soil make the plants healthy. Add organic manure from tea leaves or vegetable peels to the soil to improve its quality. 
  • Do not overwater the plants. It is one of the basics of kitchen gardening that will help protect your plants. Check if the soil is dry and moisten it with enough water to keep it moist. 
  • One of the kitchen gardening tips is to water the plants in the morning or evening. 
  • Do not allow water to evaporate in the heat of the day. Slowly water the seeds that are sprouting. 
  • Prune regularly for strong growth but do not cut over one-third of the plant. 
  • Remove dry, withered leaves and flowers to encourage rapid new growth.
  • Regularly mulch the garden plants by adding grass, dry leaves, paddy straw, etc. Mulch is a weed suppressor and acts as a wall between soil and heat, cold and wind. Mulch helps maintain soil moisture.

Conclusion

People who are health conscious can avoid the harmful effects of chemically prepared foods by adopting the use of organic foods. There are many options of organic food items available in the market that we can use to help reduce the number of pesticides. But a look at grocery bills shows that buying organic can be very expensive. So, an excellent way to continue organic production is to start your organic kitchen garden. The above information is more helpful in starting organic kitchen gardening.