Home Blog Page 59

How to Start Urban Farming/Gardening in India: Companies, Startups, Market, and PDF Guide

0

Urban agriculture has a widespread and well-known role in many parts of the world. Approximately 800 million people are mostly engaged in urban agriculture, producing more than 20% of the world’s food needs. Urban agriculture helps address local food insecurity issues in cities and suburbs. Let’s check out how to start urban farming/gardening in India.
How to Start Urban Farming/Gardening in India
Image Source

Growing food in cities includes backyard, rooftop, and balcony gardening, community gardening in open spaces and parks (sometimes spanning several city blocks), roadside urban edge agriculture, open-space livestock grazing, and deep indoor hydroponic or aquaculture facilities. Urban agriculture facilitates access to food, reconnects communities to the process of growing food, and engages the community at various levels. 

Urban farming, also known as urban agriculture, is about growing food within city limits. It has some challenges but also offers many benefits, such as increased food security, reduced waste, community involvement, and more. Urban agriculture and urban food production can include: 

  • Growing vegetables and fruits, 
  • Raising livestock, especially poultry, 
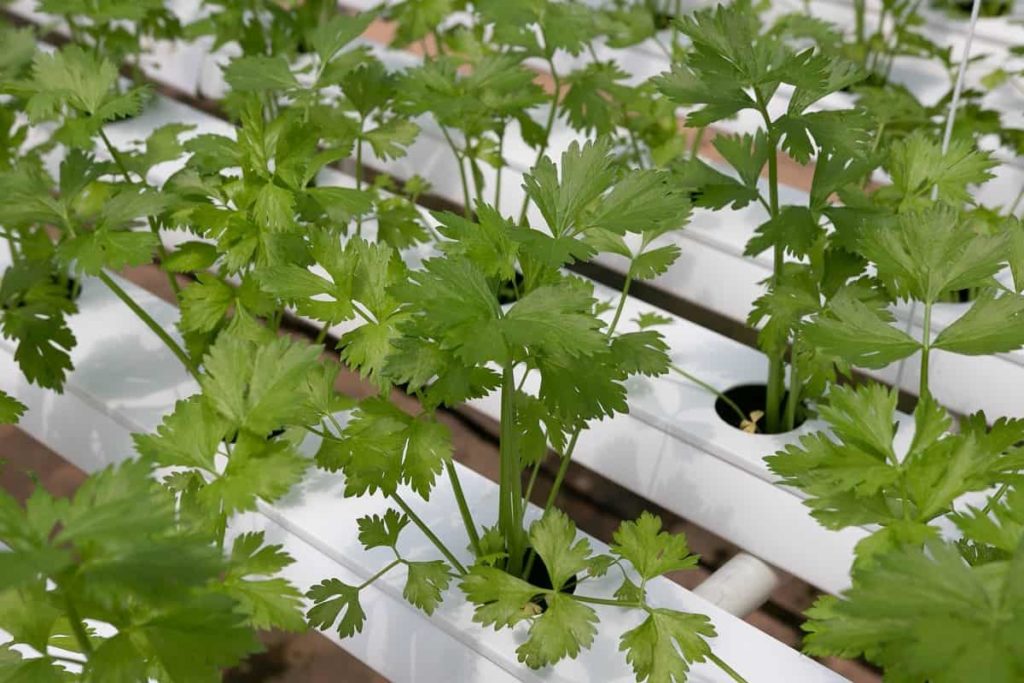
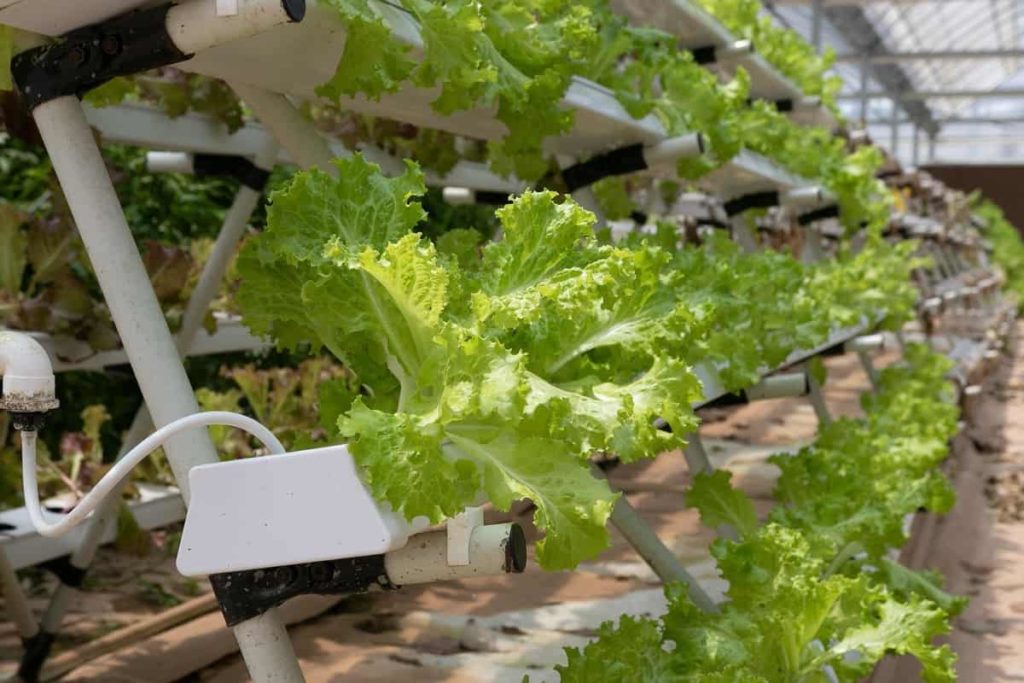
  • Beekeeping, aquaculture, hydroponics, and aquaponics, 
  • Value addition 

Urban agriculture and urban food production can take many forms and exist on different sites such as:

  • Private gardens 
  • Land managed by private institutions/businesses, including terraces and vertical gardens 
  • Privately owned land. Land owned by public/public-private utilities
  • Public-owned land, including nature strips/edges and street planter boxes 

Methods of urban farming

Urban farming has been helpful for poor people in urban and peri-urban areas as it helps them to meet their families’ nutritional needs and earn some income while working close to home and their families. It also provides a means of obtaining UA and has an important role in urban environmental management as it can counteract urban heat island effects and provide visual appeal. 

The Food and Agriculture Organization has recognized urban farming as a key element in food security strategies. However, formal recognition of UA and its integration into urban planning is essential for its success. 

  • Various urban farming practices include:
  • Community-supported agriculture
  • City farmers’ markets
  • Indoor farming
  • Vertical farming

Other alternative means of producing food in urban environments

Understanding the trade-offs from an economic, health, safety, and environmental perspective is essential to choosing the right urban farming options for a particular location. It will vary depending on location, alternative sources of food, and local income levels. 

In case you missed it: Urban Farming in Japan: How to Start, Benefits, Importance, and Challenges
Hydroponic Farming
Image Source

Urban farming startup companies

Urban farming startups in India are catering to the hyper-local demand for fresh, high-quality produce in cities with vertical farms, hydroponic growing, and greenhouses. 

1. Homecrop 

This Hyderabad-based startup is turning city dwellers into urban farmers by installing modular vegetable gardens on rooftops. Homecrop offers 15-square-foot urban farming units, which can be set up to grow a variety of regular and exotic vegetables and herbs. The Homecrop company sets up edible farms for urban households who want to grow their vegetables.

2. Growing Green 

Growing Green is a Bengaluru-based startup that grows and sells microgreens, edible flowers, herbs, sprouts, and salad leaves to high-end restaurants in the city. These microgreens are about one to three inches long and are mostly used to garnish food. They contain concentrated nutrient levels up to 40 times that of normal-sized produce. 

3. UGF Farms

Urban Green Fate (UGF) Farms transform unused spaces into living food gardens. Living food gardens are designed to not cause any structural damage to the buildings. The Mumbai-based startup sends residents’ microgreens (vegetables after they’ve first developed leaves) into pots to be grown in organic coco peat instead of heavy soil.

A consumer only has to cut the greens from the living plant as and when they need them. Additionally, UGF helps address hunger, malnutrition, and food insecurity, as well as corporates that work for disadvantaged communities as part of their CSR initiatives. 

4. Clover

Clover is a greenhouse agritech platform that partners with farmers across India for premium, high-quality, branded greenhouse-grown produce. Farms in Clover’s network typically have one to two acres of greenhouse farmland. Demand leads using its full-stack agronomy solutions, traceability, consumption forecasting, and end-to-end farm management services. The company currently has 70 acres of farmland on which it operates its greenhouses and has over 90 clients (retail chains and restaurants) across 175 locations in South India. 

5. Pindfresh 

Pindfresh aims to address all these at once by encouraging urban farming using small local hydroponic units. It provides easy, self-learning kits, home units, and fresh produce (leafy vegetables and herbs) to grow own vegetables and plants at home from city-based hydroponic farms in Chandigarh and Nayagaon. The startup is trying to make cities inclusive regarding their food and plant needs.

To that end, it’s working towards creating a system where people eat local and fresh produce – as if the food was coming straight from the Pind. They offer three services: building and selling systems for home and commercial use, preparing and selling food using the Pindfresh system, and conducting workshops. The startup is cashing in on a monetization strategy with vegetable plants available for purchase through offices and homes.

They have two customers: those who buy plants to grow vegetables and those who buy only vegetables. Find fresh is also selling in wholesale markets. Pindfresh Chandigarh-based green company, this startup offers solutions to grow vegetables and herbs at home without soil! The startup installs indoor and outdoor hydroponic plants for those who want to farm using the technology across India.

Light, humidity, and temperature are constantly controlled for the growth of these microgreens. And to that effect, Pindfresh manufactures quality-controlled pipes, lights, and all the necessary equipment to install a hydroponic plant.

In case you missed it: Urban Farming Techniques; Types; Ideas; Benefits
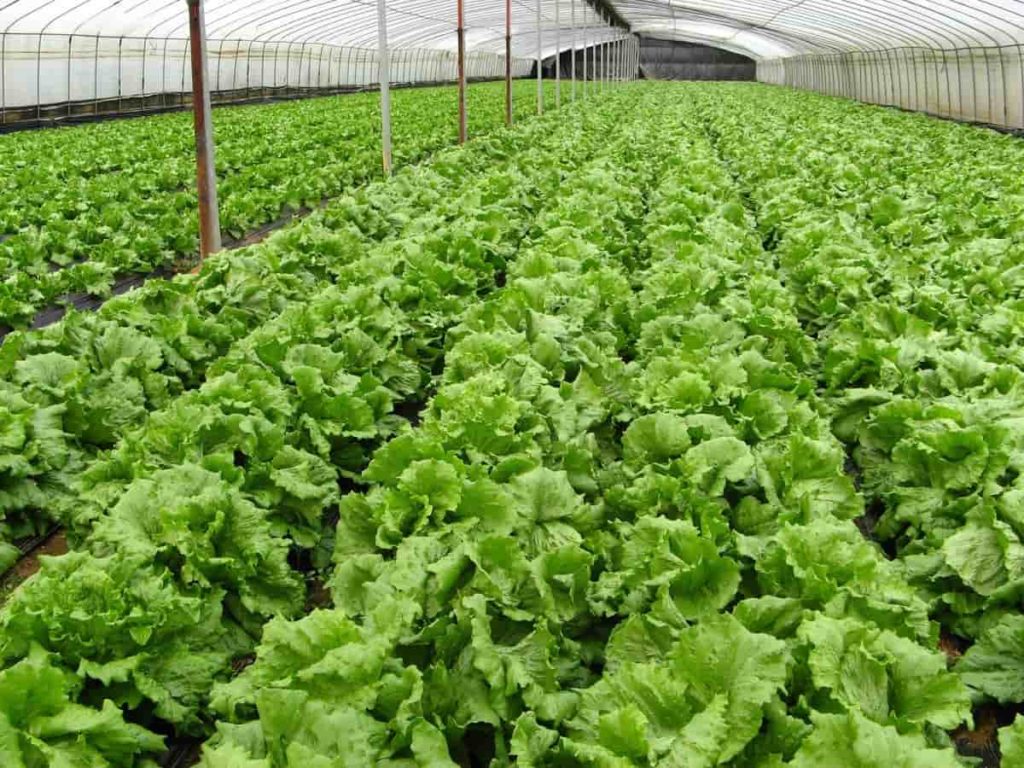
Greenhouse Farming
Image Source

6. Triton Foodworks 

Triton Foodworks was a mission to make food production environmentally sustainable by using 300 times less land than conventional farming. Triton is an integrated business engaged in the soilless cultivation of pesticide-free fruits and vegetables using hydroponics and vertical farming.

The company owns and operates 150,000 square feet of vertical farms in North India and grows more than 20 varieties of crops, including Strawberries, Spinach, Microgreens, and Bell Peppers. By growing within city limits, the company delivers fresh produce in hours and with a lower carbon footprint than traditional agriculture. Additionally, the highly controlled farming environment makes each crop uniform in size, nutrients, smell, and taste.

7. Living Food Company 

The Living Food company’s first product was microgreens. The Living Food Company had its indoor climate-controlled hydroponic farm that grew USDA-approved, non-GMO seeds. Over time, it evolved into a leading ‘farm-to-fork’ e-commerce platform in India with an NPS of 97%, the highest ever for an e-commerce company.

Sourced from local growers, the company offers fresh-harvested vegetables, 20 other product categories, and 250+ products on a subscription-based and on-demand basis. Living Food is committed to providing complete supply chain transparency and same-day delivery to ensure food freshness. 

8. iKheti 

iKheti is an urban farming organization that facilitates farming among city dwellers through consultancy, workshops, and gardening resources. From selling seeds and kits to offering consulting services on composting and kitchen gardening, the startup company trains people in the art of growing their food using chemical-free methods. This Mumbai-based startup encourages and teaches city dwellers to adopt urban farming by providing them with consultancy services, workshops, and gardening resources. 

9. Back2basics 

Back2basics is an organic farm spread over 200 acres around Bengaluru, producing high-quality organic fruits and vegetables. Back2basics supplies to grocery chains, retailers, organic stores, and gated communities in Bengaluru. Its produce is exported to organic food supply chains and retailers in other parts of the world.

The startup deals in over 90 types of seasonal produce across four categories – fruits, vegetables, vegetables, and exotics. It reserved around three to four acres of land for customers who want to visit the farm and try their hand at it. It produces some products that are 100 percent organic. The producer has complete control over the texture and color of the greens, making them healthier and tastier. 

10. UrbanKissan 

Hyderabad-based hydroponics startup lets you grow fresh produce year-round, including Lettuce, herbs, greens, and exotic vegetables. By creating hyperlocal urban farms, we are creating a fully transparent supply chain with a low carbon footprint, and our growing techniques help us save 95% of water but 30 times more than conventional farms.

The company’s vertical farming uses hydroponic farming kits to create a supply chain with a low carbon footprint and growing techniques that save gallons of water for growing farm-fresh vegetables and greens, allowing consumers to grow them to make it possible to get fresh vegetables at the doorstep.

UrbanKissan can grow more than 50 varieties of crops, a 20,000 square feet research facility, and 15 in-house scientists and agronomists. Its online food service platform provides fresh hot and cold salad bowls and dips. UrbanKissan now operates 30 vertical farms in and around Hyderabad city. 

In case you missed it: Greenhouse Flower Production In India
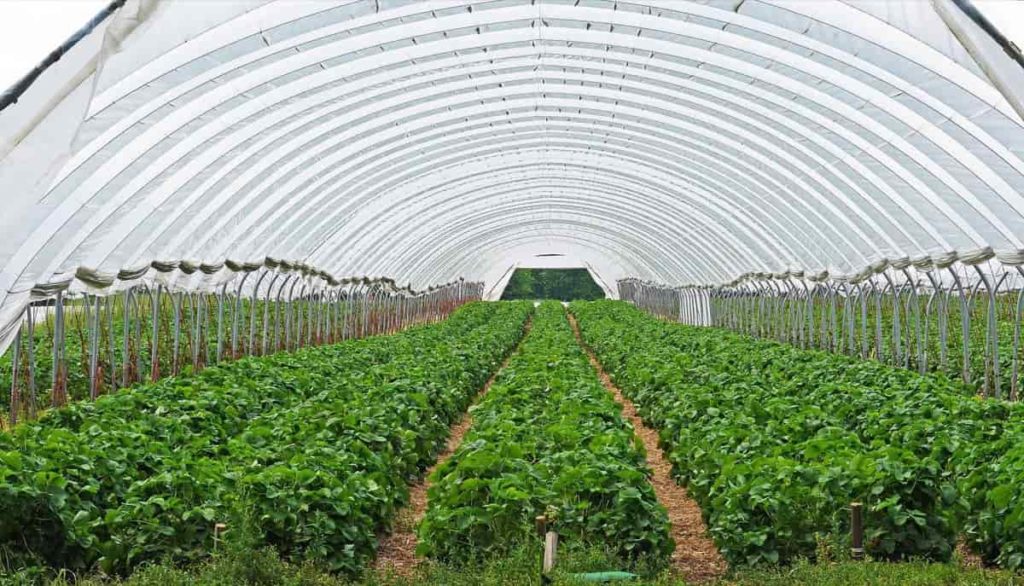
Greenhouse
Image Source

What is the urban farming market? 

Urban farming is an indoor and outdoor cultivation of plants that serves residents by processing and distributing food in and around cities. As a result of increasing urbanization worldwide, there is a corresponding increase in the demand for urban horticulture. Urban farming is gaining importance due to the low cost of transportation and supply of fresh, nutritious produce at competitive prices.

Urban agriculture produces 20% of the world’s food, keeping everyone engaged in urban farming globally. Health and nutrition, food security and transparency, education, urban sustainability, and growing demand for local food are key factors driving the popularity of urban agriculture. 

Major crops cultivated in urban agriculture

Vegetables have a short production cycle. Some plants can be harvested within 60 days of planting, so they are suitable for urban farming. Urban and peri-urban agriculture aims to produce high-value, perishable and high-demand fruits and vegetables. 

  • Green leafy vegetables or herbs: Spinach, Coriander, Curry Leaves, Banana, Watercress, etc., 
  • Fruits: Avocados, Guava, Sapota, Mangoes, Banana, Citrus, Cherry, Coconut, etc.,
  • Mushrooms: Button mushroom, Paddy straw mushroom, Oyster Mushroom, etc.,
  • Animals: Poultry, Rabbits, Goats, Sheep, Cattle, Pigs, Guinea Pigs, etc.,
  • Non-food products: Medicinal and aromatic plants, Ornamental plants, Tree products, etc.,
  • Bee products: Honey, Wax, etc., 
  • Root crops: Potato, Sweet Potato, Cassava, Radish, Beetroot, Turmeric, Ginger, Carrot, etc., 
  • Vegetables: Tomato, Brinjal, Chili, Capsicum, Pea, French Bean, Guards, Cruciferous, etc.

Key factors for the growth of the global urban farming market

Urban farming involves using modern technologies and strategies that can be used at any time of the year, facilitating consistent crop production. Such techniques make obtaining high-quality crops easier in less time by reducing harvesting time. Urban farming offers the advantage of farming in both indoor and outdoor settings, making it a popular option for crop cultivation and various other food production activities.

Being independent of climate change effects and environmental conditions and achieving global food security are some of the other important factors driving the revenue of the urban farming market. The role of urban farming is becoming increasingly important as the global population and food demand grow rapidly. Additionally, a reduction in transportation and supply costs of fresh and nutritious produce is expected to significantly increase the revenue of the urban farming market over the forecast period. 

Factors restraining the growth of global urban farming market

High operational costs, high initial setup costs, and lack of skilled manpower are some of the major factors that restrain the revenue growth of the urban farming market. The presence of heavy metals in urban soils can raise food safety concerns. Urban farming can lead to soil, water pollution, and other environmental concerns.

In addition, urban farming requires regulated conditions such as temperature, light, humidity, and water, which can be difficult to achieve and can increase the cost of crop cultivation and production. Moreover, maintaining such conditions involves high electricity consumption, which increases the total cost of production. These factors hinder the global implementation of urban farming and may hinder the market growth. 

Benefits of urban farming 

Help to boost the local economy

Local food systems can impact the local economy. As more grocers, restaurants, schools, and institutions look to local food sources, there is a small business opportunity, and food entrepreneurs to explore urban hydroponic farming as a thriving new market in which to start or expand their business should be increased. It creates more employment opportunities. As local economic activity increases, money circulates within the city and strengthens communities. 

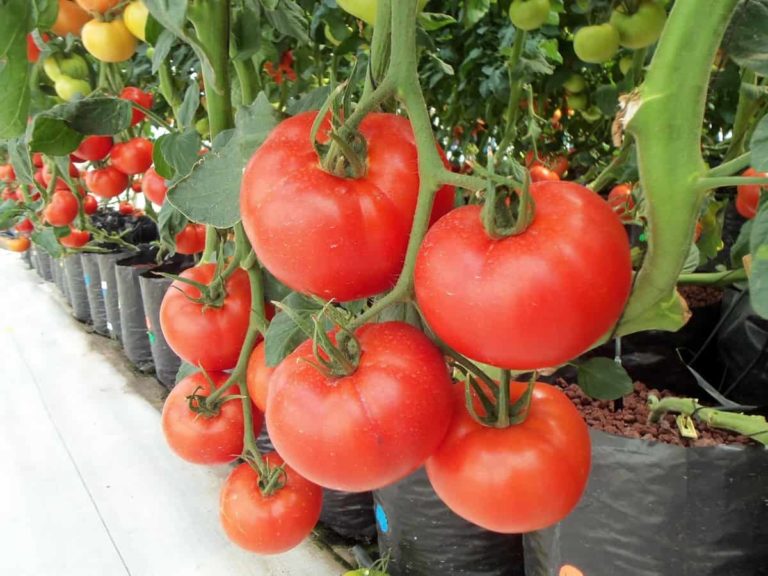
In case you missed it: High Yield Tomato Varieties in India: A Farmer Guide for Good Profits
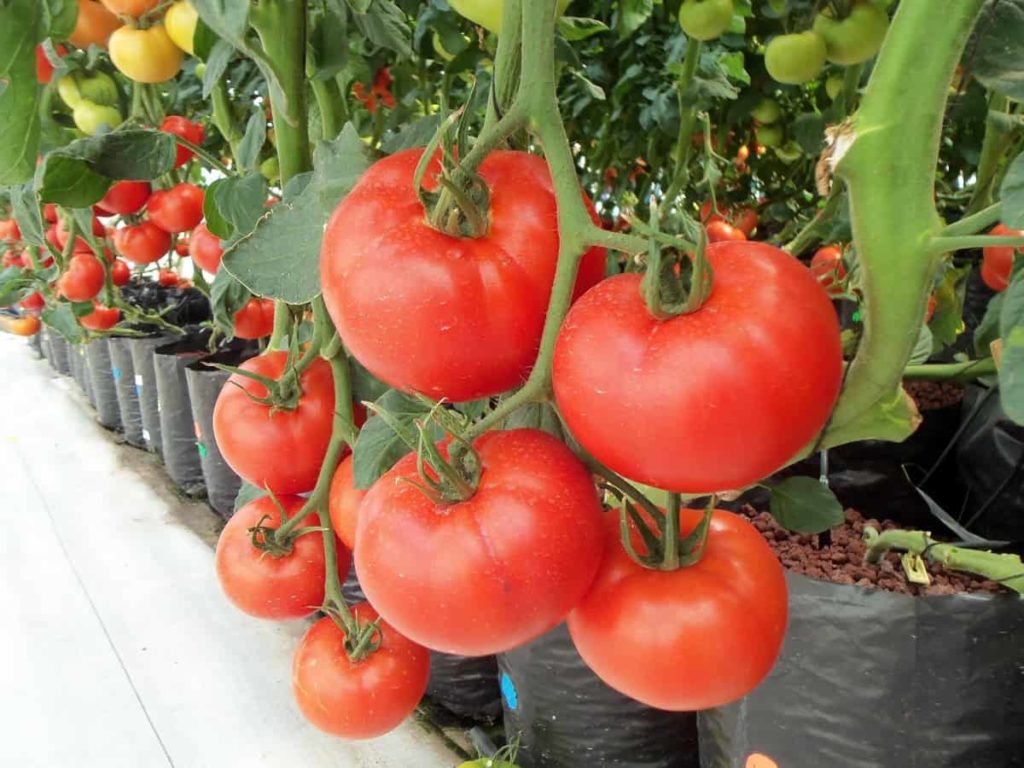
Tomato Farming
Image Source

Increasing food security

Urban areas can often become what are known as food deserts, areas where it is difficult to buy good affordable fresh food. Urban farms can provide food to low-income people who need it most. 

Create edible landscapes

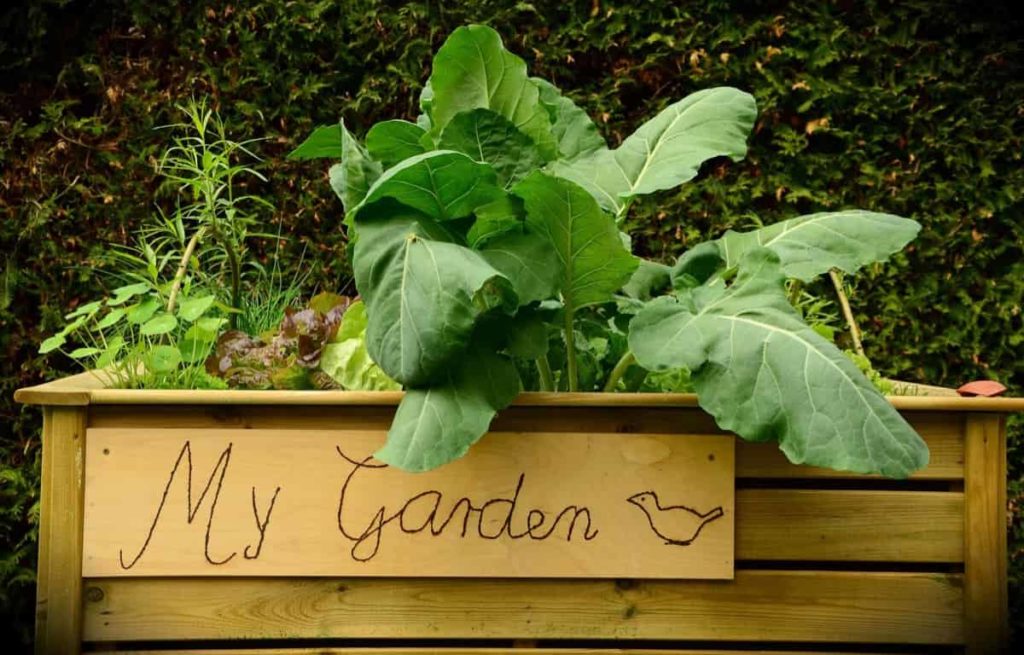
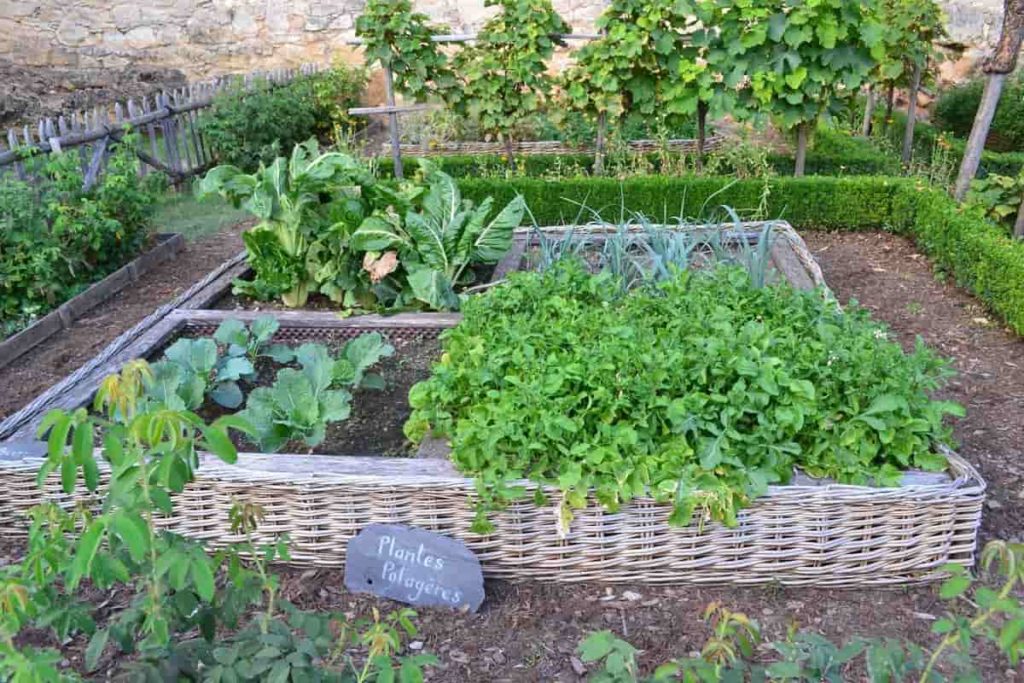
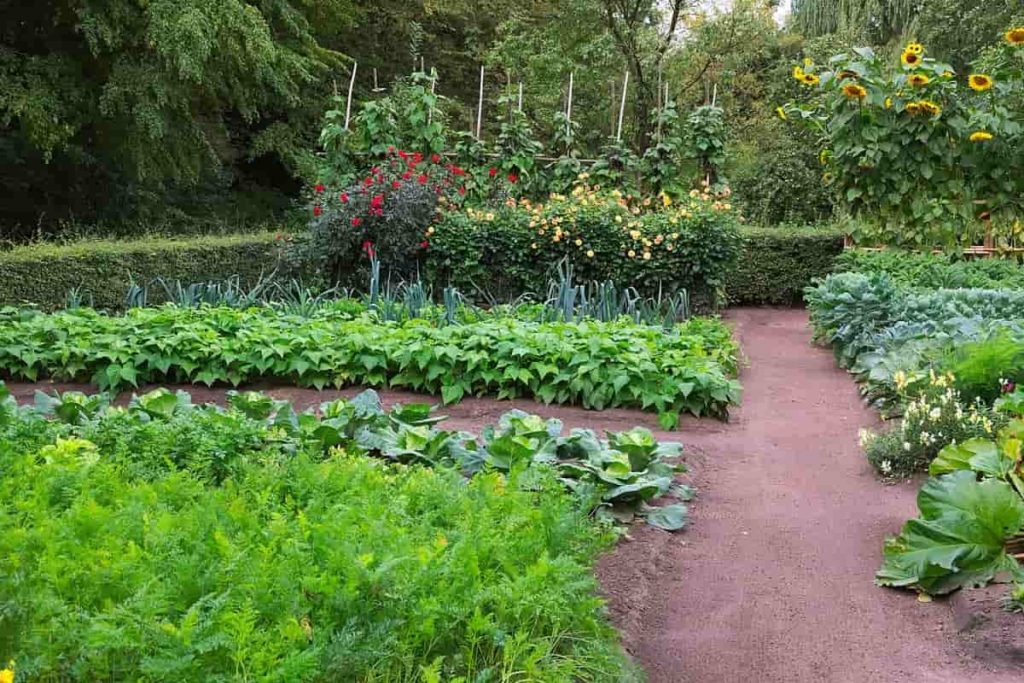
Urban agriculture is an excellent solution for vacant and underutilized lots scattered across cities, and many projects efficiently use rooftop space. Community gardens and raised beds instantly transform empty spaces into more vibrant and edible landscapes and give individuals the opportunity to take ownership of shared land and become more involved in their communities. 

Uses land efficiently

Think of how many areas of the city are sitting unused and wasted. Hydroponic systems, vertical or rooftop gardens, and other techniques can fit a lot of extra food into any free urban space. Urban farmers develop innovative and effective solutions to problems that may challenge them while growing up in the city. 

Low investment required

Buying a traditional farm is a huge undertaking. Even if you want a small farm with just an acre or two, you’re looking at hundreds of thousands of dollars. Even to lease farmland from another farmer for a season, you’re looking at some high costs. Urban farms take up less space, and initial infrastructure and setup costs are often significantly lower than conventional farms. 

Promote healthy communities

Urban farming increases access to fresh produce and gives communities a unique opportunity to learn nutrition and grow food. Several urban programs engage local youth by providing opportunities to gain experience growing crops and learn the benefit of eating a healthy and balanced diet. It allows community members to learn where their food comes from and how crops are grown and connect with the more people who grow it.

How to start urban farming/gardening in India

The government leads urban agriculture in India, private agencies, and even individuals in many cities, including Mumbai, Delhi, Kolkata, Bengaluru, and Chennai. An important factor is the use of treated or untreated wastewater for agriculture. Direct and indirect use of wastewater in urban and peri-urban agriculture is widespread in cities like Delhi, Hyderabad, Chennai, and Ahmedabad.

Although the use of untreated wastewater for irrigation is not permitted for public health reasons, it is being used in many places due to a lack of access to fresh water. It has also been proven that the use of untreated domestic wastewater for irrigation increases yields due to the presence of nitrates. Recent initiatives have been taken to sell treated wastewater to Delhi, Noida, Hyderabad, and Chennai farmers.

Treated sewage is sold in Chennai, and its demand is increasing. The Noida Authority uses treated wastewater to irrigate some green belts and has plans for tertiary treatment to treat the wastewater to potable quality. Farmers in Hyderabad lift household waste from the Musi River for irrigation purposes.

Using wastewater in urban agriculture reduces the demand for freshwater and helps close the urban water management chain, provided the wastewater is treated to safety standards to prevent environmental pollution. Organic waste from the city can be composted and used in urban agriculture with the added benefit of reducing landfill waste.

In case you missed it: Hydroponic Tomato Farming, Nutrient Solution, Yield
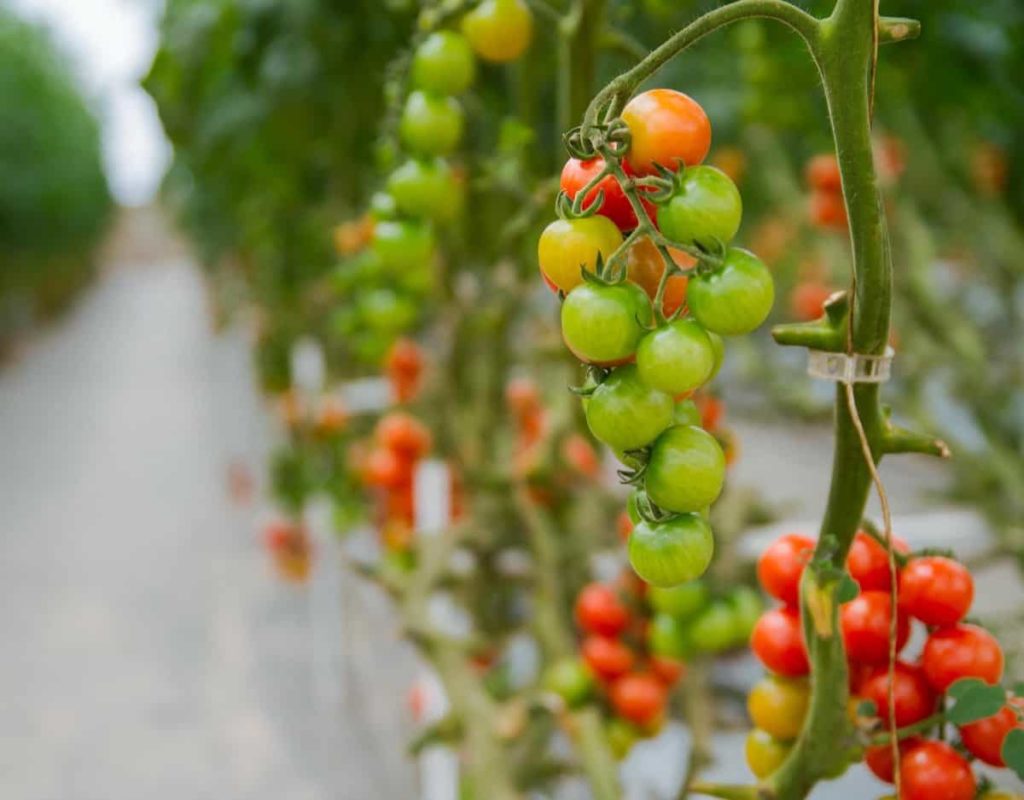
Growing Tomatoes
Image Source

Tips for starting an urban farm

Find training: Starting an urban farm involves a lot of knowledge and skill. Consider finding a learning opportunity near you. 

Create a business plan: Farmers need to grow and produce products easily marketed or in demand. To do this process, talk to restaurants, grocery stores, local food producers, and farmer’s market managers to find out where there are marketing opportunities. Consider value-added products and their role in your business. Learn about the process and cost. Create a business plan that includes a marketing strategy and budget. 

Find suitable land: If you’re looking for space, check with your local utility agencies, parks and recreation departments, or research existing vacancies. Consider local zoning codes and how they might apply to the type of urban farm you have in mind. 

Test the soil: Some urban soils have elevated levels of heavy metals, such as lead or other contaminants. Be sure to test your soil and treat it accordingly. 

Learn the basics of production: Many early urban farmers struggle with the basics of growing crops or raising animals. Learn about soil, planting, pest management, and watering. If you plan to keep animals or bees, learn the details of how to care for them. 

Ensure food safety: Learn how to ensure the crops you grow are harvested, stored, and safely processed according to best practices. 

Conclusion

Urban farming is an excellent source of income for many farmers as the population in cities is adding up every year. Apart from this, there is a Government Subsidy for Urban Farming in India.

Download how to start urban farming/gardening in India PDF

Click the Download button below to download the PDF of how to start urban farming/gardening in India. You need a PDF reader installed on your smartphone to view the downloaded PDF file. If you cannot view the file, download any PDF reader app from the Google Play Store or App Store.

How to Grow Food at Home in Small Spaces: Tips, Techniques, and Ideas for Beginners

The best way to produce more food in your garden is to give each plant the space it needs to thrive. Growing a garden is an excellent method to grow healthy vegetables, herbs, and fruits to enjoy your favorite fresh foods at home. While spacious outdoor gardens produce large crops, you don’t need a large garden to grow food in a small space. With the right seed, containers, soil, watering schedule, and sunlight, you can grow your favorite delicious vegetables in small steps.

How to Grow Food at Home in Small Spaces
Image Source

You don’t need a backyard to grow food in the garden, so you must be creative with your space. Even if you only have a window, you can grow some food. One of the biggest problems that every homeowner faces sooner or later is the problem of wanting to produce more food than their garden space. Let’s check out how to grow food at home in small spaces below.

Ideas to grow food at home

  • Grow more productive plants
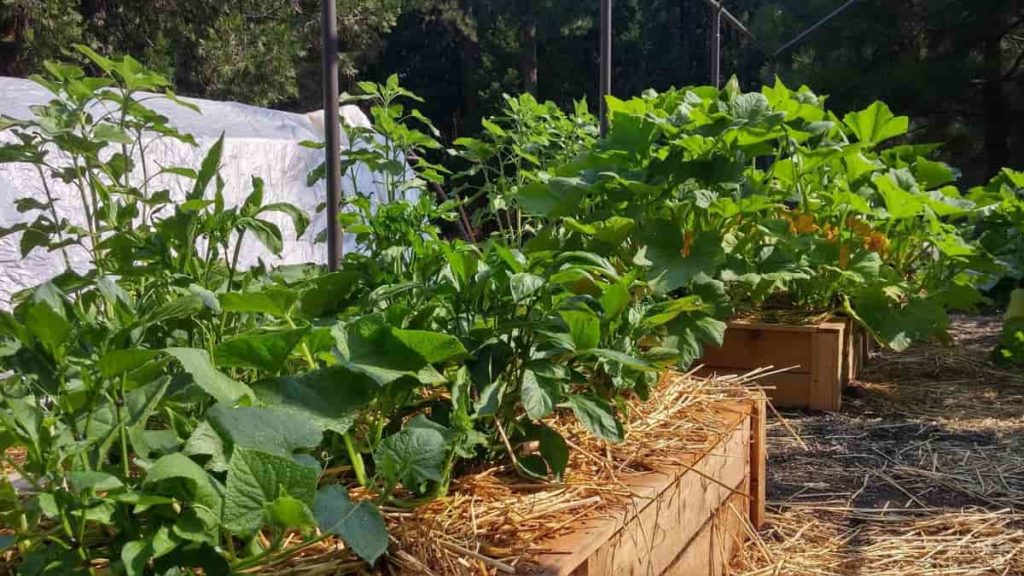
  • Plant a raised bed garden 
  • Using garden plants that do double duty (for example, flowers and fruit or decorative and tasty)
  • Use square foot gardening techniques
  • Plant in succession for longer harvests
  • Increase soil fertility for better harvest
  • Plant the foods you like the most
  • Pick up foods that cost more at the store or are heavily sprayed
  • Plant heat-loving vegetables between pavers
  • Interplant herbs, vegetables, flowers, and fruits to make the most of the available space 
  • Plant in containers, window boxes, hanging baskets, and wall planters
  • Grow vertically on fences or a trellis 
  • Grow sprouts and microgreens indoors 
  • Pick potted herbs on a sunny windowsill 
  • Pick food on a sunny terrace

Ways to utilize a small space at home

You don’t need a large area to grow food at home. Small sun spots in your yard, patio, or balcony can all be successful. Heirloom seeds and the new hybrid varieties offer excellent options such as colorful new vegetables and compact plants. Select the right location, and ideal varieties of plants will help you maximize your harvest.

Along with providing proper growing conditions, it is also helpful to consider the use of fencing. You may be surprised how your greens attract other animals in your community. If you plant it, they will come – to use this method to protect your small vegetable garden for the best results. 

How to grow food at home in small spaces

1. Plant in a window box 

You can prepare a salad in a window box—Lettuce, Radish, Spinach, and Green Onions. Don’t forget about herbs, which can produce anywhere. A window box is also great for growing strawberries. Hang planters on your balcony railing. Firstly, make sure you choose a sturdy planter that is either self-watering or has a drainage tray.

You can grow leafy greens or create a small herb garden. Make the most of sunny spots. Sweet Peppers and Chili Peppers need plenty of sun and grow well in containers. Herbs also grow well in full sun, especially basil. Make your planters mobile. Before planting, consider whether you’ll need to move your large containers. 

In case you missed it: Best Vegetables to Grow at Home in India: Easy for Pots, Terrace, Balcony, and Indoors

Home Garden
Image Source

2. Try square foot gardening

Square-foot gardening is planting vegetables, herbs, and flowers by growing them in 4′ x 4′ beds and growing vegetables by individual square feet instead of in rows, with the smallest steps possible with minimal effort. Another great method to grow more food in less space is the square foot gardening method.

The premise behind square-foot gardening is that you divide your garden bed into square feet, and then you allocate each square foot a specific crop and a certain number of vegetables to grow in that space. Some vegetables require more space, so some require a full square foot per plant, while others need less space and can be grown more densely. For example, you can grow one tomato plant per square foot, another four of Lettuce, another nine of garlic, and another 16 carrots because they each need different space to grow well.

The main benefit is planting every square foot with various vegetables, herbs, or flowers. You’re treating each square like a little garden. Instead of using planting rows to keep things neat where each vegetable is, we use a grid system. Square foot gardening breaks it down so you can grow a lot in a small space. 

3. Choose space-saving plant types

Dwarf fruit trees, vegetables, and microgreens are ideal choices. You can underplant potted fruit trees with shallow-rooted edible flowers or herbs to improve space. You may have to compromise on yield or vegetable size in some cases, but there are plenty of options. Mini Melons, Pumpkins, and Squash are just a few vegetables to try. They require less water than larger crops, so you also save money. 

Fast-growing small space crops include microgreens and sprouts. Both can be grown indoors with enough light. Sunny window sills are perfect—stack microgreens on tiered trays or shelves to maximize space. Plant successions regularly for a continuous supply. Spring Onions, Chives, Leeks, and Garlic are all slender allium herbs that take up minimal space. ‘Pick and pluck’ loose-leaf Lettuce, and Spinach plant varieties are compact. It is because you harvest individual leaves as they grow rather than when they are fully mature. 

When you choose the crops you’re going to grow; it can be tempting to try various varieties and “novelty” items. But when your primary goal is to grow more food in less space, you want to be much more practical and strategic in your decision-making. Know your gardening area and even your specific microclimate, and choose crops suitable for growing where you live. If you can find an organic seed company, this is an excellent location to find seeds and crops that are especially suited to your region. 

In case you missed it: How to Grow Curry Leaves in the USA: From Seeds in Containers at Home, A Step-By-Step Guide for Beginners

Small Home Garden
Image Source

4. Grow vertically

If you can’t grow, consider growing. Vertical gardening is small space gardening. Use trellises to grow Cucumbers and Squash successfully; you can grow melons vertically. You can make a trellis almost anything, but bamboo is good because it’s flexible but still attractive. Vegetable plants like Cucumbers, Tomatoes, Sugar Snap Peas, and Green Beans grow well in containers, and Cucumbers can grow vertically to save you some valuable space.

Add a trellis to the pot or container, depending on what you’re growing. Make sure the pots are deep enough to accommodate the roots of the plants. For Tomatoes, put a cage around the container to support the weight of the plant as it grows. Vertical gardening always makes a list when discussing growing more food in less space. And rightly so, because you can pack a ton of food into a small footprint if you grow up instead of out.

But not every plant can be grown vertically, so it comes back to choosing the right crops, and then you have the right set of trellises and growing them vertically. Some good vertical crops like Pole Beans, Peas (English Peas and Sugar Snaps), Cucumbers, Winter Squash and Pumpkins, Melons, and Indeterminate Tomatoes. You’ll need some trellis for each crop, and some will need more support than others to start leaning over and growing vertically. 

5. Consider plants that do well in shady areas

One of the advantages of growing in small spaces is that you can use plants that do well in shady areas. If you plant Cucumbers vertically, you can plant the Lettuce in a container during the summer. You can eat fresh Lettuce at a time when traditional gardeners can’t because it’s so hot and their garden is in full sun. You can even grow herbs in shady places. Parsley, Mint, and Oregano do well in the shade areas. 

6. Succession planting 

It is a useful technique for any vegetable garden, large or small, but it’s especially valuable when there is limited space. Succession planting means replanting fast-growing crops every two to three weeks during the growing season. It is especially useful for crops such as Beans, Zucchini, and Lettuce that tire themselves out during heavy production. By planting in succession, you’ll produce enough food to feed your family (and you’ll have it all summer instead of all at once).

7. Utilize your microclimates

You could have areas around your property that aren’t necessarily in full sun, but where you could add some containers or even a raised bed. Pockets of shade throughout the property where most annual, sun-loving crops don’t grow well, but we’ve learned to use those shady areas to our advantage and grow crops that thrive in cool, shady areas.

Vegetable crops like Lettuce, Kale, Arugula, Mustard Greens, Bok Choy, and Spinach grow well in the shade. Carrots, Potatoes, Peas, Beans, and Radishes do well in partial shade. And, if you’ve got nothing but shade, why not try growing mushrooms. On the other hand, you have a greenhouse on your property that acts as a man-made microclimate. You can use it to extend your growing season, harvest heat-loving plants like Tomatoes and Peppers, or even grow some vegetables year-round.

In case you missed it: How to Grow Grafted Vegetable Plants: Benefits, and Suitable Vegetables

Radischen
Image Source

8. Interplanting 

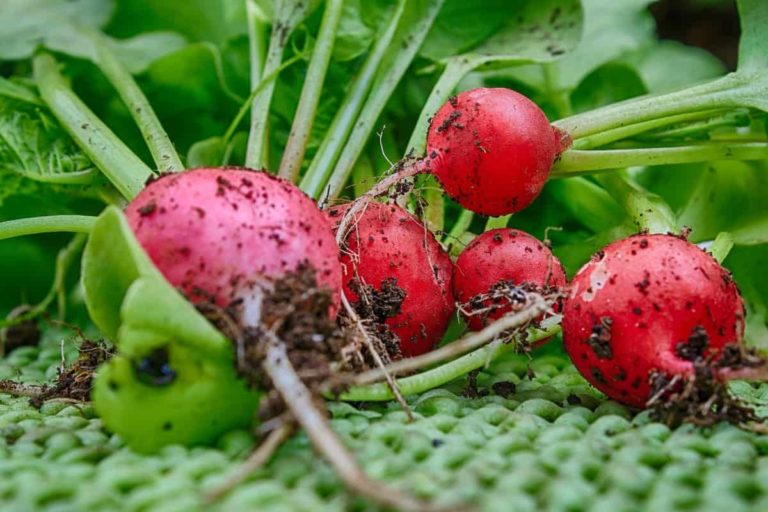
Interplanting is like companion planting, but instead of planting or growing two plants that grow simultaneously and benefit each other, you plant two or more crops of one slow-growing crop. In between is the process of planting a fast-growing crop from the same place. For example, you can grow radishes between your rows of carrots.

Radishes will grow much faster than Carrots, so you’ll get a crop of Radishes, and when you pull them out of the ground, your carrots will have room to fill in and grow. You can also grow Lettuce with onions. Lettuce will grow quickly, and you can then harvest it and allow Onions to fill in or transplant them to fill in the space. 

9. Keyhole gardens 

These maximize space by eliminating the need for walkways in traditional row gardening or raised beds. The design is intended to be drought resistant and provide nutrients through the compost throughout the growing season. A keyhole garden is a raised-style bed that takes the rough shape of a circle with a “keyhole” -a shaped path that provides access to the entire garden. Though in the center of the circle is a vertical tunnel containing many layers of manure.

As the compost breaks down, it mainly delivers nutrients directly to the bed. Certainly, an efficient method to grow keyhole gardens can be made from many different materials, as a quick search of the term will confirm. Suppose you have the space for a circle about 8 – 10 feet in diameter. In that case, you can use whatever suitable material is easily accessible, such as corrugated siding, cedar posts, landscape rock, brick, or any combination thereof. 

10. Rethink buckets

You won’t believe what plants can grow in a 5-gallon bucket. They may not be the most attractive containers, but they are affordable and convenient, especially when moving plants as needed. Before you start, you need to make a drainage hole. Potatoes and Beets will do well in a bucket, as well as Carrots—make sure you consider the root system and depth of the bucket. 

11. Container gardening

A vegetable and fruit container garden may be ideal if you have limited outdoor space, whether a small yard, shared yard, or balcony. One of the main things about container growing plants is the ability to grow almost any vegetable and fruit variety, given the right conditions and enough space for the right size container.

In case you missed it: How to Grow Papaya from Seeds at Home: In Containers, Indoors, Backyard, and On the Terrace

Salad Plants
Image Source

With the right watering system and sun exposure, it is possible to grow small fruit trees or shrubs successfully. Container gardens are also extremely space-efficient. Container gardens also have the added benefit of being a great back saver. They can be set up for those with limited mobility, ensuring that growing fresh fruit and vegetables at home is for everyone is accessible. 

12. Companion planting 

It is another great way to maximize growing space and fit more into your garden without compromising your plants’ health or space needs. It means planting certain crops next to each other so they can benefit from each other without inhibiting their ability to grow. Some companion plants will help add nutrients to the soil, which helps other nearby plants.

Another plant will repel pests or attract beneficial insects such as pollinators. Some will provide shade or protection from the wind, while some companion plants enhance the flavor of other crops, as in the case of planting Basil near Tomatoes. 

Some good companion plants you can plant side by side: 

Beans and Brassicas: Beans and Brassicas fix nitrogen in the soil and help make it bioavailable to other plants, making them a good companion plant for most plants. But they’re especially good companions for anything in the brassica family (Broccoli, Cauliflower, Cabbage, Brussels Sprouts, etc.) because brassicas are heavy nitrogen feeders. 

Brassicas and Alliums: Brassicas (Broccoli, Kale, Cabbage, Cabbage, Brussels Sprouts) do well with crops in the allium family (Onions, Garlic, Shallots, Leeks, etc.) The theory is that alliums repel insects and improve their taste. Just try not to plant alliums directly next to the brassicas as they don’t go well together. 

Tomatoes and Basil: Basil is said to repel pests that might otherwise attack Tomato plants, such as whiteflies, tomato hornworms, and aphids. It is said to improve the flavor of tomatoes growing on nearby plants.

In case you missed it: High Yield Tomato Varieties in India: A Farmer Guide for Good Profits

Growing Tomatoes at Home
Image Source

Squash, Corn, and Beans: The Corn grows upwards, giving the Pole Beans something to climb up. Pole beans fix nitrogen in the soil. And squash grows low, providing shade to keep the soil cool and moist, acting as a living mulch that prevents overgrowth of weeds, and a deterrent to critters like squirrels, rabbits, and raccoons. 

Top 16 Steps/Ways/Methods to Boost Kale Yield: How to Increase Production and Quality

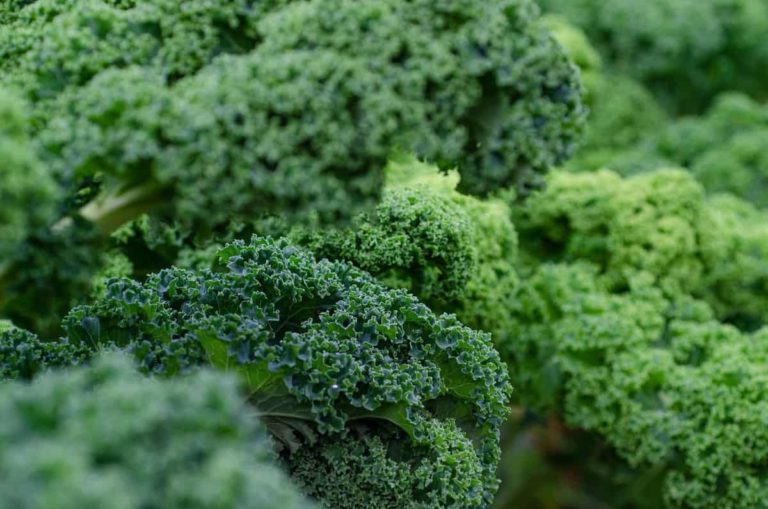
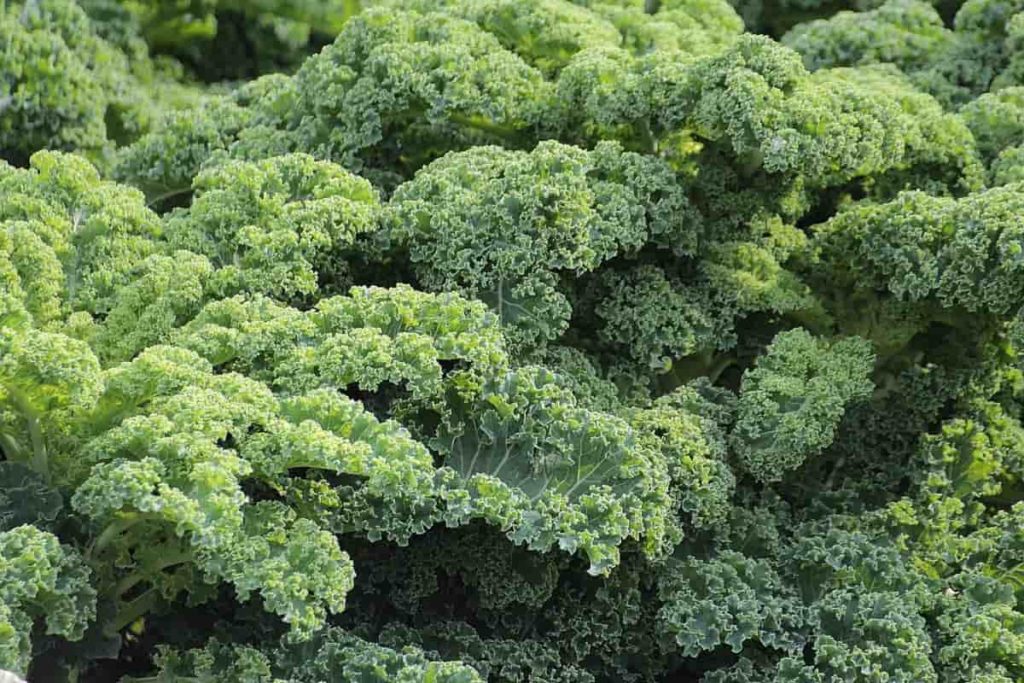
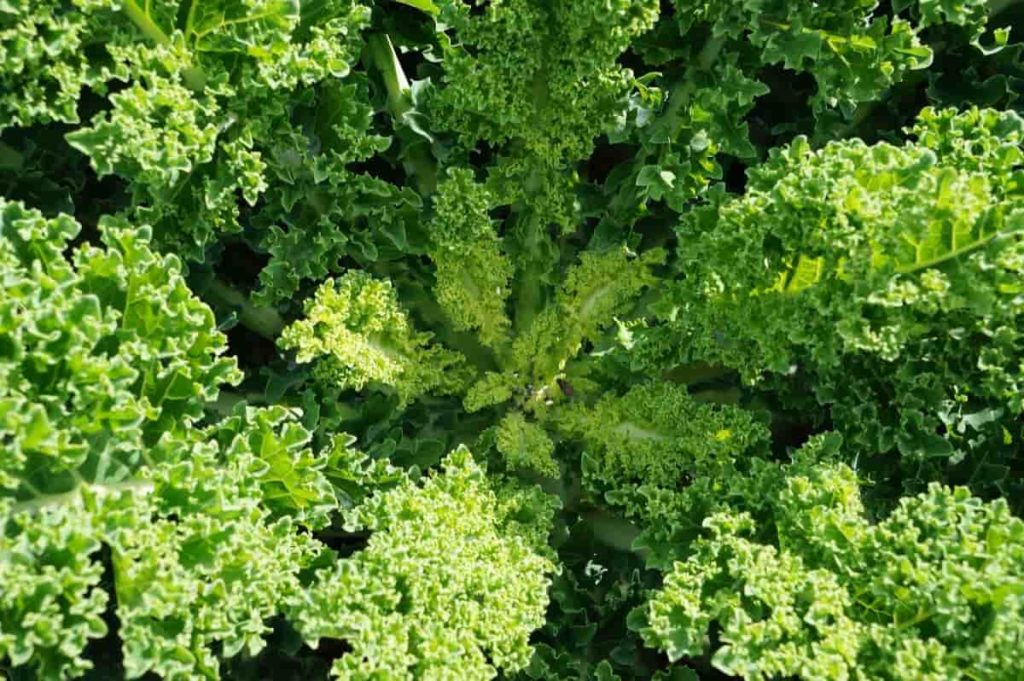
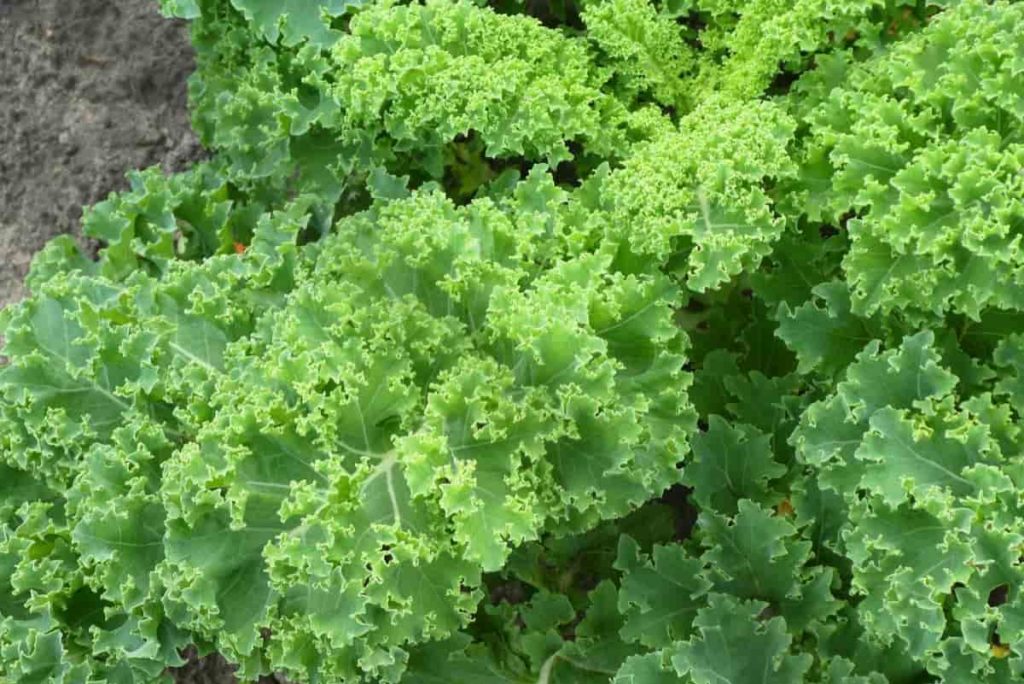
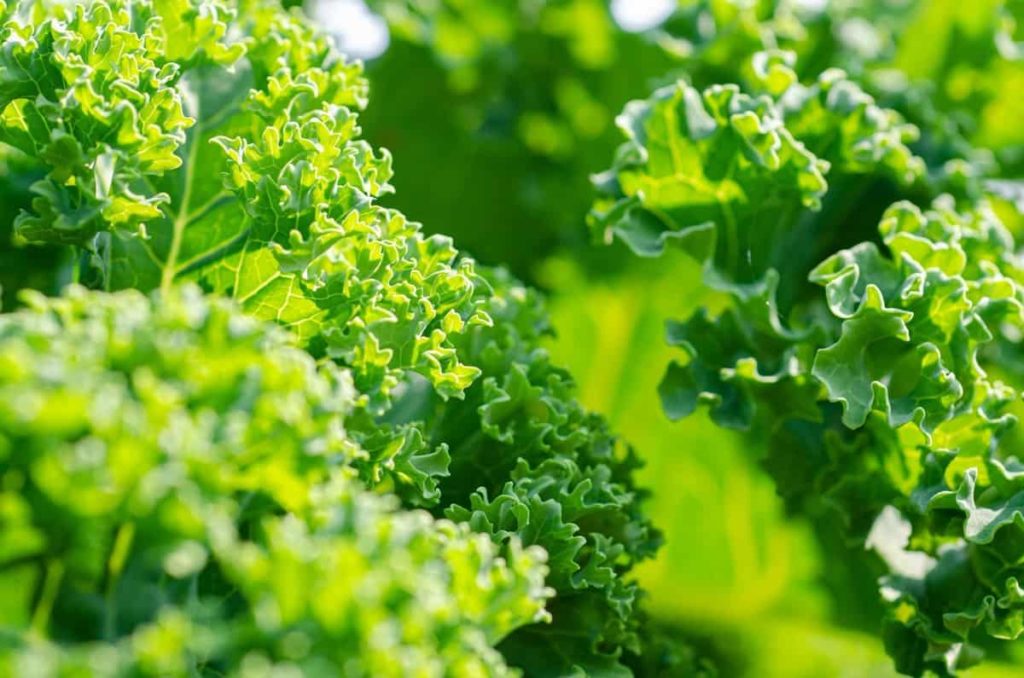
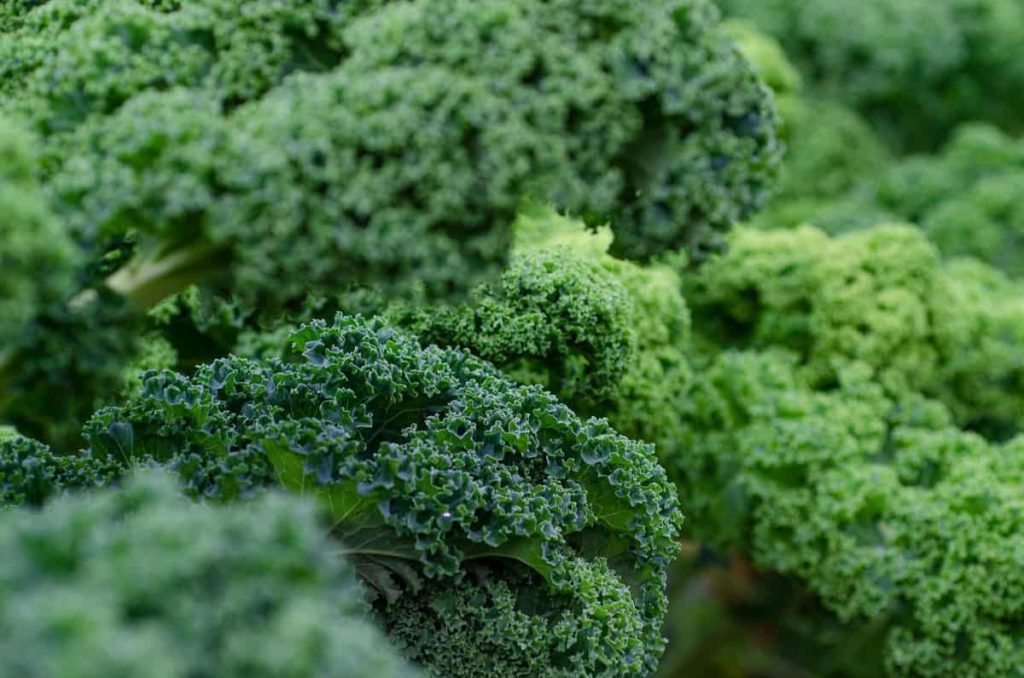
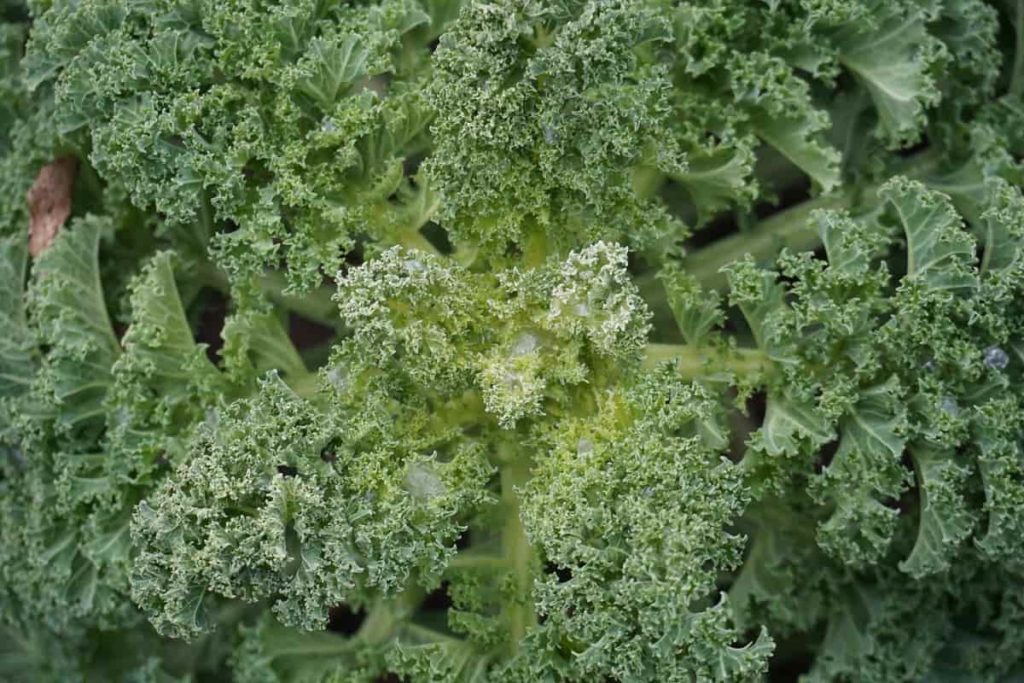
Kale is a cold-season crop, a member of the cabbage family, and a healthy leafy vegetable. It is the world’s most nutritious and popular vegetable, and its popularity in India is steadily increasing. Kale’s scientific name is Brassica oleracea. It belongs to the same genus of cabbage, broccoli, and cabbage but has no head. Kale has been the healthiest green of choice with all the nutrients and vitamins.

Top 16 Steps/Ways/Methods to Boost Kale Yield
Image Source

It steals the spotlight in rich green food marts and fancy kitchens. As well as being highly nutritious, Kale is attractive. Its decorative value can be appreciated in traditional garden beds or containers, especially in the fall. Kale plants can be ornamental, with textured and curly leaves that come in green, purple, and other shades. Kale has a fast growth rate and can grow from seed to harvest in about three months. Let’s check out the top 16 steps/ways/methods to boost Kale yield below.

Steps/ways/methods to boost Kale yield

Step 1: Select high yield Kale variety

There are many types of Kale, and they are all worth a try. Curly leaf varieties hang longer in cold weather. But flat-leaf types are usually formed quickly. Below are a few varieties: 

  • Hanover Salad is a fast-growing and early producer. It tastes good to eat raw in salads. 
  • ‘Lacinato’ is dense leaves so hard that they can be harvested even after snowfall. 
  • ‘Redbor’ variety has magenta leaves with curly edges. It has a light, crisp taste and texture. 
  • ‘Red Russian’ has smooth, soft leaves with purple veins and edges. It is the sweetest Kale variety. 
  • Vates is a dwarf, curly, blue-green Kale that tolerates heat and cold. 
  • Curly Kale is sweet and light and is one of the most common types of Kale. Its curly, wrinkled leaves mainly characterize it. 
  • Lacinato or Dino Kale also has a wrinkled texture, although its leaves are long and slender. 
  • Premier Nail is known for its cold hardiness and ability to grow fast. 
  • The Siberian Kale is one of the hardest varieties that can withstand extreme temperatures and can easily withstand pests.

Step 2: Choosing a planting site for more Kale production

Kale grows well in pots, garden soil, raised garden beds, and other containers. Kale can be grown indoors in pots as long as you have adequate light. Soil rich in organic matter and has good drainage is ideal, and the planting site should also receive plenty of sunlight. Make sure the nail is not near tall plants that will shade it. Kale growing in a window box can also be successful in the south- or west-facing windows, but in very hot climate conditions, east-facing windows can help prevent scorching from the afternoon sun. 

Step 3: Soil requirement for more plant growth

Place seeds about ¼ to ½ inch deep. Avoid using potting soil and sow the Kale seeds in well-drained, loamy soil with a pH level between 5.6 and 6.8. It will help prevent clubroot, a common fungal disease in the cabbage family. 

Step 4: Kale planting time for more yield

Kale tastes best when plants grow fast and mature before summer heat (temperatures rise above 24°C) or after a fall frost. Temperatures are as low as -4°C do not seriously injure young plants. Mature plants are very hardy and can withstand cold temperatures. However, hot temperatures will slow plant growth and cause a bitter taste. 

In case you missed it: Growing Organic Kale – Tips, Ideas, Secrets

Kale Plant
Image Source

For Spring: Whether planting seeds directly in the ground or starting seedlings from a nursery, you can plant about 4 to 6 weeks before the average spring frost. Seeds will germinate at soil temperatures below 4°C. 

For Fall: Choose early maturing cultivars and direct seed three months before the first fall frost date. You may need to delay sowing until temperatures cool in areas with hot summers. Cool fall weather conditions bring out Kale’s sweet, nutty flavor that can withstand severe frosts without suffering damage. 

Kale plants can also be grown as a winter vegetable under cover or outdoors in mild winter regions, such as the Southwest, Pacific Northwest, and Southeast. They will grow and produce all winter. 

Step 5: Tips for growing Kale in pots or containers

  • Kale is very easy to grow in pots and containers. You don’t need an entire backyard to grow this powerful vegetable.
  • Kale is easy to keep in pots. It stimulates the plant so that you can move it in proper sunlight and protect it from severe weather conditions as needed, but it also protects it from garden invaders, such as rabbits, which bite on the leaves. Also helps Also, container breeding is ideal if you do not have adequate garden space or soil conditions. 
  • Select a pot or container at least 12 inches in diameter. It should also have plenty of drainage holes. A non-shiny soil container is a good option as it allows excess soil moisture to pass out of its walls, helping to prevent roots from rotting. Use a standard pot mix; an organic mix for growing vegetables is a good option. Transplant Kale into the pot at the same depth as it was growing in your previous container, and water it after planting. 
  • Select a pot or container at least 12 inches deep and wide. Be sure to select the drainage vessels at the bottom. Fill 3/4 of the pots with dry clay. 

Step 6: Kale growing methods for higher yield

There are two ways to grow Kale by seed. You can sow the seeds directly in the garden soil or start the seeds indoors in a seeding tray and transplant the plants into the soil later. 

Direct sowing method

You need loose, well-drained soil to grow Kale. Make rows about 18 inches apart, and sow your Kale seeds directly to a depth of 0.5 cm. Cover Kale seeds with soil and water well so that the soil around the seeds can settle. 

Thinning: Once the Kale seedlings emerge, thin them out at a distance of 18 inches. That is, remove the overgrown plants. 

Transplantation method

Sow the seeds in a seed tray filled with a seed starting mixture such as an organic veggie mix. Sow 2 seeds in each cell. Transplant after 5-6 weeks. To plant, make a hole in the soil twice the size of a root ball. Place the root ball along the soil surface and backfill the soil.

Hardening: When you start your plants indoors, you slowly adapt them to the outside. Kale seedlings are hardened by exposure to as much sunlight as possible daily, eventually transplanting them into the soil.

In case you missed it: Kale Cultivation; Farming Practices; Care; Harvesting

Kale
Image Source

Step 7: Tips for starting Kale seeds 

Although Kale is grown in hot weather, they tend to be woody and bitter. It is best to allow it to harden in cold weather. Start spring seeds should be started indoors about six weeks before the last frost to allow the plants to mature before the worst summer heat. Direct seeds will ripen in 55 to 75 days, while transplants will speed up the procedure, ready for harvest in approximately 30 to 40 days.

Replant your crop in the fall, six to eight weeks before the first expected frost – you can continue harvesting after the snowfall. Plant more Kale seeds or transplants every two to three weeks for long, continuous pruning. As well as being highly nutritious, the Kale is attractive, with a wonderful range of everything from bright green to deep purple, from raw leaves to waterfall beauty, and everything in between. Its decorative value can be appreciated in traditional garden beds or containers, especially in the fall. 

Step 8: Propagating Kale for more production

Full sun and well-drained soil produce the fastest growing and softest leaves, although Kale will tolerate partial shade. Add plenty of compost to the soil carefully before planting. If your soil is not particularly rich, apply nitrogen-rich modifications (like blood meal, cottonseed meal, or composted manure) to the soil before planting. Kale is usually planted from seeds or nursery plants but can be propagated by cutting.

Kale grows again after cutting but requires a certain spread. To keep Kale healthy, cuttings from the oldest leaves should be taken. Use gardening scissors to cut the stem from the bottom of the plant; choose one with more than one leaf from the main stem (do not spread from the center of the plant). 

Place the bottom of the stem in a small container without dirty soil in a pot mixed with drainage holes. Continue to increase the medium humidity. The roots should be ready in a few weeks. If you gently pull the stem and feel the resistance, you will know that the roots have formed. After that, it is ready for transplanting.

Step 9: Water requirement for staying plants healthy

Plenty of water will be required for the healthy growth of the crop. Please make sure you are not over water. Compost and grass clippings work well as mulch, such as shredded newspapers and stray. If you get rain every week or so, your Kale crop will recover on its own. If it doesn’t rain for a while, you need to water the plants yourself. A spray works well for large patches and requires only 10-15 minutes of running to moisten the soil sufficiently. 

In case you missed it: Best Vegetables to Grow at Home in India: Easy for Pots, Terrace, Balcony, and Indoors

Kale Farming
Image Source

Step 10: Growing Kale in hydroponics for more production

Two basic hydroponics systems work best for vegetables like Kale. The first is DWC or deep-water culture, and the second is NFT or nutrient film technique. In DWC, you transplant seeds into rafts. These rafts then float on a built-in pond measuring 6-12 inches. The pond contains a large number of nutrients. 

You add a water pump that helps circulate the water in the pond. However, you will need to install an air pump to ventilate the system. NFT is another hydroponics system where you transplant plants on shallow channels. In these channels, a thin film of nutrients is in circulation all the time. In hydroponics farming methods like NFT, you must tilt the channels at a certain angle, 1-4% away from the center. This design helps the channels drain at the ends to return to the reservoir.

The DWC system offers part of its benefits. But clear water is used. Not only that, but the system also avoids changes in the nutrient solution, electrical conductivity, and pH structure. The Kratky method is also gaining widespread popularity due to its ease and ease of installation. You can easily manage and control it. This method will provide all the benefits of a hydroponics system without hassle. 

In this system, you place the Kale plants in nets that are an ideal source of growth. The plant roots are partially exposed to the wind while the lower part is submerged in deep water reservoirs. Your choice will depend on your suitability. To grow healthy Kale plants, you must maintain a temperature of between 16-24C on your hydroponics farm. 

Step 11: Hydroponic requirements for better Kale plant growth

EC and pH range – Kale has a wide range of electrical conductivity. As such, it is less sensitive to EC changes. For optimal growth of Kale plants, EC should be approximately 1.6-2.5. The pH of the nutrient solution should be about 5.5-6.5 for better plant growth. 

Lighting: You can choose an indoor hydroponics setup for artificial lighting conditions. Infrared light can increase plant yields. However, the combination of infrared and green can be amazing. 

Spacing: Kale needs enough space to ensure all plant parts get enough light. That way, when you plant Kale, try to keep them half a foot or a foot away from each other. This technique will ensure that no plant stops receiving the light it needs for growth. 

Step 12: Neighboring plants selection kale growth

Kale grows with other varieties of Cabbage, Beets, Onions, and other Herbs. The taste will be bitter if grown in a warm climate under shade. 

Step 13: Tips for getting more yield in Kale farming

  • If grown in the shade in a warm climate, the taste will be relatively bitter. Frost makes Kale sweet in taste. 
  • If your Kale leaves start to rot, add mulch after the crop is 6 inches long.
  • Kale is good at resisting pests. However, pests affecting the crop include aphids, cabbage worms, cutworms, and flea beetles. As the weather progresses, keep adding organic fertilizer to the pots and picking dry leaves. It can help prevent pests and diseases. 
  • Kale roots run horizontally from the main stem. Use straw or grass mulch based on your plants to keep the soil cool, retain moisture and make it easier to feed the roots. 
  • Use bamboo sticks to support plant growth in pots during the winter. You can also grow Kale indoors as they do not require much space like most leafy vegetables. However, it needs a good amount of sun. 

In case you missed it: Vegetable Planting Calendar in the USA: When to Plant, A Step-By-Step Guide for Beginners

Kale Garden
Image Source
  • Growing Kale indoors also reduces the chances of diseases and infections. 
  • The best type to sow indoors is the Dwarf Kale, as wide varieties can grow up to 3 feet tall. It is suited for indoor spaces. 
  • Keep pots or containers in a place with at least 8 hours of sunlight daily. Due to its ability to grow in water, Kale is grown easily in the hydroponics industry. It can be grown indoors under artificial light. 

Step 14: Pest and diseases control for Kale plant growth

The Kale plant is a member of the cabbage family, notorious for attracting insects and rotting diseases. Kale is susceptible to black rot and club roots, as well as aphids, cabbage loopers, cabbage bugs, flea beetles, cutworms, and slugs. The best defense is to monitor the Kale plants for signs of eggs or feeding, such as holes in the leaves. Treat problems as they arise. 

Rotating, cracked, yellow leaves can signify an aphid infection. Look at the underside of the leaves about the size of the pinheads for soft-bodied green, brown, or pink insects. Aphids can be hand-chewed or killed with organic insecticide soap. Ladybugs eat aphids. 

Step 15: Leaves color change problems and control for growing Kale

Tiny holes in the leaves can be caused by cabbage loopers or cabbage worms, light green, yellow striped caterpillars. Hand-pick them or spray them with Bacillus thuringiensis. Skeleton leaves may be due to the Mexican bean beetle. The leaves chewed on the stem indicate the presence of vegetarians. Pyrethrum spray can control these pests. Pyrethrum is organic but toxic to bees – spray it in the evening when the pollinators are not active. Curly Kale may be less susceptible to beet damage than flat-leafed Kale.

Stagnant growth and cracked holes: If your plants look stagnant and you see cracked holes throughout the leaves, these could be cabbage loopers. Caterpillars are large, green caterpillars that later turn gray. Like the cabbage worms, the looper prevented with row covers or plucked off your kale plants and fed to your birds. 

Both insects also respond well to the pesticide Bacillus thuringiensis (Bt). Bt is a bacterium that kills off insects that feed on leaves. It is considered safe for bees and other animals, as well as for humans and other animals. 

Weak Plants and Yellow Leaves: Cabbage aphids are particularly problematic for Kale. These woolly, grayish-green creatures suck the juices out of Kale and another brassica. The results are yellow leaves, or they may be yellow as a whole, and the plant may be weak and dull. Once you know how to handle the problems, aphids are an easy bug to control. Mix a little insecticide soap or treat with neem oil to keep aphids away. 

The kale leaves are turning white – Some gardeners have problems with Kale leaves that turn white. One possible reason is that the white leaf spots on your plants are caused by Cercospora or Cercosporella spp. The white leaf spot causes small circles (0.635 cm to 1.27 cm) on the tops of Kale leaves. You can also see your leaves turning yellow, withering, and even withering on the stalk. Protect your plants using a safe fungicide or copper spray. And water your plant under the leaves instead of above.

In case you missed it: Growing Vegetables in Clay Soil: Plants, Crops, and Amending Tips

Kale Plants
Image Source

Step 16: Harvesting tips for more Kale yield 

It is the time of pruning when the leaves will be the size of your hand. Choose one by one, starting with the lowest, outermost leaves and working towards the center. Always leave a few small central leaves attached to encourage growth. You can replant the same plant in five to seven days. 

Expect to wait about two months for your Kale plant seeds to mature. Check the maturity days on your seed packets or plant labels for more accurate timing. Spring planted Kale is good for harvesting in the summer, but they are especially delicious after a mild cold. You can cut the young kale leaves for fresh use in salads or let your plants mature for use as cooked greens. Remove old outer leaves, and allow the plant’s center to continue producing. Kale will be refrigerated for about a week, ideally in crisper drawers.

How to Start Onion Farming in the USA: A Step-By-Step Guide to Planting to Harvesting 

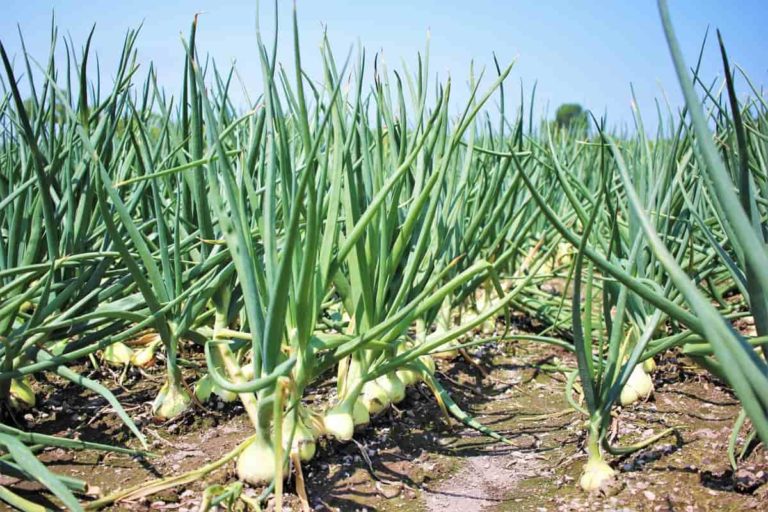
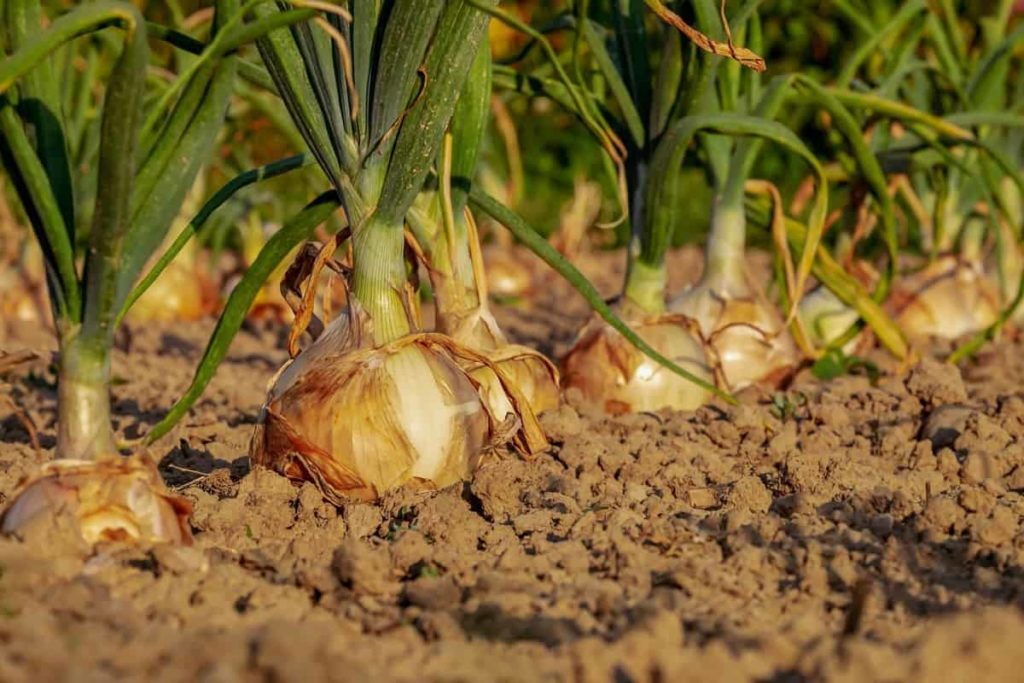
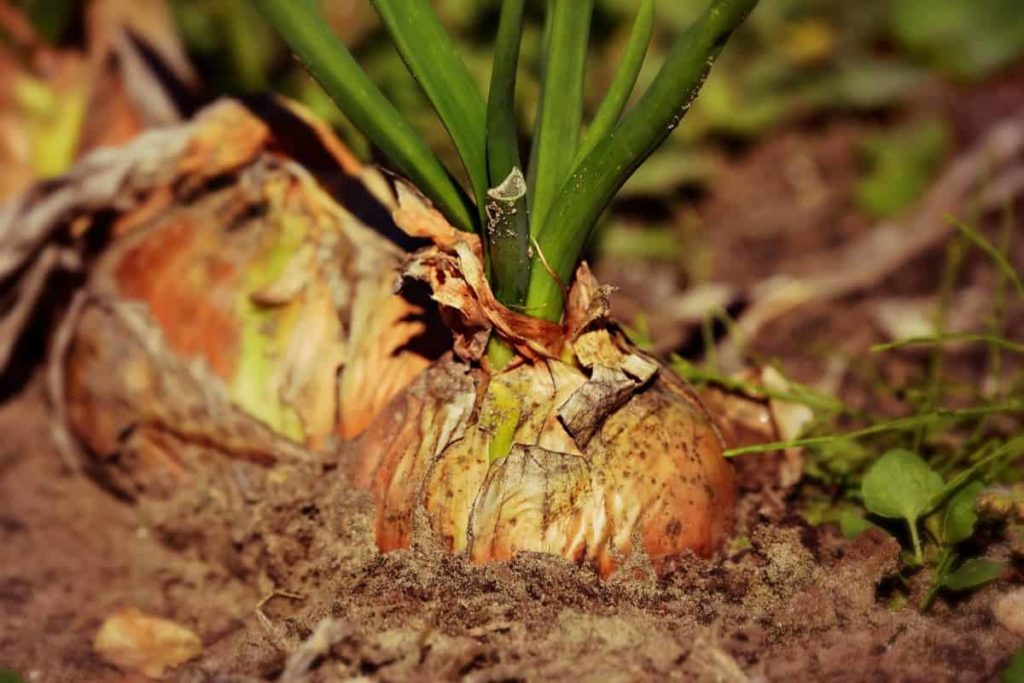
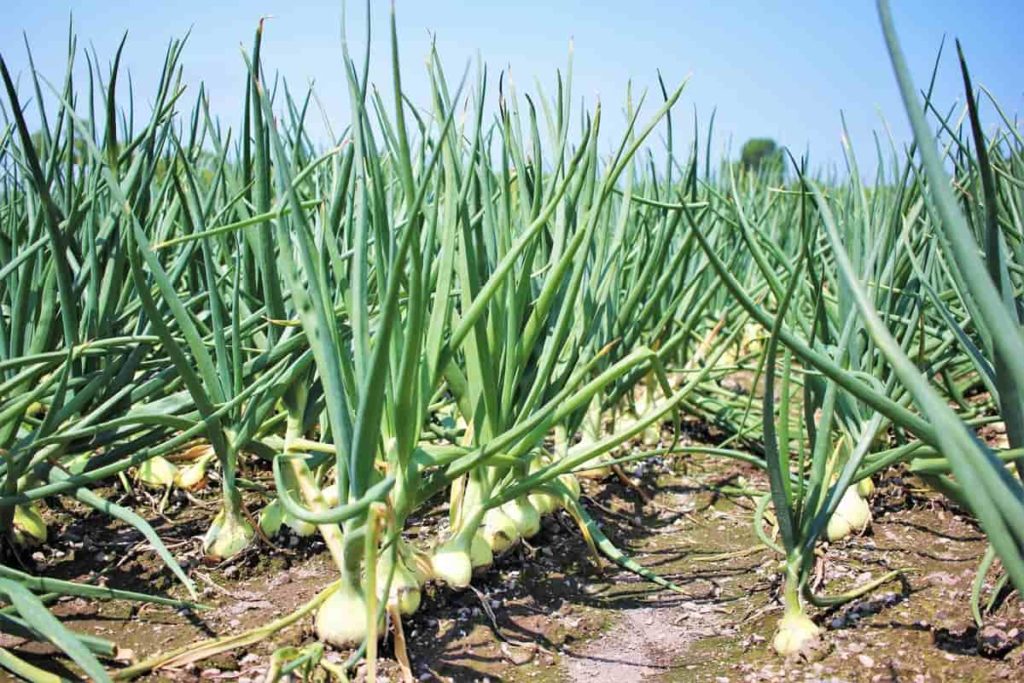
Onions are the third largest fresh vegetable industry in the USA. Onions are one of the most widely adapted vegetable crops. They can be grown in subtropical areas from the tropics. This adaptation is mainly due to the different responses of day length. Unlike most other species, day length affects bulbing in Onions, unlike flowers. Let’s check out how to start Onion farming in the USA.

How to Start Onion Farming in the USA
Image Source

How to start onion farming in the USA

Onion-cultivated areas in the USA

Producers and some productive areas (e.g., South Texas, California Valleys, Vidalia, Georgia, Walla Walla, Washington, New Mexico, etc.) trademark their brands and labels. The four largest production areas are Washington, Idaho-Eastern Oregon, California, and West Central Oregon. In Washington, dried Onion production is concentrated in the fertile Columbia Basin, north of three cities.

The Snake River Valley, from western Idaho to eastern Oregon, is the most concentrated area of ​​dried Onions in the United States, shipped from August to March or April. In California, Onions are planted for shipping from April to August. The National Onion Association reports that five more states deliver more than 100 million: New Mexico, New York, Nevada, Texas, and Colorado. 

US Onion production and availability 

Onions were first brought to the USA by early European settlers. Onions were adapted to the temperate climate conditions throughout the Northeast, where the first European settlements occurred. Varieties from the tropical Mediterranean region eventually traveled to the southeastern United States. The size of Onion production depends on the type of seed sown. There is a difference in the size and weight of the product according to the type of seed.

On average, a healthy Onion plant produces 80 grams in size and weight of Onion (the green part not included). The Onion should be grown on well-drained soils with high organic matter content, a good water infiltration rate, and a moisture retention capacity. The soil should not be compacted for growing Onions, and the pH level should be 5.8 to 6.6. Sandy loams and dung soils are often used for Onion farming. Soils with low sulfur levels (less than 40 ppm) are recommended for sweet Spanish Onion farming. 

Onion farming in California 

California is a major producer of American unions. California is a major force in the US Onion market. California also grows Onions for seed. The Imperial and Sacramento valleys are major centers for seed production. The largest Onion producer in the USA is California, and it is the only state that produces both spring and summer Onions. Other major producers of summer-grown Onions are Washington and Oregon. About 16% of California’s Onions are harvested in the spring. 

In case you missed it: Top 18 Steps/Ways to Boost Onion Yield: How to Increase Production, Size, and Quality

Onion Farming
Image Source

California produces 42% of the nation’s spring Onion crop, with Georgia and Texas being the other major producers. About half of California Onions are cultivated for the fresh market and about half for processing. The ratio of spring, summer, fresh, and processing Onions is stable. Yields of spring-harvested Onions in California are significantly higher than average in Texas and Georgia, the other major producers. For summer-harvested Onions, yields in the Pacific Northwest exceed those in California.

Onion bulbing is primarily driven by photoperiod or day length. Both long-day and medium-day Onion varieties are recommended for the northeastern United States. Onions are also divided by skin color (red, white, brown, or yellow), flavor (sweet or pungent), and bulb shape (round, flat, or globe). Based on the report from the University of California, Davis, California is the largest producer of Onions in the US (including fresh and processed) and the only state to produce spring and summer harvested Onions.

Approximately California produced 31 percent of the nation’s total Onion crop. About 16% of California’s Onion harvest is done in the spring, and the state produces 42% of the nation’s spring Onion crop. According to the report, about half of California’s Onions are grown for the fresh market and about half for processing.

The proportion of spring, summer, fresh, and processed Onions is stable. Onions are grown throughout California. In a recent census, the counties with the most Onion acreage were Fresno, Imperial, Kern, Siskiyou, and San Joaquin, with over a third of the state’s acreage in Fresno County. Los Angeles County also includes the high desert region of the Antelope Valley and the fresh Onion market in the Salinas Valley.

Different Onion varieties in the USA

Onions are also classified according to their purpose (fresh market or dehydrator). Fresh Onions are mostly short and medium days. They are harvested by hand and processed either freshly or lightly for products such as Onion rings. They are sweeter and have a lower dry matter content (5-12%).

In case you missed it: How to Start a Backyard Garden from Scratch: A Step-By-Step Guide for Beginners

White Onions
Image Source

Short-day varieties are often harvested at maturity and are not stored. Dehydrated Onions, which can last less or more days, contain faster and more dry substances (15-25%). Their crop is mechanized. Both fresh and dehydrator varieties are grown throughout California. 

Yellow Onions

Yellow Onions are full-flavored, and the most popular type – about 87% of the Onion crop in the USA is yellow Onions. Yellow Onions are a staple vegetable in the family kitchen or restaurants across the United States. It demonstrates the ability to produce yellow Onions in various food services, from Onion flowers to wonderful dishes. Wada Farms can help you increase your profit potential with some of the best yellow Onions available in the United States – discover the difference. 

Red Onions

Nothing makes the dish pop like the vibrant, strong beauty of the red Onion. Red Onions have gained popularity in both consumer and food services markets due to the color and texture of the plate’s overall offering. On the one hand, red Onions produce a crispy, light Onion flavor that can enhance the flavor of any dish. Whether it’s a food service or a retail application, we can take your red Onion category to the next level – let’s show you a lot of possibilities. 

White Onions

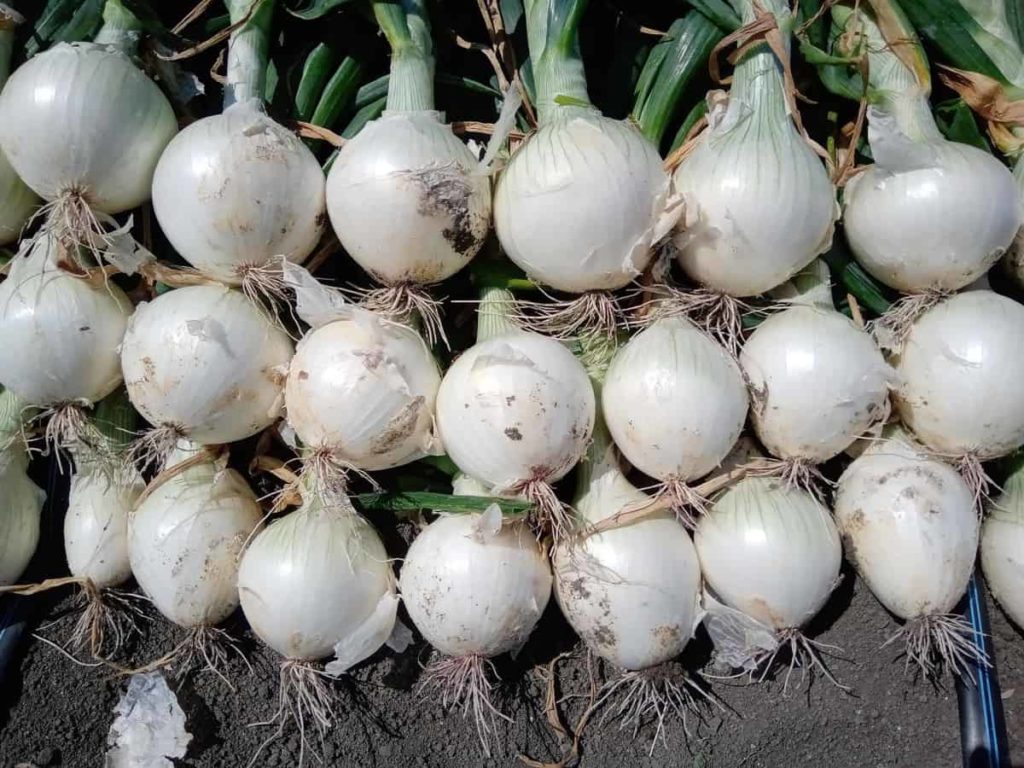
White Onions are a strong contender for one of the most popular Onions in cooking but are also used in fresh forms. White Onions are very popular in many cuisines, especially in Mexican and Southwestern cuisines, with a flavor profile that produces a tangy but subtly sweet-tasting profile. Over the years, Wada Farms has purchased some of the best growers in the country to develop an accurate white Onion program that will ensure consistent quality, supply, and, most importantly, a satisfied customer.

Brown Onion

Characteristics: With round, thin, brown papery skin, Brown Onions are the most common Onion type in the United States and easily the most versatile cooking Onion. Popular varieties include Brown Onions and slightly larger, slightly sweeter Spanish Onions. 

Varieties of Onions according to season

Spring/Summer Onions 
  • Yellow, red, and white from March to August. 
  • Recognizable by their thin, light-colored skin. 
  • Usually, they have a high water content, which shortens their shelf life and makes them more susceptible to bruising. 
  • Sweet to mild in taste. 
  • Best used in salads, sandwiches, and fresh, lightly cooked, or grilled dishes. 
  • Many specialties, sweet Onions are part of this category and are sold under a specific trade name or label. 
  • Some domestic and all imported Onions with these characteristics are offered at other times. 
Autumn/Winter Onions 
  • Available from August to April in yellow, red, and white. 
  • They are easy to recognize by their multiple layers of thick, dark-colored skin. 
  • Generally low in water content, they have a long shelf life. 
  • Mild to spicy flavor, perfect for savory dishes that require more cooking time or flavor. 

In case you missed it: How To Start Onion Farming, Questions, Answers

Onion Farm
Image Source

Soil management in Onion farming in the USA

Onions grow best in fertile and well-drained soils. However, most sandy loam, sandy loam, or sandy soil will benefit sweet Onion production. These soils are low in sulfur, allowing for greater flexibility in sulfur management for Onion production. Avoid soils with heavy clay content. Loamy soils are high in sulfur, which can cause Onions to rot. Extremely sandy soils are more difficult to manage because they require more fertilizer and water.

Fertilizer requirements should always be based on a recent, properly obtained soil sample. Contact your local county extension office or crop consultant regarding proper soil sampling procedures and results interpretation. Obtain a soil sample a few months before crop establishment to determine lime requirements and make timely lime applications.

If soil test results show a pH less than 6.0, apply dolomitic lime and disc two to three months before land preparation to bring the pH to the optimum range of 6.2 to 6.5. Adequate liming is necessary to keep the soil pH above 6.0. Low pH levels can cause nutrient deficiencies during the growing season. Also, high rates of fertilizer used in Onion production cause the pH level to drop during the growing season.

If the pH level is not corrected during the Onion season, nutrient deficiencies can occur throughout the year, and yield may decrease. Even soil tests indicate adequate levels; calcium and phosphorus deficiencies are often associated with low pH. However, phosphorus deficiency can be difficult to correct during the growing season due to low pH. 

Fertilizer requirement for Onion growth in the USA

Onions require more fertilizer than most vegetable crops because plant bed and dry bulb Onion fertilization should be considered. They respond well to additional fertilizer 40 to 60 days after sowing or transplanting. Manure application is crucial to achieve maximum yield, with multiple applications ensuring good yields. It will increase the plant’s fertilizer and reduce the amount lost through leaching.

More recent research, however, indicates that good results can be obtained by using as few as three fertilizers. Pre-plant fertilization will vary with natural fertility and harvest date. For commercial Onion cultivation, irrigation is necessary at the time of transplanting/doubling cloves, and then light irrigation is required on the third day of planting. Water the transplants immediately after planting. 

Apply well-rotted farmyard manure @ 200-300 quintals, nitrogen @ 60-150 kg, phosphorus @ 35-150 kg, and potassium @ 25-120 kg per hectare depending on soil test, cultivar and growing season. Farmyard manure for the Onion crop is applied during field preparation. Apply 50% nitrogen and full phosphorus and potash before transplanting or planting bulbs. The remaining half of nitrogen is top-dressed 5-6 weeks after transplanting.

Irrigation requirement for Onion farming

Immediately after transplanting, irrigation is given according to the needs and critical stages of the crop. Irrigation should be stopped 15-20 days before the bulbs are uprooted or maturation begins. Onions need very careful and frequent irrigation as it is a shallow-rooted crop. The need for water decreases during the early development of the crop and increases later in the growing stages. Irrigation should occur 10-15 days in cold and one week in hot weather.

In case you missed it: Growing Spring Onions – Farming Tips, Ideas, Secrets

Onion Field
Image Source

Bulb formation and bulb growth stages (70-100 days after transplanting) are important for water needs. Insufficient moisture slows down the bulb’s growth, while over-supply causes rot. A dry spell can cause the outer scales to split. Usually, 10-12 irrigations are given in the Rabi season. When the peaks mature and start falling, stop irrigating. Onion boards usually require less care and other management. However, taking extra care will help the plants grow well. 

Pest management in Onion farming

Weed management in Onions can be achieved with a good herbicides, cultivation, and crop rotation system. Depending on the specific problem of the weed and the stage of development of the Onion, many preplant and later herbicides are available for the Onion. If the infection level is mild, early planting can reduce weed problems. Pests can be the main problem in Onion farming. Thrips and Onion maggots have the potential to reduce crops in any year.

Allium leaf miner problem is a new invasive worm in Onions in Pennsylvania. Monitoring pest populations in Onion crops will help you find the best time to use pesticides and how often to spray. Numerous diseases can cause crop damage, especially bottom mildew, purple spots, and white rot. These plant diseases can be prevented using good crop circulation systems, high-quality soil with good ventilation, and disease-resistant Onion varieties.

Many pesticides needed to grow Onions are used sparingly and require a pesticide license to purchase. Pesticide application tests are conducted in extension offices. Contact the local office for dates and times. When using any pesticide in the enterprise, follow all label recommendations regarding application rates and personal safety equipment requirements. Remember that worker safety standards apply to both employers and employees.

Harvesting time for Onion farming in the USA

Pull off any bulbs that send up flower stalks. It means the bulbs have stopped growing. These Onions will not store well but can be used in recipes in a few days. Spring-planted Onions are ready to harvest by mid-summer. As the Onions ripen, the tops (leaves) turn yellow and fall off. Now, bend the tops downward or lean over the plants to speed up the final ripening process. Loosen the soil around the Onion bulb to encourage drying.

Sow in dry weather till late summer. Pull the Onions carefully when the tops are brown. Handle them carefully, as the slightest injury (now and in storage) will encourage rotting. Trim the roots, cutting the tops to 1 or 2 inches (but leave the tops if you plan to string the Onions together). Onion is harvested based on the purpose for which the crop is grown. The dry Onion crop is ready for harvesting in five months. However, for marketing as green Onion, the crop is ready three months after transplanting.

When the bulbs that develop from the Onion leaf bases are fully formed, the tops of the green leaves begin to turn yellow and eventually drop slightly above the top of the bulb, leaving the neck straight. The Onion bulbs are ready to harvest when the tops “go down” like this. Because not all Onions in a crop ripen simultaneously, large-scale commercial growers harvest them when about half of the tops are down. 

In case you missed it: Hydroponic Onion Farming – Growing Guide

Onion Farming
Image Source

Onion marketing in the USA

Fresh market Onions are available in the northeastern United States from the first of July through the end of October. They are traditionally sold loose in large containers or mesh bags of varying weights. Several marketing methods are available to the Onion grower, like local retailers, wholesale markets, cooperatives, farmers’ markets, roadside stands, community-supported agriculture (CSA), pick-your-own operations, and processing firms.

When planning production, first consider your capacity and market access. If you did some market research — growers would overestimate their selling ability. In wholesale marketing, producers contract with shippers and ship Onions at a predetermined price. Send your Onions to the wholesale market; your product price fluctuates most.

Marketing cooperatives typically use the daily accumulated cost and value, which spreads price fluctuations across all participating producers. Local retailers are another potential market, but you should take the time to contact production managers and provide stores with good-quality Onions when needed. Depending on location, processors may or may not have marketing options. 

Onion yield in the USA

US farmers grow about 125,000 acres of Onions yearly and produce about 6.75 billion yearly. It includes organic produce but not bulb Onions for dehydration.

Conclusion

Onions are the fourth most eaten fresh vegetable in the United States, after Potatoes, Tomatoes, and Sweet Corn. Americans are eating more Onions. It helps those Onions have natural properties that keep us free from food-borne diseases and healthy. The profitability of Onion cultivation depends on the quality, production, and market demand for Onion.

Best Vegetables to Grow at Home in India: Easy for Pots, Terrace, Balcony, and Indoors

0

Knowing which vegetable plants are easiest to grow at home is important if you are a beginner. In addition, growing seeds is less expensive, offers more variety, and has a higher success rate. A vegetable garden may be less caring, but it is not caring. Most vegetable varieties do well in full sun. Find a place that, if possible, has at least six hours a day. For starters, start by selecting simple vegetable plants that are also productive. 

Please start with the right vegetable seeds at the right time, and some simple garden vegetables will practically grow independently. In addition, you can relax by knowing that your vegetables will always be freshly picked and pesticide-free. Let’s check out the best vegetables to grow at home in India below.

Tips for starting a vegetable garden 

If you are growing your vegetables for the first time, these tips for starting a vegetable garden will help you get started. 

1. Choose a sunny spot for your garden – Most vegetables grow best when sun exposure, but some require shade, especially in hot months. Note how the sunlight hits your potential area throughout the day. 

2. Soil preparation for growing at home – The most suitable soil for vegetables contains a lot of fertilizers and organic matter such as fertilizer leaves and ground or shredded, aged bark. Add enough organic matter for whatever you start with so that the modified soil is neither sandy nor compact. When the mixture is right, when you squeeze it, it sticks together but breaks easily when disturbed. The water will remain large enough and still will not saturate the soil. 

3. Choose your vegetables carefully – Different vegetables have different growing seasons. Choose which plants to plant depending on the time of year. Geography is also a factor, so consult a growing guide to find the best time to grow each vegetable in your area. Many common vegetables such as Eggplant, Yam, and Zucchini are hot-season crops. Leafy vegetables such as Spinach, Rhubarb, and Chard grow in the colder months, such as Kale, Turnips, Cabbage, Broccoli, Brussels Sprouts, and Kohlrabi.

4. Check planting dates for growing vegetables – Growth conditions and ripening cycles vary depending on the season and the selected plant, so you should not sow all the seeds simultaneously. Vegetable planting dates can be found on seed packets and followed carefully. 

5. Find high-quality seeds – Invest in good heirloom, hybrid, or open pollen seeds (or save your seeds) that have a lower risk of disease and are known to produce lush plants. This seed should be taken to your local grocery store or garden center. You can also look online to buy organic and non-GMO seeds. 

6. Use natural or organic pesticides – Insects that prey on your vegetables are inevitable. For bugs, use non-invasive insecticide or insecticide soap. Companions such as rosemary repel some unwanted insects, and others such as Dill and Parsley attract predators that prey on common insects. To prevent large animals, put a fence or net around your garden. 

7. Do not add too much fertilizer – Too much fertilizer, especially nitrogen (number one on the fertilizer package), can promote substantial lush growth at the cost of fewer fruits and smaller crops. Excessive fertilizer can be harmful to your vegetable plants and soil. 

8. Apply water gently – Gently sprinkle the garden with water to keep the soil moist during the growing season. Buy a spray nozzle for your hose to create a light rain-like fog for your garden.

9. Keep weeds away – The most effective way to prevent weeds is mulching. Add a 2 to 4-inch thick layer of organic mulch to your garden to prevent weeds from overpowering your crops. If herbs appear in the garden, grab them by the trunk and shake them quickly, removing the entire root. 

Best vegetables to grow at home in India

The following easy-to-grow plants show how simple growing and enjoying your vegetables are. Some simple and common vegetables that can be grown at home can be given below;

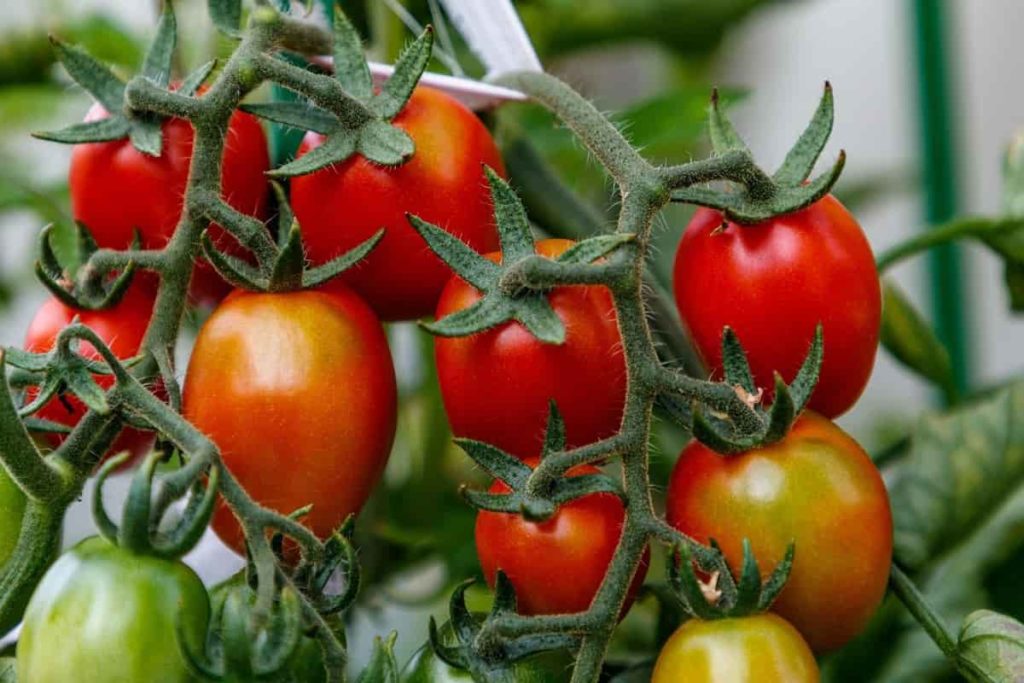
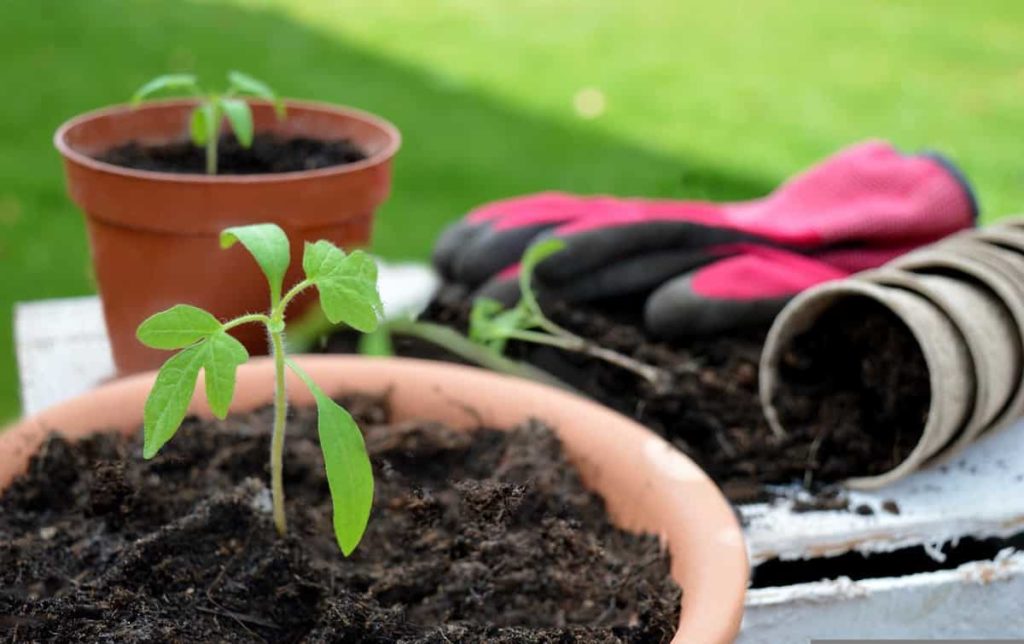
Tomatoes: Sweet-smelling homemade tomatoes are essential to a balanced and healthy diet because of their nutritional value. Plant tomato seeds in small pots 3 to 4 inches deep or in medium fertile soil about 3 inches deep in a seed starting tray. Choose a sunny spot in your garden, as tomatoes soak up the sun like water. Tomatoes are the best-tasting vine because of their flavor and taste. Tomato plants need strong and direct light. Tomatoes like heat. They will not start growing until the soil, and air temperatures remain warm.

In case you missed it: Growing Tomatoes Organically, Cultivation Practices

Tomato Farming
Image Source

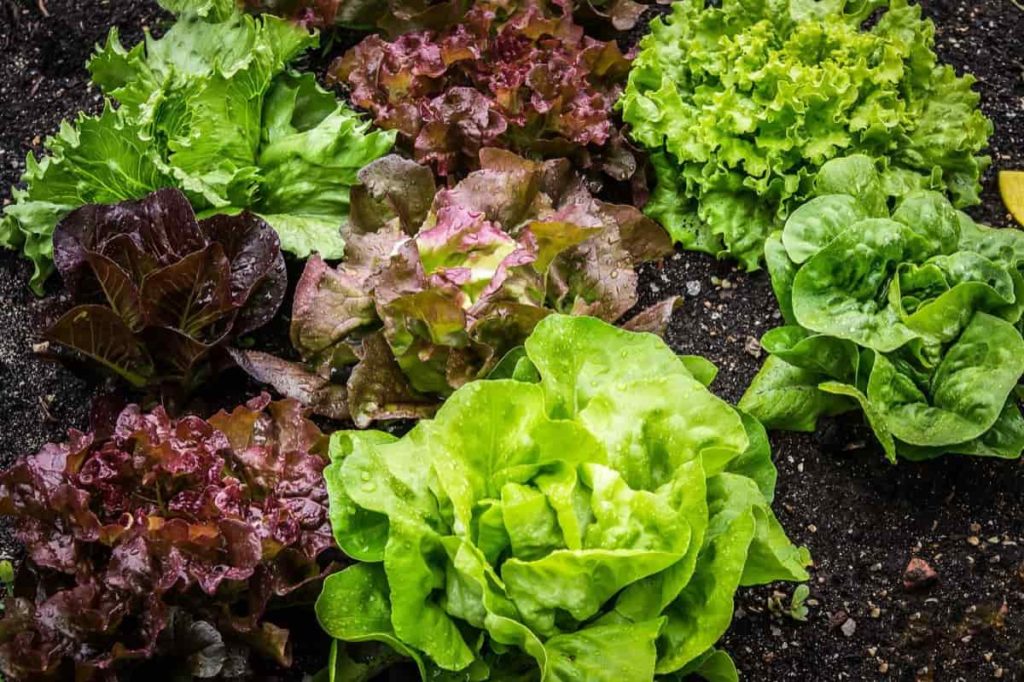
Lettuce: It can be sown directly in a garden bed or started indoors for transplanting. Lettuce growth in the shade is slow. It’s also slow to get to the seed, or “bolt,” which means it can be cut longer.

Cabbage: Growing cabbage in soil rich in organic matter that is well drained. Before planting, cover the beds with 2 to 3 inches (5-7 cm) of old manure or commercial organic planting mix and bend it to a depth of 12 inches (30 cm). If you are looking for cool-season vegetables to complement your home garden, cabbage (Brassica oleracea) is a great choice. It grows best where the soil pH level is between 6.5 and 6.8.

Depending on the variety, it will be ready for harvest in 80 to 180 days from seed or 60 to 105 days growing from transplanting. It is an easy-growing crop and does not require much advanced planning. Cabbage needs regular watering. The best option for watering your cabbage plants is to use watering cans or sprinklers. Ensure the soil stays moist, especially when the plants are exposed to sunlight.

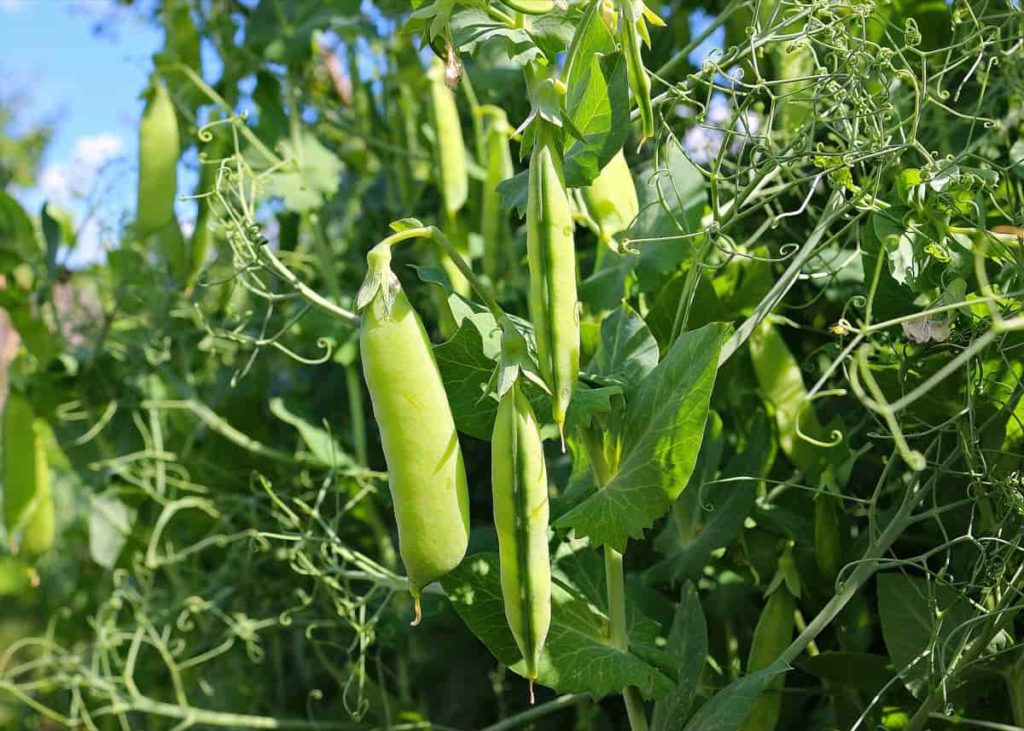
Peas – If possible, plant peas for your area 2 weeks before the average spring frost – as soon as the soil works. Cultivate varieties with different maturity dates simultaneously to ensure a steady supply of peas during the summer. 

In case you missed it: Growing Green Peas In Containers (Matar) Information

Peas
Image Source

Green Beans: Beans grow well in very poor soils as they fix nitrogen. Bean varieties do not require trellising, but pole varieties provide a more extended crop. 

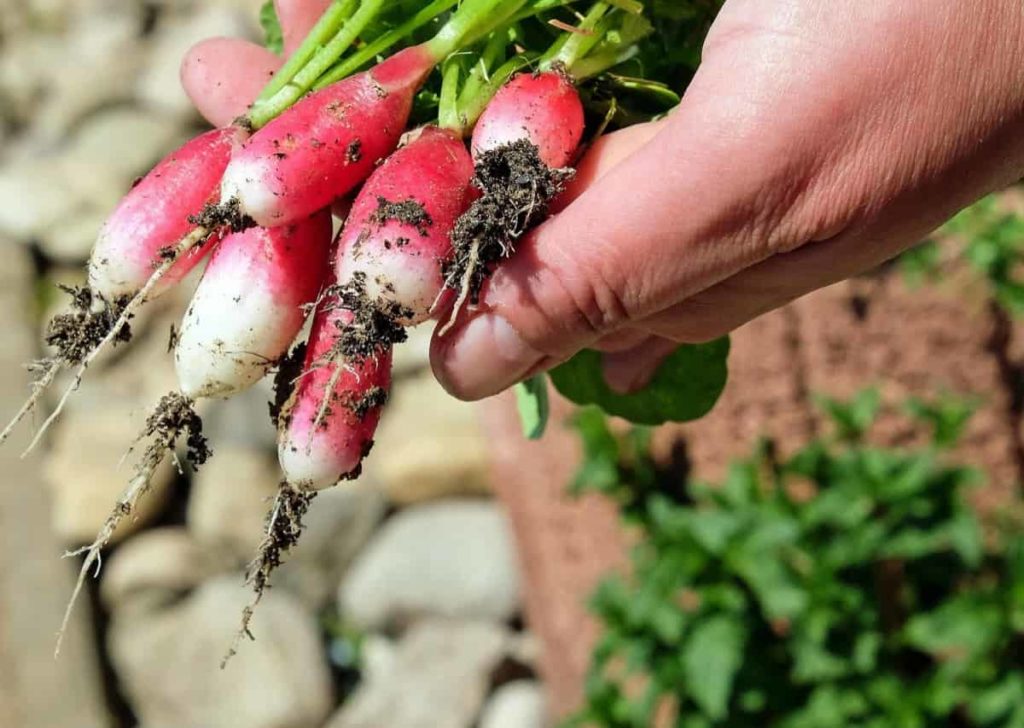
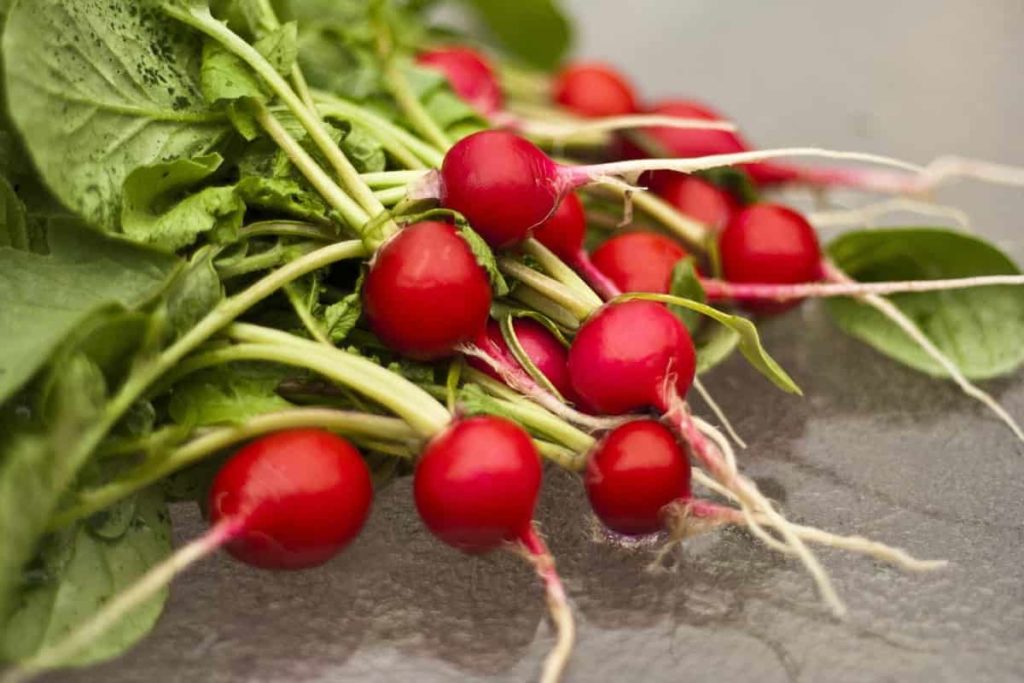
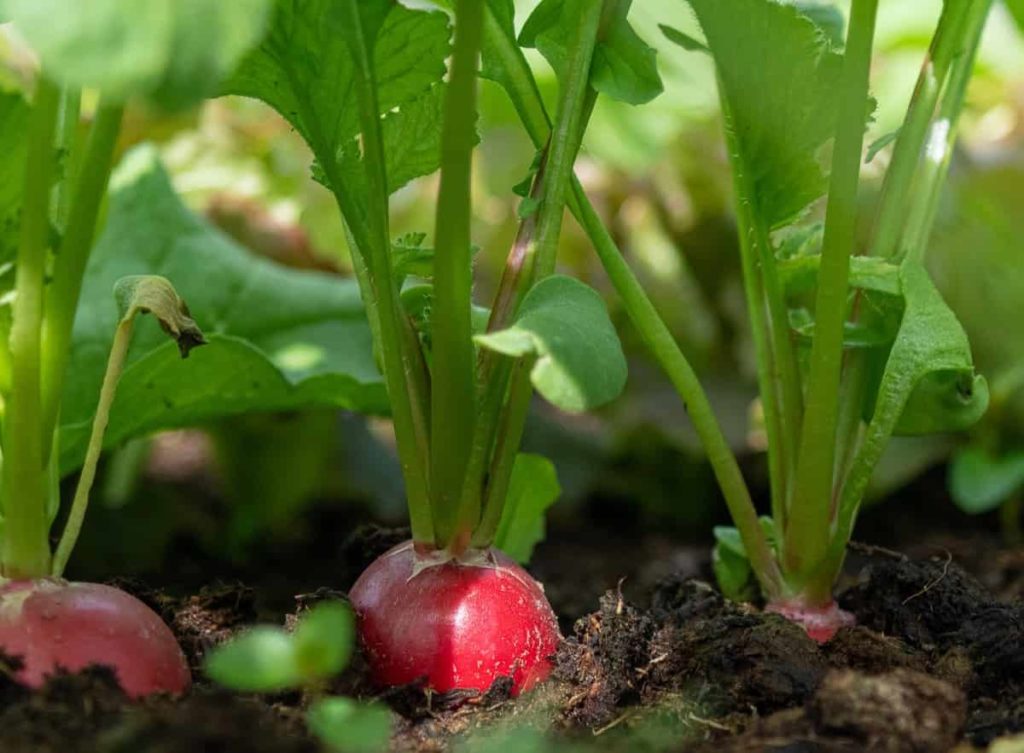
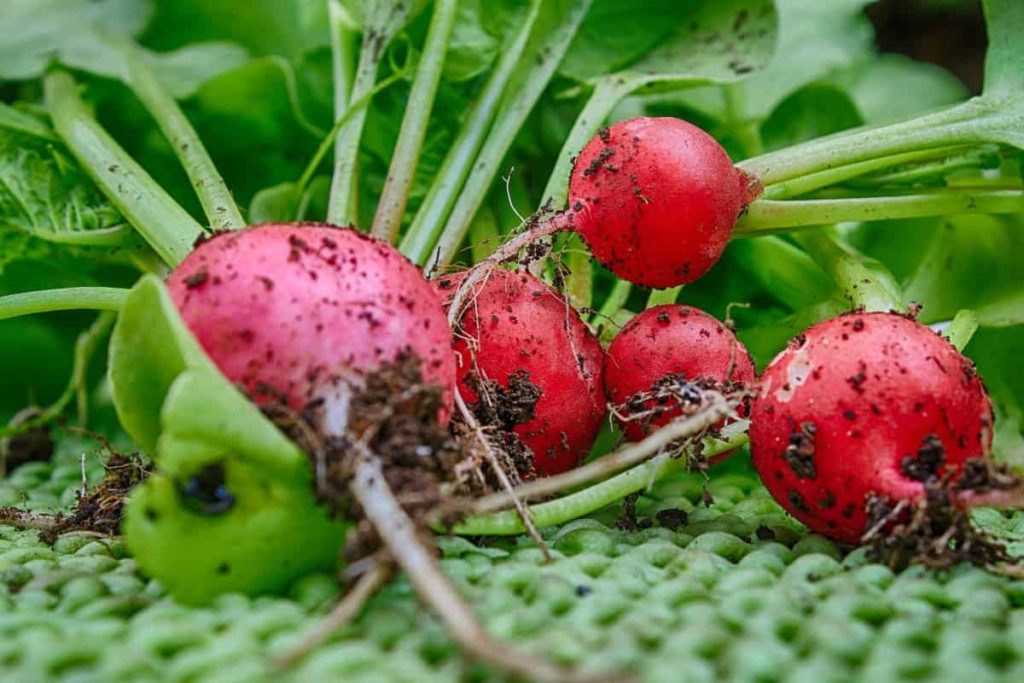
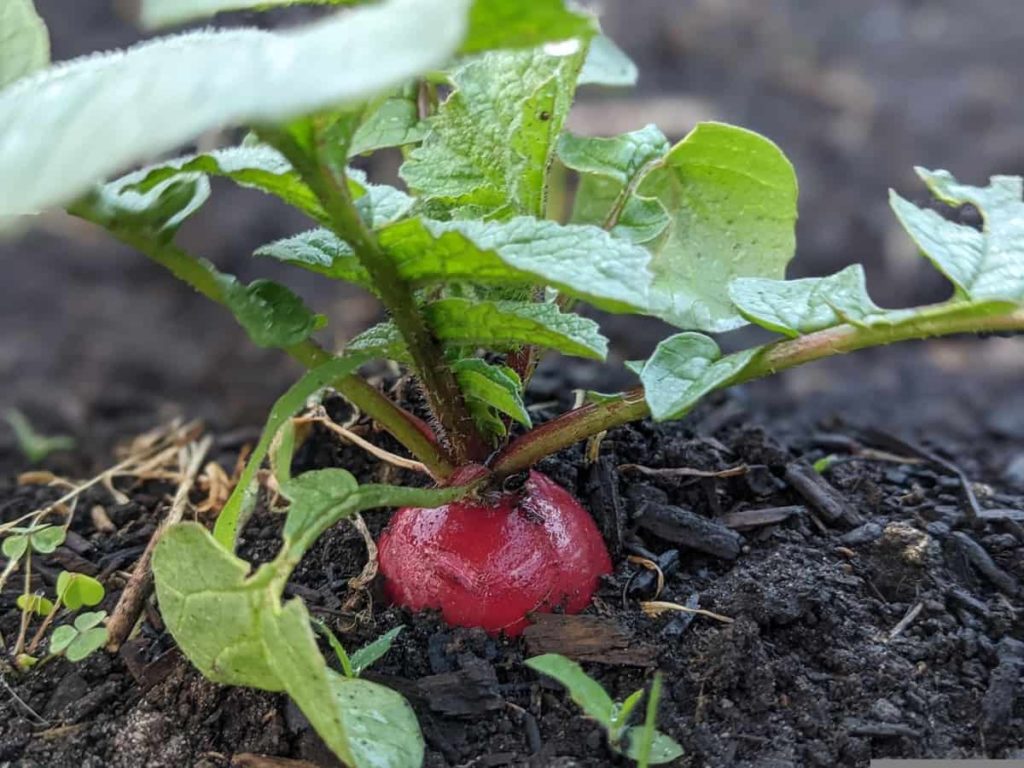
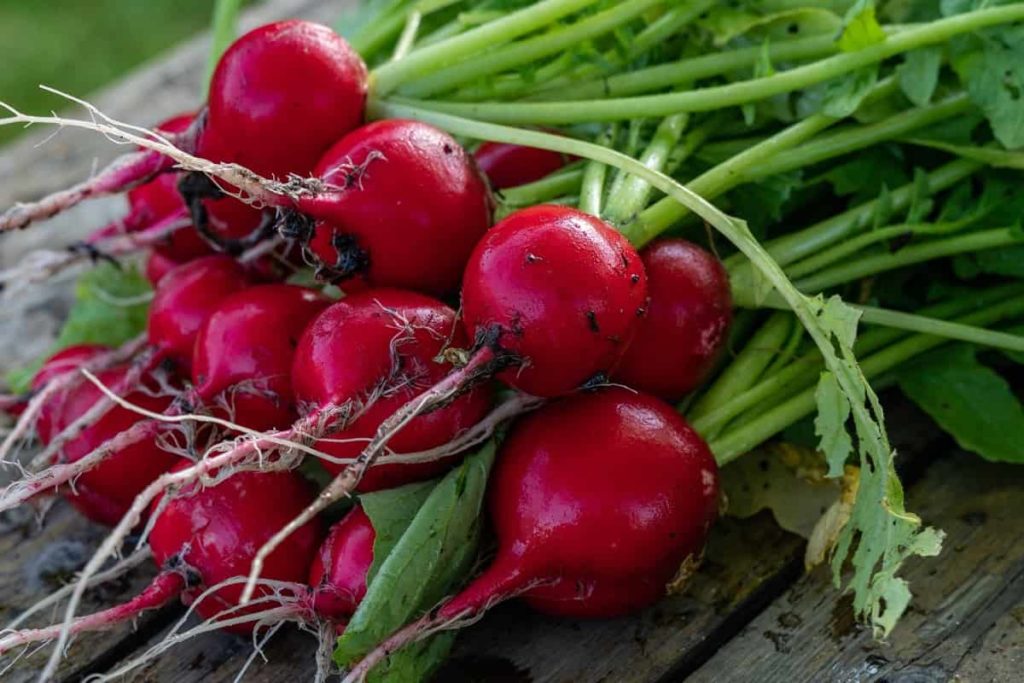
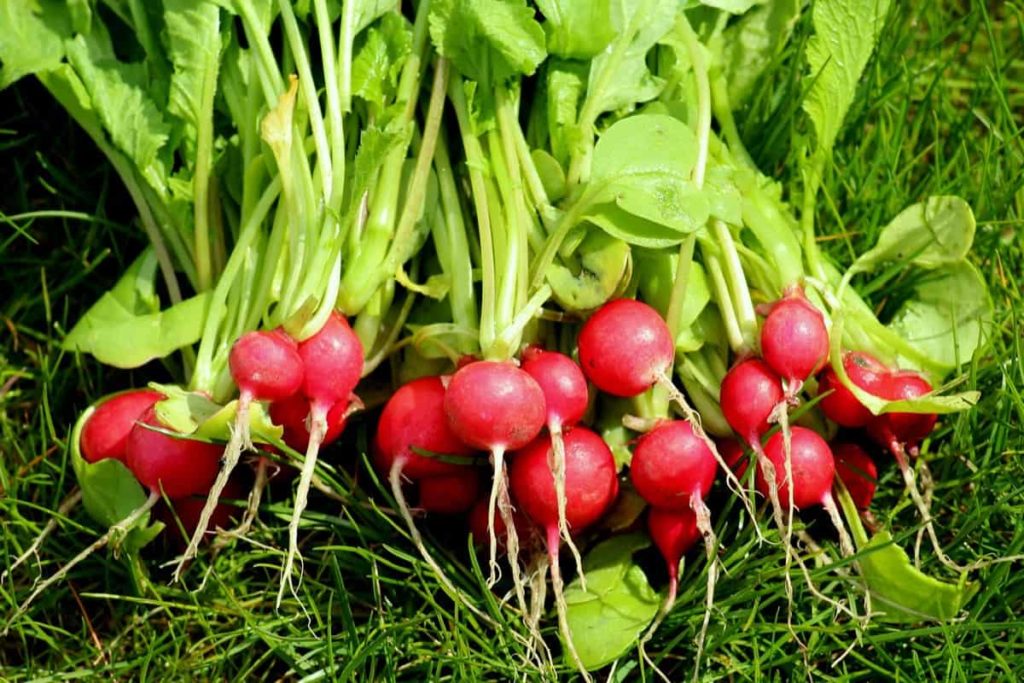
Radishes: Radishes are the fastest-growing vegetables, taking three to four weeks to reach harvest time. They are also extraordinarily easy to grow. Seeds can be sown in prepared soil or pots of potting soil. 

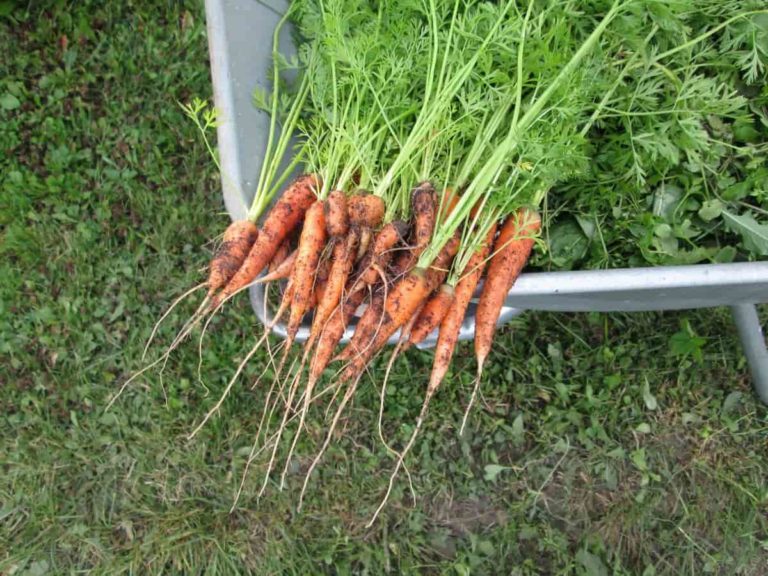
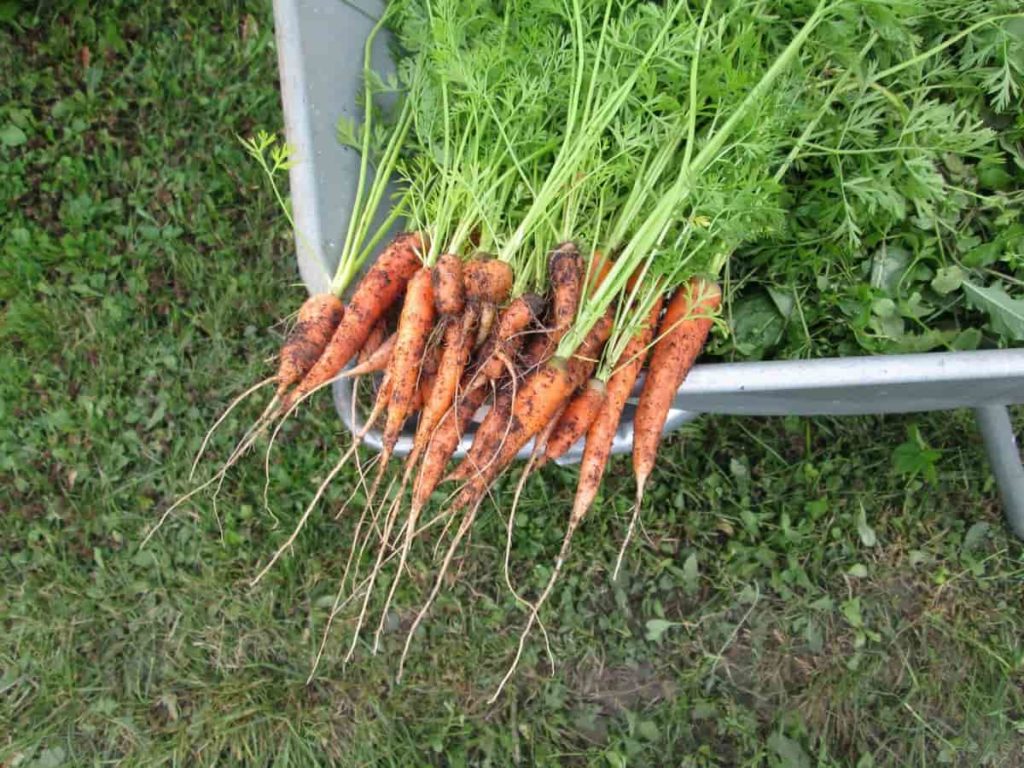
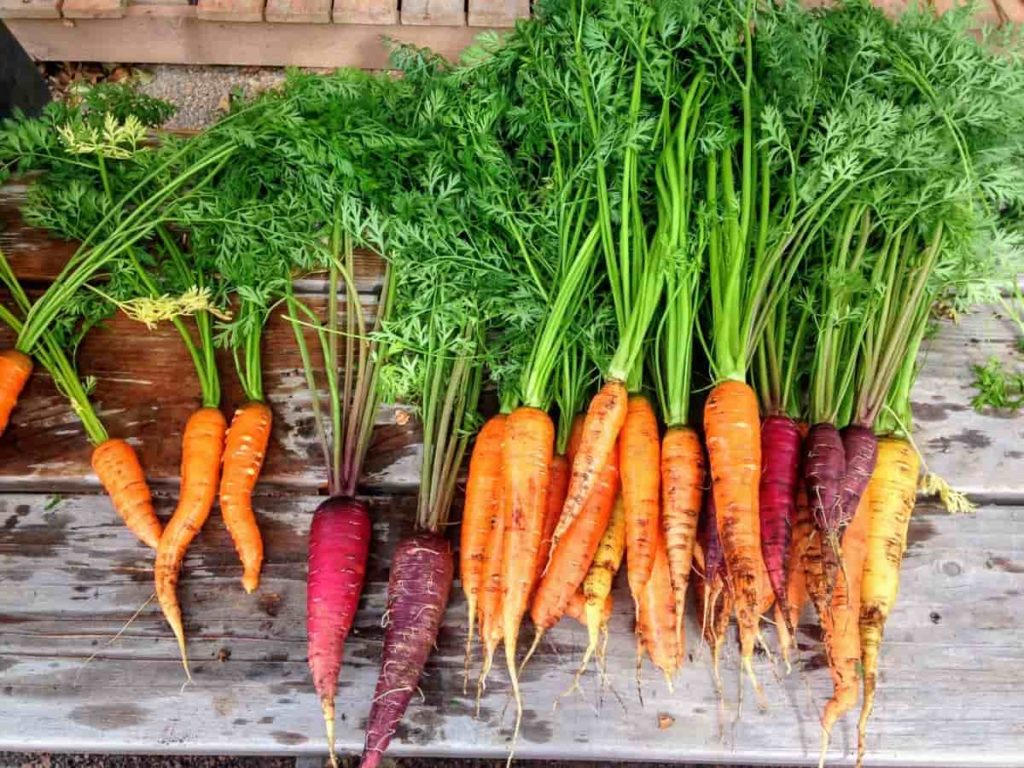
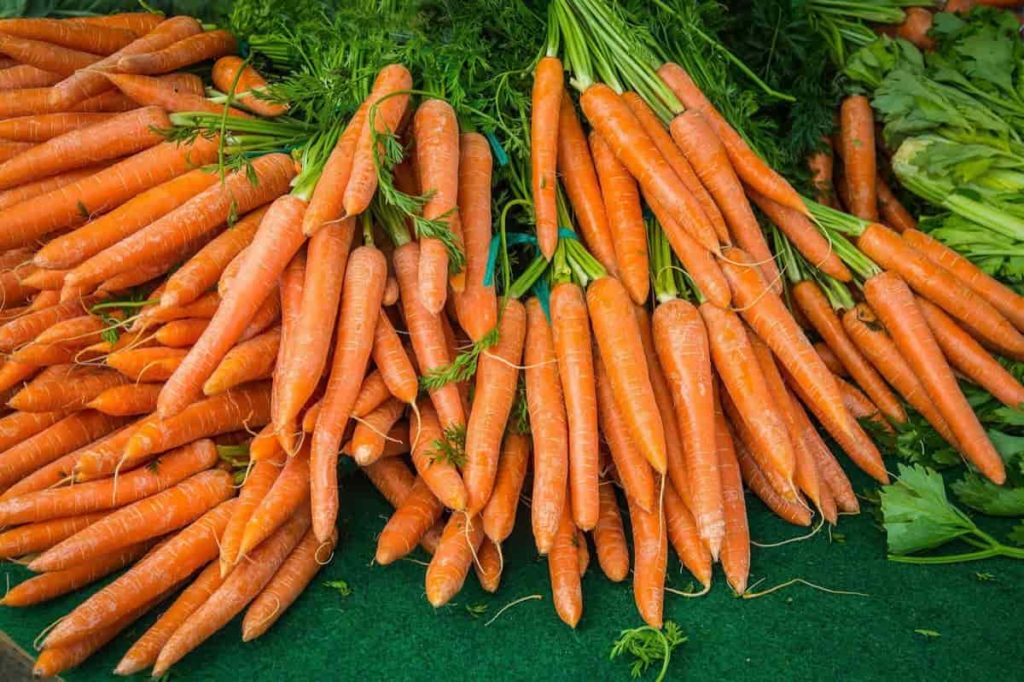
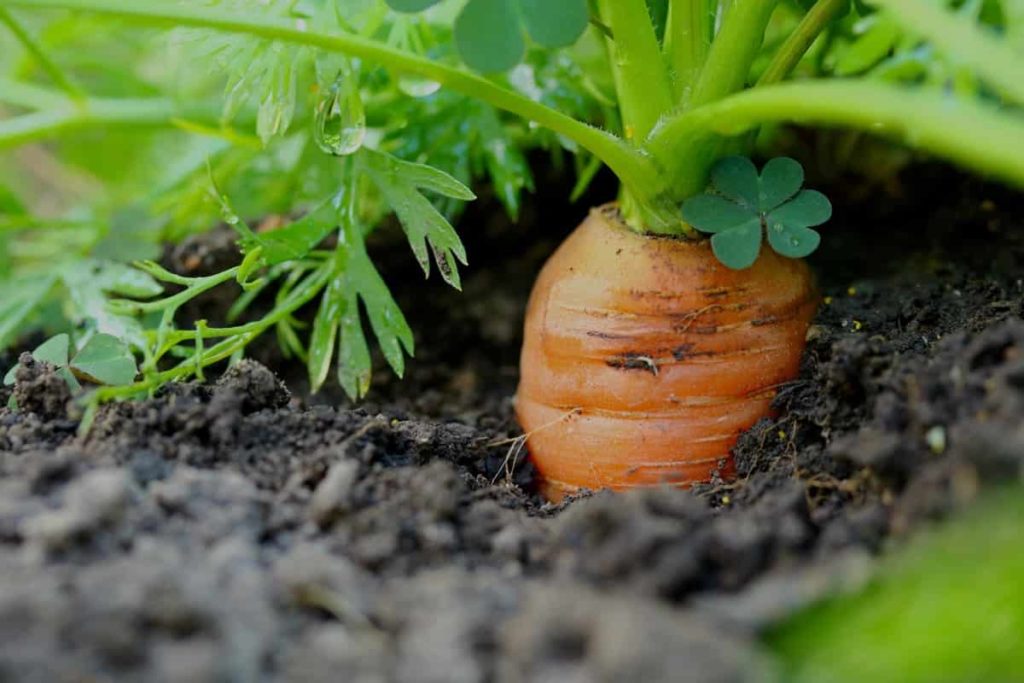
Carrots: Carrots aren’t the most obvious vegetable but choose a finger-sized fast-growing variety, and you can expect sweet, crispy roots in just six weeks. Sow in potted pots spread the seeds evenly on the surface, then cover with a thin layer of potted clay. Or insert the seed into a drill about 6 inches (15 cm) apart, cover from behind, and water. 

In case you missed it: Growing Baby Carrots – In Containers, Pots

Best Vegetables to Grow at Home in India
Image Source

Potatoes: These are the easiest vegetables to grow in the home. When you leave the potatoes for too long, they will sometimes grow on their own. Just bury a whole potato in some soil or a glass pot and wait. The potato will take root, and a new plant will grow soon. 

Pumpkin: Pumpkin can grow anywhere and is easy to grow. You can do the same for squash. Just bury the pumpkin seeds in the soil; the shoots will come out in a few days. 

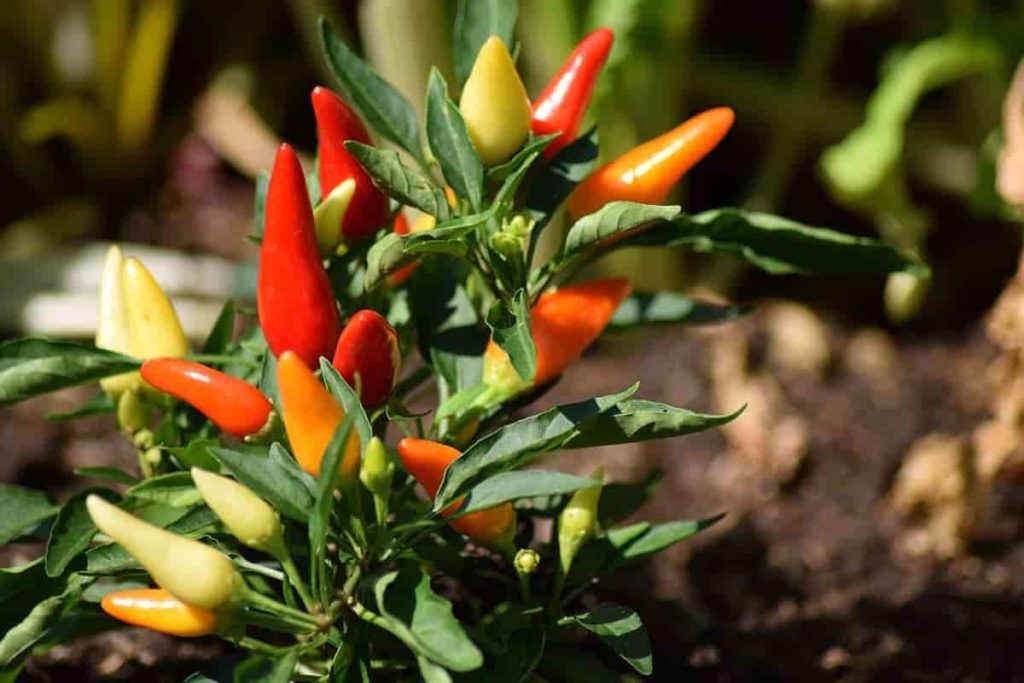
Pepper: Pepper has a lot of seeds and is easy to grow at home. Just collect the seeds with pepper, clean and dry them on a paper towel, and place them in a pot or garden. You can also grow them in smaller containers. 

In case you missed it: Top 18 Steps to Boost Chilli/Pepper Yield: How to Increase Production, Quality, and Tips

Pepper Farming
Image Source

Some other vegetables are Beets, Kale, Cucumbers, and Swiss chard.

Vegetables that easily grow on balconies 

Vegetables that you can grow in pots on the balcony. Many people would like to start a vegetable garden but do not have an outdoor space. Many people live in apartments these days and high places and have no outdoor space to work gardening. Fortunately, gardeners are no longer deterred from building high beds or starting underground gardens, and a wide variety of vegetables are suitable for container gardening.

Growing vegetable plants in pots or containers allows you to create an indoor vegetable garden on a balcony or even near a sunny window. Placing their vegetables in containers also gives gardeners the freedom to grow their crops indoors when the weather is very cold. Do not use soil from the ground for growing vegetables in containers because it is usually heavy and can cause drainage problems, leading to pests or soil-borne diseases that can damage your crops.

Instead, use potting soil, preferably potted soil specifically made for vegetables. At the top of the line, organic potting soil is ideal, and feel free to add some well-decomposed compost or worm casting, to increase the organic matter and improve water retention and drainage.  Ensure your balcony gets plenty of sunlight, as most vegetables and herbs enjoy at least eight hours daily. If your balcony or patio doesn’t get as much sun, you must adjust what is growing in that area.

A handful of root vegetables, such as Carrots and Radishes, as well as leafy vegetables such as Lettuce, Chard, and Kale, require only four to six hours of sunlight to thrive. Find a place on the porch, deck, or driveway area where you get eight hours of sun for other vegetables and herbs that thrive in full sun. Ensure you have a water source, as vegetables are very thirsty plants. Having a source of water nearby will prevent you from dragging water cans over long distances to keep your plants hydrated.

When you are planting in containers in your balcony gardens, you must make sure to use artificial soil. These containers are best suited for plants. Synthetic soil is made from wood chips, peat moss, sawdust, vermiculite, perlite, or other artificial planting material. You can fill the bottom of the container with coarse gravel before pouring the soil. It will improve the drainage of your plants. Make sure you don’t forget to water your plants once they are out in your balcony gardens.

It is important to water once a day and much more. If, on occasion, your balcony has direct sunlight and no roof, you will not have to water on rainy days. Any vegetable plant you can think of growing in the backyard garden will grow in the right conditions in your balcony vegetable garden. If your plants get enough moisture and sunlight, gardening on the balcony will yield many vegetables. Make sure you harvest your vegetables when they are ripe.

It will give the best-tasting vegetables from the balcony vegetable garden. To get the best-tasting vegetables from your balcony vegetable garden, make sure to harvest your vegetables when they are ripe. Get the right size pots for the plants that need root space (this post shows the right size pots for some plants).

Ceramic pots are heavy, so you can use rice pots, plastic or Fiberglass containers, or fabric growing bags that are combined with a lightweight clay mixture may need to be used. You can grow vegetables on the balcony: Tomatoes, Peppers, Peas, Carrots, Potatoes, Onions, Turnips, Asparagus, Parsnips, Basil, Eggplant, Beetroot, Kale, Mushrooms, Beans, Cucumbers, Squash, Radishes and Zucchini. They are recommended as they are easy to care for, and your product is more than a reward for work and care.

Vegetables that you can grow indoors

With a little care, it is easy to grow plants indoors. To get started, find a large container for your plant roots to grow, with a drainage hole at the bottom. You will need to put your container on a dish, saucer, or tray to catch the moisture coming out, so you don’t ruin the table or window. Plant your vegetables or seeds in your container using indoor potting soil, specially formulated to help plants grow indoors.

The biggest challenge in growing vegetable plants indoors is the lack of light. It is therefore important to mimic the outdoor environment as best as possible, either by using window lighting or by investing in grow lights. Vegetable plants need at least four to six hours of sunlight daily, while fruits require eight to ten hours daily. More or less when it comes to watering your plant. Since they are not subject to extreme external heat, they will not dry out.

Low humidity can be harsh on indoor plants, so either use a spray bottle to wash with water daily or consider investing in a cool fog humidifier. Even without increasing light, expect to see some sprouts fast enough. However, it may take you weeks or even months to harvest the edible part of the vegetable plant. However, indoor vegetables can grow all year round, even in the scorching winter. You can grow vegetables indoors: Carrots, Green Onions, Hot peppers, Radishes, Tomatoes, and Peas.

Tips for growing vegetables in pots 

You will need a pot or container with drainage holes and specially designed-indoor soil to start. While some options may grow in smaller planters, larger vegetables will need larger and deeper containers to allow them to thrive in their roots. In addition, picking vegetables from your garden means that the number of vitamins in the vegetables is more than the vegetables you can find in the market. 

Beginners may be wary of starting a vegetable garden, especially one suitable for a balcony or apartment patio garden. But tell you that a lot of plants grow in pots, which means the most amateur of the green thumb can find their little outdoor space in a crop-growing plot. Many vegetables need at least 12 to 18-inch pots to make room for them to grow. Either use fabric pots or make sure there are drainage holes in the bottom of the plastic or ceramic pots.

In case you missed it: Top 22 Succulents to Grow at Home: in Pots, Indoors, Greenhouse, Problems, and Care
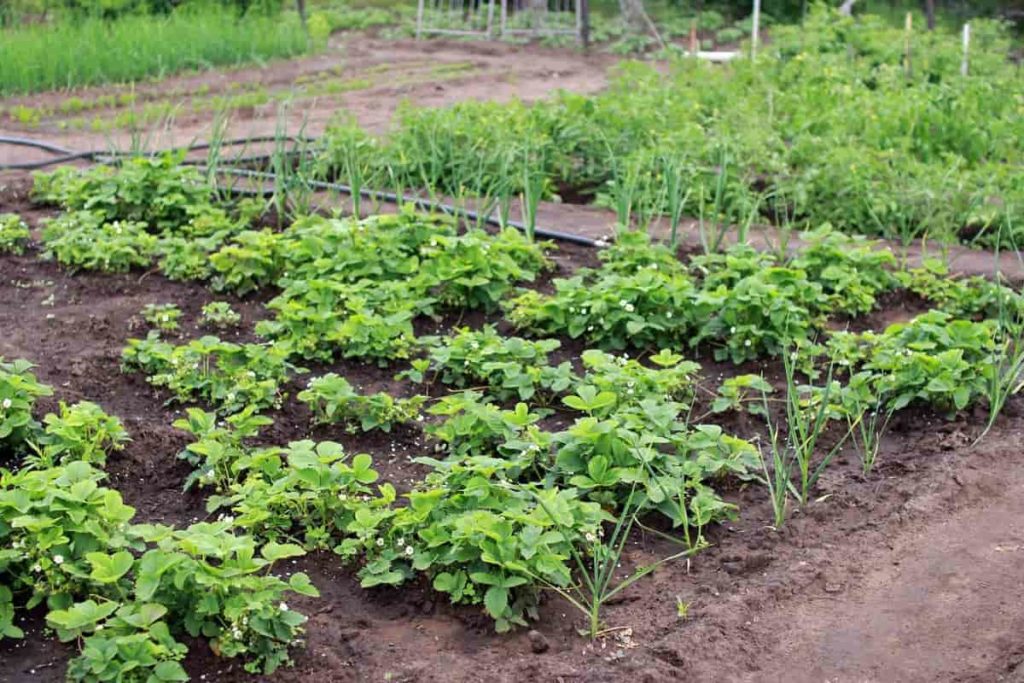
Growing vegetables in pots 
Image Source

You will want to find how much sunlight is on your balcony or apartment yard to decide which vegetables you can grow. Despite its name, potting soil is not soil but a mixture of chemically inert ingredients such as perlite, vermiculite, and peat moss (or coco coir). This mix is ​​a loose, fluffy medium that retains moisture and removes excess water. Some potting soils may include compost, worm castings, fertilizers, or other supplements that increase biological activity. 

A list of vegetables growing in pots is Bush Beans, Radishes, Broccoli, Cabbage, Cauliflower, Beets, Potatoes, Squash, Eggplant, etc. 

Vegetables to grow on your Terrace

Terrace vegetable gardens do not require much investment; the much-needed investment is time and passion. The feeling you get after sowing the seed when you see the seed grow and come out of the soil with the leaves is heavenly. You have to sow a seed to get this heavenly feeling. Every step of the plant until the harvest will bring a magical feeling. It is very good to grow some plants in your house. 

Before you start gardening, consider your vegetable garden’s environmental and other important factors. Factors such as how much sunlight or shade your Terrace gets, how much wind can affect the area, and the type of water supply to your roof naturally. The climate pattern and temperature of the place you live are other things to remember before choosing which vegetables you want to grow.
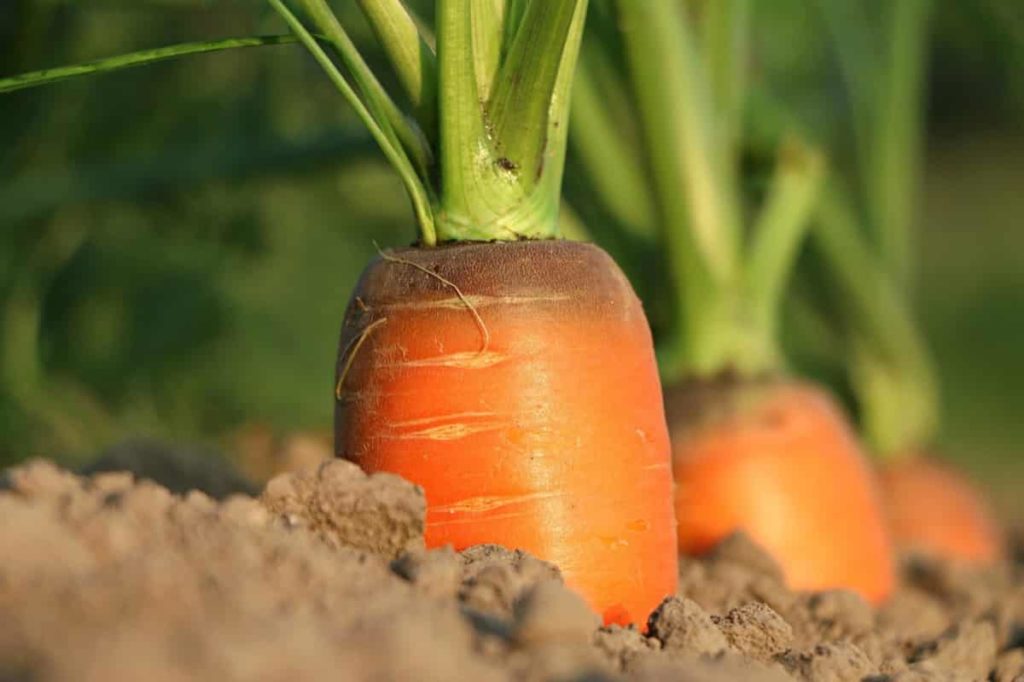
In case you missed it: How to Grow Papaya from Seeds at Home: In Containers, Indoors, Backyard, and On the Terrace
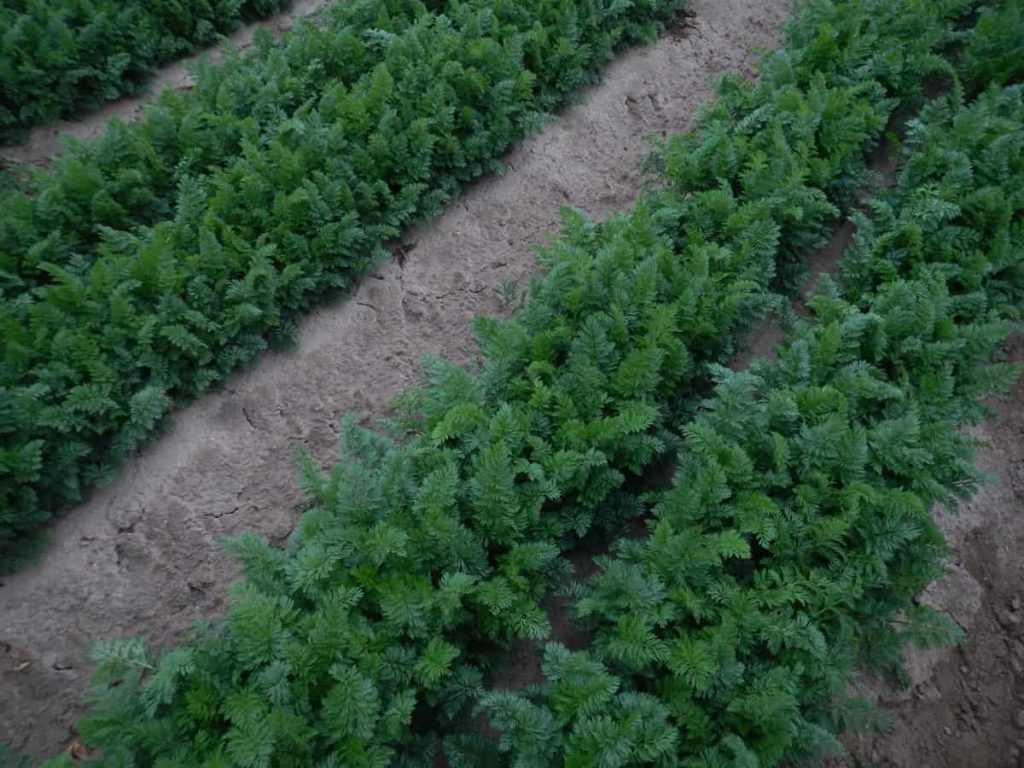
Vegetables to grow on your Terrace
Image Source

The greatest joy of planting your garden is that you can grow healthy (chemical-free) and fresh vegetables. However, growing vegetables requires time and patience. Having a small garden with organic vegetable plants can be beneficial. The vegetables in your garden contain more nutrients than those in your store. You can eat clean vegetables and imagine how much money you can save. 

Collect all the planting materials you will need: Collect everything you need, such as pots, seeds, and the soil for all the vegetables you started with. Decide if you have natural fertilizers, gardening tools, and cow dung. 

Plan a layout for the terrace garden: Start by planning a layout on paper to decide how you will place your pots. Terrace gardens have limited space, and if they do not have a proper drainage system, the growth of vegetables can be affected. You must also check the shaded and sunny areas and design the layout accordingly. 

Get ready to get dirty, and plant vegetable seeds in pots with just the right soil. It is the best part of the terrace vegetable garden. Your terrace garden will help you reconnect with nature. It is a clinically proven way to manage anxiety. 

Plant Hygiene: No matter what you do, insects find their way to the beautiful terrace garden. And you can use pesticides to keep them away, but be sure to use natural pesticides. Pesticides are easy to make at home, and you can try them too. For this purpose, mix baking soda, cooking oil, and water and spray the plants to prevent fungal infections. Also, use other pesticides such as neem oil for nightmares. In a terrace garden, you can plant almost any vegetable. 
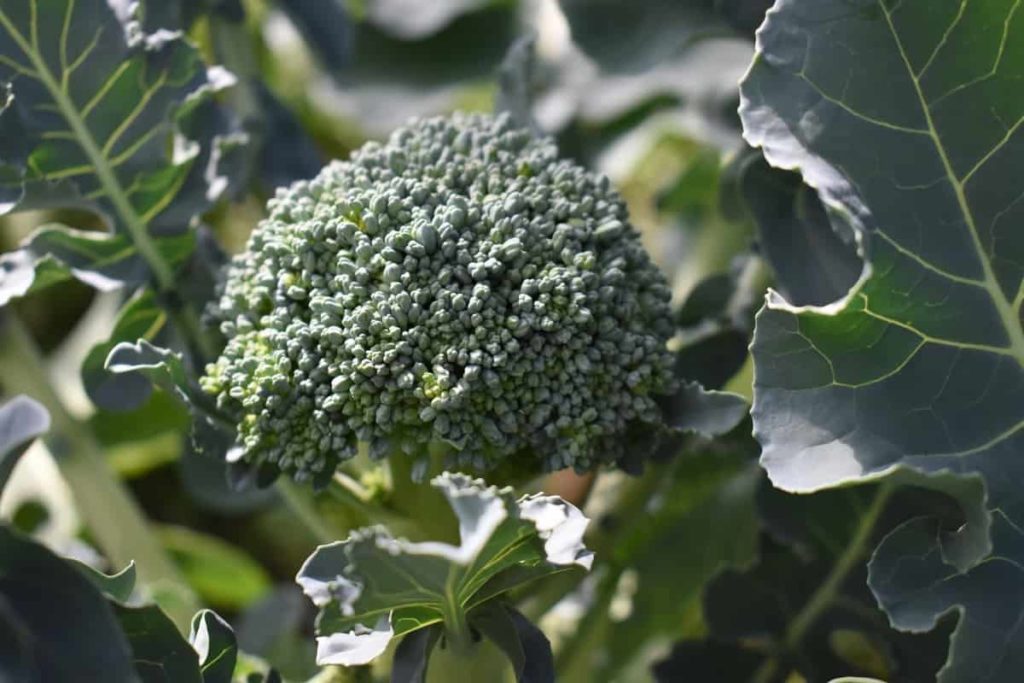
Choose large and deep containers; avoid thin and poor-quality plastic containers as they heat up quickly and cause drainage. Using ordinary garden soil to grow vegetables in pots is a bad idea. Instead, mix good-quality pots for healthy plant growth and productivity.

Create raised beds on the Terrace: If you are looking for a practical and stylish way to create a rooftop vegetable garden, a raised bed is a great option. Plants will grow better with less care and attention. A raised bed on the roof is not fundamentally different from what you see in a regular garden. 
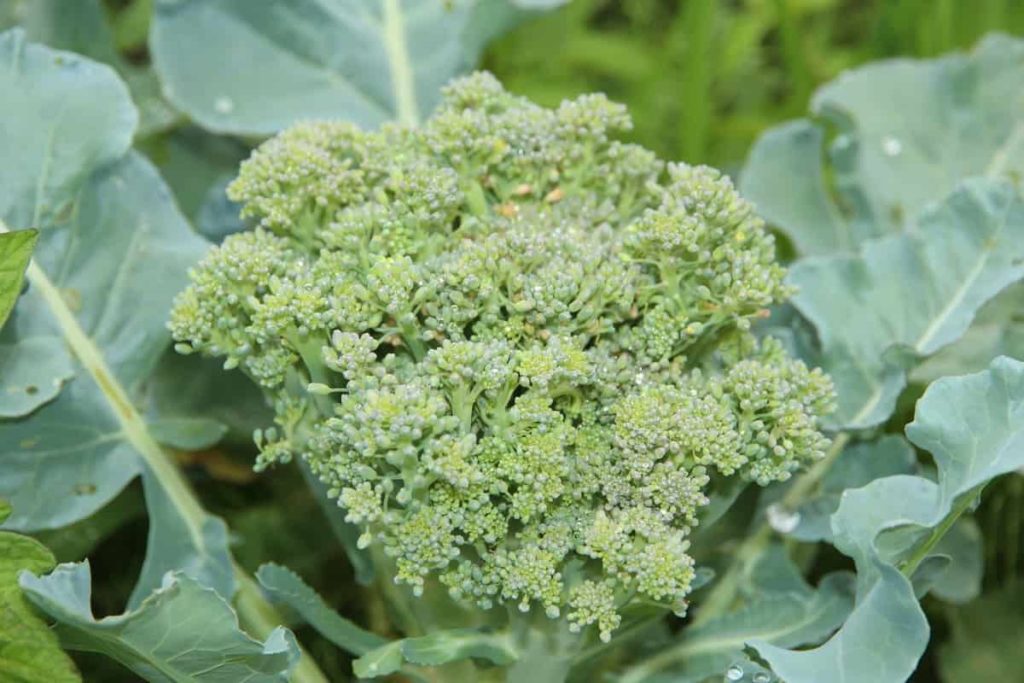
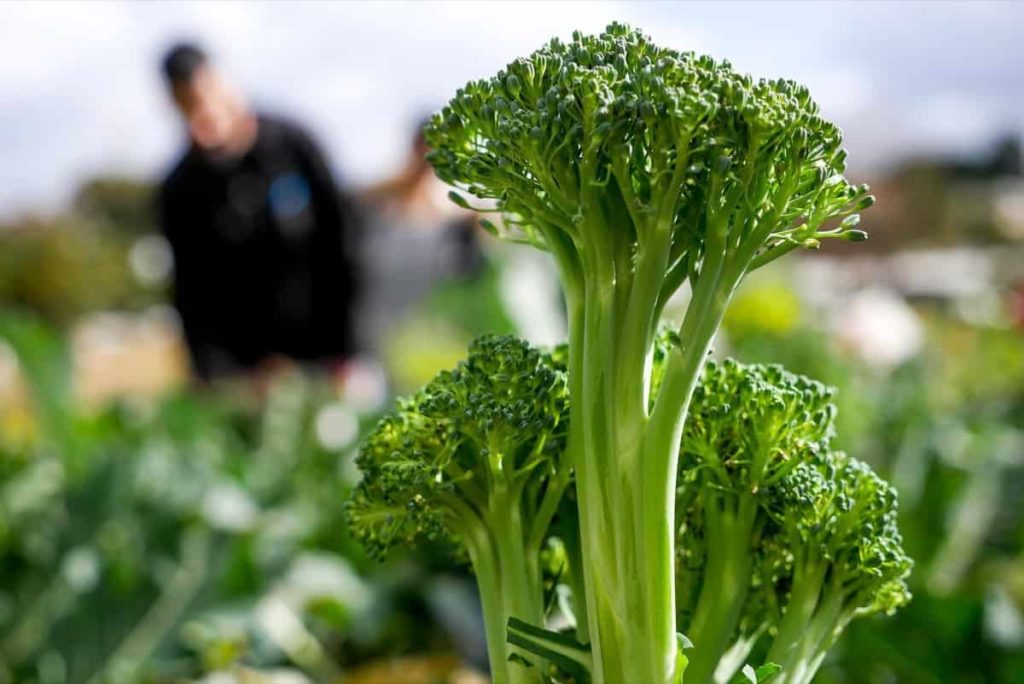
Vegetable patches on your Terrace: You can do this by making a vegetable patch on your terrace garden. Vegetable patches are like ordinary garden beds. Beds of these vegetables should be filled with a mixture of regular pots. You can fertilize the soil to keep your plants healthy and happy. 

Growing vertically: Using the terrace space wisely will help you get the most out of it. Grow tall bushes and vines near the walls and railings, such as Beans, Squash, Gourds, and Tomatoes. That way, they will not only get support but also move out and up, and you will save a lot of space. Fertilize vegetable plants regularly with good quality organic fertilizer.

With some research and experience, you can determine what fertilizer you should add to certain vegetables. The vegetables for your terrace garden are Tomatoes, Carrots, Onions, Potatoes, Radishes, Bitter Gourd, Eggplant, Snake Gourd, Bottle Gourd, Okra, Beetroot, Capsicum, and Pepper.

Conclusion

As vegetable prices are rising every year in India, this is the time to start growing vegetables at home for fresh harvest and money saving.

How to Start a Backyard Garden from Scratch: A Step-By-Step Guide for Beginners

0

One of the most gratifying things you can do is have a backyard garden in your yard. When you get a bit filthy, you can find that it rewards you with pleasant surprises, such as fragrant flowers, fresh fruits for your smoothie, or fresh leafy greens for a nutritious bowl of salad. Beginning your gardening experience might be challenging if you do not already have a backyard garden, but it does not have to be.

How to Start a Backyard Garden from Scratch
Image Source

If you do not have a backyard garden, you can still enjoy the benefits of growth. In this post, we have analyzed the undertaking of growing a garden in your backyard into more doable phases. Below we will discuss how to start a backyard garden from scratch for beginners, backyard gardening at home, and a detailed step-by-step guide to growing your own backyard.

How to start a backyard garden from scratch: A step-by-step guide to starting your own backyard garden from scratch

Choose your plants for your backyard garden

If you had a backyard garden, what would it look like? What kind of garden do you want to have? If you want to grow plants and herbs, focus on those that can be used in your kitchen and dining area. Choose between annuals, which bloom for most of the summer but must be replaced each spring, and perennials, which bloom for just a portion of the summer but return year after year.

In any scenario, it’s critical to be familiar with the local climate and weather. Vegetables, herbs, and flowers can all be combined, but bear in mind that each will need a different level of care.

Choose the right location in your backyard 

Choosing a location with a lot of light and shade throughout the day is best. Most plants, particularly those that produce fruit, thrive in full light for six to eight hours daily. Partial shadow can be tolerated by leafy and root crops. Planting gardens beneath or near trees or huge shrubs is a bad idea since the roots of these plants deprive the plants of nutrients and water.

The small, shady area between buildings and walls is not ideal for growing plants. The ideal soil is loose, rich, flat, and well-drained. Avoid using heavy clays and sandy soils if at all feasible. Weeds must be excavated and removed if found. Avoid locations where alkali salts have formed a crust. Synthetic soil can be used in raised beds or containers if suitable soil is unavailable.

In case you missed it: How to Start Organic Backyard Gardening: A Step-by-Step Guide for Beginners

Soil Preparation
Image Source

Container gardening can be used in areas when space is limited. Watering requires access to a reliable water source. Depending on your elevation, various microclimates can be found across the site—select areas of your land most suited to warm or cold plants.

Prepare the soil in the selected location

Plants rely on soil for nutrients and water. Plants can’t thrive in soil that’s too dry or compact or becomes water-soaked and sticky when it’s moist. Prepare and nurture the soil while it is dry or slightly wet so that organic matter and fertilizers can be mixed before planting. Organic matter helps the soil’s ability to retain nutrients and water, as well as its ability to drain and aerate.

Typical organic ingredients include well-rotted manure, compost, and leaf mulch. Manure that has been composted is convenient to utilize and contains few weed seeds. Layer 2 to 3 inches of organic debris over the garden area before planting. Mix it into the top ten to twelve inches of the soil. A thorough soaking of the soil can remove salts in the root zone. Apply chicken manure at a reduced rate if it is utilized.

Before planting, a fertilizer comprising nitrogen and phosphorus should be added. Garden plants will benefit from the addition of these fertilizers. Although soil fertility varies, a typical application of 16-20-0 (ammonium phosphate) would be 1 to 2 pounds (1 to 2 cups) per 100 feet. The soil was uniformly covered with two. If water drainage is a problem, 3 to 5 pounds of soil sulfur per 100 square feet can be used.

Before planting, these components should be added to the top 10 to 12 inches of soil before planting. Please don’t disturb the soil while it’s too moist when preparing the seedbed. Wait until it’s dry enough to crumble in your hands before you eat it. Rake the area to even it out. Furrow irrigation necessitates the use of elevated beds. After seedlings sprout or are transplanted, cover the planted area with a three-inch layer of organic mulch. 

In case you missed it: How to Grow Papaya from Seeds at Home: In Containers, Indoors, Backyard, and On the Terrace

Preparing Soil Mix
Image Source

Artificial soil can grow crops in tight quarters or areas where decent soil isn’t readily accessible. Raised beds filled with 12 garden soil and 12 artificial soil mix, coarse sand, perlite, or vermiculite are options if the soil doesn’t drain effectively. Fertilizer can be required throughout the growing season. The term “side-dressing” refers to applying fertilizer bands, generally only nitrogen.

Fertilize at a rate of 12 pounds per 100 feet of row with 21-0-0 or an equivalent fertilizer, and do so three inches deep and roughly four inches away from the plants’ sides. Alternatively, water in nitrogen fertilizer is sprinkled 4 inches from the plant’s base on the soil surface. The plant’s roots can be damaged if too much fertilizer is applied too near. 

Start planting your backyard garden 

Planting can be done via seeds or transplants.
From seeds

Make the garden more aesthetically pleasing and facilitate its growth, bug management, and harvesting by dividing it into straight rows. To mark the start and finish of a garden row, drive two stakes into the ground and twine between them. You may create shallow furrows appropriate for tiny seeds by dragging the hoe’s handle along the line indicated by the string. Utilize the hoe blade’s corner to create more profound furrows. Maintain the appropriate distance between rows.

Maintain the correct distance between seeds in each row. The number of seeds that should be sown per foot or hill is usually indicated on seed packets or in other reference sources. Spread the seeds out in an even manner. When working with very few seeds, mixing them with crushed dry soil or sand might be helpful, and then disseminating the mixture. Spread the seeds over a single sheet of toilet paper laid on top of the soil to help space.

Observing the seed spacing with the contrast provided by the white toilet paper will be easier. While you are doing it, cover the seed with paper as well. Place seeds at the appropriate depth. The normal planting depth for a seed is four times its diameter. A maximum of one-fourth to one-half inch of soil should be used to cover tiny seeds such as carrots and lettuce.

The planting depth for big seeds such as maize, beans, and peas should be between 1 and 2 inches. It is possible to sow seeds a little bit deeper in sandy soil. The seeds should be covered with soil, and the soil should be pressed down lightly over them using either your hand or the back of a hoe. This protects the seeds from being washed away by precipitation or water from sprinklers.

From transplants 

When initially brought outdoors, transplants need to have their hardiness increased. Before planting them, you should wait a few days and gradually expose them to the light, chilly evenings, and wind. It is best to do the transplantation on an overcast day or evening. Take special caution while working with plants. Before transplanting, give the plants and soil about an hour’s worth of thorough watering in the containers.

When removing plants from their pots, do it with extreme caution and avoid upsetting the roots as much as possible. Keep the “soil ball” around the roots. When the roots are not in the soil, you must always keep them wet. Before planting, loosen the roots by gently teasing them apart if they are “pot bound.” Dig a sufficiently big hole so the transplanted plant will be put deeper in the ground than it was while growing in its original container.

In case you missed it: Backyard Vegetable Farming, How To Start, Ideas

Planting
Image Source

Use a starter solution when you want your plants to get off to a speedier start. A soluble fertilizer heavy in phosphorous, such as a combination of 10-52-17 or 10-50-10, is known as a starter fertilizer. Mix the water and fertilizer according to the package directions, then apply it to the plants. Once the plants have been positioned in the soil, pour about one cup of the solution around the perimeter of each plant’s root system. 

Add sufficient water to the peat or fiber pots before softening them in the soil. To avoid water from wicking up the sides of the pot, cut off any surplus material so that it is below the level of the garden soil. Take off any bands made of plastic or wood around the roots. The roots should be covered with soil, and the soil surrounding the plant should be compacted. If it is essential, shield plants from the sun, wind, and cold for a few days.

Water your backyard garden thoroughly 

Watering all garden crops is necessary where rainfall is scarce and unpredictable. During the growth season, water the plant’s root zone enough to keep the soil moist but not soggy. Variations in soil moisture that are too large have an unfavorable effect on plant development and quality. Water must be applied regularly to keep the soil from drying up. Observing the plant and soil might help determine how much water is needed.

Make sure the plant doesn’t get stressed, wilted, or slow-growing. On the other side, excessive watering may lead to inadequate root development, particularly on heavy soils. It’s time to rinse if the soil crumbles when squeezed. For sprouting, a moist environment is required all around the seed. Keeping the soil wet and preventing crusting at the surface will need frequent watering. Evaporation can be reduced by three inches of organic mulch. To avoid damaging the seedlings, do not put mulch on them.

The watering duration should be extended as the plant develops to facilitate deeper penetration of the root zone. A spade, stick, trowel, or iron rod may determine the moisture level. A shallow root system means most plants only need water from the top 12 to 24 inches of soil. A variety of factors influence the frequency of watering. A huge plant requires more water than a small one.

In case you missed it: Backyard Turkey Farming In India, Breeds, and Feed

Watering Garden
Image Source

Plants need more frequent watering during hot weather than in the cooler months. When employing flood or sprinkler watering, a good soaking of the soil every five to seven days during warm weather should produce adequate results with established plants. A good soil soaking should occur in a typical circumstance during this time of year. Using a drip watering system necessitates more regular watering.

The most prevalent irrigation techniques are furrows, sprinklers, soaker hoses, and drip watering. Water is delivered to the rows of plants via the furrow technique. The root zone should be thoroughly saturated with water before the water is removed from the furrow. If the water in your garden sprinklers is salty, they should not be utilized. Soaker hoses and drip emitter systems use a hose next to the row of crops to provide water. 

Furrow irrigation is traditionally carried out on a raised bed with two rows, while the other techniques typically use a flatbed with no furrows. If you water the leaves, do it early so the plants can dry. This can result in reduced diseases. The spread of diseases is aided by not watering at night.

Weeds can be reduced with the use of drip watering. Watering is more critical for plants grown in containers since the roots are packed, and the root medium is hotter than if grown in the ground. Do not over-water the soil. Drainage and ventilation can be achieved by drilling holes in the container’s sides or bottom.

Fertilize your backyard garden 

Fertilizer knowledge and application techniques are as critical to healthy plant development for all gardeners as are an understanding of a plant’s hardiness zones. What follows is a short review of why, what, how, and when to use these multivitamins to produce healthy plants. All mixed fertilizers include three primary chemical components: As a key ingredient in photosynthesis, nitrogen encourages healthy leaf development by increasing chlorophyll production.

Roots, stems, blooms, and fruits all benefit from phosphorus. Potassium is an essential nutrient for plants since it aids digestion and food production. Granular fertilizers have the disadvantage of providing a plant with nourishment more slowly, but they have the benefit of lasting longer. Broadcast application is an excellent way to distribute granular fertilizer to lawns or new beds before planting since it covers a big area well.

Hand-rotary or drop spreaders can be used for the broadcast approach. Hand-applied granular fertilizers are used in the top-dress treatment method to feed individual shrubs and perennials. Apply the fertilizer to the plant’s drip line and the soil surrounding the plant’s base. You can use a strip of fertilizer parallel to the rows of veggies.

Water-soluble fertilizers work more quickly than those not, but they need to be applied more regularly. The base application method can be used to apply water-soluble fertilizers. This strategy is primarily used to feed your plants as you water them. Follow the mixing instructions for water-soluble fertilizers, then moisten the soil near the plant’s base. Plants in pots and vegetables benefit greatly from this food source.

Foliar application is a strategy that is similar to the base application. However, water is applied to leaves instead of soil. This is a helpful tool when plants need to absorb trace elements, such as iron. Nitrogen, phosphorous, and potassium (N-P-K) are the three main elements that all plants need, and the quantities of each are specified as figures on the box. This signifies that each chemical element—N, P, and K—contributes 20% of the total formula weight in a general-purpose fertilizer with the labeling “20-20-20.” 

Variations in the percentages of each ingredient are available to meet the demands of various fertilizer applications. To increase flower output, you should use a fertilizer with a high concentration of flower-forming phosphorus, such as 15-30-15. A high-nitrogen mix, such as 25-6-4, can help your grass become green. Plants such as roses and bulbs might benefit from specialized nutrients.

Ensure that the N-P-K ratio on the label is checked since a generic fertilizer may have the same nutritional percentages but cost less than the specific fertilizer you are looking for. Organic and inorganic fertilizers are widely accessible nowadays. Organic gardeners have a few alternatives, but the bulk is commercially made inorganic fertilizers. Many people still depend on tried-and-true methods like animal manure and compost, which are natural and helpful in developing soil but deficient in nutrients.

Bonemeal with a high phosphorus content is the best organic for flower and fruit growth, while blood meal is an excellent nitrogen source. Gardeners can choose between granular and water-soluble fertilizers. Each kind has various advantages and disadvantages. Unlike liquid fertilizers, granular fertilizers have a longer shelf life. It takes longer for granular fertilizers to leach from the soil than water-soluble ones because water must first break them down.

Water-soluble fertilizers work quicker but are more transitory, necessitating more frequent applications than granular fertilizers. You can use any sort of fertilizer, but which one you select depends on how often you want to feed your plants and how much time you have to spare. Gardeners too busy (or lazy) to apply fertilizer more than once every six to nine months appreciate the convenience of time-release granular fertilizers.

However, one should follow certain basic principles while applying granular and water-soluble fertilizers. Do not apply fertilizer in windy or wet weather. This can result in fertilizer ineffectiveness. Keep the fertilizer away from the foliage of your plants when applying a granular fertilizer. To avoid plant burn, never use granular fertilizer on dry soil and always follow up with plenty of water.

The timing of fertilization is just as crucial as the kind of fertilizer you use. There’s no purpose in fertilizing if you don’t apply the fertilizer at the right time for the plant. If you use a balanced granular fertilizer in the early spring, most perennials, annuals, veggies, and grass will repay you generously.

However, you should avoid fertilizing before the spring rains since the nutrients will leak out of the soil and waste your money. A high-phosphorus, water-soluble fertilizer is ideal for feeding annuals three to four times throughout the growing season, while lawns benefit from a second granular treatment in the autumn.

Manage pests and diseases in your garden 

Being well-prepared for the challenges the garden may provide is the best way to deal with such challenges. Learn about the frequent pests and diseases in the region, as well as the measures that can be used to manage them. Choose disease-resistant cultivars wherever it’s practicable to do so.

If the measures just described are carried out, the soil issues that have been occurring can be addressed, but crop damage caused by the salt can occur if correct management has not been done. If you want to maintain the interest of your garden, you shouldn’t plant the same kinds of plants every year in your backyard garden. This gardening practice is referred to as crop rotation.

Excessive temperatures and insufficient watering can sometimes lead to issues. Additionally, when temperatures rise, there will be an increase in the number of insect issues that arise; make sure you are prepared for them. Read as many books and articles as possible, and talk to as many experts as possible. The most excellent way to learn how to solve situations like this is via experience. If you keep a gardening journal and record the cures you use, you will be prepared for future occurrences of those problems.

In case you missed it: Backyard Livestock Farming – Profitable Guide

Backyard Garden
Image Source

Conclusion 

If you give some thought to these suggestions, you should have a flourishing garden in no time. Give the soil the correct care since it serves as the foundation from which everything else will grow. Always watch for unwanted weeds and insects, and be sure to choose your plants with care. Although it is a challenging assignment, you can do it.

How to Start Carrot Farming in the USA: A Step-By-Step Production Guide for Planting to Harvesting

Carrots are the primary source of vitamin A in the American diet. Carrots are one of the most important vegetable crops in the United States. Carrot production in the USA is highly mechanized and highly concentrated. Carrots used for processing and fresh Carrots use mechanical harvesting techniques, and only two large California firms make up most of all Carrot products sold. 

How to Start Carrot Farming in the USA
Image Source

Carrots belong to the family Apiaceae, which includes celery, fennel, dill, and red pepper. It is a biennial crop that produces twins in the first year and, if left to grow, will flower, sow seeds, and die the next year. Most Carrots marketed in the USA are orange; other colors are red, yellow, or purple and can occasionally be found in fresh, frozen, and juice products. 

How to start Carrot farming in the USA

Carrot-producing states in the USA

The top-producing states are California, Washington, and Wisconsin. Carrots grow in cold weather and can be planted early or late in the gardening season. Approximately 94% of US Carrot production is grown in seven states: California (66,580 acres or 63% of total production); Texas (9,400 acres), Washington (8,360 acres), Michigan (7,120 acres), Florida (6,780 acres), Colorado (3,700 acres) and Wisconsin (3,660 acres). 

Which state is the largest producer of Carrots? 

Carrots are grown and shipped year-round from California, with four major production areas. California produces more than 85% of all Carrots grown in the USA. Also, other major Carrot-producing states are Michigan and Texas. The production of fresh Carrots per acre was about 50,000 pounds. California produces about 85% of all Carrots grown in the United States. Colorado, Florida, Michigan, Texas, and Washington are the other major Carrot-growing states.

In case you missed it: Fertilizer Management in Carrot Farming: Organic, NPK, How and When to Apply

Carrot Field
Image Source

Soil requirements for Carrot farming in the USA

Carrots grow well on deep, loose, well-drained mineral and organic soils with good water-holding capacity. Most Michigan Carrots are grown on deep manure. Sandy and marl mixes can produce good Carrots but require more careful management. Sandy and clayey crusts easily after rain, which reduces seed germination and air intake. If crusting occurs, the soil between the rows should be worked with the cultivator as soon as possible.

Carrot roots are sensitive to soil compaction. Rows with wheel tracks often have more prickly and pruned Carrots in the middle of the bed than in rows, reducing usable yields. Therefore, limit the movement of equipment in the fields as much as possible. During the first three weeks of development, stay out of the field completely. 

Carrot varieties available in the USA

Carrot varieties that perform best in Texas include Danvers 126, Danvers Half Long, Imperator 58, Nantes, Nantes Half Long, Red Core Chantenay, Royal Chantenay, Scarlet Nantes, and Sugar Snax. The Carrot is a biennial plant. During the season it is planted, the plant produces storage roots. After cold temperatures, the root grows again and produces seed stalks.

Most Carrot seeds are grown in areas of the western United States with a relatively mild cold. The seeds are sown in August and produce a small root before winter. The following spring, the plant grows again, and flowers and plant seeds are harvested in August. Most Carrots used in Michigan are hybrids. 

There are four main types of Carrots;

  • Imperator – long, short shoulder, tapered tip; mainly used for fresh packs. Most fresh Carrots grown in Michigan are of this type. 
  • Nantes – Medium length, uniform diameter, blunt tip; used for bunches, slicing, and small Carrots. Although not widely grown in Michigan, the Nantes-type Carrots have good food quality and are especially suitable for local sales. They usually mature before Imperator types. 
  • Denvers – Large, medium-long processing type used for dicing and slicing. Denver cultivation requires a long season (120 days) to produce tannins and high sugar content. Most Carrot varieties grown in Michigan for processing are of this type. 
  • Chantenay = Large shoulder, small, usually large, with clear color cover; Used for dicing. These older crops are not usually of the required quality for processors. They are now mainly used by home gardeners. 

In case you missed it: Growing Baby Carrots – In Containers, Pots

Carrot Harvest
Image Source

Carrot varieties grown in the United States are biennial, requiring two full seasons from germination to seed production. However, it is grown commercially annually for its large storage root produced during the first year. There are real annual crop forms, but they are not grown in the United States. Young Carrots are tight rosettes with fine-grained leaves and a thin tap root with fine fibrous roots. As the taproot grows and matures, the conductive tissue becomes known as the light-colored core and the deep orange cortex.

Carrot season in the USA

Carrot season occurs between July and November in Colorado, Connecticut, Kentucky, Maine, Massachusetts, Minnesota, New York, North Dakota, Vermont, and Wyoming. But those interested in this vegetable can find it in Alabama, Arizona, Hawaii, California, Mississippi, Nevada, Texas, and Virginia in all four seasons. 

Carrots are grown in California 

Carrots are also shipped from California all year round, with the highest shipments from December to August. Carrots are mainly imported from Canada and Mexico. Across the state, California farmers grow about 62,000 acres of Carrots, with approximately one-quarter of it grown in the Imperial Valley. In recent years, Carrots have been ranked 17th in California’s top 20 livestock and crop commodities, valued at about ً $500 million, according to the US Department of Agriculture. 

In southern San Joaquin and Cuyama Valleys, Carrots are planted from December to March for harvest from May to July and from July to September for harvest from November to February. In the southern desert, December to June is harvested from August to February. In the high deserts, it is planted from April to July for harvesting from August to December. 

Cultural practices for Carrot farming in the USA

Although Carrots are often grown on sandy soils, they tolerate a wide variety of soils as long as the top 30 inches of soil is uniform and free of root growth. In some states, for example, Wisconsin, most production is on well-drained manure. In very heavy soils, the roots may be deformed and deformed. Soil suitable for Carrots has a pH of between 6.0 and 7.8. 

Carrots are a cold-season crop, but they tolerate warm temperatures at the beginning of the growing season. The roots get the best color when the air temperature is 15 to 21°C. If the temperature is within this range three weeks before harvest, the roots’ color may darken rapidly, but at higher temperatures, the color may decline.

In case you missed it: Carrot Seed Germination, Time, Seed Sowing Method

Carrot Farming
Image Source

Carrots can withstand some frost. In California, Carrots are grown in 36- or 40-inch beds all year round. In the eastern states, Carrots are sown in spring row spacing of 12 to 36 inches. Carrots are always straight-seeded and never thin. Carrot seeds are smaller than other vegetable seeds, and germination is slower. Germination can take up to 10 days in cold weather.

Carrot seeds range from 175,000 to 400,000 per pound and are sown at up to 1,000,000 seeds per acre for fresh market varieties and low rates for large processing varieties. High densities of up to 1.2 million seeds per acre are often used in planting for the ‘cut and peel’ market. Seeds are usually sown in 6 or 8 rows per bed. Both natural and powdered seeds are used. 

Planting process

Carrot planting dates will depend on temperature, type, time at which the farmer wishes to market the crop, and other factors. In most districts, except for the arid inland valleys of Arizona, California, and Texas, Carrots are planted in early spring because the soil can be worked on. Planting usually begins around April 15 and continues until mid-July. However, in California’s Salinas Valley, planting begins in January and continues through July.

Mid-winter and early spring crops are planted in the desert valleys from August 1 to October. Carrots are planted in February and March for the spring crop in Arizona’s Salt River Valley. Carrots require 65 to 75 days from planting to harvest, depending on the planting date. For some hybrid varieties, the time from planting to harvesting is much shorter than available pollen varieties.

Carrot seeds are smaller than other vegetables, and germination is slow and irregular. Young plants are small, weak, and fragile. They lack vigor until the first real leaves appear. For these reasons, planting techniques are very important. Poor planting can easily lead to stained stands, poor spacing, or other defects that result in poor yields of poor-quality roots.

Growing Carrots in containers 

It is a great way to customize the perfect growing medium and avoid pests like Carrot flies. Pots must be at least 10 to 12 inches as deep and wide as possible. A great low-fertility mix is ​​one part sand and one part potting mix. Sow very fine Carrot seeds on top of the filled pot and then cover them with just one touch of the mixture.

Water well, label, and set in a sunny position. Unlike Carrots on the ground, keep everything moist; these Carrots will be entirely up to you for all your needs. Thin the seedlings to a distance of one to two inches. Once they reached finger size, they harvested carefully.

Irrigation management

The first irrigation should be light and should be done immediately after sowing. Later irrigation is provided as required. Too much moisture causes small Carrots of light color and large diameter. The irrigation frequency depends on the soil type, weather, and type. Generally, an irrigated crop provides adequate moisture every 4-5 days in summer and every 10-15 days in winter. In the rainy season, only occasional irrigation is required. Water pressure should be avoided during root development to avoid root breakage. 

Thinning 

You will need to thin out your Carrot plants. Thinning provides enough space for Carrots to grow underground. When the Carrot leaves are two to three inches high (about 25 days old), they thin out the tender plants; they thin the plants so that the young plants are about two inches apart, depending on the variety of mature size. After that, apply a thin layer of organic mulch to help keep the soil moist.

In case you missed it: Carrot Farming Income; Cost; Profit; Project Report

Carrot Farming
Image Source

Carrot production cost per acre in the USA

Overall, 67% of US crops are destined for the fresh market, and 33% are processed. The production cost of fresh market Carrots, excluding land rental costs but including harvesting costs, ranges from $ 4,200 to $ 5,000 per acre; the processing cost of Carrots ranges from $ 1,500 to $ 2,000 per acre. Michigan grows about 7,000 acres of Carrots each year. The new market Carrots state production is about 8.8 tons of usable Carrots per acre.

Good fields can produce more than 15 tons per acre without nematodes, water, or other limited problems. Mini Carrots yield about 11 tons per acre. Processing Carrots can yield 35 to 40 tons per acre in good fields. Carrots are a cold-season crop that is always sown directly. The roots get the best color when the air temperature is 18 to 21ºC.

Although Carrots are available all year round, locally grown Carrots are available in summer and autumn when fresh and tasty. Carrots are grown and shipped year-round from California, with four major production areas. California produces more than 85% of all Carrots in the United States. Also, Michigan and Texas are major Carrot-producing states. 

Quick tips on growing Carrots 

When you grow Carrots, the soil surface should be cleaned of trash, rocks, and large pieces of bark. Fine pieces of plant material can be added to the soil for enrichment. Start with soil that will help Carrots grow. When you grow Carrots, the soil should be sandy loam. Make sure it is well-dried. Due to the heavy soil, Carrots ripen slowly, making the roots unpleasant and rough. Remember that when you grow Carrots, the soil should never be rocky as it can damage the roots.

How to plant Carrots from seeds

Carrots can be planted with nursery plants, but the common method is to sow the Carrot seeds in the garden directly as soon as the soil is viable in the spring. But Carrot seeds are small, which makes it difficult to plant them evenly. It can take up to three weeks for Carrots to grow. Ensure the soil is at least one foot deep, light, loose, and can drain well. 

Make shallow skins in the soil (the long handle of the garden tool will work), 1/4 inch deep and one foot apart if you are planting more than one row of Carrots. Sprinkle small Carrot seeds two to three inches apart, 1/4 inch deep, and lightly cover with soil. Carrot seeds are difficult to place evenly, so you must thin them as they grow. Write the crop name and sowing date on a plastic row marker, paint stick, or popsicle stick to mark the location of your seed row. 

To ensure good contact between the seeds and the soil, lightly press on the soil. Keep the skins moist and do not allow the soil to dry out as it will form a hard layer, which is difficult for small seedlings to break. Water the plants one inch a week. When the plants are one to two inches tall, thin them out and keep a distance of three inches; use tiny snips so that you do not pull the Carrot roots too close. 

In case you missed it: Growing Carrots In Container Information

Carrot Planting
Image Source

Problems for Carrot Farming in the USA

Wherever Carrots are grown, various diseases, insects, and weeds reduce root production and market value. Carrot bunches should have insect and damage-free tops as well as roots. Although tops are not a problem for large or lightly processed Carrots (e.g., cut and peel), a healthy crop is important because undercut Carrots from leaves are selected. The presence of heavy herbal infections also causes inadequate pruning. 

Control of pests, diseases, and herbs is essential for good Carrot culture. Insects are usually minor Carrot insects, but insects in any field can cause severe economic damage. Across the country, the most important Carrot insects include leaf shoppers, aphids, cutworms, wireworms, Carrot weevils, armyworms, whiteflies, mites, and Carrot rust flies—flea beetles as the only major insects in California and Colorado.

Organic options include Bt-based pesticides and sulfur. Sulfur also has antifungal properties and helps control many diseases. Before using pesticides, read the label and always follow the precautions, warnings, and instructions. If leaf spots appear on plants, wash them with an approved fungicide. Remove any Carrot plants from the garden that turn yellow and stunt. If there are knots on the roots, you may have nematodes in the soil. Neem oil, sulfur, and other fungicides can control diseases. Always follow the label instructions. 

Harvesting Tips for Carrots

Most varieties of Carrots take about 65 to 75 days, from seed sowing to harvesting. Grab the top of the Carrot when ready, then fold it in half and pull. Immediately cut off the green tops to prevent moisture loss. Rinse and store in refrigerator or other cool, dark place. Marketing Carrots are shipped from California all year round. California produces about 85% of all Carrots grown in the United States. Colorado, Florida, Michigan, Texas, and Washington are the other major Carrot-growing states. Carrots are mainly imported from Canada and Mexico.

Conclusion

Carrots are mainly fresh and the sixth most eaten fresh vegetables in the United States. Carrots are root vegetables; their leaves grow above the ground, and the edible Carrot roots grow below the ground. Both the root and the leaf are edible. The above growing conditions are useful for starting Carrot farming in the USA.

Top 20 Steps to Boost Bottle Gourd Yield: How to Increase Production, Size, and Quality

Bottle Gourd is also known as “Calabash” or “Lauki” and belongs to the “Cucurbitaceae” family. It is an annual climbing vine with tremendous growth. The plant has white flowers with fleshy and Bottle-shaped fruits. Bottle Gourd is usually a winter crop, possibly tropical or subtropical, Lagenaria Vulgaris, rich in carotene, calcium, and vitamin C.

Steps to Boost Bottle Gourd Yield
Image Source

It is the healthiest and most versatile vegetable, full of water (about 92%) and minerals, and keeps the body hydrated. It has several health benefits, is easy to grow, and tolerates high temperatures; it is an excellent vegetable for Indian summers. Below are the steps regarding how to increase Bottle Gourd yield;

Top 20 steps to boost Bottle Gourd yield

Step 1: Select high yield Bottle Gourd varieties

High yield Bottle Gourd varieties are ‘Pusa Santushti,’ Pusa aveen, Pusa Hybrid-3, Vinayak, CO 1, Pusa Summer Prolific long, Pusa, Summer Prolific Round, Pusa Manjari, Pusa Megdoot, Khetlau, and Hazari. Some  

Some other varieties are;

Kashi Kundal (VRBOG-16) – It is an attractive pear-shaped green fruit, medium-sized, suitable for sowing from July to September. The number of fruits is 12-14, with an average fruit of 1.3 to 1.5 kg. Downy mildew resistant. 

Kashi Kirti (VRBOG- 63-02) – Fruits are green, small, and cylindrical (Gutka type). Downy mildew resistant. It is early maturing and high yielding over the check variety. Suitable for remote marketing and transportation due to better post-harvest life. 

Pusa Summer Prolific Long – High yielding variety released from Indian Agricultural Research Station, Pusa, New Delhi. The fruits are 1.5-2 feet long and are eaten immaturely. 

Step 2: Soil requirement for getting high crop yield

Organic sandy loam with good drainage and pH ranges from 6.5 to 7.5, which is suitable for Gourd cultivation. This crop needs moderate warm temperatures. For Bottle Gourd cultivation, well-prepared soil mixed with organic fertilizer. It will provide high-quality vegetables.

Step 3: Propagation method for more vegetable production

About 45 days after sowing the seed, the plants grow and reach the stage where the flowers begin to grow. Both female and male flowers are produced. The female flowers in Bottle Gourd will have small fruits attached to them, and the male flowers will not have one. Pollination is essential for good growth.

In case you missed it: Growing Organic Bottle Gourd – A Planting Guide

Bottle Gourd Flower
Image Source

If the activity of bees is high, then pollination will be more and more fruits will be produced. In the absence of bee activity, rubbing male and female flowers together and polishing them by hand helps to produce some fruit. It will give results if the bees are kept close to the plant. Sprinkling water with sugar or jaggery can attract bees, which will help in pollination.

Step 4: Planting and site selection for Bottle Gourd farming

Bottle Gourd is not fussy about soil – a less fertile plot is an asset because it limits the vine strength – but it appreciates moisture-retaining soil in hot, dry weather because of a large part of the leaves. In the hot sun, dehydration occurs rapidly. Ideally, fill a trench with half-rotten leaf mold or coarse municipal compost where you plan to grow Bottle Gourd in early spring, just as you would prepare a trench for runner beans. You can use old potting compost from last season’s container plants or hanging baskets.

The best place to grow Bottle Gourd is in full sun, protected from strong winds. Like Bottle Gourds, they need to be started indoors and transplanted when all the risk of frostbite has passed. Harden the plants as soon as they have two or three true leaves, as they will quickly pop out of the window, and plant when the outside temperature is hot enough. Don’t worry if there are some cold nights right after the transplant. Just cover the young plants overnight with gardening wool or newspaper. Plants that take root are amazingly resistant to cold.

Step 5: Water requirement for more plant growth

Check the soil once or twice a day for moisture loss. If it feels dry and it’s time to water. A healthy Bottle Gourd plant needs water evenly so the soil does not dry out. Proper watering during the growing season encourages the flowering and fruiting of the plant. If not watered properly, plant production will be weak. 

Step 6: Drip irrigation for high yield crop production

Install drip system with drainage main and sub-main pipes and place inline lateral tubes at 1.5m intervals. Place the drapers at 60 and 50 cm intervals with 4LPH and 3.5LPH capacities, respectively. As a summer crop, Gourds need more irrigation at short intervals. Drip irrigation systems can help conserve water, increase water use efficiency, and reduce the need for irrigation with higher productivity.

As a wide-distance crop, drip irrigation is economical as the crop yield through this system is about 48% higher than the yield obtained through ferro irrigation. This irrigation method is important in improving the economy in areas with limited water resources. 

In case you missed it: Bottle Gourd Cultivation Income (Kaddu); Project Report

 Bottle Gourd Farming
Image Source

Step 7: Seed rate and seed treatment for high productivity

About a 2 kg seed rate is sufficient for one acre of land. The seeds are treated with Bavistin@0.2% by 3gm / kg to protect seeds from soil-borne fungus.

Step 8: Germination process to get more Bottle Gourd yield

Bottle Gourd seeds are slow in germination; depending on soil temperature, it may take 7 to 25 days to germinate. You can soak the Bottle Gourd seeds in water overnight to speed up germination. Use only seeds that go under the soaking bowl. When the seeds start to grow, and the plants grow to 2-3 leaves, transplant them in the last place.

Dispose of weak plants. (In colder parts of the United States, plant the seeds in small pots and keep them indoors in the warmest part of the house. When the risk of frostbite is gone, take the baby plants outside, maybe in mid-May.) 

Step 9: Tips for growing Bottle Gourd from seed

  • It is easy to grow by sowing seeds all year round. The summer and monsoon seasons are best to plant Bottle Gourd seeds. Buy Bottle Gourd seeds online. 
  • Bottle Gourd seeds are sown in small pits or on high beds germinating in 7-8 days. It grows very fast and quickly becomes a climber’s habit. 
  • It is essential to install strong trellis support that must be built for the climber to grow. Many gardeners allow the plant to move on the ground or climb poles or roofs. 
  • Fill the growing points of the young plant with branches. Side shoots will mainly produce separate male and female flowers in the second month. After pollination, the females have small Gourds under the flowers. 
  • If too many male flowers exist, some can be removed. 

Step 10: Install trellis for plant support

 If you want to train vines to climb, put a trellis near the mound. Trellis helps control your vines and helps dry out your Bottle Gourds at the end of the growing season. Use wood or PVC trellis with your Bottle Gourds because it needs to support the weight of the fruit when it reaches full size. Make sure one of the posts is with a mound so you can easily tie the vines to it. You don’t have to use trails if you don’t want to.

To protect the Gourd, spread 2–3-inch (5.1–7.6 cm) layers of mulch around the base of the mound as they will be on the ground. The ground is not covered with vines. Bottle Gourds can be trailed on the pandals or the ground. The pandals are the most common trailing system. For this, a 1.5-meter-high venue is erected using bamboo poles, wooden poles, GI pipes, or other strong materials when the plants start rolling.

Steel wires/strings, preferably used to connect rust-coated materials such as plastics, and with which coir or plastic ropes are tied cross-linked so that the horizontal coir/plastic. The ropes run upwards to form a net. The vines are supported by a bamboo pole, which helps the vine to climb freely and reach the top. Alternatively, Bottle Gourds can be trailed on the ground without spreading the twigs on the ground and erecting a pandal. 

Step 11: Reasons for Bottle Gourd vine fail to produce flowers

Sometimes the Bottle Gourd vine does not give much or the female flowers and fruits. To grow flowers, you can cut the growing ends of the branches when they are about 3 feet (1 meter) long. New growth will produce more flowers. Nitrogen fertilizers produce leaves with very few flowers. Add phosphorus and potassium fertilizer to the vine to produce more flowers. 

In case you missed it: Bottle Gourd Farming, Planting, Care, Harvesting (Lauki)

 Bottle Gourd Plant
Image Source

Step 12: Weed control for more Bottle Gourd plant growth

To control weeds, 2-3 hoeings are required in the early stages of plant growth. Weeding operations are performed at the time of fertilizer application. Earth up is also an effective way to do it in the rainy season. Apply weeding and raking of the soil at the time of fertilizer application. Earthing up is done in the rainy season. Hand or hoe weeding can be cut as required. Mulching is commonly used for raised beds of Bottle Gourd crops. Use organic mulch depending on availability. Mulch can be applied before or after transplanting and after sowing. 

Step 13: Training and pruning for improving yield 

To improve pruning yields, remove the lateral branches until the runner reaches the top of the trails. Leave 4-6 liters and cut off the tip of the main runner for initial pruning. Removing the background branches in the first ten nodes positively affects the total yield. Without pruning the plant, most female flowers are between the 10th and 40th nodes or at the height of 0.5-2.0 m. As Bottle Gourd grows well, proper training and pruning are beneficial.

Training plants for elbows helps to tap sunlight more efficiently and yields up to 80 tons per hectare. The axial buds of the growing vines should be removed until the grapes reach their height. When the vine reaches the bower, the apical bud is removed 10-15 cm below the elbow so that 2 or 3 branches spread on the bower. After 4-5 fruits are formed, the vines are re-pruned, allowing 2-3 axial buds to grow only on the main vines. Removing all yellow and pale-colored old leaves near the bottom is also advisable. 

Step 14: Pests, weeds, and diseases control for more plant growth

Bottle Gourd is relatively problem-free, although slugs are fond of young plants. Mature leaves have a distinctive scent and lightness that repels insects. Like all cactus, they are responsible for powdery mildew in hot, humid weather with dry roots and hot, humid air. If fungus develops, regular watering of the roots and removal of the most affected leaves often helps, as is seaweed food, to improve the plant’s immune system.

In cold, wet weather, the furry leaves trap moisture and can cause gray rot or rot: again, remove the most affected leaves, thin the twigs or maximize air around the plants. Train them far and wide to provide circulation. Bottle Gourd’s overgrown growth destroys all the weeds in their path and other more desirable plants, so stop them by cutting or tying the tendrils each week. 

In case you missed it: Ridge Gourd Farming, Planting, Care, Harvesting (Luffa)

 Bottle Gourd
Image Source

Step 15: Requirements to grow Bottle Gourd in pots/containers 

Bottle Gourds can be easily grown in large bags or 14-inch containers. Before sowing the seeds, fill the container with a mixture of good-quality pots. The organic vegetable mix is the biggest growth supplement for Bottle Gourd. Make sure you grow only one plant in each container. Pour a good quality mixture into the pot before sowing. It is ​​one of the best nourishing sources for Bottled Gourds. Grow one plant per container.

Step 16: Bottle Gourd plant care

Bitter Gourd should be grown in open and sunny places. Prepare the plant with a thick layer of cocoa peat on the top dress and well-decomposed manure in equal parts. Repeat 2-3 times during the growing season. The Bottle Gourd plant needs plenty of water to grow. It needs plenty of moisture all the time. The constant stopping and pinching of the climber ensure a very faithful and fast plant. 

Step 17: Fertilizers and manure for good plant growth

For good plant growth, it is important to provide adequate nutrients. Each contains organic micronutrients. Use it as directed. Bottle Gourd requires more phosphorus and potassium fertilizer than nitrogen. Bottle Gourds need nitrogen to grow well, but more nitrogen will encourage more leaves instead of fruit. NPK fertilizer can be applied in the ratio of 6:10:10 or 4: 8: 5.

Before planting, add about 20 grams to the soil for each plant. Feed with liquid manure or comfrey tea fertilizer every two weeks. The amount of fertilizer and manure required to grow a healthy Bottle Gourd crop depends on the type of soil, the cultivation season, and the growing area’s climatic conditions. It isn’t easy to be specific about the fertilizer recommendation as the Gourd cultivation system varies from region to region.

In the growing farming system and in areas where pit sowing is the most common practice, field fertilizer is applied in trenches and pits, respectively. Each pit contains 2 to 3 kg of agricultural fertilizer mixed well. A small amount of farmyard manure is also applied at this stage. It can also be supplemented with phosphatic and potassic fertilizers. Another dose of nitrogen fertilizer is applied to each plant, followed by weeding and hoeing.

In cases where plants are grown in polythene bags for early production, the beds are prepared at a distance of 2.0 to 2.5 meters. Then a small amount of soil is removed from the prepared pits at a distance of 60-75 cm on either side of the raised bed. Mix one kg of well-digested crop fertilizer, approximately 15-20 g of Calcium Ammonium Nitrate (CAN), 25-30 grams of Single Super Phosphate, and 15-20 grams of Muriate Potash in each pit and mix thoroughly.

Another dose of nitrogen (7-8 grams of urea per plant) is given to the plant in the early stages of crop development. However, the fertilizer amount varies with the soil type and the vine’s growth. This process saves a considerable amount of fertilizer, making it one of the most economical for farmers. 

Step 18: Pests and diseases control to increase productivity

In hot, humid weather, powdery mildew can be a problem in Bottle Gourd. If mold appears, remove infected leaves. Ensure the Bottle Gourd plant has good air circulation and proper drainage to avoid mildew and rot. 

In case you missed it: Snake Gourd Cultivation Income, Cost, Project Report

 Bottle Gourd Harvest
Image Source
  • Mites: Spray Dicofol 18.5% SC by 2.5 ml in water.
  • Aphid: Spray with plenty of Imidacloprid @ 0.5ml / liter along with a sufficient number of stickers such as Teepol, Triton X100, etc., for better adhesion and coverage. 
  • Beetles, fruit flies, and caterpillars – Beetles, fruit flies, and caterpillars can be controlled with a spray of Malathion 50 EC 1 ml/liter or Dimethoate 30 EC 1 ml/liter or Methyl Demeton 25 EC 1 ml/liter. Do not use copper and sulfur dust as they are phytotoxic. 
  • Powdery mildew – Powdery mildew can be controlled with a Dinocap 1ml / liter spray, Carbendazim 0.5 grams/liter, or Tridemorph l ml /liter. 
  • Downy mildew – Downy mildew can be controlled with a spray of Mancozeb or Chlorothalonil 2 g per liter. Twice at 10-day intervals. 

Step 19: Harvesting Bottle Gourd tips for more crop yield

It should start flowering within 25-30 days of planting. The Gourd produces white flowers, about 4 inches in diameter. Bottle Gourds appear within 40-50 days of planting. When young and soft, 15-18 cm tall, pick Bottle Gourd from anywhere and keep picking to produce new fruit. They will be refrigerated in a salad tray for about a week to ten days but will be eaten fresh. It is very important to harvest Bottle Gourds at the right time.

When the Gourd begins to change color or turn yellow, it is time to harvest it. You should be able to pierce your nails in it easily. Prune a Bottle Gourd with at least an inch of stem attached. If the fruit is too hard and you can’t pierce your nails in it, it is overripe and not suitable for cooking but good for decoration. Ripe Bottle Gourds are good for making seeds, which can be used to grow Bottle Gourds next year. 

Step 20: Bottle Gourd yield per acre

The average yield is between 150-200 quintals/acre. The most important factors influencing crop yield are soil fertility, seed selection, water availability, climate, and diseases or pests.

How to Start Pumpkin Farming in the USA: A Step-By-Step Planting to Harvesting Guide

Pumpkins are members of the Cucurbita genus, a vine plant group that includes Pumpkins and other plants such as Cantaloupe, Summer Squash, Watermelon, Winter Squash, Zucchini, and Gourd. Pumpkin is a warm-season crop that can be grown in most states of the USA. All USA states produce some Pumpkins, but six states produce most of them. About 40% of the Pumpkin acreage was planted in the top 6 Pumpkin-producing states in the USA. 

How to Start Pumpkin Farming in the USA
Image Source

Growing Pumpkins from the ground improves air circulation around the plants, which reduces fungal diseases and makes plants less susceptible to pests when they are above ground. Pumpkins grown vertically are easier to harvest because you have better access to the Pumpkin plants. Illinois expanded its area and leading position, growing more than twice as many Pumpkins per acre as the other highland states on 15,900 acres. California, Indiana, Michigan, Texas, and Virginia each planted between 3,700 and 6,000 acres. 

How to start Pumpkin farming in the USA

Major Pumpkin producing states in the USA

Texas is a major Pumpkin-producing state. American farmers are celebrating a big Pumpkin crop this year due to the dry weather and are seeing an increase in demand throughout the year with the help of new avenues of growth in products such as flavored coffee and pet food. The USA produces more than 1.5 billion pounds of Pumpkins each year. The top Pumpkin-growing states in the USA are Illinois, Indiana, Ohio, Pennsylvania, and California.

Illinois has the largest area of ​​Pumpkin in all states and the largest acre of processing. About 80 percent of the Pumpkin acre in Illinois is set aside for pie filling or other processing use, compared to about 3 percent in Michigan and even more in California and Virginia. This difference in the type of Pumpkin commonly grown in Illinois helps to explain the difference in production and price between Illinois and other higher states. 

About 80% of the American Pumpkin crop is available during October. Out of a total of 1.5 billion pounds, more than 800 million Pumpkins are ripe for picking in one month of the year. According to the University of Illinois, 95% of Pumpkins grown in the United States are harvested in Illinois soil. Based on the Illinois Department of Agriculture, 95% of the US crop produced for processing is grown in Illinois. 

In case you missed it: Top 17 Steps/Ways to Boost Pumpkin Yield: How to Increase Production, Size, and Quality  

Pumpkin Harvest
Image Source

Soil and location for Pumpkin farming in the USA

You should choose the sunny part of your garden, if you have it, a slight inclination to the south is also good. Give your Pumpkin patches plenty of space, and prepare your bed in early March / April for planting in May / June. To make a soil bed for Pumpkins, choose the size of the area you will prepare (keeping in mind the Pumpkin plants will require a lot of space, the vines can run 25 feet or more).

Then dig two to three feet down and backfill with a full fertilizer and a mixture of fertilizers. When backfilling, do not compact the soil and avoid areas where vine crops have been grown. Pay attention to the area around the patch where your Pumpkin vines grow and enrich.  Pumpkin vines will lower the roots, and good soil outside the bed will result in better Pumpkins. Many Pumpkin growers have kept many secrets when it comes to composting.

If in doubt, ask your greenhouse what works best for your soil conditions and the type you plan to grow. Pumpkins perform well in pH-neutral soils between 6.00 and 6.5; a soil test will tell if your soil needs to work. Choose a place where the vines have enough space to ramble. When the plants are young, you can direct the vines where they want to go. However, once they are established and begin to flower, the vines should be left alone.

Where to plant Pumpkins in the USA

Pumpkins are heat-loving plants, so choose a place with plenty of sunlight. Place the seeds you are planting according to the recommendations on the seed packet. To increase their success, consider growing seeds in hills of dirt slightly higher than the ground. Hills usually heat up much faster than flat land. They also draw water very fast. Planting in the hills will also allow the oxen to flow downhill. 

Plant spacing and depth for Pumpkin farming in the USA

Pumpkin vining requires at least 50 to 100 square feet per hill. Plant the seeds one inch deep (four or five per hill). Keep a distance of 5 to 6 feet between the hills, 10 to 15 feet apart in rows. Varieties of semi-bush 1 inch deep (four or five seeds per hill) and the thinnest best two plants per hill. Allow plants about 4 feet between hills and 8 feet between rows.

In case you missed it: Organic Pumpkin Farming, Cultivation Practices

Pumpkin Farming
Image Source

Plant two or three seeds of the smaller variety at a depth of one inch every 2 feet. The rows must be 6 to 8 feet apart, and when they have the first true leaves, thin the best plant every 2 feet. Plant bush varieties are one inch deep (1 or 2 seeds per row of feet) and thinner than one plant every 3 feet. Then, allow 4 to 6 feet between rows. 

Seed selection tips for Pumpkin farming in the USA

All you want to do is select the Pumpkin varieties you want. Some types are better to eat, some to cut, and others to grow the monster Pumpkin that can win you the competition. Start with standard seeds, and you will have a better chance of growing standard Pumpkins. 

Pumpkin varieties available in the USA 

More than 250 varieties of Pumpkins are readily available in North America alone. Two types of Pumpkins have become the biggest money makers. Ornamental Pumpkins, also called Halloween Pumpkins, are the most common. They are round, bright orange, and smooth and are usually carved or used as decorations for Halloween.

The second type is processing Pumpkin, which is gray, long, and tasty on the outside. They typically end up in processing plants, where the Pumpkin flesh is canned and shipped to supermarkets, which sell it for making pies and other Pumpkin-related dishes.

Blue Lakota – This heirloom species of Pumpkin belongs to the Midwestern United States. These Pumpkins have light blue-green skins and slight ribbing. They have the shape of a flat ball and reach a point in the stem. 

Conditions for Pumpkin Farming in the USA

Pumpkin is a warm-season crop that is usually planted in early July. The specific conditions required for growing Pumpkins require that the soil temperature be at least 15.5°C and 8 cm (3 inches) deep and that the soil retains water well. Pumpkin crops can be damaged if there is a lack of water or cold temperatures, in this case, less than 18°C.

In case you missed it: Pumpkin Farming in Polyhouse (Gummadikaya) for Profit

Pumpkin Field
Image Source

How to grow Pumpkins vertically

  • Pumpkin plants do not tolerate frost, so it is best to wait until the last frost has passed and the soil warms up before planting. 
  • Prepare the soil by digging some rich manure or well-broken manure in the soil. 
  • Plant Pumpkin seeds about an inch (2.5 cm) deep at the base of your chosen structure and leave at least 12 inches (30 cm) between Pumpkin seeds. 
  • You should see that the seeds start germinating in about a week. 
  • Pumpkin plants produce long branches called tendrils that help to wrap around the trellis and other vertical structures. 
  • As the Pumpkin plants begin to grow, you can help them by wrapping tendrils around the trellis. As soon as the Pumpkins appear, you can make an old piece of cloth for the trails and make a hammock to support their weight so that the Pumpkins can rest on it. 

Soil that is sandy with a lack of water or poorly drained soil that fills up with water after heavy rains is detrimental. Pumpkins, however, are pretty hardy, and even if many of the vine’s leaves and parts are damaged, the plant can quickly grow secondary vines to replace what has been removed. 

Pumpkin season in the USA

Most states have seasonality in the fall months. The three largest producers in the United States are Illinois, Indiana, and Ohio. The longest Pumpkin season in Illinois is from August to November. The Pumpkin season in Indiana is one month long in September and October, and in Ohio until November. 

Pumpkins have a long growing season of 75 to 100 days, so you must plant them in most places from mid-spring to late. Sow Pumpkin seeds in late April or early May; they will be ready for harvest sometime in August. Pumpkins are used in the USA as decorations for autumn holidays such as Halloween and Thanksgiving. Pumpkins can be used for table or front porch arrangements, carved, or cooking.

Pumpkin season in different states in the USA

State   Pumpkin in season
Alabamamid-September till mid-November
AlaskaSeptember and October
ArizonaSeptember and October
ArkansasSeptember till mid-November
CaliforniaSeptember till November
ColoradoSeptember and October
Connecticutmid-September till November
DelawareAugust till November
FloridaSeptember till November

Water and care for your Pumpkin plants

Most vegetable crops need deep but soft soaking once a week – about an inch of water at a time. Adjust based on rainfall accordingly. Pumpkin leaves appear wilted in the afternoon heat, even if the soil is still moist. If the plants benefit again in the evening or under a cloud cover, resist the urge to remove even more dirt, as more water can help the roots rot. Mulching your beds will help keep plants more permanently hydrated and will also help eliminate weeds. 

Generally, you do not need to harvest your vines. Larger leaves help them produce more carbohydrates, which means more Pumpkins. Pumpkin plants should be cultivated with hoe and shallow and kept free from weeds. If the drought lasts longer in early summer, irrigate. Pumpkins tolerate short periods of hot and dry weather well. Pumpkins should be given deep but light water once a week. Water the plants about 1 inch at a time. However, adjust your water according to the rainfall in your area. 

If Pumpkins are given too much water, they will rot. Remember that most Pumpkin leaves will wither in the heat of the day, even when their soil is still moist. You don’t need to water much until the leaves reappear when the heat fades, or the sun goes down under the clouds. Applying mulch to your beds will help retain moisture in the soil. In addition, mulch will help keep weeds that can suck water from your plants. When watering your Pumpkins, keep the plants as dry as possible unless it is a very dry, sunny day.

Dampness can cause rot and promote disease. Bees can be killed by pesticides, which are essential for pollinating squash and Pumpkins. When pesticides are used, they should be applied only in the late afternoon or early evening when the flowers are closed for the day and the bees no longer come to the flowers. Because new flowers bloom every day and bees land only inside open flowers, these pollinating insects are protected from contact with any potentially deadly spray.

In case you missed it: Pumpkin Farming, Planting, Care, and Harvesting

Pumpkin Farm
Image Source

Fertilizer requirement for Pumpkin growth

Pumpkins are heavy feeders. Using vegetable garden fertilizer can provide them with the right food. Test the soil every two years for growing Pumpkins. The results will determine what type of dirt you are dealing with – including pH and nutrient levels – and then help you plan accordingly. 

How to pollinate Pumpkins

Pumpkins produce both male and female flowers, usually fertilized by bees. Pumpkins have been pollinated in the United States by the local squash bee, Peponapis pruinosa. Still, the bee has declined, perhaps partly due to sensitivity to the pesticide. Ground-based bees like squash bees and the eastern bumblebee are better suited for selling honey bees produced from Pumpkin pollen.

About one hive per acre (0.4 hectares, or five hives per 2 hectares) is recommended for Pumpkin farming by the US Department of Agriculture. If bees are not enough for pollination, gardeners may have to pollinate by hand. Inadequate pollen Pumpkins usually start to grow but fail to grow. 

Insects and Disease Problems in Pumpkin Farming

Insects can severely damage your ability to grow Pumpkins. However, before using pesticides, remember that you need pests to pollinate your crop. Watch out for diseases like Cucumber Beetles, Melon Aphids, Pickleworms, Spider mites, Squash Beetles, Squash bugs, and Squash vine borers. Many bacterial and fungal diseases attack cucurbits. The common diseases in your Pumpkin patch are bacterial wilt and powdery mildew. 

Pumpkin varieties are affected by almost the same diseases and pests that infect Zucchini; however, they are highly resistant. In particular, Pumpkins are attacked by mullet and chrysanthemum insects that form honeycombs on Pumpkin plants, squirrels that dry the leaves, and mildew fungus that produces white spots on the leaves. 

To protect Pumpkins, we avoid planting dense plants, thus reducing the risk of fungal and entomological diseases. When the temperature is below 30°C, shake the roots around the plants while the Pumpkin plants are mixed with a tablespoon of green soap and a teaspoon of a liter of water every two weeks with an eco-friendly solution. 

Pumpkin production in the USA

According to the USDA National Agricultural Statistics Service, approximately 66,200 acres of Pumpkins were harvested in the United States, producing more than 1.5 billion pounds of usable Pumpkins with a total production of more than 2 billion. The top nine states (Illinois, Pennsylvania, New York, Indiana, Michigan, California, Ohio, North Carolina, and Texas) produced about 75% of it.

In case you missed it: Brackish Water Aquaculture, System, Benefits

Pumpkins
Image Source

About 15% of the Pumpkin area is used to make processed Pumpkin products. Illinois remains the leading producer of processed Pumpkins, together with the other five leading states, and produces about half of the national total. 

How much profit can a Pumpkin farm make? 

On average, a small Pumpkin farm can earn about ً $30,000 a year. Profits vary greatly, however, because all forms are different sizes. 

Pounds of Pumpkins per acre in the USA

The density of Pumpkins per acre varies from state to state. Illinois grows an average of about 40,000 pounds per acre, California and Texas grow about 30,000 pounds per acre, and Indiana, Michigan, and Virginia grow about 20,000 pounds per acre. 

Illinois grows three and a half times more Pumpkins than the next most productive state. Illinois produced 420 million pounds of Pumpkins. California and Indiana produced about 120 million pounds of Pumpkins, Virginia produced about 90 million pounds, and Michigan about 80 million pounds.

Conclusion

Pumpkin production is widespread throughout the United States, with crop conditions varying from region to region. Pumpkin is the most popular crop in the USA, producing more than 680 million kilograms (1.5 billion pounds) of Pumpkins. 

Vegetable Planting Calendar in the USA: When to Plant, A Step-By-Step Guide for Beginners

If you’re unfamiliar with the vegetable planting schedule, you’ll have difficulty understanding it. Understanding when to sow and harvest is the key to getting the most out of your vegetable garden in the USA and ensuring you don’t miss out on producing your favorite delicacies. You can experiment with seed-starting fruits and vegetables when you get more familiar with your plot. Let’s check out the Vegetable planting calendar in the USA below.

Vegetable Planting Calendar in the USA
Image Source

This is far more cost-effective than purchasing plug plants from a garden center. Unless you’ve missed the planting season or are a novice gardener, this is OK. Before picking up a trowel, It is recommended that you grab a notebook and paper and scribble down all of your thoughts. Make a list of your favorite vegetables, even if it seems apparent. Kitchen garden ideas aren’t worth much unless you like eating them and consistently include them in your meals.

After that, consider when to plant the seeds and how to care for them from planting to harvest. Even if some of your crops don’t turn out as you had hoped, you may try the following year again by referring to the planting calendar in this article. Where should you begin if you want to produce your food, but you’ve never done it before, particularly if you’re a novice gardener? There is an incredible diversity in the kinds of vegetables that can be grown. In addition, not everyone has the same opportunities for physical development.

You are in luck since you can choose our vegetable planting calendar for the US, which will assist you in determining what to plant and when to grow your food effectively. Below we will discuss what the USDA hardiness zones are and how to use them, how to determine what your hardiness zone is, when to start planting in the USA, what is a planting calendar and how to use a planting calendar, and a seasonal vegetable planting guide for USA, and a detailed vegetable planting calendar/guide for USA.

In case you missed it: Vegetable Farming In Karnataka – Planting Calendar

Planting in the Backyard
Image Source

What are USDA hardiness zones/planting zones?

Determining the planting zone where you live is one of the first things you will need to do if you intend to grow your food. A planting zone, also known as a hardiness zone, is a geographic area that can support the growth of certain plants due to the climatic circumstances of the region. The Plant Hardiness Zone Map published by the USDA is responsible for standardizing planting zones in the United States.

On this map, the United States is broken into zones of ten degrees, each determined by the yearly lowest temperature on average. There are ten primary zones in the United States continental portion; Puerto Rico and Hawaii each have three extra zones. You can identify your planting zone by consulting the planting zone map. Be aware that you could be utilizing information that is no longer accurate if you study an older gardening book or magazine that refers to the USDA zone map.

The zone map was revised in 2012 to reflect improved data-gathering techniques for temperature between 1976 and 2005. However, it does not consider the changes in the climate that have taken place since 2005. Therefore, you will still need discretion when determining the appropriate time to set certain plants in the ground. Even though it was developed in the United States, this method of determining planting zones is used all over the globe.

In addition, the Royal Horticulture Society of the United Kingdom has developed its way. They apply their hardiness ratings to USDA zones six through thirteen, and they employ these zones. The lowest temperature that other nations experience throughout the winter may be used to determine their hardiness zone by comparing it to the map that the USDA has created. After you have identified the planting zone where you live, the next step is to decide what plants are appropriate for that zone.

Know your hardiness zone

The USDA Plant Hardiness Zone Map determines which plants will thrive in a given location. The map is constructed using data from each region’s average annual lowest winter temperatures and is separated into thirteen different zones of 10 degrees Fahrenheit, each further subdivided into subzones of 5 degrees Fahrenheit. The majority of plants that you purchase will have a hardiness zone number stamped on their tag. The label will specify the regions of the United States where the plant can flourish.

In case you missed it: Vegetable Planting Chart/Calendar in India

Vegetable Farming
Image Source

How to make use of your hardiness/planting zone?

Because perennial plants are intended to survive for more than just one growing season, gardeners who grow them will find planting zones the most helpful gardening tool. Because perennials need to last the winter in your region, it is necessary to accurately understand how cold it generally gets there and whether or not a specific plant is hardy enough to endure those temperatures.

Perennial flowers, shrubs, and trees will thrive when planted in the correct zone and provide the most satisfactory results. You’ll discover that most winter damage happens when plants are grown in conditions outside their “comfort zone.” It is important to avoid picking plants that are just moderately hardy for your location when selecting plants for a garden or landscape. If you do this, you will observe winter damage, poor development, and a decline in blooming.

The best method to ensure a healthy garden is to populate it with plants that are local to the area. Native plants grow naturally in your region. Therefore, it is only natural that they would flourish in their native environment. When growing annual plants, such as most vegetables and certain flowers, it’s essential to pay special attention to specifics like growth season length and first and last frost dates. Planting zones are not necessary when dealing with annuals since they are only intended to survive for the duration of one growing season.

What is a planting calendar?

A planting calendar, often known as a planting timetable, provides information on when to plant several things throughout the year based on where you live. Most planting calendars use frost dates (the final spring frost and the first autumn frost), which offer direction on whether to sow seeds inside or outside, as well as when to place those seeds in the ground or transfer seedlings. In the following parts, you’ll learn how to use a planting calendar and decide what to plant and when to plant it.

When to start planting in the USA?

Your planting zone, the crop’s optimal season, and the period will dictate when to sow seeds. Planting should occur in most zones throughout the spring or early autumn. However, certain crops, such as potatoes and other tubers, are more resistant to the cold. In some regions, you may be able to keep these veggies alive throughout the winter if you cover them with mulch before the season’s first frost.

In case you missed it: Vegetable Gardening Tips (Planting), and Techniques

Backyard Gardening
Image Source

Additionally, some fruits and vegetable plantings can occur in the summertime if they thrive in warm climates. If they haven’t already been opened, many seed packages provide hardiness zones, when to plant and harvest, and other essential growth information that may help you plan your planting schedule.

The time required to cultivate vegetables varies, but the process typically takes a few weeks and a few months to complete. Planting seeds as soon as possible is always the ideal option if your objective is to produce enough food to feed your family regularly and sustainably. If you pay attention to the instructions that come with the seed, you may ensure that you have the most extended growth season possible.

Vegetable planting calendar in the USA

For people who are in zones 1 to 6

Vegetables This long before planting, start plantsZone 1Zone 2Zone 3-4Zone 5-6Harvest time (in days)
CarrotsJan to JuneMarch to July 12Mid-April to mid-June Mar 25 to April 10,
Sep 15 to 30
70 to 80
CantaloupesFour weeksNot suitableMayMid-May to JuneMay 10 to 2075 to 90
Cabbage Six weeksJan – April, July – SepApr to JunApril to MayApr 1 to 25, Sep 20 to 3065 to 80
Brussel sproutsSix weeksMay to JunMay to JulyMid-April to June 1
BroccoliSix weeksMay to JunMar to AugMid-April to June 1Mar 25 to Apr, Sep 20 to 3060 to 80
BeetsMar to JuneMar to JuneMid-April to June 1Apr 1 to 1555 to 65
Snap beansMay to JunMay to JulyMid-May to July 1May 10 to 2050 to 60
Lima beansnot suitableMay to JuneMid-May to mid-JuneMay 10 to 2565 to 75
AsparagusOne yearMar to AprFeb to MarchApr 15 to May 1Apr 5 to 25
ArtichokesAug to OctAug to Nov
Kale May to JulMay to JulMid-April to mid-JulyMar 25 to Apr 550 to 70
GarlicSep to OctSep to FebOct to Nov 1
EndiveSix weeksMar to JulApril to mid-AugMid-April 
EggplantsNine weeksNot suitableMay Early JuneMay 15 to 2570 to 90
DillMay May
CucumbersFour weeksApril to JunMay to JunMay to mid-JunMay 10 to 3060 to 65
Sweet CornApr to MayApr to Jun80 to 100
Chives6 weeksApr to MayMar to May
Chinese cabbageFour weeksJul to AugAugEarly July
Chard Feb to MayApr to JulEarly may
Celery9 weeksMar to JunMar to JulyMid May
Cauliflower6 weeksJan and JunApr to mid-JulyMid-MayApr 1 to 20, Sep 20 to 3055 to 60
Sweet potatoes6 weeksNot suitableNot suitable Early JuneMid-May to June 590 to 150
Peppers10 weeksMay May to JuneEarly JuneMid-May to May 3065 to 80
PeasJan to AugFeb to MayApr 10 to mid-MayMar 20 to Apr 1060 to 80
ParsnipsMay to JuneApr to MayMay 1 to May 15
Parsley10 weeksDec to May Mar to JuneApr 15 to May 1
Onions10 weeksJan to MayMarch to MayMid-AprilMar 20 to mid-Apr, Sep 1 to Dec 31100 to 120
Okra8 weeksNot suitableNot suitableEarly JuneMay 10 to May 2555 to 60
Lettuce5 weeksFeb to JulyApr to JulyMid-April to mid-AugApr to mid-May, Sep 1 to 1560 to 85
LeeksFeb to AprMarch to May
KohlrabiJul to AugApr to Aug 15Mid-Apr to mid-JuneEarly Apr, Late Sep
Watermelons4 weeksNot suitablemayMid-May to June 1May 10 to 1280 to 90
TurnipsJan and AugApr to SepMid-April and early AugMarch 25 to May, Early Aug to Sep 2045 to 65
Tomatoes8 weeksMay to JunmayMay 15 to June 1May 15 to 3070 to 85
Summer squash4 weeksMay May to JunMay 10 to June 1Mid-May to 3050 to 55
Winter squash4 weeksmaymayMay 10 to early JunMid-May to 3085 to 90
SpinachAug to FebApril or SepMid-April,
Aug 1 to 15
Apr 1 to 20
Aug 10 to Sep 25
40 to 45
RutabagasJun to JulyJun to JulyMay 15 to June 15
RhubarbDec to JanMar to AprilMid-April to May 1
RadishYear-roundMar to SepApr 10 to Jun 1, Aug 1 to 15Mar 25 to May 1, Aug 1 to 2525 to 30
PumpkinsMay mayMid-Apr to June 1 May 15 to 3085 to 90
White potatoesFeb to MayApr to JunMid-Apr to mid-AugApr 1 to 1570 to 90

In case you missed it: Date Palm Cultivation In Rajasthan, Planting

Home Vegetable Garden
Image Source

For people who are in zone 6 to 10

Vegetables This long before planting, start plantsZone 5, 6Zone 7, 8Zone 9Zone 10Harvest time
CarrotsMar 25 to Apr 10, Sep 20 to 30Mid Jan to Mar 25,
Aug 20 to mid-Sep
Sep to MarOct to Mar70 to 80
Cantaloupes4 weeksMay 10 to 20Mar 25 to Apr 20Mar to AprFeb to Apr80 to 90
Cabbage 6 weeks Apr 1 to 20, Sep 20 to 30Mid-Jan to Mar 25,
Aug 20 to mid-Sep
Sep to FebSep to Jan65 to 90
Brussel sprouts6 weeksMid-Jan to mid-Mar, Mid Aug to Oct 1Sep to NovOct to Nov
Broccoli6 weeksMar 25 to Apr 5, Sep 25 to 30Mid-Feb to mid-Mar, Aug 1 to Sep 1Aug to FebAug to Jan60 to 80
BeetsApr 1 to 15Mid-Feb to mid-Mar, Aug 1 to Sep 1Sep to MarOct to Mar55 to 65
Snap beansMay 10 to 20Apr 1 to May 1,
Mid-July to Aug 10
Mar to Apr, Aug to SepFeb to Apr, Aug to Sep50 to 65
Lima beansMay 10 to 25Apr 1 to June 1Mar to AugFeb to Apr65 to 80
Asparagus1 yearApr 5 to 30Mid Jan to mid-Mar, Nov and Dec2nd season
Kale March 20 to Apr 5Feb 1 to Mar 10, Aug 15 to 30Sep to FebSep to Jan50 to 75
Garlic
Endive6 weeksFeb to Mar, SepJan to Feb, Sep
Eggplants9 weeksMay 15 to 25Apr to mid-May, July 10 to 15Feb to JulJan to Mar, Aug to Sep70 to 90
Dill
Cucumbers4 weeksMay 10 to 30Apr to mid-May, Aug 20 to Sep 1Feb to Apr, Aug to SepFeb to Mar, Sep60 to 70
Sweet CornMay 1 to Jul 20Mid-Feb to Apr 1,
Aug 1 to Sep 20
Mar to Apr, AugFeb to Mar, Aug to Sep80 to 100
Chives6 weeks
Chinese cabbage4 weeksOct to FebOct to Jan
Chard 
Celery9 weeksJan to MarAug to Feb
Cauliflower6 weeksApr 1 to 20, Sep 20 to 30Mar to Apr, Aug to SepJan to Feb, Aug to OctOct to Jan55 to 65
Sweet potatoes6 weeksMid-May to June 5Mid-Apr to mid-JunMar to JunFeb to Jun90 to 150
Peppers10 weeksMay 15 to 30Apr to JuneFeb to Apr, Jul to AugJan to Mar, Aug to Sep65 to 80
PeasMar 25 to Apr 10Mid-Jan to mid-FebMar to AugMar to Sep60 to 80
Parsnips
Parsley10 weeksSep to MarOct to Feb
Onions10 weeksMar 25 to mid-Apr, Sep 1 to Dec 31Jan to mid-Mar, Sep to DecSep to DecSep to Dec100 to 120
Okra8 weeksMay 10 to 25Apr to Jun, Mid-June to JulyMar to JulyMar to Aug55 to 65
Lettuce5 weeksApr to mid-May, Sep 1 to 15Mid-May to early June, June 1 to July 25Feb to Mar, Sep to OctSep to Mar60 to 90
LeeksSep to MarSep to Feb
KohlrabiEarly April, late SepSep to MarOct to Mar
Watermelons4 weeksMay 10 to 12Mar 25 to May 1Mar to Apr, July to AugJan to Mar, Aug80 to 90
TurnipsMar 25 to May 1, Aug 5 to Sep 20Mid-Jan to Mar 1, Sep to OctJan to Apr, Aug to OctJan to Mar, Sep to Oct45 to 70
Tomatoes8 weeksMay 15 to 30Mar 25 to May 5Feb to Apr, AugSep, Jan to Mar70 to 85
Summer squash4 weeksMay 15 to 30Apr to mid-May, Aug 1 to 15Mar to Apr, Aug to SepFeb to Mar, Aug to Sep50 to 60
Winter squash4 weeksMay 15 to 30Apr to AugMar to AugFeb to Mar, Aug85 to 90
SpinachApr 1 to 20, Aug 10 to Sep 20Mid Jan to mid-Mar, Sep to mid-OctOct to NovOct to Nov40 to 50
Rutabagas
Rhubarb
RadishMar 25 to May 1, Aug 1 to 20Mid Jan to Apr 1,Sep to mid-Oct25 to 30
PumpkinsMay 15 to 30Apr to AugMar to Apr, AugFeb to Mar, Aug85 to 90
White potatoesApr 1 to 15Mid Jan to MarJan to MarJan to Feb70 to 90

Conclusion 

Where you reside is the most critical factor when deciding when and what to plant. Use the planting calendar that works best for you when planning your garden. You can either give one of the ways that can be done online or with pen and paper a try, or you can come up with your own. Just remember that striving for perfection shouldn’t be at the expense of doing what’s good. Don’t allow the fact that you can’t accomplish everything you want to or that the time isn’t ideal to prevent you from trying to grow some vegetables.

In case you missed it: How To Start Jade Planting, Tips, and Ideas

Vegetable Garden
Image Source

Keep in mind that cold will destroy most of the plants. In harsh winter areas, don’t plant too late. Now that you know when to start your vegetables choose the best time to start your vegetables. Start planting vegetables in your backyard, balcony, containers, or any other place and take care of them. In no time, you will get a healthy and quality bountiful harvest. Cheers to the vegetables and fruits that resulted from your hard work! And now you also know that gardening is fun.

Top 15 Steps/Ways/Methods to Boost Radish Yield: How to Increase Production, Size, and Quality

Radish is one of the best salad vegetables grown worldwide. Its green leaves are a rich source of vitamin A and can also be used as a green leafy vegetable. Radish can usually be grown all year round, but winter is best for good cultivation. Commercial Radish farming is a very common and popular business in many countries.

Steps/ways/methods to boost Radish yield
Image Source

Radish is a significant crop grown almost everywhere in the world. Radish belongs to the member of the Cruciferae (mustard family). Belo steps are helpful to get a better yield of Radish. Let’s check out the steps/ways/methods to boost Radish yield below.

Steps/ways/methods to boost Radish yield

Step 1: Soil management for Radish growth

Radish can be grown on almost all types of soils, but the best results are obtained on light fox soils with high humus. Heavy soils produce rough, deformed roots that contain many small fibrous laterals and should be avoided. Radishes grow faster in hot weather. The roots stay in marketable condition only for a short time before becoming pithy. Growth should be steady and fast for good quality.

This crop requires a well-drained sandy loom with a good supply of organic matter. As well as providing moisture for good quality (light, soft and attractive). Rocky or gravelly soils are generally unacceptable, especially if bedding is used. Peat soils are suitable for the production of Radish. Root crops grow in pH ranges between 6 and 7 and use good amounts of phosphorus and moderate nitrogen. Excessive use of nitrogen fertilizers encourages top growth and sacrifices large, well-formed roots.

Because phosphorus does not travel easily into the soil, the zone from which your plants can absorb it is relatively small and close enough to the root, i.e., if a soil test indicates a need for phosphorus, it must be implemented side by side. Favorite sources of dressing organic phosphorus include rock phosphate and bone meal. Mulching is very important for maintaining soil moisture, and it will also help prevent weeds from the field. Use organic matter to use as mulching.

Step 2: Climate requirement to increase production

Radish is a cold-season crop, but Asian varieties can withstand more heat than European or temperate varieties. But Radishes get the best taste, texture, and size from 10 to 15°C. Long days and high temperatures cause bolting without proper formation of roots. In hot weather, the root becomes hard and sharp before it reaches edible size, so the crop should be harvested when it is young and small.

In case you missed it: Radish Gardening For Beginners – How To Start, FAQs

Radish Farming
Image Source

Step 3: Popular Radish varieties for getting more yield 

The popular Radish varieties are Co1, Pusa Rashmi, Pusa Chetki, Pusa Desi, Japanese White, Arka Nishant, Butpee White, Champions, Cherry Belle, Daikon, Dragons Tail, French Breakfast, Misato Rose, Rat’s Tail, Red King, and Watermelon Radish. Some of the high yielding Radish varieties are;

Japanese White: The best time to sow is November-December. It was introduced in India from Japan. Late sowing is recommended in northern plains and sowing in July-September in hilly areas. The roots are cylindrical and pure white. Gives an average yield of 160 quintals per acre. 

Pusa Chetki: The best time for sowing is April-August. The early ripening variety is suitable for seed production in the Punjab region. Its roots are smooth, snow-white, and of medium length. Its average yield is 105 quintal/acre, and seed production is 4.5 quintal/acre. 

Pusa Himani: It is suitable for sowing in the fortnight of January-February. Its root is white with green shoulders. It is ready for harvest 60-65 days after sowing. Gives an average yield of 160 quintals per acre. 

Punjab Pasand: The best time for sowing is from the second fortnight of March. It is an early maturing variety, ready for harvest 45 days after sowing. The roots are long, white, and hairless. Suitable for sowing in main season as well as off-season. In the main season, the average yield is 215 quintal/acre, while in the off-season, the average yield is 140 quintal/acre. 

  • Pusa Deshi: Suitable for sowing in Northern Plains. The roots are pure white. R 
  • Pusa Reshmi: The type is suitable for skin sowing. 
  • Arka Nishant: long and pink root type. It is ready for harvest in 50-55 days. 
  • Rapid Red White Tipped: A type of European table maturing quickly. Ready for harvesting in 25-30 days. The roots are small and bright red with pure white flesh. 

Step 4: Sowing method for more growth

Radish is usually grown in heaps to facilitate good root production. It is grown as a crop or as a companion crop. Rows or tops of plants about 22 cm high are spaced about 45 cm apart, while plants are spaced 8 cm apart within the rows. European or moderate varieties, as they need close.

Step 5: Water requirement for Radish plant growth

Make sure they get enough rain or deep water. Drought stress can cause the roots to taste bad and have a hard texture. If planting doesn’t get an inch of rain every week, soak the soil well at least once a week. If soil is sandy, it is essential to water more than once a week. Radishes like moist soil ensure that the soil is never dry and always kept moist.

In case you missed it: Organic Radish Farming, Planting, And Growing Practices

Radish
Image Source

However, water moderately and avoid excess water to prevent the soil from overflowing. Water your Radish plants frequently and evenly. Failure to water your Radish plants frequently and evenly can make them a warm, woody flavor. You can use fertilizer to retain moisture. The use of fertilizers can be very effective. 

Step 6: Manures and fertilizers affects the growth of Radish

Radish is a fast-growing crop, so the soil should be rich in plant nutrients. Apply 25-40 tons of agricultural fertilizer per hectare, 18-50 kg of nitrogen, 50 kg of ammonium sulfate, 50 kg of superphosphate, and 50 kg of potash in the form of mortise of potash. Radishes are root vegetables; fertilizer needs nutrients that promote root development without overly large leaves.

Farmyard manure should be well mixed during field preparation, while total potassium phosphate and half amount of nitrogen fertilizer can be applied in rows before sowing. Apply the remaining half of the nitrogen fertilizer as a top dressing with irrigation as the plants begin to grow fully. Nitrogen promotes the growth of green leaves, and although the environment is 78% nitrogen, plants cannot use this resource directly.

Microorganisms convert gaseous nitrogen into forms that plants can use during the fall process. These shapes are soluble and can come out of the soil quickly. When plants need nitrogen, they grow small, yellow, or colorless leaves and weak stems. Using a fish emulsion such as a high nitrogen fertilizer will give you many beautiful leaves in a short time, but your Radish roots may be small or completely reduced.

Phosphorus is essential for seed germination, root development, and fruit and seed arrangement. Deficiency may appear as stunted growth with purple on the leaves. It does not come out easily, so it stays in the soil for two to three years after planting. As a root vegetable, Radishes can benefit from fertilizers such as bone meal which is high in phosphorus. Bone meal contains calcium, another nutrient that promotes root growth.

Plants use potassium to make starch and sugar, which helps develop good-sized roots, disease resistance, and growth of flowers and fruits. Easily scorched leaves can easily indicate deficiency. Since potassium is very useful for growing large roots, it should be applied generously to early growing Radishes, usually in the form of 5-10-10 fertilizers – 5% nitrogen, 10% phosphorus, and 10% potassium. 

Step 7: Why are your Radishes long and thin? 

Radishes will grow taller and thinner due to hot weather, unsuitable soil, and competition with other plants. Too much nitrogen in the soil can also cause the Radishes to grow taller and thinner. 

Step 8: Seed and seed treatment for plant growth

Depending on the type and variety, the number of Radish seeds is about 2,000-4,000 per ounce. Use warm water-treated seeds and fungicide treatment seeds to prevent many serious seed-borne diseases. Hot water seed treatments are very specific. Seed treatment is best done by a seed company and can usually be provided upon request. 

In case you missed it: Radish Cultivation Income (Mullangi); Cost; Project Report

Radish Garden
Image Source

Step 9: Reasons for Radishes not forming and cracked Radishes

The lack of growth is due to planting too thick and not thinning 1 to 2 inches between plants. If the plants are so crowded on the bed that they are rubbing against each other, they will feel that there is not enough space to grow, so that they will go to seed. The Radishes split open as they mature and grow. Cracking is the result of uneven watering.

Trying to cover the drought with a lot of water at once will cause the Radish to grow very fast from the inside and split open. Make sure your Radishes regularly receive at least 1 inch of water each week. Split or cracked Radishes are often edible. If it’s just one or two cosmetic splits, you can still enjoy them in your salad – once they’re sliced, no one will notice the cracks. 

Step 10: Tips for Radishes growing so slowly

Excess nitrogen and neutral acidity in the soil will also slow the formation of Radishes. A common reason for Radish bulbs not growing is overcrowding. Overcrowded Radishes do not have the room to make fleshy bulbs, so thinning to two inches (5 cm) can help promote bulb formation.

Step 11: Tips for Radish leaves yellow

Sometimes the leaves of Radishes turn yellow when they do not get enough sun. Radishes need six hours of full sun every day. It is fine if the Radishes have shade but need the sun to bloom. 

Step 12: Weed control for more production

Also, to monitor the growth of weeds, perform intercultural operations such as weeding and hoeing to provide air to the soil. Two to three weeks after sowing, perform a weed operation. After the weeding, perform an earthing operation. 

Step 13: Pests and diseases control of Radish for more growth

Due to the rapid growth of Radishes, the plant is relatively resistant to diseases. But it would help if you kept an eye on your Radish plants to ensure that insects like aphids or root maggots do not damage your crop. Aphids favor hot, dry conditions. Make sure your Radish plant gets enough water to keep aphids away.

If you see aphids, remove the affected leaves immediately. Root maggots are also a rare problem. These insects are present if you see something piercing your Radish crops. In this case, an organic pesticide is effective in treating root maggots. Weeds are the most common regarding Radish trouble, so keep a close eye on your garden beds and pull out whatever weed you see.

In case you missed it: Growing Radish In Containers Information

Radish Harvest
Image Source

Although Radishes are generally free from pests and diseases, cabbage root maggot infections and clubroot problems have been reported. Aphids and root maggots can attack Radishes. Remove infected plants from the pinch. Generally, Radishes grow so fast that insects do not have a problem. Radishes do not have any serious diseases. 

Step 14: Harvesting time for Radish growth and development

Note when your Radish variety should be ready for harvesting. Generally, harvest when the roots are about 1 inch in diameter. You have to take it out to see if it is ready. Harvest your Radish crop in a timely manner. Otherwise, you risk your Radishes exploding, cracking, or creating an unpleasant spongy texture and spicy taste.

Depending on the crop, the roots are ready for harvest about 25-35 days after sowing. Early and fast-maturing European crops reach maturity within 25-30 days of sowing. If harvesting is delayed, they become bitter and bitter.

In India, harvesting is done manually. Light irrigation can be given before harvesting to make the roots easier to lift. In developed countries, commercial Radish growers use a single row of harvester that pulls the plants out of the soil, cuts the roots from the top, then puts them in bags and takes them to the packing shed.

In case you missed it: Radish Farming; Planting; Care; Harvesting Guide

Radish Yield
Image Source

Step 15: Radish yield per acre

Yield per hectare depends on the variety and number of crops per year. Regular production of Radish is 10,000 to 15,000 kg per hectare. In the main season, the average yield is 215 quintal/acre, while in the off-season, the average yield is 140 quintal/acre.

How to Start Apple Farming in USA: A Step-by-Step Planting to Harvesting, and Production Guide

0

Apple is one of the most valuable fruit crops in the United States. Commercially growing Apple trees can be a good source of income, provided it is done rationally and on a medium to large scale. According to the American Apple Association, more than 7,500 farmers in all 50 states are growing Apples. The best way to prevent Apple disease is to choose varieties resistant to disease in your area. 

How to Start Apple Farming in USA
Image Source

How to start Apple farming in USA

Apple farming importance in the USA

Apple trees can be grown in many parts of the country and lend themselves well to part-time farming. The initial investment for Apples may be higher depending on the preferred production method, land preparation, and initial tree investment. New varieties, rising incomes, expanding production in the United States, a more diverse population, products that better meet consumers’ lifestyles, and factors that increase consumption of Apple and Apple products.

In addition to disease-resistant cultivation, prune trees regularly so that enough sun and air can enter the tree’s crown and cut off diseased branches, leaves, or fruits. While US acreage and Apple production have declined recently, consumer demand has boosted the rapidly growing organic Apple sector. Apples managed under a certified organic farming system now account for about 7% of the total area of ​​American Apples.

While traditional Apple production outweighs organic production, Organic Apple ordered price premiums at every level of the supply chain – farm gate, wholesale, and retail. Despite declining total Apple production over the past decade, the US Apple sector has seen a rapidly growing demand for new varieties of Apple and organically grown Apples that receive price premiums.

Farmers who want to sell on their Apple farms or at farmers’ markets have a smaller initial investment than wholesale producers due to the smaller land and equipment requirements. The direct market garden can be planted anywhere with enough customers to buy the product, as long as the soil has suitable soil and climate. Although direct marketers can sell their products at a much higher price than wholesalers, they also face the cost of overhead and labor and the lower cost of selling their products.

The long-term viability of these small farms depends on whether they can recoup their investment and earn an annual return. Depending on the amount of land dedicated to the orchard, the method of production, and the size of the trees, the equipment cost can be kept to a minimum. If the orchard is part of an existing agricultural operation, you may have more essential equipment than before. 

Apple production will require several hours, depending on the size of the orchard. During the summer, the garden must mow the lawn, apply various pesticides, and dilute the fruit. Depending on the variety and orchard size, extra labor may be required at harvest time. Although you can complete these tasks with family members and local part-time labor, hiring labor may also be necessary. 

Apple-producing states in the USA

Thirty-two states in the United States grow Apples commercially. The top Apple-producing states in the USA are Washington, New York, Michigan, Pennsylvania, California, Virginia, North Carolina, Oregon, Ohio, and Idaho. Washington is the number 1 Apple-growing state, growing 65% of the United States’ Apples.

Apple growing season in the USA

Fresh Apples are now available in grocery stores all year round, thanks to the global market, but the Northern Hemisphere Apple season is usually from early July to late November. The peak of the Apple season in the USA is September and October. Some (not all) varieties of Apples store very well and will be stored for months in storage warehouses that maintain a proper temperature and humidity.

It extends the season to 6 months later (March / April) when the southern hemisphere Apples are in season. It means fresh Apples in US grocery stores from March to July come from the Southern Hemisphere, mostly from Chile and New Zealand. That’s about 6 percent of the annual US Apple consumption, according to the American Apple Association. 

In case you missed it: A Step-By-Step Guide to High Density Fruit Farming: For Guava, Banana, Mango, Pineapple, Lemon, Papaya, Litchi, and Apple

Apple Farming
Image Source

Does soil affect Apple tree growth? 

Although most types of Apple trees can grow in a variety of soils, poor soils reduce yields. The best environment for them to grow is sandy soils and looms that are well-drained, slightly acidic, and fertile. Wet soil can result in inadequate aviation, stunted root growth, and fungal infections. It can stop the production of healthy Apples.

The presence of organic matter, such as compost, in the soil of the Apple tree allows a good root system to develop. Before planting, adding a little lime to the altered soil helps to raise the pH level. It is best to get acidity levels between 5.8 and 7.0 for tree and fruit growth. It is essential to know your soil. 

Site selection for Apple farming in the USA

The success of any orchard is directly linked to planning and preparation. The ideal garden is on sloping or rolling land to improve air drainage during the cold spring. The best site faces south, with a slope of between 4 and 8%, as operating equipment on steep slopes can be difficult. Deep and well-drained soils are preferred because shallow, poorly drained soils cause root system problems.

Consult a county soil map before choosing a site. Soil maps can be obtained from your county extension office or the USDA’s Farm Service Agency. Another consideration for selecting a site is irrigation. Regardless of the irrigation system type, locating a garden near a water source will make it easier to set up the system and reduce operating costs. 

Apple production and varieties in the USA 

The USA is the world’s second-largest Apple producer after China. After Poland, Italy, and France, there is an American production. The USA grows about 200 unique Apple varieties. The top 10 varieties in the United States are Red Delicious, Gala, Granny Smith, Fuji, Golden Delicious, Honey Crisp, McIntosh, Rome, Cripps, Pink Lady, and Empire (US Apple Association). Over 5,000 Apple growers in the United States grow an average of about 240 million bushels of Apples each year.

These producers grow Apples on about 322,000 acres of land. In the United States, anyone wishing to purchase limited-use pesticides must have a license to apply for pesticides. Even some materials used in organic farming now require a license. In Pennsylvania, the licensing process is handled by the Pennsylvania Department of Agriculture. Please check with your state about these requirements.

Due to the complexity of Apple production and the many pests and diseases that attack trees and fruits, this publication does not cover all the necessary production methods and procedures. However, some popular varieties in the United States are Golden Delicious, Courtland, Haralred, Honeycrisp, etc.  

Soil preparation for Apple cultivation in the USA

Proper arrangement and soil preparation are essential for establishing a new Apple orchard. The goal is to produce high-quality, high-yielding, high-quality crops. In addition, ease of harvesting and management are important factors to remember. Modern systems use higher densities. The average density is 400-2500 trees per acre. 

Sun and water requirements for Apple farming in the USA 

Like most fruit trees, Apple trees like plenty of sunlight and need at least 6 to 8 hours of sun daily during their growing season. Apple trees must be planted in bright, direct sunlight but in early spring areas away from the risk of frost. While they prefer warmer climates in summer, Apples need a certain number of cool hours to bear fruit, so they perform well in cold climates and cold weather.

When the risk of frost is high in late winter, steps can be taken to protect your Apple trees, such as mulching or covering them. Severe fluctuations in temperature can adversely affect your fruit production. Apple trees should be watered relatively frequently and well, provided they live in well-drained soil. When planting juvenile Apple trees, first soak them deep so that air pockets in the soil can be removed.

Younger Apple trees need careful irrigation, so keep an eye on their soil. Mature fruit trees are less fussy. The most important thing when you grow an Apple tree is not to overwater it. It can cause the roots to get wet and the trees to lose oxygen. Newly planted Apple trees need weekly watering. The key is to allow the water to slowly soak into the soil so that deep water is allowed until it is formed. Once established, Apple trees only occasionally need water unless there are long dry periods. 

In case you missed it: Top 16 Steps to Boost Custard Apple Yield: How to Increase Fruit Size, Quality, and Production

Apple Tree
Image Source

Feeding management for Apple farming in the USA

Apple trees will grow about 8 to 12 inches each year. They don’t need to be fed extra fertilizers over and over again. Instead, apply aged manure around the tree’s base once or twice a year in the spring or late fall after the plant leaves have dropped. The nutritional requirements of Apple trees vary throughout their lives and are affected by factors such as rootstock, crop load, soil type, and climatic conditions.

In addition to phosphorus, nitrogen, and potassium, Apple trees require adequate amounts of calcium, boron, copper, and zinc to maintain the tree’s health and produce quality fruit. After planting, soil tests and leaf analysis are recommended at least once every three years. Leaf analysis is the most accurate method to determine if a tree uses a soil modification. 

Thinning and weed control for Apple farming

Allow the Apple trees to set well before they bear fruit. Handpick flowers and young Apple fruit during the first two years. It will increase the tree’s ability to take root instead of producing fruit. You can allow the Apple tree to bear a small crop in the third year of planting but thin the fruit to ensure the Apple’s quality and size. 

Frequent hand pulling and shallow cultivation, not more than an inch deep, control weeds and minimize root disturbances. Deep cultivation disrupts shallow roots and is not recommended for young and established trees. 

Pruning for Apple tree growth

When your Apple tree is young, you can take two steps to encourage it to bear fruit without pruning. The first step is to rub the buds in the wrong place before they become branches in the wrong place. The second is to bend the stems almost horizontally for a few weeks to reduce growth and promote branching and fruiting.

For this method of fruit stimulation, you can tie the branches to the ground or the bottom with a string. Once the tree bears fruit regularly, cut the stiffest, straightest stems, the tallest in the tree, every winter. As the tree ages, remove the entire limb with fruiting sprays to make room for smaller replacement limbs.

In case you missed it: Fertilizer Management for Apple Trees: Organic, Compost, NPK, and Schedule

Apple Harvest
Image Source

Apple trees benefit from pruning. Pruning will allow the Apple tree to receive light and air. It would help if you harvested every year. However, never cut more than one-third of the tree in the same growing season. The best time to harvest apples is in late winter when the tree is dormant and before the buds appear. To prune an Apple tree, follow these steps: 

  • Remove all diseased, dead, or broken plant branches.
  • Remove all water sprouts – fast-growing vertical branches that usually have no side branches. 
  • Remove all suckers – fast-growing shoots that grow from the roots below the soil surface. 
  • Remove narrow V-branching crotches that form branches that do not support the weight of the entire fruit crop. 
  • Remove crossing or abrasive branches – where the two branches cross and rub. 

Pests and diseases control in Apple farming in the USA

Apple trees are susceptible to several pests and diseases. Insects that attack Apples include scale, Apple maggots, codling moths, fruit worms, leafhoppers, and bugs. Some affected diseases in Apple trees include fungal diseases, cedar Apple, powdery mildew, Apple scab, and fire blight. These Apple tree pests and diseases are difficult to control without preventive sprays. Common insect spray schedules include: 

  • When the buds begin to break, spray the multi-purpose fruit tree. 
  • Do not spray when the Apple tree is in bloom. 
  • When almost all flower petals have fallen off, spray a multi-purpose fruit tree every 10 to 14 days. 
  • Turn off all sprays two weeks before harvest.

In case you missed it: High Density Apple Farming – Planting, Spacing, Yield In India

Apple Farming
Image Source

For diseases, prevention is the best method. Choose tree species that are disease-resistant in your area. Prune trees regularly so sun and wind can enter the tree’s crown and cut off diseased branches, leaves, or fruits. Keep the garden clean of leaves, branches, and other plant debris to discourage fungal spores. 

The best way to prevent Apple disease is to choose varieties resistant to disease in your area. In addition to disease-resistant cultivation, prune trees regularly so that enough sun and air can enter the tree’s crown and cut off diseased branches, leaves, or fruits. Keep the garden clean of dead leaves and branches and plant debris. 

Apple tree care tips

  • Regularly water young Apple trees to establish the root system. Update the mulch every year, but remove it from the tree in the fall so that the rats do not build nests in the winter and eat the bark. 
  • Apple trees need training to build a strong frame of branches that can withstand the weight of heavy Apple crops. 
  • Although Apple trees are prone to pests and diseases, if you use a well-balanced organic fertilizer that allows the tree to thrive and is engaged in controlling organic pests and diseases, the tree can be used organically. It is possible to grow. 
  • Proper timing of pest and disease control is essential to avoid harming bees and interfering with pollination. Any pest control activity occurs from the flower and fruit development stage, not calendar-based. Research your nature and climate to determine which pests are most likely to cause trouble, and engage in timely prevention. 

Imports 

The United States imports fresh Apples to meet production shortages at the end of the season or before the fall harvest. Many of these Apple varieties are imported from the southern hemisphere. Only 5% of Apples used in the United States are imported. 

Harvesting for Apple farming in the USA

Freshly marketed or processed, Apples are traditionally cut by hand in large wooden or plastic bins measuring 20 to 25 bushels. Extreme care must be taken not to injure or damage the fruit during the harvesting process as it reduces the quality and storage and the profit from the sale of Apples. Harvesting Apples at the right time is key, not only to get high-quality fruit but also to maximize storage life. Each type of Apple has its own ripening time and can depend on weather conditions during the growing season. 

The ripening of the fruit is related to the change in color, texture, quality, and the development of characteristic taste. Fruits should be uniform, strong, and crisp at harvest time. Upon maturity, skin color varies from yellow to red. However, the maximum harvest time depends on the quality of the fruit and the required storage time. Hand-picking is recommended as it reduces scratches caused by fruit falling during mechanical harvesting.

In case you missed it: Organic Apple Farming, Cultivation Practices

Apple Farm
Image Source

Apple yield per acre in the USA

Standard Apple orchards at a spacing of 20 to 30 feet produce 20,000 to 30,000 Apples per acre. The current high yield of 500 trees has doubled the yield per acre. A crop circle of an Apple orchard can double that to more than 100,000 Apples per acre. Over 5,000 Apple growers in the United States grow an average of about 240 million bushels of Apples each year. These producers grow Apples on about 322 thousand acres of land.

Conclusion

Commercial Apple farming is very profitable when you use a proper farm management system. There are approximately 2,500 Apple varieties produced in the USA. The above steps are important for Apple tree growth in the USA. Are you planning a commercial apple farm in the following United States? This article may help you achieve your goals.

Top 17 Steps/Ways to Boost Pumpkin Yield: How to Increase Production, Size, and Quality  

Pumpkins belong to the Cucurbitaceae family. To get the maximum yield, your soil should prepare well for Pumpkin cultivation. Pumpkin is a popular vegetable crop grown in the rainy season. Below are the steps/ways to boost Pumpkin yield.

Steps/Ways to Boost Pumpkin Yield
Image Source

Steps/Ways to boost Pumpkin yield

Step 1: Factors that affect the growth of Pumpkins

Pumpkins can be grown as transplants on beds raised with black or silver plastic mulch and drip irrigation for optimal plant growth and production. The use of plasticulture in Pumpkin farming will;

  • Increase the soil temperature.
  • Maintain water availability in the soil. 
  • Reduce weeds. 
  • Improve soil tilth. 
  • Reduce fertilizers and pesticides under the beds. 
  • The use of drip irrigation also allows the use of fertilizers during the growing season. 

Growing Pumpkins using plasticulture will double the production of Pumpkins grown on bare soil or no-till production. Once some Pumpkins are formed, pinch the fuzzy ends of each vine to stop the vine’s growth and to concentrate the plant’s energy on the fruit. Vines pruning can help space and fruit formation. 

Step 2: Select high yield Pumpkin Varieties 

There are wide varieties of Pumpkins available. However, hybrid varieties are preferred by farmers when it comes to commercial cultivation, as these varieties yield more than regular varieties. Here are some common types: 

  • Ambili – It is high yielding variety. The average fruit weight is about 4-6 kg. Medium-sized flat round-shaped fruits.
  • Arka Suryamukhi – This type of fruit is round with thick ends. They are also orange in color, and as soon as they mature, white stripes appear on them. The average weight of the fruit will be about 1 kg. 
  • Arka Chandan – It is a medium-sized fruit in this variety that is light brown, and each fruit weighs about 2-3 kg. The crop ripens in about 120 days. 
  • PAU Magaz Kaddu-1 – There are also fruits of this type that are round in shape and medium-sized fruits which turn yellow as soon as they are ripe. 
  • Punjab Samrat – This type of fruit is small and green in color but turns brown as it grows. 
  • PPH-1 – This is the early type of maturation that comes with bony vine. The fruits are small and round, turning green to brown when ripe.
  • PPH-2 – This type of crop grows fast. The fruits are green but turn brown as they grow. In addition, these fruits are round and light green. The only difference between PPH-1 and PPH-2 is the softening of the fruit’s skin, and the production of PPH-2 is better than before. 

In case you missed it: Organic Pumpkin Farming, Cultivation Practices

Pumpkin Yield
Image Source

Step 3: Soil to increase Pumpkin quality

Pumpkins prefer well-drained soils with a pH of 6 to 6.5, which are rich in organic matter. This commercial crop can thrive on a variety of soils. Sandy loam soil with good drainage and all the essential organic matter is considered the best soil for Pumpkins. The most suitable soils for growing are sandy soils with about 10% organic matter. It is because the soil will heat up faster and drain faster.

If your soil is heavy, you can help your Pumpkins grow by adding sand and organic matter. Choose a sunny spot with well-drained soil. Add neem cake or neem solution to the soil one week before planting. Pumpkins grow best when sown at the base of the topsoil with a depressed ring at the bottom to keep it moist but well-dried. Like other types of squash, Pumpkins need full sun (at least six hours of light per day) to produce and ripen their fruit. 

Pumpkins should be grown on soils with good water intake and holding capacity. If Pumpkins are grown on sandy soils, access to irrigation is essential for optimal plant growth, uniform fruit set, and growth. Pumpkins need a constant supply of available moisture during the growing season. Water deficiency or stress, especially during flowering and fruit set periods, can cause flowers and fruits to fall off, resulting in reduced yields and smaller fruits. Pumpkins need a constant supply of moisture during the growing season. 

Step 4: Agricultural climate conditions for increasing Pumpkin production

Pumpkin is a very hot vegetable that can also withstand cold temperatures. Pumpkin fruit is cultivated worldwide due to its abundant use and benefits. There are wide varieties of Pumpkins that can grow in various climatic conditions. However, a temperature. Temperatures between 20 and 30°C are considered ideal. 

To grow Pumpkins for their best plant growth. Remember that it is not beneficial to grow Pumpkins in hot and cold areas as Pumpkin plants are very sensitive to cold, and Pumpkin seeds do not grow well in cold soil at higher ambient temperatures. Sometimes male flowers predominate over female flowers, resulting in lower fruit production this season. 

Step 5: Spacing for maximizing fruit production

In planting Pumpkins, the spacing varies according to the size of the field and the vine size. For higher yields, grow short vined or bush Pumpkin variety. Planting them at a spacing of about one meter between the plants and about 1.5 to 2 meters in rows is considered best for growing Pumpkins commercially. 

Step 6: Pollination accelerates the growth of Pumpkins

Honey bees are essential for proper pollination and fruit set. One hive per acre is the recommended honey bee population for maximum Pumpkin production. A population of pollinating insects can be severely affected by pesticides applied to flowers or weeds in bloom. 

Step 7: Plant density and sowing for maximum fruit production 

Pumpkin crops are usually planted by direct seeding but can be sown as transplants. Transplants are usually considered only when establishing a very early season crop or using a permanent bed. Good soil preparation is essential for high yields. Plant density will affect fruit size, yield, and the number of fruits per plant.

The higher the density of plants, the smaller the average fruit size, the higher the total yield, and the lower the fruit per plant. Pumpkins are sown between raised beds, and the distance between the plants along these beds depends on the vigor of the type of Pumpkin grown. 

Step 8: Seed rate and seed treatment to get a high yield

Usually, about 2 kg of Pumpkin seeds is sufficient for cultivation on one hectare of land to get a high yield. Benlate or Bavistin by 2.5 gm/kg of seed treatment is used to treat soil-borne diseases.

Step 9: Manures and fertilizers application in Pumpkin growth 

Proper manure and timely application of fertilizers directly increase the yield. In Pumpkin cultivation, add a balanced amount of manure and fertilizer to get higher yields. It requires about 50 tons of ordinary manure to be applied during the soil preparation, usually up to the topsoil in the last plow. The use of nitrogen and potassium is beneficial in increasing yield. Therefore, when preparing the soil, add 30 kg potash with about 50 to 60 kg nitrogen.

In case you missed it: Pumpkin Farming in Polyhouse (Gummadikaya) for Profit

Pumpkin Harvest
Image Source

Use caution when using nitrogen. It must be applied in two equal doses; 1/2 at the time of land preparation and the other in about a month of planting. Pumpkin plants have two types of flowers, male and female, which appear in early July. Male flowers appear first, followed by females. Find the first female flowers. Before the female flowers bear fruit, look for the vines to be strong and well established. It would help if you had a big vine to grow a big Pumpkin, so in a sense, you are choosing a vine before the Pumpkin. 

Step 10: Weed control for more plant growth

To control weeds, frequent weeding or earthing-up operations are required. The weeding is made with the help of a hoe or by hand. The first weeding is done 2-3 weeks after sowing. A total of 3-4 weeding is required to clear the field of weeds. 

As they begin to spread, Pumpkins naturally prevent the formation of many weeds. However, to prevent and stop the growth of weeds, apply mulch to your Pumpkin. Hand weeding and hoeing are also suggested forms of control, and herbicides may also be helpful, depending on growing preferences.

Step 11: Irrigation to achieve maximum yield

Proper irrigation is required at regular intervals. Immediate irrigation is required after the sowing of seeds. Depending on the weather, irrigation is required at 6-7 days intervals. A total of 8-10 irrigations are required. To consistently maximize yields of high-quality Pumpkins, farmers need to irrigate their crops. Pumpkin ferro irrigation is a preferred option for most domestic farmers.

Furrow irrigation requires a uniform, light slope and soil type that allows water to spread later without penetrating too deep into the soil. Overhead irrigation is another option in the country and can be implemented through travel irrigation, center pivots, lateral mowers, or fixed sprinkler systems. 

Step 12: Pruning to maximize crop yield

Initially, the best way to control overpopulation is to thin the plants as they grow. When the newly formed plants are well prepared, thin each mound until two or three plants are left on each one. Keep the best-looking or fastest-growing Pumpkins based on individual preference. Finally, use pruning to remove diseased fruit and other parts of the plant that have the potential to spread and infect other Pumpkins. 

Step 13: Tips for getting more Pumpkin production

  • Use row cover at the beginning of the season to protect plants and avoid pest problems. However, remember to remove the cover before flowering to prevent pollination. 
  • Bees are essential for pollination, so be careful when using pesticides or fungicides to control the fungus. If you must use it, apply only in the late afternoon or early evening, when the flowers are closed for the day. To attract more bees, try planting a bee house in your garden. 
  • Pumpkins need 1 inch of water every week. Give deep water in the morning and on very hot afternoons, especially during fruit sets. Avoid watering plants and fruits unless it is a sunny day. Wetness invites rot and disease. 

In case you missed it: Pumpkin Farming, Planting, Care, and Harvesting

Pumpkin Farm
Image Source
  • Put mulch around your Pumpkins to retain moisture, suppress weeds and discourage pests. 
  • If the plants show signs of yellowing, apply a side dressing of nitrogen fertilizer and magnesium sulfate. Fruits can be large, pale green, or dark green. Varieties of hybrids produce very large fruits, ranging in shape from globular to oblong.
  • Unfavorable growing conditions can also cause Pumpkins to turn yellow and die. Lack of water causes the plant leaves to wither and fall off. Plant growth slows down, and the growing fruit may wither, turn yellow and die. 
  • Pumpkins are pollinated by bees, spreading pollen from male to female flowers. In the cold, rainy weather, flowers cannot have pollen or cannot have pollen at all. Incomplete pollen can cause young Pumpkins to fall off. Cold weather in autumn kills grapes and leaves. The Pumpkins left in the garden will also fail to ripen and die. 

Step 14: Problems and their solutions for growing Pumpkin

Pumpkin is highly susceptible to pests and diseases, and many pests and diseases attack its crop. To get good quality and high yield from Pumpkin cultivation, it is necessary to prevent them. Yellow leaves in a Pumpkin plant can be a sign of nutrient deficiency.

Pumpkins need high levels of nutrients and constantly moist, well-drained soil. Nitrogen, an essential plant nutrient, dissolves in water, and repeated use of water removes nitrogen from the soil so that it is no longer available to the plant. Feed Pumpkins with 18-18-21 fertilizer at the rate of 1 tablespoon per gallon of water weekly or per the manufacturer’s instructions. 

Step 15: Pests, diseases, and their control for more plant growth

Although the plant is hardy, it can be affected by various diseases, especially powdery mildew. Keep plants away from walls to prevent infection. Pumpkin is highly susceptible to pests and diseases, and many pests and diseases attack its crop. To get good quality and high yield from Pumpkin cultivation, it is necessary to prevent them. Crop rotation is the best method to reduce crop pests and diseases.

Also, avoid growing Pumpkins in a previously used field to plant cucurbit crops. Pumpkins can compete with weeds when they make their mature canopy, if they are planted in a large plant population, or if they are planted on a plastic mulch. Pumpkins are labeled with several pre-transplant and post-emergency herbicides, depending on the specific grass problems required to control and stage the Pumpkin’s growth. In addition, under mild infection levels, early planting can reduce weed problems.

In case you missed it: Watermelon Farming in Texas: How to Start, A Step-By-Step Growing Guide for Beginners

Pumpkin Farming
Image Source

Insects can be a big problem in Pumpkin production. Cucumber beetles, aphids, squash vine borers, seed corn maggots, squash bugs, and spider mites can potentially reduce or damage the salable crop in any given year. Monitoring insect populations through scouting will help farmers determine when they should start and stop spraying Pumpkins and the interval between uses.

Many Pumpkin diseases can cause a decline in crop yields, especially bacterial wilt, viruses (powdery mildew, downy mildew), and scab. The crop’s best yield and the fruit’s color can only be possible if a fixed fungicide program is used to prevent leaf damage from mildew. Pumpkin vines suffer from many diseases, such as powdery mildew, bacterial wilt, phytophthora blight, and cucumber mosaic virus.

Crop rotation, good soil, and resistant varieties (where possible) can help reduce the incidence of these diseases in the field. Pumpkins are cut by hand at their maturity stage, color (orange or white), and size. Because fruits are pollinated at different times, more than one crop in the field is very common. To ensure high-quality products, pumpkins must be graded for size, maturity, and pest damage before marketing. 

Step 16: Harvesting Pumpkins for more production and yield

Pumpkins are generally harvested by hand when the fruit is fully ripe. The Pumpkin harvesting season begins when the plant’s stem begins to rot. However, harvesting can vary from crop to crop and also to market demand. It is better to start harvesting based on market demand at a young age. 

Pumpkins should be grown when they have a deep solid woody color and are hard. Harvesting will also help in collecting some seeds for further cultivation. When you see the uniform color change and the hardness of the rind, it means that the fruit is ripe. It is best to prune the fruit with a portion of the stem. It helps keep the Pumpkin fresh for longer.

In case you missed it: Watermelon Seed Germination, Time, Temperature, Process

Pumpkin Field
Image Source

Step 17: Pumpkin yield per acre and their affecting factors

It gives an average yield of 100 quintal/acre. The variety gets mature in 135 days. Maximum fruit yields are achieved on medium-textured soils with high water-holding capacity and good internal drainage. Production of your Pumpkin farming depends on several factors like cultivar, climate condition, proper care, variety, planting date, soil fertility practices, insect and control, planting equipment, cover crop type, etc.

Dates Farming in the USA: How To Start, A Step-By-Step Guide to Planting to Harvesting

0

The Date Palm’s scientific name is Phoenix dactylifera. Date Palms are very popular as landscape specimens in sub-tropical areas worldwide, especially in Southern California. Palms are famous for their great appearance, natural beauty, and easy care. Below are details about Dates farming in the USA below.

Dates Farming in the USA
Image Source

Commercial Date Palm production in the USA

A Palm can be very impressive as a specimen, and group planting can be wonderful. Date Palms grow well throughout Southern California, primarily used in landscaping. Date Palms grow taller yearly, and pruning Palms become more expensive and dangerous because they are taller. Commercial Date Palm growers in California usually sell their old Palms that have grown too long to be harvested.

These large Palm specimens are ideal for many landscaping projects. Palms are also very popular in landscape design for commercial buildings. California grows most of the Dates grown in North America. The Palm is the sweet fruit of the Palm tree and is believed to have originated in the Middle East centuries ago. They were brought to the United States, especially to California and Mexico.

Although the popularity of Dates in the United States has recently reached new heights due to their healthy but naturally sweet quality, the extensive history of Dates is not only in Arizona and the United States. They are staying and will be for years to come. The Date Palm, grown by home gardeners primarily for its decorative fronds, is grown as a landscape tree in zones 9 through 11 in the United States. The tree needs a shelter to grow in Zone 8 to protect it from frost damage.

Palms are a favorite in the desert southwest of Southern California. They are native to hot, dry climates and require very little water to thrive once established. The USA has become one of the most prominent exporters of Dates worldwide, known as the king of Dates. In the western part, California is the largest cradle of these histories. 

Soil and climate conditions for Date farming in the USA

Drainage is the most important factor when choosing where to plant the soil. This Palm performs well in sandy or clay soils and tolerates salt. The Palm must have full sun. It cannot live in the shade. It will thrive in all warm climates where temperatures rarely drop to -6.67°C. When the Palm is inactive, it can tolerate lower temperatures, but the average temperature in a flower or fruit should be above 17.78°C. 

Commercial fruit production is possible only when there is a long, hot growing season with a maximum daily temperature of 32.22°C and virtually no rain – 1/2 in the ripening season less than an inch (1.25 cm). Palms can withstand prolonged drought, although they require more water for heavy impact. It is best provided by periodic flooding from North African rivers and subsurface water rather than rain.

Dates varieties available in the USA

An estimated 3,000 varieties of Dates worldwide, but only a few are important in the global market. ‘Medjool’ is probably one of the most popular and highest dating Dates available. The fruits are large, soft, and well-shipped, which makes them the most preferred for export. Deglet Noor is a high-yielding, semi-arid crop, popular in North Africa and large in California. Barhi is another high-yielding crop. 

In case you missed it: How to Grow Curry Leaves in the USA: From Seeds in Containers at Home, A Step-By-Step Guide for Beginners

Dates
Image Source

Amri, Dayri, Deglet Noor, and Khalsa are well-known Medjol (very popular in the USA). Hundreds of varieties of Palm are available; however, the two most widely grown in the United States are “Daglet Noor” and “Medjool.”

  • Medjool is the best-selling history in the United States. They are large with a maple flavor, making them perfect for cooking and baking. 
  • Deglet Noor Dates are the second most available history in the United States. They taste better than medallions with a few nuts. 
  • Sweet Bahri Dates are commonly eaten as a snack or dessert and are popularly grown in Southern California. They are very delicate, which makes them difficult to cook. 
  • Confectionery Dates are small fruits that taste like caramel. 
  • Mozafati is a medium-sized Date Palm with a sweet taste and a soft, fleshy texture. 
  • Kadrawi Dates have a syrupy taste and texture, which makes them a popular choice for baking. 

When to plant Date Palm

Date Palm trees grow in warm, dry, or humid climates. It performs best in USDA hardiness zones 8-11 and requires full sun. If you live in the cold season, it is advisable to put your Palm in a container to move it inside when the winter comes. 

Dates farming in California

California is responsible for most of the Palm production in the United States, accounting for 90% of the total US Palm production. Most American Palms are grown in the Coachella Valley of California, north of San Diego, in the far southwest of the United States, and parts of western Arizona due to its high temperature and low humidity. 

Some California farms use traditional methods of planting and fertilization to obtain organic products. There are many certified brands of different types of organic Dates in the valleys of California. These products are globally recognized and are being exported to many countries of the world.

Different Dates farming states in the USA

In the USA, Southern California produced the most amounts of Dates followed by Arizona. Other USA states that produce Date Palms are Florida, Nevada, Southern Utah, and Texas, which also grow Palms on a much smaller scale. In the USA, California is the leading state in history, producing more than 90% of the country’s total production. Most of this production takes place in the Coachella Valley of Southern California.

In case you missed it: Dates Farming Information Guide

Dates Farming
Image Source

Propagation method in Date farming

  • Off-shots or suckers: This is the most common propagation method. The offshoots must be picked from the mother tree base. 4-5 years after planting, you must separate the sucker. A Palm tree can produce 10-25 offshoots throughout its productive life. It is a slow multiplication way that produces great crop yields. 
  • Seeds: Farmers avoid using this propagation method because the fruits are of poor quality. More than half of the Dates produce males that cannot be used for future multiplication. 
  • Tissue culture: This method encourages rapid multiplication of the Palm. 

Date Palm cultivation conditions in the USA

Palms can absorb a lot of water. Palms can withstand very cold weather and are known to survive in freezing temperatures. Palms are usually free of insects and parasites but can be attacked from time to time by fungi and scale insects. Palm cultivation was very labor-intensive and continues to be labor-intensive and dangerous. Large holes measuring eight feet deep and eight feet square were dug before planting.

Most of the holes were drilled on hard materials, including limestone. The holes were then filled with about five feet of compost and topsoil, and the rest was slowly filled around the newly planted Palm trees. The Palm was below ground level but had better water content and protection from hot winds and sun.

In many American farms, pre-harvest Dates are made by cutting the amount of fruit on each cluster to allow air to circulate and the Date to ripen more evenly. It means that the history of cultivation and harvesting on American farms will inevitably cost more and will inevitably cost more. Imported Dates are generally not as good as American-grown Dates because of the more labor-intensive farming techniques used on USA farms, but this is not always the case.

Water requirement for Dates farming in the USA

The Date Palm tolerates drought, especially once it is established. However, it must also have moisture during its flowering and fruiting season to produce a healthy crop. Young trees will also need more water than mature trees. Please do not allow the soil to dry completely, but always keep it from getting wet. 

Planting tips for Date Palms in California 

It can grow in many different regions, but for a Palm to bear quality fruit, it is necessary to have a climate with very little rainfall and a warm climate. In addition, the Palm requires a large amount of water. In many American fields, the fruit of the Palm tree is protected from possible rain, birds, and insects by placing a paraffined paper bag around the Palm cluster. It was done because of the ease with which rain can ruin Dates.

In case you missed it: Dates Farming Project Report, Cost, Profit Guide

Dates Harvest
Image Source

There is a hole around the wrapping to allow air to circulate inside the wrapping so that the Palms can ripen properly. In California Palm farms, a bell-shaped paper sheet is placed around the fruit. Almost all Palm farms in California use this technique to preserve history. Date Palms in the United States are the offspring of these original eleven mediocre Palm branches.

Over the past few decades, the amazing Palm has been planted extensively from the coasts of Southern California to the deserts across the state along the California-Arizona and Nevada borders as landscape Palms and Palm trees. Date Palms are also grown in many other US states, including Texas, Louisiana, Florida, Arizona, and Nevada. Many California homeowners are planting Palms in their yards for the annual harvest of home-grown Dates.

Date Palms are also being planted on a large scale today to appeal to their tropical landscape. These Palms have become a very popular choice for both residential and commercial building landscape designs. Palms grow well in most parts of Southern California and even further north in some parts of the state. Dates are often used in landscaping because, once ripe, they do not produce an annual crop that can sometimes attract insects.

Three main palms commonly grown in California are the Zahidi Date Palm, the Medjool Date Palm, and the Deglet Noor Date Palm. Another type of Palm that is also very desirable for its Palm and landscape is the Halawi Palm, which is even larger than the Medjool Palm. Medjool Dates in California like full sun in summer and lots of water.

They are very drought and salt-tolerant; once established, they can live long without water. Adult Date Palms can withstand temperatures falling from freezing to several degrees for a short period. To produce Dates, Date Palms need a lot of heat in summer and a little moisture, sun, and air. To get a large Palm crop in the summer, Date Palms also need frequent irrigation. 

Pruning for Date Palm tree 

Palm cultivation requires pruning to maintain a sufficient number of green leaves for optimal growth and harvesting. Scientists predict that the tree should have 75-100 leaves at the impact stage. No pruning is required for the first 4-5 years as only 20 leaves emerge annually. To improve the fruit quality, it is important to maintain a proper proportion of leaf clusters. The moisture is high when the ratio is high, leading to blacknose disease in the Palm. 

Pollination in Dates farming 

Successful Date Palm farming requires artificial pollination to ensure good pollination. In places where labor is relatively expensive, pollination is mechanized. Mechanized pollination reduces the number of male Palms required for pollination. In modern commercial Palm orchards with mechanized pollination, the ratio of males/to females is usually about 40 females per male Palm.

The most common pollination technique in cheap labor areas is to cut the male flower wires with a freshly opened male spatula and place two to three in the longitudinal direction and the inverted position, followed by the female flower wires. Place between pollen has been shaken on female flowers.

Pests and diseases problems and their control in Dates farming

Since most Palms grow in hot, dry areas, major pest problems are rare. Some examples include scale, which affects leaves, fruit stalks, or roots. Heavy infections can completely cover leaf surfaces and prevent growth. Carob moths lay eggs on the Palms, and the larvae bore into the fruit, while other types of moths are found in the Palms that cause damage.

In case you missed it: Frequently Asked Questions About Dates Farming (FAQs)

Dates Farm
Image Source

Beetles feed on leaves and fruit stalks, affect growth, and can kill the Palm, while termites can eat roots and make their way through branches, killing them, and stems can tunnel through, and weaken the Palms so that they eventually fall off. Other insects can include mites, mealybugs, Palm weevils, and worms. Black scorch is evidenced by black leaves and will stop the growth and cause rot in the stems and buds.

Diplodia forms yellow-brown lines on leaves and can weaken and kill new, young leaves. Leaf spot also affects the leaves, which can halve yield and age. Different types of Fusarium can cause leaf wilting and other diseases. Root rot disease is responsible for the premature death of Palm trees, which stops their growth.

Lethal yellowing is a pathogen is a common disease of coconut trees, but in Date Palms, the brown ones become thin with brownish brown and soft rot, eventually falling off the tree. Heavy rains or excessive moisture can cause fungal growth, although uncommon. Other diseases may include blight and white rot. 

How to take care of Date Palm

After planting Palm trees, you will want to take good care of the Date Palm trees. In addition to irrigation, Palm trees need good nutrition and pest and disease control. Manure makes an excellent fertilizer for Date Palm growth in the early spring season. Keep an eye on pests and disease problems and deal with them as soon as they are born. Once the Palm trees are planted, you rarely need to water them. Date Palms prefer dry soil, and excess moisture can prevent growth. 

Harvesting Tips for Date Palms

Generally, Dates ripen in six to seven months and are harvested from September to December. Palm harvesters either climb up the stairs, pick up the fruit by hand with mechanical lifts, or cut the ripe clusters into containers that shake the fruit vertically.

Yield 

Normally, in 5- to 8-year-old Palms, the first crop will be 17.5 to 22 pounds (8-10 kg) per Palm; at 13 years old, 132 to 176 pounds (60-80 kg). Some improved crops at higher densities have yielded more than 220 pounds (100 kg) per year. In California, Daglet Noor can produce 4.5 to 7 tons per acre (11-17 tons per acre). 

In case you missed it: Organic Dates Farming, And Cultivation Practices

Dates Tree
Image Source

Frequently Asked Questions about Dates farming (FAQ)

Will you grow Dates in the United States? 

Southern California produces the most Palm oil in the United States, followed by Arizona. Other states, such as Florida, Nevada, South Utah, and Texas, also grow Palms on a much smaller scale. 

Where are Medjool Palms grown in the United States? 

In the United States, Palms are grown in southern California, southwestern Arizona, and around Las Vegas, Nevada. The Date Palm is grown in parts of Mexico and South America. 

Can Dates grow in Florida? 

Many different species of Palms are planted in fields all over South Florida just for their beauty. Some species are Canary Island Palms, small Palms, and Senegal Date Palms. 

Can I grow Dates in California? 

Palm Palms grow well in most parts of Southern California and even further north in some parts of the state. Male Palms are often used in landscaping because once matured, they do not produce an annual Palm crop which can sometimes attract insects. 

Which soil is good for Palm? 

Date Palm trees tolerate the salinity of the earth. For best growth and high fruit production, sandy loam soil with good moisture retention, ventilation, and proper drainage is preferred. Calcium carbonate soils should be avoided. 

Top 16 Steps/Ways to Boost Broccoli Yield: How to Increase Production, Size, and Quality

Broccoli is a delicious member of the Brassica family and is packed with healthy vitamins. It requires very little care throughout the growing season. Broccoli can be grown twice a year, in late spring and autumn. Broccoli is a cold-season vegetable. Therefore, it should be applied in the year’s colder months for best results. 

Steps/Ways to Boost Broccoli Yield
Image Source

The growth of the Broccoli plant will be affected by the high temperatures of the summer months. Broccoli is an annual herbaceous or biennial herb grown for its flower heads and used as a vegetable. The Broccoli plant has a dark green stalk, or stem, which gives rise to thick, leathery, long leaves ranging from gray to blue to green. The plant produces many large, branched green flower heads covered with white or yellow flowers. Here are some common tips and steps most people use to get more Broccoli yield. 

Top 16 steps/ways to boost Broccoli yield

Step 1) Select high yielding Broccoli varieties

Some high-yielding varieties are Calabrese, Black Broccoli, Green Goliath, Purple Cap Broccoli, White Sprouted Broccoli, Palam Samridhi, Punjab Broccoli-1, Roylegreen, Evergreen, Danube, Yugren, Salinas Pilgrim, Green Mountain, and Central, Premium Crop, Premium Pusa Broccoli. Choose a variety of Broccoli that suits your climate;

  • Imperial: Grows best in hot weather. Growth slows down as the temperature cools. 
  • Green Magic: It tolerates hot temperatures; A small plant with smooth heads. 
  • Calabrese: Italian heritage with a large head and many side shoots. This variety has large heads and performs well with autumn planting.
  • Belstar: A heat-tolerant variety with many sides shoots that grow well in mild winters. 
  • Green Magic: This type is heat tolerant. 
  • Green Goliath: It has good heat tolerance and very large heads. 
  • Flash: This type is known for its relatively fast growth rate. 

Step 2) Land preparation for Broccoli growth

The first basic thing every Broccoli grower should know to grow Broccoli is to start preparing the land a few weeks before showing the seeds. All Broccoli growers remove all weeds from the field, plowing twice to three times to improve soil aeration and drainage. It is essential because we can grow Broccoli as an annual plant indoors and outdoors. If you plan to farm outside, this can be done either in early spring or fall.

If you plant them in the spring, they will be ready for harvest in the summer. On the other hand, planting in the fall will make Broccoli ready for harvest in the winter season. Choose a land with full sunshine as lack of sunlight can cause many disorders in Broccoli, such as thin-leggy plants and sub-heads. To increase soil fertility, combine soil with basal fertilization with organic-rich compost and crop boosters. 

In case you missed it: Growing Broccoli in Greenhouse – Planting, Farming

Broccoli
Image Source

Because Broccoli is a cold-season crop, it is usually planted in the spring. It would help if you started planting when the soil temperature reaches at least 10°C and the possibility of hard frosts passing in your area. Flower heads (edible part of Broccoli) thrive against ambient temperature. In the summer heat, Broccoli heads ripen in July faster than heads ripened in cold spring (4-6 days). The Broccoli heads should be closed and hard (no yellow petals are visible) to be considered good quality. 

Step 3) Plant in rich, tight soil for best growth

Broccoli needs a lot of nutrients, so be generous with compost and balanced organic fertilizer when preparing the planting space. Large Broccoli plants flutter in the wind, but only when firmly anchored in their favorite soil type, a soil-based loom with a dense, almost neutral pH. It can grow in various soils, but clay loam and sandy loom soils are best for Broccoli cultivation. Most farmers use slightly acidic soils for growing Broccoli, which has a pH range of 6 to 7.

It would not recommend choosing alkaline soils because some soil conditions can cause root cancer in plants, affecting plant growth and productivity. Also, Club Root is caused by a pathogen called Plasmodiophora brassicae. When growing plants in acidic soil, the plant can tolerate soil and water with high salinity levels. Farmers and many agronomists recommend using pre-planted fertilizers for the proper growth and development of plants, such as well-decomposed organic fertilizers or slow-release fertilizers.

After preparing the field, made rows 70-80 cm (27.5-31.5 inches) apart. Make sure the soil is well-drained and very fertile. If your soil test shows that you have poor quality soil, or if your soil drainage is very poor, there are several things you can do to prepare your garden for planting Broccoli: 

  • If your soil is flooded, consider making a garden box to lift your soil off the ground. If possible, use cedar wood to make your planter box, as it does not rot when exposed to water. 
  • Add up to four inches of solid fertilizer to your soil to increase soil fertility. If soil is in poor condition, add organic fertilizers with high nitrogen to enrich the soil. 
  • Organic fertilizers such as alfalfa, cottonseed meal, and manure are good choices for Broccoli.

In case you missed it: Organic Broccoli Cultivation, and Growing Practices

Broccoli Harvesting Machine
Image Source

Step 4) Broccoli seed germination tips for better yield

Broccoli seeds usually germinate in 10 to 14 days. This germination period is measured from the initial planting to forming the first set of real leaves rather than radical. Broccoli seeds can be germinated outdoors or started indoors and transplanted after they have grown. 

Step 5) Water management to improve crop yield and quality

Drip irrigation is very beneficial for Broccoli crops. It improves crop yield and quality. Depending on the weather conditions, light and frequent irrigation should be done after 10-15 days intervals, and soil moisture should be maintained around the roots. 

Step 6) Fertilizer management for better growth

Before fertilizing the Broccoli crop, the soil should be analyzed, and then the amount of fertilizer should be determined. Before planting, add plenty of compost, blood feed, or cotton seed feed to the soil. Consider watering with fish emulsions or other organic fertilizers every three to four weeks during the growing season. 

It usually needs 150 kg nitrogen, 100 kg phosphorus, and 170 kg potassium per hectare. At the time of transplantation, 120 kg of nitrogen, 80 kg of phosphorus, and 60 kg of potash should be added. Then, use the remaining half nitrogen in two divided doses about 30 and 45 days after transplantation. Provide micronutrients as required by the crop. The Broccoli plant has a congenital deficiency, so if it appears in the field, apply boron with foliar spray or water fertilizer.

Firstly, you want to keep in mind the soil condition of the field through semi-annual or annual soil testing before using any method of fertilizer application. No two fields are alike. No one can advise you on fertilizer application methods without considering your soil test data, tissue analysis, and crop history of your field. However, we will list many farmers’ most common fertilization schemes. In most cases, Broccoli requires heavy fertilizer to thrive and produce more than one head per plant. 

In case you missed it: Broccoli Farming in Polyhouse for Profit – A Full Guide

Broccoli Plant
Image Source

Step 7) Weed management to get more production

Weed control in the Broccoli plant can be achieved with herbicides, mechanical control, and a good crop rotation system. Broccoli competes well with weeds but should be kept free of weeds until the plants have already reached the pre-heading stage. Many pre-transplant and post-emergency herbicides are available for Broccoli, depending on the problem and the Broccoli’s growth stage.

If the level of infection is mild, cultivation can be used to reduce weed problems. Weed management 30 days after transplanting, remove the weed. This weed competes with the crop, which is important for food, sunlight, and wind, keeping the crop free from weeds. Also, rack the soil on the bed, which helps raise the oxygen level to the root zone.

Step 8) Pest and disease management for more Broccoli production

Pests and diseases are a major potential problem in Broccoli production. Some pests in the Broccoli plant are flea beetles, cabbage loopers, imported cabbage worms, diamondback moths, and aphids that damage crops. Monitoring insect populations by traps or scouting will help you determine when you should use pesticides and how often to spray. Many diseases of Broccoli can damage the crop.

Common problems in the Broccoli plant are Black rot, bacterial head rot, blackleg, downy mildew, and Alternaria. These plant diseases can be prevented by developing a good crop rotation program and using disease-resistant varieties. Many pesticides used to produce Broccoli are limited and require a pesticide applicant’s license to purchase them.

Pesticide applicant tests are usually conducted at county extension offices, so you should contact your local office for the dates and times of these tests. When using any pesticide in your enterprise, remember to follow all label recommendations regarding application rates and personal protection equipment (PPE) requirements. Ensure that Worker Protection Standards (WPS) apply to owners and employees.

Step 9) Tips for Broccoli growing taller and flowering (Broccoli bolting)

Broccoli grows taller and begins to bloom at maturity to form seeds and complete its reproductive cycle. It also occurs in response to stress and extreme soil temperatures. Sometimes, Broccoli grows long and bolted before it has a chance to grow big. The Broccoli will grow taller and flower in response: to high soil temperature (much higher than 21°C) and low soil temperature (much below 10°C). 

In case you missed it: Growing Broccoli In Pots, Containers, Indoors Guide

Broccoli Farm
Image Source

Step 10) Tips for growing large Broccoli heads 

  • Broccoli needs well-fertilized soil to grow correctly. Broccoli plants need their place to grow well because they are a heavy feeder. 
  • Applying them too close will hinder their development. Keep a plant distance of about 3 feet between rows of Broccoli plants. The Broccoli is ready to land on your plates when they become heads. 
  • The Broccoli plant needs many nutrients to grow as a fast-growing plant. Your plant will benefit from a monthly dose of rich manure or tea compost. 
  • Like other vegetables, Broccoli needs to be well hydrated. Water the plant roots to a depth of about an inch per week. 

Step 11) Why isn’t my Broccoli blooming? 

Timing is one of the reasons why Broccoli doesn’t have a head or a small head. Broccoli likes to be kept cool. Broccoli should be planted early spring for a summer harvest and early fall. 

Step 12) Causes of small Broccoli heads

Broccoli needs constant moisture from the time of sowing to the time of harvest for easy transition from the plant stage, when the plants are growing, to the reproductive stage, when the head is formed. Irregular watering can put pressure on plants, causing them to form small, individual flowers with a bitter taste.

Step 13) Broccoli yield per hectare 

After years of experience, a good yield will be 20 tons per hectare (1 hectare = 2,47 acres = 10,000 square meters). The weight of each Broccoli plant depends on the variety and growing conditions. Broccoli farming, though demanding, can offer significant profits. 

Step 14) Why are my Broccoli plants so tall? 

Broccoli grows taller and begins to bloom at maturity to form seeds and complete its reproductive cycle. It also occurs in response to stress and extreme soil temperatures. 

Step 15) Problems and their control on the Broccoli leaves 

Yellow color spots on the upper leaf surfaces and gray powder on the underside. If there are irregular yellow-brown spots on the upper surfaces of the leaves on your plants and also gray powder or mold on the underside, it is a sign of mold on the underside. A fungus causes the disease. To prevent this problem, you want to improve air circulation and keep your garden free of plant debris. In addition, you can choose to plant resistant varieties and rotate crops. 

Pale yellow leaves – If the leaves turn pale and yellow, and if they bend, the plant may die. It is caused by the so-called “yellow cabbage” fungus Fusarium soil. It affects plants where the soil is warm and is often spread by leafhoppers. To treat this problem, remove infected plants and control the leafhoppers. Also, ensure your garden is free of weeds, as they can prevent disease. It is essential to keep the soil evenly moist but not wet. Make sure to rotate crops. 

Yellow leaves and stunted plants – This symptom shows root cyst nematodes with small shiny springs on the roots. These microscopic, insect-like animals live on a water film that wraps up dust particles. In mid-summer, solarize the soil with clean plastic and rotate the family cabbage crops to prevent this problem. 

In case you missed it: Broccoli Farming; Planting; Care; Harvesting – A Full Guide

Broccoli Farming
Image Source

Deformed leaves with white or yellow spots – This could signify a Harlequin bug or a stink bug. The symptoms are black, with bright red, yellow, or orange color markings. Harlequin worms are insects that suck liquid from plant tissues, causing yellow and white blotches. You can handpick and destroy insects and eggs. You should keep the garden free of weeds and crop residues, as these are where these insects grow. Stink bugs are green shield-shaped insects that eat fruit. You should remove weeds and garden debris, so they do not attack your plants.

Step 16) Broccoli harvesting tips for more production

Harvest Broccoli in the morning. Cut the Broccoli before it heats up, when the buds are firm, just before the scalp swells. Most varieties of Broccoli are ready for harvest when their heads reach the size of a large fist. If you wait for too long, the buds will open. You can still eat the stalks, but they will be harder. 

The best harvesting time for Broccoli is in the morning, as the head and stalks will be the strongest. Cut about 6 inches of stalks along the heads. Make an angled cut so that water does not accumulate on the cut surface and any side shoots still growing rot. 

The Broccoli is ready to be harvested when the flowers are tightly closed in the middle but begin to loosen slightly around the edges. If the buds start to turn yellow, prune immediately. After that, cut the stem at an angle to prevent rot. Sometimes, the plants produce another head, so keep watering after harvesting. Broccoli heads are usually larger in fall than in the spring crop.