Home Blog Page 57

How to Start Honey Bee Farming/Beekeeping from Scratch: A Complete Guide for Beginners

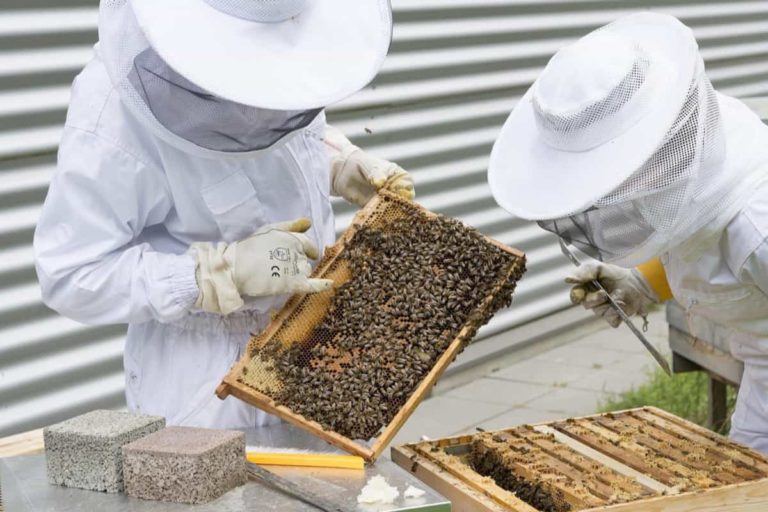
Bee farming is such a fun and rewarding experience that most beekeepers, especially new beginners, wonder if they can make a full-time income. Becoming a full-time beekeeper requires a lot of experience, money, planning, and bee management strategies. Bees generally convert the nectar of flowers into honey and store this honey in the hive.
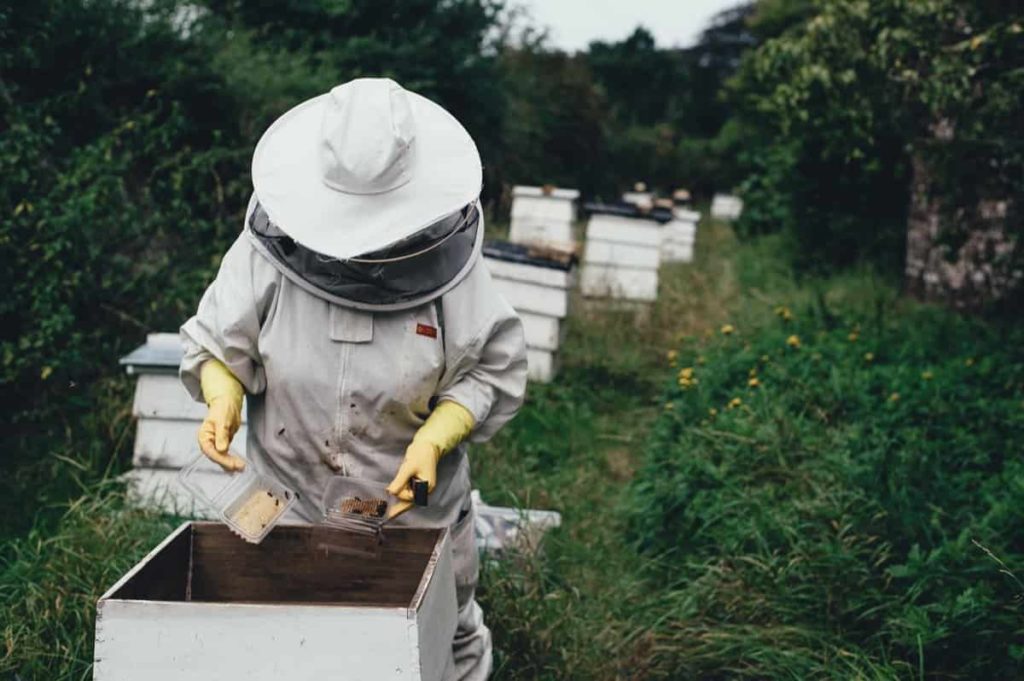
How to Start Honey Bee Farming/Beekeeping from Scratch
Image Source

Farmers are earning money by starting this business, and the productivity of farming increases due to pollination. But, after facing constant losses in them, farmers have turned to the beekeeping business. So let’s move on to learning more about bee farming. 

How to start Honey bee farming/Beekeeping from scratch

How do I start a beekeeping business? 

Make sure you know how you can start your own beekeeping business. As mentioned, a farmer who begins beekeeping needs technical knowledge. So, the farmer or entrepreneur should work with farmers already keeping bees in the area for a few months. You can also get a certificate for this business from a reputed training institute. 

Best place for bee farming business – You should choose a suitable place to start a honey business that is dry. High humidity affects bee flying and honey ripening. Therefore, there must be a natural or artificial source of water on site. Bees can be housed in shade trees, or artificial arrangements can be made to provide shade. 

Manage the pollination bee – As we all know, bees make honey by taking pollen and sap from plants. Therefore, the farmer needs to keep bees near such fields so that they can leave the plants. Pollen and sap can be easily obtained. Consequently, it is advisable to establish bee colonies in areas with at least 10% flower area. 

Bees free from pests and diseases – If a farmer or entrepreneur expects good returns from his bee farming business, he must protect his hives and the organisms that produce the products. Therefore, the trader should try to keep them away from pests and diseases. Generally, wax bugs, ants, wasps, wax beetles, birds, trachea mites, parasitic mites, varroa destroyers, bee mites, brood mites, etc., are common pests. 

Bee harvesting – Harvesting products in older and top bar hives requires the grower to select hives that contain honey with a thin layer of beeswax close to the nest’s exterior. Honey is extracted from the super hive section with the help of honey extractors. 

What is the most common type of bee? 

  • Indian Hive Bees (Apis Cerana Indica) 
  • Rock Bees (Apis Dorsata) 
  • Little Bees (Apis Florea) 
  • European and Italian Bees (Apis Mellifera) 
  • Dammer Bee or Stingless Bee (Tetragonula erydipensis) 

What things should be kept in mind during beekeeping?

  • Connect with the bees and learn about them practically in the area or region where you want to start this business. Get good beekeeping training. 
  • Assume that the farmer or entrepreneur has no experience working with bees. In this case, they should work with local entrepreneurs or farmers to get all the information about the beekeeping process. 
  • Next, the entrepreneur must create an effective plan for using the equipment and selling the product. 
  • While making a bee farming business plan, just set realistic goals and start small in the initial stage. 
  • When you get some experience in the honey business, you can also think of bigger projects. However, the equipment that can be used in this project and the species of bees that should be kept depending on the local situation. 
  • Traders or farmers working on a beekeeping project should identify a local agent to sell the products in advance. Besides this, Ayurvedic pharmaceutical companies, local bakers, candy makers, and many others can be major honey consumers.

In case you missed it: How this Woman Made 2 Lakh per Month from Beekeeping: A Success Story of Honey Bee Farmer
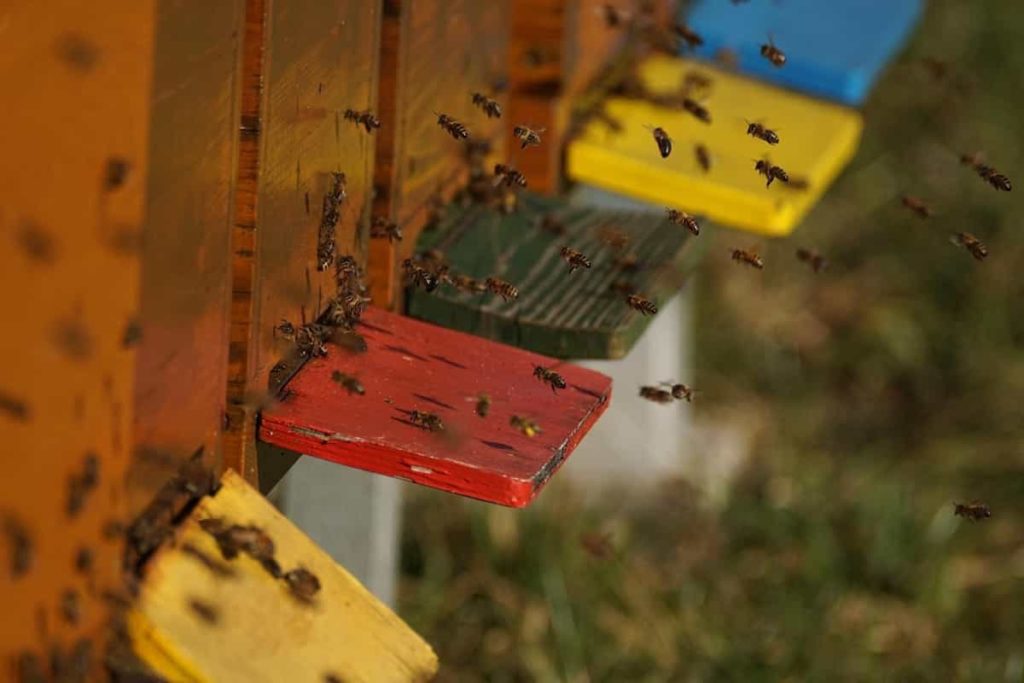
Beekeeping
Image Source

Is commercial beekeeping a profitable business? 

  • Beekeeping can be very profitable, and growers with 300 or more hives are considered commercial beekeepers. 
  • Commercial beekeepers move their colonies to provide pollination services to farmers and provide their bees with abundant nectar sources for honey production. 
  • The high demand for nutritious products is driving growth as people become more aware of the benefits of maintaining a healthy lifestyle. 

What is the most important reason for beekeeping? 

By pollinating trees, shrubs, and herbaceous plants, bees are important in producing food for all the other animals and birds in forest ecosystems that depend on them for edible berries, seeds, and fruits. There are several reasons for starting bee farming, including: 

  • Honey is probably the obvious answer – Beekeepers want to produce fresh honey. A single bee can produce about 1/12 teaspoon of honey in its lifetime (about 6 weeks), and with a colony containing thousands of bees, it can grow rapidly. 
  • Beeswax is also a popular product that comes from bees. In general, bees produce wax from special glands on their abdomen. Wax builds up in the honeycomb and becomes the structure of their home. It is mainly used in candle-making and cosmetics. Many creams contain beeswax. 
  • Pollination: If you want better yields from your gardens and orchards, bees can help. Beekeeping ensures better pollination of flowering plants. It means more food for you and the wildlife. Bees are the heroes of pollination efforts in the modern agriculture sector. Though, the role of native bee species cannot be overlooked. 

How much land is required for beekeeping? 

  • Colonies are recommended at 3 per hectare for Italian bees and 5 per hectare for Indian bees. 
  • Beehives face east/southeast, away from the surface, and are located near water sources, nectar, and pollen. In addition, they should be easily accessible in the working room. Other considerations include afternoon shade, winter ventilation, protection from neighbors, good airflow, and drainage.

How many bees do you want to start a colony? 

It’s probably two or three cupfuls bees. It’s probably 100 to 200 bees in a very small space. 

How many bees do you need to make a profit? 

  • A full-time living as a beekeeper would require at least 500+ bees. It will take a diversified approach and not rely solely on honey production. 
  • Growing slowly is recommended to gain experience and scale properly by applying sound bee management techniques. 

How many beehives can one person manage? 

  • The next logical question when considering beekeeping as your full-time occupation is how many hives of bees a person can manage. 
  • The number of colonies one person can effectively run depends on whether you focus on honey production, beekeeping, or other profitable practices. 
  • One person working full time can manage 100 to 150 hives. As a full-time beekeeper, a person can manage a colony of 500 to 800 bees but will still need seasonal workers to help harvest the honey. 
  • If you only keep bees for honey production, it becomes difficult for one person to manage many hives. Managing bees for honey production is a much more time-consuming and difficult task than raising and selling bees. 
  • Additionally, honey production requires a lot of expensive equipment and supplies when you scale your fish meat. If your primary focus is raising and selling bees, it’s easier to manage while still working full-time. 
  • Experienced beekeepers often successfully manage colonies of 100-150 bees while maintaining a full-time job. But it takes time to gain experience, grow your bees, and build a market to sell them.
  • Honey production takes longer and requires more equipment than keeping and selling bees. However, the following figures will give you some idea of ​​what is possible regarding beekeeping for profit. As a part-time hobby, a person can manage 25 hives without careful planning or time management. 
  • An experienced beekeeper who focuses on beekeeping for sale can manage 100 to 150 beehives and still have a full-time job. However, if you are keeping bees for others or renting out your bees for pollination services, you can also manage many hives part-time. 
  • Full-time beekeepers can manage colonies of 400 to 600 bees but will need seasonal workers to help harvest the honey.

In case you missed it: Honey Bee Farming Project Report, Cost, Profits
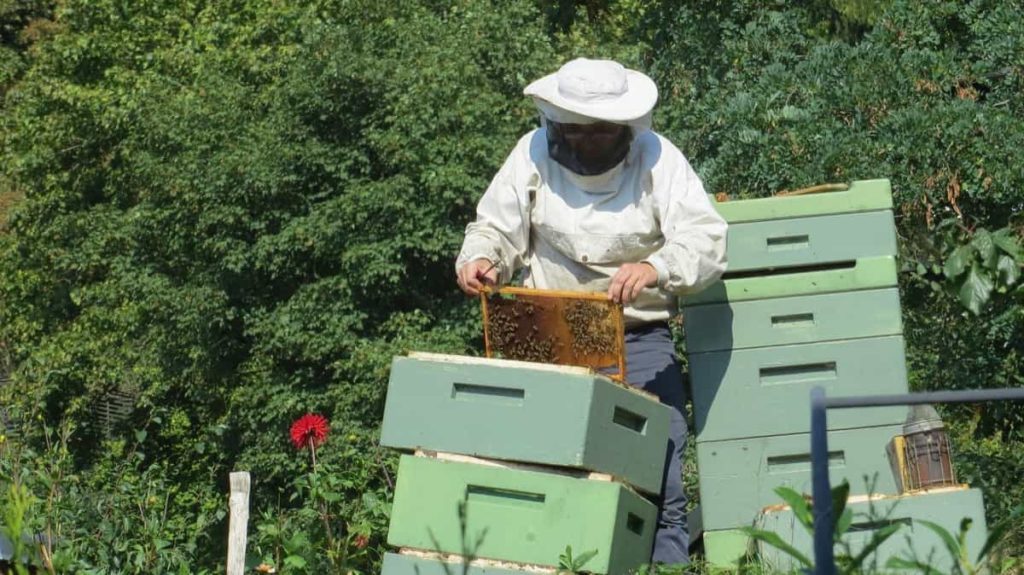
Honey Bee Farming
Image Source

When is the best time to start bee farming? 

  • Spring is the best time to start your beekeeping journey in most areas. 
  • As the winter season ends, the increase in forage makes it the perfect environment for new hives to thrive. 
  • Also, expanding colonies have the easiest time for a bee colony to build its colony. 

How do you start beehive for beginners? 

  • Start your beekeeping education and learn some basics. 
  • Find a suitable location for the bees. 
  • Estimate your budget. 
  • Order your bees. 
  • Choose the hive type and order it. 
  • Buy basic beekeeping tools. 

Once you have decided on the hive type, you will want to buy it, but you will also require some bee tools, protective clothing, and feeding equipment. 

What is beekeeping called? 

  • The science and art of bee management, known as apiculture or beekeeping, is a centuries-old tradition. The first beekeepers were hunters who sought out wild bee nests, which were often destroyed to obtain the sweet prize, called honey, for which the insects are named. 
  • Apiculture or bee farming is keeping and maintaining bees and their hives. 
  • A beekeeper is also called an apiarist, and the entire colony is called an apiary. Beekeeping has grown in popularity recently, and raw honey, beeswax, and royal jelly products are in high demand.

How many bee hives does it take to make a living?

  • If you are a beginner in beekeeping to make a full-time income, you must find the conditions for starting a bee farming business. 
  • Not everyone has the same income needs or beekeeping goals, and the number of bees needed to make a living varies greatly from one beekeeper to another. 
  • Some beekeepers need only a few hives to make a living because they are good marketers and understand the retail market well. 
  • Many experienced beekeepers will have a few hives but make money selling beekeeping supplies and providing training. 
  • Other beekeepers focus on raising and selling bees, thus creating a profitable business. However, if your goal is to profit only from honey production, you will need beehives, equipment, and land and bee management.

Can you begin a beehive without buying bees? 

  • It is common for new beekeepers to wonder if bees will return to an empty hive. 
  • However, if you can attract a swarm of bees to the hive, you won’t need to buy bees, to begin with. Yes, you can attract bees to an empty hive with a little effort and time. 

How much does it cost to maintain a beehive? 

The minimum cost to start bee farming with one beehive is about $760 for the first year. A set of hive components costs about $270. A package of bees is about $175. Protective gear and basic equipment cost $165, while miscellaneous costs for supplies and sales tax are about $150. 

In case you missed it: Honey Bee Farming Information Guide
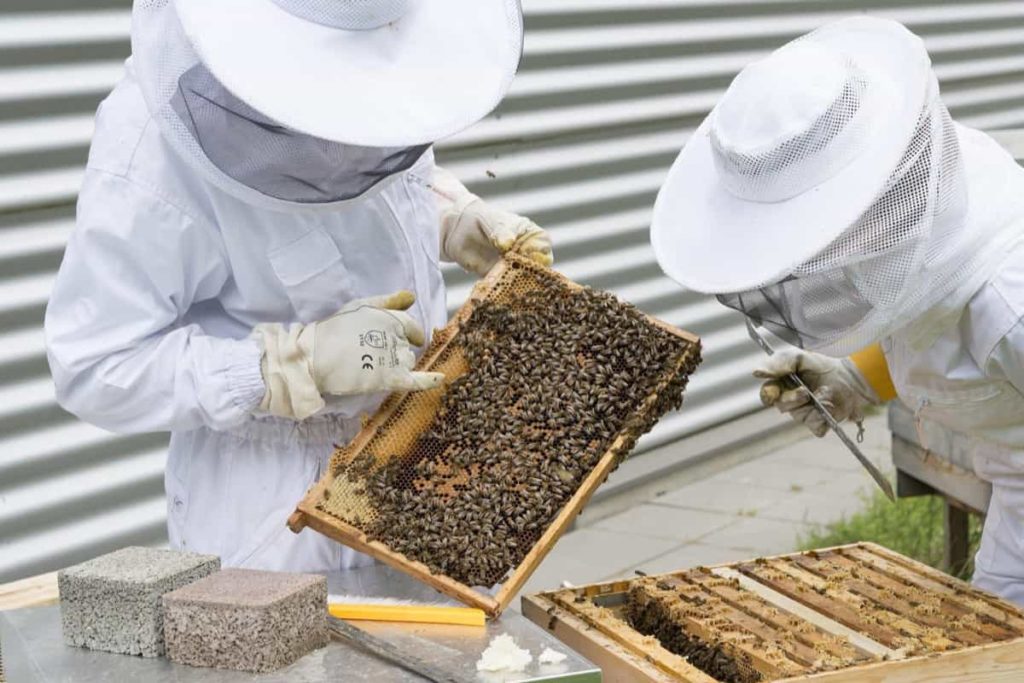
Honey Bee Box
Image Source

How many times harvest honey from a hive in a year? 

Harming honey two to three times per season in a healthy, productive hive is normal. Most beekeepers will harvest honey between June and September, but how much honey you get depends on several factors. 

How do you attract bees to a beehive? 

  • Determine when the bee season is
  • Buy or make a bait hive
  • Apply the lure
  • Position your bait box
  • Wait for the bees to move in

What to know before starting a beehive? 

  • Why do you want to keep bees? 
  • Is keeping bees legal
  • What does it cost to keep bees? 
  • Where are you going to put them? 
  • How long will they take? 
  • Get neighborhood help
  • Which equipment is best for you?

How long do honey bees take to produce honey? 

  • It takes about 550 bees 2 to 3 weeks to produce one pound or 454 grams of honey. Honey bees take approximately 2 to 3 days for a strong colony of bees to fill 10-frame honey super with honey during a strong nectar flow. 
  • The amount of time a bee colony takes to produce honey is subject to factors such as colony strength, weather conditions, mite levels, and time of year. 

Which direction should a beehive face? 

  • Face the hive entrance away from prevailing winds. 
  • If you are starting beekeeping in the Northern Hemisphere and for the Southern Hemisphere in the North, face the entrance in the South direction. 

What equipment is needed for beekeeping? 

  • The basic equipment required for extracting honey is a comb knife, honey extractor, honey strainer, wax melter, and storage containers. 
  • A beekeeper should choose equipment with the type and capacity best suits his needs. 

Different geographical conditions can require different equipment for beekeeping. Therefore, which tools will be suitable for the entrepreneur, the entrepreneur can find out from the local beekeepers, although the following is a list of some of the tools.

  • Hive stand
  • Bottom board
  • Hive bodies
  • Painting
  • Smoker
  • Hive tool
  • Protective wear
  • Frames and combs
  • Queen excluder
  • Inner cover
  • Outer cover
  • Plastic hive equipment

What things should be kept in mind during bee beekeeping?

  • Work carefully
  • Inspect in good weather
  • Wear protective gear 
  • Keep the hive clean

Is beekeeping a lot of work? 

One source claims that the total time you spend with a hive comes to about 15-30 hours a year. Another says half an hour a week should be fine for a beginner. It depends on several factors, including your willingness to get out and do the right thing. 

In case you missed it: Beekeeping Training Centers; Institutes in India
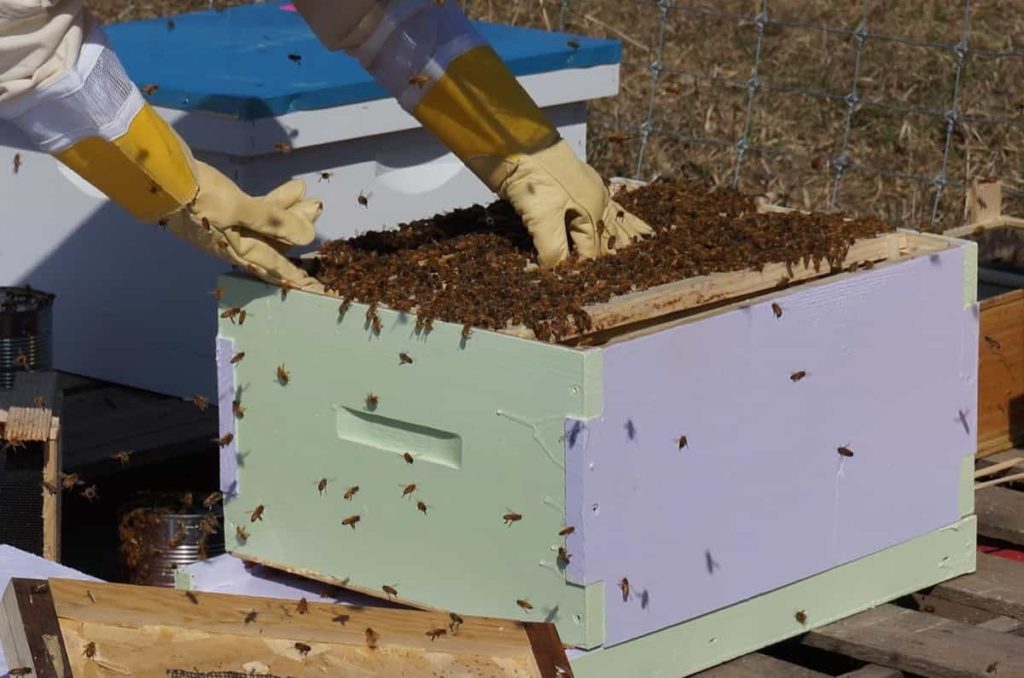
Removing Bees from Box
Image Source

What do bees do in the winter? 

Without blankets, fires, or adjustable thermostats, honeybees must stay close enough to stay warm (and alive) in the winter. When winter temperatures drop below 10°C, honeybees retreat to their hives and form a winter cluster to keep warm—such as a large three-month-old slumber party. 

Why is beekeeping ideal for homesteaders?

  • Homesteaders are looking for ways to be self-sufficient, and beekeeping is an ideal activity to take them one step further. 
  • Keeping bees not only provides delicious honey for home consumption. It also increases vegetable production, benefits the environment, and has the potential to generate additional income. 
  • Keeping a hive or two doesn’t require a lot of money or space, and it only takes half an hour a week to manage and care for two hives. 
  • If you’re a backyard gardener or farmer looking for a worthwhile project, consider beekeeping for fun and profit. 

Can I harvest honey in the first year? 

  • The main reason most people keep bees is to harvest the delicious honey they produce, although some do so for environmental reasons. Regardless of why one is keeping bees, harvesting honey is probably the primary benefit for most. To that end, you’ll want to know how many times you can harvest honey from one hive each season. 
  • Hive size will affect honey production, but other factors will affect how much honey you get. The weather conditions and climate you live in and the surrounding plant life are all things to consider. 
  • You also need to consider problems that can affect the health of your hives, such as disease and pests. It depends on the health of your bees, their hive style, your location, the weather, and the forage available. 
  • You should never plan on harvesting in your first year, but you can expect to get anywhere from 25 – 100 pounds of honey from an established colony in a successful year. 
  • When considering a harvest schedule, you need to consider the weather conditions where you live. Consider when the weather typically turns cold and, consequently, when native plant life begins to die out. It is when your bees will stop collecting nectar and producing honey. So if you take honey too late in the season, you risk having too much to eat and too little to feed your bees during the barren winter.

What is the importance of beekeeping? 

  • Beekeeping helps provide pollination services, ensure crop production and maintain plant biodiversity in natural ecosystems. Beekeeping has positive environmental consequences. 
  • Honey bees mainly pollinate many flowering plants, thereby increasing the yield of certain crops such as sunflowers and fruits. 
  • Honey is delicious and highly nutritious food.
  • Beekeeping can help low-income communities earn additional income from selling bee products to achieve sustainable development. 
  • Additionally, beekeeping helps to provide pollination services, ensure crop production and maintain plant biodiversity in natural ecosystems. Thus, beekeeping is an important agribusiness in India that promises good returns to farmers and helps increase agricultural production. 

In case you missed it: Loans and Subsidies on Beekeeping in India (Apiculture)  
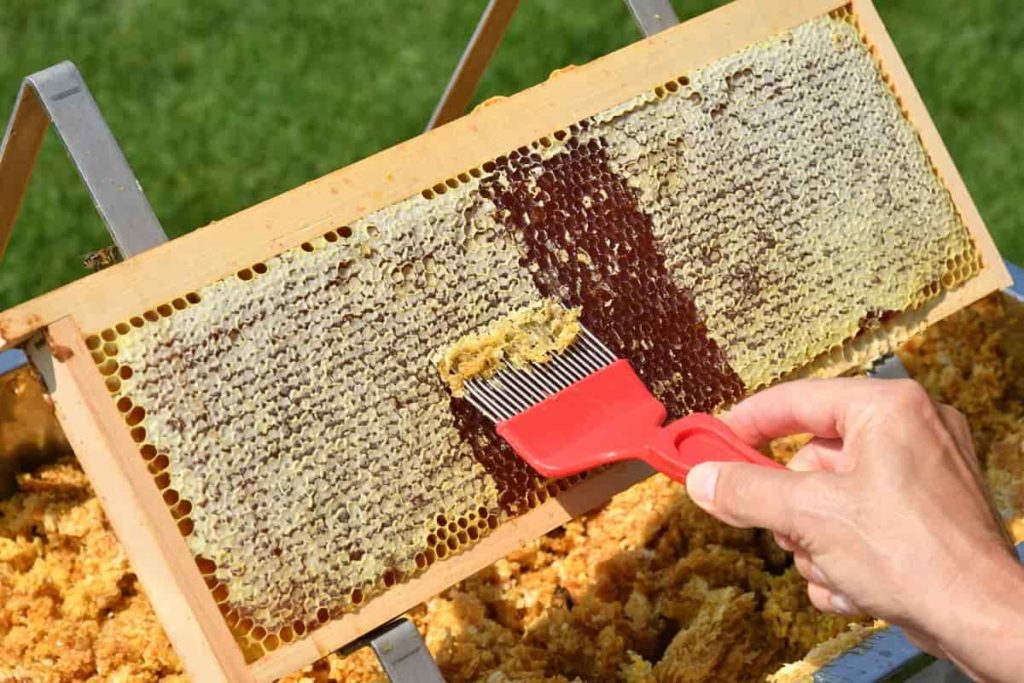
Honey Processing
Image Source

How does beekeeping businesses be beneficial to the farmers? 

  • Beekeeping or Apiculture can benefit the farming community significantly, so farmers should go for this supplementary agriculture business to earn a good profit. 
  • Bees support farming communities on a large scale by pollinating and pollinating flowers.

Conclusion

Beekeeping can be profitable, and selling honey to make money isn’t the only way to profit from beekeeping. Beekeeping is also a good source of income for farmers, especially when the crop is still growing. Here we will get important information about Bee farming which will surely increase profits.

How to Start Poultry Farming from Scratch: A Detailed Guide for Beginners

10

Poultry farming is the commercial raising of domesticated birds to increase egg and meat production. Birds raised on farms are usually chickens, turkeys, ducks, and geese for food. However, there is a global chicken market where broilers are raised for meat and layers for eggs. The term “poultry farming” can be used primarily for chicken farming, as chickens are often raised and bred. Here are some tips you should consider when starting your poultry farm successfully. 

How to Start Poultry Farming from Scratch
Image Source

How to start poultry farming from scratch

What investment is required to start a poultry farm? 

Poultry farming is a capital-intensive business; depending on the scale and business you want to start with, the fund requirement can be Rs. 1.5 lakh to Rs.10 lakh. The funds required for poultry farm are for various purposes, including: 

  • Cost of poultry birds
  • Cost of place on rent
  • Cost of equipment
  • Cost of staff
  • Cost of poultry feed and other raw materials
  • Marketing, transportation, and miscellaneous cost

If you are considering starting a small-scale poultry farm, you will need around INR 50,000 to INR 1,50,000. To start a medium-sized poultry business, you may need around Rs 1.5 lakh to Rs 3.5 lakh. And for a large-scale poultry farm, you will need to invest around Rs 7 lakh to Rs 10 lakh. 

What are poultry and its importance? 

  • In poultry farming, birds are raised domestically or commercially for meat, eggs, and feathers. 
  • Chickens, ducks, turkeys, and geese poultry birds are of primary commercial importance, while guinea fowl and squabs are of mainly local interest. 
  • Poultry meat is an important source of high-quality protein, minerals, and vitamins to balance the human diet. Specially developed chicken breeds (broilers) are now available with rapid growth and high feed conversion efficiency. 
  • There are many benefits to keeping chickens. Poultry birds provide companionship to humans, a source of food in the form of eggs and meat. Apart from this, farmers like to display their chickens in poultry shows. In addition, some people like to keep chickens in their backyard as pets or for fresh eggs daily. 

What is the process of poultry farming? 

  1. Creating a business plan
  2. Selection of location and procurement of required equipment
  3. Deciding on the replacement of birds used in poultry farming
  4. Taking steps to maintain and manage the poultry farm. 

What are the problems of poultry farming? 

  • Foodborne and zoonotic diseases are strongly linked to poultry. 
  • The eradication, eradication, and control of foodborne and zoonotic pathogens is a major challenge for the poultry industry. 
  • In addition, public health risks from food and drink with high antibiotic residues will remain a significant issue. 

Which one is profitable broilers or layers? 

In the long run, large-scale layer farming will be more profitable and generate more income than broiler farming because after laying eggs, the birds can be sold as meat, albeit at a lower price than broilers. 

How many types of poultry farms are there?

Battery Cage Poultry Farm – For a battery cage poultry farm, you may need 4,000 square feet for the birds and an additional 2,000 square feet for other infrastructure needs of the farm. In a battery cage system, the birds will not be able to move or run. 

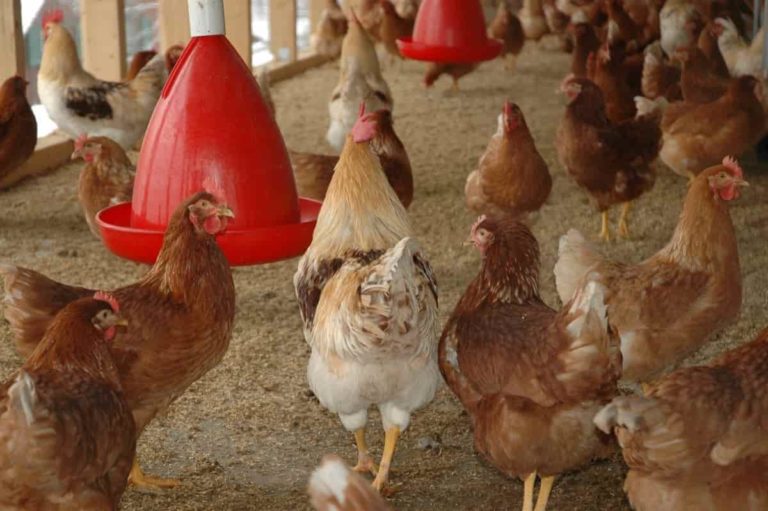
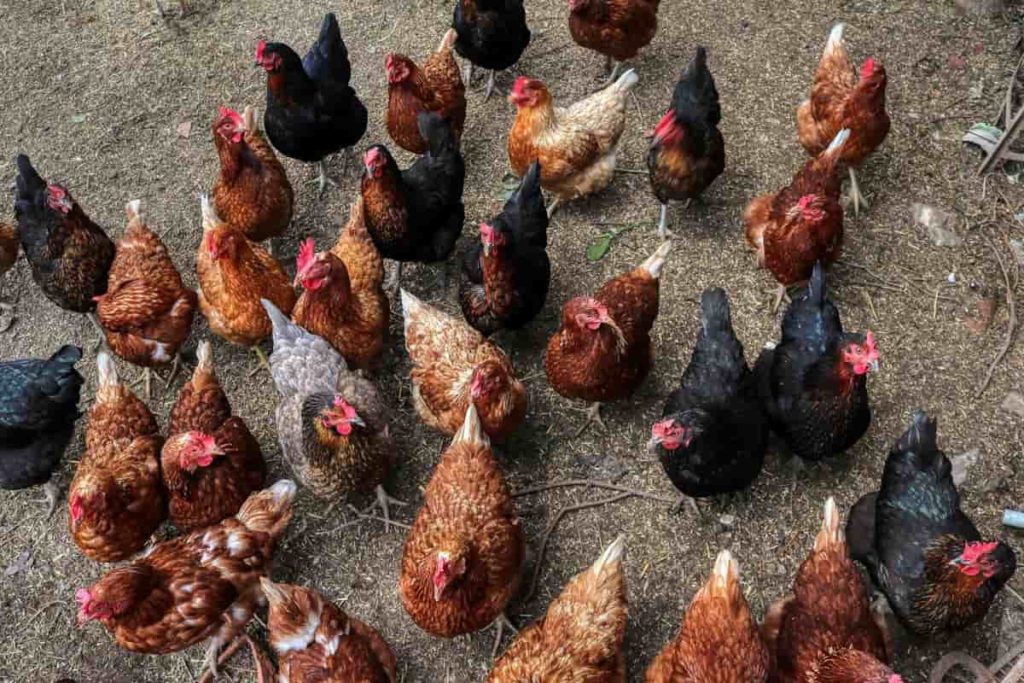
Free Range Poultry Farm – You will need around 12,000 to 36,000 square feet of space in a free-range poultry farm. As in the poultry system, the birds are released free-range in the fields. 

Semi-Range Poultry Farms – These poultry farms are a combination of both free-range and cage systems. In this system, the poultry birds are housed in a coop and provided with a small pen/paddock to roam around. You will need around 8000 square feet for this type of poultry farm. Two square feet of coop space and 2 square feet of paddock space mean a total of 4 square feet per bird. 

Completely Wild Poultry Farm – Finally, in wild poultry systems, the birds are raised in a natural environment, such as an area with many trees. In this system, you will need about 44,000 square feet of space by having 2 square feet of coop space for the birds and about 15-20 square feet of free-range space.

In case you missed it: 12 Key Rules for Effective Poultry Farm Management: From Planning to Reducing Production Cost

Poultry Farming
Image Source

How much land is required to start poultry farming? 

Broiler Poultry: By 18 days, broilers require 450 cm2 of floor space, 3 cm of feed space, and 1.5 cm of water. Birds 19 to 42 days of age require 1000 cm2, 6-7 cm feed space, and 3 cm water space. 

Layer Poultry: In the case of a deep litter system, floor space of about 2 square feet per bird should be provided. In a cage system, floor dimensions should be 18 inches x 12 inches. This space is enough to accommodate 3 to a maximum of 5 birds.

Country Chicken: Baby chickens raised in deep litter require about 280 cm² of floor space per baby chicken. Approximately one square foot of floor space should be provided from the sixth week onwards. Overcrowding birds in the brooding stage can cause stress resulting in infection and mortality. Feed conversion ratio and growth should be proportional to the floor space available for the baby chickens. 

What are the advantages of poultry farming over livestock farming? 

  • Production in poultry farming is quite high. 
  • It requires less investment as compared to cattle farming. 
  • It helps in providing nutritious food to the common people. 
  • As mentioned, poultry farming is a fast-growing business due to the increasing demand for poultry products. 
  • Poultry farming is a high-productivity business. It does not require much capital. It doesn’t need much space. 
  • Getting a license is easy. 
  • Apart from creating employment, highly skilled labor is not required. 
  • Low maintenance is required. 

Is poultry farming a profitable business? 

  • It is one of the most profitable agribusinesses in the current Indian market. Moreover, the poultry business is a great idea for those who want to pursue a successful agribusiness career. 
  • Do not start a large-scale poultry farming business if you are inexperienced in the market. 
  • It would help if you did a proper study before going into business. Then, if there are many competitors or the supply of poultry products exceeds the demand in your area, look elsewhere to start your business or find another business to start. 
  • Environmental conditions are often automatically controlled by producers. For example, the presence of light helps the bird lay eggs earlier. Therefore, producers should provide a more extended light period to increase the chances of egg laying. An egg-laying bird lays more eggs in the warm and cold months. 

How much loan can I get for poultry farming? 

  • For every 5000 bird farms, the loan amount will be up to Rs.3 lakh. Therefore, the maximum loan amount is Rs.9 lakh/farmer. 
  • For security, the individual must take a mortgage of the land on which the poultry shed and other infrastructure are available or planned to be constructed, covering at least 50% of the advance.

How much profit is there in a poultry farm? 

  • If you start layer farming on a small scale, i.e., 1500 chickens, you can earn from 50000 to 1 lakh per month. 
  • For this, you first need to find a place for poultry farming. About 1-2 lakhs will be spent on cages and equipment. 50000 should be budgeted for the purchase of chickens. 

What are the 4 types of poultry housing? 

Deep litter system

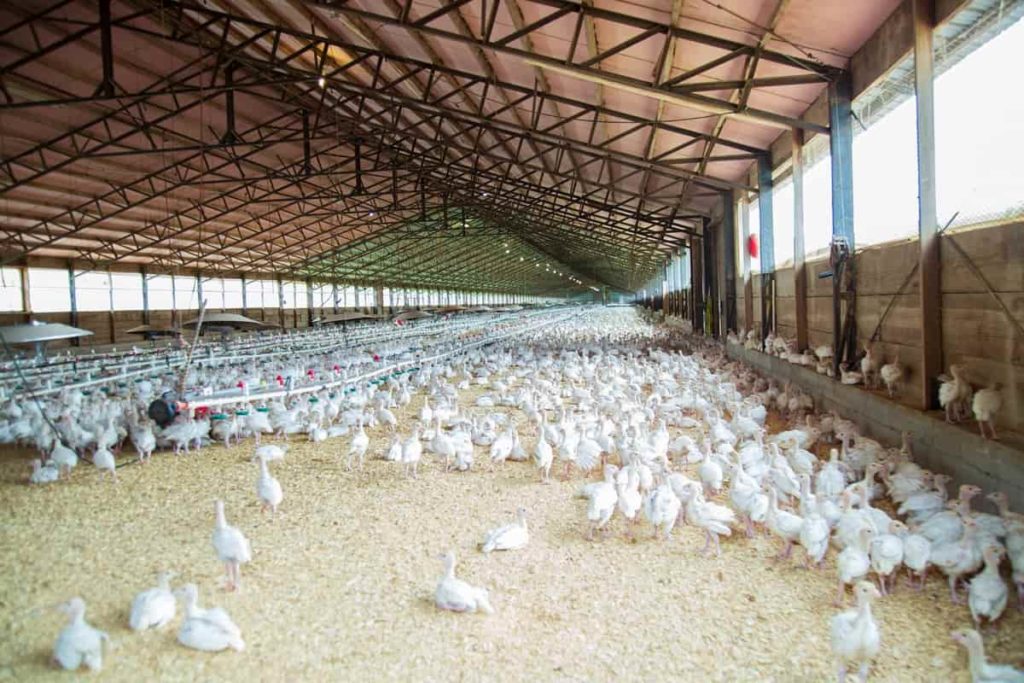
In this system, the birds are kept indoors at all times. Feed, water, and nesting are arranged indoors. Birds are placed on suitable litter material about 3 to 5 inches deep. Generally, paddy husk, sawdust, ground nut hull, chopped paddy straw, or wood shavings are used as litter material. This arrangement saves the labor involved in frequently cleaning the fecal matter, but it requires occasional agitation. Litter is spread over the floor in layers of 2 inches high every fortnight until the desired is achieved. 

Slatted floor system

In slatted floors, iron bars or wooden wrappers are used as the floor, usually 2-3 feet above ground level, to facilitate the slats from falling through. Wood rappers or iron bars 2 inches in diameter can be used along the length of the house with a 1-inch space between the rods. Advantages are;

  1. Less flooring is required per bird than solid flooring systems 
  2. Bedding is eliminated
  3. Handling of manure is avoided
  4. Increased sanitation
  5. Labor savings
  6. Soil-borne infections are controlled

In case you missed it: Poultry Farming in Nepal: How to Start, A Step-By-Step Guide for Beginners

Poultry Farm
Image Source
Slat-cum-litter system

This system is commonly used to raise birds for egg production, especially meat-type breeders. Here, part of the floor area is covered with slats. In the case of a breeder flock, nest boxes are usually placed in the litter area. Advantages are;

  • More eggs can be produced compared to all solid floors. 
  • Fertility is better with a slat-less litter house than with an all-slat house.
Cage system

This system involves raising chickens in small compartments on a wire mesh floor, called cages, either standing on the house floor or hanging from the roof. It has proven to be very useful for laying operations, from day-old to disposal. Currently, 75% of commercial layers worldwide are kept in cages. 

Feeders and waterers are connected to the cages externally except for nipple waterers, for which the pipeline is routed through or over the cages. Self-propelled feeding trolleys and egg collection belts can also be used in this rearing system. The droppings are collected either in trays under the cages, belts, floor, or deep pits under the cages, depending on the type. 

What is the importance of using proper tools and equipment on a poultry farm?

Quality poultry equipment is essential to raising healthy chickens and other poultry birds. Investing in poultry farm equipment is essential to running a successful business delivering high-quality products. Poultry farming involves a variety of machinery, including climate control, drinking, feeding, incubator equipment, egg collection and handling, broiler harvesting, slaughtering, and hatchery equipment. 

  • Incubator: Incubator is poultry equipment used to incubate bird eggs artificially. There are several types of egg incubators on the market. 
  • Egg tray: It is the equipment used in arranging eggs. Like the name, it is a tray-like device where eggs are sampled. 
  • Ventilation fan: A ventilation fan is equipment that ensures maximum ventilation in poultry farms. It is also equipment used to reduce the temperature of the poultry farm in hot weather. 
  • Nesting: Nesting is another piece of equipment that helps birds to lay eggs. One of the advantages is that it increases the egg productivity of poultry birds. 
  • Feeder: A feeder is an equipment used to feed poultry birds. Usually, some food is placed in the feeder, and the chickens start eating from there. Plastic or metal feeders are mainly used for feeding chickens.
  • Heater: Heat management is essential for poultry farming. Bulbs, heaters, or other heating devices can heat the chicken coop.
  • Egg handling nest: Egg handling nests or cages transport eggs from one place to another. It reduces the risk of egg damage during transportation for marketing purposes. 
  • Brooder machines: Brooder machines provide heat and lighting to the baby chickens. 

What are the types of poultry farming? 

Two types of chickens are generally reared in poultry farming. They are layers and broilers. Layers are raised only for eggs, while broilers are raised for meat. Generally, layers and broilers require the same equipment and facilities. 

Which poultry is the most profitable? 

  • Poultry farms are relatively easy to construct and maintain. Unlike cattle and sheep, poultry birds require less space to grow. They are also easy to care for. 
  • On a poultry farm, your feed demand is low. Birds will eat almost anything, from leftovers to vegetables. 
  • Chickens are by far the most profitable birds to raise. Because chicken prefers meat, raising chickens will set your business right. Turkey is a poultry bird that guarantees a stream of income. 

In case you missed it: Poultry Farm Insurance in India, Companies, Policy, and Premium

Poultry Farming Setup
Image Source

How many chickens can 1-acre support? 

  • It is recommended to keep about 50 chickens per acre, with a maximum of about 100 for free-range, ethically kept birds. 
  • Under very specific conditions, you can have 400-500 chickens per acre as long as you rotate them. 

How can we improve poultry farming? 

  • Another tip for poultry farming is to have your feed mill produce chicken feed. 
  • Production of chicken feed is not that difficult. If you can reduce feed production costs, you can increase your business’s overall profit. 
  • Improving poultry nutrition is a solution to address potential nutritional deficiencies of the feed or increase its nutritional value.
  • Another important factor that can help you get maximum profit from poultry farming is feed optimization. 
  • Feed optimization is crucial because feed accounts for a large portion of the cost of chicken production. In addition, birds need food and water, which they convert into their bodies to produce meat and eggs. Therefore, to maximize your poultry profits, you must reduce the cost of feeding the birds. 

What is the most effective way of preventing poultry diseases? 

  • Vaccination is one of the most effective ways to prevent certain diseases. 
  • Vaccinate poultry birds carefully. So that they are protected from the outbreak of explosive diseases. 

How do I keep my chicken’s disease free? 

  • Keep it clean – Clean, sanitize, and disinfect your poultry house regularly. 
  • Change the litter
  • Be careful adding birds
  • Monitor visitors
  • Use standard feed
  • Learn about vaccines
  • Have a comfortable coop

What are the main things to consider before starting a business? 

Poultry farming is a vast industry from which many sub-sectors are selected. Here is a list of sectors one can choose from: 

1. Choose the sector that suits your interest; these include- 

  • Meat production (through broiler breeding) 
  • Egg production (through layers breeding) 
  • Production of poultry feed 
  • Requires the manufacture of equipment in poultry farming
  • Egg and meat processing 
  • Chicken hatching 
  • Egg and meat packing and marketing 

Depending on one’s interest and feasibility, an entrepreneur can choose to start a business in more than one segment.

2. Select the poultry birds you want to raise on your farm. It is advisable to select from a limited variety of broilers and layers for meat and egg production. As the poultry business grows, more bird species can be added depending on demand and profitability. 

3. Select the poultry farm location. Rather than creating a logistical nightmare and increasing transportation costs, locating the goods further away from the point of consumption is advisable. Finalize the space in advance from where operations can be easily managed. 

4. It is important to name your farm and register it as per state laws. Creating a logo for your business is also important if you plan to market your products online and supply them to remote locations. 

5. Arrange the finances – The poultry business is not capital-intensive and requires limited initial capital. Poultry funds are required for various purposes, including buying/renting land and equipment, hiring employees and poultry, managing cash flow, paying salaries, etc. 

How many times a day do you feed the chickens? 

Ideally, you should divide your chicken feed into two servings per day. However, you can make these 3-4 small feedings if you are home during the day. Chickens enjoy small, frequent meals instead of large meals once daily. 

How do I start a poultry business? 

  • Learn poultry farming
  • Choose your poultry sector
  • Choose the correct type of bird
  • Create your farm logo
  • Determine the placement of the farm
  • Have a business plan
  • Take a loan
  • Install an excellent poultry housing system

What are the important methods of feeding poultry? 

  • Feeding your chickens doesn’t have to be complicated. Chickens aren’t usually picky eaters, and you may have more trouble stopping them from eating things they shouldn’t than eating things they might. 
  • A healthy diet will stimulate healthy egg production and improve immunity. 
  • To feed for laying hens, mix whole cornmeal, soya, fish meal, corn bran, and limestone powder in a large bucket or barrel. Then, stir them with a shovel until they are well mixed so that the chickens get the nutrients from all the ingredients at once.

What are the requirements for a poultry farm? 

  • Choose your poultry sector – In broad terms, there are two types of poultry farming – broilers and layers.
  • Select the type of bird – You can start a small poultry farm by initially choosing two to three birds and later adding more birds, depending on the growth of the business. 

In case you missed it: Common Mistakes Everyone Makes in Poultry Farming

Poultry
Image Source

How can I make my chickens healthy? 

Keeping chickens healthy provides them with clean living space, nutritious food, clean water, and isolation from pathogens. 

  • Maintain a healthy flock 
  • Give them space
  • Keep them dry
  • Feed them well
  • Protect them
  • Keeping diseases away 

What is the proper orientation of the poultry house? 

  • The poultry house should be east-west oriented, with ventilation windows facing south and north. No windows on either east or west side should prevent sun rays from entering. 
  • A small poultry farm does not require any special arrangement as it only involves the construction of a house. However, medium—and large-size farms require special considerations for building space within the farm premises. 

Basic rules to be observed for layout are;

  • The layout should not allow visitors or outside vehicles to approach the birds. 
  • The sheds should be located so fresh air passes through the brooder shed first, followed by the grower and layer sheds. This layer prevents the spread of diseases from the houses to the brooder house. 
  • There must be a minimum distance of 50-100 feet between the baby chicken and grower shed, and at least 100 meters between the grower and layer shed. 
  • The egg store, office, and feed store rooms should be near the entrance. Disposal pits and sick rooms should be constructed only at the end of the site.

What is the best poultry housing system? 

Need for poultry house
  • To protect birds from adverse climatic conditions
  • To ensure easy and economical operation
  • Facilitating suitable micro-climatic conditions in the vicinity of birds 
  • Suitable for effective disease control measures
  • To ensure proper supervision 

To ensure supervision, an open-sided poultry house should be approximately 30 feet wide and no more than 40 feet wide. Wide houses will not provide enough ventilation in hot weather. Wide houses also require additional internal supports that may interfere with equipment or manure removal.

Characteristics of a good poultry housing system;
  • Controlled access
  • A comfortable floor or bedding for birds
  • Easy to clean
  • Easy egg collection
  • Good lighting and heating system
  • Adequate ventilation
  • The efficient waste disposal unit
  • Distribution for different ages and species of birds

In case you missed it: Equipment Needed for Poultry Farming: Tools, and PDF

Poultry Feeding
Image Source

How do I market my poultry products?

  • To start a poultry farming project, a marketing plan must analyze your market supply and demand and understand your target customer.
  • Marketing is a system of bringing products to the market and highlighting their relative benefits that differentiate them from other products after taking all the standard steps to persuade the consumer to buy a particular product and avoid buying other products. 
  • Poultry and its products are not stored for a long time, so the speed of marketing is very important, marketing of the product requires sacrifice to the extent that huge losses to market the product, and the company must care in dealing with customers at the time of sale as they deal in time of depression.

Conclusion

Poultry farming information will help your poultry birds live, grow, and thrive happily. Processing, preservation, and marketing channels should be established for a profitable poultry farming business. Above are some crucial tips for every poultry businessman and marketer to get the maximum of the poultry business.

Texas Agriculture: Soil, Farmland Facts, and Department of Agriculture in Texas

Texas agriculture is showing its importance as a lead commodity-producing state. Texas has more agricultural farms than any other state in the country. Agriculture in Texas is one of the important sectors. The state is one of the largest livestock producers, including cotton, sheep, goats, hay, and horses, as well as major crops such as vegetables, fruits, etc. Tractors, mechanical harvesters, and multiple harvesters have virtually eliminated the menial tasks traditional to farming for many years. Below are the agriculture facts about Texas.

Texas Agriculture: Soil, Farmland Facts, and Department of Agriculture in Texas
Image Source

What are the top 10 agricultural commodities in Texas? 

  • Cattle, $12.3 billion 
  • Cotton, $2.6 billion
  • Milk, $2.1 billion
  • Broilers, $2.9 billion
  • Corn, $1.2 billion, Greenhouse, $838 million
  • Forestry, $859 million
  • Eggs, $506 million
  • Sorghum, $486 million 
  • Vegetables, $352 million 
  • Wheat, $276 million 

What are the top 5 agricultural products produced in Texas? 

  1. Beef cattle and calves, 
  2. Cotton, 
  3. Broilers (young chickens), 
  4. Greenhouse and nursery products, and 
  5. Dairy products. 
  • Some of the top crops in the state include vegetables, Citrus, Corn, Wheat, Groundnut, Pecan, Sorghum, and Rice. 
  • Cotton is Texas’ most valuable crop, producing 9 percent of the state’s total agricultural receipts and 29 percent of the nation’s Cotton revenue. 
  • Other field crops in Texas are Wheat, Sorghum, Corn for Grain, Hay, Peanuts, Rice, and Sugarcane.

What type of Agriculture does Texas have? 

  • Texas has several agriculture farms compared to other states. While the primary crops in Texas are Cotton, Corn, Rice, Wheat, and Feed Grains (Sorghum, Milo, etc.), other crops are abundant. From Peanuts to Sunflowers to Sugarcane and more crops. 
  • It’s no surprise that Texas produces the most beef. It is the largest producer of Cotton Fiber, Cotton Seed and wool, and mohair. The matter does not end there. 
  • The Lone Star leads the nation in sheep, horses, hay, and goats and ranks second in Grain Sorghum. 

Changes in Texas agriculture include

  • More detailed record keeping that aids management and marketing decisions;
  • Further restrictions on choice or information/action; 
  • Precision agriculture takes on new dimensions using global positioning systems (GPS), computers, and other high-tech tools to help producers manage inputs like seeds, fertilizers, pesticides, and water. 

Where is the most fertile land or place in Texas? 

  • This area was once fertile grassland, but the native prairie has been replaced by farming and development. 
  • Blackland soil is still considered the most fertile soil in the state of Texas because of its high calcium content. 

How many acres are considered farmland in Texas? 

  • Regarding farms specializing in beef cattle operations, a farm is considered to be a farm on about 440 acres. 
  • Small family farms are considered small farms on about 200 acres of land. 
  • A large family agriculture farm is considered a large field of 1,400 acres.

What are the agricultural regions in Texas? 

East – Includes East Texas, typified by sandy soils, high crop production by small farms and family operations, and multiple cow/pasture operations. 

In case you missed it: Watermelon Farming in Texas: How to Start, A Step-By-Step Growing Guide for Beginners

Texas Agriculture2
Image Source

Lower Rio Grande Valley – The largest vegetable region in the state; the four southernmost counties are included. A wide variety of crops for fresh and processing markets, including citrus and early-season vegetables for early market windows and crops of Cotton, Grains, Sugarcane, and other crops. Intense pest pressure is almost year-round.

Winter Garden and Southcentral – Consists of the Winter Garden and Uvalde area, a highly irrigated area west and south of San Antonio and the Hill Country. It extends north to Abilene and south to the Lower Rio Grande Valley. Diverse dryland and irrigated crop production are interspersed across extensive rangeland and beef production areas. 

Panhandle-Plains – Producers in the region grow a wide variety of field crops. Corn, Cotton, Wheat, Sorghum, Vegetables, Triticale, Hay, Silage, and Peanuts, to name a few. 

Far West Texas – Crops include Cotton, Grains, hardy vegetables, and other horticultural crops grown on burned soils in a high desert environment. The importance of these regions is certainly due to the diverse climate and agricultural landscape. 

How many bushels of corn can you get per acre in Texas? 

Texas corn production exceeds 2 million acres planted annually. Yields average 105 bushels per acre. 

Which region of ​​Texas would benefit the most from irrigation? 

  • The High Plains is the largest irrigated area in the USA and represents about 65 percent of all Texas irrigation. 
  • An abundant water supply and its flat terrain make the coastal plains ideal for farming and ranching. San Antonio, Dallas, and Austin are some of the larger cities. 
  • Irrigation has an important factor in crop production. Crops and livestock have led to major changes in production areas, such as the concentration of cotton in the high plains and increased cattle production in central and eastern Texas. 
  • Pest and disease control practices have improved, and herbicides are relied upon for weed control. 

What is the number one agricultural crop in Texas? 

Cotton has been an important crop in Texas. Texas has led all states in cotton farming most years, and today Texas’ annual cotton crop accounts for about 37.5 percent of the total production in the United States. The annual Texas cotton crop averages 5.8 million 480-lb. 

Is Texas good for farming? 

  • Texas is an agricultural state with an annual farm income of $24.9 billion and approximately 132 million acres of agricultural land. 
  • From December to March, there are no long crops in the state. Wheat crop peaks in June-July, while maize and cotton are harvested a little later (August-December). However, there are occasional exceptions to every rule, and we’re happy to try and find any crop, any time of year.
  • In addition to crops, there are also many orchards of fruit, Olives, and Pecan, and a growing number of beautiful vineyards. The Rio Grande Valley has various vegetable and citrus farms annually. 

How much does an acre of farmland cost in Texas?

The average Texas farm cost is approximately $2,120 per acre. The average cost per acre was $1,930 for cropland and $1,660 for pasture. Texas has about 127 million acres of farmland and about 247,000 farms. The average farm size is approximately 514 acres. 

What region in Texas is best for farming?

Coastal plains change from being completely flat to rolling hills. Home to more Texas than any other natural region. An abundant water supply and its flat terrain make the coastal plains ideal for farming and ranching. 

Is Texas soil good for crops? 

  • Limited soil moisture, the constant risk of wind erosion, and irrigation water management are major soil management problems. Still, this region is Texas’ largest producer of three major crops: Cotton, Sorghum, and Wheat. 
  • Blackland soil is still considered the most fertile soil in the state of Texas because of its high calcium content. However, the best agricultural soils in Texas are mollisols, which make up a large portion of the soil in the Texas Plains. Mollisol is a dark brown color. It is due to adding fresh organic matter each year and sticking to the top. 
  • There are mainly 12 recognized soil orders in the world. Of these, nine are in the state of Texas. There are over 1,300 soil series in Texas, and each series is classified into one of these nine soil orders.

In case you missed it: Guide to Growing Okra/Bhendi in Texas: For Beginners, Soil Preparation to Harvest

Texas Agriculture3
Image Source

What does the Texas Department of Agriculture do? 

In 1907, the Texas Legislature established the Texas Department of Agriculture (TDA). The objectives of this agency are to promote production, economic development, agriculture, consumer protection, and healthy living. The Commissioner of Agriculture oversees the agency and is elected every four years. 

Is Texas soil acidic or alkaline? 

Values ​​below 7.0 are acidic, while values ​​above 7.0 are alkaline. Therefore, if the soil pH is 7.0, it is classified as neutral. Soil pH in Texas is typically between 4.5 and 8.5, but exceptions exist. 

Is Texas a good place to grow vegetables? 

  • Texas gardeners can grow delicious, nutritious vegetables year-round. 
  • Beets, Lettuce, Mustard Greens, Radishes, and Carrots are all frost-tolerant vegetables that can grow well in Texas. 
  • Once you plant your seeds, they are watered daily for two weeks until the roots are mature enough to support plant growth. 
  • Beets, Lettuce, Mustard Greens, Radishes, and Carrots are all frost-tolerant vegetables that can grow well in a fall vegetable garden in Texas.

What fruit grows well in Texas? 

  • Although varieties of fruit and nut trees can be grown in our ecoregion, some of the more successful large fruit crops include Figs, Peaches, Plums, and Pomegranates. 
  • Blackberries and Grapes are the easiest small fruit crops to grow here. 
  • Blackberries are the easiest of all small fruit crops to grow in Texas. They produce well on various soils as long as the drainage is good. 
  • Depending on the production system, short-day strawberries in Texas typically grow from late February through May or early June. 
  • The leading fruits grown in Texas are Watermelons, Grapefruit, and Cantaloupes. 

What are the principal crops in Texas?

Major crops grown in Texas include Cotton, Sorghum, Rice, Wheat, Corn, Hay, Silage, and many others. 

Cotton – Cotton has been an important crop in Texas for over a century. It is the raw material for processing operations at oil mills, compresses, and to a lesser extent, textile mills in Texas. Cotton is harvested by machine in Texas. Most of Texas’ cotton crop is exported. 

Grain Sorghum – Most grain is exported or used in livestock and poultry feed across the state. 

Rice – Rice, grown in about 20 counties on the Texas coastal prairie, has for many years been the third most valuable crop in Texas. Rice farms are mechanized, producing rice through irrigation and using aircraft for planting, fertilizing, and applying pesticides and herbicides. 

Wheat – Wheat is one of the most valuable cash crops in the state. Wheat pastures also provide plenty of winter fodder for cattle, which is reflected in the value of the cattle produced. Most of the wheat acreage in Texas is of the hard red winter class. However, due to the development of improved disease-resistant varieties and the use of wheat for winter pasture, acreage has increased substantially in central and southern Texas. 

Corn – Corn production has increased since the 1970s as yields have improved with new varieties. After the original grain harvest, corn acreage decreased as grain sorghum cultivation increased. Grain is mainly used for livestock feed, but other important uses are in ethanol and food products. 

Hay, silage, and other forage crops – Many Texas agricultural land is devoted to foraging crop production. This area produces fodder requirements and essentially provides the total feed requirements for most of the state’s domestic livestock population and game animals. In addition, about 87.9 million acres of pasture and rangeland, primarily in the western half of Texas, provide pasture for cattle, sheep, goats, horses, and game animals. 

In case you missed it: Corn Farming in USA: How to Start, Production by State, and Cultivation Guide

Texas Agriculture4
Image Source

What kinds of apples grow in Texas? 

  • In Texas, there are mainly three varieties of apple trees that do exceptionally well, Golden Delicious, Red Delicious, and Gala apples. These apple trees grow best in the eastern part of Texas with moderate rainfall and enough sun to keep the soil dry. These apples usually ripen between September and October.
  • Fig trees are known for their beautiful deep purple color. These trees are an excellent addition to any garden and are well adapted to the harsh Texas heat. Fig trees grow best in central Texas, where there is plenty of sunlight, short winters, and hard soil. 
  • Apricots produce brilliant white flowers with red or pink centers that signal fruit is on its way. The fruit that follows these beautiful flowers is orange and yellow and very smooth to the touch. These trees do best in cool (cool for Texas) climates like North and North Central Texas. 
  • Persimmons are Texas’ versatile fruit trees. Persimmons can grow anywhere and under any conditions. These are resistant to most plant diseases and do not attract moths or other pests, which can be difficult for newcomers to the gardening world to handle. 

What vegetable is Texas famous for? 

The Lone Star State’s most popular Onion is extremely sweet and contains very little pyruvate. As a result, onions are now the largest vegetable crop in Texas. 

What is the most valuable crop in Texas? 

  • Texas staple vegetables include Onions, Potatoes, and Cabbage (Texas is the nation’s largest producer of Cabbage). 
  • Texas is a leading producer of pecans. Mushrooms are farmed commercially in the state. Cotton accounts for the largest share of all crops grown in Texas, accounting for 9% of the state’s agricultural receipts. It has been an essential crop in our state for over 100 years. 
  • As the top cotton-producing state in the United States, Cotton production is also an important part of the national economy. 
  • Texas gardeners can grow delicious, nutritious vegetables year-round.
  • Plant tall growing crops (Okra, Staked Tomatoes, Pole Beans, Sweet Corn) on the north side of the garden where they will not be shaded or obstructed by shorter growing crops such as Radishes, Leaf Lettuce, Onions, and Bush Beans. 
  • The main fruits grown in Texas are Watermelons, Grapefruit (The Official State Fruit), and Cantaloupes. The staple vegetables of Texas include Onions (the official vegetable), Potatoes, and Cabbage. 
  • Texas is the number 1 producer of Cabbage in the state. 

What plants grow in spring in Texas? 

  • Plant in March: Spinach, Radish, Lettuce, until mid-April. 
  • Late March – Plant Snap Beans, Cucumbers, Sweet Corn, Lima Beans, Mustard, Tomatoes, and Squash when soil temperatures are warm enough for all varieties.

What grows in Texas in the summer? 

  • Unlike winter season crops, the selection of the best summer vegetables to grow in Texas is much more diverse. You can enjoy planting Peppers, Okra, Squash, Cucumbers, Eggplant, and Corn in the summer vegetable garden. Plant the vegetable seeds after the last frost, then water daily for two weeks. 
  • Late summer begins a second growing season for these plants as well as broccoli, Brussels Sprouts, Cauliflower, Carrots, Cabbage, Greens, Irish Potatoes, and Turnips. 

How did Texas increase agricultural productivity? 

  • Commercial broiler production, artificial insemination, improved pasture, brush control, and reduced feed requirements have significantly increased livestock and poultry performance. 
  • Biotechnology and genetic engineering promise breakthroughs in reaching higher levels of productivity. 
  • With just over 248,000 farms, the Lone Star State ranks first in the nation, with more than 127 million acres of farmland (accounting for about 74 percent of the state’s 268,581 square miles). 

What is the average agriculture farm size in Texas?

The average agriculture farm size in Texas is 411 acres. 

Do farmers pay property taxes in Texas? 

Property taxes are the main part of the taxes that farmers and ranchers pay. However, each state has some form of preferential treatment for agricultural, conservation, or open-space land intended to protect these areas and efforts. 

In case you missed it: Indian Gardening in the USA: For Home, Containers, Backyard, Vegetables, Flowers, Herbs, and Fruits

Texas Agriculture5
Image Source

Can Lemon trees grow in Texas? 

  • The best time to start planting citrus trees in Texas is late winter in February. Remember that lemons are very sensitive to cold. 
  • The university only recommends growing citrus trees in the Lower Rio Grande Valley. 

Can Bananas grow in Texas? 

Trees will produce heavy fruit in frost-free areas. Banana trees can be grown in most parts of Texas. Bananas are tropical plants so they will grow well in Texas. Fruit production is favorable in warmer regions, and trees are used as ornamental specimens in cooler regions.

What kind of soil is available in Central Texas? 

The black and reddish soils of Central Texas are deep, dense soils that pack tightly in bulk. As a result, they absorb water slowly and have little air space, making it difficult for plant roots to establish a foothold. 

What type of soil does Texas have? 

  • In Texas, different soil types can include Blackland clay, sandy loam, sand, yellow clay, and burnt clay, to name a few. 
  • Texas soils vary from deep sandy loam to fertile, well-drained loam with heavy, black clay from layers of caliche rock. Crops grown on sandy soils generally respond to liberal amounts of potassium, while crops grown on clay soils do not. 
  • The best agricultural soils in Texas are mollisols, which make up a large portion of the soil in the Texas Plains. Mollisols are a dark brown color. It is due to adding fresh organic matter each year and sticking to the top. The growing soil is rich in calcium and magnesium, increasing soil mineral content. 
  • Many areas of Texas, mainly those with hot summers and sandy soils, require more frequent watering than other areas. A drip irrigation system is recommended.
  • The Blackland region of Texas is a narrow strip that runs north to south through the east-central part of the state. Blackland soil is still considered the most fertile soil in the state of Texas because of its high calcium content. 
  • Deep sandy loam soils are also found in Texas. Most of the soil in this Texas is highly acidic. 

What farm animals are raised in Texas? 

  • Texas mainly produces about 20% of the nation’s beef cattle and ranks No. 1 in the value of raised cattle. Other livestock products include broilers (young chickens) and dairy products, followed by chicken eggs and pigs. Sheep and lambs, and turkeys are also raised commercially in Texas. 
  • The largest source of agricultural income in Texas comes from the sale of beef cattle. 
  • Texas raises more Angora sheep and produces more mohair than any other state. 
  • Freeholders (primarily county commissioners) in a county or area within a county can petition the commissioner’s court to hold an election to find whether to allow free-ranging livestock in the county or area. 
  • Most livestock animals require a veterinary inspection certificate to enter Texas, although there are some specifications for different types of livestock. 

In case you missed it: Livestock Farming Tips, Ideas, Secrets, Techniques

Texas Agriculture6
Image Source

Conclusion

Texas is one of the leading agricultural commodities exporters. Small agriculture farms are increasing, but many are part-time farmers and ranchers. Farming mechanization continues as new and larger machines replace manpower. Although the price tags of the machinery are higher than in the past, the machines are technologically advanced and efficient. As a result, 86% of the land in Texans is in some form of agricultural production.

Individuals or families still run 98.5% of Texas agricultural operations. Though, the economic impact of the Texas food and fiber sector is approximately $100 billion. The above information will help start agriculture farming in Texas.

Homemade Fertilizer for Vegetable Garden – A Detailed Guide for Beginners

0

Fertilizers are compounds given to plants to promote growth. They are usually applied through the soil, plant roots, or foliar feeding for uptake through the leaves. It is very useful to know how to make your fertilizer. You can decide which nutrients to feed your plants based on their individual needs while avoiding harmful chemicals found in store-bought fertilizers. 

Homemade Fertilizer for Vegetable Garden
Image Source

Before you try a fertilizer throughout your garden, test it on a few plants first. Every soil, plant, and garden has different needs and deficiencies and, as a result, will respond better to different fertilizers. By testing your houseplant foods first, you’ll be able to figure out what works best for your situation. There are several ways to make your homemade fertilizers for a vegetable garden.

Homemade fertilizer for vegetable garden

What is the best homemade fertilizer? 

  1. Eggshells – Just as humans enjoy eating eggs for breakfast as they are a good source of calcium and potassium for our bodies, our plants also use them. In particular, plants like Tomatoes, Peppers, and Eggplants will benefit from eggshell fertilizer. Crushed eggshells around the base of tender vegetable plants can help keep slugs at bay. In addition, it helps prevent flower head rot in most plants. Crush the eggshells and place them around potted vegetable plants.
  2. Banana peels – Banana peels are a rich source of potassium, one of the three major plant nutrients. The other two are nitrogen and phosphorus. So, place some banana peels in a hole where you plant for easy natural fertilizer. 
  3. Grass clippings – Grass clippings are rich in nitrogen. Weed is found almost everywhere but rarely do we think it can be useful for us. Initially, fill a bucket with water and then add the grass clippings. Let it leave for a day, and then it’s ready to use. Once you’ve cut excess grass from your lawn, you can use those grass clippings as a household fertilizer for indoor and outdoor plants. Surprisingly, grass clippings contain the essential macronutrients—nitrogen, phosphorus, and potassium. Spread the chopped grass clippings evenly over the bottom layer of the soil and cover them with the rest of the soil. Since grass clippings are 80% water, they will decompose easily after a while.
  4. Weeds – Weed tea makes an excellent fertilizer. Weeds are a problem but can also be turned into useful home fertilizers. Herbs like nettle, chickweed, horsetail, yellow dock, etc., are high in nitrogen levels and beneficial for your vegetable plants. Just dry the entire plant and put it in a compost tumbler with water. After 3 to 5 weeks, it will be ready for use. 
  5. Manure – Manure comes from various sources – cows, horses, chickens, and even bats. 
  6. Tree leaves – Instead of gathering fall leaves and planting them on your curb, collect them for your garden. Leaves are rich in trace minerals, attract earthworms, retain moisture, and help lighten heavy soils. You can use the leaves in two ways: either by incorporating them into your soil (or mixing the crushed leaves into your potting soil) or using them as a mulch to fertilize your plants and keep weeds down. 
  7. Use as coffee grounds – Fertilizer made from coffee grounds is another simple yet effective fertilizer. It works wonders for acid-loving plants like Tomatoes, sweet potatoes, etc. To make it, steep about six cups of ground coffee in 5 gallons water. Coffee can maintain the required nitrogen and acid levels in such plants and is a fertilizer available in the kitchen. Two main ways to use coffee grounds are to sprinkle them evenly over the top layer of soil or dilute them in fresh water and drizzle them over your plants. 

What is the best fertilizer for my vegetable garden? 

Wood ash, kelp meal, kitchen scraps, cotton meal, bone meal, coffee grounds or tea leaves, alfalfa pellets, blood meal, and pet or human hair are the best fertilizers for vegetable garden.

How do you make homemade compost for a vegetable garden? 

  • Mix 1 tablespoon of white vinegar and water. 
  • Use the solution to water your plants. 
  • Repeat every three months. 
  • It works because the acetic acid in the vinegar increases the soil’s acidity – just for acid-loving plants. 

In case you missed it: Fertilizer Management in Pomegranate Trees: Organic, Homemade, Liquid, NPK, Schedule, and Application

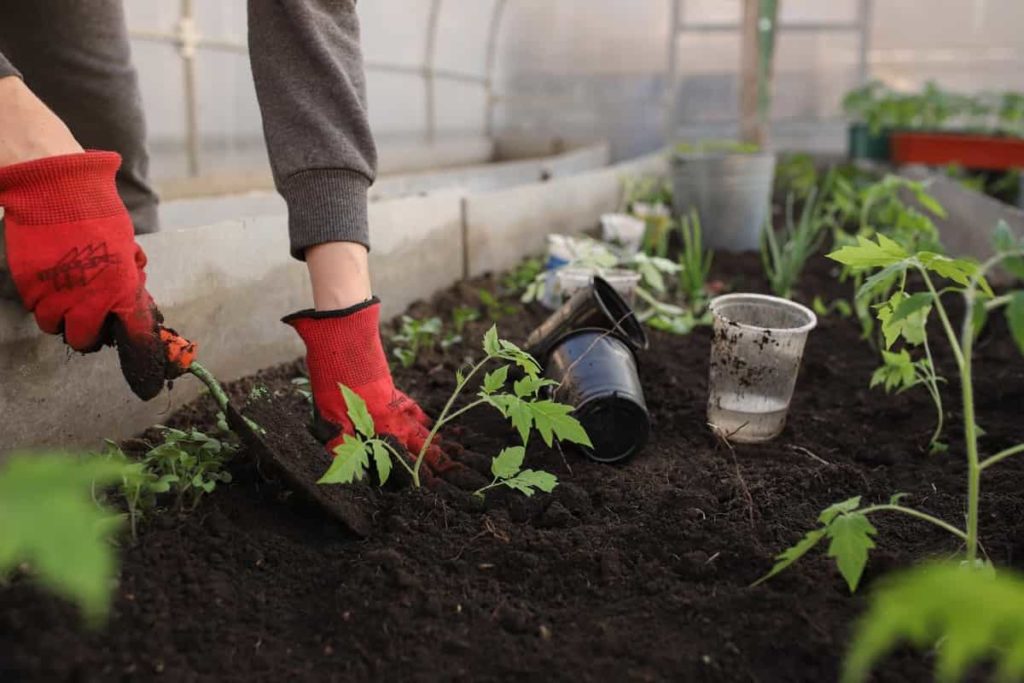
Soil Preparation
Image Source

How do I fertilize my vegetable garden organically? 

  • Growing vegetable plants yearly puts a lot of demand on your soil because they take a lot of nutrients from your garden each season. 
  • Although adding compost is a best practice, it is usually not enough to replace the nutrients that have been lost. For this, you need a balanced organic fertilizer.
  • If you fertilize your vegetable garden soil regularly, adding more fertilizer will not be necessary. Spread a ½-inch layer of compost over the soil after each harvest. 

How do I add Epsom salt to my vegetable garden? 

  1. For a typical garden start, mix one cup of Epsom salt per 100 square feet of soil before planting. 
  2. To promote germination, mix one tablespoon of Epsom salts in one gallon of water and add to the soil after sowing. 
  3. Dissolve Epsom salt about 1 tablespoon in 1 gallon of water. Stir the solution well. Use the solution to water your plants. 
  4. Water carefully with this solution once a month during the growing season. It works well because Epsom salt is made of magnesium and sulfate, both important plant nutrients. Some magnesium-loving plants include Houseplants, Peppers, Tomatoes, and Potatoes. As with any fertilizer, a little goes a long way. Be sure to use the correct dosage for the size of the plant. 

When to fertilize your vegetable garden? 

  • For edible crops, fertilizer is used in the spring and mixed into the garden soil before planting. However, if you’ve sown seeds or planted your plants, you can still gently work in a granular fertilizer (not liquid fertilizer, which can burn the young roots) around the plants. It doesn’t need to be worked deep into the soil—the top 3 to 5 inches will do. Then add water to the compost. 
  • It depends on the soil you have and what kind of vegetables you grow. But, in general, well-drained, porous soils need to be fertilized every 3-4 weeks, while loamy soils prefer every 4-6 weeks. So you may only need to fertilize 1-2 times throughout the growing season. 

Do Tomatoes like Epsom salts? 

  • Epsom salt is generally a natural mineral compound made of magnesium and sulfate. 
  • Many gardeners recommend applying Epsom salt to tomato plants for its excellent benefits for tomato vigor, health, and flavor. 

How much Epsom salt should I put in my vegetable garden? 

  • Most plants can be misted once a month with a solution of 2 tablespoons (30 mL) of Epsom salt per gallon of water. 
  • For more frequent watering, cut it to 1 tablespoon (15 mL) every other week. 

What amount of fertilizer should I use?

  • Cabbage, Cauliflower, and Broccoli can benefit from additional fertilizer three weeks after transplanting. 
  • Peas, Beans, and Cucumbers can benefit once they begin to bloom. 
  • Peppers, Eggplant, and Tomatoes benefit after the first set of fruit, and tomatoes can be used about two weeks after you pick your first Tomato and again a month later. 
  • Sweet Corn can benefit when plants are 8 to 10 inches tall and then show tassels a week later. 
  • Spinach, Kale, Mustard, and Turnip greens can be beneficial when plants are about one-third grown. 

In case you missed it: Fertilizer Management in Guava Trees – Organic, Liquid, Natural, NPK, and Homemade

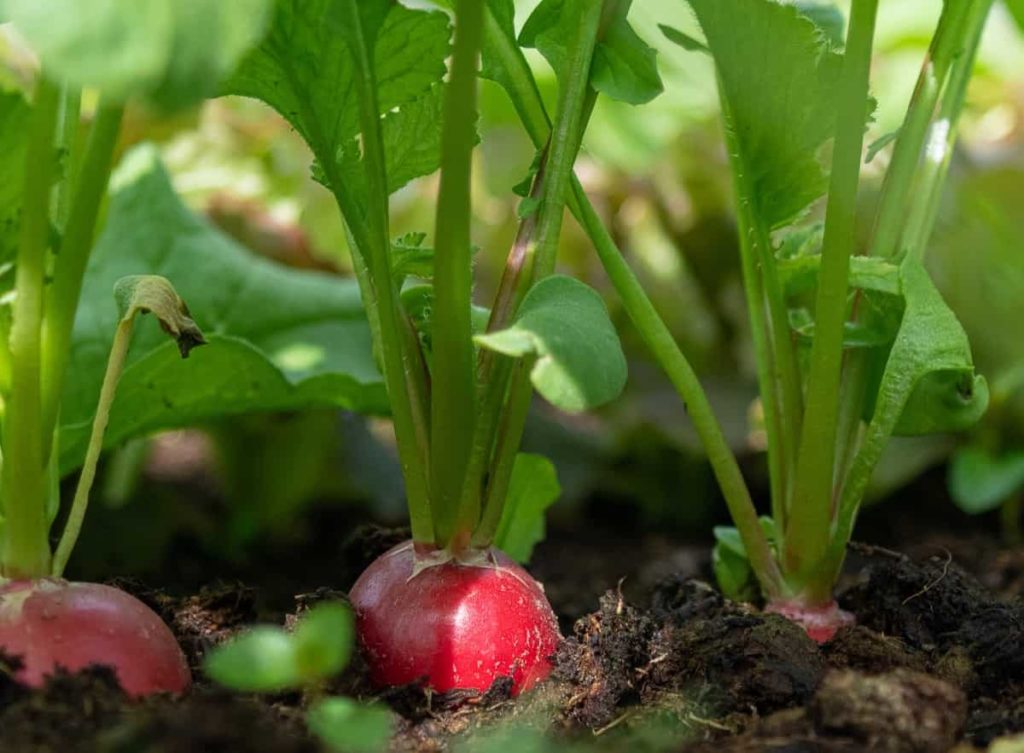
Radish Farming
Image Source

What do coffee grounds do for indoor plants? 

  • Overall, coffee grounds are good for vegetables and other plants, as they encourage the growth of microorganisms in the soil and improve tilth. 
  • Because coffee grounds are so powerful, it is an excellent repellent to fight these pests. 
  • Coffee grounds are most potent when they are burned. All you want to do is place the coffee grounds in a bowl outside on a flat surface and burn the grounds as you would incense. 
  • To use coffee compost, sprinkle the soil directly onto your soil and tamp it lightly. Coffee grounds generally add organic matter to the soil, helping water retention, aeration, and drainage. Leftover ground coffee can also make liquid plant fertilizer.
  • Spread your used coffee on the sheet, and let them dry completely. Sprinkle soil around the base of your acid-loving plants. It works because coffee grounds are rich in nitrogen, magnesium, and potassium – all-important plant nutrients. They are naturally acidic, so they can help you increase soil acidity. 
  • The most popular use of coffee grounds for indoor gardening is compost. In addition to their nitrogen content, coffee grounds contain phosphorus, potassium, and other micronutrients. It makes them an excellent choice for slow-release fertilizers on some houseplant species. 

Which vegetables benefit from coffee grounds? 

  • Your acid-loving plants like Carrots and Radishes can get a boost from fresh soil. However, Tomatoes do not like fresh coffee grounds; keep them away from this garden area. 
  • Coffee grounds contain about 2% nitrogen and varying amounts of phosphorus and potassium, which are very important for the growth of Tomato plants. Therefore, mixing some coffee grounds into the soil under your tomato plants introduces nutrients that the plants need to thrive. 
  • Cucumber plants grow well in organic soil. The occurrence of coffee grounds in the soil will help cucumber plants to grow healthy and well. 
  • Coffee grounds work perfectly for Onions. You can sprinkle soil over the beds and water them or allow rainwater to soak into them. 
  • Coffee grounds are also suitable for Zucchini and other vegetables because they are rich in nitrogen and slightly acidic. In addition, coffee grounds make excellent soil amendments for broccoli and many other vegetables. 
  • Broccoli, in particular, is a heavy feeder and can benefit from additional organic fertilizer. 
  • You can work with coffee grounds into the soil where you plan to plant Carrots, giving them an excellent place to grow. Add dry coffee grounds to a cup with your carrot seeds and stir. As they decompose, coffee grounds add nitrogen, potassium, and phosphorus to the soil, so any plant that needs a rich source of these vitamins will respond well to coffee grounds. Nitrogen-hungry vegetable plants include Tomatoes, Corn, Spinach, and any leafy greens.

Which fertilizer makes plants grow faster? 

Fertilizers high in nitrogen lead to more incredible plant growth, which is why wide varieties are enriched with nitrogen or include it as a primary ingredient. A fertilizer high in nitrogen will also restore a bright green color to your plants. 

Is banana peel water good for plants? 

  • Banana peel water can benefit plants by adding valuable minerals and nutrients to the soil. 
  • It helps to promote the growth of bacteria, which breaks down the organic compounds within the soil, making nutrients readily available for plants. 

In case you missed it: Best Fertilizer for Olive Trees: Organic, Homemade, Compost, Natural, NPK, How and When to Apply

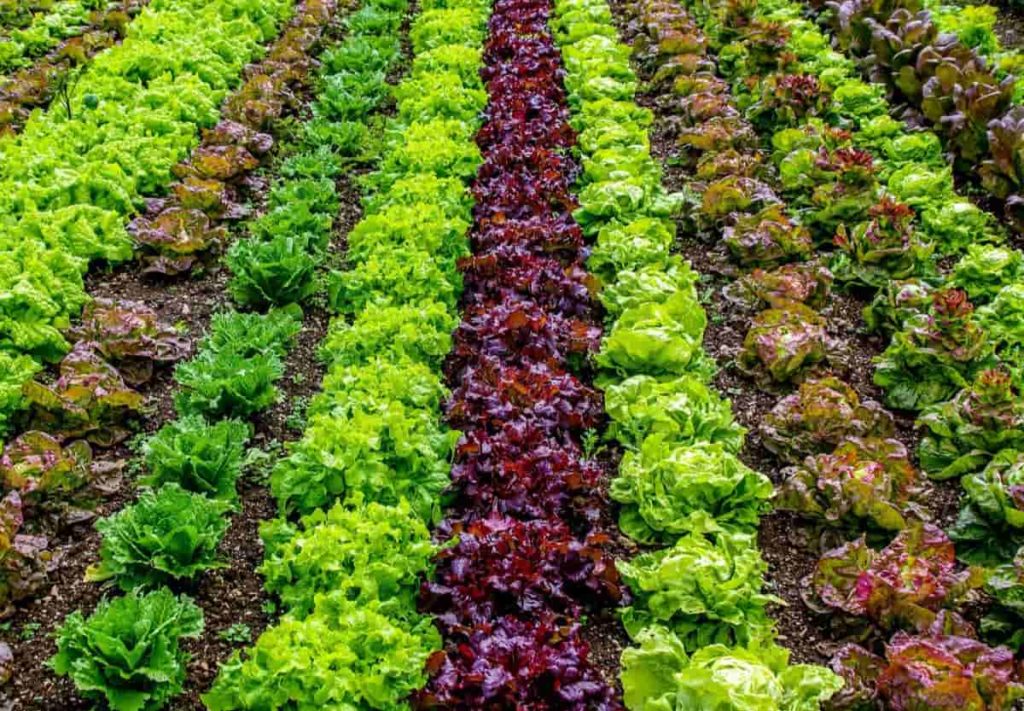
Salad Field
Image Source

How do you make pomegranate fertilizer?

Pomegranate peels are rich in iron and other minerals, which can be an excellent organic fertilizer for your plants. Its peels contain phosphorus, potassium, calcium, magnesium, boron, iron, copper, and zinc, which provide important nutrients to plants, making it one of the best recipes for growing vegetables. You will need;

  • Pomegranate Peels 
  • Grinder 
  • Water 

Finely chop the peels so that they grind easily. Now put them in a grinder and add little water to make a paste-like slurry. Dilute this paste in 1:4 parts with water, and water your plants with this mixture. The paste will promote soil microbiology and organisms that ultimately help plant health. For example, it promotes earthworms and millipedes. 

Is baking soda good for plants? 

  • Baking soda does no apparent harm to plants and can help prevent fungal spores from blooming.
  • It is most effective on the vine or stem fruits and vegetables, but regular application during spring can reduce diseases such as powdery mildew and other plant diseases.

How do you make weed fertilizer? 

Weeds always appear in places, and you must try to remove them. Well, you can use them to make liquid fertilizer. Here is a complete process. You will need;

  • Weeds 
  • Yard trimmings 
  • Mowed grass
  • Large bucket or barrel 
  • Water 

Take yard trimmings or fresh weeds from the garden and toss them in the bucket. Remember, don’t use herbicides. Fill the bucket with water until only 5 inches from the top is left. Cover the bucket and leave it for two to four weeks. It’s that easy. Pour this solution around the plant base. This liquid weed fertilizer is amazing to gardeners. 

Benefits – Depending on the type of weed, you’ll get various nutrients to enrich the soil. Fresh grass clippings have high nitrogen and potassium levels, which are fantastic for supplementing your plants. 

Can I use fish emulsion on my Tomato plants? 

  • For Tomato plants, it is one of the best fertilizers. 
  • It promotes tomato plants when you transplant them into the garden. 
  • Also, the nitrogen content promotes healthy Tomato leaves. 

Is fish emulsion fertilizer good for vegetables? 

Fish emulsion is suitable for many uses in the garden. Still, it is particularly useful as an early spring lawn fertilizer and for feeding leafy green vegetables due to its high nitrogen content. Be careful when using too much of it, though.

Fish emulsion is a natural fertilizer made using fish waste such as fish parts, guts, and water. This organic, all-purpose compost has been around for thousands of years and works great, but it takes weeks to make, and then the mixture must have time to decompose before it can be used. Process for making fish emulsion fertilizer;

  • Firstly, fill a 55-gallon drum about one-third full with a ratio of 2 parts water to 1 part fish waste. 
  • After that, this mixture stands for 24 hours. After steeping, add more water carefully to the drum until it is filled. 
  • Cover loosely, and let the drum simmer for several weeks. Usually, allow about three weeks for fermentation. 
  • You are applying fish emulsion fertilizer to the soil around your plants at 3 gallons of liquid fertilizer for every 100 square feet of yard. 

In case you missed it: How to Water Your Garden with Solar Power: For Home Gardening, Greenhouse, Polyhouse, and Outdoor

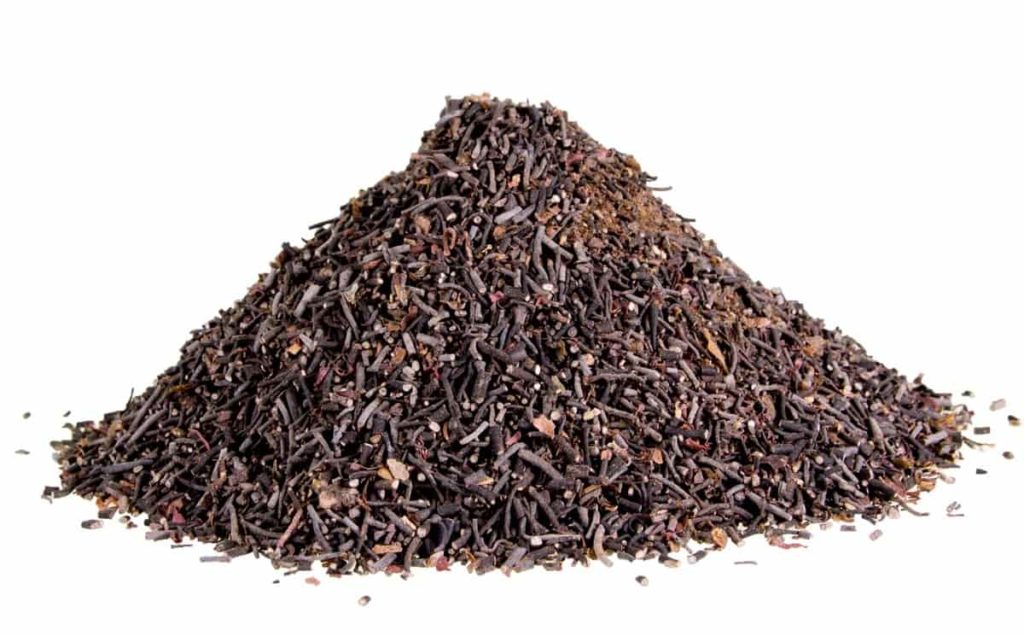
Seaweed Compost
Image Source

How do you make homemade compost fertilizer? 

  • Save your newspapers, grass clippings, fruit and vegetable scraps, and other compostable materials. Use them to start a pile or compost bin. 
  • Add a little water from time to time, and turn your pile to speed up the composting procedure. When everything has broken down into dark and rich soil, it’s time to spread it around your garden. 
  • Compost is full of microorganisms and nutrients that are good for your garden. It is an excellent organic addition to your soil that can be used anywhere in the garden. 

Is vinegar a good plant fertilizer? 

  • It has been said that one benefit of vinegar in the garden is as a fertilizing agent. 
  • Acetic acid contains only carbon, hydrogen, and oxygen – things the plant can get from the air. Vinegar is recommended to raise the pH level of your soil. 
  • Next time, mix one cup of plain white vinegar with one gallon of water and water these plants to see amazing results. Finally, you can add some distilled vinegar to the soil to fight lime or hard water for other acid-loving plants. 
  • Vinegar breaks down in soil quickly, which is one of the reasons it is so ineffective at killing weed roots. When you spray the weed, the amount of vinegar that reaches the soil will break down in 2-3 days if you get rain or water. 

How do you make organic liquid fertilizer at home? 

  • Place four tablespoons of processed poultry or mixed dry organic manure in a quart jar and fill with lukewarm water. 
  • Screw on the lid and shake, then store at room temperature for up to two days. Add liquid and dilute with water to desired strength.

Are eggshells good for a vegetable garden? 

  • Calcium from eggshells is welcome in garden soil, which moderates soil acidity while providing plant nutrients. Eggshells are so rich in calcium that they can be used almost like lime, although you’ll need many more eggshells to make a measurable effect. 
  • To prepare the eggshells, grind them with a mixer, grinder, or mortar and pestle and add them to the soil. Because the eggshells take several months to break down and be absorbed by the plant’s roots, it is recommended that they be plowed into the soil in the fall. You may find more shells in your soil in the spring. 
  • Plants absorb calcium from the eggshells and grow mostly trouble-free. For maximum effect, sprinkle eggshells in each hole before planting. Then sprinkle additional shells around the plant base every two weeks. 
  • Eggplants, Peppers, Tomatoes, and other vegetable plants are susceptible to blossom end rot, which can be caused by calcium deficiency. These vegetables can benefit from crushed eggshells placed directly in the soil over their roots. 

What vegetable plants are eggshells good for? 

Tomato, Eggplant, Broccoli, Pepper, Spinach, Swiss chard, and Lettuce are vegetables good for egg shells.

Can cooked rice be used as fertilizer?

  • Rice is a food item, making it an excellent compost material. Thus, it can provide nutrients for you and your plants and soil. However, there is a caveat. 
  • Rice can harbor bacteria in a compost pile; in this case, it’s not necessarily the type of bacteria you want.

In case you missed it: How to Grow Basmati Rice from Seed – A Full Guide

Zucchini Vegetables
Image Source

Conclusion

Plants use the soil nutrients to feed themselves and stay healthy. Over time, plant soil eventually needs plant food to replenish depleted nutrients. Store-bought plant fertilizers can vary in price and contain filler ingredients and chemicals that aren’t the best for plants. Homemade plant fertilizers are an easy way to feed your potted plants.

Many common household items have the properties needed to replenish nutrients in your plant soil so that you can make natural plant food in the comfort of your home. The above tips and tricks will help you make homemade fertilizer for your vegetable garden. 

How to Start Bell Pepper Farming in the USA: Production, and A Step-by-Step Growing Guide for Beginners

Bell Peppers are widely grown throughout the United States. Most Bell Peppers are grown outdoors in raised beds using drip irrigation and mulch. Bell Pepper is one of the most cultivated vegetable crops in the world. Characterized by a brightly colored exterior, Bell Peppers are a warm-season crop grown in temperate regions. Global production and consumption of Bell Pepper are continuously increasing.

How to Start Bell Pepper Farming in the USA
Image Source

China is the largest producer of Bell Pepper, followed by Mexico and Indonesia. Other major producers in the Bell Pepper market are Spain, Turkey, and the US. Bell Pepper is a warm-season crop in different colors, shapes, and sizes. Their popularity makes growing Bell Peppers a profitable business option for any commercial or family farm. 

How to start Bell Pepper farming in the USA

Requirements for Bell Pepper Farming in the USA

Bell Peppers like hot, humid, sunny weather. They grow well in full sun and should always be planted three weeks after the last frost date so they don’t get too cold. Plants need nutrient-rich soil without too many nitrogen levels. If you have used to apply chicken manure, use it, as Bell Peppers love it. Nutrient requirements change throughout the growing period. Field-grown Florida Bell Peppers are on the market year-round, from October to July.

Florida Bell Peppers are unavailable in high supply during late summer and early fall (July-September) due to high temperatures, high humidity, and frequent rains. The marketplace prefers that growers provide consistently high-quality products for as long as possible. It encourages large wholesale growers to produce in multiple locations to extend their season. Small, direct market farmers also look for ways to extend the season.

However, multiple locations are usually not practical. Therefore, smallholder farmers often find it more viable to adopt seasonally scalable cultural practices. Smallholder farmers traditionally use season extension methods such as transplants, multiple varieties, row covers, plastic mulch, low tunnels, high walk-in tunnels, and greenhouses. Bell Peppers are fruits because they grow from flowering plants and contain seeds—most people think of them as vegetables. Orange, red, and yellow Bell Peppers are very ripe green Bell Peppers.

Bell Pepper varieties in the USA

Common varieties of Bell Peppers used for commercial production include Aladdin, Aristotle, Brigadier, DoubleUp, Polaris, Telestar, and Wizard-X3R, to name a few. New Bell varieties can produce multiple colors from the start, which become lighter or darker as they mature. Popular types include Aladdin, Alliance, Bell-Boy, Big Bell, California Wonder, Camelot, Crusader, GatorBelle, Golden Bell, Islander, Lady Bell, Murango, Orange Blaze, Polaris, Rainbow, Stiletto, Summer Sweet, Sweet Chocolate, and Yolo Wonder. 

Where is Bell Peppers grown in the US? 

Bell Pepper is used as food, condiment, and spice. Today, most green Bell Peppers sold in the United States are grown in Florida. California, Texas, New Jersey, and North Carolina also provide a portion of the chili sold in stores. Wisconsin-cultivated Bell Peppers are available at farmers’ markets for a limited time during July, August, and September. 

In case you missed it: Organic Capsicum Farming – Bell Pepper Cultivation

Bell Pepper Red
Image Source

Although Bell Pepper is grown in many fields across the United States, California produces about 47 percent of the fresh market Bell Peppers grown in the United States. Pepper is botanically a fruit because it grows from a flower. However, when cooking, they are treated as vegetables. 

California and Florida lead the Bell Pepper production in the United States, along with Georgia, Michigan, New Jersey, North Carolina, and Ohio. The top Bell Pepper growing states in the United States are California, Florida, Georgia, New Jersey, Ohio, North Carolina, and Michigan. Most imports of Bell Peppers into the United States come from Mexico, the second largest producer of Bell Peppers worldwide.

How to plant Bell Peppers in the USA

You’ll want to start your Bell Peppers in a greenhouse to start the growing season. You can do this up to 8 weeks before the last frost date. Start your seeds in planting mix and use a spray bottle to keep the soil moist until germination. Once the seeds have germinated, be careful to only sprinkle the soil as too much moisture can cause problems for the plant.

When the plants are ready, you can plant them outside using raised beds and black plastic mulch. The main advantage of growing Bell Peppers using raised beds will help provide better drainage, prevent certain insects, and prevent weed growth. Add some 2:3:2 compost to the soil before planting.

Then, loosen the soil to provide enough room for the roots. Place the plants as mentioned earlier, and you are almost done. Once planted, you should use stakes to prevent your Bell Pepper from falling over and use a mulch to help retain soil moisture. Again, you want to ensure you’re watering the roots, not the actual plant. You can achieve this through underground irrigation. 

Bell Pepper production in the USA

Bell Peppers are widely grown throughout the United States. Most Bell Peppers are grown outdoors in raised beds using drip irrigation and mulch. The total US Bell Pepper harvested area is approximately 40,900 to 62,080 acres. Georgia, California, and Florida are the three largest Bell Pepper-producing US states. Bell Pepper growing areas in Florida have shown a significant downward trend due to increased market competition in Bell Peppers from Mexico and the phase-out of methyl bromide soil fumes. 

Bell Pepper production has been an important economic contribution to the vegetable industry in Florida and California. Production in Georgia is significantly lower than in California and Florida. US Bell Pepper production followed a steady upward trend. Although production in all three states showed an upward trend, production growth in Florida was significantly behind California and Georgia. 

Most Bell Peppers produced in the United States are still grown in the field using drip irrigation and mulch. In addition to field-grown Peppers, small quantities of locally produced, greenhouse-grown Bell Peppers are also available year-round. A typical field of fresh market Peppers is harvested by hand every week or so over four to six weeks.

Conditions for Bell Pepper Farming in the USA

Growing Bell Pepper production in Florida varies by region. Most of the state’s crop is transplanted in double rows on raised beds protected by plastic sheets. Beds are usually washed before planting to treat soil insects, pathogens, nematodes, and weeds. In other states and parts of the US, growers may not wash or use plastic sheets, depending on local conditions.

In case you missed it: Capsicum Farming in Polyhouse (Bell Pepper) for Profit

Bell Pepper Harvest
Image Source

Safe cultural production methods for Bell Peppers come in many forms, such as greenhouses and high tunnels. This form of production allows the farmer some control over weather events, pests, water, land use, pesticides, and fertilizer inputs. Most California Bell Pepper production is irrigated using drip irrigated systems and, to a lesser extent, furrow irrigated. Drip irrigation consists of a 2 to 10-inch deep water line with one or two drip lines per raised bed.

When the furrow irrigation system is used in other states, the water is channeled along parallel trenches on either side of raised beds. Water flows into the raised bed to irrigate plant roots. An overhead sprinkler often establishes the first plants until they grow. Bell Peppers are one of the most fertile crops grown in California. The land is fertilized with nitrogen, potassium, and phosphorus as a side dressing before sowing or drip irrigation during the growing season. 

Bell Peppers need deep watering, about one to two inches per week. Although Bell Peppers like warm weather, they will not thrive in extreme heat, so gardeners exposed to high temperatures should water them twice a day if necessary. Dry conditions will result in bitter-tasting Peppers, but too much water can suffocate the roots or cause flower rot, which occurs when the soil depletes calcium. Monitor your water carefully, keeping it as balanced as possible.

Bell Pepper plant care

Proper care of your Bell Pepper will ensure the most significant harvest, so ensure you’re prepared to do what’s necessary. Firstly, regularly water the Pepper to prevent the soil from drying. For this reason, drip irrigation is recommended as it will keep the water exactly where it is needed. It would help if you also weed the beds regularly. Weeds are not only unsightly, but they also take away important nutrients from your crops.

Mulch will help, but you may need to use an herbicide to keep the weeds at bay. Water the plant regularly with 1 to 2 inches of water per week. It does not mean watering less. Bell Peppers are well watered but should be allowed to dry out almost completely between watering. They need this period of relatively dry. Slow, deep watering helps strengthen the root system. Do not allow Pepper plants to wilt, reducing fruit yield and quality.

Inconsistent watering also makes Peppers prone to blossom end rot. In hot or desert climates or in the height of summer, you may need to water every day. Remember that at elevations of about 4,000 feet in desert areas, sweet Bell Peppers often fail to develop a thick, fleshy wall. Bell Pepper is very sensitive to heat.

Flowers may drop if plants are stressed—if it is too hot, cold, or insufficient water. Use shade cloth or row covers to prevent heat stress (exposure to direct sunlight during hot weather will cause Peppers to become papery, blistered, or papery). Mulch to retain moisture and prevent weeds. Weed carefully around the plants to avoid disturbing the roots. 

In case you missed it: Capsicum Farming (Colored), Bell Pepper Cultivation Tips

Bell Pepper Farming
Image Source

Bell Pepper harvesting season in the USA

Bell Peppers are produced and marketed year-round in the USA and are mostly sold as fresh produce. California’s Bell Pepper shipping season runs from April to December, with peak volumes from May to July. Florida shipments run from October through July, with peak volumes between March and April. In addition to field-grown Bell Peppers, greenhouse Bell Peppers are marketed year-round. 

Bell Peppers can be harvested when they reach the immature green stage or fully red or yellow depending on the plant variety. It is not uncommon for mature Peppers to be harvested from the same field. This decision depends on the current market price. Black Pepper used for freezing or dehydration provides a secondary market for Bell Pepper. Fields of fresh market Peppers are harvested every week for four to six weeks. Almost all Bell Peppers are harvested by hand and packed in bulk boxes or trailers for transport to the packing house. 

Most Bell Pepper crops are sold as mature green Peppers, but growers receive a premium for limited quantities of other colors. Colorful Bell Peppers follow a mature green state and turn brown as they ripen on the vine. The premium reflects that brightly colored Bell Peppers (red, yellow, orange, purple, brown, and black) are more expensive to produce, have higher field losses, and are harvested at the green stage. 

Bell Pepper yield in the USA

The USA produces an impressive amount of Bell Peppers each year, about 1.6 billion pounds, but the nation imports about 35 percent of the total to meet consumer demand. California, Florida, and Georgia are the top Pepper-producing states, and China is the top global producer. Florida’s average price was higher than the national average due to its early production season. US Bell Pepper exports are lower than imports.

Although the USA is one of the world’s largest producers of Bell Peppers, imports make up a large portion of total US Bell Pepper consumption. Most imports of Bell Peppers into the United States come from Mexico, the second largest producer of Bell Peppers worldwide. Low labor costs, the depreciation of the Mexican peso, and support from the Mexican government have made Mexican exporters more competitive than their American counterparts.

It has given a competitive edge in the competition. Production in Mexico has extended its growing season under protective structures, allowing it to supply Bell Peppers to the US market year-round. Yields in Florida (360 cwt per acre), California (455 cwt per acre), and Georgia (280 cwt per acre) were 4%, 52%, and 65% above their respective averages. Major export destinations include Canada, Germany, Japan, and the United Kingdom.

Bell Pepper marketing in the USA

Bell Peppers are produced and marketed throughout the year. Bell Peppers are generally sold as fresh produce, although Bell Pepper flowers are also edible. Bell Peppers are generally grown for both fresh and processed markets. These include the traditional “blocky” three- to four-lobed forms and the taller, more pointed varieties known as European Lamuyo varieties.

Both hybrid and open-pollinated varieties are popular, with a trend toward greater use of hybrids. However, hybrids have higher seed costs. To control costs, growers use transplants instead of direct seed. Open-pollinated varieties can either be transplanted or seeded in the field. Fresh market Peppers are produced in Pennsylvania from early June to late October.

Several primary marketing alternatives are available to the chili farmer: wholesale markets, cooperatives, local retailers (grocery stores), roadside stands, farmers’ markets, community-supported agriculture (CSA), pick-your-own operations, and processing firms. When planning production, first consider your capacity and market access. 

In case you missed it: Top 18 Steps to Boost Chilli/Pepper Yield: How to Increase Production, Quality, and Tips

Bell Pepper Plant
Image Source

Frequently asked questions about Bell Pepper farming in the USA (FAQ)

Is growing Bell Peppers profitable? 

Colored Bell Peppers can potentially be a profitable crop for USA farmers. However, infrastructure costs, marketable yields, and prices must be considered. 

Do Bell Peppers need a lot of water? 

As a general rule, Bell Pepper plants should be watered about once a week and allowed to drain well. This frequency can vary based on temperature, wind, and the size of the plant and its growing container. 

Why are my Bell Pepper leaves curling up? 

Insects such as aphids, thrips, mites, and whiteflies cause leaf curl with their feeding activities on Bell Pepper plants. Mature leaves may develop mottled or cracked areas, dry out or fall off, but leaves fed during development are randomly curled or curled depending on the feeding location. 

Do Bell Peppers grow well in Florida? 

Because Bell Peppers require warm loamy soil, moderate temperatures, full sun, and plenty of moisture, Florida is a great place to produce Bell Peppers from late fall through spring. Moisture comes in many forms, but rain is the most common form in Florida.

Why are my Bell Peppers so small? 

If your Peppers are undersized, they are most likely not getting enough water, although their size may be changed due to your climate or your planting method. 

How often do you fertilize Bell Peppers? 

Most fertilizers are given weekly or bi-weekly. Don’t over-fertilize and expect good things – Bell Pepper plants need a steady supply of nutrients, not an abundance of nutrients all at once. Some fertilizers are meant to be added to the soil before transplanting. 

Do Bell Pepper plants like coffee grounds? 

Coffee grounds are a good nitrogen source and can give your Pepper plants the healthy growth that Bell Peppers love. You can sprinkle the soil around the plants in the garden bed. From there, they are broken down into the best nutrients for your plants. 

In case you missed it: Capsicum Farming in Polyhouse (Bell Pepper) for Profit

Bell Pepper Garden
Image Source

Which states produce the most Bell Pepper? 

Mexico is the second largest producer after Indonesia, Turkey, Spain, and the United States. California is the largest producer of black Pepper in the US, with about 320,000 metric tons annually. 

Conclusion

Bell Peppers are the most popular vegetable in the USA. The scientific name of Bell Pepper is Capsicum annum. Under the right conditions, Bell Pepper plants can live for many years, but only if you live in a climate that doesn’t experience true winters. In climates with harsh winters, plants will only last for the first growing season of the garden in which you plant them. Today Bell Peppers are produced all over the world. America ranks fifth in total production. This guide to help you learn how to grow Bell Peppers in the United States.

Almond Farming/Production in the USA: How to Start, A Step-by-step Guide to Planting to Harvesting for Beginners

Almonds are the fruit produced by Almond trees (Prunus dulcis). Shelling Almonds mainly refers to removing the shell to reveal the seed. Almonds are mostly sold shelled or unshelled. The Almond tree is a fruit tree native to Middle Eastern countries. These trees belong to the same genus as peach trees. They are considered nuts; Almonds are technically a type of stone fruit called a drupe. Drupes are fruits made up of an outer hull and a hard shell that contains the seed. 

Almond Farming/Production in the USA
Image Source

Almond Farming/Production in the USA

In what zones do Almond trees grow? 

Almond trees prefer warm climates. Therefore, most Almond varieties grow well in zones 5 through 9. 

Cost of starting an Almond farm 

Established Almond orchards in this region cost $30,000 to $40,000 per acre, depending on irrigation availability, tree age, average yield, soil quality, and various other factors. 

Types of Almonds grown in the USA 

The main types of this group are Butte, Padre, Butte/Pedre, and Fritz. Over the years, Butte, Padre, and Fritz have also been sold under the “California” variety because they share a characteristic that defines the variety. 49 varieties of Almonds are grown in the United States. Four varieties account for 85 percent of all Almonds grown in California. The four main varieties are Non-Pareil, Carmel, California, and Mission.

  1. Non-Pareil – These Almonds have a thin outer shell and a smooth, light-colored kernel, making them easy to clean. If you want a good-looking smooth-kernelled Almond that is somewhat flat, non-pareil is the variety to buy. 
  2. California – This category includes several varieties. They have a hard shell but are still easy to blanch. Some varieties in this category include Carmel, Monterey, and Sonora Almonds. California Almond variety has a wide range of shell hardness, kernel shape, skin color, and surface characteristics. They are quite adaptable and suitable for almost any process or application. Some examples include but are not limited to Aldrich, Carmel, and Monterey. 
  3. Carmel – Carmel is one of the smaller varieties of Almond and is not as wide as tall. Popular in home gardens, these trees are naturally compact and easy to prune.
  4. Mission – Almonds classified in this classification have a really hard shell. The inner kernel is smaller than Non-Pareil and California Almonds. Mission Almonds have dark, wrinkled skin, making them a great choice for flavored Almonds. Producers usually do not blanch this variety of Almonds because of the dark wrinkled skin. 

Mission Almonds have hard shells; their kernels are small, broad, and plump. The kernel’s skin is usually darker and more wrinkled than the non-pearl, which increases salt and flavor retention. Blanching is not that common for this variety. Examples of Mission types include Butte, Fritz, and Padre. 

Non-Pareil Almond trees bloom first, and the fruit ripens earlier than other types of Almond trees. Other varieties may take 25 to 60 days before the nuts are ripe enough to harvest. Other major categories include “Price” (5%), “Butte” (5%), “Ne Plus Ultra,” “Merced,” and “Peerless” (about 3% each) and about 40 others. The average Almond yield per hectare is more than 1.3 to 1.5 of shelled products. 

Almond growing regions in the USA

California produces about 80% of the world’s Almonds and 100% of the US commercial supply. Almonds are California’s #1 agricultural export. Almonds are grown primarily in Kern, Merced, Fresno, Madera, Stanislaus, and San Joaquin counties in the San Joaquin Valley and Butte and Colusa counties in the Sacramento Valley. The most widely grown variety of Almonds is the non-pearl, which accounts for 45% of the total production. Other popular Almond tree locations include Texas, Arizona, and Florida.

In case you missed it: Top 20 Steps to Boost Almond Yield: How to Increase Fruit Size, Quality, and Production

Almond Farming
Image Source

Soil and sun requirements for Almond farming in the USA

Soil conditions for Almond trees should mimic those in the Mediterranean. Soil should be well-drained, sandy, loamy, or loamy. Almond trees need at least five feet of topsoil, which you can use to build a mound around the trunk to help drainage. Almond trees grow best in soil with a pH level between 6 and 7 but don’t worry if you don’t find it perfect. They generally tolerate acidic, neutral, and alkaline soils.

Almond trees prefer full sun; they require at least six hours of direct sunlight daily. If your Almond tree absorbs more sun, you will get better blooms. If the sun is particularly hot where you live, paint the south side of the trunk with white latex paint to prevent sun-scorching. 

Climate conditions for Almond framing in the USA

Like the Mediterranean, the ideal climate for Almond trees has hot, dry summers and mild but wet winters. The ideal temperature for Almond tree growth is between 15 and 30°C. It grows best in zones 7 through 9. In the United States, it includes the south-eastern states, Texas, the Southwest, and the coast of Washington, Oregon, and California in the west and Massachusetts to the coast in the east. 

California has a Mediterranean climate, perfect for growing Almonds. Only five regions on Earth feature this climate outside the Mediterranean Sea, and California is one of them. Growing in California’s ideal Mediterranean climate, Almonds have many annual life stages and an abundance of natural beauty. Almond farming is a long-term commitment. Orchards produce for 25 years, with the first harvest three years after planting. 

Almond trees thrive in Mediterranean climate conditions. They benefit from rainy winter weather but are highly susceptible to frost, making California the leading producer of Almonds in the United States. When deciding whether an Almond tree will work in your area, check your USDA plant hardiness zone—Almond trees do best in zones 7-9. 

How to pollinate Almond trees in the USA 

Most Almond varieties are not self-fertile. So they need cross-pollination to set fruit. However, an Almond tree theoretically needs only one grain of pollen from another compatible type at the right time to produce an Almond. All over the world, Almond growers rely heavily on strong and healthy bee colonies, which ensure the best possible cross-pollination.

The Almond grower should ensure that there is a large population of honey bees (2-3 strong colonies per acre or 5-7 per hectare) within the Almond orchard so that a single bee does not only pollinate different varieties of the same tree. While looking at the flowers, it will also transfer pollen to other trees of different species, usually located 20-30 feet away. Consequently, farmers often plant one row of pollinating-type trees for every three rows of main species.

But when one pollinator variety cannot ensure good cross-pollination due to inconsistent flowering, it is recommended to use two pollinator varieties, one early-flowering and one late-flowering, so that the flowering of both overlaps with the main types of flowering. Depending on the variety, the Almond tree blooms from late winter to early spring (during February in the US). The flowering period is highly dependent on weather conditions and can range from 4 to 30 or more days (the average flowering period is 25 days).

Almond growers must facilitate bee cross-pollination activity by eliminating all competing blooming weeds during the Almond flowering period. Otherwise, the bees will be distracted and visit the blooming grass; therefore, the cross-pollination of the Almond trees will be significantly reduced. In addition, frequent rains and cold weather during flowering usually impair bee cross-pollination activity, resulting in reduced fruit set and yield.

In some cases, if natural pollination of Almond trees is insufficient, commercial Almond growers may use artificial pollination methods. However, artificial pollination methods have not significantly increased Almond orchard yield. Like many crops, Almond cultivation requires cross-pollination. Although many insects pollinate Almonds, commercial Almond cultivation relies heavily on honey bees. Commercial Almond growers may rent hives during the blooming season to ensure pollination success. 

California Almond growers began suffering from colony collapse disorder, an unsatisfactory phenomenon that resulted in a decline in bee populations. Although this increased pollination costs for many growers, the high demand for Almonds from the United States created an incentive to move bees to California. The state’s bee population has since partially recovered, accounting for more than half of all bee colonies in the United States.

In case you missed it: Organic Almond Farming -Production In India

Almond Production
Image Source

Irrigation management for Almond farming in the USA

Since California receives only rainfall, there is not enough to grow a commercially viable Almond crop, so growers need to supplement rainfall with irrigation. The common irrigation method was a flood irrigation system, where a farmer would flood the field and submerge all the trees. It allowed the farmer to save on expensive infrastructure costs such as underground pipes and micro-irrigation technology, realized when water was abundant and cheap.

However, as water has become scarcer and farmers have become more aware of their environmental impact, flood irrigation is rare. Rather, most Almond growers use highly efficient irrigation methods such as drip irrigation or micro-sprinkler irrigation. Unlike flooding, which has 50% efficiency, these new irrigation methods are as high as 95% efficient. In addition, some farmers take it further by using subsurface drip or deep-root irrigation.

These methods are also more efficient in reducing or eliminating water evaporation when irrigation is applied to the soil surface. Instead, the water is used to the roots directly below the soil surface. With increasing concerns over drought, water, and climate change, underground irrigation will become more popular in California. Many existing orchards converted to this technology to save water and increase efficiency.

Cultivation practices for Almond farming in the USA

The almond season begins in late October after the previous year’s harvest. During this time, it is essential to give the Almond trees enough nutrients before dormancy, so they are ready to push buds when they bloom in February. It mainly involves the application of nitrogen, potassium, zinc, and phosphate to the trees. These nutrients can be applied through irrigation water (often called fertigation), spread on the soil in dry form, or applied to the tree’s leaves in a foliar spray.

Around December, the Almond trees will lose all their leaves and become dormant. The trees will not take any nutrients or water during this time. Blooming occurs when Almond trees begin to put forth buds and flowers that need to be pollinated by bees so that the buds will eventually produce Almonds. During this time, it is essential that the air temperature does not get close to freezing, or it will kill the buds and significantly affect the crop.

Because of California’s mild winters, Almonds are more successful in this state than in other western states such as Arizona or New Mexico. As a result, the trees will produce leaves (leaves) and small nuts that eventually become the Almonds we eat. It usually happens in early March. It is also when irrigation water and additional nutrients are applied to the tree to size the Almond kernels and ensure they stay on the tree rather than falling off before they are fully ripe. 

Water consumption increases gradually from March to July, peaking in July and then decreasing from July to October. From March to July, the Almond kernels increase in size. As a result, nutrition and water are critical during this time to ensure that there is enough energy to maintain the crop at the proper size. Many growers may also employ “deficit irrigation,” especially in years like this. Reduction irrigation is a method of reducing a tree’s water needs without necessarily affecting the crop.

Deficit irrigation is mainly applied after Almond kernels reach full size (in July) and can save 20% of water requirements during this period. In addition to nutritional requirements, Almond trees require fungicides and insecticides to protect the crop from diseases and pests. Basic fungal sprays are applied during bloom time in February. On the other hand, insecticides are mainly applied in summer to protect the crop from pests and marine orange moths. 

Blooming stage in Almond trees

Between mid-February and mid-March, the Almond tree buds open into beautiful white and pale pink flowers. Orchards grow multiple varieties of Almonds, and beekeepers bring beehives into orchards to provide the missing piece of the puzzle. As the trees bloom, bees forage pollen and nectar in the garden. 

In case you missed it: Almond Seed Germination, Time, Temperature (Badam)

Almond
Image Source

From March to June, the Almond kernel matures and grows to full size, and the shell around it hardens – both are protected by an opaque outer hull. Once the spring rains stop and the weather warms, farmers begin irrigating their fields to support the crop, taking great care to ensure that the water should be used efficiently. Also, green Almonds can be harvested for use in various foods. 

Pests and disease control for Almond trees in the USA

Almond trees are mainly susceptible to many pests and diseases, the most common of which is the navel orange worm. It takes up residence in unharvested nuts on the tree during the winter. The best method to keep them away is to cut all the nuts off the tree. Almond trees are also vulnerable to peach tree borers. If your tree’s growth is stunted or you see insect infestation near its base, apply a Bacillus thuringiensis spray or Bt spray to kill them.

Protect your tree from diseases. Almond trees are prone to diseases when old, dirty garden tools damage their bark. Take extra care not to damage the trees during felling, and always use clean tools to cut them. 

Almond tree management tips

Pruning encourages consistent, high production of good-quality nuts. It also removes branches growing in the working space between rows of trees. Pruning young trees helps them develop the desired shape and branch structure. As nut trees age, pruning is usually limited to removing dead or damaged branches unless better light penetration is needed. It is common practice to prune the Almond tree branches when planting.

It results in several shoots competing for the new leader’s position or main trunk. As a result, when new shoots are 8 – 12 inches tall, growers select the strongest and straightest as leaders and pinch the growing tips of competing shoots. The lower branches are shortened every year in late winter or early spring. If any lower branches grow vigorously during the growing season, the practice is to pinch off the growing point.

Leaving lower branches on a young tree helps it grow faster by maintaining its photosynthetic area. It also provides shade for the stem during the growing season. In addition, it facilitates weeding and other cultural practices. 

Market standards for Almond trees in the USA

The USDA (United States Department of Agriculture) generally maintains grades for California Almonds that cover everything from defects to color. Higher grades, such as US Fancy, Extra No. 1, and US No. 1 (Supreme), require a stronger visual appeal. With a low level of chips or scratches (5-15%), only 1% of kernels must be split, and the sample contains less than 0.05% ‘foreign’ material.

Dust levels also need to be kept at a minimum of <0.1% in all grades, and crop management is critical in this regard. Grades like US No. 1 whole and broken, or US No. 1 pieces, accept high levels of chips, scratches, and broken nuts. However, the size of the nuts and the level of other defects are less important, and these Almond nuts are sold at a lower price for use in the manufacture of food ingredients. 

Harvesting period for Almonds in the USA

From August to October, mechanical tree “shakers” harvest the Almond crop by shaking it vigorously into the ground. Protected by their outer holes and shells, the Almonds are dried naturally in the hot California sun for 7-10 days before being flown into rows by a “sweeper” machine. Then, a harvester or “pickup” machine moves over the rows, vacuuming the nuts into a cart that takes them to the edge of the orchard to take them to the next stop on their journey. 

In case you missed it: Almond Oil Extraction Method, Process, Machine Cost

Almond Tree
Image Source

Each variety of Almonds is harvested separately, so this process usually happens two to three times per orchard. Also, during this period, Almond trees begin to form the buds that will become next year’s crop, so growers take care to give the trees what they need for this critical stage.

Frequently asked questions about Almond farming (FAQ)

Which state farms the most Almonds? 

California produces about 80% of the world’s supply of nuts, which farmers have spent years learning to produce more with less water. So Christine Gemperl knew this would be a challenging year for her Almond crop. 

How many Almond farms are there in the US? 

Approximately 7,600 growers and 102 processors/handlers shipped 774 million pounds of Almonds. 

Why are California Almonds cheap? 

International demand for Almonds has increased recently and spurred significant crop growth in California. However, while groves expanded, California’s drought reduced supplies and drove prices above $4 a pound. 

Which country produces the best quality Almonds? 

The USA produces about 2,002,742 tons of Almonds of the best quality. 

Where are Almonds grown in the US?

California produces Almonds commercially, where cool winters and mild springs allow Almond trees to bloom. As a result, 82% of the world’s Almonds come from California. 

What is the price of Almonds in the US? 

The average price per ton in New York and Washington is US$6018.01. The US import price of Almonds was US$8.45 per kilogram. 

Can I grow an Almond tree in Texas? 

Almond trees are generally unsuitable for growing in Texas because they bloom in early spring when frost damages the flowers or the nuts forming, Texas A&M University warns. However, varieties known as ‘Mission’ and ‘Halls Hardy’ bloom later and can reward you with a crop of Almonds in the fall. 

Can Almond trees grow in Pennsylvania?

 Although you won’t be able to grow Almonds here in western Pennsylvania, plenty of delicious, hardy nut trees are perfect for our climate.

Are Almonds grown in Tennessee? 

Almonds are not suited to Tennessee’s growing conditions. Many of the others have specific characteristics that limit the areas of the state where they can consistently grow and fruit. 

In case you missed it: Almond Farming, Planting, Care, Harvesting (Badam)

Almond Farm
Image Source

Conclusion

In the United States, the best climate for growing Almond trees can be found in Central California. There are other suitable areas (Arizona, Texas, and parts of Georgia), but as a rule, the risk of fungal diseases increases as they move to the east. In addition, global growth in protein demand has been a boon for tree nuts in general and Almonds in particular. Therefore, the Almond industry is growing rapidly in the US. The above conditions are helpful to starting Almond farming in the USA.

How to Control Aphids on Plants Naturally and Organically: In Vegetables, Fruits, Herbs, and Flowers

Aphids are soft-bodied insects that coat the leaves and stems of your plants and suck the sap from your garden plants. They range in different colors, from green to gray or reddish brown. Fortunately, these are easy to find and easy to get rid of. Aphids are a group of insects belonging to the Aphididae family.

How to Control Aphids on Plants Naturally and Organically
Image Source

There are several thousand species of small insects in this large family, and they all have boring mouthparts that allow them to feed on plant sap. Aphids feed on various plants, but some species may be specific to certain plants. For example, some aphid varieties are bean aphids, cabbage aphids, potato aphids, green peach aphids, and melon aphids. Let’s check out how to control Aphids on plants naturally and organically.

Aphid damage symptoms in plants

  • Aphids are among the most destructive pests of cultivated plants in temperate regions. They are a source of fear for many growers, as they can cause yellow, droopy leaves, stunted growth, dense foliage, browning, low yields, and even plant death. 
  • Aphids pierce plant stems – preferring succulent new growth – sucking the nutrient-rich sap, weakening the plant and causing it to die. In addition, aphids carry deadly viruses that infect the host plant as they feed. These viruses can easily damage potatoes, citrus fruits, and cereals. 
  • Additionally, the honeydew secreted by aphids creates an environment for leafhoppers that spreads through the skin and envelopes the plant’s leaves, depriving them of sunlight. Look for symptoms such as curling, stunting, or yellow leaves to detect aphid infestation. 
  • Check the underside of leaves, as aphids like to hide. If a sticky substance appears on the stems or leaves, this can be an indication that aphids are infesting the plant. Honeydew can develop a fungus called sooty mold, which causes branches and leaves to appear black. 
  • Flowers or fruits may be deformed due to feeding on aphids. Some aphid species cause galls to infect or leave the roots.
  • Look for misshapen, curling, stunted, or yellow plant leaves. Aphids like to hide there. 
  • If the plant leaves are covered with a sticky substance, this is a sign that aphids are sucking sap. This “honeydew,” a sugary liquid produced as waste by insects, can attract other insects, such as ants, which collect the food material. When aphids feed on trees, their honeydew can fall onto cars, outdoor furniture, driveways, etc. 
  • Honeybees sometimes encourage the growth of a fungus called sooty mold, which causes branches and leaves to appear black. 
  • Flowers or fruits may be distorted or deformed due to feeding on aphids. Some aphid species cause leaf spotting on roots or leaves. 
  • Aphids can transmit viruses between plants and attract other insects that prey on them, such as ladybugs. 

Identification of aphids in plants

Aphids are small, which means adults are less than 1/4 inch and are often almost invisible to the naked eye. Different species can appear white, black, brown, gray, yellow, light green, or even pink. Some may have a wax or wool coating. Their bodies are pear-shaped with long antennae. Nymphs (young aphids) look similar to adults. Most species have two small tubes (called cornicles) extending from their hind end. 

How to control Aphids on plants naturally and organically

Try one of these safe and easy home remedies to kill aphids in your garden, prevent the return of aphids, and control ants. 

Spray with soapy water

Add a few drops of dish soap to a spray bottle, top up using water and then shake to dissolve. Spray the solution over the plant, being sure to reach all parts of the plant, including the undersides of the leaves. Soapy water traps and suffocates aphids. Make a homemade aphid spray by mixing a few tablespoons of pure liquid soap in a small bucket of water. (Avoid using soaps or products with degreasers or moisturizers).

Apply from a spray bottle directly to aphids and affected parts of the plant, making sure to soak the undersides of leaves where larvae and eggs like to hide. Soap dissolves the outer layer of aphids and soft-bodied insects, eventually killing them. It does not harm beneficial insects like lacewings, ladybugs, or pollinating bees. You can also purchase ready-to-use insecticidal soap online or at a local nursery.

In case you missed it: Okra Pests, Diseases, Symptoms, And Control Measures

Aphids on Plants
Image Source

Neem oil

Neem oil is an excellent option for controlling aphids. Neem oil has many good uses, as it discourages the presence of other harmful insects such as cabbage worms, ants, beetles, mealybugs, and caterpillars. It is effective in controlling fungal growth. Neem oil controls various common garden pests like aphids and fungal diseases. It can also be used as an inert spray to control overwintering eggs of different insect pests. 

Organic methods

Organic methods include soap emulsions, horticultural oils, and pyrethrum sprays. If using soapy water, reapply every 2 to 3 days for two weeks. You can control aphids through the use of natural repellents. However, it is important to avoid harsh chemicals, as they can negatively affect your plants and garden ecosystem. Instead, the leaves of Onion, Garlic, and Tomato plants are a natural aphid deterrent that won’t harm your garden. These are best applied by using a spray applied to the plant leaves. 

Grow aphid repellent plants

Plant flowers like Marigolds, Nasturtiums, and Sunflowers in your garden to get rid of pests naturally. Plant herbs such as Catmint, Lavender, Turmeric, Ginger, and Oregano to repel aphids. Vegetables that aphids do not like are Onions and Garlic. Another way to control aphids is to grow plants that repel them between vegetable patches, garden beds, and rows of ornamentals that aphids particularly like, such as Eggplant. 

Use liquid dish soap

Mix 2 to 4 teaspoons of liquid soap in a gallon of water and fill the solution into a spray bottle. Apply it to the affected plant, especially under the foliage. 

Use essential oils

Another organic way to get rid of aphids is with essential oils. While they may not kill aphids, they will keep them at bay. Peppermint and lavender oils are suitable for this purpose. You can also mix them into your spray recipes. 

Plant nectar-producing flowers

Alyssum, Cilantro, Hyssop, and other beneficial insects near aphid-susceptible plants will attract insects like ladybugs, hoverflies, lacewings, and parasitic wasps that prey on soft-bodied insects. Yellow jackets are also excellent aphid eaters. 

Steps to make garlic spray for controlling Aphids

  1. Peel a bulb of Garlic and put it in a blender. Add a cup of water and puree for about a minute until finely chopped. If you don’t have a blender, a food processor or immersion blender will do, or you can use a garlic press to chop or mince the Garlic and then blend it with water. 
  2. Pour the garlic mixture into a bowl and add about 3 cups water and two tablespoons of liquid soap. Cover it and let it sleep overnight. Liquid dish soap coats the larvae and suffocates them. 
  3. Strain and pour into a spray bottle. The tension ensures that the garlic nozzle is not blocked. 
  4. You can add a teaspoon of ground cayenne or hot pepper when the Garlic is helpful to make your spray stronger. Adding black pepper makes the garlic spray capable of repelling various pests. 

Tips to prevent aphids

Spray dormant horticultural oil to kill overwintering aphid eggs for fruit or shade trees. Beneficial insects like ladybugs, lacewings, and parasitic wasps, will feed on aphids. Attract these insects to your garden by providing an environment that has lots of flowers, as well as access to water. Supplemental populations of insects can be ordered online and help keep the aphid population under control right from the start. 

Companion planting helps keep aphids away from plants or help keep them away from plants you want to grow. For example: 

  • Aphids are repelled by catnip. 
  • Aphids are attracted to Mustard and Nasturtium. Plant them near more valuable plants to trap aphids. 
  • Nasturtiums make spoiled fruit trees taste sap for aphids and will help keep aphids away from Broccoli. 
  • Chives and Garlic repel aphids when planted near plants like Lettuce, Peas, and Rose Bushes. 
  • Prevent aphids on fruit or shade trees; spray with dormant oil to kill overwintering eggs. 
  • Invite insects that feed on aphids such as lady beetles, lacewings, and parasitic wasps. 
  • Plant floral ground covers to attract predators. 
  • Companion planting is beneficial in keeping aphids at bay. Apply catnip to keep aphids away from Broccoli Nasturtium plants. 

Control Aphids in Vegetables 

Aphids on vegetable plants are yellow, green, red, or brown and pear-shaped. They usually reproduce in colonies that gather on the underside of leaves. A bad infection results in stunted, wilted plants and weak plants. They are often hidden in organic leafy greens such as Collards, Kale, Lettuce, Mustard, and Spinach so these greens should be washed thoroughly before serving. 

In case you missed it: Ginger Diseases, Pests, Symptoms, And Control

Aphids
Image Source

Eating aphids will never cause disease. They cannot make anyone sick, either through ingestion or skin contact. Diseases spread by aphids are purely planted diseases; thus, no disease or harm will come to anyone who ingests or touches the aphids.

Affected plants: Aphids feed on many species of potential host vegetable plants, including Tomatoes, Lettuce, Bananas, and Cabbage. Their wonderful nature makes them sure to be on every vegetable garden pest guide. 

Damage: Aphids suck plant sap, causing stunted, stunted growth. 

Get rid of aphids on vegetables

  • Eliminate the problem – Fill a bucket with warm, soapy water. Cut off the aphid-infested leaves and immerse them in soapy water to kill the insects. This method works best when plants have a mild aphid infestation. 
  • Feed your plants – Instead of synthetic nitrogen fertilizers on your vegetable plants, apply a time-released urea-based fertilizer. Using too much nitrogen on plants at once can increase aphid populations. 
  • Continue checking the plants – Spray the affected plants with a strong spray of water and rinse the aphids from the plants. Repeat daily until the worms are gone. Aphids rarely find their way back into plants after you knock them off. 
  • Treat affected plants – Treat badly infested plants with insecticidal soap or neem oil spray, following package directions. Apply them directly to the affected parts of the plant, coating the aphids. Repeat the application every 2 to 3 days until the aphid population is reduced. Mix equal parts about 70 percent alcohol and water for an effective spray. Or, combine 5 cups of water, 2 cups of rubbing alcohol, and one tablespoon of mild liquid soap for a spray. 
  • Promote beneficial predatory insects by including many flowering plants with small flowers in the garden. 
  • Physical control – You can remove aphids from plants by spraying them with a strong stream of water from a hose. Aphids easily squeeze out by hand or cover the plants with floating mulch to protect them from pests. 
  • Organic product control – Use horticultural oil, insecticidal soap, or neem-based insecticides to eliminate challenging aphid infestations. 

Control Aphids in Herbs 

Aphid damage can be identified quickly and effectively. It would help if you looked for the following: 

  • Houseplant leaves that are misshapen, curled, or yellow 
  • A sticky substance on the stem of a houseplant 
  • Herbs that are growing deformed
  • Leaves on roots or leaves 
  • Small insects on the opposite side of the leaf 
  • Large numbers of small insects on the stem of the plant
  • Small insects on the root of the plant

In case you missed it: Ginger Diseases, Pests, Symptoms, And Control

Plant Pest Control
Image Source

What Herbs Get Rid of Aphids? 

Plant some herbs that help repel aphids. Plant repel aphids include Chives, Coriander, Dill, Garlic, Mint, and Nasturtium. Plant these herbs in a protective row at the edge of the garden or near herbs more prone to aphids. Plant some herbs that help repel aphids. 

Avoid excessive nitrogen fertilization, which stimulates the growth of soft, new plant tissue that aphids love to eat. 

Maintain or increase populations of natural aphid predators and parasites such as lady beetles, lacewings, syrphid bees, and parasitic wasps. Avoid using broad-spectrum insecticides, which often have a more damaging, long-lasting impact on predator populations than on aphids. Planting a diverse range of scented herbs or flowers helps attract beneficial insects.

Remove aphids from plants with a strong water spray from a garden hose. Many aphids are wingless, and those with wings are poor fliers. Repeating this spray every several days can provide adequate control. 

Spray the herb plants with neem oil, horticultural oil, or insecticidal soap. Cover the top and bottom of the plant leaves with spray to ensure complete control. Soaps and oils have no lasting effect, only killing aphids and other pests on the herb when applied, so repeat applications every 7 to 10 days are often necessary to achieve control. 

Control Aphids in Fruits 

They are common pests affecting a variety of fruit trees. They affect plants but can also infect Peaches, Nectarines, Cherries, and even Apples and Pears. Start checking fruit trees in the spring as soon as they produce buds. Aphids often congregate on the undersides of plant leaves and nitrogen-rich new plant growth.

An easy, non-toxic way to get rid of aphids on fruit trees is to spray them under the leaves with water pressure. Avoid wetting the plant leaves during the hottest part of the day, warns Philly Gardens. Many beneficial insects prey on aphids, including ladybugs and lacewing larvae. These insects are available for purchase, although they can appear independently, mainly if you plant flowers that attract them. Ants protect aphids and prevent predators from reaching them. 

Tips for getting rid of aphids in fruits

  • Monitor your trees regularly for aphids. 
  • If you identify that you have aphids, look very carefully to see if there are any predatory insects around that are eating them. Spiders, ladybirds, and wasps are all particularly prolific aphid eaters. 
  • Check if ants are associated with aphids in your tree. 
  • Prevent the aphids from reaching the aphids by placing a sticky barrier between the aphids and the ant nest. 
  • Focus on building plant biodiversity under your fruit trees. For example, flowering plants, especially white and yellow flowers, are great at attracting and providing habitat for predatory insects. 
  • Unhealthy trees attract more aphids, so focus on improving your tree’s health and soil growth.

In case you missed it: Crop Pest and Disease Management – a Full Guide

Aphid
Image Source

Frequently asked questions about Aphids in plants

What is the best killer for aphids? 

If an insecticide is required, insecticidal soaps and oils are the best choices for most situations. Oils can include petroleum-based horticultural oils such as neem or canola oil. These products primarily kill aphids by killing them, so complete coverage of infested plants is required. 

What causes an aphid infection? 

Aphids become a problem when things go wrong, usually when plants are experiencing drought, poor soil conditions, or overcrowding. 

Why do aphids come back? 

The main reasons aphids return are their constant reproduction, hiding ability, and ability to move to new plants. Pest control, especially aphids, is not a one-time deal. 

Do aphids live in soil? 

Unlike their root aphid cousins, aphids do not live in or under the soil. Therefore, they cannot survive in such an environment because they need to feed on plant micronutrients to survive and reproduce. 

Will aphids spread to other plants? 

Aphids often spread to other plants in late summer and fall as they seek new food sources. Some aphids seek out specific plants. Other species—such as green peach aphids (Myzus persicae) and cotton/melon aphids (Aphis gossypii)—can infect many plants. 

Does vinegar get rid of aphids? 

Vinegar is effective at killing aphids and ants and is also better for the environment. This home solution can fight aphid pests while maintaining a healthy garden for beneficial insects like bees and ladybugs. 

Do banana peels keep aphids away? 

Avoid using potentially dangerous pesticides to repel aphids and ants from the garden by using orange and banana peels to repel insects. Cut banana peels and bury them 1 to 2 inches deep in the soil around plants prone to aphid infestations to remove aphids from the area. 

How long will aphids last? 

The lifespan of an aphid is approximately 1 month. It reaches maturity in 4 to 10 days and can produce its offspring. 

In case you missed it: Beans Diseases, Pests, and Control Methods

Aphids
Image Source

Do aphids harm plants? 

Aphids can stunt growth and weaken plants with twisted or distorted leaves. Many aphids secrete a sticky honeydew on which black molds can grow. White scales of aphids may accumulate on the upper surface of the leaves.

Conclusion

Aphids quickly enter indoor and outdoor gardens. Small, soft-bodied insects grow quickly, so you need to control them before they reproduce. Aphids are among the breeding pests of cultivated plants. These destructive insects cause significant damage to agricultural plants, especially in temperate regions. The above steps are different ways to get rid of aphids.

Indian Gardening in the USA: For Home, Containers, Backyard, Vegetables, Flowers, Herbs, and Fruits

1

In the United States, many Indians emigrate, and many of them want to know how to grow Indian vegetables, fruits, and flowers. You can grow the vegetables you desire in your backyard or in a container at home. Here we will learn the different types of vegetables, fruits, herbs, and flowers grown on US grounds, how Indians grow Indian vegetables in the US, and how to start backyard and container gardening in the USA.

Indian Gardening in the USA
Image Source

Indian gardening in the USA

What kind of Indian Plants you can grow in your garden in the USA?

You can easily grow Indian vegetables in the United States of America (USA)such as Bottle Gourd (Sorakaya), Ridge Gourd (Beerakaya), Snake Gourd (Potlakaya), Cluster Beans (Goru Chikkudu), Broad beans (Chikkudukaya), Gongura, Ivy Gourd (Dondakaya), Bitter Gourd (Kakarakaya), Yellow Cucumber (Dosakaya), Malabar Spinach (Bachalikura), Ginger (Allam), Garlic (Vellulli), Bayleaf, Moringa (Drumstick/Munagakaya), Turmeric (Pasupu), Taro Root/Arbi Root (Chamadumpa), (Okra Bhindi/Bendakaya), Green Chilli (Pachi Mirchi), Brinjal (Baingan/Vankaya), Parwal, Methi Leaves (Menthikura), Curry Leaves (Karivepaku), Kothimeera, Ponnaganti Kura, Chukka Kura (Khatta Palak), Thotakura/Amaranthus, and Palakura/Spinach, Henna Plant (Mehndi/Gorintaku)

You can also grow Indian flowers in the United States of America (USA) such as Jasmin flowers (Malle Poolu), Marigolds (Banthipoolu), Crossandra (Kanakambaram), and Chrysanthemums (Chamanthi Poolu), Gerbera, Bougainvillea, Dahlia, and Hibiscus (Mandaram).

You can also grow Indian fruits in the United States of America (USA) such as Guava (Jamakaya), Custard Apple (Sitaphal), Mango (Aam/Mamidi), Jamun (Alla Neredu), Sapota/Sapodilla, Indian Ber (Regi Pandu), and Indian Gooseberry (Amla/Usirikaya).

Determine the plant hardiness zones where you reside

An area’s hardiness zone is characterized by its average annual lowest temperature, critical to the survival of a wide range of plant species. In certain systems, additional statistics are taken into account. The USDA devised the original and most frequently used system, which specifies 13 zones based on long-term average annual severe minimum temperatures, as an essential guide for landscaping and gardening.

As a result, it has been modified and adopted by other nations (such as Canada). Unless otherwise stated, the USDA scale is often referred to as a “hardiness zone” or simply “zone” in American settings. Hardy to zone 10, for example, indicates the plant can tolerate temperatures between 30 and 40 degrees Fahrenheit without harm.

Find out what hardiness zone you reside in using the USDA’s online hardiness map, which can be searched by zip code and includes a zone finder. It’s important to remember that planting zone maps aren’t ideal and that diverse microclimates occur within hardiness zones. Variations in humidity, heat, wind, soil, or wetness may all impact a plant’s ability to thrive in a particular microclimate. Many Indian plants fit into these hardiness zones, so choose your Indian vegetable plant wisely based on where you reside.

In case you missed it: How to Start Grapes Farming in the USA: Production, and A Step-by-Step Growing Guide for Beginners

Indian Gardening USA2
Image Source

Choose the type of home garden to grow Indian vegetables

Backyard garden 
Choose the ideal site 

The most practical location for a home Indian vegetable garden is the backyard or another site close to the house that gets enough sunshine. However, if there is insufficient drainage, the soil is too shallow, or nearby buildings or trees cast a shadow, the garden may have to be situated farther away from home. When planning your garden, you should consider what you will grow and how much of it you will plant.

It is preferable to have a modest garden that is properly kept as opposed to a huge garden that is neglected and overgrown with weeds. Draw a plan of the garden rows on paper, noting the length you want to devote to each kind of vegetable, and then cut out the plan. Use a scale that equates a certain number of feet to one inch. After that, you’ll be able to choose the number of seeds and plants.

Think about the option of growing your veggies in separate plots that are located in front of your bushes. The look of several types of vegetables can be rather attractive. You can grow some veggies in your flower beds, while others are better suited for growing in containers. You must take into consideration the quantity of sunshine that your garden receives. Indian vegetables with leaves, for instance, can be planted in areas with some shadow, while vegetables that produce fruit need to be grown in areas that get direct sunshine.

Consider sunlight soil and drainage 

To have a good garden, it is essential to have friable, deep, and well-drained soil. It is less necessary that the soil is of a particular kind than that it has good drainage, a good supply of organic matter, the ability to retain moisture, and is relatively free of stones. The kind of subsoil is another factor that is of the utmost significance. Creating high-quality garden soil is likely difficult or impossible if the surface soil contains hard shale, rock ledges, gravel beds, or very deep sand.

Organic matter, lime, commercial fertilizer, and other soil-improving ingredients may, on the other side, make rich soil infertile. The soil must have good drainage. Installation of agricultural tile, digging ditches, and sometimes plowing deeply into the subsoil are all common methods that can enhance soil drainage. In the garden, there should be no low spots or areas that might collect water after it has rained heavily.

The water from the ground around the garden should not drain into the garden, and there should be no risk of floods caused by overflow from the streams that are nearby. It is essential to have adequate air drainage to reduce the risk of damage caused by frost. A garden on a slope that allows unobstructed airflow to lower levels has the best chance of avoiding harm from late spring and early autumn frosts.

Early crops have a better chance of survival if the land they are planted on is south-facing and has a mild slope that does not exceed 1.25%. Strong winds may need a windbreak, such as a fence, hedge, or trees on the garden’s windward side. Planting hedges and other live windbreaks at a sufficient distance from the garden is essential to exclude the possibility of shadow or damage to the crops from the plants’ roots. If feasible, the sun’s rays should shine directly on the garden during the day.

However, no amount of water, fertilizer, or care can make up for the absence of direct sunlight. When trees aren’t shading fields, their roots can penetrate deep into the soil and steal crops of water and nutrients. Tree roots can damage garden crops; construct a 2-foot-deep trench between the trees and the garden and clip any roots that cross it. After that, line one of the trench walls with a barrier made of scrap sheet metal or thick roofing paper, and then fill in the trench. In most cases, this will avoid root damage for several years.

Prepare soil for growing Indian vegetables in the backyard 

Proper cultivation, utilization of organic matter, soil fertility management, and insect control are necessary to preserve good soil for producing vegetables. Soil properly prepared creates a favorable environment for root growth, quickly absorbs water and air, and seldom crusts over time. Good garden soil isn’t always the result of tillage. Tillage is necessary for several reasons, including weed control, soil amendment, and crop residue mixing.

In case you missed it: How to Start Rose Farming in the USA: A Step-by-Step Production Guide for Planting to Harvesting

Indian Gardening USA3
Image Source

If the soil is damp, tillage compacts it, increasing crusting on the surface. Long and short growing seasons, as well as different soil types, have different fertility needs. How long it takes to prepare a garden for planting is determined by the kind of soil and the location. The soil should not be plowed until early spring when a garden is covered with crops. Heavy clay soils in the northern regions often benefit from autumn plowing and exposure to freezing and thawing throughout the winter for Indian vegetables.

Most garden soils benefit from organic matter addition and erosion control by being covered throughout the winter. Dryland gardens should be plowed and kept rough in the autumn to absorb and retain the winter rains that are sure to come. A general rule of thumb is to cover crop sandy soils before spring plowing. Before planting, the area should be plowed, and the soil disked many times to help decompose and incorporate any heavy sod or cover crop growth.

Land that will be plowed and then receive an application of coarse manure should be treated the same way. Wet soils shouldn’t be plowed until severe freezing weather is imminent. Plow and work sandy and organic-rich soils with greater moisture content than heavy clay soils, for example, peats and mucks. Squeezing a handful of dirt together is the most common method of testing.

It’s too moist if it forms a ball and doesn’t easily crumble beneath the thumb and finger of a worker thumb and finger. The soil should be sampled for dryness at the surface and several inches below before beginning any work. A plow or other implement stuck to the soil indicates that the soil is excessively damp. Another sign of dangerously saturated soil is the smooth, uninterrupted surface of the turned furrow.

The fall-plowed ground should be rough until spring, when it may be disked or harrowed. A seedbed should be established on spring-plowed soil shortly after plowing. It’s easier for seeds to germinate and plants to develop in well-prepared soil, and the labor involved in planting and caring for crops may be substantially reduced.

Plant your backyard garden 

It is possible to start seedlings in a window box, pan, or flowerpot of soil and watch as they grow. Additional requirements include at least six hours of direct sunshine daily and a temperature of at least 75 degrees Fahrenheit. Sphagnum moss and finely washed sand are good seed-starting materials. A layer of fine sand or sphagnum moss, approximately three-quarters of an inch thick, should be placed at the bottom of a flat. Gently tap on the soil with your hands.

A jig can then be used to create half-inch-deep seedbed furrows. Allow the moss or sand to drain once it has been thoroughly watered. Sow the seeds in rows by covering them with some other layer of sand or moss. Cover the flat with a transparent plastic film after sprinkling it with a light mist. The light is diffused and subdued, while the plastic sheet keeps the soil and air around the seeds moist. Plastic films are more lightweight and less likely to break than glass coatings.

Choose a place where the seeded and covered flat will get at least six hours of direct sunshine each day and one that is somewhat warm at all times. After the seedlings have sprouted their first genuine leaves, the flat will need no more treatment. After that, they may be moved to new containers. It is almost impossible to protect newly transplanted plants from growing spindly and weakly in windows. 

Water your backyard garden 

During the growing season, most gardens need a moisture supply equating to around an inch of rain every week. A week’s worth of watering is needed to sustain adequate output if the soil’s moisture is depleted and there is no rain for weeks. A 30-by-50-foot garden receives 900 gallons of water for every inch of rain that falls. Rather than watering infrequently, give the garden a solid bath once a week at the most.

In case you missed it: How to Start Pumpkin Farming in the USA: A Step-By-Step Planting to Harvesting Guide

Indian Gardening USA4
Image Source

Sprinkle a few drops here and there isn’t going to do any help. When the terrain and the slope are favorable, the most effective method for applying water is to channel it down the length of the furrows that separate the rows until the ground is completely saturated. Sprinklers or porous hoses must be used if the soil is too sandy or the surface is too uneven for the furrow approach.

Pest and disease management for your backyard garden 

A wide range of pathogens and insects prey on Indian vegetable crops. Insect and disease prevention is always preferable, but if an attack happens and the gardener does not know what to do, he should contact the county agent or his experiment station at once. There are publications available for free from the U.S. Department of Agriculture and many individual states that offer information on common garden pests and illnesses. Plants and seeds that are free of disease should be used in combination with disease-resistant kinds. 

Container gardening 
Select a proper container 

Thinking about the container’s size before making a purchase decision is essential. Depending on the region’s size, there are advantages and disadvantages to both small and large containers. The bigger the container, the better for shrubs and tiny trees. A fully established plant’s root system will be able to fit in a pot with ease. More plants in a larger container mean a bigger container. As a result, the grower must devote more time and care to smaller pots since they dry up faster. 

Even if you use plenty of medium, if your plants grow too large for their container, it will run out soon. Because of their porous nature, unglazed ceramic and terracotta pots lose more moisture from the soil. Nonporous materials like plastic, polystyrene, metal and glazed ceramic should be used to decrease moisture loss. The plants might also influence the kind of container used. Drainage is a must-have. 

For the most part, ornamental plants need adequate drainage. A large amount of stagnant water can cause plant infection and death. A hole for drainage must be included in the container’s bottom as a consequence. The container should have 2-inch-diameter holes if they don’t already.

Heavy containers with a wide base are less likely to topple in windy environments. Because dark containers can quickly heat up and injure the roots of your Indian vegetable plants in locations with a lot of direct sunshine, light-colored containers are recommended. It is simpler for those with limited mobility to garden in higher pots since they do not have to stoop as much.

Choose the ideal potting mix 

Container gardening requires using artificial or soilless media, which can be purchased at most garden supply shops. Since conventional garden soil and topsoil compact too easily and limit water and airflow to the roots, using them in containers will result in your plants’ death. In contrast, artificial potting media is used in pots and does not compact. 

The decreased weight also makes it easier to move containers. Because container gardening allows you greater control over the environment in which your plants grow, it is a good idea. Blueberries, for example, thrive in an acidic climate. In comparison to altering the pH of a plant bed, container gardening is much easier. For example, better drainage is required for succulents. As a result, a succulent substrate is recommended.

Potted plants have greater control over the medium they utilize to thrive since many garden shops sell soil particularly designed for use in containers. Time and money are wasted when the same mediums are used again. A deterioration in the media’s ability to retain moisture and nutrients over time might act as a breeding ground for pathogens. A 10% bleach solution should be used to sanitize the container after the season. To prepare a bleach solution, mix 1 cup of bleach with 9 cups of water.

Plant your container garden 

Every container garden or flowerbed is unique. Afterward, the media may be included in the design. An inch of space should be left around each container’s rim to avoid washing out media whenever it is submerged in water. The material should not be stuffed too firmly in the container. Compacting the medium deprives the roots of oxygen, which they need for survival. Separate any plants’ roots that are stuck to the earth. Once the plants are in the container, use a medium to cover the root ball.

In case you missed it: How to Start Apple Farming in USA: A Step-by-Step Planting to Harvesting, and Production Guide

Indian Gardening USA5
Image Source

As soon as the plant’s root system is exposed, it will die. It’s critical to check that all of your plants are in their pots before watering them. Deep water the container plants. In addition to promoting deeper root growth, this technique also aids in draining salts that can build up. A saucer should be placed underneath the container if there are any spills or stains. Water in the saucer that has been left unattended for an extended period may lead to the development of diseases and the death of plants and larvae of mosquitos.

Water your container garden 

Unlike potted plants, in-ground plants dry up more quickly due to their smaller soil surface and the pot’s design. Watering container plants in the morning or evening, when temperatures are cooler, and the water has had more time to absorb, is recommended. However, it also prevents the growth of fungus by allowing water to drain away quickly. To water, a plant, wait until the soil is fully dry. Look for shriveled, discolored leaves, drooping stalks, and dropping petals. Etc.

Potted plants that are kept warm and dry should be checked regularly; water plants when the soil’s top inch is dry. Most plants need frequent, slow, deep watering to ensure water reaches the soil and roots. As the water evaporates quickly, the plant or soil does not have time to use it. Most potting soils will refuse water if they are completely dry. As a result, the plant’s root system will get enough moisture, and the soil will be replenished.

Rehydrating the soil in a pot by soaking it in water for around 30 minutes is the best option if you accidentally let it dry out completely. This will assist in restoring the soil’s moisture level to its pre-drying state. Water-soaked wire cages, baskets, or coir should be submerged in a bucket of water.

The water requirements of various species vary. Once you’ve figured out how much moisture your plant needs, you can buy a moisture gauge. Watering pots is a breeze with these. The probe of the gauge measures soil moisture. You should water your plant if the soil is dry, even if the gauge suggests otherwise. Once all the water drains out of the drainage holes, slowly deep water.

Pest and disease management for your container garden 

If you’ve moved to container gardening and one of your plants isn’t doing well, you may be dealing with a pest or disease. What may be done to prevent this from happening again is outlined in the following paragraphs. Begin by finding out the root cause of a problem, such as a lack of fertilization, a lack of pesticides or illnesses, too much sun or frost, etc. Most of the time, an unhealthy plant may be traced back to an improper environment. For example, does your plant get enough water? Is there a way to get water out of your container?

A plant’s susceptibility to disease and pests is increased if it is grown in an unsanitary manner. Use the least destructive management method if a pest or disease is responsible for the problem. Pesticides are the last resort, except for low-toxicity pesticides like insecticidal soap, since they may affect beneficial species like ladybug populations. Always follow local pesticide regulations. Choose healthy plants well-suited to the growth conditions to avoid pests and diseases. Inspect and care for them regularly.

In case you missed it: How to Start Carrot Farming in the USA: A Step-By-Step Production Guide for Planting to Harvesting

Indian Gardening USA6
Image Source

Conclusion 

Creating a home garden in which to cultivate Indian fruits, veggies, flowers, and herbs may be done in this manner. In the United States of America, you can begin a garden in your backyard or one in containers, depending on the available space. Have patience and make sure your vegetable garden gets the right attention it needs. You’ll get great results soon.

How to Start Grapes Farming in the USA: Production, and A Step-by-Step Growing Guide for Beginners

Grapes can be cultivated in USDA zones 4-10, almost anywhere in the continental USA. Today, more than 99 percent of the Grapes grown commercially in the United States come from California. With 81 varieties grown, California Grapes come in three colors – green, red, and black – and are available from May to January.

How to Start Grapes Farming in the USA
Image Source

How to start Grapes farming in the USA

Grapes cultivated states in the USA 

The state of California produced 6 million tons of Grapes. Washington, the nation’s second-largest producer of Grapes, produced only 325,000 tons this year. In addition to Arkansas, California, Georgia, Michigan, Missouri, New York, North Carolina, Ohio, Oregon, Pennsylvania, Texas, Virginia, and Washington, USDA, the National Agricultural Statistics Service (NASS) collects Grape production. 

The West Coast – California, Washington, and Oregon account for over 90% of all US vine farming. New Mexico and Arizona are notable in the southwestern United States. Colorado and Idaho are notable in the Rocky Mountain region. 

Find the best location to plant your Grapes

It would help if you had a large, open, sunny spot with good soil for growing Grapes. Grapes require about 50 to 100 square feet per vine if grown vertically on trellises or arbors and about 8 feet between rows if planted horizontally in rows. While they will grow in a range of soils, they will thrive in well-drained, rich, organic soil (vines cannot tolerate wet feet) mixed with plenty of compost or soil conditioner. In addition, all-around air circulation helps fight fungal diseases such as powdery mildew.

Preparing vines for planting 

  • Spring planting is recommended to give young Grape vines as much time as possible to establish before their first winter in Minnesota. Three vines are soaking in a bucket of water. When planting bare-root vines, soak the roots in a bucket of water for 3-4 hours before planting. 
  • When you get the plants, please keep them in a cool place where the root system is moist. It would help if you planted vines as soon as possible. 
  • Local nurseries also have potted vines. These Grape vines should also be planted as soon as possible, but time is not so important since the roots are growing. 
  • When planting, remove all but the strongest canes. 
  • Plant vines with the lowest buds on sugarcane just above the soil surface. Cut off any broken or excessively long roots. 
  • Dig a hole big enough for the root system to spread out and then cover the roots completely with soil. 
  • Mulching is generally not recommended for Grapes because the mulch will keep the soil temperature too cold. 

Site Selection for Grape Farming in the USA

Site selection is essential when planning a Grape vineyard. Significant factors to be considered for a particular site are minimum winter temperatures, frequency of spring frosts, length of the growing season, and total growing days (50°F, 20 days between April 1 and October 31). Grapes need full sun to ripen properly and develop full flavors.

If possible, choosing a sunny hillside location will also provide the benefit of better ventilation to reduce the risk of frost. Vines should be grown in well-drained soil. Planting in deep soil has its advantages as it enables the vines to develop a large root structure, thus reducing the potential for drought stress in dry years. The proximity of irrigation supplies for drought should also be considered. 

Grape varieties in the USA

The widely grown Grape variety in the USA is the Sultana; these Grapes are either eaten or dried into raisins. There are 148,000 acres (60,000 hectares) of this Grape, so 14% of the total area is under vines in the United States. In addition, Concord has 34,000 hectares. This Grape can be made into wine occasionally, mainly on the East Coast, but today it is more famous for jellies, juices, and jams. Muscadine, a bunch of Grapes, and a hybrid are other varieties.

Most table and wine grapes grown in North America come from the southern European Grape (V. vinifera). Adapted to Mediterranean climates, wine Grape species are “Riesling,” “Pinot Noir,” “Cabernet Sauvignon,” and “Zinfandel” varieties thrive in USDA zones 7 through 10. Seedless table Grape varieties such as “Flame Seedless” and “Thompson Seedless” can also be made into wine but are eaten as fresh Grapes or for dried purposes like raisins. 

Muscadine Grape (V. rotundifolia), also called “Bullace,” “Scuppernong,” “Muscadine,” and “Southern Fox Grape,” is native to the southeastern United States. It grows from Delaware to Florida and as far west as Texas in USDA zones 5 through 10, covering trees and houses with 60- to 100-foot-tall vines. Despite living in the humid South, Muscadine Grape varieties are also grown in California and Oregon wine-growing microclimates. 

In case you missed it: Growing Grapes In Greenhouse – Farming, Cultivation, Production In India

Grape Yard
Image Source

Native to the West Coast, the California wild Grape (V. californica) grows from California to southwestern Oregon. Hardy in USDA zones 7a through 10b, wild species are planted as wildlife habitats and to restore degraded riparian areas. Used mainly as an ornamental because of its bright autumn colors, the wild Grape and its hybrids “Roger Red” and “Walker Ridge” are eaten as fresh Grapes to make juices and jellies.

Several Grape varieties will produce well in cool climates for the homeowner’s backyard conditions. In commercial Grape production, the goal is to produce a consistent, high-quality product. An appropriate selection of varieties that fit both the planting site and local consumer preferences is critical to the success of this enterprise. Before choosing, thoroughly research the characteristics of different Grape varieties best suited to your production situation. 

Consider winter hardiness, bud break time, and proper ripening requirements (it’s important to know the specific length of the growing season and total growing degree days for your location). Also, weighing both the positive and negative horticultural qualities of the varieties you’re considering is important. 

The Grape growing season in the USA

In the United States, the peak Grape season is from August to October. However, the winter season is an important part of the California table Grape varieties growing cycle. Plant growth stops temporarily, and the vine rests. This stage is called “dormancy.” At this time, growers harvest the vine and prepare it for the growing season. In early spring, small buds bloom on the vine, and green leaves appear. The form of the first green leaves through the bud scales is known as bud break.

Progress is slow at first. As the average temperature increases, growth and shoot length accelerate. After three or four weeks, the fastest growth period begins – where shoots can grow an average of an inch or more per day. As the days warm, the flowers open, then disperse to make way for small green Grapes that eventually ripen into bunches. Berry size increases rapidly. Sunlight and warm temperatures are important for Grapevine physiological functions (such as photosynthesis).

StatesGrapes in season
Alabama   mid-July till mid-October
Alaska   July till August
Arizona   May till September
Arkansas   July till September
California   May till December
Colorado   September till October
Connecticut   mid-August till October
Delaware   September till October
Florida   August till September

Grape growing zones in the USA

The wine and table Grape varieties mostly grown in North America come from the southern European Grape (V. vinifera). Adapted to the Mediterranean climate, wine Grape varieties such as “Cabernet Sauvignon,” “Pinot Noir,” “Riesling,” and “Zinfandel” thrive in USDA zones 4 through 10. 

Support or trellis for Grape vines

Vines need some support, or they run along the ground. Grape vines can also be grown along existing fences. Grape vines grow rapidly and become quite heavy. Grape vines can be trained and pruned into almost any shape and form. Once the Grape vines are planted, the trellis system must be constructed, followed by the installation of the drip irrigation system.

Building a trellis system is a considerable expense in establishing a vineyard. There are many trellis systems to choose from, and careful consideration must be given to deciding on a system. A trellis or training system that enables good fruit exposure and optimizes a large leaf area is critical to producing high-quality Grape clusters. 

Fertilization management

Grapevines should only be fertilized if a soil test or leaf tissue analysis indicates a deficiency. Commercial manure or compost can be applied to the vineyard. Apply sparingly to avoid over-fertilizing the vines. Fertilization takes place two to three days after pollination.

The fruit-set stage occurs almost immediately after flowering when the fertilized flower begins to develop seeds and Grape berries to protect the seed. California table Grape varieties are mostly seedless – the seed stops developing soon after fertilization, resulting in seedless berries. Grape berries go through several stages of development, from being set to fully ripe. 

Plant your new vine properly in the USA

Table Grape varieties don’t need a fancy support system. Vines need a horizontal structure that gives them the support they need and allows you to train them. In mild winter regions (USDA Zone 7 and warmer), you can plant vines in early winter. In colder areas, wait for early spring. Grape vines have deep roots (up to 15 feet), so dig a planting hole about two feet deep and wide and fertilize with compost.

In case you missed it: Organic Grapes Farming, Growing Practices

Grapes Farming
Image Source

Dormancy/Pruning for Grape Plant Growth 

Dormancy is a crucial stage in the annual cycle of the Grapevine when growth and development temporarily stop and the vine rests. Lower temperatures and shorter day lengths bring it about. At this time, growers harvest the vine and arrange it for the upcoming season. 

Vine pruning and training are two of the most important aspects of quality Grape production. The two basic methods of pruning are spur and cane. Some varieties produce better crops (in terms of yield and quality) with cane harvesting, while others produce better crops with spur harvesting. 

Grape production in the USA

Before planting any commercial vineyard, consult with a viticulturist in your area. Even in areas where desirable Grapes will grow, it is important to place the vineyard on the right type of soil, with adequate air and water drainage, fertility, subsoil makeup, and exposure to sunlight. The choice of Grape varieties to produce will mainly depend on what the market wants to buy. Build a strong relationship with any buyer before planting. 

Grapes are grown in a vineyard field and the fruit of a vine plant. The vines are planted in rows evenly spaced six to 10 feet apart, and each row is 6 to 10 feet apart. A wire trellis supports the vines above ground for ease of vine maintenance and harvesting. A vineyard can cost $15,000 per acre plus the cost of the land before the first harvest in the third or fourth year after planting. Vineyards produce a very valuable crop.

The timely application of fertilizers, herbicides, pesticides, fungicides, and harvesting activities is essential to protect the crop. Other threats come from birds and deer that attack the crop at a high cost which must be controlled. Grapes are perennial plants, meaning the soil needs to be prepared for years of future growth. Amending the soil at planting time is critical to providing long-term nutrients and good drainage.

The vineyard manager will inspect the orchards or fields to determine the maturity or condition of the crop or to detect disease or pest infestation. Crop production operations like planning, tilling, planting, cultivating, spraying, fertilizing, or harvesting. Supervise activities like irrigation, milking, chemical application, harvesting, breeding, or grading to ensure adherence to safety regulations or standards. 

Carefully plan crop activities based on factors like crop maturity or weather conditions. Maintain financial, production, or employment records for farms. Obtain necessary financing for the purchase of machinery, land, equipment, or livestock. Inspect farm or field equipment to ensure proper operation. Analyze the soil to determine the fertilizers needed for maximum crop production. A vineyard is a labor-intensive farming business. Much work is done by hand and in all kinds of weather, mainly hot and humid.

In case you missed it: How to Start Banana Farming in the USA: A Step-By-Step Guide to Planting to Harvesting

Grapes Farm
Image Source

Vineyards are growing in every state of the country. Although Grapes will grow in most climates in the United States, Grape varieties grown for wine, food, or juice have a much more limited growing area. Before planting any commercial vineyard, consult with a viticulturist in your area. Even in areas where desirable Grapes will grow, it is essential to place the vineyard on the right type of soil, with adequate air and water drainage, fertility, and exposure to sunlight. 

Planting tips for Grape farming in the USA

This process begins with choosing a specific Grape variety. Next, you will need to purchase vines or prepare your cuttings. Next, select a suitable location with plenty of suns with soil that is well-drained, acidic, and semi-fertile. You will want a trellis system to support vines. Finally, it would help if you determined when to plant (spring) and finally plant your vines.

Choose a site with full sun. If you don’t have a full sun spot, ensure it gets at least morning sun. Your soil should be deep, well-drained, and loose. The vines will need to be trained for some support to grow upwards. It will reduce the risk of disease in plants. Help is required when planting. Don’t fertilize the first year unless you have a soil problem. Add a light fertilizer in the second year of plant growth. 

Mesh netting is helpful in keeping birds away from emerging fruits. Pruning is essential. Grapes bear fruit on shoots growing from one-year-old canes. You will get fewer Grapes if you have too many old canes (without pruning). If you prune your vines yearly, you get lots of new growth but fewer vines. 

Managing diseases and pests 

Most pests and other problems can be minimized by planting vines in a sunny location with good air circulation. Weather conditions, variety of winter hardiness, infestation from the previous year, history of pesticide use, and influence of surrounding vegetation can affect vine susceptibility for a particular year. 

Good air circulation is essential to prevent most diseases. After harvesting, pull the cuttings away from the vines. These practices will eliminate some of the spots that winter disease can infect next spring. If possible, diseased parts of the vine should be removed and discarded at the first sign of disease to prevent its spread to the rest of the vine. 

Grape harvesting season in the USA

Depending on your region’s climate, Grape harvesting usually begins in mid-August and continues until the end of September. Table Grapes must be pruned several times for the best quality fruit and full ripening. However, Grapes absorb odors, so avoid storing produce like onions or leeks nearby.

Grapes are usually harvested directly into plastic pieces designed for Grapes. These nests can be avoided by turning the stacks 180 degrees when not used and during harvesting to avoid crushing the fruit below. In addition to creating a visually appealing cluster, attractive packaging will aid marketability. Many packaging options are available, but the possibilities include clear plastic clamshells and perforated polyethylene bags. 

Harvest Quality – Grapes are harvested fully ripe. After they are picked, they are not very sweet, so timing is everything. Once picked, fresh Grapes are easily spoiled by rough handling, hot temperatures, excessive humidity, and rotting organisms. Consequently, the bunches of Grapes are carefully inspected and then immediately packed by hand into shipping containers – often right in the field. 

Grapes are mature and ready to harvest when their seeds turn from green to brown. It is also when their flavor peaks. Note that Grapes will not taste better after harvesting. Harvest month depends on the variety. Grapes are generally soft and develop a sweet and less acidic flavor as they ripen. Use both skin color and flavor as predictors of ripeness. You may be disappointed if you use color alone, as the Grapes can color before they are ripe. It’s a shame to cut your Grapes before they reach their ideal size and sweetness. 

Grapes marketing in the USA

Some farmers in the eastern USA are growing and selling table Grapes; there is currently a very limited market for locally grown table Grapes. Most table Grapes consumed in the USA are grown in California and South America. These Grapes are seedless and have a slightly milder flavor than most table Grape varieties in the eastern United States. However, tasting panels and farm marketers who have offered locally grown table Grapes have met with enthusiastic acceptance.

Table Grapes are another option for farmers to meet the growing demand for locally produced food products. If you are trying to sell through a local grocery store, you need to check with the product manager to find out what kind of packaging they need, how much they are willing to market, and when they prefer to receive Grape deliveries. Prices in the few markets offering these Grapes are significantly higher than local grocery store prices for domestic and imported Grapes. 

Grapes yield in the USA

Approximately 5,940,000 tons of Grapes were grown commercially in the United States. California had 5,615,000 tons. Other top Grape-growing states in the USA include Washington and New York.

In case you missed it: How to Start Tomato Farming in the USA: A Step-by-Step Production Guide to Planting to Harvesting

Grapes Tree
Image Source

Frequently asked questions about Grapes farming in the USA

Where in the US can you grow Grapes? 

Top Grape-growing states in the USA include Washington and New York. Some other Grape production areas are Arkansas, California, Georgia, Michigan, Missouri, New York, North Carolina, Ohio, Oregon, Pennsylvania, Texas, Virginia, and Washington. 

How profitable is growing Grapes? 

A grower may find they can obtain 5 tons of quality fruit and sell it for $3,000 per ton, making a gross profit of $15,000 per acre. 

Where are the vineyards in America? 

The vineyards of the North Coast, San Joaquin Valleys, Southern California, Central Coast, Sacramento, and the Sierra Foothills. Oregon’s wine regions include parts of popular American viticultural areas such as the Willamette Valley, Southern Oregon, Umpqua Valley, Rogue Valley, and Columbia Valley. 

Where does America get its Grapes from? 

Chile and Mexico supply about 98 percent of imported US table Grapes; most of these varieties are imported during the off-season months. Table Grapes are mainly imported from Chile from January to April. 

Can Grapes grow in New York? 

Like France, New York has many areas where Grapes grow well. In the extreme north are the Grape-growing areas: Lake Erie, Thousand Island, and Niagara Escarpment. In the south, the Grape cultivating areas are the Finger Lakes, the Hudson River Valley, and Long Island.

Can Grapes grow in Florida? 

Grape varieties grow in Florida: Muscadine, Bunch Grapes, and a hybrid. Some varieties have male and female reproductive parts and do not require pollination. Others, however, have only female flowers and should be planted within 25 feet of the self-fertile variety. 

In case you missed it: How to Start Pumpkin Farming in the USA: A Step-By-Step Planting to Harvesting Guide

Grapes Field
Image Source

How many Grape vines should I plant? 

Mature Grapes can produce 15 to 30 pounds per vine. Maybe you want to plant a couple of vines. Mature wine Grapes yield approximately 12 pounds per vine, and it takes about 40 pounds to make 12 bottles. If it is for making wine, you’ll need a lot of Grapes. 

Conclusion

Grapes will grow in most climates in the United States; Grape varieties grown for wine, food, or juice have a much more limited growing area. To grow and produce high-quality Grapes, the vines must be exposed to adequate sunlight, heat, and water during the growing season and cold during the dormant stage. Warm summers and rainy winters are ideal conditions for Grape vines. This information is especially useful for Grape farming in the USA. 

19 Key Rules for Effective Dairy Farm Management: From Planning to Reduce Production Cost

Dairy farming is raising dairy animals like cows, goats, buffaloes, donkeys, and other livestock and using their milk for human consumption. Therefore, proper planning and below key rules make more profit in dairy farming. 

Key Rules for Effective Dairy Farm Management
Image Source

Key rules for effective dairy farm management

Effective objectives of dairy farm management

  • Effective livestock management can play an essential role in improving household livelihoods. The effectiveness of management practices largely determines success in dairy production. 
  • The production systems of dairy farmers worldwide must be able to combine profitability with responsibility for protecting human health, animal health, animal welfare, and the environment. 
  • The primary role of dairy farmers is to ensure that good agricultural, hygienic, and animal husbandry practices are applied at the farm level.  
  • Good dairy farming practices make milk and milk products safe and fit for their intended use. 

Tips for effective dairy farming 

Among all animal products, milk is the healthiest food. It contains essential nutrients for the human body in proper proportions, easily digestible. Adding milk to the human diet also increases the digestibility of other types of food. The Milk production capacity differs from country to country; some countries are excess in production, some are in deficit, and some countries’ availability is according to their needs. 

Key rules for effective dairy housing management

Well-planned and adequate housing of dairy animals is an essential component of effective livestock management. Important considerations include comfortable and sustainable housing for individual animals throughout the year, adequate sanitation, and arrangements for clean milk production within parameters of economic feasibility. In addition, a dairy house is required to protect the cattle from adverse weather conditions. It should include cow sheds, calving boxes, isolation-cum-quarantine boxes, and sheds for young stock.

Good Housing + Good Management = More Milk 

An important and often overlooked issue that is a significant challenge for most dairy farms today is maintaining cow comfort. There are a variety of environmental stresses that must be taken into account in dairy farm management, and these have a direct impact on cow production levels. Some of these stressors are heat stress, poor ventilation, improper stall/feed bunk design, and inadequate access to water.

Such conditions are stressful for cows and greatly affect their physiology and productivity. Many aspects of farm management, such as feeding, breeding, quality milk production, disease control, ease of handling of manure, division of household labor and workload, etc., have always depended on the farmer’s accommodation for dairy animals. 

In case you missed it: How this Farmer Made 1 Lakh Per Month from His Dairy Farm: A Success Story

Dairy Cow Feeding
Image Source

Good management practices for successful dairy farming 

  • Selecting high-yielding and disease-resistant breeds. 
  • Good environmental conditions include adequate ventilation, temperature, light, water, air, and well-drained housing. 
  • They are fed on a balanced ration. 
  • Regular visits to veterinary doctors. 
  • Regular inspection and record keeping. 
  • Cleanliness and hygiene during milking and transportation. 

Farming rules to earn extra money in dairy farming

Production of milk on dairy farms and processing of milk and milk products in dairy plants constitute the dairy industry. Dairy farming is only for those who are passionate about it. Dairy farming takes time and a lot of patience to be successful. Dairy farming is now a profitable business. Most of the youth in the country are behind dairy farming. It is mainly due to the profit margin in cow dairy farming.

One says that the profitability of cow dairy is exciting many people. Apart from this, the opportunities for this business are also very high recently. Not only this, the government at the state and central levels is helping with loans and subsidies for dairy farmers. So many people are showing great interest in starting this cow dairy farming business. Proper management of dairy animals should be done to provide good quality and quantity of milk. Some essential points required for the management of dairy farms are given below:-

  • Selection of good breed of animals with high production potential. It should be disease resistant. 
  • The quality and quantity of fodder should be checked thoroughly. 
  • Proper hygiene and cleanliness should be maintained. 
  • Regular health checkups of animals should be done. 
  • Milk production, marketing, and distribution play an important role in dairy management. 

Key rules for selecting dairy breeds for good management

Breed characteristics of high-yielding dairy cows
  • It should have bright eyes with a lean neck. The udder must be well attached to the abdomen. The skin of the udder has a good network of blood vessels. All four quarters of the udder must be well marked with well-placed teats. 
  • To choose the right breed, start by finding your needs and limitations, such as your budget and how you will use the cow (and milk). Next, spend some time learning about dairy breeds like Holsteins and Jerseys. Ultimately, you can choose the best dairy cow for you with care. 
Selection of breeds for commercial dairy farm

Proper selection is the first and most crucial step in dairying. Under Indian conditions, a commercial dairy farm should have at least 20 animals – about ten cows and ten buffaloes. You can then easily increase the strength to 100 animals in a ratio of 50:50 or 40:60. But then, you need to assess your strength and market potential before opting for expansion. The best breeds are:

  • Holstein
  • Jersey   
  • Brown Swiss 
  • Ayrshire
  • Milking Shorthorn
  • Friesian
  • Girolando
  • Guernsey
  • Illawarra
  • Irish Moiled
  • Kerry
  • Lineback
  • Meuse Rhine Issel
  • Milking Devon
  • Montbéliarde
  • Normande
  • Norwegian Red
  • Randall
  • Sahiwal

Key rules for selecting dairy cow breeds for commercial farm 

Good quality dairy cows are available in the market, and their daily milk production costs around Rs 2500 to 3000 per liter. (For example, the price of a cow producing 10 liters of milk per day will be between Rs. 25000 to 30000). If properly cared for, the cow regularly gives birth to a calf at an interval of 13-14 months. They are more docile and easily handled. Good milking breeds (Holstein and Jersey cross) are well adapted to the Indian climate. The fat content of cow’s milk ranges from 3-5.5% and is less than that of buffaloes. 

Effective tips for dairy farm shed design 

The ideal dairy barn depends on the area, especially the climate. Dry composting can work well in a dry area, as it provides plenty of space and is inexpensive to set up. However, rain produces mud which significantly increases the risk of disease. Compost barns consist of sawdust or other bedding material in a large shed. A compost barn can be a comfortable and inexpensive design if you have enough affordable bedding material. 

Building a free stall warehouse is more expensive but offers some advantages. Free stall barns have individual cubicles on the sides with a wide open space in the middle. Cows can enter the stalls freely to lie down or eat. This arrangement gives the cows room to move and makes it easier to manage to feed and keep manure separate from the bedding. 

In case you missed it: Equipment Needed for Dairy Farming: Small Dairy Machinery Details

Dairy Cows
Image Source
Best shed design

When designing a cow shed, you must focus on several important areas. Although these details can be expensive to improve, they will pay off in dairy animal health and productivity.

  • Stalls with enough space for dairy cows to move forward and to the sides
  • Ventilation
  • Non-slip flooring outside of the stalls
  • Space for feed
  • Effluent management conditions that keep manure separate from food and bedding
  • Soft bedding that is fluffed daily and then replaced regularly
  • Access to clean water and food

Rules for selecting good quality dairy breeds 

  • An important point in the dairy farming business is the selection of animals with good breeding characteristics. This approach is mainly for farmers who want to do commercial dairy farming. 
  • Animals should be selected that reflect the character of the true breed. Reproducibility is of greatest concern in this standard. For example, the crossbred Holstein Friesian has a high feed intake and good milk yield compared to other breeds. Still, it requires a high-quality, balanced diet and forage. If breeders cannot meet the requirement, they ultimately suffer losses due to low production and imbalanced diets leading to deficiency diseases that take longer to recover.

Milking management rules for dairy farming

  • A good milking technique is an essential factor in dairy farming. No single duty in a dairy operation carries as much responsibility as the actual act of milking the cows. 
  • Good breastfeeding is a skill that can be learned through practical experience. Therefore, the harmonious interaction between the milker and the cow is of utmost importance regarding a cow’s milk yield and farm profitability.
  • A good milker develops a routine during each milking. It cannot be overemphasized that if the habit of drinking milk is good, the results will be good. The dairy farm conditions in question determine the choice of hand or machine milking. Whatever system is used, the milker must be familiar with the lactating cow’s basic milk secretion and udder shape. In most other countries where animal milk production is good, they prefer machine milking. 

Key rules for dairy feed management

  • When planning a dairy farm, you need to feed your cattle with nutritious feed. It is also very important for healthy milk production and healthy growth of the calf. 
  • Consult a nutritionist about feeding lactating cows and even dry cows. Many farms are seen to produce feed for their animals. 
  • Preparing your farm for grazing animals or livestock and harvesting crops can save you a good investment. But since it requires a lot of space and time, you can hire operators who can help you plant and harvest the crops. 
  • Double cropping can benefit the dairy farming business if you have your land. A balanced diet improves milk production and meets the animal’s nutritional needs. 
  • Forage should be chaffed before feeding to prevent wastage and increase digestibility. In most dairy herds, nutritional management is the most important determinant of herd productivity. The link between nutrition and productivity begins at birth. 
  • A milking system provides each cow with the necessary nutrients at the right stage of growth and lactation to maintain maximum productivity.

Feeding and watering of dairy animals to reduce the production cost

The health, milk quality, safety, and productivity of dairy animals mainly depend on the feed and water. The Diet and nutrient requirements of dairy animals depend on factors such as body condition, milk production level, age, body condition, weight, weight gain, health status, activity and exercise level, climate, and weather. 

In case you missed it: Dairy Disease Symptoms and Treatment for Cows, Cattle, Goats, and Sheep

Dairy Shed
Image Source
  1. Feed and fodder requirements vary from animal to animal depending on age, production level, pregnancy status, etc. 
  2. In consultation with the concerned Veterinary Officers of the Animal Department, always give the animals a balanced minimum cost ration consisting of good quality feed and fodder. 
  3. Provide adequate green fodder in the ration. Grow green fodder on your land as much as possible. Cut the forage at the flowering stage when the production of digestible nutrients is maximum. 
  4. Preserving fodder for use during the lean period (in the form of hay/silage) and strengthening poor-quality straw can be done under the guidance of a local veterinarian. 
  5. Change from one type of feed to another should be gradual. 
  6. Improper feeding practices should be avoided as they may result in diseases like bloat, acidity, metabolic problems, laminitis, etc. 
  7. Half crushed grains are preferred for eating instead of finely ground grains. 
  8. Moisten the concentrate mixture before feeding. 
  9. Provide adequate vitamins and minerals either through fortified salt licks (preferred) or by adding mineral supplements to concentrated rations. 
  10. Different feed ingredients can also be mixed to make Total Mixed Ration (TMR). This ration can be divided into 3-4 equal portions daily. It will reduce spoilage and feed choice and increase digestion. 

Techniques of dairy farming for effective management

The guiding aim of the good dairy farming practice is to produce milk on the farm from healthy animals under generally accepted conditions. To achieve this, dairy farmers need to implement: 

  • Animal Health 
  • Milking hygiene
  • Feed and water animals
  • Administration of veterinary drugs
  • Activities carried out on the dairy farm to food safety and food hygiene
  • Animal welfare and 
  • Environment
  • Safety and health practices relating to dairy farm operators

Tips for starting a dairy farm business plan 

  • One first needs to decide on the aims and objectives of the farm. Each year there should be a progressive goal for breeding (in which the number of animals is to be maintained) and production. 
  • You can visit dairy farms that are run on a commercial basis and interact with experienced farm owners. Consult local veterinarians for more information if needed.
  • If you plan to manage a farm, look for opportunities to work for an existing farm for at least six months. 
  • Develop an interest and study your area’s feed and fodder market and its difficulties with the seasons. 
  • Manage a good team of workers. You need to choose hard-working, reliable people preferably with some experience. Then, you can train them for specific jobs. 
  • Visit the dairy animals market occasionally. Observe the animals at the sale and talk to the people buying the animals. 
  • Read magazines and websites on the dairy industry and keep yourself informed. 

Make a dairy business plan for reducing production cost

It is an important thing to do before starting dairy farming. Creating a detailed dairy business plan is the key to a successful dairy farming business. 

Seek advice from professionals – It is advisable to consult and consult with experienced people in the field. They can give your ideas for business plans and help you set up the initial structure of your business. Try visiting other dairy farms to see how they run the business. Consider each farm’s plus and minus points when giving this field trip. While meeting others, try to get as much information as possible from these experienced people like veterinarians, nutritionists, investors, bankers, etc. 

Think about the initial investment – Dairy farming is an investment-intensive business. Basic needs are land, buildings, cows, and some other goods. Bank loans are available to farmers to start their agro-based industries. 

Challenges in dairy farm management 

  1. Breeding infrastructure and genetics: The success of Indian dairy was primarily due to an increased number of animals and not productivity. Increasing productivity per animal is essential when resources are limited. Therefore, good animal genetics, breeding infrastructure, and advanced methods like artificial insemination, embryo transfer, etc., are in high demand. 
  2. Livestock Fodder and Fodder: There is a severe and ever-increasing shortage of green fodder and good quality feed. The growing trend of high-breed animals is creating a huge demand for good quality feed and fodder to meet the nutritional requirements of dairy animals. Also, a prophylactic approach uses feed premixes to avoid many health and nutritional complications. 
  3. Animal health: Good health care and diagnostic solutions for animal diseases are required. As mentioned above, high-yielding animals demand extra care, driving the animal health sector for many years. 
  4. Farm mechanization: Farm mechanization is being welcomed by farmers to deal with the situation. 
  5. Cold chain ​​infrastructure: This segment is bound to see growth opportunities as the government and the private sector invest heavily to secure sufficient procurement. 
  6. Availability of Power: Many chilling plants are affected by lack of power and do not operate efficiently, due to which milk quality and shelf life deteriorate. An opportunity within this segment could be solar-powered milk chillers.

In case you missed it: Top Cattle Feed Manufacturers in India: Companies List

Dairy Farming Setup
Image Source

Health Management tips for dairy farm management

Health management is critical to ensure optimal care and welfare of dairy cattle and to reduce productivity losses due to disease and mismanagement. Cattle health is often discussed about the whole herd. It is because whether you have one cattle or 100, what hurts one can easily affect others. Therefore, the health of every animal on the farm is equally important. 

Veterinarians will be a regular part of cow health management. Manage many aspects of the cow’s welfare; a veterinarian is necessary to administer medication, deal with medical emergencies, perform examinations, and confirm necessary slaughter. Therefore, it’s important to factor vet bills into your budget; ideally, you’ll want to establish a relationship with a local vet of your choice. That way, whenever a group of your cows needs antibiotics or treatment for mastitis, you already have a team of professionals. 

Key rules to improve dairy animal health care 

Healthy, well-fed animals produce more milk than thin and sick animals. Dairy animal diseases, such as tuberculosis, brucellosis, and mastitis, can also affect milk quality and safety. However, many drugs sold over the counter are expired or counterfeit. Animal health care can be improved by following three principles: 

  1. Keep your dairy animals healthy. Get them vaccinated and treat them immediately if they get sick. Have a few healthy, productive, well-fed animals instead of many thin, hungry animals. 
  2. Buy accurate medicines only from a reputable dealer. Make sure to use the right medicine at the correct dose. 
  3. Milk only from disease-free animals 

Hygiene can be improved by following the following pointers. 

  1. Wash your hands and udder with clean water before feeding. 
  2. Wash the milking bucket and all accessories thoroughly. Keep the milking area clean and then free of dust and flies. 
  3. Use stainless steel or aluminum buckets and cans to store milk. Do not use plastic jerry cans, which are impossible to clean properly. 

Key rules for production and marketing of hygienic milk 

Maintaining high hygiene standards is one of the most important objectives of milk production today. Hygiene will ensure high-quality milk is produced from healthy animals. High-quality raw milk provides good economic benefits to dairy farmers. From a public health perspective, milk is an excellent medium for the growth of bacteria and other microorganisms.

Thus, the risk of illness to the public from infected milk during production, handling, and marketing can be easily assessed. Furthermore, as a business, milk unavailable for human and economical consumption is a loss for the producing farmer.

In case you missed it: Jersey Cow Farming, Feed Chart, Milk, Breed Facts

Dairy Cows
Image Source

Conclusion

Dairy farm management is an important factor in maintaining long-term high production. They must manage many key factors like cow nutrition, reproduction, rest, and milking. Along with these essentials, all dairy farms must deal with weather, transportation, and logistics costs. Therefore, the above key rules are effective for getting more profit in dairy farm management.

How to Water Your Garden with Solar Power: For Home Gardening, Greenhouse, Polyhouse, and Outdoor

0

A solar-powered irrigation system uses a solar-powered water pumping system used in gardens to irrigate paddy fields, plants, vegetables, etc. Building a solar-powered drip irrigation system offers many advantages and is easy to design and install. Solar-powered water systems work in sunlight. Pumping water when the sun shines is a sensible way to use solar power throughout the summer when water demand is highest. These pumps provide a reliable source of water for planting. 

How to Water Your Garden with Solar Power
Image Source

How to water your garden with solar power

Advantages of solar power system  

Solar irrigation uses the sun’s energy to power a pump that delivers water to crops to help them grow. Some of the advantages of a simple solar irrigation system are: 

  • No grid connection is required.
  • No electricity bill will be paid.  
  • No fuel is required.
  • Durable requires minimal maintenance.
  • Solar energy is always free from pollution and does not emit greenhouse gases after installation. 
  • Dependence on foreign oil and fossil fuels decreased. 
  • Renewable clean energy is available every year, even on cloudy days, producing some power. Unlike paying utility bills, the return on investment is virtually no maintenance because solar panels last more than 30 years. 
  • Ability to live grid-free if all electricity generated provides enough for the house/building. 
  • It can be installed anywhere, from a field to a building.
  • Use batteries to store excess electricity for nighttime use. 
  • Solar energy can be used for heating the water, power plants and buildings, and even power cars. 
  • Safer efficiency than conventional electric current is constantly improving, so the exact size of solar available today will be more efficient tomorrow. 
  • Water usage requirements for solar power plants depend on the technology and climate conditions at the site. 
  • A solar-powered irrigation system ensures the field’s corpus is well watered daily. Unlike other energy sources such as biogas, coal, etc., solar energy does not emit greenhouse gases, reducing the severe impact on the ozone layer and the overall environment. 
  • As one of the most eco-friendly energy systems, solar irrigation does not create a lot of noise, unlike power generators. Also, this efficient system does not require much water to operate. Therefore, it saves more water that can be used for crops and farming. 
  • Solar energy has multiple uses in irrigation systems. Also, farmers can connect the surplus electricity to the electricity grid and sell it to the electricity company. 

In case you missed it: How to Start Hydroponic Farming/Gardening from Scratch in India: A Step-By-Step Guide for Beginners

Watering through pipes
Image Source

Design drip irrigation system layout

The key is a good irrigation design from the start. Ideally, you’ll want to build your system before planting. Of course, you can always add a drip watering system, but larger crops will be more challenging to maneuver around. Mapping out your garden will help you create the proper layout and help you spot problems you might not have noticed otherwise. Note dimensions and immovable structures and objects. 

Considerations for designing your drip irrigation system

  • The location of your water source and if there are any obstacles in the way. 
  • The distances you will want to run irrigation tubing. 
  • The designing system without crossing walkways or burying pipes under walkways.
  • Use spaces along paths to grow vegetables and herbs.
  • You are minimizing pipes and tubes for efficiency and laying out your system to use less water.
  • Different garden areas may require different amounts of water (a more complex form of drip irrigation).

Building a successful drip irrigation system 

These are pumps that transport water, equipped with solar cells. Though the solar energy absorbed by the cells is converted into electrical energy by generators, an electric motor drives the pump when needed. It is fine-tuned to use the right amount of water. An automated system also saves you from the time-consuming task of watering the garden. A solar-powered irrigation system uses a solar-powered water pumping system used in gardens to irrigate paddy fields, plants, vegetables, etc.

Recently, farmers in the agricultural field have faced many problems watering their plants to keep their crops green during the hot season. It is because they do not have a proper idea of ​​the availability of electricity. Even if electricity is available, they must wait until the pitch is watered correctly. Thus this action prevents them from doing other actions. But, there is a solution: the automatic solar submersible pump control panel for irrigation. 

For any solar-powered pumping system, the ability to move water is a function of power, flow, and pressure. These solar-powered water pumps are very cheap, durable, easy to install and require minimum maintenance compared to conventional water pumps. This system is an automatic irrigation system with a solar-powered irrigation pump. However, manually operating irrigation systems and monitoring soil water levels becomes difficult.

So this system uses solar energy by using photovoltaic cells instead of commercial electricity. Drip irrigation can be used for any of your water needs. The only difference between irrigating small gardens and large farming operations is the scale of your system. Large watering operations will require large drip tubes, pumps, and drippers. You can adjust the drip system to all landscapes and soil types. You can go around obstacles, over hills, and into trenches, so the sky’s the limit for how you want to design the drip irrigation system.

In case you missed it: How to Start Urban Farming/Gardening in India: Companies, Startups, Market, and PDF Guide

Watering Garden
Image Source

The proposed solar-based watering system

The different parts of the tank system are;

  • Water tank 
  • Motor gun 
  • Water tap
  • Water flow controller
  • Pipe 
  • An electric switch is placed between the solar tracker and water tank systems. This switch controls the opening of the water tap. Therefore, even though solar energy is present, water will not flow from the outlet when the switch is off. 

What is the need for solar-powered water pumps? 

  1. 100% Grid Dependency – Pumps today are mostly grid-dependent. If the power goes out, the water pumps will not work. It can cause the whole house to stop working. 
  2. Timely Scheduling – Since you can use solar energy freely during the day and when there is no daylight, you can use solar-powered water pumps, unlike traditional water pumps. Can work virtually 24*7 while doing. 
  3. About 95% of hand pumps are now obsolete – so you will need some form of force/energy to draw underground water for your household tasks. 

In houses – If the water motor is ½ Hp, you can easily use a 2 KW off-grid solar system. This solar system is ideal for big houses, shops, and offices. This solar system generates ten units per day, requires 200 square feet of roof space for installation, and provides a return on investment in 5.5 years with 3000 electricity savings per month.

If the water motor is about 1 Hp, you can use a 3 kW solar system to run it. This solar system is ideal for large homes, shops, and offices. This solar system generates 15 units per day, requires 300 square feet of rooftop space for installation, and provides a return on investment in 5.5 years with Rs. 4,500 electricity savings per month. 

Components of a typical solar-powered pumping system

Major components of a solar-powered system include a solar panel array that powers a bore well pump or surface pump. The complete system’s size depends on the pump’s size, the amount of water required per day, and the power available from the solar panels. Water is often pumped from a bore well or river into a storage tank or directly into the field. A solar-powered irrigation system has three main parts: pump motor, controller, and solar panel. A good irrigation system promotes better agricultural practices. 

In case you missed it: How to Start a Backyard Garden from Scratch: A Step-By-Step Guide for Beginners

Irrigation
Image Source

Solar energy is a growing source of energy generation and electricity supply. Thus, solar energy for irrigation has become increasingly important in agriculture as a reliable, clean energy solution for agricultural water management, especially in areas with high solar radiation. The main reason for using solar/sun for irrigation is that crops need more water when the sun is shining, and solar produces more energy when needed because it is directly from the sun and gains energy. 

Whereas Solar Powered Irrigation System (SPIS) has a critical technology in the agricultural sector. In recent times, SPIS technologies are becoming a viable option for many farmers, including smallholders. In rural areas, solar energy can ensure access to energy for agriculture, especially for consumers who do not have reliable access to the power or electricity grid or where fuel is expensive and inaccessible. Other benefits may include increased access to water during dry spells and dry seasons and improved income, food, and nutrition security. 

Water your gardening plants with solar power

Water your garden with rainwater using this efficient and eco-friendly solar-powered irrigation system. The irrigation system adapts to the weather conditions and ensures that all your plants get enough water. Moisture sensors also monitor current soil conditions to ensure plants are not over- or under-watered. A solar panel system was also installed to power the entire setup without needing the main connection.

Irrigation systems are weather-responsive automated water systems that use solar energy to detect the weather and adjust watering according to conditions and weather – providing precise irrigation to plants. The irrigation system connects to a rainwater container and distributes the appropriate water throughout your property. In addition, a solar-powered pump ensures that the soil is moist.

Then, the pump releases more water if the weather condition is dry and less if the weather is wet. After that, place the solar panel where it will get a lot of sun and rainwater will reach the pump in the tank. Then, run the hose from the pump to your plants and attach it to the nozzle. The hose is 15 meters long and can be adjusted to whatever length you want by cutting and modifying it. 

Installing solar power in the garden – If you don’t have a greenhouse, you’ll likely place the solar panels on the ground rather than on a raised surface. It can be tricky, as the solar panels will have to face the direction that brings in the lightest, which will be towards the sun. Generally, solar panels come with some form of mounting, whether ground or advanced pole mount.

They are usually metal and must be pressed into the ground to ensure the panels are not going anywhere. Pole mounts are more advanced than terrestrial mounts, as they sit on a single pole and are inclined toward the sun. You’ll want to install your solar panels close to the area you intend to use them for, which is your garden. 

In case you missed it: How to Start Organic Kitchen Gardening: Tips, Ideas, and A Step-By-Step Guide for Beginners

Water Sprinkler
Image Source

Water your greenhouse plants with solar power

Choosing the right irrigation system is critical to the growth of your plants. First, you want to ensure that plants get the proper water. 

Solar Powered Greenhouse Fans – Additional PC fans in the greenhouse attached to solar panels are another way we use solar energy. Greenhouse ventilation is critical, and it is the primary way to install fans during the day to circulate air around your plants and help cool the air, especially on very hot days. However, fans can be expensive to run. So it makes sense to run away from them with solar panels. And it’s a cheap way to get fans. 

As the development of low-carbon agriculture technology continues, the agricultural greenhouse is applied in wide areas. Essential measures for greenhouse planting are irrigation, fertilization, temperature and humidity control, light control, and CO2 concentration control. High temperatures in summer disrupt the normal growth of many vegetables.

The thin-film solar module used in the greenhouse can isolate the infrared rays and reduce the incoming heat to prevent the greenhouse’s temperature from being too high in the summer and afternoon. In winter and at night, the thin-film solar module can block the external infrared radiation when greenhouses lose heat and slow the temperature drop at night. 

A solar greenhouse system provides power for lighting and ventilation. It can work with an LED system. It generates electricity to ensure plant growth during the day, and the LED system uses the electricity generated during the day to illuminate the plants at night. In addition, solar greenhouse systems can be used for pest control; redundant electricity produced can connect to the grid.

How to use solar panels in the garden? 

In this proposed system, we use solar energy from solar panels to pump water from the bore well directly to the ground-level storage tank depending on the intensity of sunlight. It leads to substantial energy savings and efficient use of renewable energy. A valve is controlled using an intelligent algorithm that controls water flow to the field according to the soil moisture requirement.

In case you missed it: Drip Irrigation for Vegetables – a Full Guide

Irrigation in Field
Image Source

Soil moisture sensor detects the amount of soil moisture and controls the flow of water according to the moisture level required by the crop, thereby increasing the yield of crops. Solar panels are a money-saving and traditional way of powering basic things in the garden. You will find that most of the electricity needs in the garden can be met by installing solar power. Below are the things you can do with a solar power system: 

  • Lighting – Use solar energy to light your garden path or power those insect-repelling lights you turn on at night. You’ll be happy to see that your electricity bill will be less than leaving the lights on all night. 
  • Irrigation – You can use solar panels in the garden to power this irrigation system. Or use it to power your water system in general. 
  • Greenhouses – Solar panels are very useful for powering your greenhouse or garden shed, especially if the greenhouse or shed is small. 

One end of your device’s hose needs to be connected to an open slot in your battery charger for a DC pump and solar panel. The other end of this hose is then connected to where standard household faucets are located.

How to Start Goat Farming from Scratch: A Complete Guide for Beginners

Goat farming involves breeding domestic goats as a branch of animal husbandry. People raise goats mainly for meat, milk, fiber, and skins. Goat rearing is becoming an increasingly popular business. However, starting a goat farming farm is the most important factor in ensuring good profit in a short period. Apart from meat, goats provide other products such as milk, skin, fiber, and manure. Goats are an important part of the rural economy, especially in the country’s arid, semi-arid and mountainous regions. 

How to Start Goat Farming from Scratch
Image Source

Goats provide food to millions of small and marginal farmers around the globe. However, the productivity of goats under prevailing traditional production systems is very low. They are maintained under an extensive natural vegetation system on degraded common grazing lands and tree felling. Even these degraded grazing resources are constantly shrinking. Furthermore, the adoption of improved production technologies/management practices among farmer herds is very low.

Therefore, rearing goats under intensive and semi-intensive systems using improved technology for commercial production utilizes their full potential and increases the demand for chevon (goat meat) in the domestic and international markets. Below are the better management practices that can bring maximum profit from goat farming.

How to start Goat farming from scratch

How many goats are required to start goat farming? 

  • Commercial goat farming needs 1 male goat (buck) for every 20 female goats (does). 
  • Ensure healthy and strong males for breeding. Most female goats become pregnant at 18-20 months of age. 
  • Most experienced farmers recommend starting slow and buying at least two goats first. Others will be overwhelmed and immediately buy ten goats. 
  • It will help if you remember that your does and bucks will soon have kids who add to the herd.

How many months will it take for a goat to grow? 

Female goats generally mature at 6 to 10 months, depending on breed, size, and weight. Male goats become adults at 12 months of age. 

Can Goat farming make you rich? 

  1. Goat farming is profitable, and you can start with less capital. 
  2. These tips can also be valuable for beginners in starting goat farming. 
  3. The goat farming business can easily be profitable with proper planning and management. Small-scale goat farming needs less investment, and profits can contribute to your regular income. However, commercial production requires more investment and additional costs.
  4. Buying a healthy, good-quality breed for your goat farm is essential. After all, you are investing in the future of the goat farming business and want to make sure the breed you choose grows and thrives in the environment.
  5. Apart from taking care of animal health, it is also important to note that different breeds have been bred for specific traits such as meat or milk production. As a result, some goat breeds may have better traits than others, so check with an expert before committing to a particular breed.

In case you missed it: Dairy Goat Breeds, List, Milk Production, Breeding

Goat Farming
Image Source

What are the benefits of goat farming?

  1. Almost everyone consumes goat meat, and there is no religious restriction. Also, goat meat is lean meat and has low cholesterol content. 
  2. The initial investment required to start goat farming is much less than that required for dairy farming. 
  3. Starting a farm with a herd of 6-10 goats is unnecessary. You can easily start the farm with a couple of goats first and can be gradually expanded to a herd or developed into large commercial units. 
  4. Goats can tolerate bitter tastes to a greater extent than other animals. Goats eat almost all types of plants that other animals do not eat. 
  5. Because they are careful eaters, they can live in almost all weather conditions. 
  6. The Goat milk includes small fat globules that are easily digested. 
  7. Minimal space required: Goats are small animals. As a result, they need less space than some other domestic animals. Their housing requirements are low, so a house with minimal amenities will suffice. 
  8. Low feeding requirements: Goats require less feed because they are small animals. As a result, several breeds of goats in India can thrive on poor-quality feed.

Which is more profitable Goat or cow? 

Goat farming is highly profitable, even better than cows or sheep. They prefer raising goats for milk because they are smaller than cows, eat less, are less expensive to buy and feed, are easier to handle (whether alive or dead), and produce more manageable amounts of milk. 

Is it expensive to keep goats? 

Although getting a goat and everything you need to care for them is expensive, the month-to-month cost is relatively low. Aside from their food and bedding, you don’t need anything else to take care of them, and none of those things are that expensive. 

How tall do you need a fence for goats? 

  • Common fencing materials include posts, bracing wire, staples, stretchers, etc. Non-climbing goat and horse wire fences are generally suitable for goat fencing because it’s stronger, heavier, and stronger than a regular fence (but they can be more expensive). 
  • To protect your animals, it is important to choose the best security fence within your means, whether you have a small farm, a large pasture, or an urban home. There are six factors to consider when choosing the best fence for goats, all equally important. These include the number of goats you have, the size of the area to be fenced, whether you want an electric fence, whether you prefer alternative fencing, where to the fence, and how much you want to spend. 
  • Goats require special fencing. The best fence for goats should generally be four to five feet high. Educating yourself and reading about goats can be very helpful in making fencing decisions, especially with goats. 
  • The fence should be charged at 4,500 to 9,000 volts at all times (some experts recommend 7,000 to 10,000 volts). If you open the fence, the goats will know. Some goats may require electric and non-electric fencing. In any pasture, maintenance is essential, but for a forest or hilly area, you’ll need to walk the area frequently to check for fallen limbs, weeds, and other debris. The area under the electric wire should be clear, so the fence does not protrude from the ground.
  • In areas where jumping is likely, such as over fences intended to protect a garden or isolate money from heat, ensure the fence is high enough to prevent the Goat from trying to jump. A 4- to 5-foot (1.2–1.5 meters) fence is satisfactory for most goats. 

How do you raise goats for profit? 

  1. Breeding and selling
  2. Sale of milk and milk products for profit
  3. Goat meat
  4. Money from different sales channels
  5. Goatskin

How long is a goat pregnant in months? 

A normal-sized domestic goat has a gestation period of 145 to 155 days. It means that the average length of time is 150 days. It works for about five months, or 21 weeks, give or take a few days. 

In case you missed it: Top 50 Goat Farming Tips, Ideas, and Techniques

Goat Farm
Image Source

How much money can you earn from goats? 

The possibilities are endless if you are raising goats for profit. It is because you can generate many sources of income from a herd of goats. For example, suppose selling goats for profit, earning at least $500 each. At the same time, you can sell their milk and fiber and produce other by-products from their various parts. Basic requirements of the goat farming business include: 

  • Buy good quality breed from your goat farm. 
  • Please provide them with the necessary housing and food. 
  • Buy some good-quality male goats of your chosen breed. 
  • You should consider the cost and other requirements before starting this business. For example, if required, you must obtain a breeding permit from the relevant authority in your city or state.

How much land does a goat need? 

  • Goat farming with other livestock (such as sheep and cattle) can be very suitable for production on low-quality grazing land. 
  • Goat generally needs at least 20 square feet of indoor space. It is an excellent general estimate, especially if you have a lot of rain or snow that will keep the goats under the roof for a long time. 
  • Goats are good tools for improving rangeland health and reducing bush encroachment. 
  • Goats are social animals and should be allowed to keep at least two together. Each Goat should have at least a quarter of an acre of space. 

What are the problems faced in goat farming? 

In order of priority, the problems encountered in goat farming included a lack of good, formal and reliable market for the sale of goats, lack of capital, lack of goat rearing training, and stock theft. Some other issues are mentioned below;

  • Predator problem
  • Risk of robbery
  • An attack of disease
  • Irregular vaccination
  • Caring for a pregnant doe
  • Feeding problems
  • The issue of sanitary management
  • Mixing of breeds

Why are goats so expensive? 

Goat meat costs more than other meats because goats are difficult to raise (high nutritional and space requirements), and the meat yield per Goat is low (compared to other common meat animals). 

How do you feed goats cheaply? 

  • Hay is a good source of goat nutrition. Feed your Goat’s mold-free qualified grass-based hay. You can also feed your goats hay as it is very cheap and contains many essential nutrients. 
  • Goats are picky eaters and can tolerate more bitterness than other animals. Therefore, they can thrive on agricultural by-products, waste, and other food. Also, they are strong and withstand all kinds of weather conditions. Furthermore, their tongues are adapted for grazing, and their upper lips are mobile. Therefore, they can graze on very short grasses, shrubs, bushes, and trees. Therefore, besides pulses, wheat, maize, etc., goats should also be given leguminous fodder.
  • A fodder plan is an essential aspect of goat farming. Therefore, a proper fodder plan and management of fodder costs are essential to earning good profit in this goat farming business. 
  • Goat grain can be made from a combination of corn, barley, oats, and soybeans – it’s high in calories (high in energy), but low in fiber, which means too much can make goats obese. 

What are the easiest goats to raise? 

As mentioned earlier, Nubian and Pygmy goats are incredibly easy to get along with and are some of the best goat breeds for the Nubian people. In addition, these two are often seen as the best goat breeds for beginners. 

What is the most common method of goat breeding? 

There are generally four main breeding systems in the goat and sheep industry: This method involves selecting a buck/ram for a doe/ewe and mating them.

  • Pen breeding
  • Artificial insemination (AI) 
  • Out-of-season breeding

Choosing the correct doe and doe is the secret to successful breeding. Goats mature between 6-10 months of age. However, it also depends on size, body weight, and breed. Goat bucks mature after 12 months. Two kiddings per year with an interval of 8-9 months is ideal for maximum yield. The peak breeding season for goats is March to May and September to November. The estrous cycle usually occurs every 17-21 days. 

In case you missed it: Dairy Disease Symptoms and Treatment for Cows, Cattle, Goats, and Sheep

Baby Goats
Image Source

A doe has a heat period of 18-36 hours. To increase conception rates, the doe should meet the doe only 10-15 hours after the onset of heat. The gestation period lasts for 155 days. While females can be used for breeding for 5-7 years, males can be used for 8-10 years.

Do goats need sunlight? 

Goats love the heat; however, it’s a good idea to provide shade for them. They graze a bit throughout the day, but you will find them seeking protection from the bright sun in the afternoon. You can build shade trees for your goats with very few shade trees. 

Which goat breed is the most profitable? 

  • Selection of goat breed is very important in goat farm as it is the main asset of your business, giving it fast and good growth. 
  • Breed selection is essential in a profitable goat farming business plan. 
  • For starting a goat farming business, the climate plays an important role in the success of the goat farming business.
  • If you are considering starting a goat farm, it is very important to take care of the weather conditions before going into any farming business. 
  • Climate can be very important for your goat farming business, so you must do proper research on different breeds and choose a breed that can easily adapt to different climatic conditions.
  • The important goat breeds are Jamunapadi Goat, Boar Goat, Beetal Goat, Black Bengal Goat, Barbari Goat, Jamnapari Goat, Sirohi Goat, and Gaddi Goat.

What is the price of 1 goat? 

Shopkeepers say that the starting price of a goat is Rs. 10,000-12,000, and depending on the size and breed, it can even exceed Rs. 1 lakh. 

How long is a goat pregnant? 

Gats’ Gestation length is about 145-155 days (average 150 days) and can be affected by breed, litter weight, environment, and parity. 

What to feed goats to gain more weight? 

  • Feed goats with corn or oats. Grain is the fastest and easiest way to fatten a goat because of its high carbohydrate content; your Goat should get no more than 1/2 pound of grain per day. Goats should be trough fed or hand-fed. 
  • Protein is an important source because it helps your Goat build muscle and helps with proper carbohydrate digestion levels. When a goat’s diet lacks protein, carbohydrates are digested too quickly, reducing your Goat’s energy and affecting mineral absorption. The presence of vitamins and minerals in goat fodder is essential. Because vitamins and minerals maintain the production of goats and help protect them from various diseases. They require a lot of vitamins and minerals in their food. 
  • Certain feed elements such as phosphorus, salt, and calcium are useful minerals for goats. First, determine the health status of your goats before feeding. Then, store feeds in a safe place to maintain feed value. 

What are the five common diseases of goats? 

  • Brucellosis
  • Campylobacteriosis
  • Q fever 
  • Listeriosis
  • Salmonellosis 

In case you missed it: Goat Farming Insurance in India, Companies, Policies, and Premiums

Goat Fencing
Image Source

How do you care for goats? 

  • Sheds must be washed and disinfected at least once a month. 
  • Feed and water handlers should be cleaned regularly. Goats are prone to endoparasite infections. So every six De-worming should be done once a month. Kids are dewormed every month, while deworming is done just before breeding. 
  • Vaccinations against some goat diseases like goat pox, plague, FMD, etc., should be done periodically. It is important to prevent zoonotic diseases like salmonellosis, brucellosis, etc., as they are contagious and spread easily. 
  • Strays animals must not be allowed to enter the farm to keep infections in check. Sick goat breeds should be isolated as soon as the infection is detected, and timely medication must be administered.
  • Providing animals with clean, dry, and ventilated shelter is important. The shelter should be spacious and well-lit. 
  • It must be insulated to maintain a comfortable temperature for goats, which are sensitive to hot or cold weather conditions. Also, it should be kept clean so that diseases and parasites do not infect your animals. 

How can I start goat farming in India? 

Make sure there is a suitable market near your chosen area to purchase essential items and medicines. Find out if there are other goat farms in your chosen area. A suitable market is available near the selected farm area with high demand for goat products. Try to choose land in the village area. Shelter, fencing, nutrition, and basic health care are the four most important things in raising happy and healthy goats. Goats despise getting wet. 

It is the simplest yet most crucial part of commercial goat farming. If everything goes well and you get enough production, it’s time to market your product. In modern goat farming practices, producers are very conscious of the health of their goats. And it is essential for commercial goat farming. However, diseases are rare in goats. 

How much profit margin can you get in goat farming?

  1. Before starting a goat farming business, you must consider the cost and other requirements. 
  2. Housing, feed, and animal care costs are higher than other animals. In addition, you have to spend money on buying goats, land, and equipment for your goat farm. 
  3. Starting a goat farming business in India will also require medicine, a breeding license, or a registration fee to sell milk. 
  4. The profit margin in goat farming is about 50%. However, if you grow goat fodder on the farm, you can increase your profit margin to 80%. 
  5. You must decide on budget and investment before starting goat farming. You should know about your required capital and how many facilities you can get in that capital for goats. From our point of view, the goat farming business is profitable; if you make a good investment, you will get a good return. 

How much investment is required for goat farming? 

The land cost per square foot is approximately Rs.180. 2000 square feet of land is required for the total number of goats. 1840 square feet of land is needed for the total number of lambs. The cost of buying a goat is 3000 rupees.

How do I start a goat farm business? 

  • Provide housing and fencing for the animals. 
  • Establish reliable food sources for hay and grain. Make room to store hay and grain out of season. 
  • Buy good quality goats to start a business. 
  • Create a breeding schedule. Depending on climate conditions, you generally want to time the birth during spring. 
  • Set aside money for veterinary expenses, which are a part of owning livestock. Like any farm animal, they are prone to diseases. 

Do we need a license for goat farming in India? 

If starting a goat farming business in India, you should contact the local animal department for licensing and other procedures. 

In case you missed it: Common Mistakes in Goat Farming: For First Time Goat Owners

Goat Farming
Image Source

How much money is required for goat farming? 

Presently the annual gross income of the goat farm is Rs. 4 to 5 lakhs, and the total annual expenditure is Rs. 1.5 to 2 lakhs per annum net income of 2 to 3 lakhs.

Conclusion

Goat farming has become a highly profitable and competitive industry. But before getting into this business, it is essential to know some facts about goats. Raising goats for meat can be a very exciting and rewarding experience, but it can also be very challenging. However, with a little preparation and understanding of goat nutritional needs, even the most sophisticated farmer can raise happy, healthy, fat goats. The above information is the excellent tips and benefits of rearing goats and making maximum profit.

16 Key Rules for Effective Shrimp/Prawn Farm Management: From Planning to Reduce Production Cost

0

Shrimp farming business is a profitable business in the aquaculture industry. Successful Shrimp farming mainly depends on the selection of suitable locations. To achieve success, it is essential to produce quality products. So you should take the resources into your hands to get enough information about Shrimp farming. Below are some important rules for effective shrimp farming.

Key Rules for Effective Shrimp/Prawn Farm Management
Image Source

Key rules for effective Shrimp/Prawn farm management

Key rules for best management practices in Shrimp farming

Biosecurity in Shrimp farming includes storage of disease-free seed, pond preparation, water screening, prevention of entry of disease-carrying individuals, personal hygiene, and sanitation. 

Effective rules for increasing Shrimp growth 

  • Providing quality feed and proper care and management. Shrimp must be fed a quality and reliable diet to ensure rapid growth. 
  • Proper water management. 
  • Offering the best supplements.
  • Using the best aeration solutions. 

Key rules for selecting Shrimp varieties and their suitability 

Due to their large size and high value, Penaeus monodon and P. indicus are commonly considered for Shrimp cultivation. It has also been observed that both these species are suitable for cultivation. Apart from these candidates, other commercially important species like Metapenaeus ensis, M. monoceros, M. brevicornis, Penaeus semisulcatus, and P. merguiensis are also potential species be grown in India.

Another potential candidate species flooding the international market is the white-legged Shrimp, Penaeus vinami. Although the Indian government has not yet banned its culture in the country, many Asian countries have already started cultivating this breed. 

Selection of site for Shrimp culture to reduce the production cost

The selection of suitable sites always plays a vital role in Shrimp farming. The location for Shrimp farming is determined only after analyzing information on topography, ecosystem, climate, and socio-economic conditions to farm design, species compatibility, and economic viability. Criteria are presented here that can serve as guidelines in evaluating the suitability of a site. Site selection is an essential process in Shrimp farming as it can often decide the success or failure of a Shrimp farm, small or large.

Apart from the technical (biological, physical, and chemical) aspects of aquaculture, environmental and socio-economic aspects covering social, economic, and legal issues should be considered while finalizing the site for setting up a Shrimp farm. It is important to look at the site’s previous use(s) and topography to determine its suitability and the cost of building the farm. Large-scale Shrimp aquaculture can place excessive demands on land resources, leading to multi-user conflicts.

The construction of Shrimp farms may encroach on agricultural land. States should conduct a detailed survey to identify the lands/areas suitable for various purposes and allocate suitable areas for Shrimp farming. They should discourage the conversion of agricultural land to aquaculture. Construction of Shrimp ponds should be allowed on marginal land, which is not suitable for cultivation. However, the cooperative and competitive activities of the concerned sectors should also be considered when approving Shrimp farms’ establishment.

Generally, loamy loam is preferred. Maintaining a farm in a sandy area would involve high capital and operational costs because of the high water runoff through sandy soils and the potential environmental damage this may cause. Moreover, the topography of the soil and its contours should be considered for the amount of water and drainage points and the construction cost. A better site involves less capital to construct fully drainable ponds.

In case you missed it: Making 60 Lakh Per Year from Prawn/Shrimp Farming – A Success Story of an Aqua Farmer

Prawn Farming
Image Source

Ways to increase the growth rate of Shrimp 

  1. Providing quality feed and proper care and management – Shrimp must be fed a quality and reliable diet to ensure rapid growth. It would be best if you offered high-quality feed, and using natural feed is a good option. A given feed contains all the nutrients required to maintain good Shrimp health and achieve expected growth performance. If you employ some workforce, you must ensure they are dedicated and disciplined. To increase Shrimp production per unit and area, you need an upgraded level of management skills. 
  2. Proper water management – You should keep the water at specific levels to promote optimal fish growth. Not only is depth, but water quality is essential to help Shrimp thrive quickly. In intensive farming systems, large amounts of metabolites are released into the water, and unused feed also reaches the bottom of the pond, contaminating the water. To prevent water quality from deteriorating, you must constantly refresh the pool water. Fresh water should be allowed to flow into the pond from the water source, and the old water should be adequately drained with the help of an outlet gate. Extensive cleaning methods should also be used between cycles to maintain optimal cleanliness. 
  3. Offering the best supplements – A wide range of feed ingredients can be used to create your supplemental feeds. The simplest fish feed can be made at the pond site with the help of locally available raw materials. You must combine the right ingredients to ensure the proper distribution of all the nutrients. You can use rice mill dust, copra meal, and corn or rice bran as sources of carbohydrates and supplement them with animal proteins such as snail meat, Shrimp heads, slaughterhouse scraps, and fish waste. This combination meets the needs of all Shrimp species, and awareness of the right feed promotes rapid growth.

Shrimp culture techniques are influenced by Shrimp culture

  • Climate 
  • Location 
  • Land, water, electricity availability, and cost 
  • Transportation and cost 
  • Credit availability and cost and payment terms 
  • Labor availability and cost 
  • Feed/fertilizer /Availability and cost of probiotics 
  • National planning regulations and environmental control 
  • Import/export costs 
  • Proximity to existing market 

Effective rules for selection of Shrimp seed 

Selection and storage of good quality and adequate quantity of Shrimp seed (PL) in the pond are essential. All farmers in the area should stock Shrimp seed under the contract hatchery system at the same time as per the harvest calendar (within one to two weeks)—certified Specific Pathogen Free (SPF) stock from registered hatcheries or sources selling high-health disease-free seed. PCR tested healthy seed.

Healthy, disease-free broodstock should be procured from approved hatcheries that comply with the norms. Shrimp seed must pass salinity stress tests for salinity and formalin. The seedlings of the same batch should be adequately oxygenated based on the distance, time, and temperature maintenance necessary for adequate quantity in a hatchery format. 

Seed stocking – The seed should be released into the pond after proper acclimatization. This is usually during the cool hours of the day – Either after 8 pm or before 8 am. Make sure the plankton bloom is nice and stable (green-colored water). Avoid stocking if the pond has clear water or dark green water. 

Adopt better management practices for Shrimp farming

Pond preparation methods: Provide Shrimp with clean pond bottoms and good, stable water quality. 

Increase the water storage capacity of ponds – To reduce disease risks and over-reliance on water exchange, the pond’s water storage capacity should be maintained by maintaining a minimum water level of 1.2 meters in the middle of the pond. 

Drain the water completely from the pond – Thorough drainage of water helps remove disease-carrying fish and crustaceans from previous crops in the pond. If draining is not possible, follow the wet preparation method. 

Remove organic waste from the bottom of the pond – Organic matter releases toxic gases such as ammonia and hydrogen sulfide into the pond, which kills the Shrimp. Organic waste occurs as a black layer on the soil in the feeding area, corners, trenches, and ponds with aerators in the center and should be checked for the presence of the black layer when wet. In addition, ensure that displaced organic waste does not re-enter the pond through rainwater. 

In case you missed it: Organic Shrimp Farming – Prawn Production Practices

Shrimp Farming
Image Source

Factors that influence the Shrimp production

In turn, the success of stock-recruitment depends on climatic factors, levels of predation, food supply, and habitat quality. Although not definitively defined for penaeid Shrimp, habitat is considered the primary factor influencing long-term sustained Shrimp harvest.

Water Quality – Water quality includes all water’s inherent Physico-chemical and microbiological characteristics. At any selected site, the pH of the water is preferably from 7.5 to 8.5. Another equally important chemical characteristic of water is the level of oxygen saturation in the water column. Fluctuations in dissolved oxygen levels should be predetermined, and oxygen levels should preferably not be less than four ppm. 

The water should not be too cloudy. Water with very high silt loads can cause siltation problems in water supply systems, such as clogging filter nets or trap walls and increased sedimentation at the bottom of ponds. The water should preferably be rich in microorganisms. Salinity variability is considered an essential factor in Shrimp production. The optimal level varies by species. Ideally, salinity should remain constant during normal weather and not drop suddenly during rainy days. 

Soil – The types and composition of the area should be analyzed before settling on a site for mud crab farming. Soil samples should be taken randomly, preferably to a depth of 0.5 meters, and subjected to physical and chemical tests to determine acidity, amount of organic load, fertility level, and physical composition. 

The soil of the proposed site should have sufficient soil resistance. It is to ensure that there will be water in the ponds created. Good quality dikes are usually made of sandy clay or sandy loam material that is hard and easily compacted. Dykes will not collapse in dry weather. A clay loam or silty loam at the bottom of the pond promotes the growth of natural nutrient organisms. Diking material made from non-decomposing plant matter and charred sediments should be avoided. 

Most ponds developed along coastal areas with dense mangrove vegetation often have an acid sulfate problem during the first few years of farming. The disintegration of pyrites in waterlogged soil is minimal. During pond construction, the subsoil is excavated for dikes, and the bottom of the pond is leveled; the pyrites oxidize to produce sulfuric acid that acidifies the soil.

The pH of the water becomes extremely low, and hence the water quality is affected; thus, the natural product is also reduced. Alleviating acid sulfate conditions in ponds requires lime application, acid extraction, and leaching.

Key rules for Shrimp aquaculture practices 

The technology and intensity of Shrimp farming determine production, productivity, and ecological and socio-cultural impacts on the coastal environment. Currently, traditional/improved traditional and scientific large-scale Shrimp farming practices are most common and adopted by farmers in coastal areas of the country. Conventional/improved conventional systems have low stocking density and limited use of additional feed or fertilizers.

In case you missed it: Biofloc Shrimp Farming (Prawn) – a Full Guide

Shrimp Farming Setup
Image Source

In extensive farming, supplementary feed and seeds are encouraged to more efficiently coordinate the use of land and water resources in coastal areas. However, other Shrimp farming technologies, such as semi-intensive and intensive, are not recommended because they involve a high stocking density of seed and large amounts of feed and fertilizers.

Such processes generally place great demands on natural resources and result in high organic loads, resulting in pollution and social impacts in coastal areas. Therefore, only traditional/improved traditional and scientifically based Shrimp farming systems will be allowed in coastal areas. 

Best practices for Shrimp farming 

  1. External nursery – External nurseries allow Shrimp farmers to monitor baby Shrimp closely. This best practice improves Shrimp survival rates, farm sustainability, and farmers’ incomes. It is the most important process for raising Shrimp, and farmers who incorporate outdoor nurseries are far more successful and reduce their risk quickly.
  2. Central drain system – Farmers have realized the importance of maintaining a clean and healthy farming environment to avoid disease. Central drainage systems clean sediment and detritus material from the bottom of the pond. Farm workers run the central drain several times a day to remove this waste, helping to create a cleaner environment. This method keeps the pond water clean, improves viability, and increases the sustainability of the Shrimp farm. As a result, central drain farms are more successful and more sustainable.
  3. Crab and bird nets – Crab and bird nets are safety nets that keep predatory species away from Shrimp farms. Rogue Shrimp from local waterways can destroy pond infrastructure, carry diseases, and force emergency harvests of Shrimp before they reach optimal size. Additionally, native waterfowl may eat crabs. Farms with this infrastructure can raise Shrimp and have high survival rates. 
  4. Aerators – Aerators usually consist of rotating paddle wheels or oxygen lines that increase the dissolved oxygen in the pond. This equipment is essential to Shrimp farming because it enables us to grow Shrimp more efficiently at higher densities. In addition, ponds with high levels of dissolved oxygen reduce overall Shrimp stress, minimize disease risk and increase growth rates. 
  5. Pond liners – Pond liners reduce erosion on Shrimp farms, particularly through a water-circulating aerator system. Fully lined ponds can also reduce runoff and the water needed to raise Shrimp. However, there is an ongoing debate among farmers as to whether partially lined or fully lined ponds are more sustainable – fully lined ponds reduce the amount of seepage into the ground. Still, partially Lined ponds allow crabs to eat algae and small insects that thrive on the bottom of the soil. The benefit of using pond liners is that it helps reduce edge erosion and maintenance costs.

Pond design and construction for Shrimp production

There is no standard design for Shrimp ponds. Farming practices today still depend heavily on individual farmers’ experience, financial ability, and on-site environmental conditions. From an engineering point of view, Shrimp ponds are essential for a better finfish culture pond. The refined structural design is largely due to the behavior of Penaeid Shrimps. P. monodon is a benthic animal and has a habit of congregating along tank walls.

Therefore, any design to increase wall surface, e.g., adding substrates or raised mud platforms extending to the pond’s edges, can promote stocking density. An ideal Shrimp farm consists of a complex establishment: 

  1. Nursery and grow-out ponds of various sizes, 
  2. Water control structures, and 
  3. Auxiliary Facilities like roads, bridges, residential quarters, workshops, warehouses, etc. 

Size and Shape of Culture Ponds – Rectangular or square ponds are suitable for Shrimp culture. The longest axis of the pond should be parallel to the prevailing wind direction. It facilitates water movement caused by wind action, which increases dissolved oxygen in the water and reduces water temperature fluctuations during summer or warmer months. 

In case you missed it: Prawn Hatchery Business Plan, Management

Shrimp
Image Source

Feed management rules in Shrimp farming

Feed ingredients for Shrimps should not contain contaminants, anti-nutritional factors, microbial toxins, or prohibited antibiotics. Farmed wet food should not be used. However, crustaceans should be avoided as an ingredient when wet feed is used. 

  • An only dry, nutritionally balanced pelleted feed with optimum water stability should be used. 
  • The freshly obtained feed should be used as much as possible. Under no circumstances should feed stored for more than two months be used. 
  • Feed trays should be distributed widely throughout the pond. 
  • Overfeeding and underfeeding should be avoided. 

Key rules for disease control in Shrimps   

The introduction of pathogens can cause large disease outbreaks in Shrimp with devastating consequences. When Shrimp get sick with certain diseases, they float to the surface instead of the bottom of the production pond. The seagulls swoop down, eat the diseased Shrimp, and then defecate in ponds miles away, spreading the pathogen. 

When Shrimp farms are closed due to disease, there are socio-economic impacts, including loss of employment. About 80 percent of Shrimp species are farmed from just two species – Penaeus vannamei (Pacific white Shrimp) and Penaeus monodon (giant tiger Shrimp). Then, these monocultures are susceptible to disease. 

Care should be taken to collect all Shrimp in the pond to prevent the spread of disease. Do not stop feeding common ponds during disease outbreaks. Without feeding, crabs become weak and prone to disease. 
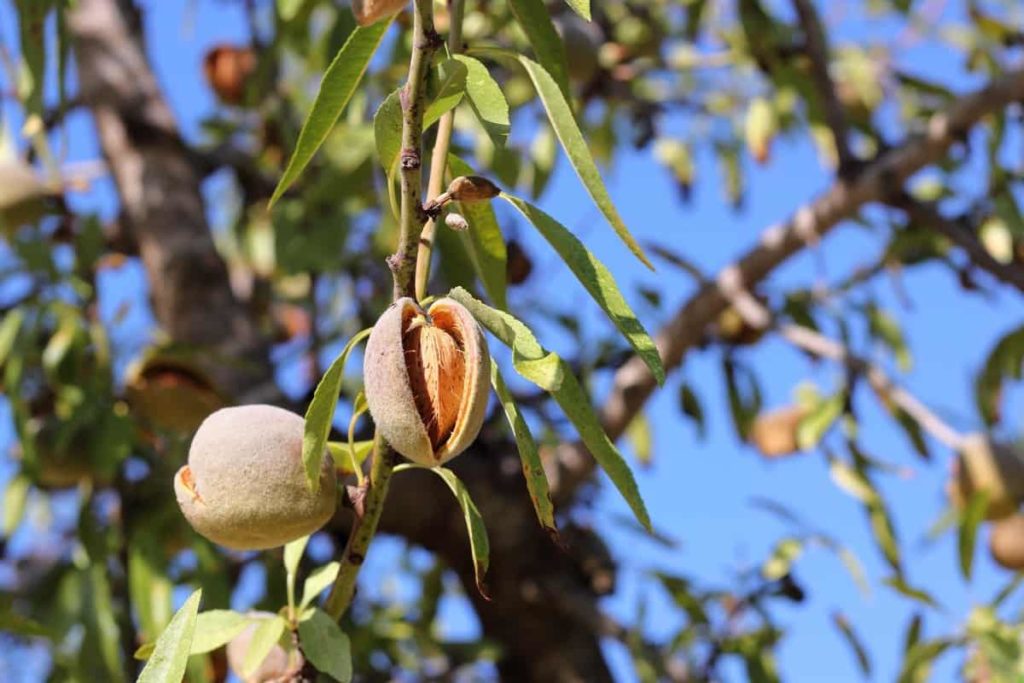
Harvesting for Shrimp farm growth

When the Shrimps have grown to the required market size, they are removed from the stocked ponds and sent for processing. There are different methods of harvesting. 
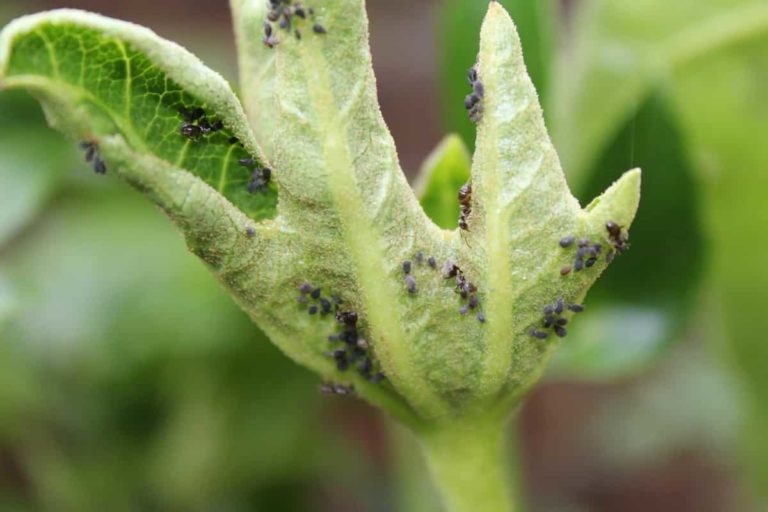
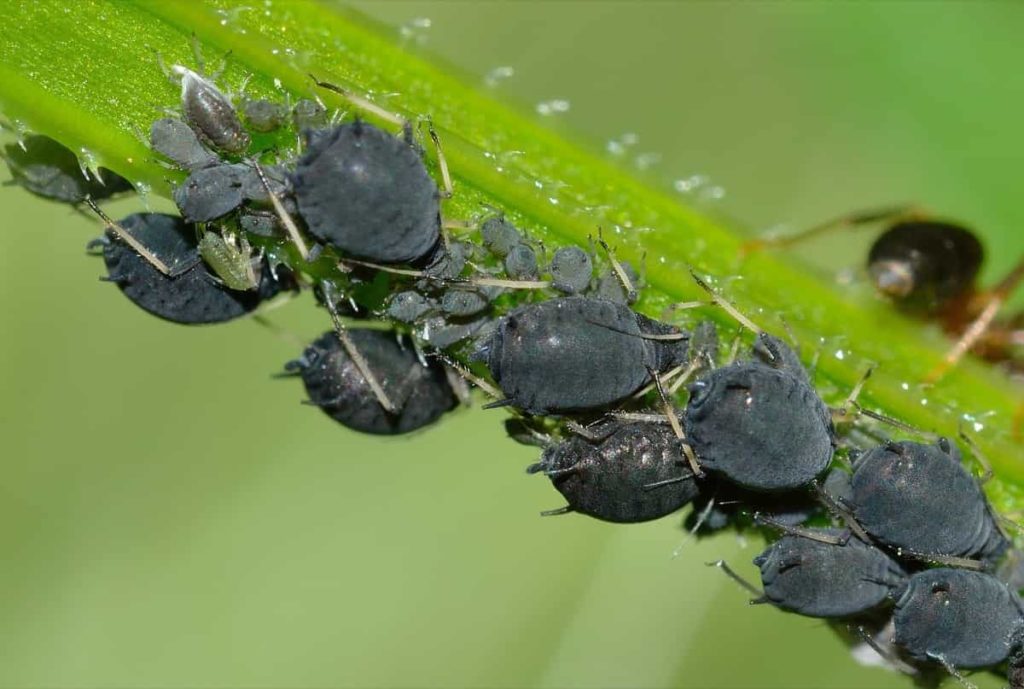
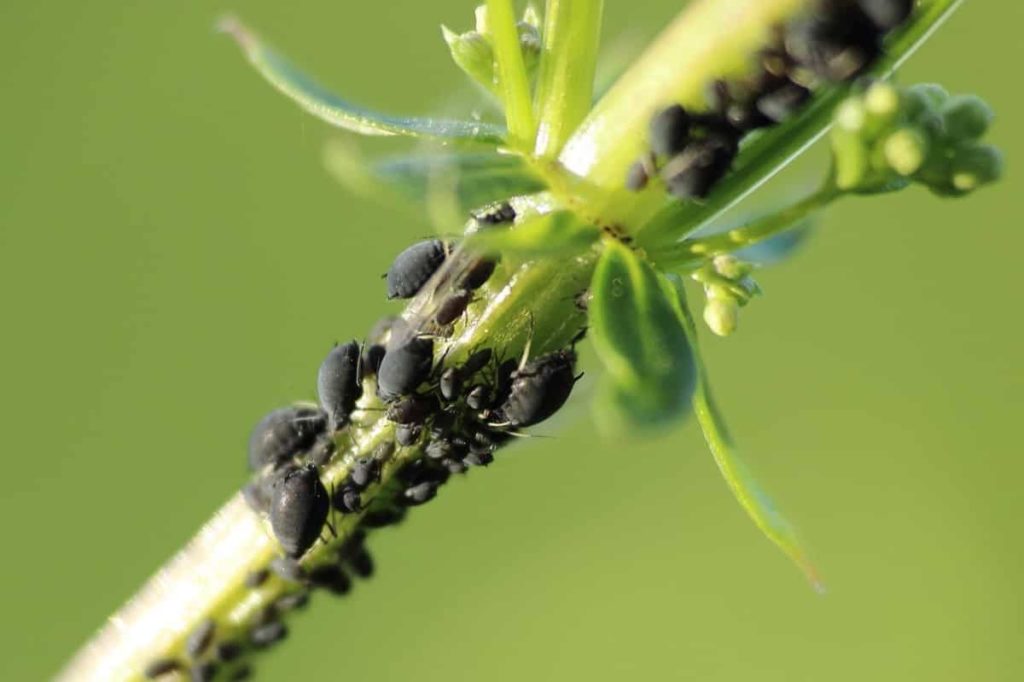
  • Harvesting using bag nets at outlets 
  • Harvesting using dragnet 
  • Harvesting using hand picking

Successful Shrimp harvesting can be achieved if the Shrimp are grown in good condition in a short period. Harvesting techniques should not damage the Shrimp or contaminate it with waste. Fast harvesting will reduce the risk of bacterial contamination and keep the Shrimp fresh when they reach the processor. 
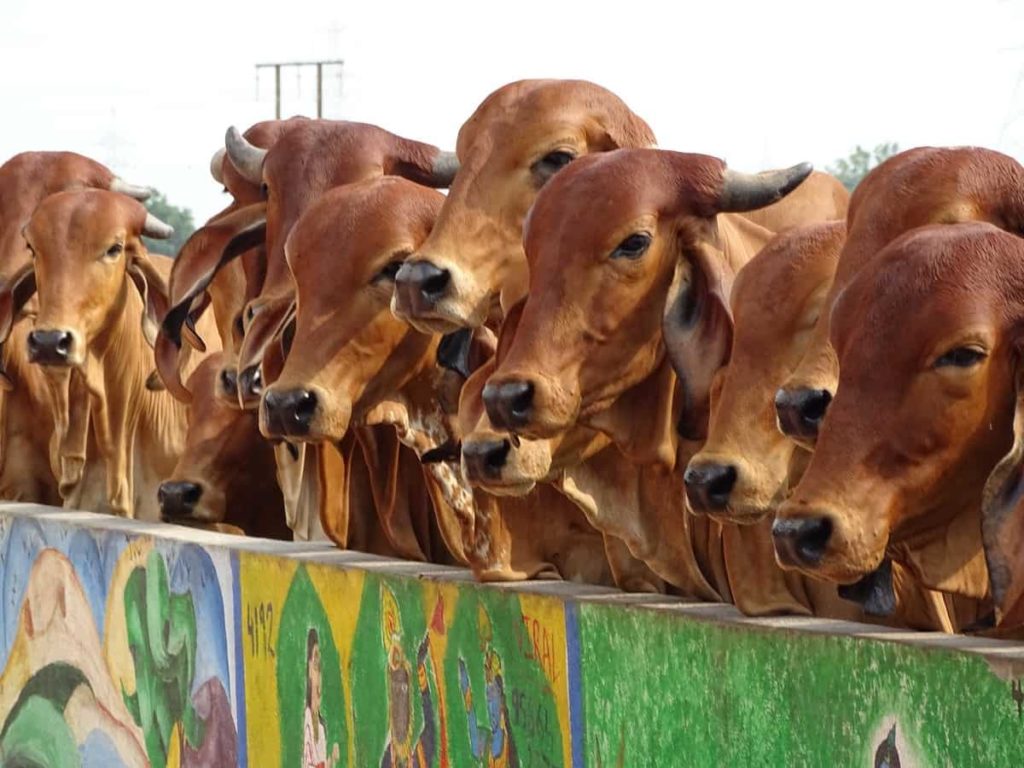
Complete harvesting can be done by draining pond water using bag nets and handpicking. The average culture period is about 120-150 days, during which the prawns will grow to a size of 15-30 grams depending on the species type. A batch of farmed Shrimp can be placed between layers of crushed ice before being transported to the market.
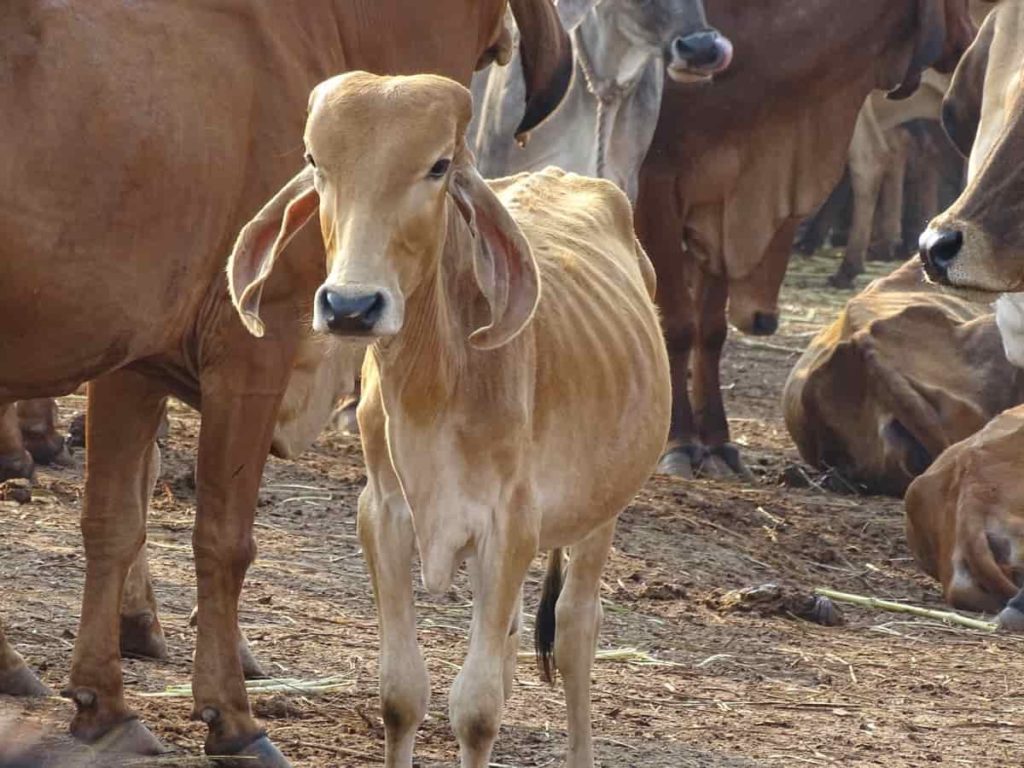
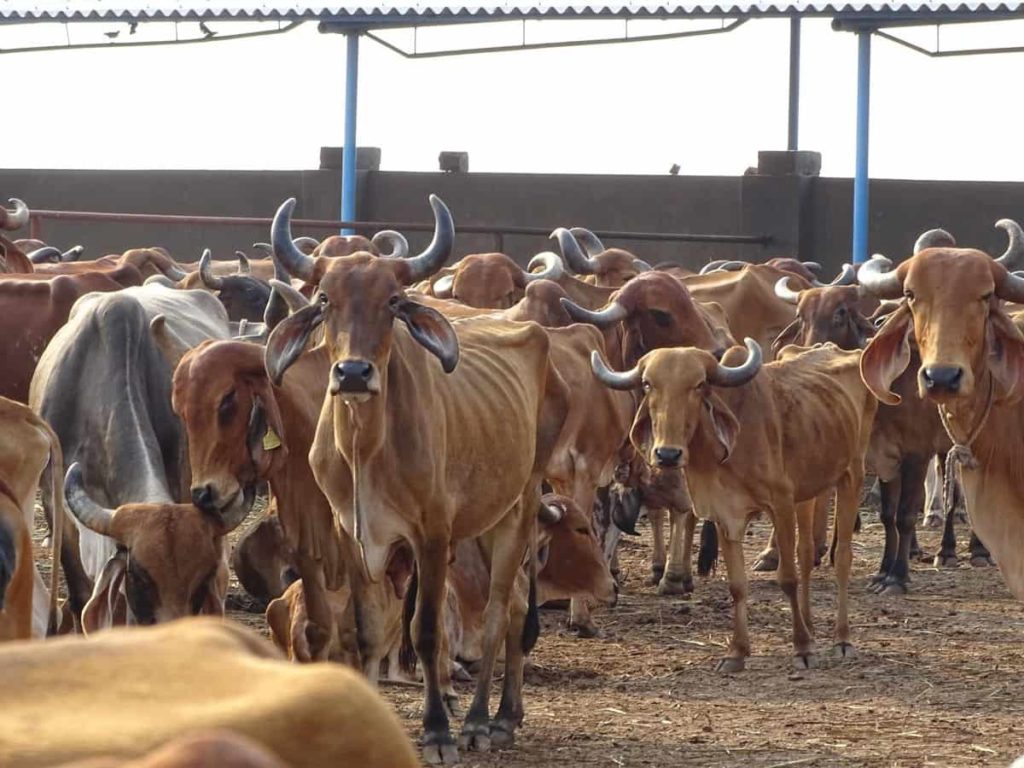
Common mistakes avoided in Shrimp farming practices 

Poor pond preparation

Proper pond preparation is a must! We must have heard this often. It is equally important to analyze if there is any history of disease in the selected area. It will be the first baby step towards good farming practices. 

Best Practices: Pool cleaning and disinfection; proper pond preparation before stocking 

Overstocking

Shrimp are highly sensitive to many environmental factors, and stress is one of them. Overstocking can increase stress in Shrimp; a commonly observed effect is reduced growth. Also, it increases the chances of the crop being affected by various diseases. 

Best Practices: Stocking the pond with the right number of Shrimp. An ideal number would be 40-60 prawns/square meters. 

In case you missed it: Prawn Farming At Home for Maximum Profits

Prawns
Image Source
3. Overfeeding

Accumulation of feed particles in the pond does more harm than good. It decomposes and gradually degrades the pond environment and makes it more toxic. Toxic compounds will poison the Shrimp in the pond. 

Best practice: Feed only the right amount of food. Constantly check the pond to see if the feed is being consumed, and increase/decrease the amount of feed accordingly. 

Conclusion 

These key rules help Shrimp farmers produce delicious Shrimp more efficiently and sustainably. Many of these farms are family-run, and using these improved practices improves their quality of life. Additionally, optimal handling improves the health and quality of Shrimp, which improves the flavor of the Shrimp on your dinner plate. These best practices help farmers by increasing Shrimp survival rates, minimizing natural resource use, and improving long-term sustainability.

How to Grow Okra from Seed to Harvest: In Pots, On the Ground, A Full Detailed Guide for Beginners

0

Okra plant is an herbaceous annual plant belonging to the Malvaceae family grown for its edible seed pods. Okra plants have short erect stems that can be hairy or hairless with heart-shaped leaves. Okra is also a surprisingly attractive crop. It is related to the hibiscus, meaning its flowers look like plants. For specific planting information, see our Okra growing guide for getting more harvest.

How to Grow Okra from Seed to Harvest
Image Source

How to grow Okra from seed to harvest

Can the Okra plant be grown indoors? 

Okra usually starts indoors in a greenhouse, warm, well-lit sunroom, or kitchen. Sow Okra in individual pots of light potting mix 4 to 6 weeks before you intend to set plants out. Sow Okra seeds in peat pots if planted indoors. Plant 2 seeds in each pot. After the germination process, thin to one plant per pot. Okra transplants can be grown indoors or purchased from a local greenhouse. Start transplanting about 2 to 3 weeks before planting, ideally about two weeks after your last frost-free date in the spring. 

Does Okra need full sun? 

Okra thrives in full, bright sun. Regular watering is required and is essential during flowering and pod development. During extended dry spells, a weekly deep soak is beneficial. Good soil management and crop rotation help to control diseases in Okra plants. Okra thrives in full sun, place the plant in a spot that gets 5-6 hours of sunlight, or it will not produce much fruit. Okra should be grown in fertile, well-drained soil in full sunlight for good yields. 

How long does it take to harvest Okra for the first time? 

The Okra plant will produce large flowers about 2 months after planting. Okra pods will be ready to pick up after 3 to 4 days. The fruit should be harvested in the morning and evening. However, harvesting Okra can be tricky because you have to harvest the pods before they harden. As all the Okra fruits do not ripen simultaneously, harvesting is done once in 3-4 days. Frequent picking promotes fruit development and prevents pods from becoming too large.

Can I grow Okra from fresh seeds? 

Yes, fresh Okra seeds can be easily used to grow new Okra plants. However, successfully growing Okra requires a little preparation. Place your Okra seeds in the freezer and let them chill overnight. 

How many varieties of Okra are there? 

Some important varieties are Dwarf, Cow Horn, Emerald, Go Big, Hill Country Red, Louisiana Green Velvet, Perkins Long Pod, Red Velvet, Burgundy, Cajun Delight, Clemson Spineless, and Louisiana Green Velvet. 

How do I make my Okra bushy?

  • Fortunately, Okra is a very hardy plant that tolerates heavy pruning and pinching to
    promote short, bushy growth. Plan to remove the tops of the Okra plant at least twice
    during the growing season.
  • Promoting bushy growth in the Okra plant is easy, but a case must be made for
    practicing different pruning methods with this prolific vegetable.
  • Making Okra “leggy” instead of bushy can make pruning and mowing around plants
    easier for weed control.
  • This heat-loving, fast-growing, bushy plant can grow up to five feet tall and produce
    edible pods that can be easily harvested and used in kitchens worldwide.

How many Okra can one plant produce?

Okra plants can produce above 20 – 30 pods per plant if your plants have ideal conditions. In
a warm hardy zone such as zone 9b, your growing season will be in the fall or longer.

What is the average yield per acre of Okra?

  • Okra productivity is a function of Okra number per unit area, several fruits per plant,
    and fruit size.
  • Neem cake and chicken manure help in plant growth and improve yield in this crop. It
    is possible to reduce manure use by neem cake and poultry manure or other fertilizers.
  • Okra should be cultivated when the fruits are bright green, the pods are fleshy, and the
    seeds are small. After this period, the pods become thin and hard, and the green color
    and mucilage content decrease.
  • The average yield of Okra is about 40 to 48 quintals per acre.

How much is the Okra seed rate per hectare?

  • Okra requires about 3.5-5.5 kg seeds per hectare in summer and 8-10 kg seeds per hectare in the rainy season.
  • Generally, the seed rate in Okra varies with germination percentage, spacing, and season.
  • Soak the seeds in Bavistin (0.2%) solution for 6 hours before sowing.

Can Okra be grown in pots or containers? 

To grow Okra in pots, start with a large enough pot, at least 10 to 12 inches (25-31 cm) in diameter. A wide-bottomed pot is best as the plant can be top-heavy. Make sure the bottom of the selected pot has a drainage hole. Because of its taproot, you will need to plant the seeds directly into a container or biodegradable pot. Sow 2 to 3 Okra seeds about 1/2 to 1 inch deep in each pot.

Water with a sprayer and place the seeds in a bright, warm place; the substrate should remain moist until the seeds germinate. Like most vegetables, Okra is suitable for container gardening. To start growing Okra in pots or containers, choose a large pot made of the material you prefer. The container must be at least three gallons or larger. 

Is it profitable to grow Okra?

  • Okra, also called ‘Lady Finger’ or ‘Bhendi,’ is one of India’s most loved and healthy vegetables. Okra cultivation is more profitable if done at the right time.
  • Okra farmers can earn income with minimum investment.
  • It is grown in places where the crop will receive sunlight throughout the day.
  • This popular vegetable is found in both home and commercial gardens. Okra can be a profitable crop.

How do you soak Okra seeds before planting? 

Okra can be seeded in the garden as late as July and still produce a good crop in late summer. Soaking Okra seeds in warm water overnight can help speed up the germination process but is not necessary. Before planting, soak Okra seeds in water for 12 to 18 hours to soften the hard seed coat. Soaking helps in moisture absorption and germination. Plant Okra in spring or early summer after the danger of frost has passed.

In case you missed it: Okra Farming Cost, Profits (Bhindi) – A Project Report

Okra Plant
Image Source

To prevent the Okra seeds from rotting, the soil should be warmed to at least 18°C. Soak Okra seeds in hot water (about 40-50°C) for 12 hours. At the end of the immersion, if any seeds are still floating, discard them. Take the seeds using a sieve and wash them with clean water (boiled water). 

Do Okra plants come back every year? 

It is a perennial but is grown as an annual plant in temperate climates. 

How do you maintain Okra plant growth? 

  • For a successful harvest, plant only in areas with warm day and evening temperatures during summer. Select a site in full sun with healthy soil and plenty of room. Keep your Okra plant hydrated. 
  • Okra will need only a light side dressing of fertilizer during the season for the best yield if the soil is well conditioned. Foliar sprays are also effective in Okra plants. Liquid seaweed sprays can be applied 2 or 3 times during the season.
  • Water your Okra plant daily to help it retain water throughout the day. Thin them out and space them when they are about 3 inches tall. Thin out the younger plants and leave the stronger ones intact. Keep your plant away from unwanted insects and weeds. To keep pests at bay, use a household insecticide and keep your plants in good condition. 
  • If you plant your Okra in full sun, you will have the strongest plants and the most pods. It means six hours of direct sunlight on most days. If you have organically rich soil, you won’t need additional fertilizer. Side dressing with compost or feeding the plants with seaweed/fish compost will provide extra fuel.

What is the fastest way to grow Okra seeds? 

To speed up the germination process, soak the seeds in warm water for a few hours before sowing. Plant Okra seeds in rows 1/2 to 1 inch deep and 12 to 18 inches apart. You can also speed up the germination process by soaking the Okra seeds in warm water overnight. 

How can I grow Okra faster? 

  • Okra seeds soak overnight to encourage germination, which takes a week or so. 
  • By covering, you can plant seeds early in the season and encourage faster germination. The rows with black plastic. It also encourages rapid early growth. 
  • Ensure optimal growing conditions like sun, space, soil, and water. 
  • Give your Okra plants plenty of nutrients. 
  • Plant high-yielding Okra varieties. 

How often should I water Okra? 

Okra likes heat and can tolerate drought, but do your best to water the plants 1 inch each week. Harvest pods when they are about 2 to 4 inches long. An inch of water per week is ideal, but if you are in a hot, dry area, use more. High heat can slow Okra growth. Cut the tops off Okra plants when they are 5 to 6 feet tall. Water the Okra plant every morning to thoroughly moisten the soil, except during heavy rains. Okra can withstand drought but does much better when given plenty of water in summer.

Why are Okra leaves turning yellow? 

Okra plants are also susceptible to yellow mosaic virus, a disease transmitted by whiteflies. Plants affected by this viral disease will display leaves with a yellow network of thickened veins that may be completely yellow. Yellowing Okra plants indicate potentially devastating problems. Yellow leaves lack chlorophyll, which converts sunlight into food for the plant. As a result, okra’s natural resistance to pests and diseases decreases as the plant dies.

Yellow colored leaves of Okra plants indicate the fact that the leaves do not have an adequate amount of chlorophyll to sustain their life. You will know that chlorophyll is a catalyst that takes incoming sunlight and converts it into a form that plants can eat. As a result, the ability to stand strong against some plant diseases and other bacteria gradually decreases to the point where you can no longer survive. Something similar happens with Okra plants.

In case you missed it: Red Okra vs Green Okra: Which Makes You Rich?

Okra Flower
Image Source

The plant leaves become susceptible to pests and diseases, thus reducing its natural resistance or immunity to fight, resulting in its death. While some main causes of yellowing Okra leaves can be addressed immediately, such as saving them before dawn, other causes require professional or long-term intervention that can be troublesome for gardeners. 

Can Okra be planted next to tomatoes? 

Another plant you can grow with Okra is Tomatoes. When companion planted, tomato acts as a trap crop, drawing stink bugs away from Okra plants. In addition to fruits and vegetables to pair with Okra plants, flowers can be a great option to increase pollination in the area. 

Some of the Okra’s best garden companion plants are that, like Okra, need plenty of water. It includes Cucumbers, Melons, Eggplant, and Sweet or Hot Peppers.

Is Epsom salt good for Okra? 

Some add Epsom salt to the Okra, but this is not universally recommended. Epsom salts are made from sulfur and magnesium. However, caution is needed when applying Epsom salt to Okra, as it can quickly kill Okra plants if used over-applied. 

Is chicken manure good for Okra? 

Applying organic fertilizer (chicken manure) significantly increased the growth and yield of Okra compared to chemical fertilizer (urea).

Why is my Okra plant stunted?

The root-knot nematode can be a severe problem with Okra. If a plant is stunted, yellow, or not producing at full potential, pull the plant out of the ground and check for leaves on the roots. These worms are caused by nematodes, which are microscopic worms. Root knot is a type of nematode that causes cankers or swellings on the roots of plants. It restricts the nutrients from the root system to the plant, resulting in the yellowing of the plant. 

The root-knot lives in the soil and can survive on many weed and vegetable crops. It is best done by planting solid stands of marigolds (close enough to overlap the root systems) three months before the first fall frost and planting cereal rye (Elbon) for a winter cover crop. Cereal rye should be cut and incorporated into the soil 30 days before spring planting. 

What can you do with leggy Okra seedlings

Provide more light as soon as possible. The best way to cure leggy plants is to give them more lightly. It could mean if you’re not already using one, upgrading to stronger light, or lowering your existing light closer to the plants, so it’s more effective. Also, you can plant leggy plants deeper into the soil to help compensate for the extra-long stems. However, avoid the temptation to plant them too deep right away when they are still very young and tender. 

What kind of fertilizer do you use for Okra? 

  • Okra should be pruned or cut 6 to 12 inches above the soil line. Once the plants are cut back, gardeners want to fertilize with a fertilizer with a 1:2 ratio of nitrogen to potassium, encouraging new growth and stimulating flower production. Although Okra grows easily at first, it helps to enrich the soil to help it produce throughout the seasons. As mentioned, Okra grows well in different types of soil. It helps to start with quality soil; for maximum growth, sprinkle with organic fertilizer 4-6 weeks after planting.
  • If you don’t have livestock, you can buy well-rotted, old manure from horses, chickens, cows, etc. The application of organic fertilizers will help increase the yield of pods. 
  • Fertilizing the plant around mid-season will boost it, so it continues to produce. Especially in mid-season, when Okra plants are 18 – 24 inches tall, they will benefit from a nitrogen-rich organic fertilizer. 
  • The Okra plant requires a lot of energy to make seed pods. Feeding additional nutrients will help ensure optimal growth and help the Okra plant to produce throughout the season. 

How often should Okra be fertilized? 

Once the plants reach about 6 inches in height, you only need to apply a water-soluble fertilizer every 4-6 weeks. Apply a balanced granular fertilizer before planting Okra seeds. We spread it on the soil, water it well, and then till the soil one last time before planting. When harvesting the Okra plant begins, sprinkle a small amount of nitrogen around each plant. Avoid heavy nitrogen applications, which can stunt plant growth and reduce crop yields.

In case you missed it: Growing Okra in Australia: At Home, Planting Season, and Guide

Okra Harvest
Image Source

Does Okra grow well in containers? 

You can grow Okra in containers. Suppose you start them directly from seed and plant three Okra seeds. As they grow, cut back two weak plants. It is best to develop one Okra plant per container. Growing Okra in containers means placing them on a patio, balcony, deck, outside your door, and any small space. You can also take advantage of keeping them in ideal conditions. You may have fewer critters and bugs when you grow Okra in containers. 

Why is my Okra growing so slowly? 

Unopened Okra can suffer from dehydration. Okra is more drought tolerant than many plants, but watering it will keep it healthy and can be more productive. It prefers fertilizers that are higher in phosphorus than nitrogen. The Okra plant may slow down production during summer’s hottest and often driest parts. 

What is the best time to plant Okra? 

The best time to plant Okra depends on where you plan to grow it. When growing Okra outdoors, plant it in April or May when night-time temperatures do not fall below 15°C. Though, in a greenhouse, you can grow Okra all year round.

How many times can Okra be harvested? 

As all the Okra fruits do not ripen simultaneously, harvesting is done once in 3-4 days. Frequent picking promotes fruit development and prevents pods from becoming too large. 

Can Okra plants survive the winter? 

Okra plant will not grow in cold temperatures and needs warm air and soil temperatures to grow and thrive. 

Is urea fertilizer good for Okra? 

The increased growth and yield of Okra with urea fertilizer and goat manure is due to the increased availability of organic matter and nutrients in the soil. Okra fusarium wilt is a likely culprit if you’ve noticed wilting of an Okra plant, especially if the plants perk up when temperatures drop in the evening. Your plants may not die, but the disease delays growth and reduces yields when it’s time to harvest. 

Is Okra easy to grow? 

Growing Okra from seed is very easy. It prefers full sun, average moisture if possible without letting the soil dry out completely, and good soil drains well. A neutral soil between 6.5 and 7.5 is preferred. Keep your Okra plant hydrated. 

Water your Okra plant daily to help it retain water throughout the day. Thin them out when they are about 3 inches long. Thin out the younger plants and leave the stronger ones intact. Keep your plant away from unwanted insects and weeds. Okra is a very hardy plant that will grow well in good soil. To keep weeds down, do some shallow cultivation near plants as needed. 

How much time does Okra take to grow from seed? 

Okra seeds germinate within seven days and need about 48 to 60 days to maturity, depending on the variety. The plants and pods grow very quickly and must be picked every day or two to prevent the pods from becoming large and stringy. 

In case you missed it: Fertilizer Management for Okra: Dose, NPK, and Schedule

Okra Flowering
Image Source

Do you have to prune Okra plants? 

Once the Okra leaves can no longer produce food for the plant, the plant begins to get rid of them. Leaves begin to take more energy than they produce, so yes, cut off any small dying leaves near the bottom of the plant and any that look weak or are beginning to rot. Pruning your Okra plants allows you to train your plants, improve the quality of the Okra and limit its growth if necessary.

This pruning technique causes buds to grow on the main stem and produce a secondary, late crop. Prune dwarf Okra varieties in the same way to rejuvenate the plants. This pruning gives the Okra a chance to produce more Okra pods. You can promote your Okra plants in hotter areas by cutting them back to about two inches above the secondary buds. It encourages the plant to flower a second time as new growth emerges from the pruning. After harvesting, you can also fertilize the plant to help it grow. 

What are the important pests and diseases of Okra? 

Many pesticides are available at garden centers for homeowners to use. Organic options include sulfur and Bt-based pesticides. Sulfur has fungicidal properties and then helps control many diseases. Before using a pesticide, carefully read the label and follow the caution, warnings, and directions. 

The major diseases on Okra are most severe in cloudy, damp weather. Check the Okta plants daily and treat them with an approved fungicide if diseases appear. Sulfur, neem oil, and other fungicides are available for use. Always carefully follow label directions. Aphids, stink bugs, and corn earworms are common diseases. If your plant faces this problem, we recommend using “neem oil.” Neem oil can completely eradicate diseases; it also helps in keeping plants healthy. 

Okra rarely suffers from pests or diseases. Hand-pick any stink bugs that appear as they can cause the beans to disfigure. Corn earworms, cabbage loopers, aphids, and flea beetles can also be a problem. Fusarium wilt, a soil-borne disease, is sometimes a problem in warmer regions. If the disease causes the leaves to turn yellow and wilt, pull up and destroy the affected plants. Crop rotation is the best method to control Okra plant diseases.

In case you missed it: Top 15 Ways to Boost Okra Crop Yield: How to Increase production, Quality, Methods, and Tips

Okra Plant
Image Source

What is the best method to harvest Okra? 

An important part of how to grow Okra is harvesting it at the right time to get the best pod flavor. Use scissors or lift them just above their caps. Once you bite, another pod will start growing from the same spot. Continue harvesting Okra until the plant stops producing. Harvest Okra when the seed pods are 1 to 2 days old and 2 to 4 inches long. They appear about two months after planting. Cut the stem above the cap by using a knife. If the stem is too hard to cut, the Okra pod is probably too old and should be thrown away.

Conclusion

For gardeners, Okra is an easy and annual crop to grow—no need to worry about rain or frost. Once fruiting begins, production is almost daily. However, like any other plant, Okra requires care and maintenance, especially during monsoon when plants are prone to insects and fungi. Therefore, the above information helps to grow Okra easily from seed.

Goshala Registration and Preparation of a Project Report: For Seeking Government Assistance for Subsidy and Procurement of Land for Goshala

2

Goshala, also known as Gaushalas, are protective shelters for cows in India. Goshala focuses on treating cows well because of their religious importance in Hinduism and the resulting cultural sensitivity to their welfare. Government grants and donations are India’s primary source of income for cow sanctuaries. 

Goshala Registration and Preparation of a Project Report
Image Source

Goshala registration and preparation of a project report

Number of Goshalas in India

Goshalas take care of cows with real passion and care, as most of the organizations running Goshalas are with a mission to take care of cows with dignity and grace in their last stage of life. Adequate nutritious food, clean drinking water, free movement in open pastures (at least in small areas), regular bathing, and periodic cleaning of pens, washing, and disinfection of cattle on the way to the cow sheds.

Routine care provided by Apart from this, regular health checks of cows and treatment of sick individuals by veterinary professionals, preventive measures against infectious diseases, etc., are available in the cow sheds. Above all, the cows are cared for by a team of passionate caretakers to develop an emotional connection with the cows.

At present, there are more than five thousand Goshalas in India. They have more than six lakh cows with an annual cost of thousands of crores. Most of the Goshalas are being run as charitable institutions. The resources of these farms vary widely in terms of the number and quality of livestock they have, land availability, finances, and organization. 

How can you help a Goshala

Now that you know what a Goshala is, you might want to help someone with their mission. Fortunately, you can help a Goshala in India in many different ways. If you live near a Goshala and practice Hinduism, you can participate in the Agnihotra, a milk offering. The Goshala allows you to use animal waste and clean the environment in this ritual. It provides an opportunity to participate, as, in Agnihotra, cow dung is fed into the fire.

Then an offering of rice with ghee is made on the fire. The smoke from this fire cleans the surroundings and repels mosquitoes. Agnihotra is a wonderful method to purify the air. Rice and ghee of Agnihotra are also combined with fresh dung. Ashes act as fertilizer, while ash mixed with cow’s ghee or butter has antibacterial properties and can be used to heal wounds. As you can see, various cow products can be reused and sold, helping to sustain the farms and the environment.

In case you missed it: Boran Cattle Facts, Profile, and Characteristics

Goshala
Image Source

Management tips for Goshala

Goshala if properly maintained with the right breed and cow fodder. Each cow is capable of giving about 30 liters of milk. Goshala-covered states are Delhi, Chandigarh, Punjab, Haryana, Himachal Pradesh, Uttarakhand, and Uttar Pradesh, West Bengal, Bihar, and Assam in the north, Karnataka, Tamil Nadu, Maharashtra, and Andhra Pradesh in the south, and Gujarat, Rajasthan, and Goa in the west. Cattle are left to graze in Goshalas and are fed with fresh and dry fodder, minerals, and gram husk. 

Goshala means cow house and means to rescue, shelter, protect, feed, treat and rehabilitate weak, sick, injured, disabled, and abandoned homeless cattle. India’s great cultural heritage institutions exemplify India’s reverence and love for animals, especially the cow. Cattle in the Goshala are respected, revered, and treated with dignity. Goshala is a Sanskrit term combining go or “cow” and shala or “shelter.” 

In 76 percent of the Goshalas, animals were kept tied up most of the time, none of the farms had trained staff, leading to widespread mismanagement and lack of professional care, and 86 percent of the Goshalas had breeding done, which increased the number of animals. Animals beyond the capacity of cow sheds, it added, are sick, dry, and injured animals and males of the species are also housed in cow sheds. 

Most of these animals do not produce milk; therefore, it is unfair to expect them to depend on the income generation system around milk. Seventy-four percent of Goshalas are forced to depend on cow’s milk to generate income for their livelihood. Milking for income generation in Goshalas is a serious problem as it makes them similar to dairy farms. 

Strengthening of Goshalas 

  • The main drawbacks of Goshalas are lack of funds, unskilled workers, and a traditional approach. To make them self-sufficient units, they must be encouraged to make the best use of their hitherto underutilized resources like cow dung and cow urine. 
  • At least one Goshala in each district can be developed as “Krishi- Govigyan Anusandhan Kendra” with demonstration units to demonstrate the compost, vermicompost, biopesticides, and bioenergy production. It will act as a catalytic agent not only for other Goshalas but also for individual farmers. The concerned State Animal Husbandry and Agriculture Departments should provide infrastructure and trained personnel for these centers. 
  • There may be a laboratory and documentation center at the division headquarters or for a cluster of districts. Bio-fertilizers and bio-pesticides developed at ‘Krishi Go Vigyan Ansandhan Kendras’ can be tested and documented in these laboratories to increase their crop effectiveness and reduce input costs. 
  • Since the ‘Krishi Go Vigyan Ansandhan Kendra’ and laboratories will be primarily for the benefit of the rural areas, an appropriate portion of the Krishi Mandi tax may be diverted to maintain them. Such an arrangement has been made in UP.
  • Goshalas can train their workers at Krishi Go Vigivaan Anusandhan Kendras. 
  • The State Government concerned must provide electricity and water to Goshalas and Panjarpools at subsidized rates. 
  • The State Animal Husbandry Department should ensure that full veterinary cover is provided to Goshalas. 
  • Livestock expansion is currently a part of agricultural expansion. But livestock extension, based on providing services and goods, needs to be treated differently from crop extension activities based on knowledge transfer. While in crops, the assumption is to transfer knowledge from the laboratory to the farmer through an extension channel, in animal sciences, knowledge transfer is minimal. In contrast, services (such as treatment of sick animals, artificial insemination, pesticides, etc.) are available—the main platform for action. Therefore, the Animal Husbandry Department must organize a well-equipped service independently, as it would greatly benefit the Goshalas.

In case you missed it: How to Start Hydroponic Farming/Gardening from Scratch in India: A Step-By-Step Guide for Beginners

Cows
Image Source
  • Central and State Governments should have a mechanism to provide financial assistance to Goshalas to develop the necessary infrastructure. Funds for this purpose can be raised through cess on importing leather and leather goods, which is about Rs 17,000 crore annually. These earnings are mainly from the cattle, but not a single minute of it goes back into the betterment of the cattle to produce quality hides and skins. 
  • A working capital loan scheme for Goshalas Police may be introduced. Such a provision would help these institutions avoid going to donors for further financial support. In addition, the state government may create a venture capital fund with NABARD.
  • Introducing the Goshala Credit Card (like the Kisan Credit Card) can also help solve working capital problems. Under this scheme, the Goshalas will get credit for their future milk, bio-fertilizer, bio-pesticides, Panchgavya medicines, etc. They will be free to buy inputs from their chosen shops at competitive prices. The Goshala Credit cards will be issued by the competent authority based on the production value of a particular Goshala. 

Land requirement for constructing Goshala

To effectively open or run a Goshala of 500-800 animals, a minimum of 1.5-2.0 acres of land is required. Similarly, to open or run a Goshala of 2500 and 5000 animals, a minimum of 5 and 10 acres of land is needed, respectively. Layout suitable for different sized Goshalas (500-800 cattle and more than 3000-5000 cattle) 

Essential considerations in the Goshala layout 

  1. To provide maximum comfort and welfare to the animals housed, sick, blind, and recumbent. Dead (strapped/fallen) animals should be kept in a separate shed. Lying and blind animals are housed separately to avoid injuries. Animals with diseases (e.g., tuberculosis, foot-and-mouth disease, hemorrhagic septicemia) that spread rapidly must be kept in isolation. 
  2. Pregnant and young animals should be kept in separate sheds for safety. 
  3. Lactating animals can be kept separately to save labour. However, if the number of animals is small, they can be housed with other animals. 
  4. Quarantine sheds should be located at the entrance of the Goshala. Newly arrived, rescued, and resettled cows, and those from areas where they may be at risk of infection, are quarantined for 15 days to 1 month to detect any disease before being released into the herd. 

Goshala government assistance in Haryana 

Haryana has a network of about 283 Goshalas, housing more than 1.81 lakh cattle. However, Haryana’s dual-purpose population has recently suffered a severe decline mainly due to the modernization of agricultural operations in the state as well as a reduction in common grazing land. Moreover, farmers are reluctant to raise these animals due to relatively low productivity. 

Various organizations are initiating breeding programs in the state, especially Goshalas, where artificial insemination with quality semen is done along with natural services. Moreover, with the establishment of the Haryana Livestock Development Board, breeding activities have increased in the state. 

22 Goshalas have also been provided basic infrastructures like liquid nitrogen jars, and an amount of Rs. 51,000/- each has been given to 96 registered Goshalas to strengthen their breeding infrastructure. Goshalas have been encouraged to increase their economic profits by producing quality germplasm and installing other eco-friendly activities such as dung gas plants. The Animal Welfare Board of India has also played an important role by assisting various Goshalas of the state from time to time. 

Development of Goshala in Gujarat 

Following are the major works undertaken for the development of Goshala in the state of Gujarat. 

  • Support establishment of new Goshalas 
  • Natural breeding of indigenous breeds (Giri, Kankrej, and Dangi)
  • Offer of scholarship on Goshala research, Gau Vigyan course in schools/colleges, emphasis on organic farming, Goshala awareness in tribal areas, a microchip for cows in urban areas, etc
  • Organize national and international conferences on Goshala development to discuss upcoming issues and challenges
  • Organize awareness and interaction programs through cow exhibitions, and felicitate Goshala workers. 

In case you missed it: Top Cattle Feed Manufacturers in India: Companies List

Indian Cows
Image Source

Hence to run a self-sustainable Goshala, Gujarat Model Gauseva, and Kolkata Pujarapole Society Goshala, Chakulia should be replicated across the country to save cows and their offspring from making Goshalas self-sustaining. Such programs will sustain the indigenous breed of cow and support the farmers’ economy by protecting the environment and ecosystem.

Goshala Registration System in UP

Goshala Registration System will help transparently establish registration between Government/Departments/Government Offices. Citizens will be able to register/track the status of UP Goshala Yojana registration/track status through online mode anytime. UP Goshala registration from various sources will be available on the same portal/platform.

It will ensure departmental officers have easy access to registration and registration monitoring. Firstly check the official UP State Goshala Registration System. At the UP State Goshala Registration System portal, candidates can log in for registration for Goshala. 

  • Facility to register registrant through mobile OTP. 
  • Online registration facility at all levels of government. 
  • Facility to register anytime. 
  • Dissemination of information through SMS/email at all levels. 
  • Registration between citizens and government in a transparent manner. 

Registration status 

Citizens can use the Goshala Registration Number to check their current registration status on the UP State Goshala Registration System portal. Track registration through a registered mobile number or email id. Facility to find registration reference number through registered mobile number or email id. Facility to view forwarding details of action taken on registration. Facility to view settlement declaration after disposition. 

The Registrar may make inquiries to ascertain at any time on his motion or the application of any person claiming an interest in the Goshala or when required by the Director or the Federation. 

  1. particulars of the property relating to such Goshala; 
  2. the name and address of the trustee of such Goshala; 
  3. the manner of succession to the office of trustee of such Goshala;
  4. income and expenditure of such Goshala. 

In every inquiry under this section, the Registrar shall give notice of such inquiry to the trustee of the Goshala and permit him to appear in person or by an agent authorized in writing. After the inquiry, the Registrar may make such order as he thinks fit in respect of the matters to which the inquiry relates.

The site and other requirements for construction of the Goshala

The site for constructing the Goshala should be located near an all-weather concrete or tar road that ensures year-round connectivity to ease working staff, volunteers, and devotees reaching the Goshala. Poorly developed or bad roads prevent them from regularly visiting Goshala and offering services. Also, travel time for staff increases with poor connectivity and will pay extra salary to administrative staff to stay at the Goshala itself or a nearby location. 

Walls – Goshala walls can be constructed of materials such as brick, stone, or concrete with variable thicknesses depending on location and function, with thicknesses of 9 inches and 12 inches, and 4.5 inches, respectively. 

Location and Layout – Ideally, a Goshala should be located near a city so that facilities are easily accessible and there are Goshala products like milk, panchgavya, cow dung gas, vermicomposting, and manure produced to make the Goshalas self-sufficient. There is a definite market for other materials produced. Rather than staying in the heart of an urban area, it is better to be a little further away.

In case you missed it: Dairy Disease Symptoms and Treatment for Cows, Cattle, Goats, and Sheep

Cattle
Image Source

Villages near cities are ideally suited for setting up village halls on highways leading to cities. Proximity to forest and pasture/agricultural land are also beneficial features that can be considered when selecting a Goshala site. Besides providing a quiet and noise-free environment, feeding costs will be considerably reduced. 

Feeding management for Goshala

Important grasses for cow fodder – The Goshala may grow grasses for fodder in the available space (if space is available) near or around the premises. Below are the types and details of different grasses that can be grown or procured by a Goshala for feeding cows. They are Sewan Grass, Anjan Grass, Dhaman Grass, Karad Grass, Gramna Grass, Doob Grass, Sen Grass, Hybrid Napier, Dinanath Grass, Black Spear Grass, and Para Grass.

Sustainability tips for Goshalas

At present, Goshala is a new area of ​​concern. Several non-governmental organizations, trusts, and self-help groups are already working in this area. Their efforts can be complemented with new government schemes. The government has been lax in providing financial support to the Goshalas as it has been found that meagre grants were provided to the Goshalas too irregularly. Government funding can be increased by earmarking a specific portion of Goshala’s annual budget.

The net income of various Goshalas is negative due to high expenditure on feeding large animals and very low milk production. Therefore, efforts should be made to provide good quality feed and fodder at reasonable prices, which will help reduce the Goshala expenses. It will help increase the net income of Goshalas. 

Goshalas can strictly start charging some fees from the farmers who leave their animals in Goshalas. Farmers should diversify their sources of income. It can also be taken up as a commercial and collective business by making various products like pesticides, insecticides, organic fertilizers, and many other products made from milk, cow dung, and cow urine. The basic structure of Goshalas should be built efficiently to accommodate the adequate number of animals in the Goshalas. 

Goshalas must have adequate facilities like a veterinary hospital, ambulance, processing facilities, oil mill, etc. Although dung was used in some Goshalas to produce manure and fertilizer, there is scope for its use in biogas plants and power generation. Cow urine, the skin of dead animals, hooves, etc., can be used to manufacture various products. These are some of the ways to diversify the income of cows.

Efforts should be made to increase the number of productive animals in Goshalas as milk is considered an essential and fundamental component of Goshala income. Furthermore, the less sustainable Goshalas should learn from the higher sustainable Goshalas like Chakulia Goshala about the various activities carried out by the highly sustainable Goshalas, and the less sustainable Goshalas should follow them.

Sustainable Goshala can go a long way in protecting indigenous cows and improving their welfare in the country. Goshalas can be run more efficiently by providing professional orientation. In addition, Goshalas can be integrated, and better quality products can be sold commercially.

Major challenges for Goshala 

The major challenges Goshalas faces are similar, i.e., inadequate resources, lack of trained manpower, and lack of compassionate veterinarians. Animals in Goshalas are old and weak, and maintaining their health is challenging. The management staff does not have adequate scientific knowledge about feeding, housing, care, and managing these animals. Besides, most Goshalas do not have adequate land for proper housing and grazing their animals.

Since this Goshala also lack fodder and pasture, many cows are in a state of semi-starvation and disease. It has been realized that institutions with better organization and management can be self-sustaining centers for cow welfare, transforming Goshalas from prisons into homes. The four freedoms for the Goshala are: 

  1. Ready access to fresh water and freedom from hunger and thirst through food to maintain full health and vigor; 
  2. Freedom from discomfort by providing a suitable environment, including a comfortable and relaxing space. 
  3. Freedom to express behavior by providing the animal with adequate space, facilities, and the company of its kind. 
  4. Freedom from fear and anxiety by ensuring conditions and treatments that avoid mental suffering. 

In case you missed it: Braford Cattle Facts, Profile, and Characteristics

Cow Shelter
Image Source

The problem is that the Goshalas are run like charities and exist mainly on random donations. Also, cattle are seen as productive only when they produce milk. However, if a Goshala is to become a thriving business in its own right, doing well and making money will help the cows and change the perspective of people and policymakers who see dry cattle as a nuisance. A dry cow is a very useful resource for its dung and urine alone.

A well-functioning Goshala increases soil fertility, increasing crop yields and eliminating the need for pesticides and fertilizers. It makes farming more profitable and healthy. Goshala was a standard installation in every village. It needs to be revived and should be seen as an integral part of Indian agricultural rejuvenation.